I’m not usually a big fan of the “creative fun filters” that are included as in-camera processing options for many of the current dSLR and compact point-and-shoot cameras. I prefer to do my processing in Photoshop, where I can see the full quality version of the image, and have more control over the editing. However, I was playing around with the “Grainy Film” mode of the new Olympus XZ-1, and I was quite impressed with how cool, fun, and easy it is. Perhaps I should reevaluate their usefulness!
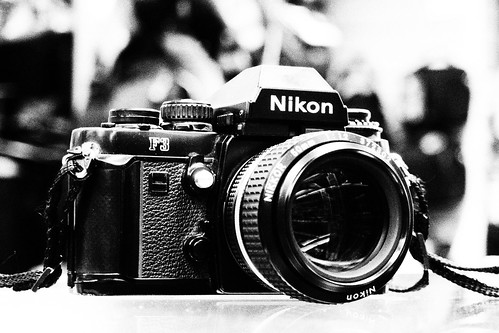
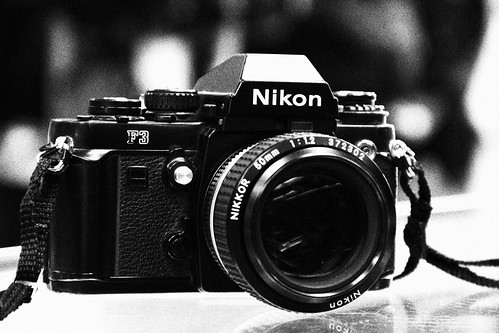
Olympus XZ-1 – Grainy Film
So I decided to have a look at some of the other cameras’ black and white grainy film options and see how they all compare. This is a pretty informal comparison without too much strict effort put into the “test” other than putting the subject camera in about the same place, zooming in all the way and using the maximum aperture if possible, and loosely trying to frame the images all about the same.
Since the Olympus XZ-1 inspired this experiment, I will cover that one first. The Olympus XZ-1 is a new competitor to the high end compact point-and-shoot class of cameras which includes the Canon S95 and the Panasonic Lumix DMC-LX5 – as well as the upcoming newly released Nikon P300. They are all roughly about the same size, and have excellent image quality and low light performance. Their features and maximum apertures vary, and there are other site, such as DPReview, that do full reviews of these models if you are more interested in learning about them.
For the Olympus XZ-1, you turn the Mode Dial to “Art.” How cool is that?! All you have to do is turn the dial and you can make art! Other cameras merely have “Scene Modes,” while the Olympus offers “Art!” In Art Mode choose Art 3, which is Grainy Film. While in Art Mode, as in most of its other modes, you can easily change the exposure compensation by pressing up on the rear dial and dialing in a (+) or (-) compensation amount, and immediately see what you will get. I kept it at 0 for this test.
The image from the Olympus, seen at the top of this post, is nice and contrasty. It has a bit of grain, but actually isn’t really very grainy. The large aperture does blur out the background nicely. Have a look at the larger version on Flickr to see it better.
Next up is the Panasonic Lumix DMC-LX5, another one of the high end point-and-shoots. For this camera you go into the My Color Mode and choose Film Grain.
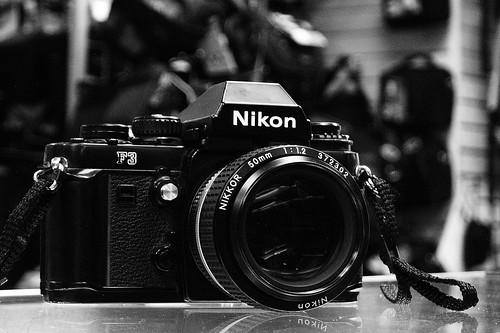
Panasonic Lumix DMC-LX5 – Film Grain
Compared to the Olympus, it appears to have created more of a dark monochrome image, without the high amount of dramatic contrast. There is a bit of grain, perhaps a little more than the Olympus, but I really wouldn’t call it grainy. The background blurring isn’t nearly as dramatic as the Olympus. See larger image on Flickr.
The Canon S95 is quite a popular camera for those seeking great image quality in a compact point-and-shoot. After David Pogue wrote an ode to it in the New York Times, they really started to move off the shelves. For the S95, you use one of the Scene Modes called the Nostalgic Mode. You have a few degrees of exposure to choose from as you turn the front lens dial, which first start to affect image color, then go to sepia, and then to contrasty black and white. I choose the highest setting to get the grainy black and white look.
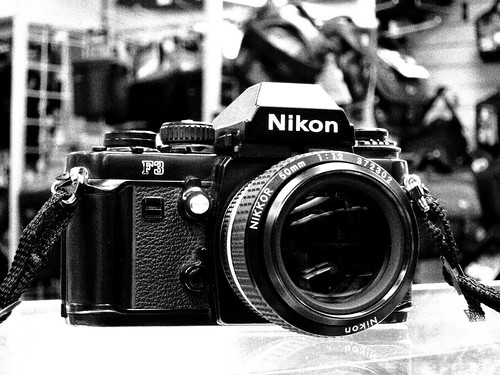
Canon S95 – Nostalgic Scene Mode
The contrast of the S95 image is between the other two – more than the Panasonic but less that the highly contrasty Olympus. The background really shows the grain, but is not very dramatically blurred out. Have a look at the larger version on Flickr to see it better.
Here is the entry from the Nikon P300. To get to this setting, you set the mode dial to Scene Mode, go to Special Effects, and set it for High-Contrast Monochrome.
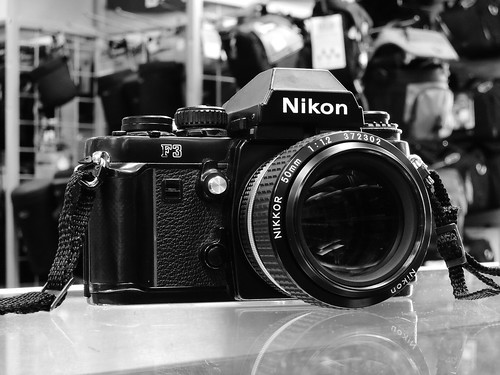
Nikon P300 – High-Contrast Monochrome
Like the Panasonic, the contrast isn’t actually that dramatic. And I did not find any way to adjust the aperture setting while in this mode so as to take advantage of its fast lens (including the inability to change the ISO in this mode), so it used f/5.5 and thus the background blurring really isn’t very dramatic either. And this setting does not introduce any grain into the image. Have a look at a larger version of the image on Flickr.
The final camera is the Canon 60D, used here with its 18-135mm kit lens. This is a digital SLR, not a compact point-and-shoot like the others, but I knew it offers a grainy black and white option in its Creative Filters, so I added it to the mix. To use this feature, you take an image in color, then access the Creative Filters to apply the affect, and then save the new copy along with the original image. You can quickly access the Creative Filters during playback by pressing the Q Button. This one is called Grainy B/W, and is offered in three levels of contrast: Low, Standard, and Strong. I chose Standard to demonstrate the middle ground. Standard appears to be pretty contrasty, and is closer to the highly contrasty Strong setting than it is to the not-as-contrasty Low setting.
Canon 60D – Grainy B/W Creative Filter
As you can see, even on the Standard level of contrast it is quite contrasty. And you can definitely see the grain in the background of this image, which is nicely out of focus because I was able to use a long lens and a wide aperture. The Strong setting increases the contrast to a level very similar to the Olympus. See larger image on Flickr.
With the compact cameras, you can see on the rear LCD screen what you are going to get in advance, while with the Canon 60D, you can see how your original color image will be affected by the different levels of contrast.
So there you have it – the grainy black and white in-camera processing of these camera. Of the compacts, my favorite is the very dramatic look of the Olympus XZ-1, due to both its contrast and its more out-of-focus background. Thanks to my patient subject, the classic Nikon F3 with the stunning 50mm f/1.2 lens. Have a look at some real black and white grain on some of my earliest SLR photos from Rome, 1991.


