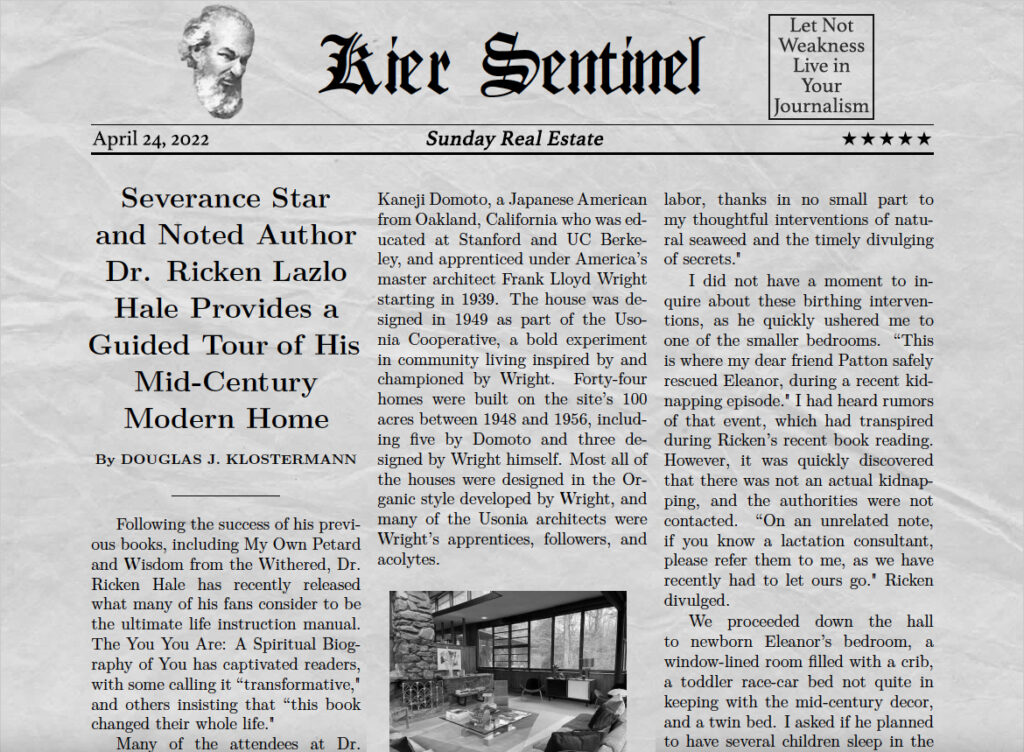
Severance Star and Noted Author Dr. Ricken Lazlo Hale Provides a Guided Tour of His Mid-Century Modern Home in Kier, PE

A visit with author Dr. Ricken Lazlo Hale, wherein he talks about his life living in a ‘living’ machine-for-living

By Douglas J. Klostermann

This article originally appeared in the Sunday Real Estate supplement of the Kier Sentinel.

Following the success of his previous books, including My Own Petard and Wisdom from the Withered, Dr. Ricken Hale has recently released what many of his fans consider to be the ultimate life instruction manual. The You You Are: A Spiritual Biography of You has captivated readers, with some calling it “transformative,” and others insisting that “this book changed [their] whole life.”

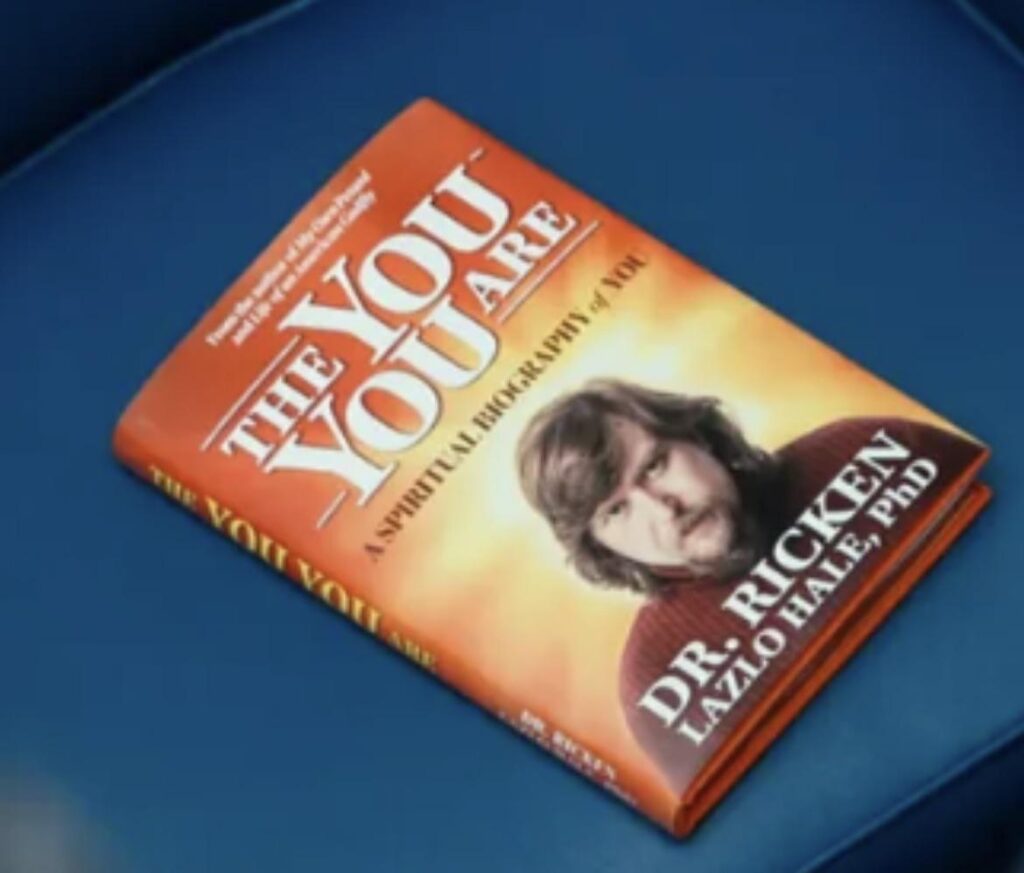
Dr. Ricken Hale’s book, The You You Are, often found left behind on chairs in airports, waiting rooms, conference rooms, and coffeeshops (photo by Seth Milchick).

Many of the attendees at Dr. Hale’s initial reading of this latest book were not only awed by his profound words, illuminating ideas, and wavering voice, but also by his warm and welcoming Mid-Century Modern home, nestled in the woods in the winter landscape of Kier, PE. As an aficionado of Mid-Century architecture and design, I asked to meet up with Dr. Hale to learn more about this special house that he shares with his wife and newborn daughter.

“Welcome, welcome. Please, call me Ricken,” the author proclaimed as he greeted me at the glass-paned front door of his home, and ushered me into the foyer. “The space before you was originally the consultation room of the original owner, a certain Dr. Arthur Bier, who lived here with his wife Gertrude, and their two daughters,” Ricken knowingly informed me.

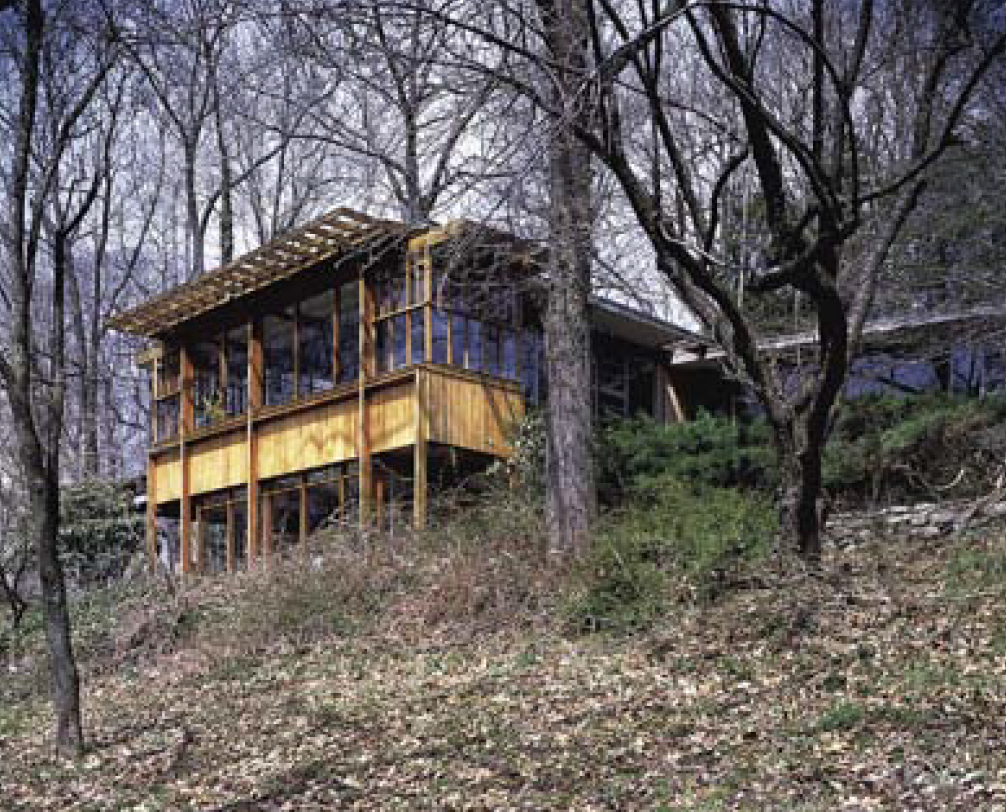
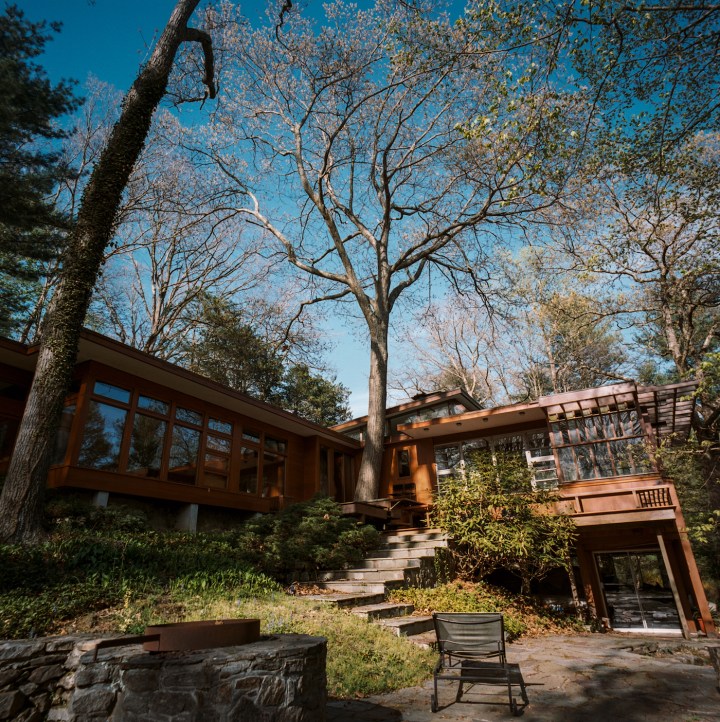
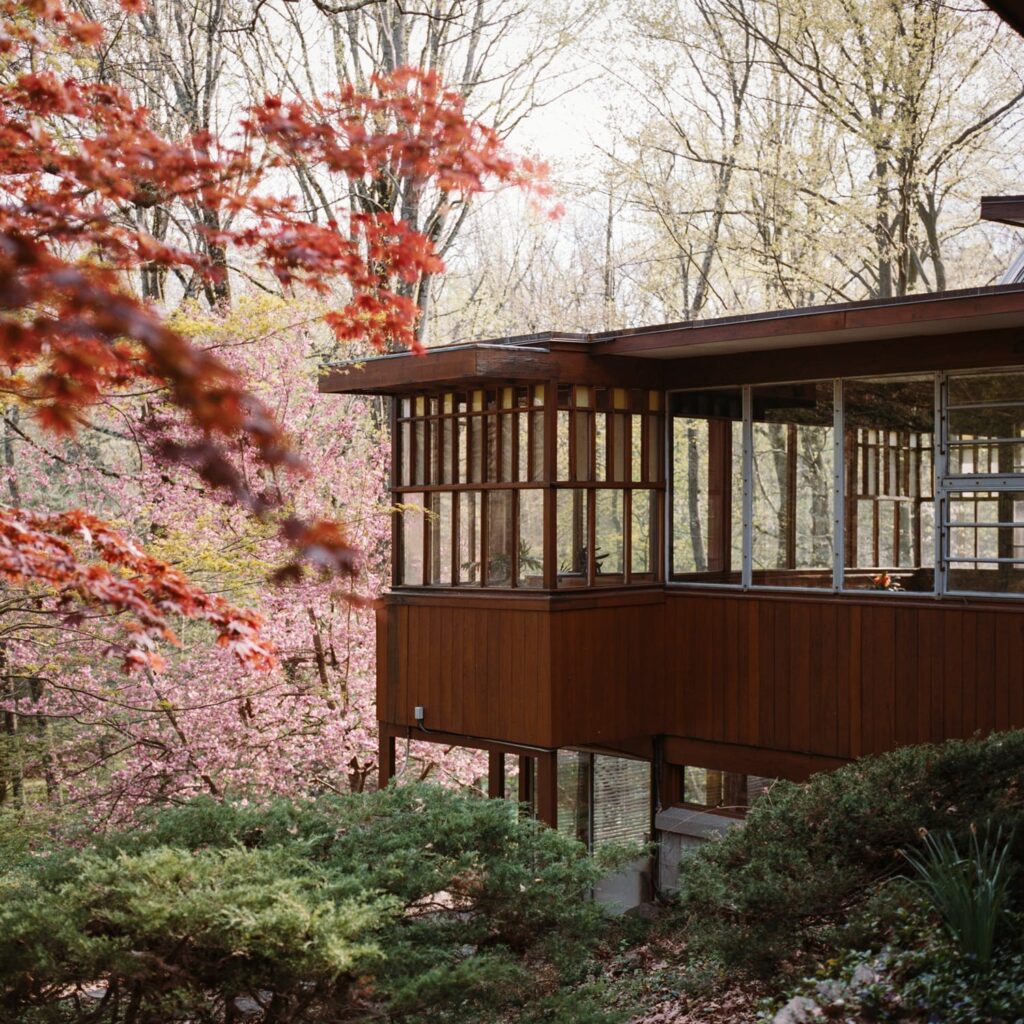
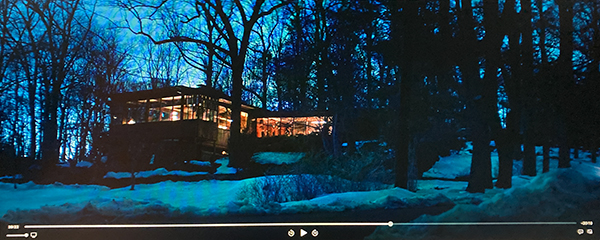
The view approaching the Bier House, currently the home of Dr. Ricken Lazlo Hale and his family (photo by Roland Reisley).

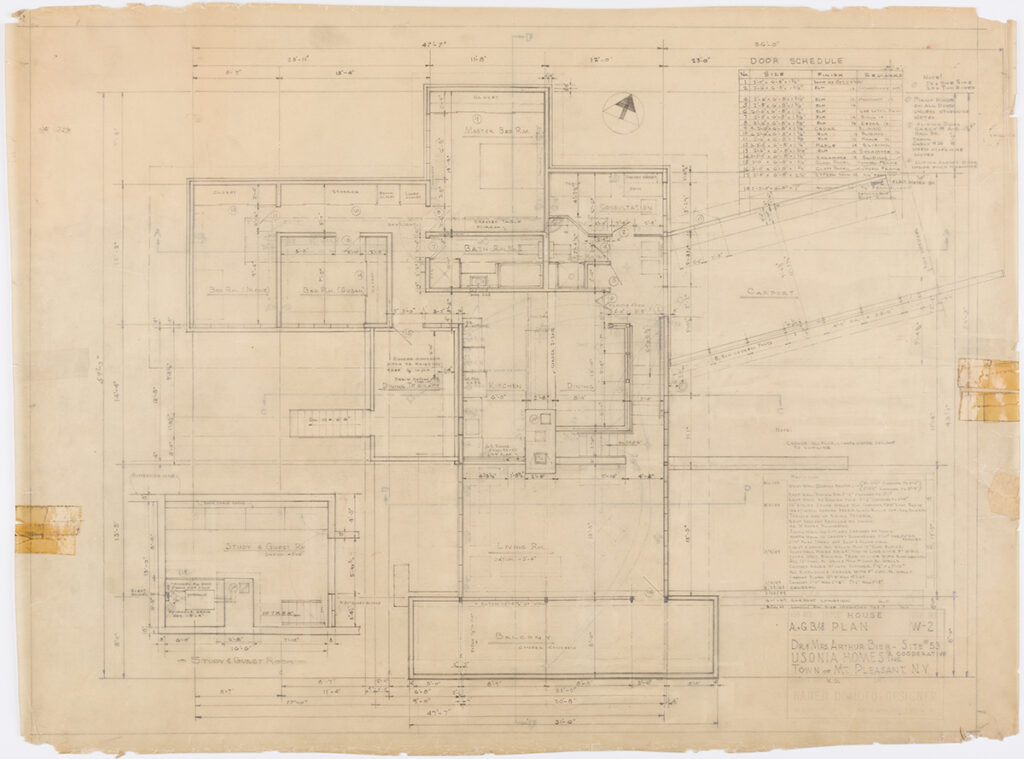
I had recently learned this information myself, as I had dutifully studied the original plans for the house, hand-drawn by the designer Kaneji Domoto, a Japanese American from Oakland, California who was educated at Stanford and UC Berkeley, and apprenticed under America’s master architect Frank Lloyd Wright starting in 1939. The house was designed in 1949 as part of the Usonia Cooperative, a bold experiment in community living inspired by and championed by Wright. Forty-four homes were built on the site’s 100 acres between 1948 and 1956, including five by Domoto and three designed by Wright himself. Most all of the houses were designed in the Organic style developed by Wright, and many of the Usonia architects were Wright’s apprentices, followers, and acolytes.

Kaneji Domoto’s hand-drafted floor plan of the Bier House, dated 1949. View a larger version of the plan here: https://calisphere.org/item/7e55449f-d89c-4e9d-a077-1eec378967de/?order=2

“Let the tour commence,” Ricken announced, as he shepherded me past the breakfast room and galley kitchen, and down a winding hall toward the bedroom wing. I asked him how he came about living in this house, and Ricken began to explain, “Once I had broke the world of literature, I desired to live in a house that broke the world of architecture.”

Indeed, Wright’s designs and those directly inspired by him had a tremendous influence on architecture, far beyond the exceptional collection of homes in the Usonia community. Countless architects and designers adopted Wright’s Organic philosophy of using natural materials such as wood and stone, integrating the building into the surrounding landscape, bringing the natural world into the house through abundant windows and intentional vistas, and creating open spaces that flowed into each other. 

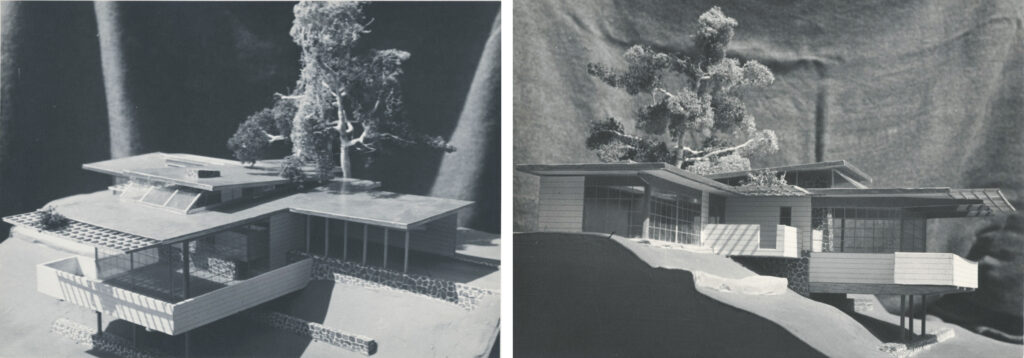
An early model of the Bier House by Kaneji Domoto, circa 1949 – Left image: The living room is at the left with its original balcony, and the open car port is at the right. Right image: The rear of the house, with the living room and its original balcony at the right, and the bedroom wing at the left.

We rounded a corner and entered the master bedroom, where we encountered Ricken’s wife Devon Scout-Hale, who was in the process of expressing milk for the couple’s newborn daughter. “We have recently given birth to the new love of my life, my daughter Eleanor Ricken Scout-Hale Hale,” the proud father declared. “My wife and I joyfully survived the labor, thanks in no small part to my thoughtful interventions of natural seaweed and the timely divulging of secrets.” 

I did not have a moment to inquire about these birthing interventions, as he quickly ushered me to one of the smaller bedrooms. “This is where my dear friend Patton safely rescued Eleanor, during a recent kidnapping episode.” I had heard rumors of that event, which had transpired during Ricken’s recent book reading. However, it was quickly discovered that there was not an actual kidnapping, and the authorities were not contacted. “On an unrelated note, if you know a lactation consultant, please refer them to me, as we have recently had to let ours go.” Ricken divulged.

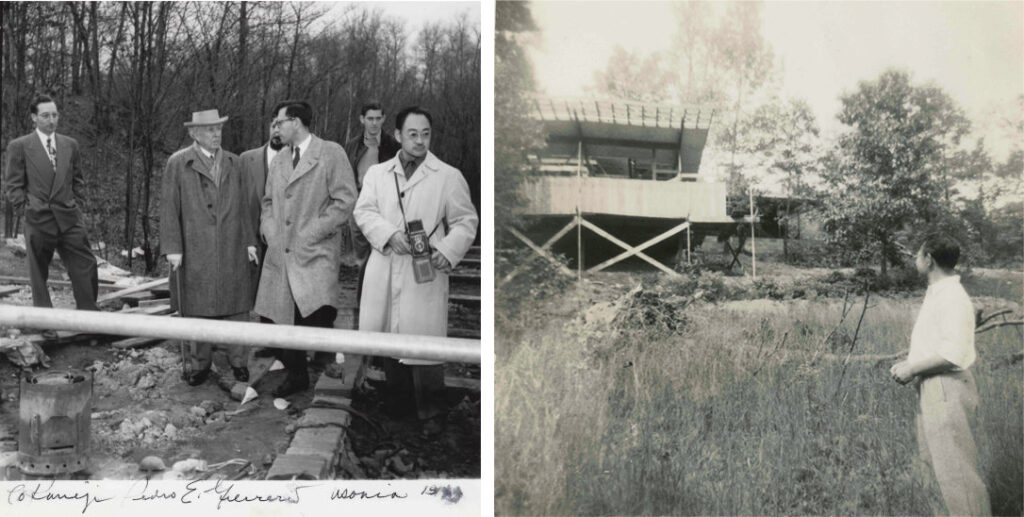
Left image: Architect Kaneji Domoto standing at right with the camera, and Frank Lloyd Wright in the center, with his distinctive porkpie hat (photo by Pedro E. Guerrero). Right image: Domoto admiring the construction of the Bier House (photo by Unknown). Both images circa 1949.

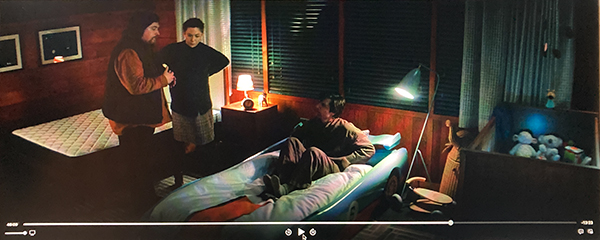
We proceeded down the hall to newborn Eleanor’s bedroom, a window-lined room filled with a crib, a toddler race-car bed not quite in keeping with the mid-century decor, and a twin bed. I asked if he planned to have several children sleep in the room, but Ricken explained that a child should be able to view and choose their own bed, throughout their life development. 

As we returned toward the kitchen, I noted several portraits of Ricken throughout the spaces. He informed me that when he first moved into the house, he required all of his artistic friends and colleagues to provide a drawn, painted, or photographic portrait of him, as a housewarming gift. “I do not wish for the house to forget me in my absence, nor to fear me upon my return.” he explained.

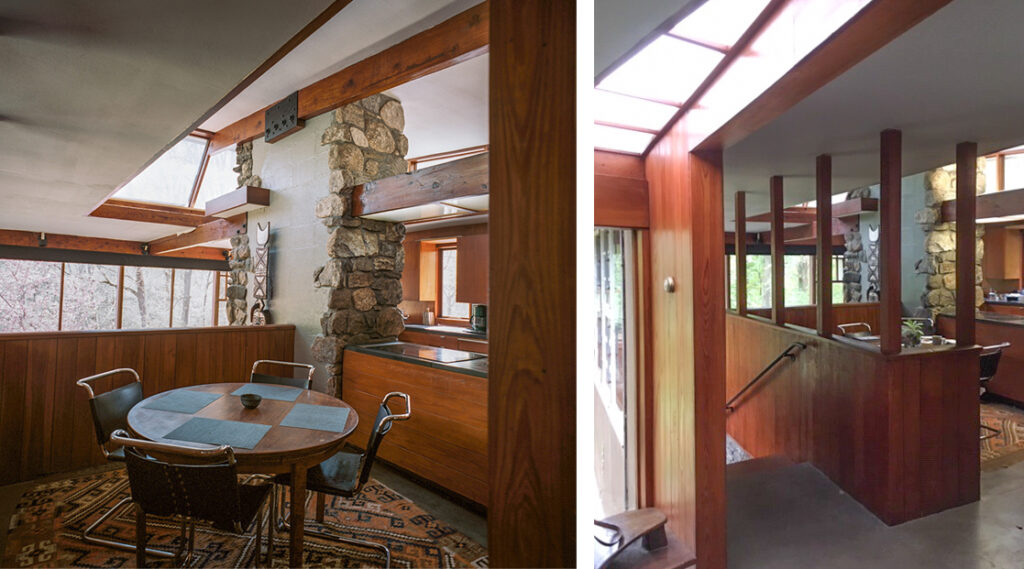
Left image: The original dining room, as decorated by previous owners. Ricken’s wife Devon sometimes serves late-night sandwiches to her brother Mark in this breakfast room. Right image: Just beyond this original dining room are the steps leading down from the kitchen / bedroom level to the living room level (photos by Waverly Lowell).

Just before reaching the kitchen, we stepped out through a sliding door onto the deck, or Dining Terrace as the architect officially designated it on the floor plans.“This deck was originally built around a large tree, as you can see by the pattern of a now-covered hole, and the notch designed into the roof’s overhang above. It seems that at some point in the house’s history, the tree was misplaced. Perhaps I shall be the one who relocates it,” Ricken declared. “Or perhaps one of the imbibers from the local tavern down below took it with him one night…?” Ricken pondered.

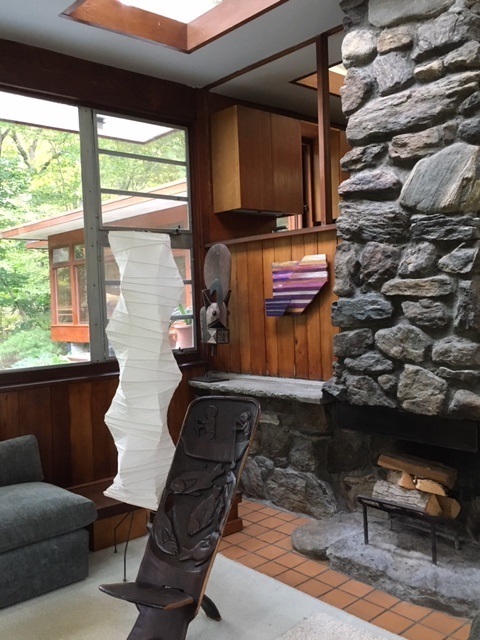
The heart of this house is of course the living room with its high ceiling, its natural stone fireplace, and towering chimney surrounded with skylights. Dark wood beams stand out overhead against the white plaster ceiling. The living room is located 6 steps down (“Exactly 3 feet, 4 inches lower” Ricken informs me) from the entry / kitchen / bedroom level, and can be viewed from the kitchen and the breakfast room. 

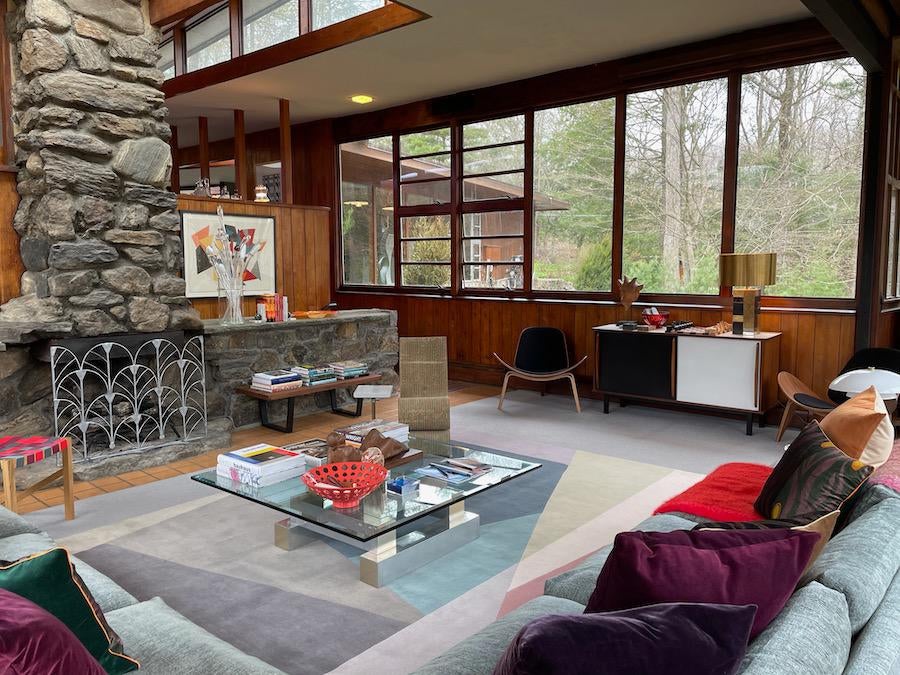
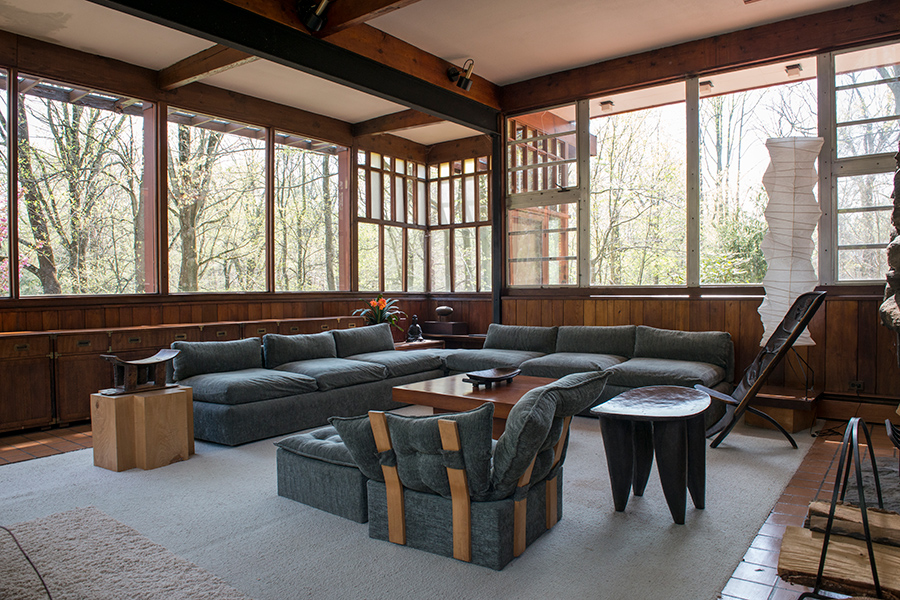
The living room as decorated by current residents Devon and Ricken Hale, and looking north. Ricken typically stands to the left of the fireplace, just out of frame, when he gives his book readings (photo by Andrew Baseman).

“This is where I host all my book readings, as well as my conversation-less debates, and no-singing Karaoke sing-along nights,” Ricken shared. Light and nature fill the room through the large windows that completely surround the space on the east, south, and west sides. Ricken has tastefully decorated the living room space with mid-century icons including a George Nelson slat bench-table, a leather-covered Hans Wegner Shell Chair, a Charlotte Perriand mahogany black and white sideboard, as well as a more recent Frank Gehry cardboard Wiggle Chair. I noted that a geometric-motif rug very much tied the room together. On the sectional sofa lay a throw pillow embroidered with a quote by Michel Foucault, “I don’t write a book so that it will be the final word; I write a book so that other books are possible, not necessarily written by me.” 

The living room as decorated by a previous owner, and looking south. The rear area of the space was originally an exterior balcony, but was enclosed by previous owners to enlarge the living room. Ricken typically stands near the location of the tall Noguchi lamp at right when he gives book readings to his friends and family (photo by Thad Russell).

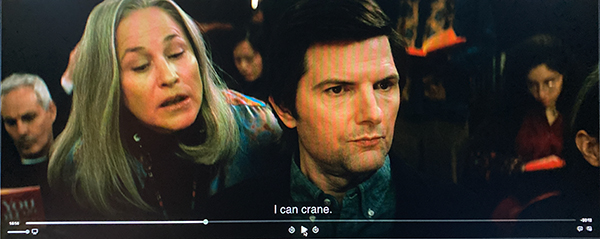
Domoto’s original design for the Biers was later modified and enlarged by later owners, the Cooper family. A balcony off the southern side of the living room was enclosed and incorporated into the living room, in order to enlarge that space. The geometric window patterns with opaque panes at the corners of the living room space were added when the balcony was enclosed, and are now a distinctive element of the house. When the living room was enlarged, the open outdoor area that it dramatically cantilevered over was also enclosed, to add more lower-level living-space to the house. The now-larger living room comes in handy during Ricken’s popular book readings. “There were so many attendees, some were forced to share copies of my book as they followed along,” Ricken informed me about the recent reading. “I saw much craning,” he added.

The rear exterior of the house, where patrons from a local bar sometimes appear at night. The original house was built around the existing tree, seen here embraced by the wings of the house as it emerges through the Dining Terrace deck. Ricken noted that this tree has currently been misplaced. The bedroom wing is at left. A door seen at the lower-right enters into the lower addition to the house (photo by Thad Russell).

While Kaneji Domoto’s design for the Bier House resembles many of the mid-century houses in the community, and contains several of the elements of Wright’s Organic Usonian houses, Frank Lloyd Wright did not actually like the design, and refused to approve any of Domoto’s plans. Wright called Domoto a “green amateur” who designed “half-baked imitations.” In one letter, Wright stated that “Kan’s designs are lousy — pretentious imitations.” Eventually, after repeatedly rejecting the plans, Wright demanded Domoto’s resignation. 

Completely normal and appropriate questions that were asked of applicants to the Usonia Cooperative who wished to join the community and build a house at the site, circa 1948.

The other Usonia architects protested to Wright that Domoto was brought to the project because of his status as one of Wright’s apprentices at his home and studio, Taliesin. In fact, Domoto had to abandon his education with Wright when he and his family were forcibly detained at a Japanese Internment Camp during World War II. Although Wright himself asked for Domoto’s release from the camp, Wright later denied to the Usonia team that Domoto was a student at Taliesin, and instead claimed that “he was a gardener.”

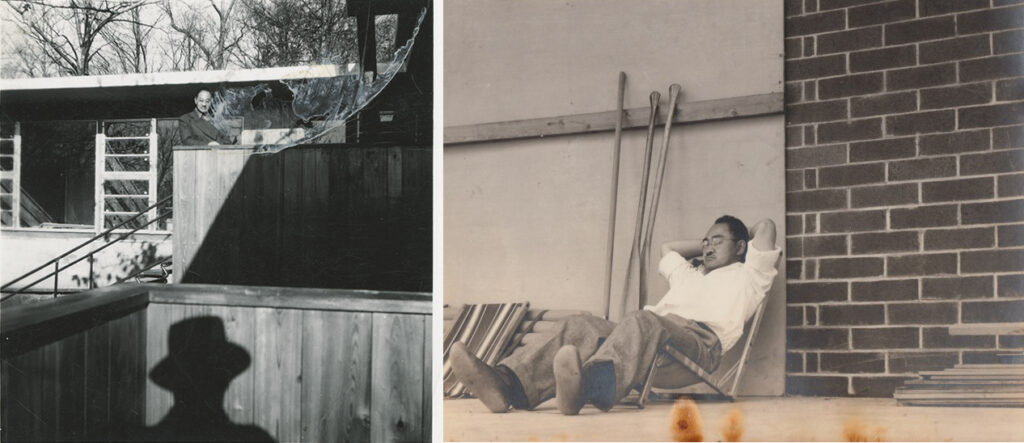
Left image: A mysterious figure in business attire approaches the house, as Domoto looks on from a balcony, circa 1949 (photo by Unknown). Ricken Hale informed me that his brother-in-law recently had a similar encounter with a mysterious figure approaching the house. Right image: Domoto unwinds at Usonia, circa 1949, after being repeatedly insulted by Frank Lloyd Wright (photo by Jack Holme).

The families at Usonia who had commissioned houses from Domoto fought for the young architect’s continued inclusion in the project, and even began constructing his designs without Wright’s explicit approval. The situation so ruffled Wright that the master architect eventually left the Usonia Cooperative project, explaining that he would finish his own three designs, but offer no more leadership or involvement. Domoto continued and eventually completed five houses on the site, but lost clients to other Usonia architects. The Bier House was the largest of Domoto’s contributions.

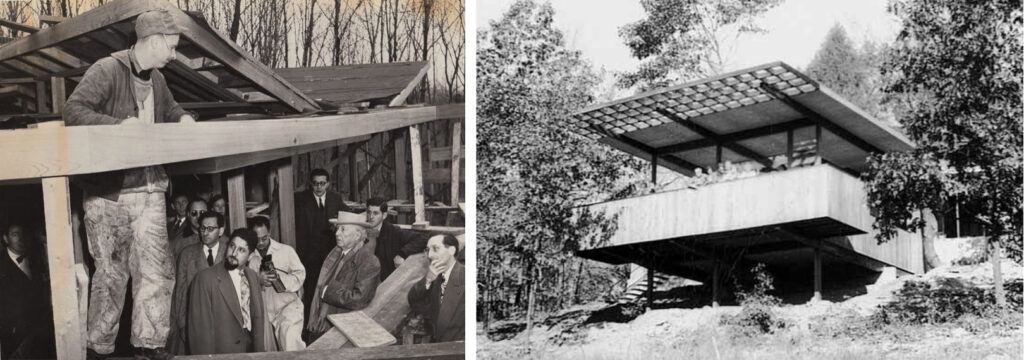
Left image: Frank Lloyd Wright mansplains to a carpenter how to build a house, as the Usonia architects look on, circa 1949 (photo by Pedro E. Guerrero). Right image: The Bier family looks down from the balcony of their recently completed house, unaware that one day, Dr. Ricken Hale would elevate its standing even further (photo by Unknown).

Wright was also disapproving that Domoto’s design contained overtones of the International Style of architecture, a style with sharp, rigid geometries and colder metal, glass, and marble materials. Proponents of that style often proudly called their houses “machines for living.” I asked Ricken about his thoughts of the combination of rigid International Style components along with living Organic architecture elements.

“I have found the combination to be intriguing, and perhaps ideal. Because this house incorporates the two prominent mid-century architectural styles, I am able to live my life in a ‘living’ machine-for-living.” This brought to mind Ricken’s contrast of man and machine that he expounded upon in his latest book, and Ricken readily agreed, saying “Most machines are made from metal, while this one is made from wood and stone and glass and concrete. And also, it has doors and windows and Himalayan throw rugs.”

Exterior detail of the former balcony that was enclosed in order to expand the living room, which fortunately now allows for more guests at Ricken Hale’s book readings (photo by Thad Russell).

When I inquired about another set of stairs that led down from the living room, Ricken invited me to descend to a small study and guest room plus mechanical space tucked under the kitchen. Originally it was a discrete space, but now serves as a transition to the added lower spaces that were part of the later owners’ renovations. Following a musty, earthy odor, we continued down to the added space below the living room, which is currently filled with large bundles of wool, fabrics, and weavings. “This is where I work my Baltic hand loom,” he explained. “I will now demonstrate.” Deflecting my kind but firm protests, Ricken began to weave, elucidating the intricacies of warps and wefts, and explaining how he is compelled to use wool from Emsket-colored sheep who sleep on the south side of a knoll.

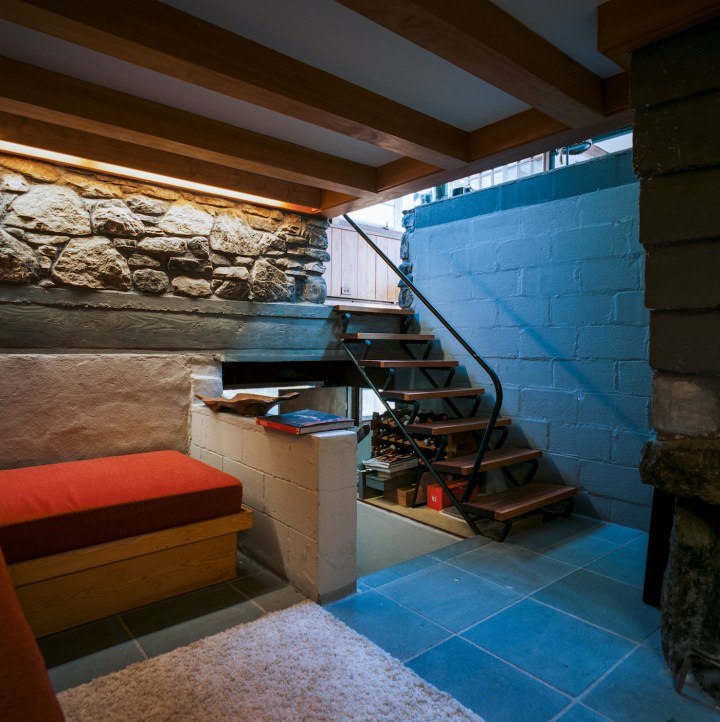
Lower space that was originally a Study and Guest Room plus the furnace, but now serves as a transition space to the added lower level (photo by Thad Russell).

“Once I initiated my weaving projects for dear Eleanor’s linens, I had to disassemble my medieval bookbinding workbench, and temporarily place my small-mammalian taxidermy station into storage.” When I marveled at his numerous hobbies and undertakings, Ricken pointed to one of the room’s electrical outlets and explained, “Just as electrical outlets are needed to release surplus electricity into lamps, personal outlets are needed to release manifold talents into life.”

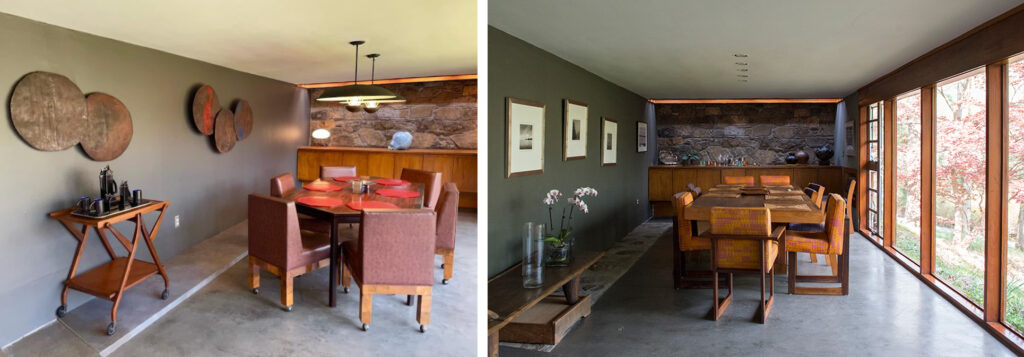
At the conclusion of the weaving demonstration, we returned upstairs for a respite in the concrete-floored dining room. Accented with a natural stone wall on the eastern side that is fronted with a built-in mahogany buffet and recessed overhead lighting, the space also boasts full-length glass panes that run across the room’s southern wall. The dining room was the house’s original car port, but was enclosed by later owners as part of their renovations.

Left image: The larger dining room as decorated by Devon and Ricken Hale. This room was created by previous owners by enclosing the original car port. It is also the room where pre-reading cocktails and hors d’oeuvres are often served (photo by Andrew Baseman). Right image: The dining room as decorated by previous owners, showing the large glass panes along its southern wall (photo by Thad Russell).

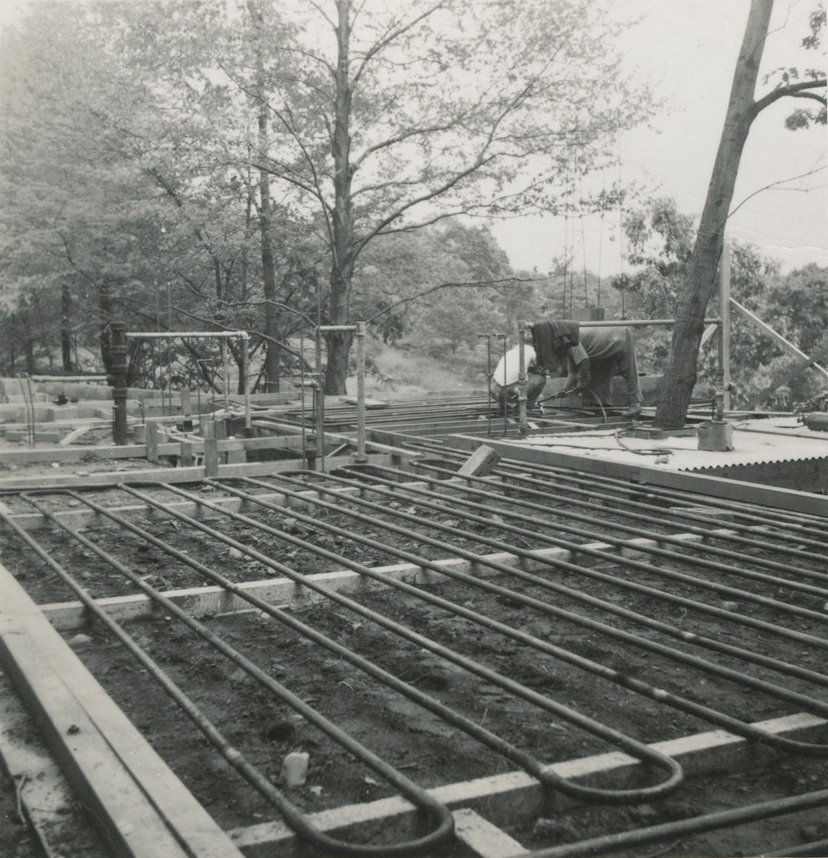
Ricken offered me a coffee with warm goat milk, served from an enviable mahogany beverage trolley that he recently acquired from the local Midcenturion vintage furniture store. “This week I am sampling Liberica beans from the Philippines,” he purposefully mentioned as we sat for a moment under pendant lighting at the hexagonal table. “I individually hand-ground many of the beans myself, before aggravating my finger tendons and outsourcing the project to my aide Balf.” As with the rest of the house, the concrete floors emit radiant heating, as hot water flows through copper tubes embedded in the poured concrete. This was a heating technique also favored by Frank Lloyd Wright in his Usonian houses. 

The Bier House under construction, with the radiant heating tubes visible, before being encased in the poured concrete floor. The bedroom wing is seen in the foreground, with the tree emerging from the Dining Terrace also visible at right (photo by Unknown).

After Ricken demonstrated the proper method of slurping a Liberica, I asked him about the origins of his writing career. He explained that after misguided attempts at being a lamp electrician, a daffodil gardener, and a tree-and-pond photographer, he returned to his first childhood passion of introspective writing. “Just as you must send out your image to a mirror in order for it to return as your reflection, you must send out your thoughts to the world in order for them to return in the guise of self-reflection,” he explained. “But listen to me, prattling on like an airport weatherman about my writing, my house, and myself. Why don’t you tell me what you think of my writing, my house, and myself?”

Before Ricken moved into the house and began using this location to present his book readings, previous owners enlivened the corner with an Akari floor lamp designed by Isamu Noguchi (photo by Waverly Lowell).

Dr. Ricken Lazlo Hale, PhD is the author of five books, including The You You Are: A Spiritual Biography of You, My Own Petard, Life of an American Gadfly, Wisdom from the Withered, and The Fun in Profundity. His books can be found at many of the finest airport booksellers.

His upcoming book signing event at Selvig’s Flowers in Downtown Kier has, unfortunately, been cancelled.

You can follow his many Twitter pages here https://twitter.com/DrRickenHale here https://twitter.com/TheYouYouAreBot and here https://twitter.com/michaelchernus and also here https://twitter.com/DanErixon

Do you enjoy refining macrodata? Then shop the look!
https://amzn.to/3SUTRXO

If you wish to learn more about architect Kanji Domoto, the Bier House, and the Usonia Cooperative, as well as view additional photographs, plans, and a full PDF book about Usonia, links are provided below.

Ricken did not succeed as a tree-and-pond photographer because he never read any of my comprehensive and user-friendly Nikon, Canon, and Sony camera guides. Don’t make the same mistake – learn to take control of your camera and the images you create, with my Full Stop camera guides: www.fullstopbooks.com

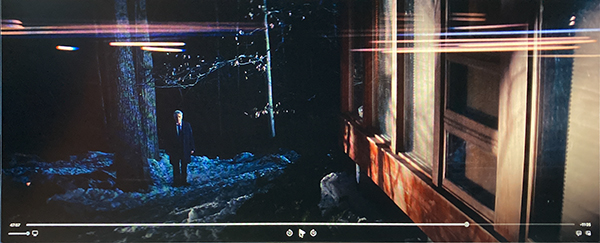
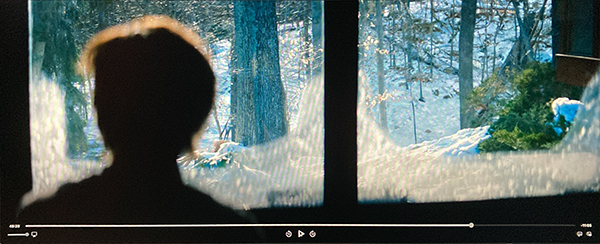
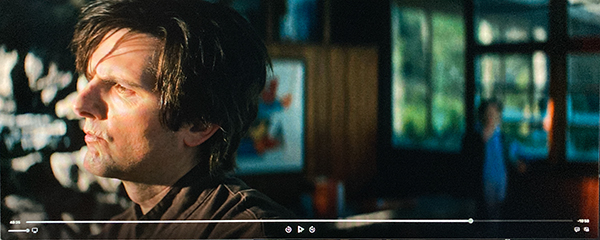
In an ongoing project, Ricken has asked his photographer and filmmaker friends and colleagues to document his everyday life. Many of these recordings have been shared in a nine-part Apple TV+ presentation titled Severance. Some images and video stills that he has kindly shared, to help illustrate this article, can be viewed at this companion link:
http://blog.dojoklo.com/2022/04/28/devon-and-ricken-hale-house-in-kier-pe/

Sources and Resources

Original architectural drawings and construction photographs, Domoto (Kaneji) Collection at UC Berkeley
https://calisphere.org/item/7e55449f-d89c-4e9d-a077-1eec378967de/
http://exhibits.ced.berkeley.edu/exhibits/show/domoto/usonia–an-experiment-in-livin/arthur-and-gertrude-bier-house

Visiting Usonia, by Waverly Lowell
https://archives.ced.berkeley.edu/blog/archives/2019/10

Step into Houses Designed by Frank Lloyd Wright Acolyte Kaneji Domoto, by Zachary Edelson
https://metropolismag.com/projects/kaneji-domoto-usonia-house-exhibition-photography/

The Complicated Story Behind the Only Japanese-American Architect at Frank Lloyd Wright’s Usonia, by Elizabeth Fazzare
https://www.architecturaldigest.com/story/kaneji-domoto-only-japanese-american-architect-at-frank-lloyd-wright-usonia

The Japanese American Architect Who Was a Disciple of Frank Lloyd Wright, by Claire Voon
https://hyperallergic.com/392963/kaneji-domoto-frank-lloyd-wright-usonia/

Exhibition on Life and Career of Renowned Nisei Landscape Architect Kaneji Domoto, by Rafu Reports
https://rafu.com/2019/08/exhibition-on-life-and-career-of-renowned-nisei-landscape-architect-kaneji-domoto/

Usonia Community Remembers its Past, by Scott Riklin (paywall)
https://www.nytimes.com/1981/08/30/nyregion/usonia-community-remembers-its-past.html?sec=&spon=&pagewanted=1

The Wright Stuff, by Jill Clateman
https://westchestermagazine.com/uncategorized/the-wright-stuff/

Usonia, New York – Building a Community with Frank Lloyd Wright, by Roland Reisley (PDF copy of book)
Preview: https://issuu.com/papress/docs/9781568982458

Additional images of Ricken Hale’s interior decor, by SeveredSetDirector
https://www.reddit.com/r/SeveranceAppleTVPlus/comments/tz3696/in_the_outie_world_weve_seen_bits_of_devon/

Devon and Ricken Hale House in Kier, PE

These are the companion images to an article about Devon and Ricken Hale’s house in Kier, PE
http://blog.dojoklo.com/2022/04/27/severance-star-and-noted-author-ricken-lazlo-hale-provides-a-guided-tour-of-his-mid-century-modern-home-in-kier-pe/

Exterior of the house as approaching from the street. The living room is at left, and the original car port, now the large dining room, is at right.
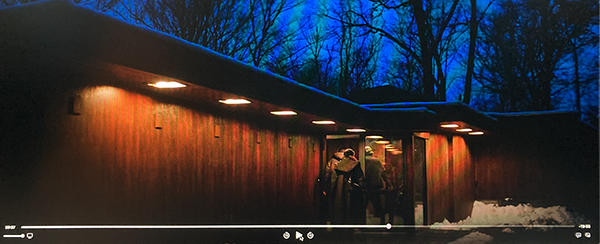
Entrance to the house, with original car port at left, now enclosed as the large dining room.
The original car port, now enclosed as the large dining room, as viewed from the exterior, looking north.
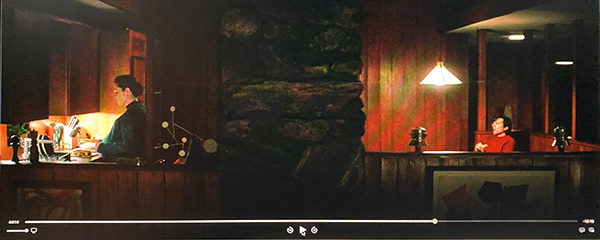
Simultaneously viewing the kitchen (left) and the original dining room (right). The view is from the living room, from a point 8 or 9 feet above its floor.
Eleanor’s bedroom – I cannot locate this bedroom on the original plan, as they may have been reconfigured, or more added to the north side of the hallway.
A businessman standing in the backyard, as viewed from the Dining Terrace deck, with the bedroom wing at right.
The businessman’s view of the Dining Terrace deck, with the bedroom wing at left, and the kitchen behind the figure, with the kitchen window to the right of the figure. The original tree that emerged from the deck has been misplaced.
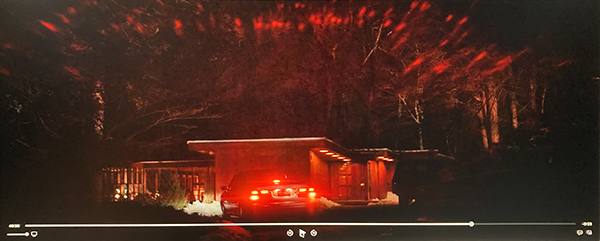
View of the house from the approaching street, as the sun rises in the morning. Apparently the sun rises in the west in Kier, PE.
Looking out into the backyard from the living room, from a spot near where Ricken stands for his book readings.
Gazing out into the backyard at sunrise, standing at the approximate spot where Ricken gives his book readings. Apparently the sun rises in the west in Kier, PE.
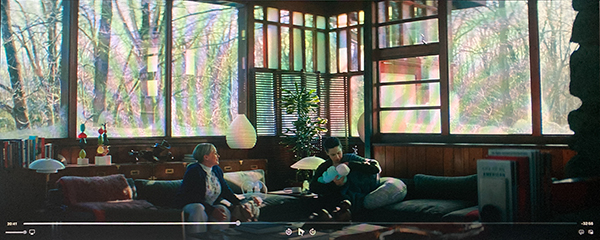
Southern side of living room, showing the former balcony that was enclosed behind the figures, with the added distinctive windows.
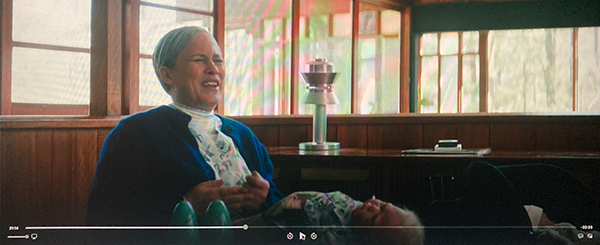
A woman describes a “fire-hose” situation, as she sits in the original dining room.
View into the kitchen from the original dining room.
View of the original dining room and the kitchen. They overlook the living room, to the left.
Approaching the house from the driveway. The original car port has been enclosed as the large dining room.
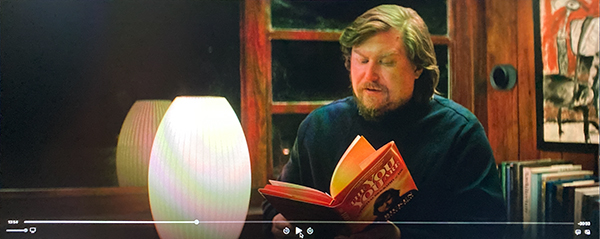
Ricken Hale giving a book reading, while standing in the north-west corner of the living room.
There were limited copies of the book available at the reading, and some attendees were required to crane.
Ricken Hale giving a book reading, while standing in the north-west corner of the living room, near the fireplace.
As Ricken Hale gives a book reading from the north-west corner of the living room, his wife Devon Hale calls from the kitchen above.

Recommended Nikon D850 Settings

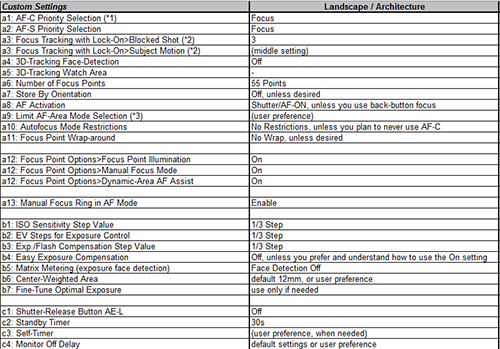
I’ve put together a comprehensive Nikon D850 Menu Setup Spreadsheet, with suggested settings for various types of shooting situations, such as Landscape, Action/Sports, Portrait, Concert, etc. The Excel spreadsheet covers all of the Photo Shooting Menu items, all of the Custom Settings, and various other camera and exposure settings. A free link to the spreadsheet is included inside my Nikon D850 Experience guide if you purchase that, otherwise you can purchase and download the spreadsheet here, where you will also find instructions for printing it out:

http://www.fullstopbooks.com/setup-guides/

Here is an image of just a small portion of the comprehensive spreadsheet:

Nikon D850 setup guide menu custom setting spreadsheet quick start tips tricks

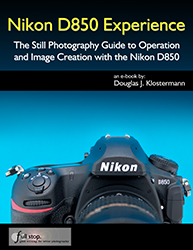
The setup guide spreadsheet is a great companion to my full D850 guide, Nikon D850 Experience, which is a clear and comprehensive guide to the camera. The full guide explains all the Menu and Custom Settings items, as well as all of the other camera features, functions, and controls.

Nikon D850 Experience book manual how how to use tips tricks

I’m Looking for a Photography Writer

Would you like to write about dSLR cameras/ photography and help contribute to this blog? I am looking for someone to help me out with writing articles / blog posts for this blog, Picturing Change, about the latest dSLR cameras and accessories. This blog reaches a wide, always-growing audience of dSLR photography enthusiasts, and this could give you an opportunity to share your knowledge and enthusiasm, further hone your writing skills, and develop a “portfolio” of written work. Not only that, but I’ll pay you for each post!

Please read through the following requirements/ desires and see if you would like to be considered.

What I’m Looking For:

  • Contribute regular blog posts, perhaps 3 to 5 per month.
  • Typical posts would be about the latest Canon and Nikon dSLR cameras and accessories, similar to several of my posts on this blog, including:

-Comparing the latest cameras (and how one would choose the right one for their needs)
-Previewing then Hands-on with the latest cameras
-“Top Ten” features of the latest cameras
-How to use a specific feature (GPS, Wi-Fi, AF system, etc)

You can look through this blog to see the typical kinds of posts I write, such as these here:
http://blog.dojoklo.com/canon-dslr-cameras/

  • The posts would need to have some relevant images (images and details of the camera body and/ or sample images taken with the camera).
  • Thus you would likely need to develop a friendly relationship with a local camera store so that you can have access to the latest models.
  • You will be credited as the author and photographer (or perhaps co-credited if I help contribute), but the text and images would have to be exclusive to my blog as far as Internet use, at least for a pre-determined time frame (Google doesn’t like seeing the same content on different sites).  The articles and images will need to remain on this blog indefinitely. You retain all other rights to your writing and images. (You don’t need to contribute your portfolio images here, just informative, nice shots of/ with the cameras!)
  • I will be including links to my dSLR e-book guides and Amazon affiliate links within the posts.
  • While I would like to maintain a consistent “style” for my blog’s writing, your personal “voice” is welcome. What I am looking for is clear, concise, helpful writing in a somewhat “familiar,” friendly, and knowledgeable voice.
  • The goal of the posts is not only to discuss the latest cameras and their features, but also to apply them info to real-world enthusiast photographers – ie: explain the differences and why a feature or option would or wouldn’t be needed by a photographer, in real-world use.
  • The audience is enthusiast photographers trying to decide which dSLR model fits their needs, and dSLR owners looking to learn how to better use their equipment.

Other Requirements:

  • Be extremely knowledgeable about the latest Canon and Nikon dSLR cameras, and hopefully knowledgeable about previous cameras in order to better explain how the new ones are different / improved from the previous model.
  • Have access to the latest dSLR cameras as soon as they are available.
  • Excellent writing, grammar, and proofreading skills.
  • Technical knowledge and fact-checking to ensure camera specs and info are always correct.
  • I have very high standards, as I wish to maintain the quality and reputation of my blog and related writing! Since I want to work with one or two people for an extended period, I am going to be picky!
  • If you are a “Canon person” or a “Nikon person” and feel comfortable with just your brand, let me know, and perhaps I can find different contributors for each brand.

Payment:

You would be paid per post, as a freelance consultant.  Payments would be reported for my tax purposes.  Any taxes due on your income would be your responsibility. No employment or benefits are offered.

Please let me know what your desired rate is.  I have a range in mind, but I want to make sure I am in line with expectations. (Don’t worry, if you propose lower than what I have in mind, I will adhere to my initial range.)

Application:

If you are interested, please let me know via email:

doug (at) dojoklo (dot) com

Fill me in on your relevant background and experience, and be prepared to provide samples of applicable writing or links to existing articles/ posts, and a link to your photo website.

Thanks! I look forward to hearing from you.


Canon 6D Hands On Review

Several weeks ago I wrote a post previewing the Canon EOS 6D, based on its specs and information available at its announcement. I’ve now had some hands-on time and have done significant research on the camera and its functions and features as I work on my latest e-book camera guide Canon 6D Experience. So now I am able to share some more insight into the body, controls, features, and handling of this very nice new full frame dSLR camera. And thanks to Newtonville Camera of Newton, Mass. for getting it into my hands so quickly!
Canon 6D EOS unbox unboxing new full frame dslr review preview hands on test how to use manual guide dummies
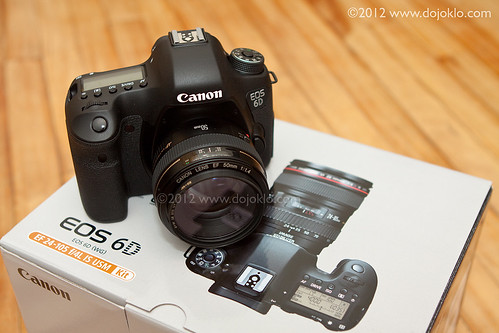
The Canon EOS 6D Unboxing – shown here with a Canon 50mm f/1.4 lens attached, not the EF 24-105mm f.4L kit lens.

The EOS 6D is first “affordable” full frame camera from Canon, priced at about $2,100. This means it is a consumer level camera that boasts an image sensor the same size as a frame 35mm film – rather than the smaller APS-C sized sensors that have been the necessary compromise for so many years in order to offer highly capable dSLRs which are still affordable to enthusiast photographers. With the availability of the 6D, many more photographers will now be able to gain the benefits of full frame photography, including the ability to use your lenses at their “intended” focal lengths (no more 1.6x crop factor) as well as obtain great image quality, resolution, and low noise at high ISO settings.

The Canon 6D is aimed at intermediate and dedicated enthusiast photographers (and dSLR beginners willing to learn!), not only with its price and body size, but also with its features and straightforward controls and menus. It is obviously not as fully-featured as the professional-level 5D Mark III, yet it contains nearly every feature that the majority of “non-pro” photographers will need. Besides the much more basic 11 point autofocus system (vs. the 61 AF points of the 5DIII), what the 6D leaves off are often very specific customization options that even some pros never get around to figuring out or using. Plus the 6D adds a couple new features previously not yet seen on a Canon dSLR such as built-in WiFi and GPS.  Most importantly, with its 20.2 megapixel sensor, the image quality of the 6D should prove to be nearly at the level of the 22.3 megapixel 5D MkIII.

As the author of dSLR user guides, my primary interest is more with the controls, features, functions, and “real world” use of any camera – as opposed to the image quality/ sensor issues (resolution, dynamic range, noise, etc.), which I leave up to DP Review, DXOMark, and other sites to examine in depth.  Although I will discuss and give examples of some of these issues in this post, I direct you these other sites to view sample/ comparison images and read detailed discussions of sensor and image quality issues.

Body: Weight and Size: The very first thing I noticed when picking up the camera is how incredibly light it is.  Granted, it was just the body only without a lens attached yet, but I was pleasantly surprised at its light weight. The body only (w/o battery) weighs a mere 1.5 lb. (680g), much lighter (relatively) than the full frame 5D Mark III (1.9 lb./860g) and the APS-C sized 7D (1.8 lb./820g).  The EOS 6D is nearly the same weight – and size – as its closest sibling the (smaller APS-C sensor-sized) EOS 60D, and truly represents an important milestone in dSLR evolution where a full-frame sensor and several advanced features fit into a similar body as an mid/upper-level consumer camera.

Body: Controls and Feel:  The controls of the 6D are similar to those of the 60D. It shares many of the same buttons (though some are relocated) as well as the thumb-pad Multi-Controller that sits inside the rear Quick Control Dial. This replaces the thumb-joystick version of this controller that was seen on all non-Rebel Canon dSLR cameras up until the 60D. Personally I am still not a fan of this thumb-pad, as the joystick is more comfortably located for autofocus selection, and I also find that I sometimes accidentally hit the thumb-pad while turning the Quick Control Dial when navigating menus, and thus suddenly jump to a different menu option. I also prefer to have the Playback and Delete buttons on the left side, so that I can access them with my left thumb, perhaps due to much more experience and muscle-memory with that set-up. However, these are simply a matter of getting use to the locations and sensitivity of the controls – after some use, muscle memory and habit typically allows one to easily use the controls they are provided with. The top Main Dial (for adjusting aperture and changing various settings) has a great “soft” feel as if made of firm rubber rather than the harder plastic of lower-end models. The rubber of the grip areas also feels great, no complaints regarding the over-all ergonomics of holding and carrying the camera, and the body feels perfectly solid.
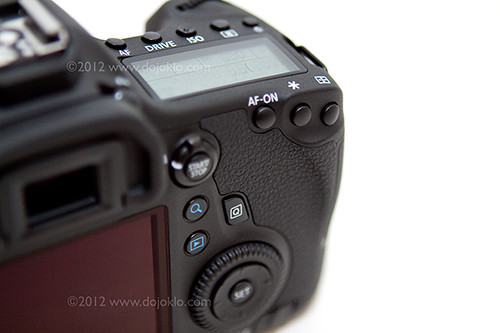
Canon 6D EOS unbox unboxing new full frame dslr review preview controls button autofocus hands on test how to use manual guide dummies
Detail of the Canon 6D, including some of the buttons and controls.

There are several “quirks” to get used to with the 6D if you are accustomed to working with a different Canon body such as a 50D, 7D, or one of the older 5D models. Primarily, the 6D has the new single Magnify Button introduced on the 5DIII, rather than the Zoom-in/ Zoom-out buttons of previous models. Your muscle memory will definitely cause you frustration with this one for awhile until you get used to reaching for this new button rather than using the top-right rear buttons for zooming in and out during image playback. Now during image playback, you press the Magnify Button located just above the Playback Button, and then use the top Main Dial to zoom in and out. One of the advantages of this Magnify Button is that its initial magnification level is customizable from 1x to “zoom-in immediately to pixel level on the area of the image where you focused” (Actual size from selected point). Instead of pressing the Playback Button and then zooming, you can simply press the Magnify Button and immediately view the image at your zoom-level of choice. I found that I actually prefer to set the Magnify Button for 1x zoom. Then after taking an image, I can press the Playback Button to view the thumbnail of the image with the histogram (since I leave this as my default Image Playback view), or press the Magnify Button to immediately see the image full-screen. Using the two buttons, I can easily toggle between these two views.  Others will enjoy immediately zooming in on the area where they focused to ensure that it is indeed in-focus.

As with the 7D and 5DIII, the 6D has the ability to customize the various buttons and controls of the camera. I recommend that you use these Custom Functions to set the Multi-Controller to AF Point direct selection. That way you can simply use the Multi-Controller to manually select your desired AF Point instead of having to first press the AF Point Selection Button. However, if you do this, the SET Button will not select the center AF Point, as you may be used to from other cameras. Instead it will activate whichever function you set the SET Button for. But if you press the AF Point Selection Button first and then use the Multi-Controller, you can then still use the SET Button to select the center AF Point, which can be very convenient for quickly choosing this point.

The 6D has the Live View/ Movie switch and START/STOP Button which makes it quick and easy to switch between the two, start Live View, or begin Movie recording. However, this may bring you to another “quirk” (ok, it is not really a “quirk,” more a necessity of design and function, but until you realize that you may feel like it is a quirk!).  There are a couple functions that will be greyed-out in your menus if you have a certain conflicting setting option set. For example, some features will not be available (like HDR Mode) if you have the image quality set for RAW or JPEG+RAW.  You will have to switch to JPEG only in order to access these features.  Or you cannot access the Multi Shot Noise Reduction feature if you have Long Exposure Noise Reduction enabled or if you are shooting in RAW. This is bound to aggravate you at first as you try to determine why the function is greyed-out and not accessible in the menus. So, back to the Movie function, you cannot begin movie shooting if you have WiFi enabled. Thankfully with this particular incompatibility, the camera will alert you to this on the rear LCD Monitor. With the other conflicting settings, you are simply going to have to learn and remember the conflicting option.

As with the 60D, the 6D has the top row of buttons that only access one function (such as ISO or Drive Mode) rather than two functions as with previous/ other Canon models. However, this means you can press the button and then use either the top Main Dial or the rear Quick Control Dial to change the function. Or you can always use the [Q] Button and Quick Control Screen to access these functions or other functions that there is not a dedicated button for, such as Image Quality, White Balance, or Flash Exposure Compensation. And Canon has continued the use of the locking Mode Dial, which I prefer as there have been many times my 50D Mode Dial was accidentally turned when pulling the camera out of its bag.

Brief Commercial Interruption: I have completed my e-book guide to the Canon 6D, called Canon 6D Experience. The guide covers all the controls, functions, features, Menus options and Custom Function settings (with recommended settings), autofocus system, exposure, metering, and more. Plus most importantly, it explains how, when, and why to use the various controls, features, and functions of the 6D. Click the link above or the cover to learn more, preview, and purchase the guide.

Canon 6D EOS book manual dummies field guide instruction tutorial how to use learn full frame autofocus system

Use and Response: There really isn’t too much I can say about the 6D in action, as it performs as expected.  Not really any complaints, aside from my personal issues with the controls issues I described above.  The autofocus response is quick and accurate in normal use. I realize now that I was paying more attention to my photographic tasks and wasn’t paying particular attention to the AF performance as I was out and about with the camera, and didn’t specifically test the center vs. outer points, so I need to get back out and do that.  But on the other hand I didn’t notice and wasn’t limited by any issues or shortcomings.  In low light, night-time scenes, such as the in-camera Multiple Exposure image below and the in-camera HDR image above, the camera locked right on and focused well with the center and outer points. In extremely low light when using the outer points, it did not seem to react as quick and instantaneous – in my experience so far – as the highly advanced AF system of the 5DIII. For example the 5DIII could immediately find focus on the black face of a cat in very low light, while the 6D needed me to find a slightly stronger area of contrast on the kitty’s face before it locked on. But you can see from the exposure settings and the lack of contrast in the focus area of the image below, it still performed rather admirably for the situation (I focused just above the eye and recomposed slightly).
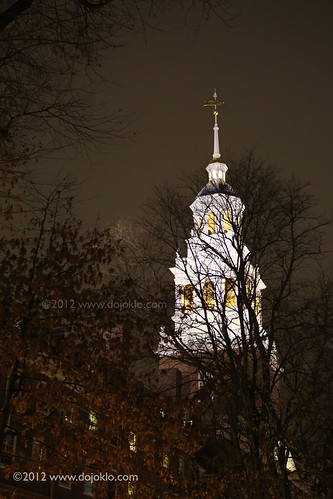
Canon 6D eos in camera hdr mode autofocus af system low light high iso hand held
Canon 6D – In-camera HDR Mode, with three images automatically combined and processed in-camera. “Adjust Dynamic Range” setting +/-1, “Auto Align” enabled, hand-held. Resulting image 1/40, f/2.8, ISO 6400. This image was also automatically geotagged with the GPS, as can be seen on Flickr.


A closer look at the above image.  I focused at about the center of this image, where the white meets the blue dome, though it may have focused on the closer branches.  Keep in mind this was handheld, for 3 images that were aligned and combined in camera.

The center cross-type AF point of the 6D is said to be even more sensitive (both in specifications and by users in real life use) than that of the 5DIII (according to Canon, the 6D center point is EV -3 while the outer points are EV +0.5; 5DIII is EV -2 all points; 60D is EV 0 all points).  Unfortunately I now realize I did not test the center point in this situation, and I will have to go back and do that.  So, I acknowledge it is premature for me to take away any conclusions about the extreme low light AF performance of center vs. outer points before I re-examine this further. Others are already saying that the center AF Point is stellar in very low light. And I did not test the AF system for tracking moving subjects using AI Servo yet. What does all this EV info mean?  If you are a wedding photographer or a concert photographer and simply need to get the shot and capture a very precise moment with no delay, then you may prefer to work with the 5D Mk III. If you are not working on assignment and perhaps have 1 extra second to re-position an outer AF point on an area of slight contrast, or else use the center AF point and recompose in dark situations, then you will certainly still be able to capture great low light shots with the 6D.
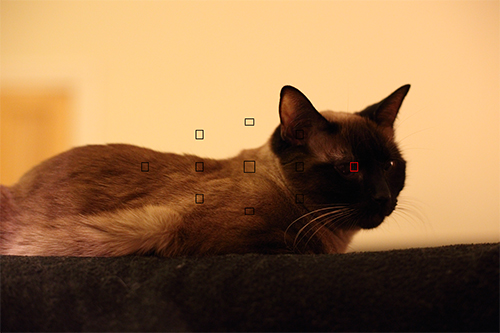
Canon 6d autofocus af low light auto focus system sample image center outer af point
Canon 6D Autofocus in low light – I had to focus just above the eye where dark meets light, and then I slightly recomposed. But as you can see from the settings, it was very low light, and that type of performance is a major accomplishment for any camera: f/2.5 1/60 ISO 6400 (screenshot from DPP in order to show AF points.)


A closer look at the above image. I think due to the high ISO setting some sharpness was lost, but that could be recovered with sharpening.

WiFi: The Canon 6D is the first of their dSLR models to incorporate built-in WiFi and GPS capabilities. Neither of these is something I thought I needed – but I can already see the benefits. With the 6D you can wirelessly connect your camera to your computer, smart phone/ tablet, wireless network, printer, or TV to perform a variety of functions:

Computer: when wirelessly connected to your computer, you can make use of the included EOS Utility software to remotely control the camera (change settings and release the shutter) and save the images directly to your computer.  Previously you could do this only through the use of a USB cable.
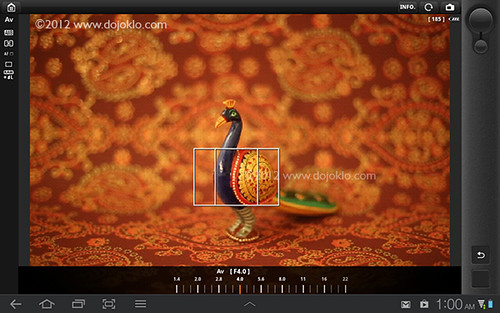
Canon 6D wifi wireless tablet ipad iphone smartphone android share connect upload test review preview hands on
Canon 6D WiFi – Control the camera remotely with an iPhone, iPad, or tablet.  Here the aperture setting is being changed, and the focus area is positioned on the subject.

Smart Phone/ Tablet: You can also control your camera through your smart device (iPad, iPhone, Android phone or tablet) using the free EOS Remote app, and this takes it to a higher level than with EOS Utility. You can actually monitor on your device what the camera is seeing, as if you are seeing the camera’s Live View screen on your device.  You can change some settings (like aperture, shutter speed, ISO), move and resize the focus area to tell the camera where to focus, and release the shutter. You can also view the images that are on the camera’s memory card, and transfer images from your camera to the device, however they will be reduced size JPEGs.

Wireless Network – Internet Services: You can set up your camera with websites including Canon Image Gateway, Facebook, Flickr, Twitter, and YouTube, and directly send images or videos to these sites – straight from the camera! (Some instances like Twitter will merely share a link to the image on Canon Image Gateway, but with Facebook the actual image will appear.)

Canon 6D wifi wireless facebook share connect upload test review preview hands on
Canon 6D WiFi – Send your images directly to Facebook (or links to Twitter, or movies to YouTube) straight from the camera.

TV and Printer: You can wirelessly show a slideshow of the images on your camera with a compatible TV, or print images directly from the camera with a wireless compatible printer.

The great thing about these wireless functions is that they are actually easy to set up and use (at least in my experience). By following the simple instructions in the manuals and the prompts on the camera’s screen and the software and apps, you can just keep clicking OK (and enter your password and name your connections) as the camera finds the network or device and connects them together. The EOS Utility software also automatically installs a “device pairing” function on your computer that finds the camera and easily lets you connect. The biggest challenge was setting up the connections to the Internet sites (Facebook, Twitter)  since the instructions were not straightforward. But once you determine that you need to first connect the camera via USB to the computer then open EOS Utility, the right set-up screen is available on EOS Utility.  Then the Internet sites can be selected and registered with the camera, and it works great. There are lots of intimidating wireless set-up option screens on the camera that may have to be used if the connections to your wireless network or devices are not so straightforward.

GPS: The built-in GPS function can be enabled so that your images are automatically geotagged with data such as location and elevation. You can even log your camera’s journey – even when the camera is turned off (as long as it can “see” the satellites) – and then view the route on a Google map (with the included Map Utility software). You can set the camera to communicate with the satellites at anywhere from every 1 second to every 5 minutes, though note that this will drain the battery to some extent.

Functions and Features: The 6D has all of the features of the other current Canon dSLRs, such as in-camera HDR Mode, Multiple Exposure Mode, Handheld Night Scene mode, and various Noise Reduction features. In my standard camera use, I don’t typically have a need for many of these types of features, but they might come in handy or be fun to experiment with for many users. The image rating option is also included and can be quickly accessed during image playback. While initially this seemed unnecessary for me, I have found that it is a great time saver for marking either really good images or likely deletions, both of which require a quick review on a full size monitor once back at my computer – and now can be easily located with their 1 to 5 star rating.

Canon 6D EOS multiple exposure how to manual instruction use review preview hands on tutorial dummies guide book
Canon 6D Multiple Exposure mode used to create a multiple exposure image in-camera, combining three images. Multiple Exposure Control setting: “Average” used here, as it works best for night/ dark scenes. This image was also automatically geotagged with the built-in GPS, as can be seen on Flickr.

The fast Digic 5+ processor of the 6D also allows for some lens correction features – Peripheral Illumination Correction and Chromatic Aberration Correction – to correct for issues introduced with some lenses, several of which are pre-registered in the camera. These types of corrections can also be done with specific lens profiles in Lightroom or Photoshop, so you will need to decide if you want to make these corrections with more control in post processing.  However, if you will be outputting JPEG files, you may want to take advantage of this in-camera.  You can even apply the corrections in-camera after the fact if you have shot in RAW. There are also several other in-camera RAW processing options which will allow you to fully process the image in camera (for brightness, Picture Style, White Balance, JPEG size, etc.) and output a JPEG file for immediate use.

One other nice feature is that not only does the 6D have lens autofocus microadjustment capability to correct for minor autofocusing distance issues, but (as with the 5D Mk III) you can adjust separately for the wide end and tele end of a zoom lens! Of course this means a lot more work in your AF microadjustment process. Also, through the Custom Functions you can choose the number of shots to take during bracketing, either 3, 2, 5, or 7. This is extremely desired by HDR shooters who were previously frustrated with the 3 shot limit.

On the down-side, the 6D has a relatively slow continuous shooting speed of 4.5 frames per second, and no Low-speed and High-speed Continuous settings – unless of course you use Silent Continuous Shooting at 3fps (though be aware that use of the Silent Drive Modes can result in slight shutter lag). This slower maximum rate, along with the less sophisticated 11 point AF system may limit the camera’s appeal to sports and action shooters who need to track moving subjects. (“Less sophisticated” = not as many AF Points as the 7D or 5DIII, only 1 cross-type AF Point, not as many options to customize how it tracks and responds to moving subjects.) Action photographers should look instead at the Canon 7D or 5D Mark III.) On an unrelated note, I should also mention that the 6D has a slower 1/180 flash sync speed.

Menus and Custom Functions: The 6D has the standard menu interface and options as the other current models. You can adjust and customize a few more settings than with the 60D, but the menus are reduced and simplified a bit from the 5DIII.  For an enthusiast photographer this is generally a good thing, as the 6D contains most all of the customization options that you will need, without overwhelming you with extremely specific or advanced items that are found on the 5D Mk III. After becoming familiar with the 5DIII however, it is interesting to note what options were left off, such as additional Multiple Exposure and in-camera HDR Mode processing options, no Auto level for LCD Brightness, and the elimination of some of the extremely precise, nearly “hidden” Custom Controls sub-sub-menus and options.

But the 6D does contain the additional ISO settings used to specify the minimum and maximum ISO available for you – or the camera in Auto ISO – to select, plus the minimum shutter speed for the camera to use in Auto ISO.  If you choose to use Auto Lighting Optimizer, you can tell the camera to turn it off when shooting in M (since you will want full control of your exposures and don’t want the camera to over-ride your careful settings).  A nice feature is the Safety Shift options, where instead of merely enabling the camera to over-ride your settings if it needs to in order to obtain the proper exposure, you can specifically tell it shift either the shutter speed/ aperture setting, or the ISO setting.  Generally, I believe, it will be better to shift the ISO setting in order to obtain the exposure, as you probably intentionally selected your aperture or shutter speed. The Custom Setting for autofocus Tracking Sensitivity now helpfully lists the options as “Locked On” and “Responsive” rather than the previous vague and confusing notations, so you can tell the camera to remain locked-on to your subject or to be more responsive and begin focusing on a new subject that enters the field of view of your active AF Point.

The Orientation Linked AF Point feature is much simplified from the 7D and 5DIII in that you do not need to pre-register the desired points, but rather the camera makes use of the current, manually selected AF points for each specific camera orientation, and then returns to them when you hold the camera in that orientation.

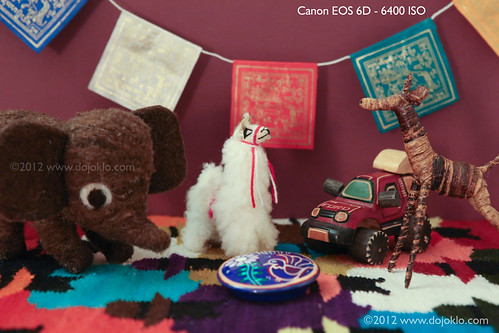
Image Quality: I am not a pixel peeper, I am more of the “just get out there and shoot” variety, and I believe that most all the current consumer cameras – including the 6D – offer more than enough in terms of image quality and low noise for most every photography from enthusiast to semi-pro. So I will leave it up to DP Review and other sites to evaluate the image quality and sensor performance. I have shot some informal ISO tests, which can be viewed on Flickr. For pixel peepers, here is a 6400 ISO, 100% crop detail of the scene below, with no in-camera Noise Reduction or White Balance correction.
Canon 6D high iso noise full frame test review preview hands on
Canon 6D full frame sensor – high ISO noise performance. Click image to see larger version with notes of all the settings.

Video: Oops, I just realized that I forgot to discuss this in the review!  I will come back to this, but it is interesting to note that while the 6D has manual audio input level control, the Wind Filter and Attenuator, it lacks a headphone jack for monitoring audio.

Manuals: Canon has unfortunately followed the trend of not including the full printed manuals with the camera.  While the camera comes with the printed version of the basic instruction manual and “pocket guide” for the camera, plus the basic WiFi/ GPS manual, you have to access the PDF files on the included disc for the full camera manual, the full detailed manual for WiFi, plus the instruction manuals for the software including Map Utility and EOS Utility. Of course you need the full manual to properly set up and learn all the features of the camera, plus you will need to look at some of the the other manuals in order to learn how to get your camera connected to Internet services.  It is a bit frustrating not to have these at hand to quickly refer to.  Fortunately if you have an iPad or tablet, you can download the PDF version of all the manuals from the Canon website and easily read and search through them and take them with you.

However, to quickly learn all the essential and important features of the camera, how to set up the menus and Custom Functions, and learn how, when, and why to use the various controls, features, and functions of the Canon 6D, have a look at my e-book guide Canon 6D Experience.

Canon 6D EOS book manual dummies field guide instruction tutorial how to use learn full frame autofocus system

Conclusion: Overall I think the Canon 6D is an excellent dSLR camera, a very good value for the price, and should easily meet or exceed the needs of most enthusiast and dedicated photographers. It provides the wonderful possibility for a non-pro or aspiring-pro to finally shoot with an affordable full-frame camera. Landscape photographers should enjoy this, as their wide angle lenses will once again act as true wide angle lenses, and be able to capture sweeping vistas.  It should provide general, portrait, and travel photographers with the controls, features, durability, and image quality they desire. Sports, wildlife, and action photographers may not find what they need, however, due to the limited 4.5 frames per second continuous shooting speed and the less sophisticated 11 point autofocus system with only one cross-type point. edit 12/13/12DXOMark summarized it well when they concluded that the 6D “is a high-end, full-frame camera ideal for enthusiast and advanced photographers, or professional photographers looking for a second camera body. Its resolution and AF system mark it out as a camera that is aimed at those shooting portraits or landscapes, where good resolution and a full-frame sensor are key, but where the fastest AF is not as important.”

Designed as a consumer-level camera, a few features (or lack of features) – such as those mentioned – obviously prevent it from being a full-fledged professional level body for highly demanding users (at least not the primary body), but its sensor, image quality, and capabilities will certainly provide anyone with the potential to take professional quality images – and in most situations capture exactly the image you intend. And that, in the end, is the number one goal of photography!

If you enjoyed this post, please be sure to share it, mention it, or link to it!

If you are going to be ordering your Canon 6D online, please consider using my affiliate links below or on the left side of the page (Amazon, B and H, Adorama). Your camera (or other gear) will be the same price, but they will give me a small referral bonus – thanks!

Canon 6D on Amazon (body only or 24-105mm f/4L kit)

Canon 6D at B and H Photo – body only

Canon 6D at B and H Photo – with the 24-105mm f/4L IS kit lens

Steve Jobs 1955-2011

“Despite all he accomplished, it feels like he was just getting started.” – Bob Iger

I’ve admired Steve Jobs for about as long as I can remember, and can even recall being inspired by his story at the time of his first Time magazine cover back in 1982, when I was merely twelve.

I now suddenly remember that around that period I took an after-school computer class using Apple II’s and can still recall the amazement when some lines of code I typed, when run, magically made lines and shapes dance and change colors across the screen.

I just recently began to return to his story, reading books and articles about his life and his work, recalling the reasons he originally inspired me so many years ago, and gaining new-found inspiration.
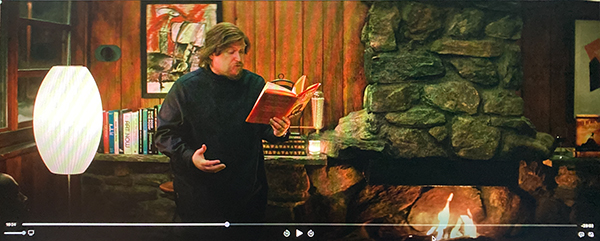
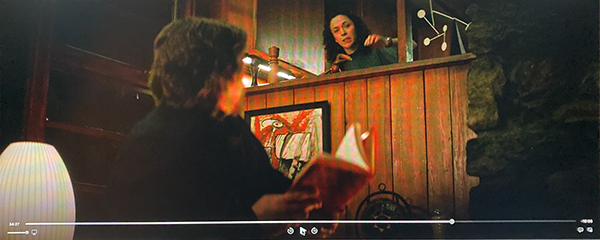
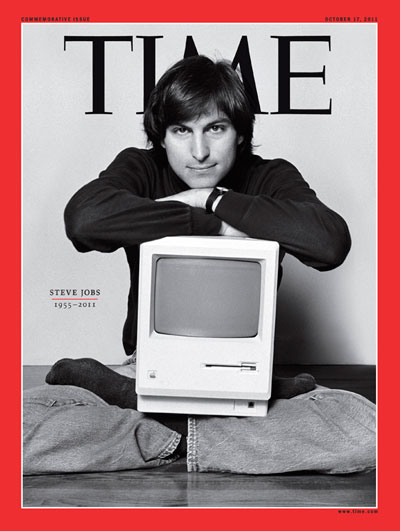
edit – 2011-10-06:  The new cover image – that Time literally stopped the presses to include – captures the Steve Jobs spirit of that era even better.  The audacious young contrarian in 1984, still fresh out of the start-up garage, beating the big, established companies and their traditional ways.  And already changing the world:

steve jobs magazine cover time portrait newsstand
Here it is along with some other covers on the newsstand in mid October

Perhaps the best remembrance of Steve Jobs – in addition to the beautiful devices and amazing innovations he created – is his wonderful Stanford Commencement speech from 2005, which is sometimes – poignantly – titled “How to Live Before you Die”:

As President Obama stated, “The world has lost a visionary. And there may be no greater tribute to Steve’s success than the fact that much of the world learned of his passing on a device he invented.”


Under Construction

I am in the process of transferring my blog from WordPress to my own website here.  Please excuse the re-construction process.

Various links in these posts may not yet be operating properly. Please let me know if you find an important link that is broken, and view the Categories on the left of the screen to help you find a post you are interested in reading.

Canon, Nikon, Sony News on Post-Earthquake Operations

Camera equipment may be of little concern to those who lost family members, friends, homes, and possessions in the earthquakes and tsunami disaster in Japan. As far as I have read, Nikon did suffer the loss of at least one employee.

As manufacturing companies Canon, Nikon, Sony, and others report that they are working to resume their operations and provide the products to meet their consumers’ demands. They continue to provide a little bit of information about their plans for ongoing operation:

Canon Press Releases

Nikon PR

Sony PR

2010 in review

Thanks to all my blog visitors over the year!  I hope you continue to come back in 2011 for more insights about photography, equipment, and the photographic creative process.

The stats helper monkeys at WordPress.com mulled over how this blog did in 2010, and here’s a high level summary of its overall blog health:

Healthy blog!

The Blog-Health-o-Meter™ reads “Wow!”

Crunchy numbers

Picturing Change WordPress blogThe Louvre Museum has 8.5 million visitors per year. This blog was viewed about 95,000 times in 2010. If it were an exhibit at The Louvre Museum, it would take 4 days for that many people to see it.

In 2010, there were 77 new posts, growing the total archive of this blog to 130 posts. There were 44 pictures uploaded, taking up a total of 48mb. That’s about 4 pictures per month (this doesn’t count all the photos hosted externally on Flickr).

The busiest day of the year was August 27th with 1,138 views. The most popular post that day was Canon 5D vs 7D vs 60D vs 50D vs 550D / T2i.

Where did they come from?

The top referring sites in 2010 were dojoklo.com, facebook.com, google.com, fatwallet.com, and en.wordpress.com.

Some visitors came searching, mostly for canon 50d vs 60d, 50d vs 60d, canon 60d vs 7d, 60d vs 7d, and canon 7d vs 60d.

Attractions in 2010

These are the posts and pages that got the most views in 2010.

1

Canon 5D vs 7D vs 60D vs 50D vs 550D / T2i August 2010
37 comments and 3 Likes on WordPress.com

2

Canon 50D vs. 60D October 2010
5 comments

3

Canon 5D vs. 7D vs. 60D vs. 550D / T2i Part III July 2010
6 comments

4

Canon 7D vs. 5D vs. 50D part II (plus 550D / Rebel T2i) May 2010
3 comments

5

Your World 60D – Canon 60D User’s Guide and Tutorial September 2010
3 comments

Say Hello, Leave a Comment!

I can see in my blog statistics that a lot of interesting searches regarding cameras, photography, and humanitarian photography lead people to my blog.  But I don’t get a lot of comments yet so I don’t know how well I’m solving people’s problems, answering their questions, and entertaining them.

So let me know what you think!  Leave a comment, let me know what you like, what is helpful, and what you would like to see.  Thanks in advance for the feedback!


Cynthia Paniagua performs Despierta Peru – 2009-09-16


Cynthia Paniagua performs Despierta Peru – 2009-09-16