Since several of the current Canon dSLR cameras – such as the T4i/650D (and T3i/600D), 60D, and 7D – share similar features and an 18 megapixel sensor, it can make it difficult and confusing to decide which one is best for you. But each one is designed for different levels of photographers with specific needs, and there are significant differences that may or may not be important to how and what you photograph.
Obviously as you pay more, you get more, and this article will explain what that “more” is and help you decide if you need it. If you are new to dSLR cameras, know that things like 9 cross-type AF points and dual Digic IV processors aren’t feature-bloated “bells and whistles” or marketing hype, but are important features for how advanced photographers work and they provide the capabilities that some demand from their equipment. If your needs don’t demand them, don’t be swayed to invest more in a camera that provides far more than you require. It won’t help you take better photos, and in fact may cause you to take worse photos until you figure out how to properly take control of a more advanced camera!
This comparison post has grown organically as new models have been released, so please be sure to look through the entire post to find the section that best applies to you, such as T2i vs T3i, or 60D vs 50D, the Canon 5D Mk II, or the overall Canon EOS 7D vs. 60D vs. 600D / Rebel T3i comparison which is the main point of this post. Don’t miss the Which Canon dSLR is Right for You summary at the end of this article!
Rather than add the T4i into this post, I have written a new post to introduce and explain the features of the latest Rebel, the T4i – Introduction to the Canon Rebel T4i / EOS 650D. The additional features of the T4i make the decision between the T4i vs. 60D more challenging than ever, and so I wrote more about that in Canon Rebel T4i vs EOS 60D.
I know there is a lot to read, but you are preparing to spend a lot of money, and this post will thoroughly explain the differences of these cameras and help you decide which one if right for you! Even if some of these models become outdated, the majority of the information and comparison factors remain similar, and it is still worthwhile to read this article before heading over to the T4i articles.
If you haven’t yet committed to Canon and are interested in comparing the Canon 60D vs. Nikon D7000 , or the Canon T3i vs Nikon D5100, or the entire Nikon line-up, have a look at those posts next.

The new Canon Rebel T3i / 600D (all photos by the author, some equipment courtesy of Newtonville Camera)
Review / Comparison of Canon EOS 7D vs. 60D vs. 600D / Rebel T3i:
Sensor and Image Quality: As I said above, all three cameras share a very similar sensor with 18 megapixels, and so their image quality and low light performance will be virtually the same. All are capable of taking professional quality images.
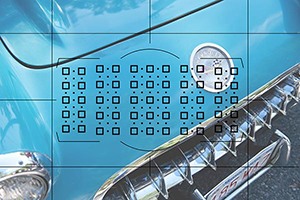
Exposure Metering: The threecameras all share the latest 63-zone, dual-layer exposure metering system and 4 metering modes. That means they will all determine the exposure virtually identically and enable you to take properly exposed photos in most every situation, including difficult back-lit scenes. The size of the areas metered for Partial and Spot metering vary slightly between the cameras, but that isn’t anything critical.
Autofocus: The 60D shares a similar autofocus system to the T3i and the previous 50D, with 9 focus points and three auto focusing modes. However the 9 AF points of the 60D are more sensitive/ accurate than those of the T3i: all are cross-type in the 60D, only the center is cross-type in the T3i. This means that the outer focus points of the 60D will do a better job, in difficult focusing situations, of quickly and accurately focusing on the subject. This may include, for example, lower light situations or tracking moving subjects. The T3i does a stellar job of focusing, but if you are highly demanding or are going to be primarily shooting action and motion, this is an important difference to consider.
The 60D autofocus system in turn is much less complex than the sophisticated AF system of the 7D with its 19 AF point system and its additional Zone, Spot, and Expansion area modes. If you shoot serious sports, action, birds, wildlife, etc., then you are going to want to consider the highly capable autofocus system of the 7D. With its additional AF points and the ability to group them in various ways (Autofocus Area Modes), as well as the multiple Custom Functions that allow you to customize exactly how the AF system works, it is ideal for sports and action. These Custom Functions can dictate how it tracks subjects, how it deals with objects that come between you and your initial subject, how quickly it responds to these changes of possible subjects that are at different distances from you, etc. The entire AF system of the 7D is a bit complex, and will take some studying and experimentation if you wish to fully understand and take advantage of it. However, if you are not an avid sports photographer, a wildlife shooter, or someone who understands, needs, and will use the elaborate features of the 7D AF system, then this shouldn’t dissuade you from the 60D.
I have written an additional post about Taking Control of Your Canon Autofocus System.
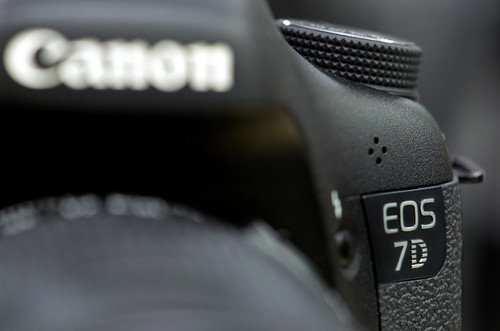
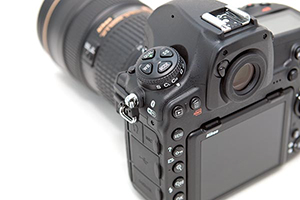
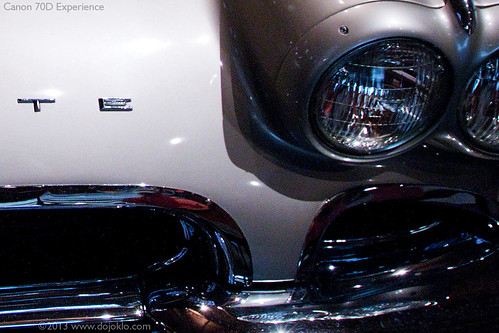
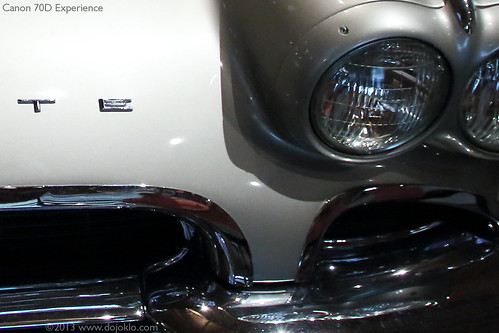
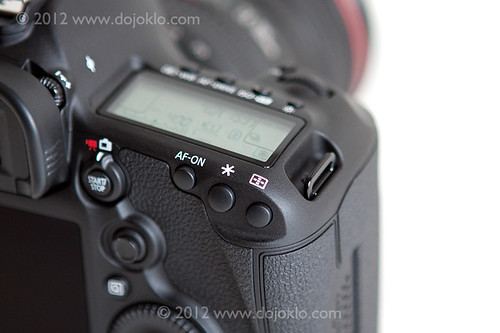
Detail of the Canon 7D
Construction: As you can probably figure out from the prices, each camera is not built the same. The 60D has relatively strong construction of an aluminum frame and polycarbonate body. It is better built than the stainless steel frame with polycarbonate body of the T3i/ 600D but not as strong as the 7D’s magnesium alloy construction. The 60D also has some amount of weather sealing – more than the 600D/T3i, less than the 7D. But for most users, including even those using the camera daily or in travel situations, the construction of any of these cameras is far more than good enough, strong enough, and durable enough. But if you are going to be working extensively in dusty or moisture-heavy areas or situations, you will want to seriously consider the extensive weather sealing of the 7D. While the strong magnesium construction of the 7D is impressive, that is not really needed by many people other than pros who intensively use their cameras in photo-journalist or constant-travel type situations.
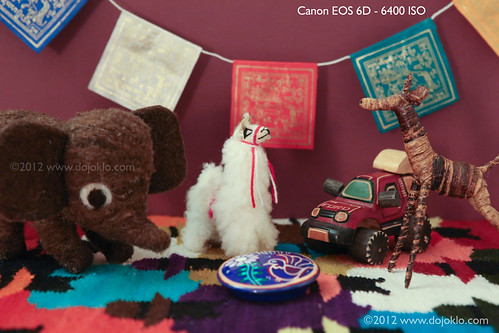
ISO: Since they all share a very similar sensor, the ISO sensitivity and performance at high ISO settings is virtually the same for these three cameras. But don’t take my word for it, don’t be swayed by pixel peepers on forums, instead check out the camera sensor tests at dxomark to verify this. As you can see, they all share the exact same overall score, and show very similar performance.
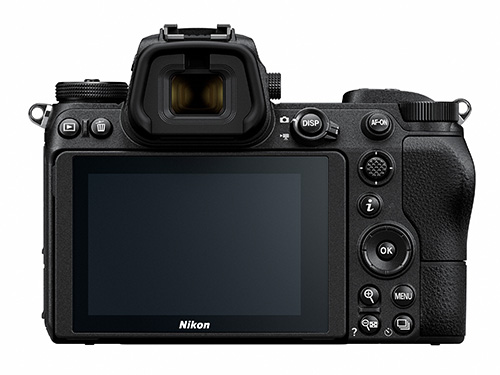
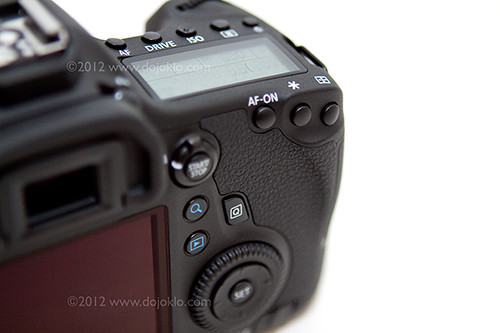
Controls: As with construction, the buttons and controls vary significantly with these cameras. Unlike the T3i, the more advanced 60D and 7D have nearly every control an advanced photographer needs on the exterior of the camera and they also have the top LCD panel and rear Quick Control Dial that are not on the 600D/T3i. Do you find yourself constantly changing the ISO, the metering mode, or the autofocus mode to adapt to changing situations? Then you will want direct access to these controls and the ability to more easily monitor them on the top LCD panel. Or do you generally work in one of the more automatic modes and not need to deal with these settings? With all the cameras, any controls can also be easily accessed with the Q button and Q menu or in the other menus on the rear LCD monitor. The top buttons of the 60D set only one setting each, so this is less complicated (but thus less versatile) than the multiple-setting buttons of the 7D. Canon has removed the white balance (WB) button on the 60D that the 7D and 50D have, but that isn’t a big deal – use the Q Menu. Another change on the 60D is that the Multi-controller has been moved from the thumb joystick like the 7D and 50D and placed in the middle of the rear Quick-control dial. This doesn’t change how it functions, and should just be a matter of getting used to the difference. (Unfortunately, I still really do prefer the old design and location, though I find it is easier to quickly and accurately click on the diagonal directions with the new 60D Multi-controller design). If you plan on using your camera on Auto or Program most of the time, then the controls of the T3i are more than sufficient for your needs. If you work in Av, Tv, or M modes and need quicker and more direct access to your controls and the additional top LCD screen to view and change your current settings, then you need to look at the 60D or 7D over the T3i.
Brief commercial interruption: I want to mention that I have written e-book user’s guides for the Canon 7D, Canon 60D, Canon Rebel T3i, and Rebel T2i. After spending so much time studying, experimenting, writing about, comparing, and discussing these cameras, I decided to put all that knowledge into e-book form! Each of these user’s guides cover all the features, settings, and controls – but more importantly when and why to use them in your photography. This includes metering modes, aperture and shutter priority modes (Av and Tv), advanced autofocus use, and more. They also describe all the Menu settings and Custom Function settings – with recommended settings. Take control of your camera and the images you create! Canon 7D Experience, Canon T3i Experience, Your World 60D and T2i Experience. Learn more about the e-books by clicking on their titles or on the covers below.

Menus and Custom Functions: These allow for greater control over customizing how the camera functions. The 60D has many more Menu and Custom Function options than the 600D/T3i and nearly as many as the 7D. These settings enable you to customize the operation, function, and controls to work how you want them to, including things like exposure increments, peripheral illuminations correction for lenses (fixes dark corners), tweaking how the autofocus system operates, setting more precise white balance settings, and customizing which button does what. These settings are very important to advanced users who wish to customize their camera to work exactly how they need it too, but aren’t nearly as critical to others who don’t have such intensive demands. (Since many of the Menu and Custom Function settings can be complicated and confusing, my e-books on the 60D, the 7D, and on the T3i/600D cover all of these options along with my recommended settings to get you up and running quickly!)
Wireless Flash: Like the 7D, the 60D and the T3i both incorporate wireless flash triggering. It allows you to trigger multiple off camera flashes at different output levels. The older 550D/T2i does not have this feature.
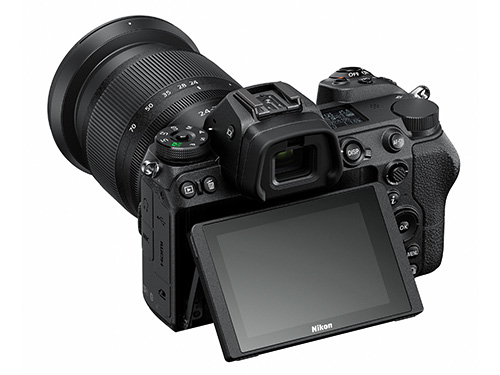
Articulating LCD Screen: The big new feature that the 60D and T3i have that the 7D and T2i do not is the articulating rear LCD screen. This may prove useful for videographers, as well as for setting up compositions while the camera is on a tripod, for macro use, or for using it from unusually low or high vantage points. Some users will be able to avoid buying an expensive angle finder because of this feature. There is also an electronic level in the 7D and 60D, visible in the viewfinder, rear LCD, or top LCD.
Viewfinder: The 60D has a large, bright pentaprism viewfinder with 96% coverage of the actual resulting image, better than the pentamirror and 95% coverage of the 600D/T3i, but not quite as nice as the nearly 100% view of the 7D pentaprism.
Processor: The 60D shares the same Digic 4 processor as the 600D/T3i. The 7D has dual Digic 4 processors. However, if you don’t need to shoot dozens of continuous images, you probably won’t notice any processing speed issues.
Continuous Shooting Speed: The 7D can shoot a blazing 8 frames per second, in which the photos barely change from frame to frame. The 60D can shoot a respectable 5.3 fps which is actually a more useful rate, and is a higher rate than the 600D/T3i rate of 3.7 fps. If you need the extremely high fps for sports, wildlife, or other action shooting, consider the 7D. If not, don’t be swayed by this excessive feature that is designed for people like pro sports or dedicated wildlife shooters. However, if you are shooting any type of sports, action, birds, dance, etc., the 5.3 fps of the 60D is much more useful than the slower T3i.
Detail of the Canon 7D
Memory Card: The 60D uses the SD memory card like the 600D/T3i, not the CF card of the 7D and 50D. This doesn’t really mean too much other than the CF cards are larger and more rugged, yet prone to bending the camera’s internal connection pins. Handle either of them with care and it shouldn’t make much of a difference.
Battery: The 60D uses the LP-E6 battery like the 7D and 5D, which is a nice feature as this battery can often last through a full day of shooting. The T3i and T2i use the smaller LP-E8 battery with less capacity. In any case you should have an extra battery or two.
Size and Weight: The T3i is smaller and lighter (18.2 oz/515 g) than the 60D (23.8 oz/675 g), which in turn is smaller and lighter than the 7D (28.9 oz/820 g). Go to the store and hold them to get a better feel for their size and weight. HOWEVER, please know that the size and weight of these bodies is a result of their build, features, and capabilities. Those are the criteria that should be compared first, not the resulting size and weight. (Also be sure to read this post of Why How it “Feels” is not a valid Criterion for Choosing an dSLR.) But, I do realize that size and weight is important to some, perhaps many, due to physical limitations or just simple comfort and enjoyment. So take my dramatic proclamation with a grain of salt! The 60D and 7D “feel” like the more substantial cameras that they are. A nice improvement of the T3i is that its hand grip area has been modified, and has a different feel than that of the T2i – the area where the thumb rests is contoured differently and has a nice channel for the thumb, which allows for a much more secure one-hand-grip of the camera.
AF Microadjustment: The 7D has this feature, the 60D and T3i and T2i do not. Many are disappointed that the 60D does not include the ability to micro-adjust the focus so that each of your lenses focuses extremely accurately. However, if you have a major focus issue, send your camera and/ or lenses to Canon while under warranty and ask them to calibrate them. Bad bodies and lenses are rare, but they do exist. Doing AF microadjustment yourself is often a maddening undertaking. You may make a good calibration under controlled conditions, but this really doesn’t replicate real life shooting. And due to manufacturing tolerances of both cameras and lenses, there is a relatively wide range of what is considered acceptable. If you need your camera and lens to be perfectly sharp, you are going to need to buy a $6000 pro body and a $1500 lens. See this article This Lens is Soft and Other Myths, its follow up article, and the follow up controlled tests to learn more about this.
Locking Mode Dial: This is a new feature for a Canon dSLR, only on the 60D, that keeps the Mode dial from accidentally rotating. A nice touch, and not at all difficult to change quickly with one hand, as some people have claimed: just push the center button with your left index finger, rotate dial with thumb and middle finger. I actually wish my 50D had this. If you wish to retrofit your 7D or 5D Mk II with this feature, Canon will do it for $100.
Full HD video: Of course they all offer this capability. Note that this is not video for your kids’ parties and soccer games. It does not have continuous autofocus while shooting, as a camcorder does. It is not designed for that kind of use, but rather for serious videographers who typically manually focus. You can adjust autofocus while shooting by pressing the shutter button or the AF button, but it may have a less than desired looking result and unless you are using an external microphone, the autofocusing sound will be picked up. The T3i has the digital zoom feature in video, which allows for nice smooth zooms while filming.
Flash Sync: A Note to Strobists -the 60D and T3i do not have a PC sync flash socket to plug in PC sync cords. The 7D has this.
Ease of operation: While beginners may find all the buttons, controls, and menus of any dSLR difficult and confusing at first, the additional controls and menus of the 7D and 60D are all quite intelligently designed, intuitive, and straightforward for the more advanced user. The menus and controls of the T3i and T2i are also pretty basic and simple to learn. There is certainly a “price of admission” to learning and getting the most from any dSLR, and you will need to invest time and effort into both reading and using/ experimenting with your camera. Start with the manual, then perhaps have a look at my e-book camera guides, then practice, practice, practice!
Remember that all of these comparisons and features are relative. Of course the fact that the 7D can take 126 consecutive photos at the rate of 8 frames per second makes it “better” than the other models. Advanced features like that differentiate it from the other cameras and are also why it costs more. But is it actually “better” for you and how you plan to photograph? Do you ever need to take 15.75 seconds of continuous photos? Ever? (Look at your watch for 15.75 seconds right now and act like you are taking continuous photos. Now what are you going to do with all those nearly identical 126 imaginary photos?!)
Purchasing: If you plan to purchase any of these cameras, please see the Purchasing section below.
*****
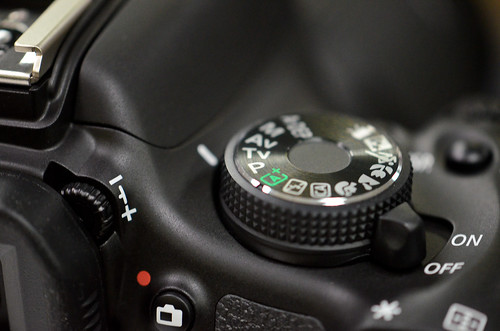
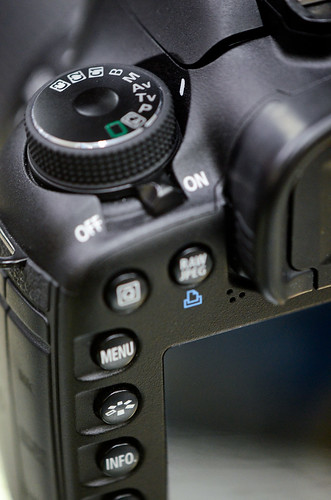
Mode dial of the Canon Rebel T3i
T3i vs T2i
Review / Comparison of Canon Rebel T3i vs T2i (600D vs 550D): If you are trying to decide between the Canon T2i or T3i, the previous model, the T2i, already shared many important features with the 60D (and even features of the semi-pro 7D) including the 18 MP sensor, 63-zone exposure metering system, high ISO performance, HD movie capabilities, and Digic 4 image processor. Now with the addition of the vari-angle articulating rear LCD screen (aka rotating screen), remote flash capabilities, creative filters, additional movie options, and in-camera image processing features, the new Canon T3i is even closer in specifications to the 60D, which may make your choice harder. But there are some important differences, and this post will hopefully help you decide which features are important to you and the way you photograph, which ones may be unnecessary, and thus which model fits you best. As I’ve said before, you need to choose which camera is best for you based on your needs and experience as a photographer and based on how the advanced features, controls, and customization options fit those needs and serve the way you work – not the other way around where you look at the new features and speculate if you really need or will use them.
The Rebel T3i is replacing the T2i at the entry level end of the Canon line-up. (There is also the T3 in the most basic, entry level position.) The differences are minor but possibly significant depending on your needs. Since both cameras share the same 18 megapixel sensor and Digic 4 processor, both the T2i and T3i will create images with exactly the same image quality, produce the same low light-high ISO performance, shoot at 3.7 frames per second, and have nearly the same size and build quality. They are both offered with the same 18-55mm kit lens (with some minor cosmetic differences on the new T3i kit lens). The T3i is very slightly larger and heavier due to the addition of the rotating rear LCD monitor. And that is one of the biggest differences between the two cameras: do you want and need a vari-angle rear screen or not? The other major difference is the ability of the T3i to remotely control multiple off-camera flashes. Like the 60D and 7D, you can use the built-in flash of the T3i to trigger other Canon Speedlites. This could be an important reason for choosing the T3i. However, if you don’t use or plan to use one or more off-camera flashes, this shouldn’t be important to you.
Some other minor additions to the T3i include the Scene Intelligent Auto Mode, which is a feature borrowed from point and shoot cameras. When in Auto mode, the T3i will make a determination of what type of scene you are shooting – close-up, portrait, landscape, etc. – and automatically configure the camera settings accordingly. However, if you want to use a powerful and costly digital SLR as a point and shoot, you should probably save the money and just buy a nice, high quality point and shoot like the Canon S95. Other additional but not very important upgrades include the in-camera processing Creative Filters like Grainy Black and White or Fisheye, and the ability to choose different image size ratios and to rate your images. However, this type of processing is best done on your computer with software like Photoshop or even Photoshop Elements. There is also a marginally helpful Feature Guide which gives brief descriptions of various settings and some additional video features like digital video zoom (for nice smooth zooms) and Video Snapshot, which you can use to shoot short video clips that are automatically joined together into a video, with music. Again, this is pretty easily done on your computer, and with much more control, with basic video editing software.
So if you need any of these new features, get the Canon Rebel T3i / 600D. If not, buy whichever one if offered at a cheaper price. However, if you still wish to compare the Rebel T3i to the 60D and 7D, see below. If you wish to compare the Canon T3i to the Nikon D5100, check out this post Nikon D5100 vs. Canon T3i.
see the Canon EOS Rebel T3i (Body Only) on Amazon
see the Canon EOS Rebel T3i with 18-55mm Lens on Amazon
********
Review of Canon EOS 60D vs. 50D: Since the Canon EOS 60D basically replaces the Canon 50D (well, replacement isn’t exactly the right word because the 60D doesn’t really follow the 20D to 50D progression of improvements…), the 60D or 50D decision is an easy one. The 50D shouldn’t really be considered anymore. While the Canon 50D does hold a couple interesting advantages over the 60D (faster frame per second (fps) burst rate in continuous mode, stronger construction, more comprehensive buttons and controls, complete lack of fun filters like “grainy black and white”), the sensor and exposure metering system have been greatly improved in all the newer cameras (such as the 7D or 60D or 600D/ T3i or 500D/ T2i) and I feel these features, along with the increase in megapixels, outweigh any other 50D advantages. I would definitely choose a 60D instead of a 50D. This is coming from experience, as I use a 50D professionally and on a weekly basis. Or choose a 7D instead of a 50D if your needs require it and budget allows it. (Find out below if your needs require it!) If you still wish to learn more about the differences of these two models, I write in more detail about the 50D vs. 60D comparison here from a camera features and operation point of view.

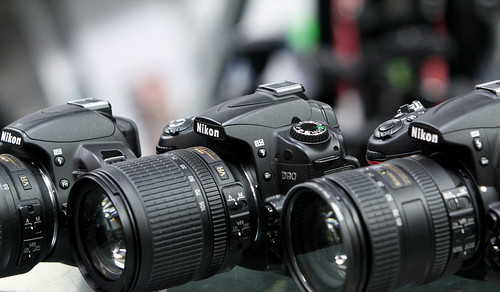
Canon Rebel T3i / 600D and the Canon 60D
Purchasing: If you plan to purchase cameras, photo equipment, books, or anything else from the retailers below I encourage you to do so through these referral links. While your price will be the same, they will give me a little something for the referral, which helps to support my blog and my work – thanks! I appreciate your support!

If you are in the UK, please click here for the UK Amazon referral link.
And if you are in Canada, please click here to use my Canada Amazon.ca referral link.
For those interested in purchasing through B&H Photo, Adorama, or directly from Canon, I have set up affiliate links with them as well. Just click on the logos below to start shopping:


These are all retailers that I have purchased equipment from (excluding Amazon UK/Canada), and I recommend them based on my good experiences, their extensive selection, competitive prices, great customer service and responsiveness, and fair return policies.
or use one of these direct links to Amazon:
See and buy the Canon EOS Rebel T3i (Body Only) on Amazon
See and buy the Canon EOS Rebel T3i with 18-55mm Lens on Amazon
See and buy the T2i on Amazon.
See and buy the 60D on Amazon.
See and buy the 7D on Amazon.
See and buy the Canon 5D MkII on Amazon
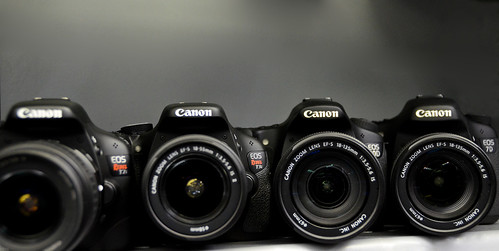
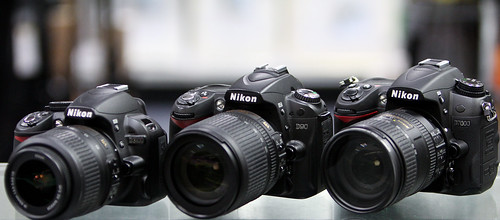
Canon Rebel T2i, T3i, 60D, and 7D – photo by author at Newtonville Camera
Which Canon dSLR is Right for You?
This section of the article, which can help you decide on a camera based on your photography experience and needs (and also includes the discussion of the Canon 5D Mk II), has been moved to its own post here:
http://blog.dojoklo.com/2011/10/14/which-canon-dslr-is-right-for-you/
*****
Related Posts:
Comparing and Choosing Canon Lenses
Equipment for Digital Photography
Essential Books for Digital Photography
As I said above, when you are trying to determine which camera to purchase or upgrade to, you need to first consider and determine your needs, and then see which camera fills those needs. Not the other way around. Here is a post I wrote which discusses this, titled
How to Choose a New dSLR Camera
Was this post helpful? Please let others know about it by clicking the Facebook, Twitter, or Google+ sharing buttons below, or linking to it from your blog or website, or mentioning it on a forum. Thanks!
Want to help support this blog with no cost or effort? Simply click on the Amazon and B&H Photo logos on the left side of this page to go to those sites and make your purchases. They will then give me a little referral bonus!