How to Get the Most From Amazon Vine Without Losing Your Time, Money, and Sanity!

INTRODUCTION:

If you have come across this article, you may have just been invited to join Amazon Vine, or recently started using it daily. If so, there is a lot you will want to learn and know before you start going crazy ordering stuff. And there are a lot of tips and tricks for searching and finding worthwhile items, even completely tax free items.

In this post I am going to introduce and explain much about getting started with and using Amazon Vine daily. Be sure to check out the companion video of The Best Tax Free Items on Amazon Vine. There are a lot of them, and many of these items will be worthwhile for a lot of users. Here is the link to that video:

https://youtu.be/Q_olk-N2dQU

I am a long time Amazon Associate, which is the affiliate program, and a longtime, successful Amazon KDP Author, offering Canon and Nikon e-book camera guides (which you can find here: https://amzn.to/3CL1fz9). Though I don’t believe those programs had anything to do with me being invited to Vine. For many years, I have often written detailed reviews, both good and bad, sometimes with photos and videos. Some of my detailed reviews have been liked dozens or hundreds of times. So eventually, I must have hit a threshold where Amazon noticed, and I was invited to join Amazon Vine.

Amazon Vine Intro Page.

Unfortunately I jumped right in without reading much and knowing about the three item per day limit or the ETV taxable amounts. But luckily I discovered these things quickly. A couple things I suggest is to fully read the Vine agreement and resources page, join some Vine Facebook Groups, and join the Vine Discord page. And read through this article to learn all the ins and outs, potential pitfalls and errors, and tips and tricks!

FINDING ITEMS:

As you probably know, you will get to select three items a day, at least as long as you are a Silver status member. As you continue, you will need to order and review a certain number of items in order to remain a Vine member, and to get promoted to the next Gold tier where you can order 8 items, including items over $100 value.

Use the search bar at the Additional Items tab.

As you may have discovered, searching through each page and each category will eat up way too much of your time, so you will quickly need to develop a strategy that limits the daily cost of time, effort, and distraction. You may first want to search through some of the categories you are interested in under the Additional Items group, to first get a feel for what kinds of items are available. Or for an item you are planning to buy, do a search for it in the Additional Items group. Once you have a list of items or keywords that you are interested in, do a search for each one, on the Additional Items page, and then save all those searches in one bookmark folder. Then you can “open all tabs” from that folder, and quickly click through each tab with your search terms, to see if anything new has appeared.

On the Vine Discord page, you can view the feed to get a feel for what kinds of items are available, or to grab things as they become available. Scroll though the recent items a couple times throughout the day, and order the items you want if they are still available, or make note of what you might want if you missed it and add it to your search terms.

To help you locate and choose items, you can also make use of the Amazon Vine Helper extension for Google Chrome, which enables you to highlight new items, display the ETV, and hide items you don’t want to keep seeing.

Amazon Vine Helper extension for Google Chrome, which adds various tools to the Vine pages.

In order not to have a huge tax burden at the end of the year, you may want to focus on $0 ETV items, which are tax free, and thus truly free, and will not count in your annual taxable amount. There are numerous worthwhile $0 ETV items, and I have created a separate video that goes through all of the free, $0 ETV items that I have ordered or discovered:

https://youtu.be/Q_olk-N2dQU

These items include lots of medical items, food related items, makeup and body related items, knee braces and elbow braces, equipment for elderly people like toilet rails, baby items including carriers, baby gates, and car seat covers, and some pet items like poop bags and nail trimmers. And believe it or not, there are a lot of adult items and sex toys on Vine, and many of them are $0 ETV, including vibrators, dildoes, lube, and bondage gear. There are many, many more $0 ETV items that I cover In my $0 ETV Free Vine Items video. You can find many of these types of $0 ETV items in the Health and Household, and the Beauty and Personal Care categories of the Additional Items tab.

Be careful, though – for some items that are typically $0 ETV, sometimes a similar item is not $0, and it may have a very expensive ETV. So be very careful and check the ETV amount before ordering. For example, some of the arm braces, or bathroom scales, or elderly equipment, or baby items that look like ones you may have ordered for free before, are not actually $0 ETV, and they can be very pricey. If you accidentally order one, cancel it right away.

PRODUCTS to AVOID:

Based on user experience, there are some products that it may be best to avoid on Vine, for safety reasons. These include products that plug in and use electricity, such as power strips, charging blocks, cords or cables, and even lamps and such. These types of products are often not UL Listed, or properly certified to be safe, and people have found that these types of items become excessively hot and possibly dangerous when plugged in. You may also want to avoid certain types of off-brand supplements, herbal products, balms, teas, food, or items such as kid’s makeup kits. These items often don’t list the ingredients, so you have no idea what you are ingesting or putting on your skin. There are also many baby products such as swings, slings, seat belt adjusters, etc. that are not certified in any way to be safe. These types of products are probably not worth the risk to the safety of an infant or child. I’ve made the mistake of ordering these types of products in the heat of excitement, only to soon regret it, especially when they arrive and no ingredients or safety standards are listed. So they will just end up in the trash.

ORDERING:

So to continue describing the ordering process, when you click on the “See Details” icon to view and order a specific item, be sure and check the size, the color, and most importantly the ETV tax value. Some items are grossly overpriced as far as the ETV, and you may not want to order it. Some items may be of only one size, and you cannot select the size. Be sure to check in the description, as the size may be an XXL.

Be sure and always click See More and scroll down, because some items, even ones you may not expect, offer you a size, color, or variation choice. You will want to select the desired size or color, otherwise you will get the default one, which may be extra large or small, or an undesirable color. Sometimes an item has several variations, and they may be listed by a code or number, and you may need to go to the product page and confirm which variation or which item you want to order. For example, a Vine ordering page for a wig or a tattoo set may actually have a pull down menu to select from many different wigs or tattoo sets. Once when I ordered ear plugs, there was an option to order 10 or to order 100, either one for $0 ETV, so why not get 100!

Be sure to scroll down in the product details, to view the ETV and to check for size and color option pull-down menus.

As soon as you order, click on your order tab, and confirm the ETV amount, to make sure you got a $0 ETV if that is what you expect, or make sure the ETV is not absurdly high. It will be shown under the Fair Market Value column.

And once you have ordered your three items for the day, try to close all the Vine windows and Discord page, and avoid looking at it for the rest of the day. It is tempting to see what you may have missed, but that just leads to frustration and regret. It is always a risk to pass up a certain item in order to wait for something better that may or may not appear later in the day, so you need to carefully weigh the personal value of an item now vs. possibly missing out on a better, more desired item later in the day. For example, you should probably pass on a tempting item that is only worth $6 or $9, if you are really waiting for a $50 item that you can get for $0 ETV. The desired item may not appear that day or the next day, but on the day that it does appear, you will want to be ready for it.

REVIEWS:

You will need to order 80 items, and review 90% of them, in order to be upgraded to Gold status after six months. You will be writing numerous reviews, perhaps some of very personal or potentially embarrassing items, so you can edit your profile name to anything you want, and you can make sure your reviews and information are not shown on your public profile page. This will not affect your Amazon name for ordering, etc, just the name associated with your reviews and ratings.

Edit your review profile to remain incognito.

Vine encourages you to write thorough, honest reviews, as well as to include photos and videos. You will see that some members do this, and other just write a quick but informative review. I’m not sure if Vine actually checks up on the length and content of your reviews. They do approve each review, and some have complained about how their reviews get rejected. I believe that it could be an automated review process, as I can’t imagine an actual person is reading and approving each review. I have written over 400 Vine reviews, and haven’t yet had a single one rejected.

Once you start ordering three items a day, your review list will start to get long, so you need to stay on top of the reviews. Some items may require you to use it over time to give an honest review, but since you need to stay on top of the reviews, this isn’t always feasible. If you aren’t using it over time, you can still honestly review an item by describing its components, options, material, quality, comfort, etc. I suggest keeping your pending review list down to 2 or 3 pages, otherwise you will have a lot of work to catch up.

Keep on top of your reviews.

Sometimes when you go to write a review, you will see that you have already written one for a variation of that item. For example, you ordered the same brand of knee braces in different sizes or colors. When this happens, just contact Vine to remove the item from your review list. Use the Contact Us icon on the Vine page. Do not contact regular Amazon Customer service, always contact Vine Customer Service for Vine related issues. Explain in a clear and simple email that this item is a size or color variation of an item you already reviewed, so please remove it from your review list. You should usually get a response and have it removed in a day or two. These items will still be in your order list, but they will be listed as Cancelled in your tax spreadsheet. Vine asks that you not order multiple variations of an item. However, I have ordered countless ankle braces, in various sizes and colors, and successfully had them removed from my review list, and haven’t been kicked off Vine. But this leads us to cancelled items.

CANCELLED ITEMS:

With many desirable items, you have to move quickly and order it right away. You barely have time to go check the size chart on the product page, or verify exactly what it is. When you come back to the Vine page to order it, it may be gone. So that may cause you to order things quickly without fully knowing the details. Or sometimes you may order an item and immediately discover it wasn’t really what you thought it would be, or it was the wrong size, or it won’t fit your computer or your car, or it was a mistake on your part. When this happens, you should contact Vine right away and cancel it. Or you may be able to quickly go to your Amazon order page and cancel it.

The item will remain on your order list, but if you check your tax spreadsheet, you should see that it is cancelled, and the amount removed. Be sure and check the spreadsheet and confirm. When you cancel an item, you will not get that pick back for the day. If that was your third pick of the day, you will not get that third selection back, and you will be done choosing items that day. Apparently if you cancel too many items, you may get kicked off of Vine, so be careful about ordering and cancelling.

Go to the product page to check the size charts, which are often in one of the product images.

In order to be ready to order any desirable item, perhaps make a handy list of your sizes, in inches, centimeters, shoe size, etc. For example, your waist and body measurement sizes for clothes, your arm or calf sizes for compression braces. Then quickly go to the product page and determine the size. The size chart is often one of the product images. You may want to be careful about buying expensive items that require the correct size, however, because you will not be able to return or exchange them. You can try contacting the seller, but most often they will not respond or they will not exchange the item. Amazon will not exchange the item or accept a return, since it is a Vine item.

DEFECTIVE or LOST ITEMS:

Sometimes items get lost in shipment, get damaged in shipment, or are defective or missing pieces in the box. Or sometimes the order simply gets cancelled because the seller really didn’t have enough of them in stock to send you. This all happens relatively often if you are ordering three items a day. When any of this happens, contact Vine and have them remove the item from your Tax list. DO NOT, under any circumstances, write a review of a lost, damaged, or defective item. Once you write a review, or once 30 days has passed I believe, Vine WILL NOT remove that item from your tax list, and you will be paying taxes on it. Be sure to check the Vine tax spreadsheet and make sure it was cancelled.

If an item is lost, damaged, or defective, Amazon will not replace it. It was a limited Vine item provided by the seller, and so Amazon will not do anything about it. Tough luck. It happens more than you would like, and usually with something you really wanted or needed.

TAXES:

As I have been explaining, each item has an Estimated Taxable Value, or ETV. When you click on a product to order it, be sure and check the ETV amount. At the end of the year, Amazon will send you and the IRS a tax form that lists this amount as income. You will need to add this amount to your income amount on your tax return, and pay taxes on it. The amount of tax you pay may range from perhaps 15% to 25%, depending on your situation. So every time you order an item on Vine, assume that you will be paying 25% of the ETV that is listed, as taxes. These items are not free. You are getting them for perhaps 75% off. That is why you need to be careful about what you order, and what the ETV amount is.

After ordering an item, immediately confirm the ETV or Fair Market Value, to make sure it is what you expect.

Be sure to conside that even if you are getting the item for 75% off, is the item really worth it? For example when I order anything that is electronics related, such as an Arduino board or accessory, I will be paying for it later with my taxes. But the 25% cost to me is approximately the same price or more, for that same item at AliExpress. So is it really worth it for me to buy this item from Vine? If I order it from AliExpress, I can carefully select the exact item I want, I can take my time and make sure it is what I want, and I can order the quantity I want. As tempting as it is to get these items from Vine, even with the 75% discount, it often isn’t really worth it.

This applies to a lot of other items. Everything under the sun is available on AliExpress, often with free shipping if you get more than $10 worth of stuff. For example, all the cheap lingerie that is shown on Vine, you can find the exact same thing on AliExpress for much less. Just copy the image of the item, do a Google image search, and you will see the exact item listed from 10 different sellers on AliExpress. Now, AliExpress items have about 2 weeks shipping time, but I have found them to be very dependable, and have never had any problem with refunds when there is an issue. Keep in mind, you don’t want to buy something from AliExpress that you may have to physically return, since that could cost a lot, so be sure of the size you need etc. But buying things like electronic components, various craft items, small kid’s items, or even some clothing or lingerie, all of which costs only a few dollars and aren’t a major loss if you accidentally ordered the wrong option or wrong size, can be worth it.

As with most all independent contractors, there is a $600 mark which triggers the tax form that Amazon will send to you and send to the IRS. If your ETV at the end of the year is under $600, Amazon will not send out that tax form. However, that means you are responsible for including the amount on your taxes.

There are several videos and articles explaining why and how Vine members should not have to be paying taxes on these items. There are many reasons for that. One is that these items come from the sellers, not from Amazon. Amazon is the warehouse and shipping middle-man. So why are they sending you a tax form acting like it was their item? They are perhaps merely covering themselves, with some boilerplate words and forms. Also some argue that the item or the item’s value is used up in the review process. The whole point of the item is that it is sent to you in exchange for a review. So these items aren’t being sent to you in your everyday life, they are sent to you in your capacity as a reviewer. So the entire amount can be deducted as an expense, zeroing out the ETV amount.

Some of these people have discussed this with the IRS, and there is no clear answer, because this is such a weird, unique situation and relationship. But some have been advised by the IRS that they can zero out the amount as expenses. Take all of that advice at your own risk. It may be best just to pay the taxes on it, if you don’t want to argue about it with the IRS or get audited and possibly pay fines and interest. Here are a couple videos and an article which explain their approach to taxes:

Another video:

https://www.youtube.com/watch?v=tWiIiqOVBFg

Article:

https://wonko.net/blog/2024/07/09/how-i-plan-to-tackle-taxes-as-an-amazon-vine-member-a-practical-guide/

When paying the annual taxes, some include the amount as business income, or personal income, or hobby income. It is up to your and your financial advisors to figure out how to do this.

Personally I agree that Amazon should not be sending Vine members a tax form, based on the fact that these items come from the sellers, not Amazon – among other reasons. But that is a matter for the IRS to investigate and determine, and I don’t expect that to ever happen.

A big issue I have with the Vine program is that Amazon passes all the cost, all the expense, to the sellers and the Vine reviewers. Amazon accepts none of the cost, and yet they profit from it. The Vine reviewer pays a cost of time, energy, stress, and taxes. The Vine sellers pay a couple hundred dollars to join Vine. Then they pay, I believe, when any individual item gets a review. You can look at the Vine Seller signup to see all the costs to the sellers. So Amazon takes money from the sellers, and they get the huge benefit of Vine member’s reviews, which cost members a lot of time and effort. And Amazon passes the tax expense to the Vine reviewers. As all good capitalists do, they have socialized the costs, and privatized the profit. It is quite a scheme for them.

CONCLUSION:

In conclusion, is Amazon Vine worth it? Should I be wasting my time with this? Do I need any of this stuff? Yes, sort of. The heating pads and elbow braces and kinesiology tape could definitely come in handy some day. I use most the things that I ordered that have tax amounts, that I actually needed and searched for – like a dash cam, car sun screens, kitchen stuff, electronics stuff, hose repair, and other household things. Some of the tax free but valuable things like blood pressure monitors and electronic scales are nice to have.

Most of the items are not junk, as some claim they are. Sure, most of it comes from China, but most of it is decent quality. Except for the hair trimmers and Swiffer refills, which work but are pretty cheapo. However, many of the $0 ETV items turn out to be stuff that will just sit in the closet until I may or may not need it someday.

But now I also have lots of items I can give away to friends and family, after the six month holding period where you must keep the item. Like the nice toilet rails and walkers and shower seats for elderly family members, bathroom and kitchen scales for everyone, elbow braces and ankle braces and foot rollers and blood pressure monitors for everyone. A family member tested much of the makeup for me, and she will appreciate getting it all after the 6 month period. My kid appreciates most all the various fun things I get for them.

But is it worth the time, the distraction, the stress, the daily hunting, the daily tracking of shipments and tax values, the emails to Vine to cancel lost or defective items, the infinite number of boxes and plastic bubble envelopes that must be recycled or discarded, the cost to the planet for every step of the process? Probably not.

Be sure to check the ETV. Is the item really worth the 25% tax expense?

And then there is the tax cost. Sure you intend to only order things which you really need. But nearly every Vine video on YouTube will attest to how that tax number gets quite large before they realize it. Since it counts as income, it will raise your annual income, which may cause a major issue for those getting benefits or applying for a loan, etc.

You can stick to the tax free items, but after about 6 months, you have likely grabbed most everything you wanted, and are now just getting multiple copies of things. So I don’t know what to say. It can be a distracting addiction, and it probably would be best if I could just step away. I am up for my promotion to Gold level soon, so I will get that far, and then see how it goes…

Do you have any questions or comments? Be sure to leave them here. And be sure to check out the companion video of The Best Tax Free Items on Amazon Vine.

https://youtu.be/Q_olk-N2dQU

There are a lot of $0 ETV items that appear each day, and many of these items will be worthwhile for a lot of users. And with patience and searching and time, I assure you that you can eventually grab many of them.

And be sure to check out my e-book camera guides for Canon and Nikon mirrorless cameras, available on Amazon:
https://amzn.to/3CL1fz9

The Secrets to an Interesting Photo – Unlocked!

A few days ago Reuters published a collection of the Best Photos of the Year 2012. This collection, similar to the Atlantic’s 2012: The Year in Photos, is a sometimes inspiring, often depressing look back at the events of the past year. The content and subjects of the images aside, they are both excellent presentations of some of the best in photojournalism and image making for the year, and I encourage you to not only look through the images, but to analyze the ones that you like or that move you, and determine what it is about the images that makes them so powerful. Look at the position and point of view of the camera, the aperture settings used (shallow depth of field vs. deep dof), the composition including wide vs. tight and what was put in the frame and what may have been left out, how the elements, forms, and colors in the image relate, the moment captured, etc.


Reuters photographer Joseba Etxaburu is knocked down by a wild cow during festivities in the bullring following the sixth running of the bulls of the San Fermin festival in Pamplona July 12, 2012. Etxaburu suffered some scratches on his right elbow but was able to continue shooting afterwards. Canon EOS-1D Mark IV, lens 70-200mm, f3.5, 1/640, ISO 500. http://blogs.reuters.com/fullfocus/2012/11/30/best-photos-of-the-year-2012/#a=1

In an interesting exercise, someone has compiled the type of cameras and lenses used for the photos, and the exposure settings, and then put it all into easy to read pie charts. To turn this information on its head, it seems that to have the best chance of make an interesting image, what you need is a Canon 1D Mark IV with a 16-35mm lens (likely the EF 16-35mm f/2.8L), set your aperture at f/2.8, shutter speed at 1/320, and use 200 ISO.

But to look seriously and more in-depth at the information compiled and presented in the charts, one can learn a lot about how photojournalists in the field operate:

They seem to prefer Canon dSLR cameras, with Canons used in about 90% of the images* – or it perhaps merely shows that Reuters provides, supports, and/ or encourages Canon equipment. (For example, they likely have a collection of Canon bodies and lenses at their offices for the photojournalists to use or to supplement their equipment when they need a specialized lens.) The top camera used, the Canon 1D Mark IV is a very rugged and reliable professional camera, which is interesting to note has “only” 16 megapixels (though it has a much higher quality image sensor than consumer cameras). It has recently been replaced with the more current Canon 1D X.

Prime lenses were used (rather than zooms) in about 55%* of the images, and the most common favorites were nearly equally divided over the 24mm, 50mm, and 16mm (each used about 8% of the time overall when including all lenses*).

With zoom lenses, the wide angle 16-35mm (EF 16-35mm f/2.8L) was used most often (about 19% of the time overall with all lenses*), followed by the 70-200mm (likely the EF 70-200mm f/2.8L IS version I or II). (The lens links here are for Canon lenses – I’ll try to get back to this and add similar Nikon lens links.)

(*these numbers may be off, as the numbers on Reddit seem to be inconsistent/ incomplete)

What this tells us is that wide angle lenses really are the “bread and butter” lens of the photojournalist, used to capture a wide scene or to place the subject or the action into a larger context – which is often important in telling a full and accurate story in a single image. It also means that the photographer was typically very close to the subject, right in the middle of the action. Sometimes however, a close-up portrait or detail best tells the story, or a photographer can’t get as close as desired, and that is where the 70-200mm comes in.  It is interesting to note that when I did extensive research into choosing lenses at the start of my professional career, I followed many working photographers’ advice and settled first upon these exact lenses – the 16-35mm and 70-200mm. You can do a lot of great travel and photojournalism work with those two lenses alone. One problem you will run into if you are only using one body, however, is that you sometimes have to quickly switch to the other, and that is where the more versatile 24-105mm f/4L or 24-70mm f/2.8L lenses can be more practical.  And you can see that these mid-range zooms were two of the other, lesser used zooms in the chart.

After some time with the zooms, most people want to try their hand at a prime lens – to increase image quality, help them work a bit more at composing and framing, and to provide even shallower depth of field. And as you can see, the wide primes are the most popular among photojournalists. The 50mm f/1.2L or the more affordable 50mm f/1.4 will give you a field of view approximating your normal vision (hence they are called “normal” lenses. The 24mm f/1.4L and 16mm focal lengths are much wider. These also show that the photographers were right up in the action.

The photojournalist’s expression used to be “f/8 and be there” but based on this data, it will obviously have to be modified to “f/2.8 and be there.” The most common aperture setting in these images was f/2.8, used in about 29% of the photos, followed by f/4, f/1.4 (which is possible with some of the prime lenses), and f/3.2. What this means is that they are most often using a very shallow depth of field, usually in an attempt to visually separate the subject of the image from the background, and to call attention to exactly where in the image they want the viewer’s eye to fall. Plus the wide aperture lets in lots of light, which may help them be able to use the fast shutter speeds and low ISO settings they desire.

The “f/8 and be there” expression has been interpreted in a few different ways, but what it seems to say is have your camera ready, and then just be at the scene. The camera settings aren’t nearly as important in photojournalism as simply being there to capture the action.  It also shows that with f/2.8 (and other wide apertures) being used as the most common aperture setting today, photography has likely made a shift over the past few decades where shallower depth of field is much more common.  This would be interesting to investigate, but it could be the result of autofocus systems, allowing a photojournalist to be much more sure of their focus and able to use shallow dof – where as before they had to quickly manually focus and a slightly deeper dof allowed some focusing lee-way. It could also have to do with lenses now being sharper at wider apertures.

The most often used shutter speeds were 1/320, 1/250, 1/800, and 1/640. A photojournalist is often capturing action or precise moments, and thus a fast shutter speed is desired. The best thing to do in these types of situations – especially if working in Aperture Priority Mode so that you have full control over your depth of field – is to set an ISO speed (based on the lighting of the scene) that will allow the camera to select appropriately fast shutter speeds. The best shutter speed depends on the situation and how fast/ what direction the subject might be moving, but from these results it shows that anywhere from 1/250 to 1/800 can work for many scenes – although 1/1000, 1/2000, or faster will be needed for sports and fast action. So set an ISO speed that will result in this shutter speed range when your aperture is set around f/2.8 or f/5.6 (or whatever aperture range you plan to use). The results show that the photojournalists seem to choose the lowest ISO possible for the situation (based on the lighting), as this will result in the least amount of digital noise – interestingly the most used ISO settings actually went in order from 200, 400, 800, to 1600. The fact that ISO 100 came in next, but at a much smaller percentage seems to say: don’t risk it with 100 ISO – just use 200 ISO so that you don’t inadvertently use too slow of a shutter speed when the lighting level decreases but you aren’t paying attention to the exposure settings. The noise and sharpness difference between 100 and 200 is pretty negligible for most current cameras.

Don’t quite understand all these settings and the terminology?  Have a look at my Full Stop dSLR camera guides, such as Canon 5D Mark III Experience and Nikon D600 Experience, which cover not explain the functions, features, and controls of Nikon and Canon dSLR cameras, but more importantly how, when and why to make use of them in your photography.

full stop dslr photo photography camera manual guide for dummies canon nikon


Ten Top Accessories for the Nikon D5100

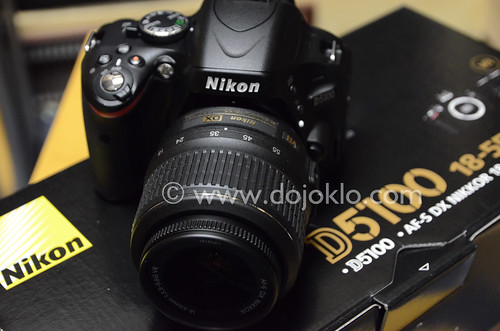
Now that you’ve finally decided on a dSLR and chosen the Nikon D5100 you will want to get some basic, essential accessories. While there are countless accessories available that may look appealing or seem necessary, I suggest you first gain some experience with your basic equipment, and then discover through use which additional items you truly want or really need.  No add-on, whether an elaborate flash modifier or color balance correction tool, will instantly improve your images so concentrate instead on your image making!

nikon d5100 dslr camera unbox unboxing kit lens choose decide vs
photo by author – copyright 2011 – please do not use without permission!

But you can’t go wrong with these initial 10 additions to your camera bag. Click on the links or the images to view and purchase them on Amazon.com (and help support my blog by doing so – thanks!)

1. SanDisk Extreme 8GB Memory Card – You are going to need a high quality, high speed memory card to save all those images and capture those videos. Go with the best and don’t risk corruption and errors – a SanDisk Extreme. Perhaps a couple 8GB cards or 16GB cards.

2. Nikon EN-EL14 Rechargable Battery: It is always good to have an extra battery or two, especially when traveling or when photographing an event all day.  Go with the official Nikon brand and avoid battery communication and charging issues. If you are a fan of the optional battery back / vertical grip, there is a third-party offering for the D5100, the Neewer Pro Battery Grip for Nikon D5100.  Though Nikon did not design their own D5100 battery grip, this third-party option fills the gap, and accepts 2 EN-EL 14 batteries. The grip may make the camera easier to handle for those with larger hands, when working with a large lens, or if often working in portrait orientation.

Nikon d5100 battery en-el14

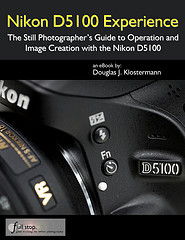
3. Nikon D5100 Experience e-book – You will want to begin to learn to use your camera, go beyond Auto, and start to use the advanced functions and settings of your sophisticated D5100, so be sure to check out my e book, Nikon D5100 Experience.  This guide will help you to take control of your camera so that you can consistently take better images – the images you wish to capture. You’ve invested in an advanced camera, now invest the time to learn how to use it to its full potential! There are also Kindle, Nook, and iPad versions of the e-book available here.

4. Black Rapid RS7 Strap – This sling-style camera strap provides a more comfortable and practical – and somewhat more discreet – way to carry around your camera, especially if you have a larger lens on it.  The RS-7 version has a nice curved shoulder strap, the RS-4 is not curved at the shoulder but does have a handy little pocket for memory cards, and the RS-W1 R-Strap is designed for women.

5. Giottos Large Rocket Blower – Blow the dust off your lens, camera body, interior, and sensor safely with the Rocket Blower. Get the large size for maximum “whoosh!”

6. LensPEN Lens Cleaning System – Clean those fingerprints, smudges, and mysterious spots off your camera lens (filter) safely and quickly with the LensPEN. Brush off the loose spots with the brush end, “charge” the tip with a twist of the cap, then clean by “drawing” in a circular motion. Read the manufacturer’s instruction for complete details.

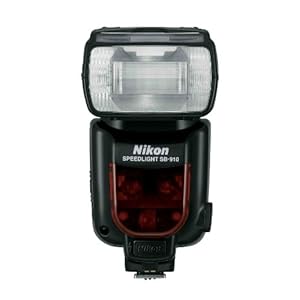
7.  Nikon SB-900, SB-800, SB-700, or SB-600 Speedlight Flashes: Use one of these external flashes for greatly increased flash power and control compared to the built-in flash. They also have adjustable and rotating heads so that you can use indirect and bounce flash, and all of them can be used as remote flashes controlled by the built-in flash.  With the exception of the SB-600 all can be used as commanders to trigger remote flashes. The SB-900 Speedlight or the new SB-910 Speedlight is recommended if you need maximum flash power for events and weddings, etc. Otherwise the smaller SB-700 Speedlight is best for general use.

8. B+W Brand UV Filter – Protect your lenses from dust, scratches, and impact damage with a high-quality, multi-coated B+W brand UV filter. It typically shouldn’t affect your image quality due to its high quality glass and coatings, and it just might save you from a $200 repair. Leave one on each of your lenses at all times, unless you are using another filter like the circular polarizer. Be sure to get the right size filter for your lens.

8a. B+W Brand Circular Polarizer Filter – Use this high-quality, multi-coated filter to dramatically darken skies, increase contrast, and cut through reflections. Turn the rotating lens to adjust the amount of darkening or reflection as you place the sun to your left or right.

9. Nikon 18-200mm f/3.5-5.6G AF-S ED VR II Lens – After you’ve realized the limitations of the kit lens, especially in that area of focal range, pair your D5100 with this high quality all-purpose “walk-around” lens, great for everyday and travel use. It provides the full focal range from wide angle (for capturing the entire scene) to telephoto (for zooming in on details and faces), and delivers excellent image quality, color, and contrast, as well as Vibration Reduction (image stabilization) to prevent blur from camera movement.

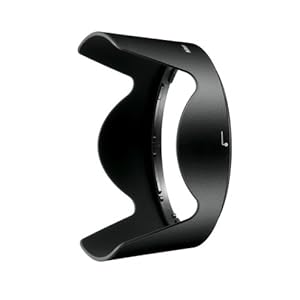
9a. HB-35 Lens Hood – And you will want the optional bayonet lens hood for the 18-200mm lens, to shade the lens from unwanted glare and flare and protect it from bumps and bangs.

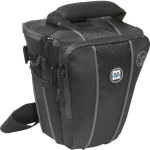
10. M Rock Holster Bag – Carry and protect your camera and walk-around lens in a holster style bag from M Rock. I used the Yellowstone style extensively in my travels throughout South America, and I love its durability and extra little features like a built-in rain cover, micro-fiber cleaning cloth, zippered interior pocket, adjustable interior, and extra strap. Be sure to get the model that fits your body and lens.


Bonus items:

Understanding Exposure by Bryan Peterson – If you don’t yet understand the relationship between aperture, shutter speed, and ISO, read this book immediately. This knowledge is essential to understanding and using your powerful dSLR to its full potential.

Nikon ML-L3 Wireless Remote or MC-DC2 Remote Release Cord: These remotes will allow you to trigger the shutter of the camera remotely, thus allowing either self-portraits or the ability to release the shutter without pressing the Shutter-Release Button thus preventing possible camera shake.

Nikon Capture NX2: If you are not using Photoshop, this software will enable you to process and retouch your JPEG or RAW files, and correct things such color, contrast, and sharpening.

For additional photography gear, accessories, and books, be sure to check out my dSLR Photography Gear, Accessories, and Books post!

Two Hot New Releases!

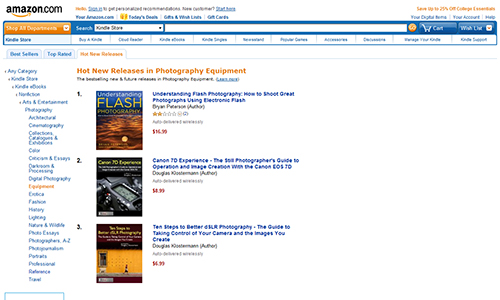
My two latest photography e-book guides, Canon 7D Experience and Ten Steps to Better dSLR Photography are both “Hot New Releases” in the Amazon Kindle Photography Equipment category!

book photography dslr learn guide manual digital slr camera for dummies

Of course, I’m always second fiddle to Bryan Peterson…

Each of these guides can help you to learn more about the functions, settings, and features of your camera and assist you in improving your photography.

Take control of your camera and the images you create!

Please visit my Full Stop e-book site to learn more about my guides, preview them, and purchase them.

Canon T3i / 600D vs T2i vs 60D vs 7D vs 5D MkII

Since several of the current Canon dSLR cameras – such as the T4i/650D (and T3i/600D), 60D, and 7D – share similar features and an 18 megapixel sensor, it can make it difficult and confusing to decide which one is best for you.  But each one is designed for different levels of photographers with specific needs, and there are significant differences that may or may not be important to how and what you photograph.

Obviously as you pay more, you get more, and this article will explain what that “more” is and help you decide if you need it.  If you are new to dSLR cameras, know that things like 9 cross-type AF points and dual Digic IV processors aren’t feature-bloated “bells and whistles” or marketing hype, but are important features for how advanced photographers work and they provide the capabilities that some demand from their equipment.  If your needs don’t demand them, don’t be swayed to invest more in a camera that provides far more than you require.  It won’t help you take better photos, and in fact may cause you to take worse photos until you figure out how to properly take control of a more advanced camera!

This comparison post has grown organically as new models have been released, so please be sure to look through the entire post to find the section that best applies to you, such as T2i vs T3i, or 60D vs 50D, the Canon 5D Mk II, or the overall Canon EOS 7D vs. 60D vs. 600D / Rebel T3i comparison which is the main point of this post.  Don’t miss the Which Canon dSLR is Right for You summary at the end of this article!

Rather than add the T4i into this post, I have written a new post to introduce and explain the features of the latest Rebel, the T4i – Introduction to the Canon Rebel T4i / EOS 650D. The additional features of the T4i make the decision between the T4i vs. 60D more challenging than ever, and so I wrote more about that in Canon Rebel T4i vs EOS 60D.

I know there is a lot to read, but you are preparing to spend a lot of money, and this post will thoroughly explain the differences of these cameras and help you decide which one if right for you! Even if some of these models become outdated, the majority of the information and comparison factors remain similar, and it is still worthwhile to read this article before heading over to the T4i articles.

If you haven’t yet committed to Canon and are interested in comparing the Canon 60D vs. Nikon D7000 , or the Canon T3i vs Nikon D5100, or the entire Nikon line-up, have a look at those posts next.

Canon Rebel T3i EOS 600D book guide manual tutorial how to instruction
The new Canon Rebel T3i / 600D (all photos by the author, some equipment courtesy of Newtonville Camera)

Review / Comparison of Canon EOS 7D vs. 60D vs. 600D / Rebel T3i:

Sensor and Image Quality: As I said above, all three cameras share a very similar sensor with 18 megapixels, and so their image quality and low light performance will be virtually the same. All are capable of taking professional quality images.

Exposure Metering: The threecameras all share the latest 63-zone, dual-layer exposure metering system and 4 metering modes. That means they will all determine the exposure virtually identically and enable you to take properly exposed photos in most every situation, including difficult back-lit scenes. The size of the areas metered for Partial and Spot metering vary slightly between the cameras, but that isn’t anything critical.

Autofocus: The 60D shares a similar autofocus system to the T3i and the previous 50D, with 9 focus points and three auto focusing modes. However the 9 AF points of the 60D are more sensitive/ accurate than those of the T3i: all are cross-type in the 60D, only the center is cross-type in the T3i. This means that the outer focus points of the 60D will do a better job, in difficult focusing situations, of quickly and accurately focusing on the subject.  This may include, for example, lower light situations or tracking moving subjects.  The T3i does a stellar job of focusing, but if you are highly demanding or are going to be primarily shooting action and motion, this is an important difference to consider.

The 60D autofocus system in turn is much less complex than the sophisticated AF system of the 7D with its 19 AF point system and its additional Zone, Spot, and Expansion area modes.  If you shoot serious sports, action, birds, wildlife, etc., then you are going to want to consider the highly capable autofocus system of the 7D.  With its additional AF points and the ability to group them in various ways (Autofocus Area Modes), as well as the multiple Custom Functions that allow you to customize exactly how the AF system works, it is ideal for sports and action.  These Custom Functions can dictate how it tracks subjects, how it deals with objects that come between you and your initial subject, how quickly it responds to these changes of possible subjects that are at different distances from you, etc.   The entire AF system of the 7D is a bit complex, and will take some studying and experimentation if you wish to fully understand and take advantage of it.  However, if you are not an avid sports photographer, a wildlife shooter, or someone who understands, needs, and will use the elaborate features of the 7D AF system, then this shouldn’t dissuade you from the 60D.

I have written an additional post about Taking Control of Your Canon Autofocus System.

Canon EOS 7D compare 60D T3i
Detail of the Canon 7D

Construction: As you can probably figure out from the prices, each camera is not built the same. The 60D has relatively strong construction of an aluminum frame and polycarbonate body. It is better built than the stainless steel frame with polycarbonate body of the T3i/ 600D but not as strong as the 7D’s magnesium alloy construction. The 60D also has some amount of weather sealing – more than the 600D/T3i, less than the 7D. But for most users, including even those using the camera daily or in travel situations, the construction of any of these cameras is far more than good enough, strong enough, and durable enough.  But if you are going to be working extensively in dusty or moisture-heavy areas or situations, you will want to seriously consider the extensive weather sealing of the 7D.  While the strong magnesium construction of the 7D is impressive, that is not really needed by many people other than pros who intensively use their cameras in photo-journalist or constant-travel type situations.

ISO: Since they all share a very similar sensor, the ISO sensitivity and performance at high ISO settings is virtually the same for these three cameras. But don’t take my word for it, don’t be swayed by pixel peepers on forums, instead check out the camera sensor tests at dxomark to verify this. As you can see, they all share the exact same overall score, and show very similar performance.

Controls: As with construction, the buttons and controls vary significantly with these cameras. Unlike the T3i, the more advanced 60D and 7D have nearly every control an advanced photographer needs on the exterior of the camera and they also have the top LCD panel and rear Quick Control Dial that are not on the 600D/T3i. Do you find yourself constantly changing the ISO, the metering mode, or the autofocus mode to adapt to changing situations?  Then you will want direct access to these controls and the ability to more easily monitor them on the top LCD panel.  Or do you generally work in one of the more automatic modes and not need to deal with these settings?  With all the cameras, any controls can also be easily accessed with the Q button and Q menu or in the other menus on the rear LCD monitor. The top buttons of the 60D set only one setting each, so this is less complicated (but thus less versatile) than the multiple-setting buttons of the 7D. Canon has removed the white balance (WB) button on the 60D that the 7D and 50D have, but that isn’t a big deal – use the Q Menu. Another change on the 60D is that the Multi-controller has been moved from the thumb joystick like the 7D and 50D and placed in the middle of the rear Quick-control dial. This doesn’t change how it functions, and should just be a matter of getting used to the difference. (Unfortunately, I still really do prefer the old design and location, though I find it is easier to quickly and accurately click on the diagonal directions with the new 60D Multi-controller design).  If you plan on using your camera on Auto or Program most of the time, then the controls of the T3i are more than sufficient for your needs. If you work in Av, Tv, or M modes and need quicker and more direct access to your controls and the additional top LCD screen to view and change your current settings, then you need to look at the 60D or 7D over the T3i.

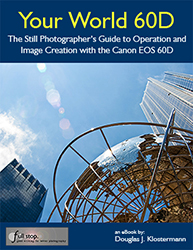
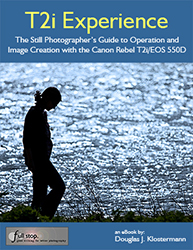
Brief commercial interruption:  I want to mention that I have written e-book user’s guides for the Canon 7D, Canon 60D, Canon Rebel T3i, and Rebel T2i. After spending so much time studying, experimenting, writing about, comparing, and discussing these cameras, I decided to put all that knowledge into e-book form! Each of these user’s guides cover all the features, settings, and controls – but more importantly when and why to use them in your photography.  This includes metering modes, aperture and shutter priority modes (Av and Tv), advanced autofocus use, and more.  They also describe all the Menu settings and Custom Function settings – with recommended settings.  Take control of your camera and the images you create!  Canon 7D Experience, Canon T3i Experience, Your World 60D and T2i Experience. Learn more about the e-books by clicking on their titles or on the covers below.
canon eos 7d book ebook firmware 2 2.0 how to manual dummies field guide instruction Canon T3i book Canon 600D book Canon T3i Experience book guide manual tutorial how to instruction by Douglas Klostermann

Canon 60D book Your World 60D by Douglas Klostermann Canon T2i book Canon 550D book T2i Experience by Douglas Klostermann

Menus and Custom Functions: These allow for greater control over customizing how the camera functions. The 60D has many more Menu and Custom Function options than the 600D/T3i and nearly as many as the 7D. These settings enable you to customize the operation, function, and controls to work how you want them to, including things like exposure increments, peripheral illuminations correction for lenses (fixes dark corners), tweaking how the autofocus system operates, setting more precise white balance settings, and customizing which button does what. These settings are very important to advanced users who wish to customize their camera to work exactly how they need it too, but aren’t nearly as critical to others who don’t have such intensive demands.  (Since many of the Menu and Custom Function settings can be complicated and confusing, my e-books on the 60D, the 7D, and on the T3i/600D cover all of these options along with my recommended settings to get you up and running quickly!)

Wireless Flash: Like the 7D, the 60D and the T3i both incorporate wireless flash triggering. It allows you to trigger multiple off camera flashes at different output levels. The  older 550D/T2i does not have this feature.

Articulating LCD Screen: The big new feature that the 60D and T3i have that the 7D and T2i do not is the articulating rear LCD screen. This may prove useful for videographers, as well as for setting up compositions while the camera is on a tripod, for macro use, or for using it from unusually low or high vantage points. Some users will be able to avoid buying an expensive angle finder because of this feature. There is also an electronic level in the 7D and 60D, visible in the viewfinder, rear LCD, or top LCD.

Viewfinder: The 60D has a large, bright pentaprism viewfinder with 96% coverage of the actual resulting image, better than the pentamirror and 95% coverage of the 600D/T3i, but not quite as nice as the nearly 100% view of the 7D pentaprism.

Processor:
The 60D shares the same Digic 4 processor as the 600D/T3i. The 7D has dual Digic 4 processors. However, if you don’t need to shoot dozens of continuous images, you probably won’t notice any processing speed issues.

Continuous Shooting Speed: The 7D can shoot a blazing 8 frames per second, in which the photos barely change from frame to frame. The 60D can shoot a respectable 5.3 fps which is actually a more useful rate, and is a higher rate than the 600D/T3i rate of 3.7 fps. If you need the extremely high fps for sports, wildlife, or other action shooting, consider the 7D. If not, don’t be swayed by this excessive feature that is designed for people like pro sports or dedicated wildlife shooters.  However, if you are shooting any type of sports, action, birds, dance, etc., the 5.3 fps of the 60D is much more useful than the slower T3i.
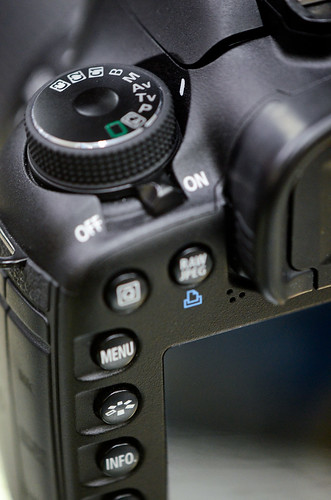
Canon EOS 7D compare vs 60D T3i
Detail of the Canon 7D

Memory Card: The 60D uses the SD memory card like the 600D/T3i, not the CF card of the 7D and 50D.  This doesn’t really mean too much other than the CF cards are larger and more rugged, yet prone to bending the camera’s internal connection pins.  Handle either of them with care and it shouldn’t make much of a difference.

Battery: The 60D uses the LP-E6 battery like the 7D and 5D, which is a nice feature as this battery can often last through a full day of shooting. The T3i and T2i use the smaller LP-E8 battery with less capacity.  In any case you should have an extra battery or two.

Size and Weight:
The T3i is smaller and lighter (18.2 oz/515 g) than the 60D (23.8 oz/675 g), which in turn is smaller and lighter than the 7D (28.9 oz/820 g). Go to the store and hold them to get a better feel for their size and weight. HOWEVER, please know that the size and weight of these bodies is a result of their build, features, and capabilities.  Those are the criteria that should be compared first, not the resulting size and weight.  (Also be sure to read this post of Why How it “Feels” is not a valid Criterion for Choosing an dSLR.)  But, I do realize that size and weight is important to some, perhaps many, due to physical limitations or just simple comfort and enjoyment.  So take my dramatic proclamation with a grain of salt!  The 60D and 7D “feel” like the more substantial cameras that they are. A nice improvement of the T3i is that its hand grip area has been modified, and has a different feel than that of the T2i – the area where the thumb rests is contoured differently and has a nice channel for the thumb, which allows for a much more secure one-hand-grip of the camera.

AF Microadjustment: The 7D has this feature, the 60D and T3i and T2i do not. Many are disappointed that the 60D does not include the ability to micro-adjust the focus so that each of your lenses focuses extremely accurately. However, if you have a major focus issue, send your camera and/ or lenses to Canon while under warranty and ask them to calibrate them. Bad bodies and lenses are rare, but they do exist.  Doing AF microadjustment yourself is often a maddening undertaking. You may make a good calibration under controlled conditions, but this really doesn’t replicate real life shooting.  And due to manufacturing tolerances of both cameras and lenses, there is a relatively wide range of what is considered acceptable.  If you need your camera and lens to be perfectly sharp, you are going to need to buy a $6000 pro body and a $1500 lens.  See this article This Lens is Soft and Other Myths, its follow up article, and the follow up controlled tests to learn more about this.

Locking Mode Dial: This is a new feature for a Canon dSLR, only on the 60D, that keeps the Mode dial from accidentally rotating. A nice touch, and not at all difficult to change quickly with one hand, as some people have claimed: just push the center button with your left index finger, rotate dial with thumb and middle finger.  I actually wish my 50D had this. If you wish to retrofit your 7D or 5D Mk II with this feature, Canon will do it for $100.

Full HD video: Of course they all offer this capability. Note that this is not video for your kids’ parties and soccer games. It does not have continuous autofocus while shooting, as a camcorder does. It is not designed for that kind of use, but rather for serious videographers who typically manually focus. You can adjust autofocus while shooting by pressing the shutter button or the AF button, but it may have a less than desired looking result and unless you are using an external microphone, the autofocusing sound will be picked up. The T3i has the digital zoom feature in video, which allows for nice smooth zooms while filming.

Flash Sync: A Note to Strobists -the 60D and T3i do not have a PC sync flash socket to plug in PC sync cords. The 7D has this.

Ease of operation: While beginners may find all the buttons, controls, and menus of any dSLR difficult and confusing at first, the additional controls and menus of the 7D and 60D are all quite intelligently designed, intuitive, and straightforward for the more advanced user. The menus and controls of the T3i and T2i are also pretty basic and simple to learn.  There is certainly a “price of admission” to learning and getting the most from any dSLR, and you will need to invest time and effort into both reading and using/ experimenting with your camera.  Start with the manual, then perhaps have a look at my e-book camera guides, then practice, practice, practice!

Remember that all of these comparisons and features are relative. Of course the fact that the 7D can take 126 consecutive photos at the rate of 8 frames per second makes it “better” than the other models.  Advanced features like that differentiate it from the other cameras and are also why it costs more. But is it actually “better” for you and how you plan to photograph?  Do you ever need to take 15.75 seconds of continuous photos? Ever? (Look at your watch for 15.75 seconds right now and act like you are taking continuous photos. Now what are you going to do with all those nearly identical 126 imaginary photos?!)

Purchasing:  If you plan to purchase any of these cameras, please see the Purchasing section below.

*****
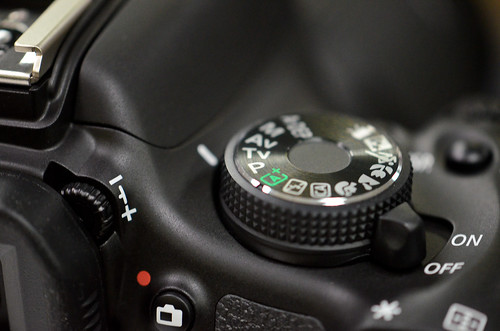
Canon Rebel T3i EOS 600D book guide manual tutorial how to instruction
Mode dial of the Canon Rebel T3i

T3i vs T2i

Review / Comparison of Canon Rebel T3i vs T2i (600D vs 550D):  If you are trying to decide between the Canon T2i or T3i, the previous model, the T2i, already shared many important features with the 60D (and even features of the semi-pro 7D) including the 18 MP sensor, 63-zone exposure metering system, high ISO performance, HD movie capabilities, and Digic 4 image processor. Now with the addition of the vari-angle articulating rear LCD screen (aka rotating screen), remote flash capabilities, creative filters, additional movie options, and in-camera image processing features, the new Canon T3i is even closer in specifications to the 60D, which may make your choice harder. But there are some important differences, and this post will hopefully help you decide which features are important to you and the way you photograph, which ones may be unnecessary, and thus which model fits you best. As I’ve said before, you need to choose which camera is best for you based on your needs and experience as a photographer and based on how the advanced features, controls, and customization options fit those needs and serve the way you work – not the other way around where you look at the new features and speculate if you really need or will use them.

The Rebel T3i is replacing the T2i at the entry level end of the Canon line-up. (There is also the T3 in the most basic, entry level position.)  The differences are minor but possibly significant depending on your needs. Since both cameras share the same 18 megapixel sensor and Digic 4 processor, both the T2i and T3i will create images with exactly the same image quality, produce the same low light-high ISO performance, shoot at 3.7 frames per second, and have nearly the same size and build quality. They are both offered with the same 18-55mm kit lens (with some minor cosmetic differences on the new T3i kit lens). The T3i is very slightly larger and heavier due to the addition of the rotating rear LCD monitor. And that is one of the biggest differences between the two cameras: do you want and need a vari-angle rear screen or not? The other major difference is the ability of the T3i to remotely control multiple off-camera flashes. Like the 60D and 7D, you can use the built-in flash of the T3i to trigger other Canon Speedlites. This could be an important reason for choosing the T3i. However, if you don’t use or plan to use one or more off-camera flashes, this shouldn’t be important to you.

Some other minor additions to the T3i include the Scene Intelligent Auto Mode, which is a feature borrowed from point and shoot cameras. When in Auto mode, the T3i will make a determination of what type of scene you are shooting – close-up, portrait, landscape, etc. – and automatically configure the camera settings accordingly. However, if you want to use a powerful and costly digital SLR as a point and shoot, you should probably save the money and just buy a nice, high quality point and shoot like the Canon S95. Other additional but not very important upgrades include the in-camera processing Creative Filters like Grainy Black and White or Fisheye, and the ability to choose different image size ratios and to rate your images. However, this type of processing is best done on your computer with software like Photoshop or even Photoshop Elements. There is also a marginally helpful Feature Guide which gives brief descriptions of various settings and some additional video features like digital video zoom (for nice smooth zooms) and Video Snapshot, which you can use to shoot short video clips that are automatically joined together into a video, with music. Again, this is pretty easily done on your computer, and with much more control, with basic video editing software.

So if you need any of these new features, get the Canon Rebel T3i / 600D. If not, buy whichever one if offered at a cheaper price. However, if you still wish to compare the Rebel T3i to the 60D and 7D, see below. If you wish to compare the Canon T3i to the Nikon D5100, check out this post Nikon D5100 vs. Canon T3i.

see the Canon EOS Rebel T3i (Body Only) on Amazon
see the Canon EOS Rebel T3i with 18-55mm Lens on Amazon

********

Review of Canon EOS 60D vs. 50D: Since the Canon EOS 60D basically replaces the Canon 50D (well, replacement isn’t exactly the right word because the 60D doesn’t really follow the 20D to 50D progression of improvements…), the 60D or 50D decision is an easy one. The 50D shouldn’t really be considered anymore. While the Canon 50D does hold a couple interesting advantages over the 60D (faster frame per second (fps) burst rate in continuous mode, stronger construction, more comprehensive buttons and controls, complete lack of fun filters like “grainy black and white”), the sensor and exposure metering system have been greatly improved in all the newer cameras (such as the 7D or 60D or 600D/ T3i or 500D/ T2i) and I feel these features, along with the increase in megapixels, outweigh any other 50D advantages. I would definitely choose a 60D instead of a 50D. This is coming from experience, as I use a 50D professionally and on a weekly basis. Or choose a 7D instead of a 50D if your needs require it and budget allows it. (Find out below if your needs require it!) If you still wish to learn more about the differences of these two models, I write in more detail about the 50D vs. 60D comparison here from a camera features and operation point of view.
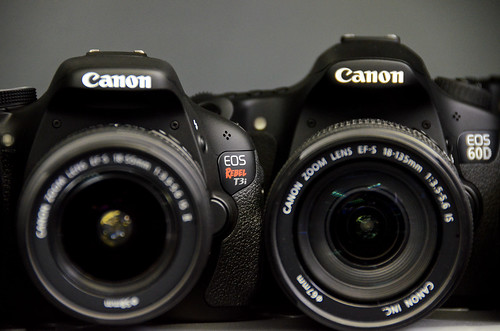
Canon Rebel T3i EOS 600D vs Canon 60D
Canon Rebel T3i / 600D and the Canon 60D


Purchasing: If you plan to purchase cameras, photo equipment, books, or anything else from the retailers below I encourage you to do so through these referral links. While your price will be the same, they will give me a little something for the referral, which helps to support my blog and my work – thanks!  I appreciate your support!

Amazon

If you are in the UK, please click here for the UK Amazon referral link.

And if you are in Canada, please click here to use my Canada Amazon.ca referral link.

For those interested in purchasing through B&H Photo, Adorama, or directly from Canon, I have set up affiliate links with them as well. Just click on the logos below to start shopping:
BandH Photo   

These are all retailers that I have purchased equipment from (excluding Amazon UK/Canada), and I recommend them based on my good experiences, their extensive selection, competitive prices, great customer service and responsiveness, and fair return policies.

or use one of these direct links to Amazon:

See and buy the Canon EOS Rebel T3i (Body Only) on Amazon
See and buy the Canon EOS Rebel T3i with 18-55mm Lens on Amazon

See and buy the T2i on Amazon.

See and buy the 60D on Amazon.
See and buy the 7D on Amazon.
See and buy the Canon 5D MkII on Amazon
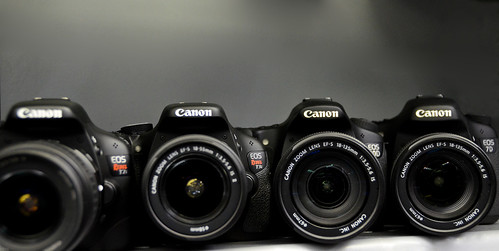
Canon Rebel T3i EOS 600D vs 60D vs 7D vs T2i
Canon Rebel T2i, T3i, 60D, and 7D – photo by author at Newtonville Camera


Which Canon dSLR is Right for You?

This section of the article, which can help you decide on a camera based on your photography experience and needs (and also includes the discussion of the Canon 5D Mk II),  has been moved to its own post here:

http://blog.dojoklo.com/2011/10/14/which-canon-dslr-is-right-for-you/


*****

Related Posts:

Comparing and Choosing Canon Lenses
Equipment for Digital Photography
Essential Books for Digital Photography

As I said above, when you are trying to determine which camera to purchase or upgrade to, you need to first consider and determine your needs, and then see which camera fills those needs. Not the other way around. Here is a post I wrote which discusses this, titled

How to Choose a New dSLR Camera


Was this post helpful?  Please let others know about it by clicking the Facebook, Twitter, or Google+ sharing buttons below, or linking to it from your blog or website, or mentioning it on a forum.  Thanks! 

Want to help support this blog with no cost or effort?  Simply click on the Amazon and B&H Photo logos on the left side of this page to go to those sites and make your purchases.  They will then give me a little referral bonus!

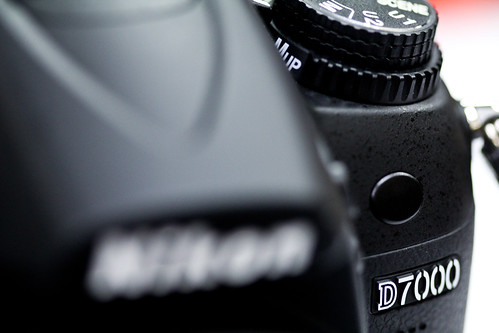
Nikon D7000 vs. Canon 60D

(Sorry for the wrong link to the Essential Digital Photo Books – you can find that list HERE:
http://blog.dojoklo.com/2010/10/06/essential-digital-photography-books/)

Just when you thought it was difficult to choose between the latest offerings from Canon – the 7D vs 60D vs. T3i / 600D – Nikon comes out with the D7000! The Nikon D7000 is a competitor to both the Canon 60D and some say to the 7D, and I guess it is up to the forums and early users to really figure out where it stands. (See the comparison of the Canon dSLR line-up – 7D, 60D, T2i here and the comparison of the Nikon dSLR line-up – D7000, D90, D300s – in this post.)

I spent a couple months writing eBook user’s guides to both the Canon 60D (Your World 60D) and the Nikon D7000 (Nikon D7000 Experience), so I’ve spent considerable time with each of these cameras and know their features and controls inside and out. Check out these ebook guides to learn more about using and photographing with these cameras including all of their Menu settings and Custom Function settings (with recommended settings) plus discussions of how, when, and why to use the cameras’ settings and features, (metering modes, aperture and shutter priority modes, advanced autofocus use, focus lock, exposure lock, and more) for everyday and travel use, to help you take better photos.

Canon 60D vs Nikon D7000
Image of a Canon 60D taken with a Nikon D7000 and Nikkor 24-70mm f/2.8 – by the author

Comparing their features on paper, the Canon 60D and the Nikon D7000 are incredibly similar. One model is slightly better in one area, and the other model wins out in another area. With both models, it appears that you pretty much get what you pay for. Pay a couple hundred dollars more for the D7000, and you get a camera that rewards you for that extra cost.

Here is how the Canon 60D and the Nikon D7000 compare:

Canon 60D: (see it on Amazon)
18 megapixels
ISO 100-6400 expanded to 12800
HD Video with more fps options
3″ Articulating rear LCD screen
9 point autofocus system – all cross type
5.3 frames per second maximum burst rate
construction: aluminum chassis with polycarbonate body
single SD card
wireless flash triggering
96% viewfinder
size – slightly bigger but lighter
$1099

Nikon D7000: (see it on Amazon)
16.2 megapixels
ISO 100-6400 expanded to 25600
HD Video with full time autofocus
3″ fixed rear LCD screen
39 point autofocus system – with 9 cross type
6 frames per second maximum burst rate
construction: magnesium chassis with partial magnesium alloy body
dual SD cards
wireless flash triggering
100% viewfinder
size – slightly smaller but heavier
$1199

Here is a more in-depth exploration of these features:

Megapixels: Canon’s 18MP is more than the Nikon’s 16MP, which gives you slightly more cropping and enlarging ability with the 60D. To see how this affects images quality, you are going to have to look at the tests at dxomark.com. ISO performance is very similar, with the D7000 having a slight edge. And as far as color sensitivity, dynamic range, and tonal range, the sensor of the D7000 performs noticeable better. But, be aware that dxomark tests the sensors, but not in conjunction with the camera’s processor, so it is not a complete indication on the final image. A camera processes the images captured by the sensor, even when shooting in RAW, to produce optimal image quality – such as applying a bit of noise reduction, maybe tweeking the color. So it is likely that any “shortcomings” of a particular model’s sensor are addressed by that camera’s processor.

Nikon D7000 vs Canon 60D
Image of a Nikon D7000 taken with a Canon 60D and EF 100m f/2.8 Macro lens – by the author

ISO: You typically shouldn’t be shooting over 1600, maybe 3200 if absolutely necessary, so this is no big deal to most users. But since the megapixel race is over, ISO has become the current benchmark for comparison. It gives the pixel peepers and forum folks something to argue about. Again, check out the tests at dxomark.com to see that they show pretty similar ISO performance, with the D7000 slightly better. DPReview says the D7000 is arguably the best performing sensor for high ISO/ low noise in the consumer class (along with the Sony A55 since they have the same sensor. Did you know that little nugget? Sony manufactures sensors used by numerous other camera ).

HD Video: Canon offers 60fps which I understand is very important to videographers, and Nikon doesn’t shoot 30fps or 25fps at 1080p as Canon does. Nikon offers full time autofocus which may be slow and cumbersome and thus isn’t a big deal to videographers. We will have to see how well that works – early reports say not so great.

LCD screen: the articulating screen of the 60D could come in handy for several types of shooters. There are many times I could have benefited from a rotating screen such as when I was on my belly in wet grass trying to crane my neck to see through my viewfinder and capture a subject and her active dogs from grass level.

Auto focus system: This is a difficult comparison. The 39 AF point system of the Nikon offers both many more AF points plus customization capabilities for how it operates and tracks moving objects that rival the 7D (see Custom Functions/Custom Settings section below). However, only 9 of those points are the more accurate cross type, while all 9 points of the 60D are cross type. The 39 point system of the Nikon might be better for situations where you let the camera choose the AF points to track motion, such as sports, action, and wildlife. But you should often otherwise be choosing the AF point yourself. So with the Nikon, you may want to limit selection to 11 points (Custom Setting a6). If you want a Canon body with a more advanced AF system than the 9 points and basic tracking of the 60D, and overall more accurate than the D7000, have a look at the incredibly advanced and customizable AF system of the 7D with 19 AF points, all cross type.

Maximum burst rate: Close, but Nikon wins this one by a hair. Either rate should be fast enough for most photographer’s needs. The Nikon has the nice feature of being able to change the low speed continuous rate from between 1 to 5 fps. I had previously complained that the 7D should have had this feature since its 8 fps is often overkill. The 5.3 fps of the 60D is great, so it doesn’t really require the ability to change the fps beyond the available 3 or 5.3. Also note that the Canon will allow a continuous burst rate of 58 continuous photos in highest quality JPEG and 16 in highest quality RAW, while the Nikon is limited to a much lower 31 JPEG and 10 RAW before its buffer fills.

Construction: Nikon wins this one, but Canon saves weight with its construction. And I assure you both are more than strong enough for everyday, even abusive use. That being said, the partial metal body (magnesium allow on top and rear) and rubber grip material of the Nikon has a nicer feel and is a great detail that the 60D should have had. I think it is one of the main reasons for the increased price of the D7000 over the 60D. It is worth noting that the magnesium alloy body of the D7000 does not fully extend around the front, and thus the area surrounding the lens mount, which plays quite an important role in supporting a large, heavy lens, is plastic. See this image of a D7000 skeleton next to one of a 7D for details. Kind of an ugly sight for those trying to compare the D7000 to the 7D. Important details like this demonstrate why, in the end, the D7000 just ain’t no 7D competitor. Sorry, the name of this post will just have to remain Canon 60D vs. Nikon D7000!

SD Memory cards: I’m not sure the appeal of 2 memory cards in the Nikon, and why that might be better than just using one larger capacity card? Is it really useful or just a bell/ whistle? You can use the two cards of the D7000 in four ways: overflow, JPEG / RAW, backup, or stills / movies, so maybe that is kind of cool, but I actually prefer to be dealing with just one card at a time at this point.

Wireless, remote flash triggering: A super-cool feature available on both cameras using the built in flash to trigger off camera flashes.

Viewfinder: Nikon wins this one with slightly bigger size, though I don’t know how the actual brightness and view compares. It is a shame the 60D viewfinder view is not 99% or 100% of the actual resulting image like the Nikon. In reality, you won’t notice any shortcomings with either the 60D or the D7000 viewfinder once you start using it. The D7000 includes the option of displaying the grid in the viewfinder, which the 7D also has, and I wish the 60D did as well.

Size and Weight: Not a major difference, you will have to see how they feel in your hands.

Metering: They each have different metering systems, so it is difficult to compare. I’m sure they will both perform quite well. In addition to Evaluative/Matrix and Spot in both of them, the Canon has Center-Weighted and Partial, while the Nikon doesn’t have Partial but has the ability to change the size of the center area in Center-Weighted mode, which sounds pretty cool but may be more of a “set it once to your preference and forget it” thing. Depends on how quick and easy it is to access it in the menus, on the fly.

Processor: This is a pretty important component in the comparison and can really help resolve if the D7000 sits closer to the 7D or the 60D. I don’t yet know enough about the performance of Canon’s Digic IV vs. Nikon’s Expeed II to comment on this. The larger maximum burst buffer of the 60D may point to a more powerful processor. However the dual Digic IV processors of the 7D are able to handle much longer bursts of many more images than the single processor of the D7000 (and the 60D) – again, another very important reason the D7000 is not actually head to head with the 7D.

Custom Functions/ Custom Settings: Despite what I say below in the Controls and Menu section, the Custom Settings of the D7000 are far more sophisticated than those of the 60D, and in that respect make it much more of a contender with the Canon 7D. With the D7000, you can change the size of the center area metered in Center Weighted Metering Mode (not possible on 60D or 7D), you can change the frame rate of Continuous Low Speed between 1 and 5 frames per second (not possible on 60D or 7D), you can give buttons a “hold” feature or not, where you press and release instead of having to hold it down when turning another dial to dial-in a setting (“hold” means the camera does the holding, not you). With the D7000 you can set the autofocus tracking to be nearly as sophisticated as the 7D in terms of how to react to objects that come between you and your intended subject, and also in setting focus priority or release priority (take the picture only when focus is attained or take it immediately even without necessarily attaining focus). You can limit the number of AF points to 11 if you don’t wish to deal will all 39, you can fine-tune focus adjustment for different lenses like the 7D AF microadjustment (not possible on the 60D), plus you can fine-tune exposure adjustment for each individual exposure mode (to set a baseline compensation behind the scenes and not have to use exposure compensation every time, if you feel one of those modes is consistently over- or under-exposing). You can fine-tune the white balance for many more standard fluorescent options without having to have a Kelvin cheat sheet, as you might need to set the same temperature settings on a Canon. All very impressive, and all features that the 60D and certainly the 7D should have but don’t. Also, while I like the two rear thumb buttons of the 60D 7D for exposure and focus lock, you can set the AE-L/AF-L and Fn buttons (and preview button) of the D7000 to take on similar operations.

Controls and Menus: As a Canon user, I find the controls and menus of the Canons to be incredibly practical and intuitive. As a photography instructor, I try to be open-minded about the Nikon controls, notations, and menus, but continue to find them incredibly irritating, nonsensical, and not nearly as intuitive and user-friendly as Canons. I also think that the consistency of the controls and menus across the Canon line, from the 550D to the 5D MkII points to intelligent and thoughtful design. You can pick up any model and go to work, then quickly and intuitively change the ISO setting or metering mode. On the Canons, the controls are not scatted about in seemingly random places that change dramatically from model to model. Please don’t think I’m just a Canon guy on a rant here. Have a look at the controls on the top, back, and front of the D300s vs. the D7000 – essential controls are completely different. Why is that? Functions that are switches at the rear of one are a button at the top of the other, or marked dial switches on the rear become an unlabeled button on the front. The standard dSLR mode dial completely disappears and becomes a trio of buttons on one Nikon but not the other? I challenge you to pick up a D7000 and change the AF area mode to single point AF. The first time I picked it up I searched the camera’s buttons, switches, and menus for 15 minutes and never found it.  I handed it to my camera store co-worker and he failed as well! (Spoiler alert! It is done with the unmarked button located inside the Auto/ Manual focus switch near the lens mount in conjunction with a command dial.) Wait, so a switch that is C/S/M (continuous/ single/ manual) on one Nikon becomes AF/M (autofocus/ manual) on the other? So the same switch now partially controls a different function? Where are AF-C and AF-S (auto-focus continuous/ single modes) found now? Oh, who knows! (Actually, the same place as above, with the unmarked button and the other command dial.) As you can see, this is maddening to a photography instructor or salesperson who must deal with a number of different models and who is attempting to quickly demonstrate these very functions. I’m not even going to start on my feeling for Nikon menus!

Keep in mind, this all doesn’t really matter if you buy and use one of these cameras- you get that one and learn its controls. But I feel it does point to an intelligent consistency on Canon’s part, and as an architect in an earlier life, I highly appreciate good design and intuitive wayfinding. And also many photographers work with two bodies which are often different models of the same brand, and the ability to switch between a Canon 50D and a 5D Mk II without skipping a beat is how it should be. You can actually forget which one you have in your hands and it doesn’t matter. But once you do learn all the controls on the body of the D7000, you have an incredible amount of control at your fingertips.

edit:  After much more experience with various Nikon cameras, I no longer have any issues with their menus – once you get used to the Canon or the Nikon menu system it really is no big deal.  I still do think that the ability to seamlessly go from a 60D or 7D to a 5D Mk II with all the controls being the much the same is awesome (with the exception of the thumb multi-controller now becoming a pad on the 60D) and many photographers working with two bodies do this often – as opposed to going from a D90 or D7000 to a D300s, where there are some dramatic differences (which I do understand make sense in relation to the capability of the bodies, yet must aggravate those photographers working with two of these different bodies…).

Price: The Nikon is $100 to $200 more than the 60D (depending on current specials), and people are saying it is a cheaper competitor to the 7D. But if you study them closely, you can see that it does actually sit between the two. While the D7000 has an advanced AF system and tremendous customizing capabilities, details like the partial vs. full magnesium body construction and the single vs. dual processors of the D7000 vs 7D demonstrate why they are not exactly head to head competitors. The D7000 definitely offers at least $200 of improvements over the 60D, if not more, and is being very well received among photo enthusiasts just as the Canon 7D was last year – you pay a bit more and you get more features. Oddly, DPReview has suggested that the pro-sumer D7000 is a viable upgrade to the Nikon D300s, a higher end, more expensive semi-pro camera. So this makes the decision a bit more complicated for the Nikon D7000 vs. D300s comparison.

Quality Control: There have been numerous reports on the Internet of faulty D7000 bodies. The issues are mainly the bad pixel problem and the front/ back focusing issue. While this type of reaction seems to occur every time any new camera model comes out, there seems to be legitimacy to these complaints. My local camera store (where I worked for a time) reports that they continue to experience these issues with their customers. For the pixel peepers who insist on a clean sensor, nearly every D7000 body tested was found to have bad pixels out of the box. The firmware upgrade fixed some of cameras with bad pixels but not all of them. (What is the fix exactly? Pixel mapping?). Several pixel peeping customers also had front or back focus issues, and went through 2 or 3 bodies to find one they could accept. (see This Lens is Soft and Other Myths for an article about front/ back focus and quality control.)  Also, some of the official Nikon EN-EL15 batteries are larger than others – yes physically larger – and do not properly fit or get stuck in the D7000 body. As far as Canon 60D QC issues or exchanges: none. Zero. (But perhaps Canon customers aren’t so picky…!  Who knows.)  And for their report on repairs and customer service for Canon and Nikon in general: Repairs with Nikon cameras is a daily, ongoing issue. They see Nikons come back, both new and older models, and it sometimes takes sending the camera / lens / flash 3 or 4 times to Nikon to resolve the problem or the customer gives up by then. A few Canon models come in for repair, typically 4-6 year old heavily used Rebels that stop functioning properly. Canon repair is reported as excellent, customer service incredibly helpful, and turnaround is quick. Pile of brand new, defective Nikons returned over two month period: 15. Number of defective Canons: 0. Please note, this is the store’s report, not my opinion or bias, but I think it is worth taking this into account when choosing a dSLR system.

edit 2011-09-29: When any new camera comes out, there is an outcry of “this problem” and “that problem.” Some are exaggerated because you only read about the few bad ones and not the tens of thousands of good ones. Some are possibly over-reactions by people not fully understanding the new or advanced features or nuances of the latest model.  But I wanted to speak from personal experience while working at a camera store and comment on the issues that were being discussed in forums which proved to be real. The scope of the issues in the overall picture (of tens or hundreds of thousands of bodies made), however, should be taken into account, as well as the fact that the returns and exchanges may have been prompted in whole or in part by the internet reports, thus creating a circular chain of whatnot (I’m sure there is a term for this!).

Just keep in perspective, while your camera is a precious object to you, there are literally hundreds of thousands of the same body manufactured. It is a consumer electronics item, just a (precision) hunk of metal, plastic, and 100’s of tiny screws. It is a tool to be used towards an end goal of great photos, not an end unto itself.  (If you wish to learn to take control of your camera and capture great photos, please have a look at my dSLR camera guides such as Nikon D7000 Experience.)

Know that C and N are reputable companies and will make right any genuine issue you may encounter (within your warranty period!).  And while it is frustrating if you encounter a bad pixel, I think it is a marvel of technology that any sensor can be manufactured with 16 million pixels that all work!

Conclusion: Hey look! They are incredibly similar! (other than quality control issues) Both are capable of taking high quality digital images. They are both leaps and bounds better – and cheaper – than the same level dSLRs of just a few years ago. I do like the specifications of the expanded autofocus system, the slightly better sensor performance, the larger viewfinder, the custom setting options, and the partial magnesium alloy body construction of the D7000. Yet the 60D has the additional HD video frame rates, 9 out of 9 cross type AF points, and the articulating screen. You pay a few hundred dollars more for the Nikon, and you get a camera with body construction and features that are a bit better than the 60D. However, if you don’t actually need, understand, or wish to learn how to use all these additional features of the D7000, there is no point in paying for them. (If you are going to leave the camera in Auto or Program mode and let the camera choose the autofocus points, you definitely don’t need a D7000!) In the end, it totally comes down to which one you are more comfortable with – which one feels better, which one’s buttons and controls work best for the way you work, which one’s menus make better sense to you, which one’s custom functions allow you to make the customizations you want to make, and how much money you want to spend. Or which system you want to invest in for the long-term, as far as all the lenses, flash, and accessories you are going to accumulate. Or which camera brand your friends use so that you can go to them for help. Just choose one, learn to use it well, and get out and take photos! That’s what digital SLRs are all about.

Canon didn’t drop the ball with the xxD line, as some have said. It’s just that they reconfigured their price points and naming conventions. The 7D replaced the 50D months ago, and it was widely agreed to be a dramatic, spectacular, and successful improvement. That was very much like the Nikon D90 to D7000 improvement we see now. Canon definitely took the 50D to the next level with the 7D. But then they needed a high-end consumer model to offer between the entry level Rebel line and the semi-pro 7D. Hence the highly capable 60D. So who wins? The consumer. The digital photographer. Cheesy, but true.

If you wish to compare the Nikon D7000 vs the Nikon D90 vs the D300s, have a look at this post.

Purchasing? If you are planning to buy either of these cameras from Amazon.com (or other equipment, accessories, or simply anything else), please use the links below and I will get a little something for referring you, which will help support my blog. Thanks!

see and buy the Canon EOS 60D – Body Only

see and buy the Canon EOS 60D with 18-135mm lens

see and buy the Nikon D7000 – Body Only

see and buy the Nikon D7000 with 18-105mm lens

Link for any other Amazon.com purchases

Purchasing from the UK? Use my Amazon UK referral link here.

If you wish to purchase from B&H Photo, Adorama, or direct from Canon, please click on their logos on the Gear page. Thanks!

Was this post helpful?  Please let others know about it by clicking the Facebook or Twitter sharing buttons below, linking to it from your blog or website, or mentioning it on a forum.  Thanks!

Best Canon Lenses or Which Lens Should I Buy Next

When I began my work in travel, culture, and humanitarian photography I spent a great deal of time scouring websites, reading forums, checking reviews, making lists, and agonizing before I finally settled on which lenses were best for my needs and my work. So hopefully all my effort can help you save some time and assist you in your research in selecting which lenses are best for you. In addition to travel, humanitarian, and photojournalism work, much of this advice will apply to general photography as well. After you’ve learned all about lenses here, you can have a look at this other post to see what other camera gear and accessories you might want.


Open Windows, San Miguel Duenas, Guatemala

The easy answer to the question of which lens is best for travel photography, right up front, is: an all purpose zoom that goes all the way from wide to telephoto, like an 18-200mm, or a standard zoom like a 24-105mm. See the Standard Zoom section and the One Lens For Travel sections of this post for more information about these. The more difficult answer to that question is addressed in detail by this post. The most difficult answer to this question is: it depends. It depends on you. It depends on your level, interests, and goals as a photographer. It depends on what you most enjoy taking photos of and what type of images you aim to capture. Hopefully this post will help you figure that out, and I’ll address this most complicated answer more at the end of the post.

The primary sources for me in determining which lenses to choose were looking at the websites and blogs of other photographers who do similar work, since they often list and discuss the equipment they use. The initial and most helpful source for me was Karl Grobl, since his work as a humanitarian photojournalist is closest to what I do and what I aspire to do. But some of the other ones I can recall looking at include David duChemin – (who is a travel, art, and humanitarian photographer – he seems to have moved or deleted his “Gear” page), plus Nevada Wier and Bob Krist – both dedicated travel and cultural photographers. Oh, and the books and advice of the ever-enthusiastic Rick Sammon helped out along the way. I then applied what I learned from them to my specific photographic interests, preferences, and tendencies (which can be summed up with the fact that I typically like to zoom in close). In other words, if one of them favors a 50mm prime lens but you know you prefer the versatility of zooms, then adapt what they say to your needs.

For me and many others the ideal combination is a wide angle zoom, a standard (or middle range) zoom, and a telephoto zoom. (If you are interested in just one lens for travel, have a look at the Standard Zoom section, and then also jump down to the bottom of this article for the One Lens for Travel section.) I’m going to stick to the professional level lenses and compare the Canon L lenses first, and discuss other Canon lenses in the One Lens for Travel section below. I’ll try to keep it short and simple, and let you conduct further research on the countless sites dedicated to equipment and reviews.

Click on each lens below to link to its page on Amazon.com. If you plan to purchase any of this equipment from Amazon (or other equipment, accessories, or anything else), I encourage you go to Amazon.com by clicking on the links found throughout this post, and then Amazon will give me a little something for the referral, which will help support my blog. Thanks!

If you wish to first try out a lens before buying it, click on this link to go to BorrowedLenses.com, where you can get great prices on short-term rentals of any lens as well as the latest Canon and Nikon dSLR bodies (as well as video, audio, and lighting equipment).

If you are in the UK or wish to purchase from B&H, Adorama, or direct from Canon see the information at the end of this post for those links. The lenses I chose, which work best for my needs, are indicated by (Y). I apologize to the Nikonistas out there, since all of these lenses are the Canon variety. However, Nikon typically has an equivalent lens for each of these. Just search for the same focal length and have a look at the aperture and price to determine the comparable Nikon (Nikkor) lens. For example here are some equivalents:
Canon 16-35 f/2.8L to Nikkor 14-24mm f/2.8
Canon 24-70 f/2.8L to Nikkor 24-70 f/2.8
Canon 70-200 f/2.8L IS to Nikkor 70-200 f/2.8 VR

Check out this post to better Understand Canon Lens Notations – the significance of all the various numbers and letters in a lens name.

Wide Angle Zoom
As humanitarian photojournalist Karl Grobl says, this is the “bread and butter lens” of the photojournalist. This is used for up-close-and-personal shots, for environmental portraits or photos, and for “story-telling” images which include multiple subjects or a larger context.


Open Windows, San Miguel Duenas, Guatemala

EF 16-35mm f/2.8L II USM (Y)
pros: slightly wider on the wide end which is good for cropped sensors (7D, 60D, Rebels), larger maximum aperture (“faster”) for use in low light situations or for more dramatic depth of field
cons: high price, heavier in weight
notes: get the slim UV filter to avoid vignetting, especially if using a full frame camera like the 5D
filter: 82mm slim filter fits this lens.
notes: The above two images of this post were with this lens. This is the wide angle zoom I chose because I wanted the “faster” f/2.8 aperture to be able to use it effectively in low light situations.

EF 17-40mm f/4L USM
pros: more zoom on the far end, lighter in weight, much lower price
cons: f/4 maximum aperture not as “fast” and slightly less dramatic for shallow depth of field, not quite as wide on the wide end
filter: 77mm slim filter fits this lens.

Standard Zoom
This is a great “walk-around” all purpose lens, especially for travel or everyday photography. If you want to head out on the streets with just one lens, this is the one to take which will serve you well in most situations you encounter.


Panajachel, Guatemala

EF 24-70 f/2.8L USM (Y)
pros: larger maximum aperture (“faster”) for use in low light situations and more dramatic depth of field
cons: heavier in weight, higher price, less zoom range, no image stabilization
filter: 77mm multi-coated filter or 77mm coated filter fits this lens.
notes: a great all-purpose walk-around lens, though relatively big and heavy. I discuss using this lens, with several photo examples, in this post here.

There is a new EF 24-70 f/2.8L II USM lens plus the new EF 24-70 f/4L IS USM lens, both with the same focal length as above.  The first one just listed is an improved, lighter version of the 24-70 f/2.8L, and the second one listed adds Image Stabilization but has an f/4 maximum aperture rather than the f/2.8 maximum aperture of the other 24-70mm lenses. Adding these two new lenses into the mix makes this an even more challenging decision in the Standard Zoom category!

EF 24-105 f/4L IS USM
pros: lighter in weight, image stabilization which will help you gain 2 or 3 stops in speed vs. hand-held non IS (*see below), more zoom range, lower price
cons: f/4 maximum aperture not as “fast” and slightly less dramatic for shallow depth of field
filter: 77mm multi-coated filter or 77mm coated filter fits this lens.

* this means for example, if the proper exposure of a scene is 1/60 at f/5.6, and you want to hold on to that f/5.6 aperture for compositional reasons and not have to sacrifice your chosen depth of field for a faster shutter speed, you could capture it without blur, whereas without the image stabilization (IS) the hand held image may have been blurry.

Telephoto Zoom
This is a great lens for portraits, close ups, details, ability to zoom in and capture something far away, sports and action shots, and ability to create dramatic depth of field or blurry backgrounds. There are four versions of the Canon 70-200mm lens – either f/2.8 or f/4, each with or without image stabilization (IS). Oh wait, there are now five versions, with the recent Mark II version of the f/2.8 IS. I think with a lens this long and heavy, you need image stabilization if you are going to be hand holding it, so I will ignore the non-IS versions.


Solola Market, Guatemala

EF 70-200, f/2.8L IS USM
pros: larger maximum aperture (“faster”) for use in low light situations and more dramatic depth of field. The Mark II version of this has a closer minimum focus distance and improved optics
cons: very heavy, very large, higher price, especially the new Mark II version
filter: 77mm multi-coated filter or 77mm coated filter fits this lens.

EF 70-200, f/4L IS USM (Y)
pros: lighter weight, smaller, lower price
cons: f/4 maximum aperture not as “fast” and less dramatic for shallow depth of field
filter: 67mm multi-coated filter or 67mm coated filter fits this lens.
notes: This is the telephoto zoom I chose. I sacrificed the one-stop of aperture for the much more manageable size and weight of the f/4. And since I primarily use it outdoors, and because it has image stabilization, the f/4 aperture only really affects the extent of background blurring. There are several example photos of this lens in action in this post here and also more nice example photos in this post here.

I haven’t used each of these lenses in the field, though I have briefly tested most of them, so my decisions and my pros and cons are sometimes based on my research and from what I’ve learned from others who use them. Consider them starting points for issues you want to consider in your selections. And while there are endless discussions and comparisons regarding image quality, sharpness, sweet spots, etc. for each pair above, I will stay out of that discussion and tell you there are highly regarded professionals who use each of these, that any Canon L series lens is professional quality, that price and/ or largest maximum aperture will often indicate the one that is generally considered “better,” and that you will never regret your choice based on these concerns. Note that many L-series lenses are sealed against and dust, water and weather. Sometimes a front filter is required to complete the weather sealing, such as with the wide angle lenses. I suggest always using a clear, protective UV filter with any lens, preferably a high quality, multi-coated B+W brand filter. If you don’t want to spend that much, at least get a high quality single-coated B+W filter rather than a cheaper Tiffen filter.

When making your choices, I highly recommend going to a store with your camera and actively testing and comparing each pair. The difference in size and weight, and even feel of the lens in your hands, is often dramatic and may help you make your decision. If you are still undecided, rent one for the weekend and work with it. And don’t think that you have to immediately get three lenses in order to do your work. Karl Grobl uses just two of them in his work, and that hasn’t limited him in either humanitarian or travel work. Consider your primary needs, and buy one or two based on that, and combine them with less expensive non-L lenses for now.

If your budget or needs don’t call for L-series lenses, see the One Lens for Travel section below, or look for the closest equivalents of the above lenses in other Canon or Sigma or Tamron, etc. lenses (or in the Nikon lenses if you are over in that camp).

Prime Lenses
Many photographers rave about prime lenses (lenses of a single focal length, that don’t zoom) for many reasons, including image quality, the purity and simplicity of working with them, and their large maximum apertures (as wide as f/1.2) for very dramatic compositions through use of shallow depth of field. The focal lengths I see used most often are (these are obviously Canon examples):

Canon 35mm f/2
Canon 50mm f/1.8 II (high image quality for about $100!)
Canon 50mm f/1.4 (Y) (a little more costly, but higher quality 50mm)
Canon 85mm f/1.8

Take into consideration if you have a full frame or a cropped sensor, since with a cropped sensor 7D , 60D, or 550D the field of view of the 50mm lens will be closer to an 80mm lens on a full frame 5D camera (or a 35mm film camera), so the field of view of a 35mm will be closer to a 50mm on a full frame or 35mm film camera.


San Miguel Dueñas, Guatemala

One Lens for Travel
I know a lot of people are interested in finding just one lens that is good for travel photography. As I mentioned above the best option is typically the standard, mid-range zoom. Look above for info on the Canon L-series lenses. My choice would be the EF 24-105 f/4L IS USM. For something less expensive Canon offers a couple other great options. For each of these lenses, I would highly recommend getting the optional lens hood (the hood comes with L-series lenses). It helps shade the lens to prevent unwanted lens flare (although lens flare can sometimes be used for a great effect when desired), helps protect the lens from bumps and drops, and makes you look cooler and more professional! And of course always get a good quality, coated B+W brand UV filter for protection – or at least a cheaper Tiffen filter. However, there is a significant difference in the clarity and lack of reflectiveness of a coated B+W filter vs. a standard Tiffen filter, which you can see if you look through them side by side, so those who are concerned about image quality should go with a coated, or better yet multi-coated B+W filter (designated MRC). Also, note that non-L-series lenses are not nearly as well sealed against dust, water and weather as most all of the L-series lenses are.

EF-S 18-135mm f/3.5-5.6 IS
pros: less expensive, lighter weight, image stabilization
cons: less zoom range on the telephoto end than the 18-200mm, not a constant minimum aperture like the L-series lenses (the f/3.5-5.6 means your largest aperture at the 18mm wide end will be f/3.5, while the largest aperture at the 135mm telephoto end will be a less dramatic f/5.6), not higher quality USM focusing motor, EF-S means this lens can only be used on cameras with the APS-C sensor, or non-full-frame sensors, so it can be used on all Digital Rebels, 20D-50D, and 7D, but cannot be used on a Canon 5D. However, that means it is optimized for those cameras, especially for the wide end.
Lens hood EW-73B fits this lens, and a 67mm coated filter or 67mm filter.
This is currently one option for the kit lens for the Canon EOS 60D, and is a good choice if you are debating between the kit lens or not.

EF-S 18-200mm f/3.5-5.6 IS
pros: more zoom range on the telephoto end, image stabilization, better image quality than the 18-135mm lens.
cons: more expensive, heavier weight, not a constant minimum aperture like the L-series lenses (see above lens), not higher quality USM focusing motor, EF-S for APS-C sensor cameras only (see above lens).
Lens hood EW-78D fits this lens and a 72mm coated filter or 72mm filter.
This is currently another option for the kit lens for the Canon EOS 60D, and is an excellent choice if you are debating between the kit lens or not.

EF 28-135mm f/3.5-5.6 IS USM
This is an older lens that seems to have been replaced for the most part by the two lenses above.
pros: less expensive, image stabilization, USM means a faster, quieter auto-focusing motor and full time manual focus (which means you can override the auto-focus by turning the focus ring without having to switch the lens to MF manual focus), EF so can be used with both APS-C and full frame cameras too if you have or wish to upgrade to a 5D.
cons: not a constant minimum aperture like the L-series lenses (see above), less range on both the wide and telephoto ends.
Lens hood EW-78BII fits this lens and a 72mm coated filter or 72mm filter.

It Depends
The actual answer to the question of which lens is best for travel photography is: it depends. As I said above, it depends on you – on your level, interests, and goals as a photographer. It depends on what you most enjoy taking photos of and what type of images you aim to capture. If you are a photography novice, or just want to be able to capture all or most situations, the all purpose zoom or standard zoom might serve you best. But if you wish to capture more of a certain type of photo that you like, photos that match your specific visual ideas and preferences, you need to reconsider. Do you like sweeping vistas and all encompassing environmental portraits? Do you typically want to capture the entire scene in your shots? Then perhaps a wide angle zoom will work better for you than a standard zoom. Certainly, you will be limited and not able to frame certain shots the way you might want, but you will capture more of the types of images you like, and might simply have to move in closer than usual to get some the other images. Do you like extreme close-ups of people’s faces with dramatically blurry backgrounds, architectural details on buildings, the look of compressed perspective? Then a telephoto zoom rather than a standard zoom will help you capture more of those images you like. Sure, you will not be able to get the wide angle view of spaces, but you might succeed in capturing many more of the dramatic photos you like. Or perhaps you best work like a classic photojournalist and want to capture scenes and portraits more closely to how you see them. Then a single prime lens like a 50mm or 85mm might be the one lens that is perfect for you.

The Best Lens for the Canon 60D
A lot of people ask, “Which is the best lens for the Canon 60D, (or the 7D, or the 550D/T2i or the 5D)?” There isn’t a specific lens that is best for a specific camera. I hope you’ve already learned that from reading this post! A lens will perform exactly the same on each of those cameras or any other camera with an APS-C size sensor. The effective focal lengths will be different with a full frame sensor dSLR, such as the Canon 5D, but they will still be wide angle zooms, medium zooms, etc. The best lens for your camera is the one that is best for you, your work, and the types of photos you take. That being said, the kit lens that Canon has paired up with the 60D, the EF-S 18-200mm f/3.5-5.6 IS is an excellent choice for an all-purpose everyday and travel lens. See the EOS 60D with the kit lens on Amazon here.

For related posts, check out other entries in the Lenses Category, the Humanitarian Photography category, and my posts about Fixed vs. Variable Aperture Lenses and Choosing a Lens beyond the Kit Lens, as well as my discussion and recommendations for gear for travel photography.

Purchasing: As I mentioned above, if you plan to purchase any of this equipment, I encourage you to do so by clicking on the links of each of the lenses listed above, which will take you to that page on Amazon.com. Or go directly to Amazon using this link or click on the Amazon logo below. If you purchase through these links, Amazon will give me a little something for the referral, which will help support my blog. Thanks, I appreciate your support!
Amazon.com

If you are in the UK, you can click here for the UK Amazon referral link. If you are in another country, click on one of my Amazon links, scroll to the bottom of the page, and click on your country for your local Amazon.

For those interested in purchasing from B&H Photo, Adorama, or direct from Canon, please click on their logos on the Gear page. Thanks!

Renting Lenses: If you wish to first try out a lens before buying it, click on this link to go to BorrowedLenses.com, where you can get great prices on short-term rentals of any lens as well as the latest Canon and Nikon dSLR bodies (as well as video, audio, and lighting equipment).

Was this post helpful?  Please let others know about it by clicking the Facebook or Twitter sharing buttons below, linking to it from your blog or website, or mentioning it on a forum.  Thanks!