Ten Top Accessories for the Nikon D5100

Now that you’ve finally decided on a dSLR and chosen the Nikon D5100 you will want to get some basic, essential accessories. While there are countless accessories available that may look appealing or seem necessary, I suggest you first gain some experience with your basic equipment, and then discover through use which additional items you truly want or really need.  No add-on, whether an elaborate flash modifier or color balance correction tool, will instantly improve your images so concentrate instead on your image making!

nikon d5100 dslr camera unbox unboxing kit lens choose decide vs
photo by author – copyright 2011 – please do not use without permission!

But you can’t go wrong with these initial 10 additions to your camera bag. Click on the links or the images to view and purchase them on Amazon.com (and help support my blog by doing so – thanks!)

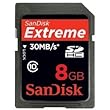
1. SanDisk Extreme 8GB Memory Card – You are going to need a high quality, high speed memory card to save all those images and capture those videos. Go with the best and don’t risk corruption and errors – a SanDisk Extreme. Perhaps a couple 8GB cards or 16GB cards.

2. Nikon EN-EL14 Rechargable Battery: It is always good to have an extra battery or two, especially when traveling or when photographing an event all day.  Go with the official Nikon brand and avoid battery communication and charging issues. If you are a fan of the optional battery back / vertical grip, there is a third-party offering for the D5100, the Neewer Pro Battery Grip for Nikon D5100.  Though Nikon did not design their own D5100 battery grip, this third-party option fills the gap, and accepts 2 EN-EL 14 batteries. The grip may make the camera easier to handle for those with larger hands, when working with a large lens, or if often working in portrait orientation.

Nikon d5100 battery en-el14

3. Nikon D5100 Experience e-book – You will want to begin to learn to use your camera, go beyond Auto, and start to use the advanced functions and settings of your sophisticated D5100, so be sure to check out my e book, Nikon D5100 Experience.  This guide will help you to take control of your camera so that you can consistently take better images – the images you wish to capture. You’ve invested in an advanced camera, now invest the time to learn how to use it to its full potential! There are also Kindle, Nook, and iPad versions of the e-book available here.

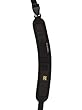
4. Black Rapid RS7 Strap – This sling-style camera strap provides a more comfortable and practical – and somewhat more discreet – way to carry around your camera, especially if you have a larger lens on it.  The RS-7 version has a nice curved shoulder strap, the RS-4 is not curved at the shoulder but does have a handy little pocket for memory cards, and the RS-W1 R-Strap is designed for women.

5. Giottos Large Rocket Blower – Blow the dust off your lens, camera body, interior, and sensor safely with the Rocket Blower. Get the large size for maximum “whoosh!”

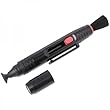
6. LensPEN Lens Cleaning System – Clean those fingerprints, smudges, and mysterious spots off your camera lens (filter) safely and quickly with the LensPEN. Brush off the loose spots with the brush end, “charge” the tip with a twist of the cap, then clean by “drawing” in a circular motion. Read the manufacturer’s instruction for complete details.

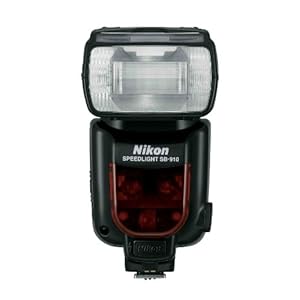
7.  Nikon SB-900, SB-800, SB-700, or SB-600 Speedlight Flashes: Use one of these external flashes for greatly increased flash power and control compared to the built-in flash. They also have adjustable and rotating heads so that you can use indirect and bounce flash, and all of them can be used as remote flashes controlled by the built-in flash.  With the exception of the SB-600 all can be used as commanders to trigger remote flashes. The SB-900 Speedlight or the new SB-910 Speedlight is recommended if you need maximum flash power for events and weddings, etc. Otherwise the smaller SB-700 Speedlight is best for general use.

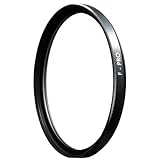
8. B+W Brand UV Filter – Protect your lenses from dust, scratches, and impact damage with a high-quality, multi-coated B+W brand UV filter. It typically shouldn’t affect your image quality due to its high quality glass and coatings, and it just might save you from a $200 repair. Leave one on each of your lenses at all times, unless you are using another filter like the circular polarizer. Be sure to get the right size filter for your lens.

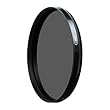
8a. B+W Brand Circular Polarizer Filter – Use this high-quality, multi-coated filter to dramatically darken skies, increase contrast, and cut through reflections. Turn the rotating lens to adjust the amount of darkening or reflection as you place the sun to your left or right.

9. Nikon 18-200mm f/3.5-5.6G AF-S ED VR II Lens – After you’ve realized the limitations of the kit lens, especially in that area of focal range, pair your D5100 with this high quality all-purpose “walk-around” lens, great for everyday and travel use. It provides the full focal range from wide angle (for capturing the entire scene) to telephoto (for zooming in on details and faces), and delivers excellent image quality, color, and contrast, as well as Vibration Reduction (image stabilization) to prevent blur from camera movement.

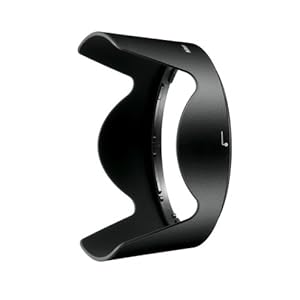
9a. HB-35 Lens Hood – And you will want the optional bayonet lens hood for the 18-200mm lens, to shade the lens from unwanted glare and flare and protect it from bumps and bangs.

10. M Rock Holster Bag – Carry and protect your camera and walk-around lens in a holster style bag from M Rock. I used the Yellowstone style extensively in my travels throughout South America, and I love its durability and extra little features like a built-in rain cover, micro-fiber cleaning cloth, zippered interior pocket, adjustable interior, and extra strap. Be sure to get the model that fits your body and lens.


Bonus items:

Understanding Exposure by Bryan Peterson – If you don’t yet understand the relationship between aperture, shutter speed, and ISO, read this book immediately. This knowledge is essential to understanding and using your powerful dSLR to its full potential.

Nikon ML-L3 Wireless Remote or MC-DC2 Remote Release Cord: These remotes will allow you to trigger the shutter of the camera remotely, thus allowing either self-portraits or the ability to release the shutter without pressing the Shutter-Release Button thus preventing possible camera shake.

Nikon Capture NX2: If you are not using Photoshop, this software will enable you to process and retouch your JPEG or RAW files, and correct things such color, contrast, and sharpening.

For additional photography gear, accessories, and books, be sure to check out my dSLR Photography Gear, Accessories, and Books post!

Nov. Canon Rebate on Lenses, 60D, Flashes

Canon is running more Instant Savings Rebates on the EOS 60D, body only or with a variety of different lenses or lens combinations.  There are also rebates on several desirable lenses – including great wide angle, telephoto, and macro lenses, the nifty 50, and even tilt-shift lenses.  Plus Speedlite flashes.

It’s a great time to get a pre-holiday gift for yourself or those on your list!

Have a look at the options below, and head over to Amazon, B&H, or Adorama to start shopping – click these store links, or the logos at the left of the page, to shop at these stores and help support this blog!. Thanks!

Have a look at the Canon rebate site to see the details of the offer.

Canon Instant Savings on L Lenses and Speedlites

Are you ready to purchase a nice new Canon L series lens or a Speedlight flash?  Now is the time with their instant savings until Sept. 3, 2011!

Click here to visit Amazon and have a look at these lenses/ Speedlites.  Or please consider using my affiliate links for B&H or Adorama by clicking the icons on the left side of the page.

canon rebate instant save savings l lens speedlite flash speedlight


Photographing in Natural Light

Some recent portrait sessions (see them here) have led me to the realization that it is finally time to get my flash off-camera and to expand my knowledge of lighting for portraits.  Since I’m currently working with a camera that doesn’t have built in remote flash triggering, this means I either need a cable or remote triggers.  But which one?  Expensive TTL or radio triggers?  Cheap eBay triggers?  A basic sync cord or a more costly TTL cord?  How long?  A 3′ cord for hand holding, or a longer cord for putting the flash on a stand?  Or both?  What situations am I going to be using them in at home and while traveling?

3268 LSS on beach
Jan. 2010 – Plum Island, Newburyport, MA – Canon Rebel XT, 105mm (28-105mm lens), 1/500s, f/4.5, ISO 200 – natural light at 4pm on beach

The more thought and research I put into it, the more the possibly necessary equipment began to add up:  a stand for the flash, plus maybe a Justin Clamp.  A stand and special arm for the reflector.  Perhaps then a softbox or an umbrella.  Then what else…?

I’m not a strobist.  While I admire the cool things one can do with lighting and I sometimes desire to overpower the sun, it’s just not the kind of thing that gets me excited about photography.  I have more of a photojournalist instinct.  I’d prefer to simply work without a flash most of the time, to make the most of natural light, and to capture the reality of situations in front of me.  But my experience has shown me this isn’t always possible so I decided to seek out a viable alternative for situations I assumed required flash, and to learn how to maximize my use of natural light without sacrificing lighting quality.  Thankfully I quickly discovered a book that demonstrated this was possible – Available Light: Photographic Techniques for Using Existing Light Sources by Don Marr.

Unlike countless photography books that stress the importance of looking at, understanding, and making use of natural light but then leave it to the photographer to figure out, this one leads you directly there.  It is short, simple, and intuitive – so much so that I didn’t write down a single note during my first reading.  It shares knowledge and techniques that can easily and immediately be put to use, such as with this photo I took soon after reading it – look at that glow!  100% natural light:

8772 LSS portrait
Sept. 2010 – Cambridge, MA – Canon 50D, 75mm (28-105mm lens), 1/125s, f/4.0, ISO 200 – natural light at 3pm just inside the shadow-line under a concrete overpass

While we all know to photograph in the shade on a sunny day or how an overcast day is supposed to create nice, soft lighting, with this book it suddenly all clicked and I really understood why these things are so.  When walking around outside, I’m typically always aware of the intensity, direction, color and quality of natural light.  I now realize that in itself was not nearly enough.  Now I have gained the knowledge to work with the natural light and modify it to create the softness/ hardness, direction, color, and intensity I want, whether I am working on an overcast day, at high noon, inside, outdoors, or any other type of situation.  The book also makes one very aware of the existence and potential use of natural reflectors everywhere which will help give you the lighting you want: a wall, the ground, a pole. And it explains the important concept and effective practice of subtractive lighting, used to even-out or create the desired lighting instead of turning to flash to artificially add to existing lighting. The author does not just guide you to finding and creating good light in any situation, but to light that fits your subject and the way in which you wish to portray them, whether that includes soft light or hard light, even light or deep shadows, hair light or flare – or whatever.  I would love to summarize the whole book in this post, but I think it’s better that you just go to your library or Amazon.com and get it!

Douglas J. Klostermann Photography
Nov. 2009 – San Miguel Dueñas, Guatemala – Canon 7D, 135mm (70-200mm lens), 1/200s, f/4.0, ISO 1600 – natural light at 3pm diffused by the fiberglass panel ceiling/ roof of her home

I feel that this book has set me on the right path, away from what I thought was inevitable membership in the Strobist club.  While the author is not against the use of flash, and certainly not against reflectors, this book offers a refreshing and viable alternative to that never-ending accumulation of equipment and techniques, and I encourage off-camera-flash fans to read it as well so they can learn to look for beautiful natural lighting alternatives that will give them as-good or even better images, before instinctively setting up their lighting equipment and knocking down the natural light in order to rebuild it artificially.

In the process of my strobist research, I came back around to the photos of Joey Lawrence (Joey L), and in particular his images of the Mentawai.  They are wonderful images and beautiful portraits, but something about this project has always rubbed me the wrong way.  My recent research into artificial vs. natural light has helped me to think this through and start to figure it out.  I’m always disturbed when people or crews invade, er, I mean visit a culture or community like the Mentawai with a bunch of equipment and ask them or pay them to pose for photographs or footage.  There’s nothing inherently wrong with it and his subjects obviously enjoyed cooperating in his project, but I simply have a different philosophical and stylistic approach – more documentary and photojournalistic.  Plus I feel that there should be more of a unity of subject and technique.  In other words when celebrating (or is it romanticizing?) people’s close relationship with their natural environment, one should perhaps not light them with giant, unnatural, high power artificial lights!  The disharmony certainly creates stunning photos, and that kind of lighting is part of Joey L’s established style.  Possibly the contrast between the natural surroundings and the artificial light helps to emphasize the dichotomy of indigenous people living in a modern world.  But I just feel it would have been more interesting and authentic to make use of the unique natural light of that place when romanticizing, er, I mean portraying the people and their relationship with their environment.  That being said, I am very much looking forward to Joey L’s Faces of a Vanishing World TV series (starting on September 27th on Ovation TV) in order to get a glimpse into how he works in the field and see how he creates his dramatic and undeniably stunning images.

Douglas J. Klostermann Photography
June 2008 – Sillustani, Peru – Canon Rebel XT, 90mm (28-105mm lens), 1/800s, f/5.0, ISO 100 – natural light at 4pm on the altiplano near Lake Titicaca (that is a different lake in the background)

One of the unique aspects of different places in the world is their unique light:  the light at high altitude, in a desert, equatorial light, sunset in the Cinque Terre or Santorini, and of course the diffused light of a rainforest.  Why not try to capture that light as part of your images of a place?  At least, for the strobists out there, I encourage you to first look at and possibly incorporate the natural light before instinctively and blindly setting up the strobes.  In reality, I think it is probably a much greater challenge to find and shape the natural light, but it is a challenge I intend to take on for the long term.

0212 LSS Roosevelt Island portrait
March 2010 – Roosevelt Island, NYC – Canon 50D, 70mm (70-200mm lens), 1/125s, f/4.0, ISO 200 – natural light at 5pm in open area