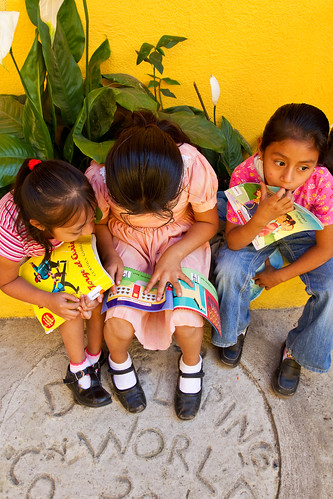
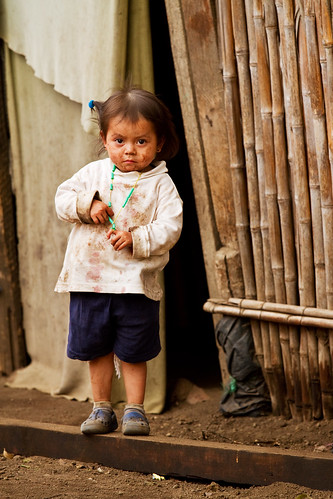
Interviews with Humanitarian Photographers

One of my favorite Friday reads is the 10Q Interviews with Humanitarian Photographers on Heber Vega’s blog.  As suggested by the title, he interviews a different humanitarian, travel, or culture photographer each week, asking them a similar series of questions and sharing several of their photos.  I was fortunate to be interviewed by him a few months ago.

It is a wonderful resource for any photographer who works in the field or especially one who aspires to do this type of work.  You can learn a great deal from the experiences of those who have been at it for awhile.  This week’s edition, with photographer Jake Lyell, is especially candid about the process of becoming and working as a humanitarian photographer.  As you can see from his responses, it is a slow, hard road requiring an incredible amount of persistence.

I encourage you to jump over there and have a look at these great interviews.

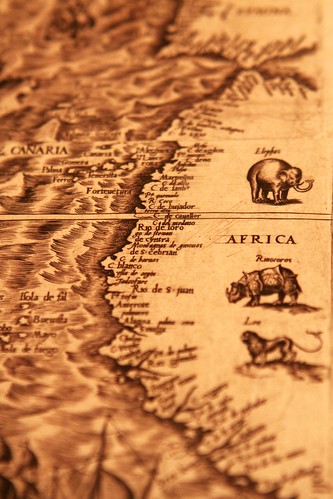
Harvard map africa
Map by Diego Gutierrez, 1562 – Peabody Museum, Harvard

Humane Society’s All Animals Magazine

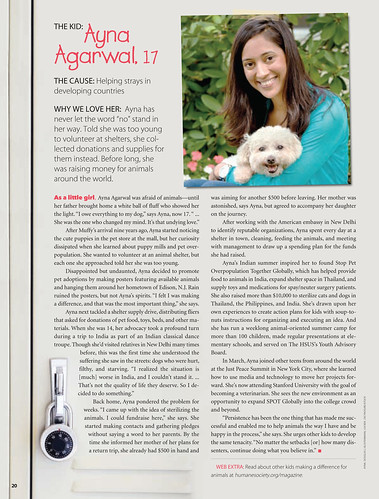
If you happen to receive the Humane Society’s All Animals magazine, be sure to check out the section on young animal activists.  Last month I was fortunate to meet and photograph an amazing and motivated young animal activist, Ayna Agarwal (and her dogs).  One of my portraits of her and Muffy illustrates her profile in the Sept./Oct. 2010 edition of All Animals, and another image was used in the table of contents.
Douglas J. Klostermann Photography

You can read her story here, or read the entire article on the HSUS website here.

Search Terms, Questions and Answers Part 2

This is part two of an ongoing series. Over the last several months I’ve collected some of the search terms that led people to read my blog. I’m presenting several of them here, along with brief but informative answers. This is part 2 of this series. The next ones in the series include questions on the Canon 7D specifically, and then on lenses. Here was part one.

What is humanitarian photography?
Humanitarian photography can be defined as the photography of international NGOs (non-governmental organizations), humanitarian aid, and non-profit organizations. These include organizations that focus on diverse issues including from health, development, indigenous rights, and children. Photographers make images of these organizations’ work in the field, projects, staff, and clients or the populations that are served. These images can be for documentation, to tell a story, for printed and web use such as marketing, fundraising, reports, or training publications, for presentations, or many other uses.

A humanitarian photographer, however, can also be a photographer who wishes to tell the story of the human condition through their photography, and this does not need to necessarily involve the work of an NGO. They can be a photojournalist, such as Ami Vitale, or a travel, world, and culture photographer who depicts the world through the people who inhabit it.

Humanitarian photographer / photography
That’s me! Welcome to my site. Also be sure to check out Heber Vega’s website where he has the 10Q interview series with a number of humanitarian photographers. And be sure to check out Karl Grobl, who is an inspiration to all of us humanitarian photographers.

How to become a humanitarian photographer / Getting into humanitarian photography
First, work at becoming a skilled photographer. Then begin to learn about humanitarian issues and what humanitarian aid organizations do. I address that in this post:
http://blog.dojoklo.com/2010/01/26/becoming-a-humanitarian-photographer-part-ii/

Then, have a look at these posts:
http://blog.dojoklo.com/2009/12/10/how-to-start-out-as-a-humanitarian-photographer/

http://blog.dojoklo.com/2010/08/16/after-the-self-assignment/

How much do humanitarian photographers make? / Salary for humanitarian photographer / How can I make a lot of money being a humanitarian photographer?
While there are some humanitarian photographers who work on staff with NGOs, these types of jobs are few and far between. So there really is no such thing as a salary for humanitarian photographers. In fact, at this time, there really isn’t a salary for most types of photographer except for the few that still work on staff at newspapers or a few other places, and this number is dwindling every day. For the most part, humanitarian photographers are freelance photographers who must seek out their own assignments. What they earn depends on how hard they work at this. As with any type of vocational photographer, working as a humanitarian photographer involves something like 10% photography and 90% business and seeking out work. Sounds dreadful, right, but just read about any other photographer discussing business and you will see the same thing. How to make a lot of money as any type of photographer? I haven’t figured that one out yet. Maybe work as a dentist by day.

Humanitarian photography career / jobs / opportunities
As I said above, this doesn’t really exist except in the way you create it yourself. Really. It is 100% up to you to make it a reality. There is no one path to follow, no correct course to take (although there are countless incorrect moves one could make). It is all pretty much up to you to determine through the amount of effort and dedication you put into it. One place to start is to read David DuChemin’s Visionmongers. This is one of the few guides out there for becoming a vocational photographer, and luckily for you, he began as a humanitarian photographer himself. However, it is far from containing all the answers. He leaves much unsaid that you have to learn the hard way.

Humanitarian photography ethics / Guidelines for NGO photojournalists
One good place to start is to read the NPPA Code of Ethics. I address that and discuss it a little further in this post:
http://blog.dojoklo.com/2010/01/28/working-as-a-humanitarian-photographer-ethics-and-images/

You can also look at the countless writings about journalism ethics, photojournalism ethics, and media ethics. Much of those subjects will directly apply to humanitarian photography.

How to shoot humanitarian pictures
However you want! Create your own style, tell your own story! However, if you really don’t know where to start, have a look a photojournalism and how to work and shoot as a photojournalist. You can learn this through reading books, and just as importantly through looking at images. A good place to start is The Big Picture at Boston.com:

Also, learn to tell a story through images, whether it is a single image or a photo essay. How you shoot depends on your goals as well. If you are working for an NGO, they may want photos in a certain style or which serve a certain need. If you are shooting a documentary series for yourself, you may choose your subjects, compositions, and style very differently.

David DuChemin on being a humanitarian photographer
I get this search every day! Perhaps he has set up an automatic tracking search to see where he is mentioned each day.

Deconstructing the Shot – Photo 1

This post is the first in an occasional series in which I will describe the making of a photograph, from both a technical and artistic standpoint. I’ll go through the camera settings and why they were chosen, as well as the thought processes going through my head regarding composition and the creation of the image. These types of posts will be concrete examples of a previous post of mine called How Pros Photograph, which describes the various decisions that may be going through a photographer’s head as they work a scene and make photos.

Douglas J. Klostermann Photography
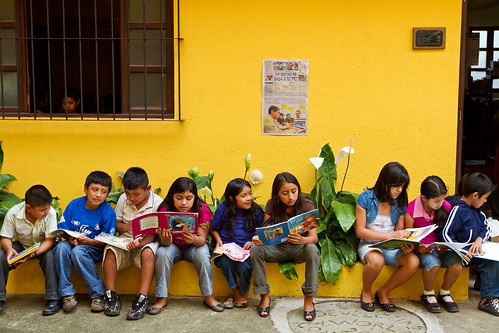
Ventanas Abiertas – San Miguel Dueñas, Guatemala – Canon 7D, 16-35mm f.2.8L II at 35mm, ISO 200, f/5, 1/100s

The Photo: As the first example photo, I’ve chosen the full, original version of the current header image of this blog (also seen just above), a line of kids reading in the courtyard of Ventanas Abiertas, an after-school learning center in San Miguel Dueñas, Guatemala. I traveled to this NGO near Antigua in November of 2009 to photograph the center, its founder, teachers and students, and its work in the community. I created this strip of images showing select photos from the series as I worked towards finding and making this image:

The Process: As I roamed the center taking photos, I spotted the kids all lined up on a curb in the courtyard, reading. The linear composition and the striking yellow wall made for a pretty obvious opportunity. I had a Canon 16-35mm f/2.8L II lens on a Canon 7D, with a protective UV filter on the lens. I first took a shot from a standing position, composing the image with the kids across the center of the frame. The focal length of the lens was at 23mm, a wide shot to capture the whole scene. That shot has a bit of a snapshot look, and didn’t take full advantage of the yellow wall, had far too much of the grey concrete patio, and created too static of a composition which did not make use of the opportunity to apply the rule of thirds for a more dynamic composition. I re-framed to move the line of kids to the bottom third of the frame, and still had the lens wide and was standing. To better fill the frame with just the kids and to create a better point of view, more on the level of the kids, I crouched down and zoomed in to 35mm. Although the 35mm focal length is a wide angle and thus prone to distortion, due to my camera to subject distance there is only a slight amount of distortion in the image. If I had moved closer to the subjects, more distortion would have been obvious. At this point I checked my settings and saw I was at ISO 400 from the previous shots in the shade, so I lowered it to ISO 200 since the late afternoon light was still pretty bright. The lowest ISO possible for the given situation will typically create a higher quality image file. For all the shots I was using Aperture Priority mode. I almost always use Av mode unless i am dealing with motion or blur that needs to be controlled (then I use Tv mode), or am using the flash in a controlled situation (and then I often use Manual, M mode). The aperture was set at f/5.0 to give me a relatively shallow depth of field, but enough so that the kids and the wall behind them were all in focus, but anything inside the doorway and window would be a bit blurry and thus less distracting. Unlike most of my images, the aperture setting wasn’t critical here, as the depth of the entire image is mostly all within a couple feet, from the kids’ toes to the wall behind them. So f/4.0 or f/8 would have given me virtually the same image. At ISO 200, the shutter speed was at 1/80 or 1/100, which was fast enough for handholding. A little faster would have been better to ensure there was no blurring if a child moved their head or hands during a shot, so leaving the camera set on ISO 400 would not have been a mistake.

As you can see in the first several photos, many of the kids were aware of me taking their photo, and were posing, goofing, or self conscious. I continued to take a few shots and waited for them to begin to ignore me. I liked the composition, and the window and the doorway to anchor the sides of the frame, so I continued to take the same shot, attempting to get the best moment of poses and facial expressions. I attempted to keep the image straight, aided by the lines visible in the viewfinder of the 7D. For all of the shots, I manually selected an auto-focus point, using a point below the central focus point which would line up on or near the face of one of the central kids. This would take advantage of the nice contrast between the dark hair and the lighter face to ensure proper auto-focus. By selecting an AF point exactly where I wanted to focus, I didn’t have to worry about focusing or have to re-frame each subsequent shot. The exposure metering was set on evaluative. The bright yellow wall could have easily messed with the metering, and I’m sure another camera like my 50D would have miscalculated the exposure based on the wall, but the 7D performed nicely on this mode. I checked my histogram a couple times to make sure I wasn’t blowing out any highlights and thus needing to use exposure compensation to adjust for that.

Douglas J. Klostermann Photography
The Final Image: Canon 7D, 16-35mm f.2.8L II at 35mm, ISO 200, f/5, 1/100s

I took a series of 19 images of this same scene, over 1 minute and 12 seconds. As you can see, it didn’t take long for the kids to begin to ignore my presence. My chosen shot was from the middle of this series, IMG_3068. It stood out among all the others in the poses, positions, groupings, and facial expressions of all the kids. Throughout the time of the series, a head appeared in the window, and people moved around inside the doorway. Luckily with my chosen shot, the head was in the window, as I like this subtle, almost hidden detail. I liked the bit of green from the plant on the left, but my chosen shot unfortunately doesn’t show much of it.

The Post-Process: To create the final image, I adjusted the color and contrast in Adobe Camera RAW (ACR). I had shot the image in RAW for maximum quality and processing latitude. Due to the available light of the scene and the proper exposure, it required little processing. I set the Temperature at 4600 and the Tint to 8. I adjusted Recovery to 5 to bring back some of the detail of the yellow wall which was very slightly blown out, Fill to 15 to lighten up the children’s clothes, Brightness stayed at the standard 50, I set Contrast to 20 with plans to increase it a bit more in Photoshop. Clarity 20, Vibrance 15, and Saturation 0. I like a bit of color saturation, vibrance, and contrast in my images, but I prefer not to overprocess or to make the adjustments obvious. While the yellow of these images is definitely vibrant, especially compared to the dull, neutral RAW images, it is a realistic representation of the actual color. Typically I straighten and maybe crop a bit in ACR, but miraculously this shot was very level, and also left no room for cropping. In Photoshop I used Curves to adjust the contrast somewhere between the Linear and Medium presets, and used Unsharpen Mask to sharpen. I don’t know what my exact settings were, but I had to use aggressive sharpening because the Canon 7D I used had a severe front-focusing problem. The settings were probably Amount: 175 or 200, Radius: 1.8, and Threshold: 4.

The Lesson: We should always learn from our photos, so that next time we are in a similar situation, we can create an even better image. Some improvements I could have made to this image include possibly crouching or sitting even lower to be more on level with the kids faces (although this would have caused keystoning of the vertical lines), eliminating the doorway at right by either re-framing or moving slightly to the left (which would cut out a child or two on the right) or moving to my right and shooting back towards them at a slight angle, but this would have affected the straight-on view which I feel is important to this composition. I would not have minded a little more of the green plant on the left in the frame. The image demonstrates the importance of keeping the camera level and the sensor parallel to the subject to avoid unwanted distortion. The best way to keep the horizontal and verticals straight while taking the photo is to make sure the camera is not tilted up or down and that the sensor is parallel to the wall. This involves moving yourself and the camera up or down to get the framing you desire. Also, in post-processing, I could have used the lens correction menus in ACR or Photoshop to perfectly straighten all the verticals and horizontals. Finally, although the color looks good, now I would have paid more attention to adjusting the Temperture and Tint, or adjusting the white balance using Curves in Photoshop because I have experimented and learned a bit more about these settings since then. Also, now that I see IMG_3074 again, (the last one in the strip above) I like it a lot, and should probably process that one and add it to my collection of final images.

So hopefully you can see from this explanation and from my previous post that photographs don’t necessarily just happen. They are created through a combination of thought processes, a series of decisions, and the application of camera settings based on these decisions and on the situation at hand.

See the Related Posts section just below for links to parts 2 and 3 in this series.

And learn more about how to take control of your camera and the images you create with my Full Stop e-book camera and photography guides.

Full Stop photography e book camera user guide Nikon Canon dSLR

Becoming a Humanitarian Photograper – After the Self-Assignment

I wrote a popular previous post about How to Start Out as a Humanitarian Photographer. It discusses one of the important initial steps of this endeavor: the Self-Assignment. The self-assignment – a volunteer trip to work with and photograph an NGO or non-profit – should help you determine if humanitarian or travel photography is something you really wish to pursue. And if so, it helps you to gain experience working in the field, collaborating with NGOs, and preparing for future assignments. Once you’ve completed and returned from that trip, there is much more to be done!

8421

Editing: Your first task is to select the best images out of the hundreds or thousands of digital images you took, and then to edit and optimize those images. If you are not already adept at working with Photoshop and/ or Lightroom you need to learn the programs and begin to gain proficiency. There are numerous books for this, so try to find the ones that work best with your learning style. Some of the ones I’ve found most helpful are the books by Scott Kelby and by Chris Orwig:

The Adobe Photoshop CS5 Book for Digital Photographers by Scott Kelby

The Adobe Photoshop Lightroom 3 Book for Digital Photographers by Scott Kelby

Adobe Photoshop CS4 How-Tos: 100 Essential Techniques by Chris Orwig

Adobe Photoshop Lightroom 2 How-Tos: 100 Essential Techniques by Chris Orwig

These and other helpful photography related books can be found in my post on Essential Digital Photography Books. Don’t worry about learning every feature of the programs but concentrate on the basic color, contrast, and sharpening features, as well as layers and adjustment layers. As you gain proficiency, move into masking, retouching, advanced sharpening and black and white conversions. Develop good editing, metadata, storage, and workflow habits from the start because it becomes hard to undo bad habits later on. Begin to learn how to use actions and batch processing to more quickly process numerous images.

Contests: When you’ve finished selecting and editing your best images, begin to enter them in contests. The reason for entering contests is not to gain sudden fame, riches, and an instant professional career. Few, if any contest will lead to this, no matter what they promise. Instead, the purpose of contests is to start to develop credentials. Being selected as a finalist or winner of a photo contest will enable you to add that accomplishment to your CV, and winning will allow you to add that coveted phrase in front of your name: “Award winning photographer.” Many contests lure you with the promise of exposure to those in the photo industry or the greater public, but in reality there is very little chance that this will lead anywhere, even if you win. Photographers who are regularly published in magazines and whose name is often in front of industry insiders still struggle to obtain their next gig, so don’t expect your single photo to bring you much. Also, participating in contests will help you to see what others think of your photos. Of course you think they are great, and your friends and family rave over them, but what about others out there? It also helps to see your photos side by side with countless others to see if your images truly stand out among the masses. However, it comes back to you to be the best judge of this. The images that are chosen will often confuse and annoy you and the other entrants, and it is often difficult to understand why the judges chose particular images. It helps somewhat to look at the winners of the previous years to see what types of images catch the judges’ eyes, but it is impossible to second-guess what they are looking for year to year. Stick to entering the images you like best, but detach yourself emotionally from your photos’ subjects and the experience of taking them, and view them as an impartial observer. If contests ask for captions, descriptions or short essays to go with the photos, take time to carefully write them. Look into guidelines and recommendations for writing newspaper captions, and please, avoid saying amateurish phrases like, “I took this photo while standing…”

8387

There are a few contests (and grants) that cater to humanitarian photography, such as those run by Photoshare, Focus for Humanity, and PhotoPhilanthropy. There are countless other photography contests so search on the Internet to find some current ones. Many of your photos will likely fit well in travel photography contests or the travel category of a contest. Also be sure to look at other categories that might apply such as people or portraits. It is best to stick to the well know, reputable contests, like those run by National Geographic, Smithsonian magazine, airline magazines, travel magazines like Conde Nast Traveler, travel guidebooks like Rough Guides and Viva Travel Guides, travel websites like Peterman’s Eye, contest sites like Travel Photographer of the Year, and newspapers. Be wary of contests that charge entry fees. You can quickly spend a lot of money entering multiple photos to multiple contests in the hope of gaining notoriety. But remember that the likelihood of you winning the grand prize is small, no matter how amazing your images are, and even if you did win, it will not lead to sudden fame and an instant professional career. While some of the contests you have to pay for are well respected and legitimate, such at the International Photography Awards, and it may be worth it to enter a couple, keep in mind that the most you can expect is to be able to use this credential in your bio and descriptions. Also note that some of the prestigious contests with entry fees attract professional and commercial photographers or very highly talented amateurs, and the quality of the entries exceptional. Determine if it is worth your time and money to enter, or better to wait a few years until your skills and images improve. But also remember that, despite thousands of entrants, it is possible to win photo contests. I’ve been recognized in several contests, have won a dSLR, and had my photo selected for a travel guidebook cover.

Be sure to carefully read the fine print of a contest’s rules and guidelines, especially to determine if you are signing away the rights to your photos. Contests are often tools for a company to gather a large pool of free photos to use in their books or website, and you may be surrendering lifetime, or even exclusive rights to them just by entering. You never want to surrender your copyright or give them exclusive rights and just give away your photos for free for them to use however they wish. Recent examples of this which greatly upset many photographers including well respected professionals were a National Trust contest in the UK and a Frommer’s cover contest. If you are still determined to enter and feel that the potential benefit outweighs the cost, consider entering a photo that is similar to your best photo, but not the exact same one that you may wish to use, exhibit, and sell later.

Grants and Fellowships: In addition to contests, you should also consider applying for grants and fellowships. There are very few of these, but if you were to win, they would allow you to travel and pursue an in-depth project. I’m sure you’ve begun to think about personal projects and places you would like to travel to and photograph, so turn your idea into a compelling story. Most grant and fellowship applications require both a sample photo essay or story and an essay or proposal. Hopefully on your self-assignment you documented your project in a manner that tells a story of a place, organization, or person. If not, careful editing and captions might create a good photo essay. Some grants or fellowships require a project already in process, so keep this in mind as your travel and work. Writing the proposal is very time consuming and takes a lot of careful thought, so start working on yours well in advance of the deadline, and follow their requirements precisely.

Many of the contests, grants, and fellowships occur annually, so be sure to add them to your calendar, giving yourself a few weeks to prepare for each of them. Some online sites which list many of them are:

http://www.lightstalkers.org/
http://photographygrants.blogspot.com/
http://photojournalismlinks.com/awardsgrantsandcompetitions/

8378

Website: This is pretty self-explanatory – build a website to share your work with others. There are countless sites which are designed to host photo portfolio websites, such a PhotoShelter and Fluid Galleries, or templates you can incorporate into your own website. Try to strike the best balance you can between do-it-yourself, cost, functionality, and professionalism. Domains and hosting are very cheap through places like GoDaddy, but portfolio templates and hosting can start to add up to hundreds of dollars a year. Try to keep the costs to a minimum until you start making money from your photography. Just make sure your site looks clean and professional, functions quickly and intuitively, and that your images are large and easy to navigate. Here is a list that can get you started.

Exhibitions: Print and frame your photographs and exhibit them so that you can share them with a wider audience. Look for unique opportunities of places and events that might be eager to incorporate your photos, such as travel agency offices, local festivals, performances, and movie screenings that relate to the culture or country where your images are from, local stores, and restaurants (although I am wary of this last one as I would prefer to sell my images to them and am afraid of damages to the prints from exposure to constant cooking air).

Read: Continue to read and learn about the humanitarian issues and the countries that most interest you. A good place to start is any of the books listed in the Humanitarian Books section of the Amazon.com site I put together. Get them from your library, or purchase them through that site and help support my work! This post also has information about books, and this post talks about other resources for learning about humanitarian issues.

The next step in the process is to learn the business aspects of becoming a professional photographer. I’ll save that lesson for another time!

For related posts, be sure to check out the other entries in the Humanitarian Photography category.

Interview at 10Q – Interviews with Humanitarian Photographers

I’d like to welcome the new readers that are finding me after reading my interview with Heber Vega in the “10Q – Interviews with Humanitarian Photographers” section of his blog.  Please have a look around, including the posts in my Humanitarian Photography category.  Some of them I referred to in the interview, including my post on self-assignments entitled “How to Start Out as a Humanitarian Photographer.”  Other posts include information on photo equipment for working in the field, lenses for travel and humanitarian work, ethics and images, and humanitarian related books.  My most popular post seems to be a comparison of the various current Canon dSLRs, but of course, we’re not all caught up with gear, right?!

Mission Accomplished

Two years ago, in 2008, I ventured to the annual rebuilding of the last remaining traditional Inca rope bridge, the Keshwa Chaca, which spans the Apurimac River near Huinchiri, Peru.  My mission was to photograph the locals as they spun q’olla grass into rope, constructed the bridge, and celebrated the completion with a festival of traditional dance and music.

Previous posts describe my journey to the bridge site and show some of my photos from the weekend.  Many of my photos are also posted on my website in the Inca Bridge gallery as well as in the dance gallery.  One of my very favorite photos of the weekend was of this bridge-builder:

Keshwa Chaca bridgebuilder
Keshwa Chaca 2008 – Huinchiri, Peru

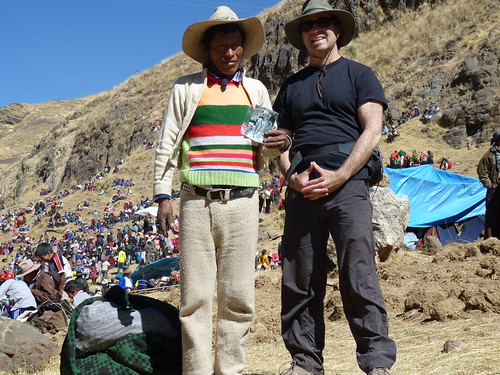
As I was taking images of the bridge construction, this man quietly asked me to take his photo.   A crowd of fellow bridge-builders quickly gathered to see it, and when I realized I had taken it in the black and white setting, I asked to do another in color.  But it was too late.  “Oh, es blanco y negro,” I said disappointedly, “¿un otra en color?”  I asked.  “¡Un otra desnudo!” an onlooker called out – “Another one in the nude!”  The men erupted in laughter, the moment was gone, and I wasn’t able to take another.  Luckily this one came out well, and ever since then it has been my goal to get a copy of the photograph to this man.  Many people in developing countries have few, if any, photos of themselves or their family.  I was sure he and his family would appreciate such a nice photo of this man standing modestly but proudly in front of the bridge he is helping to construct.

This year at bridge building time my friend Mitch Teplitsky (director of the documentary film Soy Andina) was visiting Cusco.  He got in touch with me to find out more about the event and how to get there.  When I learned he and his wife Doris had decided to go the following day, I begged him to find a way to print the photo and deliver it to the man.  “It shouldn’t be hard,” I said, “just find a photo place on Avenida el Sol to print it out, and when you get there, just ask around, they will know him!”  At least I hoped it would all be that easy.  I’m not sure how they did it, but Mitch and Doris managed to print the photo, find their way to Huinchiri, and locate the man!

Bridge-builder and Mitch 2010
Keshwa Chaca 2010 – Bridge-builder and Mitch Teplitsky, photo by Doris Loayza

Books for Humanitarians (and Humanitarian Photographers)

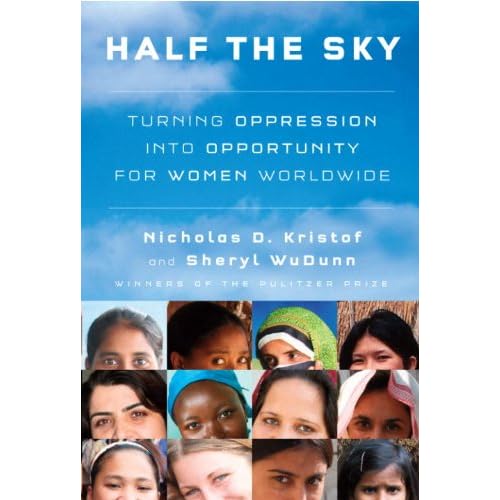
I’ve been intending to write a post about Nicholas Kristof’s wonderful book Half the Sky: Turning Oppression into Opportunity for Women Worldwide, and how it should be required reading for humanitarian photographers. I haven’t gotten around to that yet…but I have set up an Amazon collection of required reading for humanitarians – please take a look at the Humanitarian Books section of the store I’ve set up with Amazon.com for quick and easy links to these books.  (Purchasing from Amazon.com through that site helps to support my work!)

Half the Sky cover

No Woman, No Cry Movie

One woman, somewhere in the world, dies each minute from complications of pregnancy or childbirth. Half a million women a year. Learning that fact compelled Christy Turlington to do something about it, and one of the things she has done is to make a documentary about the issue, “No Woman, No Cry.”

I was fortunate to see this movie at a specially added showing at the Tribeca Film Festival last month, where both Turlington herself as well as the producer Dallas Brennan Rexer were on hand for a Q+A afterward.
everymothercounts_wallpaper1_1024x768
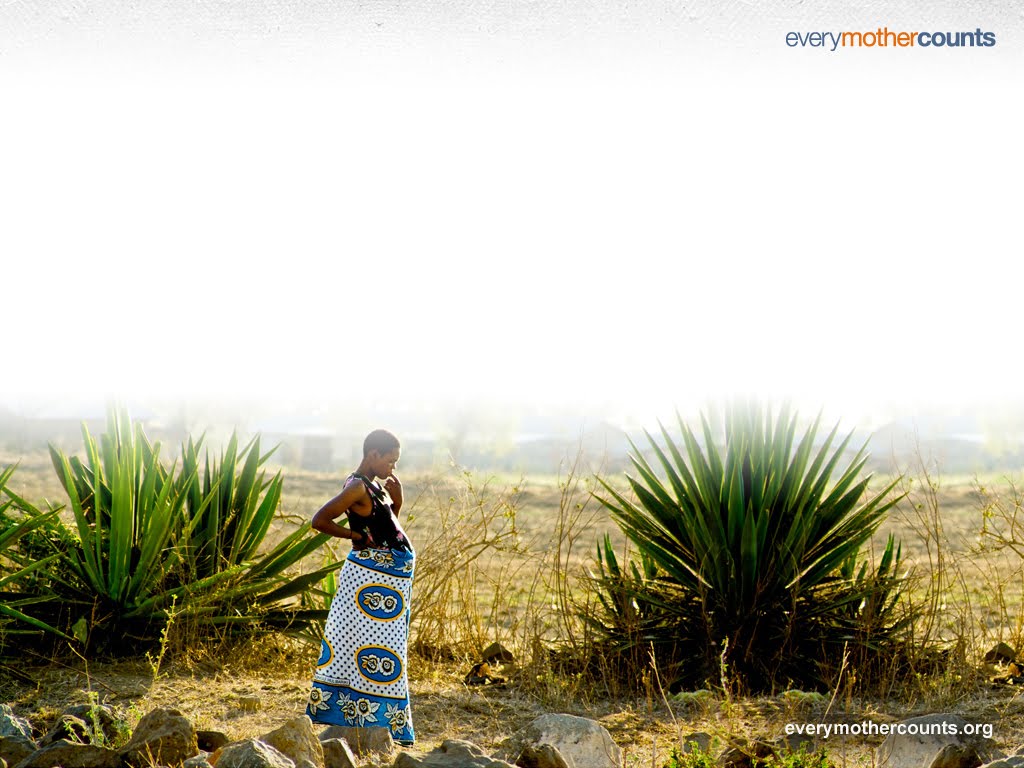
photo courtesy of “No Woman, No Cry” / everymothercounts.org

“No Woman, No Cry” is a film about issues surrounding maternal health and the numerous difficulties women face, not only in developing countries, but in the US as well.  Turlington follows the stories of three women, in Tanzania, Bangladesh, and Guatemala, as they confront the obstacles that put women’s lives in danger leading up to and during childbirth.  Some of the greatest obstacles, we discover, aren’t merely the lack of good medical care and facilities, or economic barriers to proper care, but are also cultural, societal, and religious pressures, influences, and beliefs about pregnancy, childbirth, and family planning.  On top of this, to prevent the viewers from thinking these are distant problems only faced by women in developing countries, the film addresses a variety of related issues in the US, both among the poor and marginalized as well as the middle class.

Turlington began to learn about these issues after complications when she gave birth to one of her children.  While the care she needed was easily accessible, she soon began to learn the staggering statistics of maternal death and disabilities that are mostly preventable, yet around the globe still claim one woman’s life every minute.  While you may be thinking Turlington is another celebrity joining her name to a cause, giving lip service to an issue that interests her, the fact is she is deeply and passionately involved with this issue.  Her interest first led her to become actively involved with CARE, and subsequently inspired her to pursue a masters degree in public health at Columbia University.  And in the process of making the film, she interviewed, worked with, and consulted dozens of experts and organizations in the field of global health and maternal health.  She is taking on this cause whole-heartedly, and I am certain she will continue to do tremendous things to both bring attention to maternal mortality and to help dramatically reduce it.

Visit the film’s website to learn more and to find out where you might be able to see the movie.

[youtube=http://www.youtube.com/watch?v=8F6hngJFGOk]

And finally, here is a powerful photo/ video essay about maternal mortality in India, by Susan Meiselas:

https://www.youtube.com/watch?v=U1bBYfC8Mf4

Best Canon Lenses or Which Lens Should I Buy Next

When I began my work in travel, culture, and humanitarian photography I spent a great deal of time scouring websites, reading forums, checking reviews, making lists, and agonizing before I finally settled on which lenses were best for my needs and my work. So hopefully all my effort can help you save some time and assist you in your research in selecting which lenses are best for you. In addition to travel, humanitarian, and photojournalism work, much of this advice will apply to general photography as well. After you’ve learned all about lenses here, you can have a look at this other post to see what other camera gear and accessories you might want.
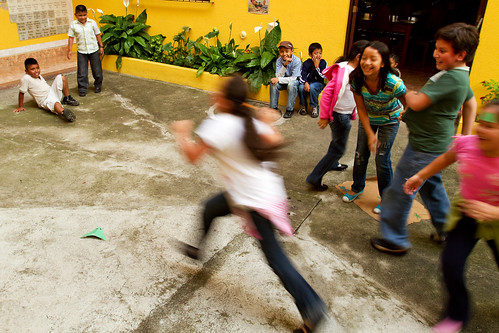

Open Windows, San Miguel Duenas, Guatemala

The easy answer to the question of which lens is best for travel photography, right up front, is: an all purpose zoom that goes all the way from wide to telephoto, like an 18-200mm, or a standard zoom like a 24-105mm. See the Standard Zoom section and the One Lens For Travel sections of this post for more information about these. The more difficult answer to that question is addressed in detail by this post. The most difficult answer to this question is: it depends. It depends on you. It depends on your level, interests, and goals as a photographer. It depends on what you most enjoy taking photos of and what type of images you aim to capture. Hopefully this post will help you figure that out, and I’ll address this most complicated answer more at the end of the post.

The primary sources for me in determining which lenses to choose were looking at the websites and blogs of other photographers who do similar work, since they often list and discuss the equipment they use. The initial and most helpful source for me was Karl Grobl, since his work as a humanitarian photojournalist is closest to what I do and what I aspire to do. But some of the other ones I can recall looking at include David duChemin – (who is a travel, art, and humanitarian photographer – he seems to have moved or deleted his “Gear” page), plus Nevada Wier and Bob Krist – both dedicated travel and cultural photographers. Oh, and the books and advice of the ever-enthusiastic Rick Sammon helped out along the way. I then applied what I learned from them to my specific photographic interests, preferences, and tendencies (which can be summed up with the fact that I typically like to zoom in close). In other words, if one of them favors a 50mm prime lens but you know you prefer the versatility of zooms, then adapt what they say to your needs.

For me and many others the ideal combination is a wide angle zoom, a standard (or middle range) zoom, and a telephoto zoom. (If you are interested in just one lens for travel, have a look at the Standard Zoom section, and then also jump down to the bottom of this article for the One Lens for Travel section.) I’m going to stick to the professional level lenses and compare the Canon L lenses first, and discuss other Canon lenses in the One Lens for Travel section below. I’ll try to keep it short and simple, and let you conduct further research on the countless sites dedicated to equipment and reviews.

Click on each lens below to link to its page on Amazon.com. If you plan to purchase any of this equipment from Amazon (or other equipment, accessories, or anything else), I encourage you go to Amazon.com by clicking on the links found throughout this post, and then Amazon will give me a little something for the referral, which will help support my blog. Thanks!

If you wish to first try out a lens before buying it, click on this link to go to BorrowedLenses.com, where you can get great prices on short-term rentals of any lens as well as the latest Canon and Nikon dSLR bodies (as well as video, audio, and lighting equipment).

If you are in the UK or wish to purchase from B&H, Adorama, or direct from Canon see the information at the end of this post for those links. The lenses I chose, which work best for my needs, are indicated by (Y). I apologize to the Nikonistas out there, since all of these lenses are the Canon variety. However, Nikon typically has an equivalent lens for each of these. Just search for the same focal length and have a look at the aperture and price to determine the comparable Nikon (Nikkor) lens. For example here are some equivalents:
Canon 16-35 f/2.8L to Nikkor 14-24mm f/2.8
Canon 24-70 f/2.8L to Nikkor 24-70 f/2.8
Canon 70-200 f/2.8L IS to Nikkor 70-200 f/2.8 VR

Check out this post to better Understand Canon Lens Notations – the significance of all the various numbers and letters in a lens name.

Wide Angle Zoom
As humanitarian photojournalist Karl Grobl says, this is the “bread and butter lens” of the photojournalist. This is used for up-close-and-personal shots, for environmental portraits or photos, and for “story-telling” images which include multiple subjects or a larger context.


Open Windows, San Miguel Duenas, Guatemala

EF 16-35mm f/2.8L II USM (Y)
pros: slightly wider on the wide end which is good for cropped sensors (7D, 60D, Rebels), larger maximum aperture (“faster”) for use in low light situations or for more dramatic depth of field
cons: high price, heavier in weight
notes: get the slim UV filter to avoid vignetting, especially if using a full frame camera like the 5D
filter: 82mm slim filter fits this lens.
notes: The above two images of this post were with this lens. This is the wide angle zoom I chose because I wanted the “faster” f/2.8 aperture to be able to use it effectively in low light situations.

EF 17-40mm f/4L USM
pros: more zoom on the far end, lighter in weight, much lower price
cons: f/4 maximum aperture not as “fast” and slightly less dramatic for shallow depth of field, not quite as wide on the wide end
filter: 77mm slim filter fits this lens.

Standard Zoom
This is a great “walk-around” all purpose lens, especially for travel or everyday photography. If you want to head out on the streets with just one lens, this is the one to take which will serve you well in most situations you encounter.


Panajachel, Guatemala

EF 24-70 f/2.8L USM (Y)
pros: larger maximum aperture (“faster”) for use in low light situations and more dramatic depth of field
cons: heavier in weight, higher price, less zoom range, no image stabilization
filter: 77mm multi-coated filter or 77mm coated filter fits this lens.
notes: a great all-purpose walk-around lens, though relatively big and heavy. I discuss using this lens, with several photo examples, in this post here.

There is a new EF 24-70 f/2.8L II USM lens plus the new EF 24-70 f/4L IS USM lens, both with the same focal length as above.  The first one just listed is an improved, lighter version of the 24-70 f/2.8L, and the second one listed adds Image Stabilization but has an f/4 maximum aperture rather than the f/2.8 maximum aperture of the other 24-70mm lenses. Adding these two new lenses into the mix makes this an even more challenging decision in the Standard Zoom category!

EF 24-105 f/4L IS USM
pros: lighter in weight, image stabilization which will help you gain 2 or 3 stops in speed vs. hand-held non IS (*see below), more zoom range, lower price
cons: f/4 maximum aperture not as “fast” and slightly less dramatic for shallow depth of field
filter: 77mm multi-coated filter or 77mm coated filter fits this lens.

* this means for example, if the proper exposure of a scene is 1/60 at f/5.6, and you want to hold on to that f/5.6 aperture for compositional reasons and not have to sacrifice your chosen depth of field for a faster shutter speed, you could capture it without blur, whereas without the image stabilization (IS) the hand held image may have been blurry.

Telephoto Zoom
This is a great lens for portraits, close ups, details, ability to zoom in and capture something far away, sports and action shots, and ability to create dramatic depth of field or blurry backgrounds. There are four versions of the Canon 70-200mm lens – either f/2.8 or f/4, each with or without image stabilization (IS). Oh wait, there are now five versions, with the recent Mark II version of the f/2.8 IS. I think with a lens this long and heavy, you need image stabilization if you are going to be hand holding it, so I will ignore the non-IS versions.


Solola Market, Guatemala

EF 70-200, f/2.8L IS USM
pros: larger maximum aperture (“faster”) for use in low light situations and more dramatic depth of field. The Mark II version of this has a closer minimum focus distance and improved optics
cons: very heavy, very large, higher price, especially the new Mark II version
filter: 77mm multi-coated filter or 77mm coated filter fits this lens.

EF 70-200, f/4L IS USM (Y)
pros: lighter weight, smaller, lower price
cons: f/4 maximum aperture not as “fast” and less dramatic for shallow depth of field
filter: 67mm multi-coated filter or 67mm coated filter fits this lens.
notes: This is the telephoto zoom I chose. I sacrificed the one-stop of aperture for the much more manageable size and weight of the f/4. And since I primarily use it outdoors, and because it has image stabilization, the f/4 aperture only really affects the extent of background blurring. There are several example photos of this lens in action in this post here and also more nice example photos in this post here.

I haven’t used each of these lenses in the field, though I have briefly tested most of them, so my decisions and my pros and cons are sometimes based on my research and from what I’ve learned from others who use them. Consider them starting points for issues you want to consider in your selections. And while there are endless discussions and comparisons regarding image quality, sharpness, sweet spots, etc. for each pair above, I will stay out of that discussion and tell you there are highly regarded professionals who use each of these, that any Canon L series lens is professional quality, that price and/ or largest maximum aperture will often indicate the one that is generally considered “better,” and that you will never regret your choice based on these concerns. Note that many L-series lenses are sealed against and dust, water and weather. Sometimes a front filter is required to complete the weather sealing, such as with the wide angle lenses. I suggest always using a clear, protective UV filter with any lens, preferably a high quality, multi-coated B+W brand filter. If you don’t want to spend that much, at least get a high quality single-coated B+W filter rather than a cheaper Tiffen filter.

When making your choices, I highly recommend going to a store with your camera and actively testing and comparing each pair. The difference in size and weight, and even feel of the lens in your hands, is often dramatic and may help you make your decision. If you are still undecided, rent one for the weekend and work with it. And don’t think that you have to immediately get three lenses in order to do your work. Karl Grobl uses just two of them in his work, and that hasn’t limited him in either humanitarian or travel work. Consider your primary needs, and buy one or two based on that, and combine them with less expensive non-L lenses for now.

If your budget or needs don’t call for L-series lenses, see the One Lens for Travel section below, or look for the closest equivalents of the above lenses in other Canon or Sigma or Tamron, etc. lenses (or in the Nikon lenses if you are over in that camp).

Prime Lenses
Many photographers rave about prime lenses (lenses of a single focal length, that don’t zoom) for many reasons, including image quality, the purity and simplicity of working with them, and their large maximum apertures (as wide as f/1.2) for very dramatic compositions through use of shallow depth of field. The focal lengths I see used most often are (these are obviously Canon examples):

Canon 35mm f/2
Canon 50mm f/1.8 II (high image quality for about $100!)
Canon 50mm f/1.4 (Y) (a little more costly, but higher quality 50mm)
Canon 85mm f/1.8

Take into consideration if you have a full frame or a cropped sensor, since with a cropped sensor 7D , 60D, or 550D the field of view of the 50mm lens will be closer to an 80mm lens on a full frame 5D camera (or a 35mm film camera), so the field of view of a 35mm will be closer to a 50mm on a full frame or 35mm film camera.


San Miguel Dueñas, Guatemala

One Lens for Travel
I know a lot of people are interested in finding just one lens that is good for travel photography. As I mentioned above the best option is typically the standard, mid-range zoom. Look above for info on the Canon L-series lenses. My choice would be the EF 24-105 f/4L IS USM. For something less expensive Canon offers a couple other great options. For each of these lenses, I would highly recommend getting the optional lens hood (the hood comes with L-series lenses). It helps shade the lens to prevent unwanted lens flare (although lens flare can sometimes be used for a great effect when desired), helps protect the lens from bumps and drops, and makes you look cooler and more professional! And of course always get a good quality, coated B+W brand UV filter for protection – or at least a cheaper Tiffen filter. However, there is a significant difference in the clarity and lack of reflectiveness of a coated B+W filter vs. a standard Tiffen filter, which you can see if you look through them side by side, so those who are concerned about image quality should go with a coated, or better yet multi-coated B+W filter (designated MRC). Also, note that non-L-series lenses are not nearly as well sealed against dust, water and weather as most all of the L-series lenses are.

EF-S 18-135mm f/3.5-5.6 IS
pros: less expensive, lighter weight, image stabilization
cons: less zoom range on the telephoto end than the 18-200mm, not a constant minimum aperture like the L-series lenses (the f/3.5-5.6 means your largest aperture at the 18mm wide end will be f/3.5, while the largest aperture at the 135mm telephoto end will be a less dramatic f/5.6), not higher quality USM focusing motor, EF-S means this lens can only be used on cameras with the APS-C sensor, or non-full-frame sensors, so it can be used on all Digital Rebels, 20D-50D, and 7D, but cannot be used on a Canon 5D. However, that means it is optimized for those cameras, especially for the wide end.
Lens hood EW-73B fits this lens, and a 67mm coated filter or 67mm filter.
This is currently one option for the kit lens for the Canon EOS 60D, and is a good choice if you are debating between the kit lens or not.

EF-S 18-200mm f/3.5-5.6 IS
pros: more zoom range on the telephoto end, image stabilization, better image quality than the 18-135mm lens.
cons: more expensive, heavier weight, not a constant minimum aperture like the L-series lenses (see above lens), not higher quality USM focusing motor, EF-S for APS-C sensor cameras only (see above lens).
Lens hood EW-78D fits this lens and a 72mm coated filter or 72mm filter.
This is currently another option for the kit lens for the Canon EOS 60D, and is an excellent choice if you are debating between the kit lens or not.

EF 28-135mm f/3.5-5.6 IS USM
This is an older lens that seems to have been replaced for the most part by the two lenses above.
pros: less expensive, image stabilization, USM means a faster, quieter auto-focusing motor and full time manual focus (which means you can override the auto-focus by turning the focus ring without having to switch the lens to MF manual focus), EF so can be used with both APS-C and full frame cameras too if you have or wish to upgrade to a 5D.
cons: not a constant minimum aperture like the L-series lenses (see above), less range on both the wide and telephoto ends.
Lens hood EW-78BII fits this lens and a 72mm coated filter or 72mm filter.

It Depends
The actual answer to the question of which lens is best for travel photography is: it depends. As I said above, it depends on you – on your level, interests, and goals as a photographer. It depends on what you most enjoy taking photos of and what type of images you aim to capture. If you are a photography novice, or just want to be able to capture all or most situations, the all purpose zoom or standard zoom might serve you best. But if you wish to capture more of a certain type of photo that you like, photos that match your specific visual ideas and preferences, you need to reconsider. Do you like sweeping vistas and all encompassing environmental portraits? Do you typically want to capture the entire scene in your shots? Then perhaps a wide angle zoom will work better for you than a standard zoom. Certainly, you will be limited and not able to frame certain shots the way you might want, but you will capture more of the types of images you like, and might simply have to move in closer than usual to get some the other images. Do you like extreme close-ups of people’s faces with dramatically blurry backgrounds, architectural details on buildings, the look of compressed perspective? Then a telephoto zoom rather than a standard zoom will help you capture more of those images you like. Sure, you will not be able to get the wide angle view of spaces, but you might succeed in capturing many more of the dramatic photos you like. Or perhaps you best work like a classic photojournalist and want to capture scenes and portraits more closely to how you see them. Then a single prime lens like a 50mm or 85mm might be the one lens that is perfect for you.

The Best Lens for the Canon 60D
A lot of people ask, “Which is the best lens for the Canon 60D, (or the 7D, or the 550D/T2i or the 5D)?” There isn’t a specific lens that is best for a specific camera. I hope you’ve already learned that from reading this post! A lens will perform exactly the same on each of those cameras or any other camera with an APS-C size sensor. The effective focal lengths will be different with a full frame sensor dSLR, such as the Canon 5D, but they will still be wide angle zooms, medium zooms, etc. The best lens for your camera is the one that is best for you, your work, and the types of photos you take. That being said, the kit lens that Canon has paired up with the 60D, the EF-S 18-200mm f/3.5-5.6 IS is an excellent choice for an all-purpose everyday and travel lens. See the EOS 60D with the kit lens on Amazon here.

For related posts, check out other entries in the Lenses Category, the Humanitarian Photography category, and my posts about Fixed vs. Variable Aperture Lenses and Choosing a Lens beyond the Kit Lens, as well as my discussion and recommendations for gear for travel photography.

Purchasing: As I mentioned above, if you plan to purchase any of this equipment, I encourage you to do so by clicking on the links of each of the lenses listed above, which will take you to that page on Amazon.com. Or go directly to Amazon using this link or click on the Amazon logo below. If you purchase through these links, Amazon will give me a little something for the referral, which will help support my blog. Thanks, I appreciate your support!
Amazon.com

If you are in the UK, you can click here for the UK Amazon referral link. If you are in another country, click on one of my Amazon links, scroll to the bottom of the page, and click on your country for your local Amazon.

For those interested in purchasing from B&H Photo, Adorama, or direct from Canon, please click on their logos on the Gear page. Thanks!

Renting Lenses: If you wish to first try out a lens before buying it, click on this link to go to BorrowedLenses.com, where you can get great prices on short-term rentals of any lens as well as the latest Canon and Nikon dSLR bodies (as well as video, audio, and lighting equipment).

Was this post helpful?  Please let others know about it by clicking the Facebook or Twitter sharing buttons below, linking to it from your blog or website, or mentioning it on a forum.  Thanks!
The State of Photography

Here is another one of those articles, this one in the New York Times, chronicling the decline of opportunities for professional photographers.  It is frustrating and discouraging to keep reading this news and these types of predictions.  But there are always going to be those who are determined to follow their passion and figure out how to make their way in the changing landscape.  Many people say the answer is through diversifying, working in multiple markets, developing a variety of revenue streams, and hustling non-stop.

Here is a great example of a young photographer who seems to be having success at figuring this out.

World Water Day

Yesterday was World Water Day, an annual event which calls attention to the issues surrounding, you guessed it, water!  Some of these issues include water quality, access to clean water, water shortages, and water management.  This year’s theme was “Clean Water for a Healthy World.”  As with many global struggles, it is the poor who are most affected by issues of water contamination and access to clean water.

There are several excellent displays of photos in honor of World Water Day, including The Big Picture, The Frame, and a free downloadable edition of National Geographic.  Also be sure to refer back to my post about the downloadable book Blue Planet Run, which addresses global water issues through amazing photography.


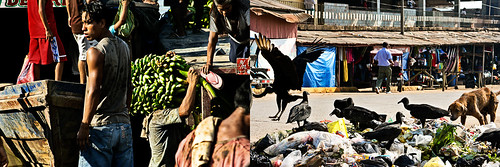
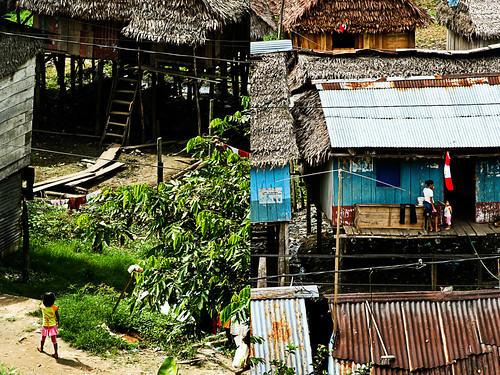
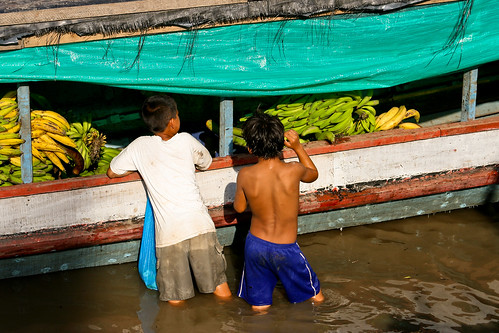
Ucayali River, an Amazon tributary, Pucallpa, Peru                               by dojoklo


Ucayali River, an Amazon tributary, Pucallpa, Peru                               by dojoklo


Ucayali River, an Amazon tributary, Pucallpa, Peru
by dojoklo

James Nachtwey’s Images of XDR-TB

In 2007, legendary war photographer James Nachtwey won the TED prize in honor of his life’s work documenting conflicts and social issues around the globe. In addition to awarding him $100,000, the prize also allowed him to make a wish that the TED fellows would assist him in fulfilling. His wish was to photograph an issue that had been under-documented and under-reported in the media: tuberculosis – a preventable, treatable, and curable disease that millions worldwide continue to suffer from. He is particularly concerned about mutations of the disease, MDR-TB (multi drug resistant) and XDR-TB (extremely drug resistant) which are considerably more difficult and more expensive to treat.

Last week I viewed the results of this project – an exhibit of his photos at 401 Projects gallery in New York City (open until March 25, 2010).  The large black and white prints tell a powerful and dramatic story, and it was incredible to see how Nachtwey uses every photographic tool at his disposal to make such compelling images.  The photos can be viewed on the XDRTB.org website, which also contains more information about the issue and the ongoing campaign against the disease.  After you look through the photos and just try to digest the story, I encourage you to go back and study why they are so powerful beyond simply the subject matter.  They are often photos of patients in bed or in treatment, but he has made them so much more.

[youtube=http://www.youtube.com/watch?v=yj8KZNI6-W8&hl=en&fs=1]

Look at how he:

-uses composition, point of view, and light and shadow to strengthen and accentuate the essential subject.

-draws your attention to the subject he wishes to focus on, yet provides layers of information in the image that encourage further viewing and closer inspection.

-makes use of the element of time and captures a very specific moment, gesture, or emotion.

-uses basic compositional techniques of balance, scale, and line to create cohesive images.

I could go on, but as you can see, this is a wonderful opportunity to study how Nachtwey is using the most basic elements of photographic composition and design – ones that we have all learned about in photography books and classes and which we all have at our disposal to make our images stronger and more successful.

On the flip side, I ran across this blog post which challenges his use of traditional photo-journalistic conventions and visual language.  It is interesting to read and consider as well as you look at the photos.

Haiti Photos of Hope

There are many grim, depressing, disturbing, and disheartening photos of the aftermath of the earthquake in Haiti, such as this series on The Big Picture.  But today I came across a series of photos that show a different side of the conditions in Haiti.  Photographer Alice Smeets had taken revealing photos of the lives of people and children in Haiti before the earthquake (see the “Documentary” section), and she recently returned to document the aftermath in this series of amazing photos.  Although it is a relatively long slideshow, I encourage you to look at the entire series.  The “life goes on” section in the middle is particularly wonderful.  From a photographic standpoint, I was often struck by her amazing use of light – using the low, warm sun of morning or late afternoon, and often shooting into the sun to accentuate it.

Smeets-Haiti
photo by Alice Smeets

Documentary photographer Robert Coles wrote “Who we are, to some variable extent, determines what we notice and…what we regard as worthy of notice, what we find significant.”  It is obvious from Smeets’ series of Haiti photos that what she regards as worthy of notice differs greatly from many of the photographers working in Haiti and/ or their photo editors at home.  She communicates a much more human and hopeful perspective of the situation.  All the photos from Haiti show a view of the reality there, but which one is more worth focusing on?

Great Photo Book

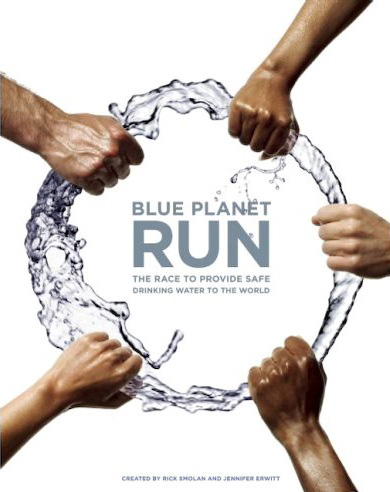
I’ve recently discovered the excellent book Blue Planet Run, which I came across after seeing photographer Rick Smolan’s TED lecture.  He’s the guy behind the “Day in the Life” series of photo books that were so ubiquitous awhile ago.  Anyway, Blue Planet Run is a book he created, full of amazing photos, statistics, and essays about the worldwide water crisis.  It was originally offered as a free e-book, and after a little hunting around, I found a pdf copy of it to download on RapidShare.  It seems to be virus free and is definitely worth having a look at, either in hard copy or e-version.

blue-planet-run-cover-page
Click cover for hard-copy version on Amazon

Working as a Humanitarian Photographer – Ethics and Images

(For related posts, check out other entries in the Humanitarian Photography category.)

The National Press Photographers Association (NPPA), “a professional society that promotes the highest standards in visual journalism,” has a code of ethics that all members are required to endorse. Whether or not you are a member, I think that they are excellent guidelines for any photographer working in the field, documenting people and humanitarian situations.


Campo Nuevo, Jalapa, Guatemala

While they appear to be common sense principles, they need to be listed and occasionally reviewed because they are sometimes challenging. For example, the first one is “Be accurate and comprehensive in the representation of subjects.” As anyone using high-speed continuous shooting mode knows, a facial expression can change in a split second, and the difference in the resulting images can be dramatic. They may tell completely different stories or give opposing impressions of the subject. There are many other examples of how composition, point of view, and time can change the perceived reality of an image. Which representation is most accurate? The photographer must act as an editor and decide based on all they know about the subject and the situation.


San Miguel Duenas, Guatemala

The third one is equaling challenging. It reads, in part, “Avoid stereotyping individuals and groups. Recognize and work to avoid presenting one’s own biases in the work.” Of course a humanitarian photographer in the field doesn’t want to turn the subject into a stereotype, but in many ways they are working against a lifetime of education and image viewing. As I discussed in my previous “Exotic vs. Real” post, those in the developed world grow up learning to see the developing world and its people as exotic and colorful, but this is often far from the reality. A photographer cannot simply decide to portray a subject without bias and preconceived ideas, but he or she must dedicate themself to learning as much as they can about the subject, their life, culture, and situation. Cultural biases are so deeply embedded one often does not even realize they are there and simply assumes all other humans think and feel the same way. For example, in a classroom when a student gives the wrong answer, a teacher often asks another student to correct them and give the right answer. In certain cultures this action is deeply offensive and insulting, and would never be done by a teacher. It is impossible to know and understand how those in another culture think – expats living a foreign country for years will verify this. But one must make the effort to learn as much as they can about the cultures they work in, and to recognize the multitude of biases they carry with them.


San Antonio Aguas Calientes, Guatemala

The third standard also says “Be complete and provide context when photographing or recording subjects.” In addition to the numerous layers of meaning and importance this has as an ethical guideline, this is also an excellent compositional guideline. Show the context of the subject and the environment around them. This is why photojournalists often work with a wide angle lens such as a 16-35mm. By doing this, the photograph gives a more complete story of the subject, and it often makes for a more interesting composition.


San Miguel Duenas, Guatemala

The fourth guideline has been a subject of discussion in the media in response to the images being shown from the earthquake in Haiti. “Treat all subjects with respect and dignity. Give special consideration to vulnerable subjects and compassion to victims of crime or tragedy. Intrude on private moments of grief only when the public has an overriding and justifiable need to see.” Images of dead and unclothed bodies have been prominently shown in newspapers and websites, and have offended some viewers. The Public Editor of the New York Times gave an excellent response and defense to this controversy in this article. One of his responses, which I have often read from other photographers and have experienced myself, is that the subjects very often want the photos to be taken and to be seen. They want their story told, and they themselves have no method or channels for effectively telling their important story.

As far as treating subjects with respect and dignity, nearly all humanitarian photographers, including myself, speak these words in some form on their website. But what do they really mean, in the field? For me it means treating the subject with respect and dignity both in the interactions with them, and in the representations of them in the images. As I’ve written about before, it starts with not entering into a situation with the camera to your face, immediately snapping shots. The photographer should first introduce themself, talk with the subject, or communicate as best a possible. They should explain what they are doing and why. And even before that, as mentioned above, it means educating oneself in advance about the people and culture. It means trying to understand the situation from the subject’s point of view, and then striving to capture that visually. There are an infinite number of visual realities that can be taken of a subject and a situation, but it means capturing and presenting the one that both tells the story and celebrates the subject.


Campo Nuevo, Jalapa, Guatemala

The final NPPA ethical guideline that I will address here is the fifth one, “While photographing subjects do not intentionally contribute to, alter, or seek to alter or influence events.” There is a difference between photojournalism for the media and humanitarian photography for a client. A humanitarian photographer may be posing a subject in order to get a portrait or to show a certain component of a project. But that does not mean the humanitarian photographer cannot follow this guideline as well. I believe that in many situations, an unaltered, uninfluenced shot will make a more natural, and thus much stronger image. In my work I have found that it is often easy to disappear into a situation, and become the fly on the wall. While subjects may initially strut and pose for the camera, or begin to act self-consciously, if you just stay in place, and let a minute or two pass, they will begin to ignore you and forget you are there taking photos.


Open Windows, San Miguel Duenas, Guatemala

I encourage you to have a look at the other guidelines I have not discussed here and think about how they apply to your work. Please leave a comment, ask a question. Let me know what has been helpful, and what you’d like to read more about.

For related posts, check out other entries in the Humanitarian Photography category.

Becoming a Humanitarian Photographer, Part II

(For related posts, check out other entries in the Humanitarian Photography category.)

In my previous post about starting out as a humanitarian photographer, I discussed how to go about creating, planning, and executing your own self-assignments, in order to gain experience in the field and begin to develop a portfolio of work. In this post I’d like to discuss some resources that can help you develop in a different way. An important part of being a humanitarian photographer is understanding what humanitarian aid organizations aim to do, the issues they address, and the people and populations they work with.

young girl, Duenas
San Miguel Duenas, Guatemala photo by dojoklo

A great place to get a broad view of the important humanitarian issues in developing countries is the TED website, which presents a ongoing series of “riveting talks by remarkable people.” Each one I’ve watched has been interesting and enlightening, and they are worth searching through to find the topics that most interest you. Here are a few of my favorites that relate to humanitarian work:

Start with Hans Rosling’s “Best Stats You’ve Ever Seen.” Through his innovative, visual, and dramatic use of statistics, he begins to tear apart myths and preconceptions about the developing world. His other lectures on poverty, AIDS, and Asia are equally as interesting and worthwhile.

Bill Gate’s lecture on “Mosquitos, Malaria, and Education” gained notoriety in the media with his tactic of releasing of mosquitoes into the audience. Through his Bill and Melinda Gates Foundation, he is focusing his money, attention, and shrewd business sense to tackling some of the largest and most important humanitarian issues of today.

Paul Collier’s lecture on the “Bottom Billion” addresses the ways we can, and must, close the gap between the rich and poor.

Wade Davis is an anthropologist and ethnobiologist who has spent his career studying indigenous cultures. I highly recommend reading his books, including Light at the Edge of the World: A Journey Through the Realm of Vanishing Cultures. In it he celebrates and speaks to the importance of the fascinatingly diverse ways cultures have chosen to exist on this planet. In addition, the book contains stunning photos Davis has taken on his adventures around the globe. Some of these thoughts and photos are part of his lecture on “Endangered Cultures.”

There are many other lectures on these types of issues, so be sure to check out the links and suggested lectures after watching the ones I’ve listed. There are other lectures that aren’t directly related to humanitarian topics which are however very interesting and may help to expand your thinking.

Malcolm Gladwell is always helpful in shifting the way one thinks about things, and his talk on “Spaghetti Sauce” is very entertaining.

Robert Sapolsky, who spends a lot of time studying primates, has interesting and surprising insights into what does, and doesn’t make humans unique.

VS Ramachandran’s talks on the brain, including “The Neurons That Shaped Civilization” are also quite fascinating.

And finally, I can’t leave you without a photography related lecture. James Nachtwey’s “Searing Photos of War” will be an eye-opening and inspiring presentation for any aspiring photojournalist.

I have to warn you, watching one lecture typically leads to another, and they are quite addictive.

For related posts, check out other entries in the Humanitarian Photography category.

Interview with a Humanitarian Photographer

Check out LensFlare35.com for a great interview and narrated slideshow with humanitarian photographer Karl Grobl.  He discusses how he started out, his experiences traveling and working in developing countries, and the stories behind some of his favorite photos.

Sorry, the webpage with the interview seems to be gone.  Here are some other interviews with Karl:

http://www.peachpit.com/podcasts/episode.aspx?e=f7840b74-d863-43ed-ac49-f4e1dc34da35

http://www.hebervega.com


Solola Market, Guatemala                      photo by dojoklo
190mm, f/4, subject distance 10m (image cropped)

For related posts, check out other entries in the Humanitarian Photography category.

The Exotic vs. The Real

(For related posts, check out other entries in the Humanitarian Photography category.)

As one grows up in the first world, they learn to see the developing world as exotic lands of vibrant color and fantastic ceremonies.  I recall that for a grade school project I made a large cut-out of the African continent, and populated it with carefully detailed stand up paper people, all dressed in their traditional local costumes, as copied from the encyclopedia.  I marveled at the variations in dress, and how each country had its own unique outfit.

This viewpoint continues on well into adulthood, encouraged by travel brochures showing smiling local people in their indigenous dress, and every traveler with a camera aims to capture those same shots on their journey (see previous post for a couple of my examples).  But after spending just a little bit of time in a developing country, one learns that these types of images are far from the “truth.”  The ones who still wear the colorful traditional outfits are almost always the poorest and most politically ignored segment of a country’s population.  Though they often smile and laugh, their lives are far from exotic and joyful.  They are often difficult, full of pain, and short.  During my recent brief trip to Guatemala, I repeatedly came face to face with these realities of life in a developing country, even more so than I ever did during my many months in Peru.  And in my photos I found I still battle with the contradictions of exotic vs. reality.


San Miguel Dueñas, Guatelmala

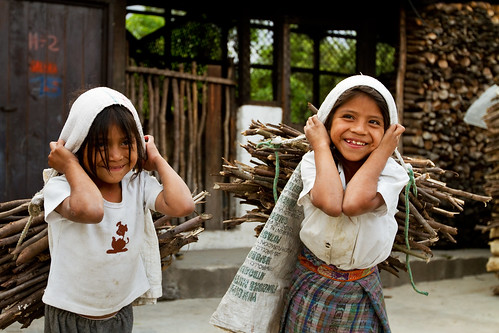
I was visiting a compound of several families’ concrete block houses surrounding a paved courtyard containing the shared sink and stoves.  These girls returned home in the late afternoon, and I immediately got caught up in taking photos of them.  Lost in my concentration, my traveling companion gently reprimanded me, “That’s enough, let them put it down.  It’s heavy.”  “Right, right, OK” I said and immediately stopped, embarrassed that I hadn’t realized this myself.  Although one cannot deny the momentary smile on these girls’ faces is genuine, the reality is that they are child laborers.  They had spent the day working in a coffee field, and then as they walked home they gathered and carried the wood, slung on their heads, as they do each day.  I imagine that the attention being paid to them by Elizabeth and I is a big part of the smile you see on their faces and in their eyes.


Concepcion (second from left), Kevin (second from right) and family – 11/16/2009

On another day we visited two boys and their families in order to interview and photograph them to write an article about them that will hopefully find them sponsors.  The two boys are about to enter high school, and each has lost one or both parents.  Without the help of a sponsor to pay for school, books, and supplies, they will have to leave school and begin working.  Elizabeth has written more about their stories here.  One of the boys, Kevin, is losing his mother Concepcion to cancer of the uterus, and his father died just a month earlier.  After interviewing Kevin, it occurred to us that his family probably doesn’t have a single photo of themselves or their mother, which would obviously be a nice memento now and after her passing.  We returned the next day to take a portrait.  They gently lifted their mother on her bed, where she has lied for endless weeks lacking the strength to get up, and supported her as I quickly took a couple shots, praying that they would be properly focused and exposed in the near complete darkness of the dusty, dirt-floored room.

Although she is dying of cancer, there is nothing she can do about it because the family lacks money for both doctors and trips to Guatemala City for the treatment.  And at this point, it would be physically impossible for her to get on and ride a chicken bus the 1 hour into town.  She does not have doctor’s visits, she does not even have appropriate medication for the pain.  She is dying a slow and very painful death.  Sadly, I later learned, many types of uterine cancer are preventable or successfully treatable if detected early with regular doctor visits.  In fact, conditions leading to cervical cancer can often have a 10 year window for detection and treatment.  But Concepcion has probably rarely seen a doctor in her life, and certainly did not have annual examinations.  We had learned the previous day that the other boy, Luis, had also lost his mother to uterine cancer and a very similar death.

Immediately after we left, the head of the NGO I was working with (who had dropped off food and supplies to deal with the bleeding) called a contact and got hold of some appropriately strong pain medication that they, like many of us often do, had left over in their medicine cabinet.  I went into Antigua and had an 8×10 print made, and found a simple but nice wood frame.  We returned to Kevin’s house, and presented it to Concepcion.  She sat up in bed and a huge smile washed across her face.  The pain medication had already begun to work wonders, and for the first time in weeks, maybe months, she was not in constant, unbearable pain.

See more related posts in the Humanitarian Photography category.