In my e-book user’s guide for digital SLRs I include a list of accessories and books, complete with links to purchase these products on Amazon or from the manufacturer. However, the links don’t always work with some e-book formats, so I am posting the list here too. Some accessories may have been updated since this list was last modified, such as the Nikon SB-5000 Speedlight replacing the SB-910, or the Canon 600 EX II-RT Speedlite replacing the 600 EX-RT, so be sure to check for the latest versions of the various accessories.
Below are some accessories that are handy for general and travel photography use with any dSLR camera, plus some of my favorite photography books, and camera-specific accessories mentioned in the texts of my Full Stop camera guides. Click on the links to go to the product or category pages on Amazon.com or the manufacturer’s website. Please note that these are my referral links, and I will receive a small referral fee if you use these links to make your purchases, which helps to support my blog and my work. Thanks!
Contents:
dSLR Photography Accessories
Digital Photography Books
Nikon D780 Accessories
Nikon Z8 / Z7 / Nikon Z6 / Nikon Z 7II / Nikon Z 6II Accessories
Nikon D850 Accessories
Nikon D500 Accessories
Nikon D750 Accessories
Nikon D810 Accessories
Nikon D7500 / D7200 / D7100 Accessories
Nikon D7000 Accessories
Nikon D5600 / D5500 / D5300 / D5200 / D5100 Accessories
Nikon D610 / D600 Accessories
Nikon Df Accessories
Nikon D3300 Accessories
Canon EOS R, EOS R7, EOS R6II,EOS R8 Accessories
Canon 5D Mark IV Accessories and 5DS / 5DS R Accessories
Canon 7D Mark II Accessories
Canon 80D / 77D / 70D Accessories
Canon 7D Accessories
Canon 60D Accessories
Canon T5i, T4i, T3i and T2i (EOS 700D, 650D, 600D and 550D) Accessories
Canon 5D Mark III Accessories
Canon 6D Accessories
dSLR Photography Accessories
UV Filters – Clear, protective filters for the lenses. You should have these on at all times to protect your lenses. Get high quality coated ones, such as B+W, especially for higher quality lenses. Consider the MRC multi-coated versions for highest quality lenses. While some argue that any filter may degrade image quality, a high-quality filter will show little effect, and most know that it is cheaper to replace a $100 filter than to repair a $1500 lens. Use the slim filters for wide angle lenses to avoid vignetting.
Circular Polarizing Filter: Use this outdoors in sunlight to darken the sky, cut through haze and reflections, and increase contrast. Do not use on a wide angle lens as it will cause the sky to change from light to dark and back again across the frame. You have to turn the second ring of the filter to create the amount of lightness or darkness in the sky that you desire, or to reduce or eliminate reflections. It works best when the sun is to your left or right, but does not have any polarizing effect if the sun is directly in front or behind you. Do not use an older linear polarizing filter with a digital camera, as it will interfere with the metering and autofocus systems.
Neutral Density (ND) Filter: If shooting video in bright lighting, you will need to use a dark neutral density (ND) filter on the lens to block light in order to be able to use dramatic wide aperture settings (such as f/ 2.8 or f/4.0). These are also useful with still photography for allowing slow shutter speeds in bright light, such as for photographing waterfalls. They are available in a variety of densities to block out the amount of light to enable you to increase your exposure settings by a certain number of stops, such as 3 stops (0.9), 6 stops (1.8), 10 stops (3.0), etc. For example, when working in M or S mode and the exposure meter reads 1/30s, f/8, ISO 100, but you wish to use and aperture setting of f/2.8 while “holding” the other settings – you can use a 3-stop ND filter and the exposure meter will now read 1/30s, f/2.8, ISO 100, allowing you to obtain the wide aperture setting and resulting shallow depth of field. There are also variable ND filters, where you can adjust one of the filter’s rings to vary the amount of density, as well as the Cokin filter system that makes use of a filter holder that attaches to the front of the lens, which then holds square filters. These are useful to landscape photographers using graduated or split neutral density filters that either gradually or sharply transition from dark to light. Using the square filter in front of the lens, you can then vary the angle and location of the transition to align with the horizon.
Nikon Lens Hoods or Canon Lens Hoods: Use a lens hood on your lens to both prevent flare and to protect the front of the lens when it inevitable bangs against something or drops. Some nicer lenses typically come with a lens hood. With other lenses, buy the corresponding optional hood.
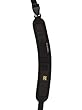
BlackRapid R-Straps: A different, more comfortable style of strap for carrying and using your camera, especially with a larger or heavier lens. There are a variety of current models, including the Curve, Metro, Kick, Sport, and Cross Shot.
Manfrotto 055XPROB Tripod Legs and Manfrotto 496RC2 Ball Head: This is an excellent “starter” combination of tripod legs and head for the beginner or enthusiast. They are sturdy, durable, and well built. If you know you will be doing a lot of tripod work, such as for studio, landscape, or travel photography, it is best to invest in more advanced (expensive) versions, including lighter carbon fiber legs and a head with additional features.
Insurance: Make sure your equipment is covered by insurance. When I worked in a camera store, people came in on a weekly basis to replace the equipment that was stolen from their car, trunk, luggage, while traveling, or was in a fire. You may need special insurance or a rider if your homeowner or renter’s insurance does not cover it. I use the policy available through NANPA, though you have to join NANPA to get it. This insurance is primarily for the equipment only, so you are not paying for liability coverage geared toward a business as you are with many other photo equipment insurance plans. Please note that the NANPA membership fee covers you annually from July – they don’t pro-rate, so you will not get a full year if you join at any other time. (If you happen to join NANPA to get their insurance, mention my name as a referrer, and I save on my next membership renewal!)
Silica Packs: Keep these in your camera bags to absorb moisture. Consider using real ones that you buy in solid cases instead of the little packs that you found in your new pants pocket that may break open over time.
Sto-Fen Omni Bounce Diffuser: Works great on the optional external flash units (note some Nikon flashes come with a diffuser like this). Do not use this on your flash outdoors because all it will do outside is cause your flash to work harder. I know you see lots of people doing it. They didn’t bother reading how to use it. Don’t imitate them. Use a direct bare or gelled flash outdoors. These diffusers are designed to work as a diffuser when bounced off a surface and angled at 45 degrees or so. Not straight on, and not bouncing off the sky.
Giottos Rocket Air Blaster: Always have this manual air blower handy for getting dust off lenses in a hurry, because blowing on them with your mouth – no matter how careful – inevitably leads to spittle on the lenses. Also use for manually cleaning the sensor, carefully following sensor cleaning instructions.
Dust-Aid Platinum dSLR Sensor Filter Cleaner: If the Air Blaster does not remove all the dust during sensor cleaning, you can move to a “silicon stamp,” such as this one. This is slightly more invasive, as you will be touching the sensor with the cleaning device. Be sure to carefully read and follow the Dust-Aid instructions, as well as the manual’s sensor cleaning instructions, particularly the correct way to raise the mirror and access the sensor.
Lens Pen Cleaning System: Works great for cleaning off mysterious spots and smudges that appear on the lens. Blow dust off the lens first with the Rocket Air Blaster, brush it with the Lens Pen brush, and then follow the instructions for using the Lens Pen.
Digital Grey Card: Used to measure and set accurate custom white balance.
Rosco Strobist Collection Flash Gels: Use these to balance the color temperature of your flash to the color temperature of the ambient light in order to have a single WB setting that neutralizes the color cast of the entire scene. Tape them in place or use the LumiQuest Gel Holder which attaches to your flash with the Honl Speed Strap, an overpriced strip of Velcro.
Sandisk Extreme CF Memory Cards (CompactFlash for Canon 7D, Canon 5D Mk II, 5D Mk III): I suggest getting a couple 16 GB or 32 GB CF cards to store your photos – more if traveling. Be sure to check the Sandisk site for current rebates.
Sandisk Extreme Pro CF Memory Cards: For an even faster CF memory card, look at the Extreme Pro version, which saves at 90MB/s over 60 MB/s of the Extreme CF cards.
SanDisk Extreme Pro UDMA 7 CF Memory Card: This CF memory card will allow you to take full advantage of the high speed continuous shooting of the 5D Mk III (or the 7D) to capture up to the maximum 16,270 continuous JPEG images or 18 RAW images in a single burst (7D rates are 130 JPEG / 25 RAW).
SanDisk Extreme Pro SDXC UHS-I SD Memory Cards: I suggest getting a couple 64GB or higher capacity Secure Digital (SD) cards to capture and store your photos – more if traveling. The current version of this card is rated at up to 170 MB/s (read) and 90 MB/s (write) speed. The older version of the card, SanDisk Extreme Pro SDXC UHS-I SD, is rated at 95 MB/s (read) and 90 MB/s (write) speed, and is available in the smaller 32GB size.
SanDisk Extreme Pro SDXC UHS-II SD Memory Cards: These high speed SD cards, with 300/260 MB/s read/write speeds, will enable you to take advantage of the camera’s maximum burst rate.
Eye-Fi Wireless Flash Memory Card: This SD memory card can be used to automatically upload photos wirelessly via Wi-Fi to your computer during shooting or afterwards.
Card Reader: Use this to transfer image files from the memory cards to your computer if your computer does not have a card reader built in. They may be faster than the camera’s USB cable and will save camera batteries.
Stereo Microphones: The Rode VideoMic or the Rode VideoMic Pro are good-quality affordable external stereo microphones for recording audio while shooting video. They mount to the camera’s Hot Shoe.
Camera’s USB Cable: Always have the included camera USB cable when traveling, as a back-up method of transferring image files to your computer.
Lens and Body Caps: Don’t forget to have these in your camera bag, to protect lenses and camera body when switching and storing them.
Camera Wrap: For protecting your camera while carrying it around in dusty, misty, or sandy situations, or for protection when storing it.
Rainhood or Rainsleeve: For protecting your camera while using it in dusty, misty, rainy, or sandy situations.
Adobe Creative Cloud (with Photoshop and Lightroom): These software programs are essential for editing, processing, retouching, and manipulating your photographs, especially if you are shooting in RAW. Lightroom is designed specifically for photographers and is the processing program of choice for many of them, but it does not have the manipulation capabilities of Photoshop. Take advantage of Adobe’s significant student and teacher discounts if applicable.
Nikon Capture NX2: If you are not using Photoshop, this software will enable you to process and retouch your JPEG or RAW files, and correct things such color, contrast, and sharpening.
Camera Bags and Travel Gear: For additional gear that is helpful for travel situations, including various camera bags for different situations, have a look at my travel gear blog post:
http://blog.dojoklo.com/2009/12/01/assignment-guatemala-gear/
Digital Photography Books
Understanding Exposure: How to Shoot Great Photos with Any Camera by Bryan Peterson
Learning to See Creatively: Design, Color & Composition in Photography by Bryan Peterson
The Photographer’s Eye: Composition and Design for Better Digital Photos by Michael Freeman
The Photographer’s Mind: Creative Thinking for Better Digital Photos by Michael Freeman
Available Light: Photographic Techniques for Using Existing Light Sources by Don Marr
On-Camera Flash Techniques for Digital Wedding and Portrait Photography by Neil van Niekerk
Speedliter’s Handbook: Learning to Craft Light with Canon Speedlites by Syl Arena
Digital Photographer’s Complete Guide to HD Video by Rob Sheppard and Michael Gunchen.
Canon Speedlite System Digital Field Guide by Michael Corsentino
Nikon Speedlight Handbook: Flash Techniques for Digital Photographers by Stephanie Zettl
The New Complete Guide to Digital Photography by Michael Freeman – a comprehensive general reference guide with brief explanations of nearly every aspect of digital photography.
New Epson Complete Guide to Digital Printing by Rob Sheppard.
More Essential Digital Photography Books are listed in this post.
Nikon D780 Accessories
Nikon EN-EL15b Rechargeable Battery: It is always good to have an extra battery or two, especially when traveling, or when photographing all day, or for an event.
EH-7P Charging AC Adapter: This charging adapter allows you to directly charge the battery while in the camera, via a USB cable. Note that the camera needs to be turned off in order for it to charge, and it will not charge older EN-EL15or EN-EL15a batteries.
MC-DC2 Remote Release Cord: This corded remote will allow you to trigger the shutter of the camera remotely, allowing either self-portraits or the ability to release the shutter without pressing the Shutter Button, thus preventing possible camera shake.
WR-T10 Remote Transmitter and WR-R10 Remote Controller or WR-R10 Wireless Remote Adapter Set: These wireless remote accessories will allow you to trigger the shutter of the camera remotely, allowing either self-portraits or the ability to release the shutter without pressing the Shutter Button, thus preventing possible camera shake. The WR set communicates via radio frequencies, and does not require direct line-of-sight between the camera and the remote. You can even use multiple WR-R10 receivers on multiple cameras and trigger them simultaneously with one WR-T10remote transmitter. The WR-1 Wireless Remote Controller will allow even greater wireless control over one or multiple cameras with their own WR-1 or WR-R10 units.
Nikon SB-5000 Speedlight Flash: In addition to offering all the functions of the above flash units, this top of the line Nikon Speedlight offers optical wireless control, as well as wireless radio control (when used with the WR-R10 Wireless Remote Controller). The radio control can be triggered nearly 100 feet away and does not require line-of-sight. The flash also contains a cooling system that will allow 100 or more consecutive shots at full power. The less sophisticated SB-500 is also compatible.
SU-800 Wireless Speedlight Commander: This unit is mounted on the camera’s hot shoe, and will allow you to wirelessly control and trigger one or multiple remote Speedlights.
Nikon WT-7 Wireless Transmitter: This can be used to wirelessly transmit your images and videos to an FTP server, computer, tablet, or smart-phone as you shoot, or even use the computer or smart device to remotely and wirelessly release the camera’s shutter. It also offers a wired Ethernet port for a wired (tethered) connection. You will also need Nikon’s Camera Control Pro 2 software for the tethered or wireless computer connection, which allows you to remotely change numerous camera settings.
ME-1 Stereo Microphone: An external, stereo mic to record much better sound during movie shooting that the built-in mic. The Rode VideoMic or the Rode VideoMic Pro are also good-quality affordable external stereo microphones for recording audio while shooting video. They each mount to the camera’s Hot Shoe and connect via the External Microphone connector terminal on the side of the camera. More advanced (expensive) models and lavalier mics are recommended for professional use, along with an audio mixer such as a BeachTek dSLR audio adapter, or an external audio recorder such as the Zoom H6 Portable Recorder.
Nikon Capture NX-D: If you are not using Photoshop or Lightroom, this software will enable you to process and retouch your JPEG or RAW files, and make image adjustments such as color, contrast, sharpening, and noise. This free software is available for download from the Nikon website: https://nikonimglib.com/ncnxd/
High-Speed A to C Type, HDMI to Mini-HDMI Cable: Use this HDMI cable to connect the camera to an HDMI CEC compatible TV (or other external HDMI device), and then view images, slideshows, or video from the camera.
Nikon z8 / Z7 / Nikon Z6 / Nikon Z 7II / Nikon Z 6II Accessories
Nikon EN-EL15b Rechargeable Battery or updated EN-EL15c: It is always good to have an extra battery or two, especially when traveling, or when photographing all day, or for an event. The MB-N10 Multi-Power Battery Pack will be offered in the future, and will hold two EN-EL15bbatteries.
EH-7P Charging AC Adapter: The Z 7 includes this charging adapter, which allows you to directly charge the battery while in the camera, via a USB cable. This adapter is also compatible with the Z 6, but is not typically included. Note that the camera needs to be turned off in order for it to charge, and it will not charge older EN-EL15or EN-EL15abatteries. This adapter is compatible with the Z 6, but is not typically included.
Nikon MB-N11 Power Battery Pack with Vertical Grip: This battery grip for the Z 7II and Z 6II accepts two EN-EL15 type batteries, while also providing a vertical grip and duplicated, customizable controls including the shutter release, AF-ON Button, Fn Buttons, and Multi Selector. Note that the thumb-joystick on the grip corresponds to the Multi Selector thumbpad on the camera body, and not to the Sub-Selector joystick on the camera.
Nikon MB-N12 Power Battery Pack with Vertical Grip: This battery grip for the Z 8 accepts two EN-EL15 type batteries, while also providing a vertical grip and duplicated, customizable controls including the shutter release, AF-ON Button, Fn Buttons, and Multi Selector.
MB-N10 Multi-Power Battery Pack: This battery grip for the Z 7 and Z 6 will hold two EN-EL15b batteries. However, it does not have any camera controls.
Nikon FTZ Adapter or newer FTZ II Mount Adapter: These lens adapters will enable you to use a large number of compatible Nikon F-mount lenses and teleconverters with the Z 7 and Z 6.
MC-DC2 Remote Release Cord: This corded remote will allow you to trigger the shutter of the camera remotely, allowing either self-portraits or the ability to release the shutter without pressing the Shutter Button, thus preventing possible camera shake.
WR-T10 Remote Transmitter and WR-R10 Remote Controller: These wireless remote accessories will allow you to trigger the shutter of the camera remotely, allowing either self-portraits or the ability to release the shutter without pressing the Shutter Button, thus preventing possible camera shake. The WR set communicates via radio frequencies, and does not require direct line-of-sight between the camera and the remote. You can even use multiple WR-R10receivers on multiple cameras and trigger them simultaneously with one WR-T10remote transmitter. The WR-1 Wireless Remote Controller will allow even greater wireless control over one or multiple cameras with their own WR-1 or WR-R10 units.
Nikon SB-5000 Speedlight Flash: In addition to offering all the functions of the above flash units, this top of the line Nikon Speedlight offers optical wireless control, as well as wireless radio control (when used with the WR-R10 Wireless Remote Controller). The radio control can be triggered nearly 100 feet away and does not require line-of-sight. The flash also contains a cooling system that will allow 100 or more consecutive shots at full power. The less sophisticated SB-500is also compatible with the Z 7 and Z 6.
SU-800 Wireless Speedlight Commander: This unit is mounted on the camera’s hot shoe, and will allow you to wirelessly control and trigger one or multiple remote Speedlights.
Nikon WT-7 Wireless Transmitter: This can be used to wirelessly transmit your images and videos to an FTP server, computer, tablet, or smart-phone as you shoot, or even use the computer or smart device to remotely and wirelessly release the camera’s shutter. It also offers a wired Ethernet port for a wired (tethered) connection. You will also need Nikon’s Camera Control Pro 2 software for the tethered or wireless computer connection, which allows you to remotely change numerous camera settings.
Nikon GP-1A GPS Unit: Use this GPS receiver for automatic geotagging of your images including location, altitude data, and UTC time. Remember that you can also make use of the camera’s wireless capabilities via the SnapBridge app, to add time and location data from your smart phone to the images on the camera, and thus perform similar capabilities as a GPS device. Here is an alternate Micnova GPS receiver if the Nikon model is no longer available.
ME-1 Stereo Microphone: An external, stereo mic to record much better sound during movie shooting that the built-in mic. The Rode VideoMic or the Rode VideoMic Pro are also good-quality affordable external stereo microphones for recording audio while shooting video. They each mount to the camera’s Hot Shoe and connect via the External Microphone connector terminal on the side of the camera. More advanced (expensive) models and lavalier mics are recommended for professional use, along with an audio mixer such as a BeachTek dSLR audio adapter, or an external audio recorder such as the Zoom H6 Portable Recorder.
Nikon Capture NX-D: If you are not using Photoshop or Lightroom, this software will enable you to process and retouch your JPEG or RAW files, and make image adjustments such as color, contrast, sharpening, and noise. This free software is available for download from the Nikon website: https://nikonimglib.com/ncnxd/
High-Speed A to C Type, HDMI to Mini-HDMI Cable: Use this HDMI cable to connect the camera to an HDMI CEC compatible TV (or other external HDMI device), and then view images, slideshows, or video from the camera.
Nikon D850 Accessories
Nikon D850 User’s Manuals – For PDF downloads of the Nikon D850 User’s Manual and D850 Menu Guide, see the webpage and below:
http://downloadcenter.nikonimglib.com/en/products/359/D850.html
Nikon EN-EL15a Rechargeable Battery: It is always good to have an extra battery or two, especially when traveling or when photographing all day or for an event.
Nikon MB-D18 Battery Pack/ Grip: This accessory will enable you to use an additional EN-EL15a battery, or eight alkaline, lithium, or Ni-MH AA batteries, or an EN-EL18 battery with the use of the optional BL-5 Battery Chamber Cover. This allows you to shoot longer without having to change batteries, and can allow you to share EN-EL18 batteries with the Nikon D5 body. It also increases the size of the D850 body which may be more comfortable for some shooters, especially when shooting vertically in portrait orientation. There is also an MB-D18 Battery Pack kit that comes with the battery pack, plus the BL-5 Cover and an EN-EL18b battery.
MC-30 Remote Release Cord: This corded remote will allow you to trigger the shutter of the camera remotely, thus allowing either self-portraits or the ability to release the shutter without pressing the Shutter Button thus preventing possible camera shake.
WR-T10/ WR-R10 /WR-A10 Wireless Remote Controller, Transceiver, and Adapter: This wireless remote set will allow you to trigger the shutter of the camera remotely, thus allowing either self-portraits or the ability to release the shutter without pressing the Shutter Button thus preventing possible camera shake. The WR set communicates via radio frequencies, and does not require direct line-of-sight between the camera and the remote. You can even use multiple WR-R10 receivers on multiple cameras and trigger them simultaneously with one WR-T10 remote transmitter. The WR-1 Wireless Remote Controller will allow even greater wireless control over one or multiple cameras with their own WR-1 or WR-R10 units.
Nikon SB-910 or Nikon SB-700 Speedlight Flash: These external flashes will give you significant flash power and control over output and direction. They have adjustable and rotating heads so that you can use indirect and bounce flash. They can also be used as commanders to trigger remote Speedlight flashes.
Nikon SB-5000 Speedlight Flash: In addition to offering all the functions of the above flash units, this top of the line Nikon Speedlight offers optical wireless control, as well as wireless radio control (when used with the WR-A10 Wireless Remote Adapter and WR-R10 Wireless Remote Controller). The radio control can be triggered nearly 100 feet away and does not require line-of-sight. The flash also contains a cooling system that will allow 100 or more consecutive shots at full power.
SU-800 Wireless Speedlight Commander: This unit is mounted on the camera’s hot shoe, and will allow you to wirelessly control and trigger one or multiple remote Speedlights.
Nikon WT-7 Wireless Transmitter: This can be used to wirelessly transmit your images and videos to an FTP server, computer, tablet, or smart-phone as you shoot, or even use the computer or smart device to remotely and wirelessly release the camera’s shutter. It also offers a wired Ethernet port for a wired (tethered) connection. You will also need Nikon’s Camera Control Pro 2 software for the tethered or wireless computer connection, which allows you to remotely change numerous camera settings. However for certain situations and uses, an Eye-Fi SD memory card may be a more convenient and less expensive solution for wireless transmission of full sized images.
Nikon GP-1 or GP-1A GPS Unit: Use this GPS receiver for automatic geotagging of your images including location, altitude data, and UTC time. Remember that you can also make use of the camera’s wireless capabilities to add time and location data from your smart phone to the images on the camera, and thus perform similar capabilities as a GPS device.
ME-1 Stereo Microphone: An external, stereo mic to record much better sound during movie shooting that the built-in mic. The Rode VideoMic or the Rode VideoMic Pro are also good-quality affordable external stereo microphones for recording audio while shooting video. They each mount to the camera’s Hot Shoe and connect via the External Microphone connector terminal on the side of the camera. More advanced (expensive) models and lavalier mics are recommended for professional use, along with an audio mixer such as a BeachTek dSLR audio adapter, or an external audio recorder such as the Zoom H6 Portable Recorder.
Nikon ES-2 Film Digitizing Adapter Set: This accessory for digitizing negatives using your camera includes holders for 35mm film strips and slides, and attaches to the AF-S Micro 60mm f/2.8G ED lens. This can be used with the Negative Digitizer feature of the D850 (accessed via the Live View i Button Menu), to more easily “scan” your negatives.
Nikon Capture NX-D: If you are not using Photoshop or Lightroom, this software will enable you to process and retouch your JPEG or RAW files, and make image adjustments such as color, contrast, sharpening, and noise. This free software is available for download from the Nikon website. (http://nikonimglib.com/ncnxd/)
High-Speed A to C Type, HDMI to Mini-HDMI Cable: Use this HDMI cable to connect the camera to an HDMI CEC compatible TV (or other external HDMI device), and then view images, slideshows, or video from the camera. By accessing the Setup Menu item HDMI > Device control > On, you will also be able to then control the image playback using the TV remote.
Nikon D500 Accessories
Nikon EN-EL15 Rechargeable Battery: It is always good to have an extra battery or two, especially when traveling or when photographing all day or for an event. Be sure to use the newer Li-Ion20 type of EN-EL15 battery for best results. Nikon will replace your older EN-EL15 Li-ion01 batteries with the newer version, for free. See this link for further information:
https://support.nikonusa.com/app/answers/detail/a_id/19541
Nikon MB-D17 Battery Pack/ Grip: This accessory will enable you to use an additional EN-EL15 battery, or eight alkaline, lithium, or Ni-MH AA batteries, or an EN-EL18 battery with the use of the optional BL-5 Battery Chamber Cover. This allows you to shoot longer without having to change batteries, and can allow you to share EN-EL18 batteries with the Nikon D5 body. It also increases the size of the D500 body which may be more comfortable for some shooters, especially when shooting vertically in portrait orientation.
MC-30 Remote Release Cord: This corded remote will allow you to trigger the shutter of the camera remotely, thus allowing either self-portraits or the ability to release the shutter without pressing the Shutter Button thus preventing possible camera shake.
WR-T10/ WR-R10 /WR-A10 Wireless Remote Controller, Transceiver, and Adapter: This wireless remote set will allow you to trigger the shutter of the camera remotely, thus allowing either self-portraits or the ability to release the shutter without pressing the Shutter Button thus preventing possible camera shake. The WR set communicates via radio frequencies, and does not require direct line-of-sight between the camera and the remote. You can even use multiple WR-R10 receivers on multiple cameras and trigger them simultaneously with one WR-T10 remote transmitter. The WR-1 Wireless Remote Controller will allow even greater wireless control over one or multiple cameras with their own WR-1 or WR-R10 units.
Nikon SB-910 or Nikon SB-700 Speedlight Flash: These external flashes will give you significant flash power and control over output and direction. They have adjustable and rotating heads so that you can use indirect and bounce flash. They can also be used as commanders to trigger remote Speedlight flashes.
Nikon SB-5000 Speedlight Flash: In addition to offering all the functions of the above flash units, this top of the line Nikon Speedlight offers optical wireless control, as well as wireless radio control (when used with using the WR-A10 Wireless Remote Adapter and WR-R10 Wireless Remote Controller). The radio control can be triggered nearly 100 feet away and does not require line-of-sight. The flash also contains a cooling system that will allow 100 or more consecutive shots at full power.
SU-800 Wireless Speedlight Commander: This unit is mounted on the camera’s hot shoe, and will allow you to wirelessly control and trigger one or multiple remote Speedlights.
Nikon WT-7A Wireless Transmitter: This can be used to wirelessly transmit your images and videos to an FTP server, computer, tablet, or smart-phone as you shoot, or even use the computer or smart device to remotely and wirelessly release the camera’s shutter. It also offers a wired Ethernet port for a wired (tethered) connection. You will also need Nikon’s Camera Control Pro 2 software for the tethered or wireless computer connection, which allows you to remotely change numerous camera settings. However for certain situations and uses, an Eye-Fi SD memory card may be a more convenient and less expensive solution for wireless transmission of full sized images.
Nikon GP-1 or GP-1A GPS Unit: Use this GPS receiver for automatic geotagging of your images including location, altitude data, and UTC time. Remember that you can also make use of the camera’s wireless capabilities to add time and location data from your smart phone to the images on the camera, and thus perform similar capabilities as a GPS device.
ME-1 Stereo Microphone: An external, stereo mic to record much better sound during movie shooting that the built-in mic. The Rode VideoMic or the Rode VideoMic Pro are also good-quality affordable external stereo microphones for recording audio while shooting video. They each mount to the camera’s Hot Shoe and connect via the External Microphone connector terminal on the side of the camera. More advanced (expensive) models and lavalier mics are recommended for professional use, along with an audio mixer such as one of the BeachTek Audio Adapters, or an external audio recorder such as the Zoom H6 Portable Recorder.
Nikon Capture NX-D: If you are not using Photoshop or Lightroom, this software will enable you to process and retouch your JPEG or RAW files, and make image adjustments such as color, contrast, sharpening, and noise. This free software is available for download from the Nikon website: http://nikonimglib.com/ncnxd/#
High-Speed A to C Type, HDMI to Mini-HDMI Cable: Use this HDMI cable to connect the camera to an HDMI CEC compatible TV (or other external HDMI device), and then view images, slideshows, or video from the camera. By accessing the Setup Menu item HDMI > Device control > On, you will also be able to then control the image playback using the TV remote.
Lexar 64GB Professional 2933x XQD card: The maximum continuous burst capacity specifications given by Nikon for the D500 are based on the use of this card. When set for RAW L image files and DX Image Area, this XQD card can capture up to the maximum 200 14-bit lossless compressed or 12-bit uncompressed images, without filling the buffer and having to pause. Sony also offers numerous XQD cards that are compatible with the D500, as listed on page 385 of the Nikon D500 User’s Manual.
SanDisk Extreme Pro UHS-II 280MBs SD: This is a very fast SD type card that appears to be working well with the D500. There have been issues reported with SD cards from Lexar and Transcend, which are caused by the card and not the camera. Nikon has released a firmware update that creates a workaround for errors when using a problematic UHS-II card, though it reverts to using it as a slower UHS-I card. The memory card manufacturers are working to resolve this issue.
Nikon D750 Accessories
Nikon EN-EL15 Rechargeable Battery: It is always good to have an extra battery or two, especially when traveling or when photographing all day or for an event.
Nikon MB-D16 Battery Pack/ Grip: This accessory will enable you to use a second EN-EL15 battery or else use six AA batteries, thus allowing you to shoot longer without having to change batteries. It also increases the size of the D750 body which may be more comfortable for some shooters, especially when shooting vertically in portrait orientation.
MC-DC2 Remote Release Cord: This corded remote will allow you to trigger the shutter of the camera remotely, thus allowing either self-portraits or the ability to release the shutter without pressing the Shutter Button thus preventing possible camera shake.
WR-R10/ WR-T10 Wireless Remote Controller and Transceiver: This wireless remote will allow you to trigger the shutter of the camera remotely, thus allowing either self-portraits or the ability to release the shutter without pressing the Shutter Button thus preventing possible camera shake. The WR set communicates via radio frequencies, and does not require direct line-of-sight between the camera and the remote. You can even use multiple WR-R10 receivers on multiple cameras and trigger them simultaneously with one WR-T10 remote transmitter. The WR-1 Wireless Remote Controller will allow even greater wireless control over one or multiple cameras with their own WR-1 or WR-R10 units.
Nikon SB-910 or Nikon SB-700 Speedlight Flash: These external flashes will give you significant flash power and control over output and direction. They have adjustable and rotating heads so that you can use indirect and bounce flash. They can also be used as commanders to trigger remote Speedlight flashes.
Nikon SB-5000 Speedlight Flash: In addition to offering all the functions of the above flash units, this top of the line Nikon Speedlight offers optical wireless control, as well as wireless radio control (when used with using the WR-A10 Wireless Remote Adapter and WR-R10 Wireless Remote Controller). The radio control can be triggered nearly 100 feet away and does not require line-of-sight. The flash also contains a cooling system that will allow 100 or more consecutive shots at full power.
SU-800 Wireless Speedlight Commander: This unit is mounted on the camera’s hot shoe, and will allow you to wirelessly control and trigger one or multiple remote Speedlights.
Nikon WT-5A Wireless Transmitter with the Nikon UT-1 Communication Unit: These can be used together to wirelessly transmit your images to a computer, tablet, or smart-phone as you shoot, or even use the computer or smart device to remotely and wirelessly release the camera’s shutter. The two units can also be purchased together: WT-5A and UT-1. You will also need Nikon’s Camera Control Pro 2 software for the tethered or wireless computer connection. The Nikon UT-1 Communication Unit when used alone will allow you to connect the camera to a computer or FTP server via an Ethernet cable, rather than wirelessly. However for certain situations and uses, an Eye-Fi SD memory card may be a more convenient and less expensive solution for wireless transmission.
Nikon GP-1 or GP-1A GPS Unit: Use this GPS receiver for automatic geotagging of your images including location, altitude data, and UTC time.
ME-1 Stereo Microphone: An external, stereo mic to record much better sound during movie shooting that the built-in mic. The Rode VideoMic or the Rode VideoMic Pro are also good-quality affordable external stereo microphones for recording audio while shooting video. They each mount to the camera’s Hot Shoe and connect via the External Microphone connector terminal on the side of the camera. More advanced (expensive) models and lavalier mics are recommended for professional use, along with an audio mixer such as the BeachTek DXA-SLR Pro Audio Adapter, or Mini Pro version, or an external audio recorder such as the Zoom H6 Portable Recorder.
Nikon Capture NX-D: If you are not using Photoshop, this software will enable you to process and retouch your JPEG or RAW files, and make image adjustments such as color, contrast, sharpening, and noise. This free software is available for download from the Nikon website: http://nikonimglib.com/ncnxd/#
High-Speed A to C Type, HDMI to Mini-HDMI Cable: Use this HDMI cable to connect the camera to an HDMI CEC compatible TV (or other external HDMI device), and then view images, slideshows, or video from the camera. By accessing the Setup Menu item HDMI > Device control > On, you will also be able to then control the image playback using the TV remote.
Nikon D810 Accessories
Nikon EN-EL15 Rechargeable Battery: It is always good to have an extra battery or two, especially when traveling or when photographing all day or for an event.
Nikon MB-D12 Battery Pack/ Grip: This accessory will enable you to use a second EN-EL15 battery or else use eight AA batteries, thus allowing you to shoot longer without having to change batteries. It also increases the size of the D810 body which may be more comfortable for some shooters, especially when shooting vertically in portrait orientation. And its use with AA batteries will enable the maximum 7 frames per second continuous shooting speed when using DX Image Area. If you wish to use the larger EN-EL18 battery (used with the D4 body) with this MB-D12 battery grip, you can purchase the optional BL-5 Battery Chamber Cover which accepts the EN-EL18 battery.
MC-DC2 Remote Release Cord: This corded remote will allow you to trigger the shutter of the camera remotely, thus allowing either self-portraits or the ability to release the shutter without pressing the Shutter Button thus preventing possible camera shake.
MC-30A Remote Release Cord: Another basic corded remote release, with a larger thumb button that enables you to hold it down to keep the shutter open for Bulb shooting.
MC-36a Remote Shutter Release Cord: A multi-function corded remote for shutter release with an intervalometer, which attaches via the ten-pin connector.
WR-R10/ WR-T10 Wireless Remote Controller and Transceiver: This wireless remote will allow you to trigger the shutter of the camera remotely, thus allowing either self-portraits or the ability to release the shutter without pressing the Shutter Button thus preventing possible camera shake. The WR set communicates via radio frequencies, and thus does not require direct line-of-sight between the camera and the remote. You can even use multiple WR-R10 receivers on multiple cameras and trigger them simultaneously with one WR-T10 remote transmitter. The WR-1 Wireless Remote Controller will allow even greater wireless control over one or multiple cameras with their own WR-1 or WR-R10 units.
Nikon SB-910 or Nikon SB-700 Speedlight Flash: These external flashes will give you significant flash power and control over output and direction. They have adjustable and rotating heads so that you can use indirect and bounce flash. They can also be used as commanders to trigger remote Speedlight flashes.
Nikon SB-5000 Speedlight Flash: In addition to offering all the functions of the above flash units, this top of the line Nikon Speedlight offers optical wireless control, as well as wireless radio control (when used with using the WR-A10 Wireless Remote Adapter and WR-R10 Wireless Remote Controller). The radio control can be triggered nearly 100 feet away and does not require line-of-sight. The flash also contains a cooling system that will allow 100 or more consecutive shots at full power.
SU-800 Wireless Speedlight Commander: This unit is mounted on the camera’s hot shoe, and will allow you to wirelessly control and trigger one or multiple remote Speedlights.
Nikon WT-5A Wireless Transmitter with the Nikon UT-1 Communication Unit: These can be used together to wirelessly transmit your images to a computer, tablet, or smart-phone as you shoot, or even use the computer or smart device to remotely and wirelessly release the camera’s shutter. The two units can also be purchased together: WT-5A and UT-1. You will also need Nikon’s Camera Control Pro 2 software for the tethered or wireless computer connection. The Nikon UT-1 Communication Unit when used alone will allow you to connect the camera to a computer or FTP sever via an Ethernet cable, rather than wirelessly. However for certain situations and uses, an Eye-Fi SD memory card may be more convenient and less expensive.
Nikon GP-1 or GP-1A GPS Unit: Use this GPS receiver for automatic geotagging of your images including location, altitude data, and UTC time.
ME-1 Stereo Microphone: An external, stereo mic to record much better sound during movie shooting that the built-in mic. The Rode VideoMic or the Rode VideoMic Pro are also good-quality affordable external stereo microphones for recording audio while shooting video. They each mount to the camera’s Hot Shoe and connect via the External Microphone connector terminal on the side of the camera. More advanced (expensive) models and lavalier mics are recommended for professional use, along with an audio mixer such as the BeachTek DXA-SLR Pro Audio Adapter, or Mini Pro version, or an external audio recorder such as the Zoom H6 Portable Recorder.
Nikon Capture NX-D: If you are not using Photoshop, this software will enable you to process and retouch your JPEG, TIFF, or RAW files, and make image adjustments such as color, contrast, sharpening, and noise. This free software is available for download from the Nikon website: http://nikonimglib.com/ncnxd/#
High-Speed A to C Type, HDMI to Mini-HDMI Cable: Use this HDMI cable to connect the camera to an HDMI CEC compatible TV, and then view images and slideshows from the camera. By accessing the Setup Menu item HDMI > Device control > On, you will also be able to then control the image playback using the TV remote.
Nikon D810 dSLR Filmmaker’s Kit: This package, costing about $5,000, includes the D810 camera plus everything one needs to get started with dSLR HD filmmaking. In addition to the body, the kit includes three prime lenses which are all f/1.8 (35mm, 50mm, 85mm), a video recorder with HDMI cable, the ME-1 Stereo microphone, variable ND filters so that you can take advantage of wide apertures even in brighter lighting, and two EN-EL15 batteries.
Sandisk Extreme CF Memory Cards: I suggest getting a couple 32 GB or higher CompactFlash (CF) cards to store your photos – more if traveling. Be sure to check the Sandisk site for current rebates. This card’s speed is 120 MB/s, so to achieve the buffer rates of the D810 listed in the manual you will need to use the CF card listed just below.
SanDisk Extreme Pro UMDA 7 CF Memory Card: For an even faster CF memory card, look at the Extreme Pro version, which is rated at 160 MB/s, higher than the 120 MB/s speed of the Extreme CF cards. This is the minimum card needed to achieve the buffer capacity rates listed in the D810 manual on page 489.
SanDisk Extreme Pro SDHC UHS-I SD Memory Cards: If you plan to use the camera’s SD card slot, I suggest getting a couple 32GB or higher capacity Secure Digital (SD) cards to capture and store your photos – more if traveling. Review the various ways that the camera’s two memory card slots can be used with the Primary slot selection and Secondary slot function items of the Shooting Menu. Again, be sure to check the SanDisk site for current rebates. This card is rated at 95 MB/s speed, so you may need the above CF card to achieve the maximum the buffer capacity of the D810.
Nikon D7500 / D7200 / D7100 Accessories
Nikon EN-EL15 Rechargable Battery: It is always good to have an extra battery or two, especially when traveling or when photographing all day or for an event.
Nikon MB-D15 Battery Pack/ Grip: This accessory will enable you to use a second EN-EL15 battery or else use AA batteries, thus allowing you to shoot longer without having to change batteries. It also increases the size of the D7100 body which may be more comfortable for some shooters, especially when shooting vertically in portrait orientation.
Nikon ML-L3 Wireless Remote Controller or WR-R10/ WR-T10 Wireless Remote Controller and Transceiver: These wireless remotes will allow you to trigger the shutter of the camera remotely, thus allowing either self-portraits or the ability to release the shutter without pressing the Shutter Button thus preventing possible camera shake. The WR set communicates via radio frequencies, and thus does not require direct line-of-sight between the camera and the remote. You can even use multiple WR-R10 receivers on multiple cameras and trigger them simultaneously with one WR-T10 remote transmitter. The new WR-1 Wireless Remote Controller will allow even greater wireless control over one or multiple cameras with their own WR-1 or WR-R10 unit.
MC-DC2 Remote Release Cord: This remote will allow you to trigger the shutter of the camera remotely, but is attached to the camera via a cable, rather than being wireless.
Nikon SB-910 (or SB-900, SB-800, SB-700, SB-600, SB-500) Speedlight Flash: These external flashes will give you greatly increased flash power and control compared to the built-in flash. They also have adjustable and rotating heads so that you can use indirect and bounce flash. All of them can be used as remote flashes controlled by the built-in flash, and with the exception of the SB-600 all can be used as commanders to trigger remote flashes.
Nikon SB-5000 Speedlight Flash: In addition to offering all the functions of the above flash units, this top of the line Nikon Speedlight offers optical wireless control, as well as wireless radio control (when used with using the WR-A10 Wireless Remote Adapter and WR-R10 Wireless Remote Controller). The radio control can be triggered nearly 100 feet away and does not require line-of-sight. The flash also contains a cooling system that will allow 100 or more consecutive shots at full power.
Nikon WU-1a Wireless Mobile Adapter: This can be used to wirelessly transmit your images to a tablet or smart-phone as you shoot, share your images, or even use your smart phone or tablet to remotely release the camera’s shutter – all with Nikon’s Wireless Mobile Adapter Utility app:
Nikon GP-1 GPS Unit: / GP-1A GPS Unit (check compatibly with your camera here.) Use this GPS receiver for automatic geotagging of your images including location, altitude data, and UTC time.
Nikon ME-1 Stereo Microphone: An external, stereo mic to record much better sound during movie shooting that the built-in mic. Other options include the Rode VideoMic or the Rode VideoMic Pro, which are good-quality affordable external stereo microphones for recording audio while shooting video. They mount to the camera’s Hot Shoe.
UT-1 Communication Unit: This unit is used with an Ethernet cable or wirelessly with the WT-5a Wireless Transmitter to connect to a network and transfer images to a computer or server, or to control the camera remotely from your computer. You can also purchase these two units, the UT-1 and WT-5a as a bundle.
Nikon Capture NX2: If you are not using Photoshop, this software will enable you to process and retouch your JPEG or RAW files, and correct things such color, contrast, and sharpening.
Nikon D7000 Accessories
Nikon EN-EL15 Rechargable Battery: It is always good to have an extra battery or two, especially when traveling or when photographing all day or for an event.
Nikon MB-D11 Battery Pack/ Grip: This accessory will enable you to use a second EN-EL15 battery or else use AA batteries, thus allowing you to shoot longer without having to change batteries. It also increases the size of the D7000 body which may be more comfortable for some shooters, especially when shooting vertically in portrait orientation.
Nikon ML-L3 Wireless Remote or MC-DC2 Remote Release Cord: These remotes will allow you to trigger the shutter of the camera remotely, thus allowing either self-portraits or the ability to release the shutter without pressing the Shutter Button thus preventing possible camera shake.
Nikon SB-910, SB-900, SB-800, SB-700, or SB-600 Speedlight Flashes: These external flashes will give you greatly increased flash power and control compared to the built-in flash. They also have adjustable and rotating heads so that you can use indirect and bounce flash. All of them can be used as remote flashes controlled by the built-in flash, and with the exception of the SB-600 all can be used as commanders to trigger remote flashes.
Nikon WT-4A Wireless Transmitter: This can be used to wirelessly transmit your images to a computer as you shoot. However for certain situations and uses, an Eye-Fi SD memory card may be more convenient.
Nikon Capture NX2: If you are not using Photoshop, this software will enable you to process and retouch your JPEG or RAW files, and correct things such color, contrast, and sharpening.
Nikon D5600 / D5500 / D5300 / D5200 / D5100 Accessories
Nikon EN-EL14a Rechargable Battery: It is always good to have an extra battery or two, especially when traveling or when photographing all day or for an event.
Battery Pack/ Grip: This third-party accessory will enable you to use two EN-EL14a batteries, thus allowing you to shoot longer without having to change batteries. It also increases the size of the D5600 body which may be more comfortable for some shooters, especially when shooting vertically in portrait orientation.
Nikon ML-L3 Wireless Remote Controller or WR-R10/ WR-T10 Wireless Remote Controller and Transceiver: These wireless remotes will allow you to trigger the shutter of the camera remotely, thus allowing either self-portraits or the ability to release the shutter without pressing the Shutter Button thus preventing possible camera shake. The WR set communicates via radio frequencies, and thus does not require direct line-of-sight between the camera and the remote. You can even use multiple WR-R10 receivers on multiple cameras and trigger them simultaneously with one WR-T10 remote transmitter.
MC-DC2 Remote Release Cord: This remote will allow you to trigger the shutter of the camera remotely, but is attached to the camera via a cable, rather than being wireless.
Nikon GP-1 or GP-1A GPS Unit: Use this GPS receiver for automatic geotagging of your images including location, altitude data, and UTC time.
Nikon SB-910 or SB-700 Speedlight Flash: These external flashes will give you greatly increased flash power and control compared to the built-in flash. They also have adjustable and rotating heads so that you can use indirect and bounce flash. And they can be used as commanders to control and trigger multiple remote flashes.
Nikon WU-1a Wireless Mobile Adapter: (Nikon D5200, D7100, D3200 and later cameras only) This can be used to wirelessly transmit your images to a tablet or smart-phone as you shoot, share your images, or even use your smart phone or tablet to remotely release the camera’s shutter – all with Nikon’s Wireless Mobile Adapter Utility app:
Nikon GP-1 GPS Unit: / GP-1A GPS Unit (check compatibly with your camera here.) (Not needed for D5300) Use this GPS receiver for automatic geotagging of your images including location, altitude data, and UTC time. Using this accessory, you images will also be automatically located on a map, such as when uploaded to the Flickr photo website.
ME-1 Stereo Microphone or ME-W1 Wireless Microphone: External, stereo mics to record much better sound during movie shooting that the built-in mic. The Rode VideoMic or the Rode VideoMic Pro are also good-quality affordable external stereo microphones for recording audio while shooting video. They each mount to the camera’s Hot Shoe and connect via the External Microphone connector terminal on the side of the camera.
Nikon Capture NX-D: If you are not using Photoshop or Lightroom, this software will enable you to process and retouch your JPEG or RAW files, and make image adjustments such as color, contrast, sharpening, and noise. This free software is available for download from the Nikon website: http://nikonimglib.com/ncnxd/#
High-Speed A to C Type, HDMI to Mini-HDMI Cable: Use this HDMI cable to connect the D5600 to an HDMI CEC compatible TV, and then view movies, images, and slideshows from the camera. By accessing the Playback Menu item HDMI > Device control > On, you will also be able to then control the image or video playback using the TV remote. Note that movies may not display properly, depending on the Frame size / Frame rate settings at which they were recorded.
Nikon D610 / D600 Accessories
Nikon EN-EL15 Rechargable Battery: It is always good to have an extra battery or two, especially when traveling or when photographing all day or for an event.
Nikon MB-D14 Battery Pack/ Grip: This accessory will enable you to use a second EN-EL15 battery or else use AA batteries, thus allowing you to shoot longer without having to change batteries. It also increases the size of the D600 body which may be more comfortable for some shooters, especially when shooting vertically in portrait orientation.
Nikon ML-L3 Wireless Remote or MC-DC2 Remote Release Cord: These remotes will allow you to trigger the shutter of the camera remotely, thus allowing either self-portraits or the ability to release the shutter without pressing the Shutter Button thus preventing possible camera shake.
Nikon SB-910 (or SB-900, SB-800, SB-700, SB-600, SB-500) Speedlight Flash: These external flashes will give you greatly increased flash power and control compared to the built-in flash. They also have adjustable and rotating heads so that you can use indirect and bounce flash. All of them can be used as remote flashes controlled by the built-in flash, and with the exception of the SB-600 all can be used as commanders to trigger remote flashes.
Nikon SB-5000 Speedlight Flash: In addition to offering all the functions of the above flash units, this top of the line Nikon Speedlight offers optical wireless control, as well as wireless radio control (when used with using the WR-A10 Wireless Remote Adapter and WR-R10 Wireless Remote Controller). The radio control can be triggered nearly 100 feet away and does not require line-of-sight. The flash also contains a cooling system that will allow 100 or more consecutive shots at full power.
Nikon WU-1b Wireless Mobile Adapter: This can be used to wirelessly transmit your images to a tablet or smart-phone as you shoot, or even use the smart device to remotely release the shutter. However for certain situations and uses, an Eye-Fi SD memory card may be more convenient.
Nikon GP-1 GPS Unit: / GP-1A GPS Unit (check compatibly with your camera here.) Use this GPS receiver for automatic geotagging of your images including location, altitude data, and UTC time.
ME-1 Stereo Microphone: An external, stereo mic to record much better sound during movie shooting that the built-in mic.
Nikon Capture NX2: If you are not using Photoshop, this software will enable you to process and retouch your JPEG or RAW files, and correct things such color, contrast, and sharpening.
Nikon Df Accessories
Nikon Df User’s Manual – For a PDF download of the Nikon Df manual, see the webpage below:
https://support.nikonusa.com/app/answers/detail/a_id/18767
AF-S NIKKOR 50mm f/1.8G Special Edition Lens: This lens, with its silver ring, is specifically designed to match the retro-style of the Df – though it contains the same optics of the non-special AF-S 50mm f/1.8 lens.
Nikon EN-EL14a Rechargeable Battery: It is always good to have an extra battery or two, especially when traveling or when photographing all day or for an event.
WR-R10/ WR-T10 Wireless Remote Controller and Transceiver: This wireless remote will allow you to trigger the shutter of the camera remotely, thus allowing either self-portraits or the ability to release the shutter without pressing the Shutter Button thus preventing possible camera shake. The WR set communicates via radio frequencies, and thus does not require direct line-of-sight between the camera and the remote. You can even use multiple WR-R10 receivers on multiple cameras and trigger them simultaneously with one WR-T10 remote transmitter. The new WR-1 Wireless Remote Controller will allow even greater wireless control over one or multiple cameras with their own WR-1 or WR-R10 units.
AR-3 Cable Release Cord: This remote will allow you to trigger the shutter of the camera remotely, but is attached to the camera via a cable, rather than being wireless. In keeping with the styling of the Df, it is a “retro” cable-release with a plunger.
MC-DC2 Remote Release Cord: This is also a straightforward corded remote used to trigger the shutter of the camera, and is plugged into the Accessory Terminal of the Df.
Nikon SB-910 or Nikon SB-700 Speedlight Flash: These external flashes will give you significant flash power and control over output and direction. They have adjustable and rotating heads so that you can use indirect and bounce flash. They can also be used as commanders to trigger remote Speedlight flashes.
Nikon SB-400 Speedlight: This is a much smaller and less powerful flash than the versatile SB-910, and is closer to the strength of a typical built-in flash. However you can angle it for bounce-flash purposes.
SU-800 Wireless Speedlight Commander: This unit is mounted on the camera’s hot shoe, and will allow you to wirelessly control and trigger one or multiple remote Speedlights.
Nikon WU-1a Wireless Mobile Adapter: This can be used to wirelessly transmit your images to a tablet or smart-phone as you shoot, share your images, or even use your smart phone or tablet to remotely autofocus and release the camera’s shutter.
Wireless Mobile Utility: To get started with Wi-Fi, you will also need to download Nikon’s Wireless Mobile Utility app, which is available for both iOS and Android. Note that the iPad app is available as an “iPhone Only” app in the Apple App Store, though it can still be used on the iPad. You can find links to both versions of the app below, along with links to both versions of the Wireless Mobile Utility User’s Manuals:
Nikon GP-1A GPS Unit: Use this GPS receiver for automatic geotagging of your images including location, altitude data, and UTC time.
Nikon Capture NX2: If you are not using Photoshop, this software will enable you to process and retouch your JPEG or RAW files, and correct things such color, contrast, sharpening, and noise. This version is in the process of being replaced with Capture NX-D.
CF-DC6 Semi-Soft Case or CF-DC5 Semi-Soft Case: The CF-DC6 is a retro-styled leatherette case specially designed for the Df, and is available in Black or in light Brown. The CF-DC5 is of a more contemporary style and materials.
Leather Strap in Black or in Brown: You can pair the retro-styled CF-DC6 case with a leather strap, available in similar colors.
Gariz Leather Half-Case: There is also a very nice looking leather half-case by a third-party named Gariz. It is available in black and brown, and covers the grip area and lower part of the Df body, but also allows you to open and access the battery/ memory card compartment and the side terminal covers, without removing the case. It lengthens the body of the camera in order to provide a replacement tripod socket (since the camera’s is used for attaching the case), and perhaps to enlarge the camera to offer a better grip.
Screen Protectors: This pair of screen protectors is specifically sized for the LCD screens of the Df. While I have not personally used them, and thus cannot vouch for their quality or usefulness, previous versions of this brand have gained good reviews.
High-Speed A to C Type, HDMI to Mini-HDMI Cable: Use this HDMI cable to connect the Df to an HDMI CEC compatible TV, and then view images and slideshows from the camera. By accessing the Setup Menu item HDMI > Device control > On, you will also be able to then control the image playback using the TV remote.
Nikon D3300 Accessories
Nikon D3300 Manuals: The D3300 Reference Manual can be obtained as a PDF file from the Nikon website at this link:
https://support.nikonusa.com/app/answers/detail/a_id/18824
Nikon WU-1a Wireless Mobile Adapter: This can be used to wirelessly transmit your images to a tablet or smart-phone as you shoot, to share your images, or even to use your smart phone or tablet to remotely release the camera’s shutter – all with Nikon’s Wireless Mobile Adapter Utility app.
Wireless Mobile Utility:To get started with Wi-Fi, you will first need to download Nikon’s Wireless Mobile Utility app, which is available for both iOS and Android. Note that the iPad app is available as an “iPhone Only” app in the Apple App Store, though it can still be used on the iPad. You can find links to both versions of the app below, along with links to both versions of the Wireless Mobile Utility User’s Manuals:
Nikon EN-EL14a Rechargeable Battery: It is always good to have an extra battery or two, especially when traveling or when photographing all day or for an event.
Battery Pack/ Grip: This third-party accessory will enable you to use two EN-EL14a batteries, thus allowing you to shoot longer without having to change batteries. It also increases the size of the D3300 body which may be more comfortable for some shooters, especially when shooting vertically in portrait orientation.
Nikon ML-L3 Wireless Remote Controller or WR-R10/ WR-T10 Wireless Remote Controller and Transceiver: These wireless remotes will allow you to trigger the shutter of the camera remotely, thus allowing either self-portraits or the ability to release the shutter without pressing the Shutter Button thus preventing possible camera shake. The WR set communicates via radio frequencies, and thus does not require direct line-of-sight between the camera and the remote. You can even use multiple WR-R10 receivers on multiple cameras and trigger them simultaneously with one WR-T10 remote transmitter. The new WR-1 Wireless Remote Controller will allow even greater wireless control over one or multiple cameras with their own WR-1 or WR-R10 unit.
MC-DC2 Remote Release Cord: This remote will allow you to trigger the shutter of the camera remotely, but is attached to the camera via a cable, rather than being wireless.
DK-5 Eyepiece Cap:When using any of the Release Modes such as Self-Timer or Remote, where your eye is not at the Viewfinder, be sure to cover the Viewfinder with a piece of tape or this optional eyepiece cap in order to prevent stray light from entering the camera and modifying the exposure settings.
Nikon SB-910 or SB-700 Speedlight Flash: These external flashes will give you greatly increased flash power and control compared to the built-in flash. They also have adjustable and rotating heads so that you can use indirect and bounce flash. And they can be used as remote flashes triggered by the built-in flash, and as commanders to control and trigger multiple remote flashes.
ME-1 Stereo Microphone: An external, stereo mic to record much better sound during movie shooting that the built-in mic. The Rode VideoMic or the Rode VideoMic Pro are also good-quality affordable external stereo microphones for recording audio while shooting video. They each mount to the camera’s Hot Shoe and connect via the External Microphone connector terminal on the side of the camera.
Nikon Capture NX2: If you are not using Photoshop, this software will enable you to process and retouch your JPEG or RAW files, and correct things such color, contrast, and sharpening.
High-Speed A to C Type, HDMI to Mini-HDMI Cable: Use this HDMI cable to connect the D3300 to an HDMI CEC compatible TV, and then view movies, images, and slideshows from the camera. By accessing the Playback Menu item HDMI > Device control > On, you will also be able to then control the image or video playback using the TV remote. Note that movies may not display properly, depending on the Frame size / Frame rate settings at which they were recorded.
–
–
Canon EOS R / EOS R7 / EOS R6II/ EOS R8 Accessories
Canon LP-E6N Battery or the current Canon LP-E6NH Battery: It is always good to have an extra battery or two, especially when traveling or when photographing all day or for an event.
Canon LP-E17 Battery for the EOS R8
Canon BG-E22 Battery Grip: This optional battery pack and grip for the EOS R will enable you to use two LP-E6N batteries, thus allowing you to shoot longer without having to change batteries. (No official Canon grip is available for the EOS R7.) The grip replicates the controls of the body and also increases the size of the EOS R body which may be more comfortable for some shooters, especially when using the camera in the vertical position. Note that there is a firmware update for the BG-E22 Battery Grip:
https://www.usa.canon.com/internet/portal/us/home/support/details/supplies-accessories/batteries-grips/battery-grip-bg-e22?tab=drivers_downloads
Canon EF-EOS R Mount Adapters: Canon offers three EF to EOS R mount adapters, which enable you to use EF and EF-S lenses with the EOS R mirrorless models, as well as extenders. The adapters are dust and weather sealed. One is a basic EF-EOS R adapter, the Canon Mount Adapter EF-EOS R. One includes a Control Ring similar to the one on the RF lenses, the Canon Control Ring Mount Adapter EF-EOS R. And the Canon Drop-In Filter Mount Adapter EF-EOS R allows for the use of a drop-in filter, including a variable ND filter or a circular polarizing filter. This adapter can be purchased with the Circular Polarizing Filter, with the Variable ND Filter, and you can separately purchase just the Variable ND Filter or just the Circular Polarizing Filter.
Canon Remote Switch RS-60E3, Canon Wireless Remote Control RC-6, or the Bluetooth Canon BR-E1 Wireless Remote Controller: These remotes will allow you to trigger the shutter of the camera remotely, allowing either self-portraits or the ability to release the shutter without pressing the Shutter Button thus preventing possible camera shake. Note that you must pair the BR-E1 remote with the camera, by first setting the Setup 5 Menu > Wireless Communication Settings > Bluetooth Function > Remoteoption. Then select the Pairing item in the Bluetooth Function menu, and simultaneously press and hold the W and Tbuttons on the remote, for 3 seconds. Infrared remote controllers such at the RC-6 are not compatible with the EOS R.
Canon Speedlite EL-1: This is the newest flagship flash, which replaces the 600EX-II-RT. This external flash will give you the most flash power and control of the Canon Speedlites, as well as continuous shooting support. It has an adjustable and rotating head so that you can use indirect and bounce flash, and includes a diffuser plus color filters for white balance. It also allows optical wireless functionality plus is compatible with the radio wave wireless flash system when controlled and triggered by the Speedlite Transmitter ST-E3-RT.
Canon Speedlite EL-5: This is a non-professional version of the EL-1 external flash. The EL-5 will provide less flash power and control, and fewer features than the top-of-the-line EL-1, however it may meet your needs if you don’t make extensive use of a flash. It also has an adjustable and rotating head so that you can use indirect and bounce flash. It allows optical wireless functionality plus is compatible with Canon’s radio wave wireless flash system when controlled and triggered by the Speedlite Transmitter ST-E3-RT.
Canon Speedlite 600EX II-RT: This external flash will give you the most flash power and control of the Canon Speedlites, as well as continuous shooting support. It has an adjustable and rotating head so that you can use indirect and bounce flash, and includes a diffuser plus color filters for white balance. The 600EX II-RT also allows optical wireless functionality plus is compatible with the radio wave wireless flash system when controlled and triggered by the Speedlite Transmitter ST-E3-RT.
Speedlite Transmitter ST-E3-RT: Use this radio wave wireless transmitter to control and trigger up to 5 groups of 15 flashes, up to 30 meters, with no line-of-site required. Compatible with the Canon 600EX II-RT Speedlite.
Note that either the 600EX II-RT Speedlite or the ST-E3-RT Transmitter can also act as a remote camera trigger for the EOS R. If either one of these units is in the Hot Shoe of the EOS R, another one of these units can fire the camera remotely, for a single frame, with the press of a button.
Speedlite 430EX III-RT external flash will provide less flash power and control, and fewer features than the top of the line 600EX II-RT, however it may meet your needs if you don’t make extensive use of a flash. It also has an adjustable and rotating head so that you can use indirect and bounce flash. The 430EX III-RT allows optical wireless functionality plus is compatible with Canon’s radio wave wireless flash system when controlled and triggered by the Speedlite Transmitter ST-E3-RT or a 600EX II-RT. And the 430EX III-RT offers an optional bounce adapter and color filter.
Speedlite 470EX-AI external flash has an auto-intelligent bounce function, meaning that the flash head will rotate and swivel automatically, to be positioned at the best angle for bounce flash, based on the subject distance and ceiling height. The 470EX-AI also allows optical wireless functionality.
Canon HTC-100 HDMI cable or a similar HDMI cable Use this HDMI cable to connect the EOS R to an HDMI CEC compatible TV, and then view movies, images, and slideshows from the camera.
WFT-E7A Wireless File Transmitter Version 2: This optional device enables fast wireless or wired Ethernet transfer of images from the camera to a computer or smart device such as an iPad or tablet. It also offers remote control and linked shooting capabilities, and offers built-in Bluetooth function.
Canon GPS Receiver GP-E2: This optional device can be used to automatically geotag your images with location data. If you are using the GP-E2, be sure to update its firmware to the latest version (Version 2.0.0 or later).
–
Canon 5D Mark IV Accessories and Canon 5DS / 5DS R Accessories
Canon LP-E6N Battery: It is always good to have an extra battery or two, especially when traveling or when photographing all day or for an event.
Canon BG-E20 Battery Grip: This optional battery pack and grip for the 5DIV will enable you to use two LP-E6N batteries, thus allowing you to shoot longer without having to change batteries. The grip replicates the controls of the body and also increases the size of the 5D Mark IV body which may be more comfortable for some shooters, especially when using the camera in the vertical position.
Canon Remote Switch RS-80N3 or Canon Wireless Remote Control RC-6: These remotes will allow you to trigger the shutter of the camera remotely, allowing either self-portraits or the ability to release the shutter without pressing the Shutter Button thus preventing possible camera shake. There is also the Timer Remote Controller TC-80N3 for time-lapse or long exposure photography.
Canon Speedlite 600EX II-RT: This external flash will give you the most flash power and control of the Canon Speedlites, as well as continuous shooting support. It has an adjustable and rotating head so that you can use indirect and bounce flash, and includes a diffuser plus color filters for white balance. The 600EX II-RT also allows optical wireless functionality plus is compatible with the radio wave wireless flash system when controlled and triggered by the Speedlite Transmitter ST-E3-RT.
Speedlite Transmitter ST-E3-RT: Use this radio wave wireless transmitter to control and trigger up to 5 groups of 15 flashes, up to 30 meters, with no line-of-site required. Compatible with the Canon 600EX II-RT Speedlite.
Note that either the 600EX II-RT Speedlite or the ST-E3-RT Transmitter can also act as a remote camera trigger for the 5D Mark IV. If either one of these units is in the Hot Shoe of the 5D Mark IV, another one of these units can fire the camera remotely, for a single frame, with the press of a button.
Speedlite 430EX III-RT or Speedlite 320EX: These external flashes will provide less flash power and control, and fewer features than the top of the line 600EX II-RT, however they may meet your needs if you don’t make extensive use of a flash. They also have adjustable and rotating heads so that you can use indirect and bounce flash. The 430EX III-RT allows optical wireless functionality plus is compatible with Canon’s radio wave wireless flash system when controlled and triggered by the Speedlite Transmitter ST-E3-RT or a 600EX II-RT. The 430EX III-RT offers an optional bounce adapter and color filter. The 320EX has a built in LED light for lighting video.
Canon HTC-100 HDMI cable: Use this HDMI cable to connect the 5D Mark IV to an HDMI CEC compatible TV, and then view movies, images, and slideshows from the camera. By setting the Control over HDMI menu item to Enable (Playback 3 Menu), you will also be able to then control the image or video playback using the TV remote.
WFT-E7A Wireless File Transmitter Version 2: This optional device enables fast wireless or wired Ethernet transfer of images from the camera to a computer or smart device such as an iPad or tablet. It also offers remote control and linked shooting capabilities, and offers built-in Bluetooth function.
Canon 7D Mark II Accessories
Canon LP-E6N Battery: It is always good to have an extra battery or two, especially when traveling or when photographing all day or for an event.
Canon BG-E16 Battery Grip: This optional battery pack and grip will enable you to use two LP-E6N batteries or six AA/ LR6 batteries, thus allowing you to shoot longer without having to change batteries. The grip replicates the controls of the body and also increases the size of the 7D Mark II body which may be more comfortable for some shooters, especially when using the camera in the vertical position.
Canon Remote Switch RS-80N3 or Canon Wireless Remote Control RC-6: These remotes will allow you to trigger the shutter of the camera remotely, allowing either self-portraits or the ability to release the shutter without pressing the Shutter Button thus preventing possible camera shake. There is also the Timer Remote Controller TC-80N3 for time-lapse or long exposure photography.
Canon Speedlite 600EX-RT: This most recently introduced external flash will give you the most flash power and control of the Canon Speedlites. It has an adjustable and rotating head so that you can use indirect and bounce flash, and is compatible with a specially designed color filter holder and gels (see below). The 600EX-RT also allows infrared wireless functionality plus is compatible with the new radio wave wireless flash system when controlled and triggered by the Speedlite Transmitter ST-E3-RT.
Speedlite Transmitter ST-E3-RT: Use this radio wave wireless transmitter to control and trigger up to 5 groups of 15 flashes, up to 30 meters, with no line-of-site required. Currently only compatible with the Canon 600EX-RT Speedlite.
Note that either the 600EX-RT Speedlite or the ST-E3-RT Transmitter can also act as a remote camera trigger for the 7D Mark II. If either one of these units is in the Hot Shoe of the 7D Mark II, another one of these units can fire the camera remotely, for a single frame, with the press of a button.
Canon SCH-E1 Color Filter Holder: This plastic holder attaches to the front of the 600EX-RT Speedlite and holds the gels of the Canon Color Filter Set. Use these filters (gels) to balance the color temperature of your flash to the color temperature of the ambient light in order to have a single White Balance setting that neutralizes the color cast of the entire scene.
Canon Speedlite 580EX II or Speedlite 430EX II or Speedlite 320EX: These external flashes will give you varying levels of flash power and control, with the 580EX II being the most powerful of the group. They also have adjustable and rotating heads so that you can use indirect and bounce flash. The 320EX also has a built in LED light for lighting video. To attach color filters to these models see the Rosco Strobist Collection Flash Gels section below.
Canon HTC-100 HDMI cable: Use this HDMI cable to connect the 7D Mark II to an HDMI CEC compatible TV, and then view movies, images, and slideshows from the camera. By setting the Control over HDMI menu item to Enable (Playback 3 Menu), you will also be able to then control the image or video playback using the TV remote.
WFT-E7A Wireless File Transmitter Version 2: This optional device enables fast wireless or wired Ethernet transfer of images from the camera to a computer or smart device such as an iPad or tablet. It also offers remote control and linked shooting capabilities, and offers built-in Bluetooth function. The device attaches to the base of the 7D Mark II, and is a similar size and shape as the optional battery grip.
Eh-S Super Precision Matte Focusing Screen: The 7D Mark II is able to accept this optional focusing screen, which is designed for manual focusing. However, you will need to be using a lens with a maximum aperture of f/2.8 or larger, or else it will make the Viewfinder appear darker than the standard focusing screen. This screen will display the out-of-focus areas of the scene more dramatically out-of-focus, thus helping you to better view what is in-focus. Be sure to change the C.Fn 3 Custom Function item of the Focusing Screen for Eh-S, if you make use of this screen.
Canon 80D / 77D / 70D Accessories
Canon LP-E6 Battery: It is always good to have an extra battery or two, especially when traveling or when photographing all day or for an event.
Canon BG-E14 Battery Grip: This optional battery pack and grip will enable you to use two LP-E6 batteries or six AA/ CR6 batteries, thus allowing you to shoot longer without having to change batteries. The grip replicates the controls of the body and also increases the size of the 70D body which may be more comfortable for some shooters, especially when using the camera in the vertical position.
Canon GP-E2 GPS Receiver: Use this GPS receiver for automatic geotagging of your images including location and altitude data, a digital compass, and UTC time.
Canon Remote Switch RS-80N3 or Canon Wireless Remote Control RC-6: These remotes will allow you to trigger the shutter of the camera remotely, allowing either self-portraits or the ability to release the shutter without pressing the Shutter Button thus preventing possible camera shake. There is also the Timer Remote Controller TC-80N3 for time-lapse or long exposure photography.
Canon Speedlite 600EX-RT: This most recently introduced external flash will give you the most flash power and control of the Canon Speedlites. It has an adjustable and rotating head so that you can use indirect and bounce flash, and is compatible with a specially designed color filter holder and gels (see below). The 600EX-RT also allows infrared wireless functionality plus is compatible with the new radio wave wireless flash system when controlled and triggered by the Speedlite Transmitter ST-E3-RT.
Speedlite Transmitter ST-E3-RT: Use this radio wave wireless transmitter to control and trigger up to 5 groups of 15 flashes, up to 30 meters, with no line-of-site required. Currently only compatible with the Canon 600EX-RT Speedlite.
Note that either the 600EX-RT Speedlite or the ST-E3-RT Transmitter can also act as a remote camera trigger for the 70D. If either one of these units is in the hotshoe of the 70D, another one of these units can fire the camera remotely, for a single frame, with the press of a button.
Canon SCH-E1 Color Filter Holder: This plastic holder attaches to the front of the 600EX-RT Speedlite and holds the gels of the Canon Color Filter Set. Use these filters (gels) to balance the color temperature of your flash to the color temperature of the ambient light in order to have a single White Balance setting that neutralizes the color cast of the entire scene.
Canon Speedlite 580EX II or Speedlite 430EX II or Speedlite 320EX: These external flashes will give you varying levels of flash power and control, with the 580EX II being the most powerful of the group. They also have adjustable and rotating heads so that you can use indirect and bounce flash. The 320EX also has a built in LED light for lighting video. To attach color filters to these models see the Rosco Strobist Collection Flash Gels section just above.
Canon HTC-100 HDMI cable: Use this HDMI cable to connect the 70D to an HDMI CEC compatible TV, and then view movies, images, and slideshows from the camera. By setting the Control over HDMI menu item to Enable (Playback 3 menu), you will also be able to then control the image or video playback using the TV remote. Use the Canon AVC-DC400ST Stereo AV cable for non-HD TV sets.
Canon 7D Accessories (see also the Canon 5D Mark III Accessories section for the new Canon 600EX-RT flash and its accessories)
Canon LP-E6 Battery: It is always good to have an extra battery or two, especially when traveling or when photographing all day or for an event.
Canon BG-E7 Battery Grip: This accessory will enable you to use two LP-E6 batteries, (or else use six AA batteries), thus allowing you to shoot longer without having to change batteries. It also increases the size of the 7D body which may be more comfortable for some shooters, especially when shooting vertically in portrait orientation.
Canon Remote Switch RS-60E3 or Canon Wireless Remote Control RC-6: These remotes will allow you to trigger the shutter of the camera remotely, thus allowing either self-portraits or the ability to release the shutter without pressing the Shutter Button thus preventing possible camera shake.
Canon Speedlite 580EX II or Speedlite 430EX II or Speedlite 320EX: These external flashes will give you greatly increased flash power and control compared to the built-in flash. They also have adjustable and rotating heads so that you can use indirect and bounce flash. All of them can be used as remote flashes controlled by the built-in flash. The 320EX also has a built in LED light for lighting video. (see also the Canon 5D Mark III Accessories section for the new Canon 600EX-RT flash and its accessories).
Canon WFT-E5A Wireless File Transmitter: Use this accessory to wirelessly transmit your images from the camera to a computer over a Wi-Fi or Gigabit Ethernet connection. It can also be used to wirelessly control the camera via a web-enabled mobile device.
Canon GP-E2 GPS Receiver: Use this GPS receiver for automatic geotagging of your images including location and altitude data, a digital compass, and UTC time.
Canon 60D Accessories (see also the 5D Mark III section for the new Canon 600EX-RT flash and its accessories)
Canon LP-E6 Battery: It is always good to have an extra battery or two, especially when traveling or when photographing all day or for an event.
Canon BG-E9 Battery Grip: This accessory will enable you to use two LP-E6 batteries, (or else use six AA batteries), thus allowing you to shoot longer without having to change batteries. It also increases the size of the 60D body which may be more comfortable for some shooters, especially when shooting vertically in portrait orientation.
Canon Remote Switch RS-60E3 or Canon Wireless Remote Control RC-6: These remotes will allow you to trigger the shutter of the camera remotely, thus allowing either self-portraits or the ability to release the shutter without pressing the Shutter Button thus preventing possible camera shake.
Canon Speedlite 580EX II or Speedlite 430EX II or Speedlite 320EX: These external flashes will give you greatly increased flash power and control compared to the built-in flash. They also have adjustable and rotating heads so that you can use indirect and bounce flash. All of them can be used as remote flashes controlled by the built-in flash. The 320EX also has a built in LED light for lighting video.
Canon Hand Strap E2: This hand strap provides a more secure grip and allows for easier single hand operation of the camera. It attaches on the right side of the 60D and your right hand slips between it and the camera.
Canon EF-D Focusing Screen: This is the grid focusing screen to help you keep your compositions and horizons straight and level.
Canon Rebel T5i/700D, T4i/650D, T3i/600D, and T2i/550D Accessories
Canon LP-E8 Battery: It is always good to have an extra battery or two, especially when traveling or when photographing all day or for an event.
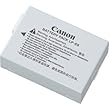
Canon BG-E8 Battery Grip: This accessory will enable you to use two LP-E8 batteries, (or else use six AA batteries), thus allowing you to shoot longer without having to change batteries. It also increases the size of the camera’s body which may be more comfortable for some shooters, especially when shooting vertically in portrait orientation.
Canon GP-E2 GPS Receiver: Use this GPS receiver for automatic geotagging of your images including location and altitude data, a digital compass, and UTC time.
Canon Remote Switch RS-60E3 or Canon Wireless Remote Control RC-6: These remotes will allow you to trigger the shutter of the camera remotely, thus allowing either self-portraits or the ability to release the shutter without pressing the Shutter Button thus preventing possible camera shake.
Canon Speedlite 600EX-RT: This most recently introduced external flash will give you the most flash power and control of the Canon Speedlites. It has an adjustable and rotating head so that you can use indirect and bounce flash, and is compatible with a specially designed color filter holder and gels (see below). The 600EX-RT also allows infrared wireless functionality plus is compatible with the new radio wave wireless flash system when controlled and triggered by the Speedlite Transmitter ST-E3-RT.
Speedlite Transmitter ST-E3-RT: Use this radio wave wireless transmitter to control and trigger up to 5 groups of 15 flashes, up to 30 meters, with no line-of-site required. Currently only compatible with the Canon 600EX-RT Speedlite.
Note that either the 600EX-RT Speedlite or the ST-E3-RT Transmitter can also act as a remote camera trigger for the T4i. If either one of these units is in the hotshoe of the T4i, another one of these units can fire the camera remotely, for a single frame, with the press of a button.
Canon SCH-E1 Color Filter Holder: This plastic holder attaches to the front of the 600EX-RT Speedlite and holds the gels of the Canon Color Filter Set. Use these filters (gels) to balance the color temperature of your flash to the color temperature of the ambient light in order to have a single White Balance setting that neutralizes the color cast of the entire scene.
Canon Speedlite 580EX II or Speedlite 430EX II or Speedlite 320EX: These external flashes will give you greatly increased flash power and control compared to the built-in flash. They also have adjustable and rotating heads so that you can use indirect and bounce flash. All of them can be used as remote flashes controlled by the built-in flash. The 320EX also has a built in LED light for lighting video.
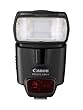
Canon Hand Strap E2: This hand strap, used with or without the battery grip, provides a more secure grip and allows for easier single hand operation of the camera. It attaches on the right side of the camera and your right hand slips between it and the camera.
Canon EOS 5D Mark III Accessories
Sandisk Extreme CF Memory Cards: I suggest getting a couple 16GB, 32GB, or higher capacity CompactFlash (CF) cards to capture and store your photos – more if traveling. Be sure to check the Sandisk site for current rebates.
Sandisk Extreme Pro CF Memory Cards: For an even faster CF memory card, look at the Extreme Pro version, which saves at 90MB/s over 60 MB/s of the Extreme CF cards.
Sandisk Extreme SD Memory Cards: If you plan to use the camera’s second card slot, I suggest getting a couple 16GB, 32GB, or higher capacity Secure Digital (SD) cards to capture and store your photos – more if traveling. Review the various ways that the camera’s second card slot can be used. Again, be sure to check the Sandisk site for current rebates.
Sandisk Extreme Pro SD Memory Cards: For an even faster SD memory card, look at the Extreme Pro version, which saves at 95MB/s over 30 MB/s of the Extreme SD cards.
SanDisk Extreme Pro UDMA 7 CF Memory Card: This CF memory card will allow you to take full advantage of the high speed continuous shooting of the 5D Mk III to capture up to the maximum 16,270 continuous JPEG images or 18 RAW images in a single burst.
Canon LP-E6 Battery: It is always good to have an extra battery or two, especially when traveling or when photographing all day or for an event.
Canon BG-E11 Battery Grip: This optional battery pack and grip will enable you to use two LP-E6 batteries or six AA/ CR6 batteries, thus allowing you to shoot longer without having to change batteries. The grip replicates the controls of the body and also increases the size of the 5D Mk III body which may be more comfortable for some shooters, especially when using the camera in the vertical position.
Canon WFT-E7A Wireless File Transmitter: Use this accessory to wirelessly transmit your images from the camera to a computer over a Wi-Fi or Gigabit Ethernet connection. It can also be used to wirelessly control the camera via a web-enabled mobile device.
Canon GP-E2 GPS Receiver: Use this GPS receiver for automatic geotagging of your images including location and altitude data, a digital compass, and UTC time.
Canon Remote Switch RS-80N3 or Canon Wireless Remote Control RC-6: These remotes will allow you to trigger the shutter of the camera remotely, thus allowing either self-portraits or the ability to release the shutter without pressing the Shutter Button thus preventing possible camera shake. There is also the Timer Remote Controller TC-80N3 for time-lapse or long exposure photography.
Canon Speedlite 600EX-RT: This most recently introduced external flash will give you the most flash power and control of the Canon Speedlites. It has an adjustable and rotating head so that you can use indirect and bounce flash, and is compatible with a specially designed color filter holder and gels (see below). The 600EX-RT also allows infrared wireless functionality plus is compatible with the new radio wave wireless flash system when controlled and triggered by the Speedlite Transmitter ST-E3-RT. The AF assist beam of the Canon 600EX-RT is the only current Speedlite designed to be compatible with the 61 point autofocus system of the 5D Mk III.
Speedlite Transmitter ST-E3-RT: Use this radio wave wireless transmitter to control and trigger up to 5 groups of 15 flashes, up to 30 meters, with no line-of-site required. Currently only compatible with the Canon 600EX-RT Speedlite.
Note that either the 600EX-RT Speedlite or the ST-E3-RT Transmitter can also act as a remote camera trigger for the 5D Mk III. If either one of these units is in the hotshoe of the 5D Mk III, another one of these units can fire the camera remotely, for a single frame, with the press of a button.
Canon SCH-E1 Color Filter Holder: This plastic holder attaches to the front of the 600EX-RT Speedlight and holds the gels of the Canon Color Filter Set. Use these filters (gels) to balance the color temperature of your flash to the color temperature of the ambient light in order to have a single WB setting that neutralizes the color cast of the entire scene.
Canon Speedlite 580EX II or Speedlite 430EX II or Speedlite 320EX: These external flashes will give you varying levels of flash power and control, with the 580EXII being the most powerful of the group. They also have adjustable and rotating heads so that you can use indirect and bounce flash. The 320EX also has a built in LED light for lighting video. To attach color filters to these models see the Rosco Strobist Collection Flash Gels section just above.
Sto-Fen Omni Bounce Diffuser for the Canon 580EXII or for the Canon 600EX-RT: Works great on the optional external flash units like the Canon 580EX II Speedlite or the newer 600EX-RT Speedlite. Do not use this on your flash outdoors because all it will do outside is cause your flash to work harder. I know you see lots of people doing it. They didn’t bother reading how to use it – don’t imitate them! Use a direct bare or gelled flash outdoors. These diffusers are designed to work as a diffuser when bounced off a surface and angled at 45 degrees or so, not straight on, and not bouncing off the sky.
Canon EOS 6D Accessories
Canon LP-E6 Battery: It is always good to have an extra battery or two, especially when traveling or when photographing all day or for an event.
Canon BG-E13 Battery Grip: This optional battery pack and grip will enable you to use two LP-E6 batteries or six AA/ CR6 batteries, thus allowing you to shoot longer without having to change batteries. The grip replicates the controls of the body and also increases the size of the 6D body which may be more comfortable for some shooters, especially when using the camera in the vertical position.
Canon GP-E2 GPS Receiver: Use this GPS receiver for automatic geotagging of your images including location and altitude data, a digital compass, and UTC time. However the EOS 6D (WG) has built-in GPS, so this accessory is generally not necessary. Ironically, the GP-E2 is not compatible with the EOS 6D (N), the model that is sold in certain regions without built-in Wi-Fi and GPS.
Canon Remote Switch RS-80N3 or Canon Wireless Remote Control RC-6: These remotes will allow you to trigger the shutter of the camera remotely, allowing either self-portraits or the ability to release the shutter without pressing the Shutter Button thus preventing possible camera shake. There is also the Timer Remote Controller TC-80N3 for time-lapse or long exposure photography.
Canon Speedlite 600EX-RT: This most recently introduced external flash will give you the most flash power and control of the Canon Speedlites. It has an adjustable and rotating head so that you can use indirect and bounce flash, and is compatible with a specially designed color filter holder and gels (see below). The 600EX-RT also allows infrared wireless functionality plus is compatible with the new radio wave wireless flash system when controlled and triggered by the Speedlite Transmitter ST-E3-RT.
Speedlite Transmitter ST-E3-RT: Use this radio wave wireless transmitter to control and trigger up to 5 groups of 15 flashes, up to 30 meters, with no line-of-site required. Currently only compatible with the Canon 600EX-RT Speedlite.
Note that either the 600EX-RT Speedlite or the ST-E3-RT Transmitter can also act as a remote camera trigger for the 6D. If either one of these units is in the hotshoe of the 6D, another one of these units can fire the camera remotely, for a single frame, with the press of a button.
Canon SCH-E1 Color Filter Holder: This plastic holder attaches to the front of the 600EX-RT Speedlite and holds the gels of the Canon Color Filter Set. Use these filters (gels) to balance the color temperature of your flash to the color temperature of the ambient light in order to have a single White Balance setting that neutralizes the color cast of the entire scene.
Canon Speedlite 580EX II or Speedlite 430EX II or Speedlite 320EX: These external flashes will give you varying levels of flash power and control, with the 580EX II being the most powerful of the group. They also have adjustable and rotating heads so that you can use indirect and bounce flash. The 320EX also has a built in LED light for lighting video. To attach color filters to these models see the Rosco Strobist Collection Flash Gels section just above.
Viewfinder Focusing Screens: The optional Canon Eg-S Super Precision Matte focusing screen is designed to assist with manual focusing, and the optional Canon Eg-D Precision Matte focusing screen provides a grid in the Viewfinder to help keep your compositions straight and level.