The First and Best Canon EOS 5DS / 5DS R User’s Guide now Available!

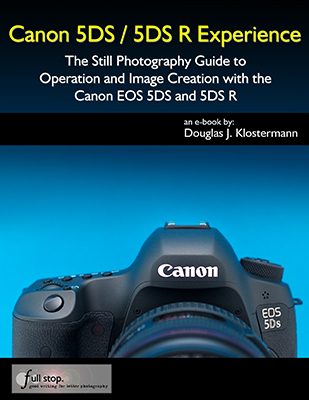
Canon 5DS / 5DS R Experience, my latest Full Stop e book and the first EOS 5DS and 5DS R user’s guide, is now available!

This e book goes beyond the manual to help you learn the features, settings, and controls of the powerful and highly customizable Canon 5DS and 5DS R. Plus most importantly it explains how, when, and why to use the functions, settings, menu options, and controls in your photography – including the sophisticated 61-point viewfinder autofocus system with its AF Modes and AF Case settings, the Live View-Movie AF system, personalizing the Custom Controls, and controlling exposure and shooting settings. The guide also covers the in-camera features such as Multiple Exposure, Time-Lapse, HDR, RAW image processing, and the Mirror Lock-Up and Exposure Time delay settings to help maximize sharpness and get the most from the high-resolution sensor. Plus it includes explanations and recommended settings for the Menu items and Custom Function settings.

Written in the clear, concise, and comprehensive style of all Full Stop guides, Canon 5DS / 5DS R Experience will help you learn to use your 5DS or 5DS R quickly and competently, to consistently create the types of images you want to capture. This e-book is available in either PDF or EPUB format for reading on your computer, tablet, iPad, e-reader, etc.

Canon 5DS 5DSR book manual guide master how to use learn quick start tips tricks setup setting menu custom function recommend

Learn more about it, view a preview, and purchase it here:

http://www.fullstopbooks.com/canon-5ds-5ds-r-experience/

As readers have said about Full Stop guides:

Best reference book for Canon – Well written and easy to understand. This book really helps one to be able to take advantage of all the features of the camera. A must have book.”

Excellent ebook – This ebook is first-class, and this author knows his stuff about Canon cameras. He cuts to the chase, and gets right to the heart of the important matters. I learned a lot and I learned it very quickly indeed – which I am now putting to good use with my camera. Highly recommended.”

Will Save You A Month On The Learning Curve – This book clearly and practically walks the reader through every step of setting up and using the camera for the first time. A wonderfully well-organized book, it explains every feature and setting on the camera with recommendations on optimal setup choices and the reasoning behind each recommendation. Whether you are a novice or experienced photographer, this book will impart a huge amount of information quickly and you will save yourself weeks on the learning curve in just a few hours.”

Well-organized, easy to understand – I don’t know how I could fully take advantage of all the features the camera has to offer without this publication! It’s well-organized, easy to understand, and succinct enough to keep your attention while still containing a wealth of information to get the most out of your camera.”
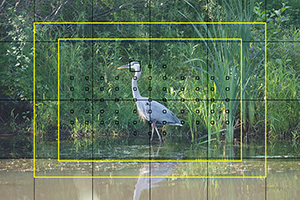
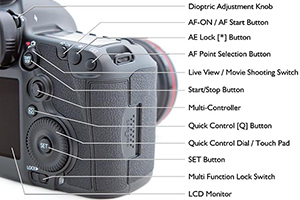
Canon 5DS / 5DS R Experience autofocus viewfinder book manual guide how to tips trick master Canon 5DS / 5DS R Experience book manual guide how to tips trick master controls

Take control of your Canon 5DS / 5DS R, the image taking process, and the photos you create!

For Intermediate and Enthusiast Photographers – This guide is designed for enthusiast dSLR photographers who wish to take fuller advantage of their camera and shoot competently in Av, Tv, and M modes; take full control of the versatile 61-Point autofocus system; and learn how, when, and why to use and customize the various controls, buttons, and features of the 5DS and 5DS R. It covers dSLR camera functions and exposure concepts for those learning digital SLR photography, and explains more advanced camera controls and operations such as Metering Modes, Exposure Compensation, and Histograms.

For Experienced Photographers
– This guide explains the new and advanced features and settings in order to quickly get you up and running and taking advantage of these capabilities. Plus it explains the camera controls and how to customize them, how to take control of the AF Area Modes and configuration Cases for capturing moving subjects, how to make use of the in-camera HDR, Multiple Exposure, and Time-Lapse features, and how to get the most from the 50.6 MP sensor. It introduces back-button focusing, the HD video capabilities, and guides you through all the 5DS / 5DS R Menu and Custom Function items to help you best set up and customize the camera for your specific shooting needs.

The guide contains a link to a detailed 5DS / 5DS R Setup Spreadsheet, to help set up your menus and settings for various shooting situations.
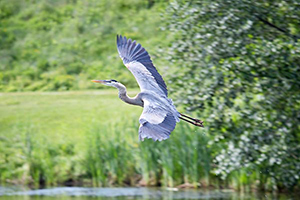
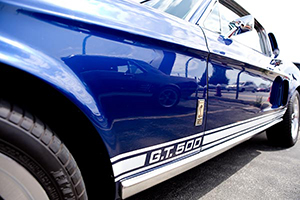
Canon 5DS / 5DS R Experience book manual guide how to tips trick master exposure autofocus Canon 5DS / 5DS R Experience book manual guide how to tips trick master exposure focus autofocus

Canon 5DS / 5DS R Experience includes:

  • Setting Up Your 5DS / 5DS R – All of the Menus and Custom Function settings, with explanations and recommended settings to set up and customize the advanced features to work best for the way you photograph.
  • Aperture Priority (Av), Shutter Priority (Tv), and Manual (M) Modes – How and when to use them to create dramatic depth of field, freeze or express motion, or take total control over the exposure settings.
  • Auto Focusing Modes and Area Modes, and Drive Modes – Learn the AF Modes, AF Area Modes, and the AF Menus and Cases, plus how they differ, how and when to take advantage of them to capture both still and moving subjects.
  • Exposure Metering Modes – How they differ, how and when to use them for correct exposures in every situation, including exposure lock and exposure compensation.
  • Histograms, Bracketing, and White Balance – Understanding these features for adjusting to the proper exposure in challenging lighting situations.
  • Multiple Exposures, HDR, Interval Timer, and Time-Lapse Shooting
  • Optional Flash and GPS use
  • The Image Taking Process – Using the settings and controls for both still and moving subjects.
  • Introduction to Video
  • Photography Accessories and Books – Useful accessories for the 5DS / 5DS R.
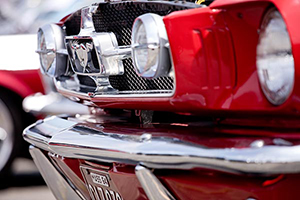
Canon 5DS / 5DS R Experience book manual guide how to tips trick master exposure focus autofocus Canon 5DS / 5DS R Experience book manual guide how to tips trick master focus autofocus exposure

This digital guide to the Canon 5DS and 5DS R is a 400 page illustrated e-book that goes beyond the 5DS / 5DS R manual to explain how, when, and why to use the features, settings, and controls of the 5DS and 5DS R to help you get the most from your camera.

Learn more about Canon 5DS / 5DS R Experience, view a preview, and purchase it on my Full Stop website here:

http://www.fullstopbooks.com/canon-5ds-5ds-r-experience/

Hands On Review of the Nikon D5200 for dSLR Video

I was recently conversing with one of my readers – a Nikon D5200 user who was putting the camera through its paces for professional-level video shooting. He has given the camera a thorough field test, so I asked him to put together a review and a tutorial of the camera in regards to its video performance. So for today’s guest post, I introduce:

by Steve MacDonald of 5dhdvideo
I have recently put the Nikon D5200 through its video capability paces, in a couple of different shooting scenarios.  Scenario one was a bright sunny outdoor situation with mixtures of heavy sunlight and shaded areas, and the second was an indoor, controlled lighting situation.

Scenario one was tested with a Nikon 17-55mm f2.8 making use of a Schneider 4×4 polarizer and Schneider 4×4 1.6 graduated ND filters. Mind you, these are probably the harshest video acquisition lighting conditions.

Nikon D5200 video dslr manual movie mode
Still from dSLR video taken with the Nikon D5200, by Steve MacDonald

One of the biggest challenges of shooting with any dSLR camera is setting critical focus. One camera feature that can help is a really decent LCD screen. I found the Nikon D5200 screen to be less the stellar, but I suppose that is to be expected from a mid-level consumer camera. Using a Hoodman loupe on the back of this unit, at first, I thought the inability to see a somewhat sharp image was the kit lens. But even with a very expensive Nikon 17-55mm f2.8 zoom lens, manually achieving critical focus was challenging. Using the cameras focus assist the image never really seemed all that sharp, so it’s was a guessing game of finding what would be the sharpest focus point. I quickly abandoned using the LCD for critical focusing and used the cameras viewfinder with a right-angle viewer by Seagull. This worked much better, but it’s something I’m not used to, having come from shooting with many Canon DSLR models.

I decided to give auto-focusing a try, since, a lot of my shots that day were stationary subjects – and that feature seemed to be dead on. The only downside to using this is that in certain lighting situation, the Nikon will throw a beam of light from the AF-Assist Illuminator. Not a big deal, untill you realize the AF-Assist Illuminator is eating into your battery faster than you can imagine.  (Note – you can turn off the Built-in AF-Assist Illuminator using Custom Setting a3.) The battery life of the EN EL14 has already been documented as being less than adequate, which I can confirm.

Nikon D5200 video dslr manual movie mode
Still from dSLR video taken with the Nikon D5200, by Steve MacDonald

Another quirk I found with this Nikon is discrepancies between metering in the viewfinder then switching back to live view. Many times after setting a dead zero meter in the viewfinder and not moving anything, switching back to live view, could at times , show an almost full stop difference. Switching metering methods didn’t seem to change the situation.

We’re all familiar with the nagging Nikon situation of having to come out of live view to change aperture settings, which is indeed a pain, but what I didn’t realize is if you keep the camera pointed at your subject, it will meter that subject in live view. This brings me to the subject of trying to run and gun with this camera: in two words, very difficult. The reason being is having to come out of live view to change the aperture, making a moving subject next to impossible to keep properly exposed. The way around this is to buy manual lenses with the aperture on the barrel and not controlled by the camera. Or, one would think that is a viable work around – not so. Nikon has further limited video functions on this camera by not offering any metering with a manual lens attached, which in my opinion renders this camera far less than ideal from a professional video acquisition standpoint. (Note: the Nikon D7100 and D7000 offers the ability to register non-CPU lenses in the camera, thus allowing access to additional functions including color-matrix metering – though they suggest you make use of Center-Weighted or Spot Metering in these situations.  The D7100 and D7000 also offer the ability to assign aperture selection to the aperture ring on lenses which have this ring, thus allowing aperture change while shooting video.)

Nikon D5200 video dslr manual movie mode
Still from dSLR video taken with the Nikon D5200, by Steve MacDonald

It goes without saying, for professional use an EVF (electronic viewfinder / monitor), such as the SmallHD DP4 EVF, is pretty much a must with any DSLR. False color, peaking, and many other features they offer make for a better user experience.  Sure, you could rely on an EVF to set proper exposure levels with a manual lens attached to the D5200, but you’re going to pay a grand for a good one.

The indoor shooting scenario was a two camera interview situation, with the other camera being a Canon T3i. One feature I really liked was Nikon’s ability to tweak the White Balance presets in movie mode, in order to dial in a match between the two cameras. The picture quality of the Nikon looks very good, and the ability to output a clean HDMI will no doubt attract many. Shooting the indoor scenario was much easier, although none of the issues mentioned above disappeared.

At the end of the day, my take on this camera is that it just isn’t full equipped for demanding or professional-level videography. It takes fantastic still images, since as with any of these dSLRs, that is their main function. While its video capabilities and performance may fulfill the needs of a casual video user, there are just too many roadblocks with this camera to make it a sensible choice when it comes to professional video work. One should instead consider the additional video capabilities of the D7000 or D7100, which both improve upon some of these video shortcomings of the D5200.

Nikon D5200 video dslr manual movie mode
Still from dSLR video taken with the Nikon D5200, by Steve MacDonald

Manual exposure and white balance for the videographer with the Nikon D5200

Although the Nikon D5200 has the quirk of having to come out of live view to change aperture, and the fact it won’t meter a manual lens, this section of the article focuses on methods to help you gain proper exposure for shooting video.

Recently, I purchased two Rokinon Cine Lenses for the D5200, knowing full well the camera would not meter these lenses. If you don’t know what that means, basically, the built in light meter of the D5200 will not give you a reading with these lenses or any manual lens. My main reasons for buying these manual lenses was to avoid having to come out of live view to change the aperture, not to mention, for the price, these are great prime lenses!

So my quest after buying these Rokinon’s was to find a way to get a proper exposure, without having to resort to buying a light meter. Don’t get me wrong, having a light meter is well worth having,  but I just spent a chunk on these lenses, so that’ll have to wait. What I did buy was a Photovision one-shot target.  Targets are used to set 18% gray level, but with this particular target, it also has a white and black section outside the middle gray, so in essence, it sets your highlight and black level as well. The target works by first lighting your scene, then setting the target in front of that scene and taking a photo of the target.  You’ll want to make sure the white side of the target is towards the key light of your scene, and that the entire target is filling your screen with the white, gray, and black columns in sharp focus.  You’ll also want to make sure your shutter speed and ISO are set for your video shoot at hand. Next, set your D5200 play back display options by accessing the menu, highlighting the display icon, top icon on the left, then making sure all those options have a check mark beside them. Now, hit your playback button and bring up that photo of the target.

By clicking on the bottom portion of the multi-selector you can scroll through the various information provided for that particular photo. What you’re looking for is the histogram display. This histogram display will show you three distinct spikes. The left most spike being the black level, the middle gray, and the far right spike is your highlight. It’s this highlight we want to set so that it’s not clipping.  Clipping would have the far right spike at or very near the far right side of the histogram. Now, by adjusting your f-stop (aperture setting) for subtle changes in exposure, and taking a photo of the target after each f-stop adjustment, you’ll be able to view that photo in playback and determine if that exposure gives you the proper histogram.

After determining which histogram suits your best exposure, you’ll want to set that target photo as a custom white balance within your D5200.  Note: although by default the camera sets the last photo you’ve taken as your white balance, I choose to select the photo just to make sure its definitely the right one. You’ve now not only set a proper white balance, but you’ve also set an exposure level. One thing to keep in mind is that you need to light your scene for proper levels because the target has no idea how light or dark your subject is, it only reflects what lights you’ve set up for a particular scene.

Now, with all that being said, this target wouldn’t work in a run and gun situation, it would just take way to much time. For these types of situations, you can still utilize the histogram feature of the D5200 to get a proper exposure. To do that, set your f-stop (aperture), take a photo of your scene, review that photo and look at your histogram. If the highlights are slammed against the right side, lower your f-stop (aperture), take another photo and review it’s histogram reading.  The advantage of using the histogram in this manner, is that you’ll soon recognize what’s over exposed just by viewing it in the LCD, because you’ve been in these situations enough times and have looked at enough histograms to know what’s over exposed just from viewing your scene from the LCD.Utilizing the one-shot target, as well as, learning to read your histograms will give you a big advantage in gaining proper exposures with your Nikon D5200.

The Secrets to an Interesting Photo – Unlocked!

A few days ago Reuters published a collection of the Best Photos of the Year 2012. This collection, similar to the Atlantic’s 2012: The Year in Photos, is a sometimes inspiring, often depressing look back at the events of the past year. The content and subjects of the images aside, they are both excellent presentations of some of the best in photojournalism and image making for the year, and I encourage you to not only look through the images, but to analyze the ones that you like or that move you, and determine what it is about the images that makes them so powerful. Look at the position and point of view of the camera, the aperture settings used (shallow depth of field vs. deep dof), the composition including wide vs. tight and what was put in the frame and what may have been left out, how the elements, forms, and colors in the image relate, the moment captured, etc.


Reuters photographer Joseba Etxaburu is knocked down by a wild cow during festivities in the bullring following the sixth running of the bulls of the San Fermin festival in Pamplona July 12, 2012. Etxaburu suffered some scratches on his right elbow but was able to continue shooting afterwards. Canon EOS-1D Mark IV, lens 70-200mm, f3.5, 1/640, ISO 500. http://blogs.reuters.com/fullfocus/2012/11/30/best-photos-of-the-year-2012/#a=1

In an interesting exercise, someone has compiled the type of cameras and lenses used for the photos, and the exposure settings, and then put it all into easy to read pie charts. To turn this information on its head, it seems that to have the best chance of make an interesting image, what you need is a Canon 1D Mark IV with a 16-35mm lens (likely the EF 16-35mm f/2.8L), set your aperture at f/2.8, shutter speed at 1/320, and use 200 ISO.

But to look seriously and more in-depth at the information compiled and presented in the charts, one can learn a lot about how photojournalists in the field operate:

They seem to prefer Canon dSLR cameras, with Canons used in about 90% of the images* – or it perhaps merely shows that Reuters provides, supports, and/ or encourages Canon equipment. (For example, they likely have a collection of Canon bodies and lenses at their offices for the photojournalists to use or to supplement their equipment when they need a specialized lens.) The top camera used, the Canon 1D Mark IV is a very rugged and reliable professional camera, which is interesting to note has “only” 16 megapixels (though it has a much higher quality image sensor than consumer cameras). It has recently been replaced with the more current Canon 1D X.

Prime lenses were used (rather than zooms) in about 55%* of the images, and the most common favorites were nearly equally divided over the 24mm, 50mm, and 16mm (each used about 8% of the time overall when including all lenses*).

With zoom lenses, the wide angle 16-35mm (EF 16-35mm f/2.8L) was used most often (about 19% of the time overall with all lenses*), followed by the 70-200mm (likely the EF 70-200mm f/2.8L IS version I or II). (The lens links here are for Canon lenses – I’ll try to get back to this and add similar Nikon lens links.)

(*these numbers may be off, as the numbers on Reddit seem to be inconsistent/ incomplete)

What this tells us is that wide angle lenses really are the “bread and butter” lens of the photojournalist, used to capture a wide scene or to place the subject or the action into a larger context – which is often important in telling a full and accurate story in a single image. It also means that the photographer was typically very close to the subject, right in the middle of the action. Sometimes however, a close-up portrait or detail best tells the story, or a photographer can’t get as close as desired, and that is where the 70-200mm comes in.  It is interesting to note that when I did extensive research into choosing lenses at the start of my professional career, I followed many working photographers’ advice and settled first upon these exact lenses – the 16-35mm and 70-200mm. You can do a lot of great travel and photojournalism work with those two lenses alone. One problem you will run into if you are only using one body, however, is that you sometimes have to quickly switch to the other, and that is where the more versatile 24-105mm f/4L or 24-70mm f/2.8L lenses can be more practical.  And you can see that these mid-range zooms were two of the other, lesser used zooms in the chart.

After some time with the zooms, most people want to try their hand at a prime lens – to increase image quality, help them work a bit more at composing and framing, and to provide even shallower depth of field. And as you can see, the wide primes are the most popular among photojournalists. The 50mm f/1.2L or the more affordable 50mm f/1.4 will give you a field of view approximating your normal vision (hence they are called “normal” lenses. The 24mm f/1.4L and 16mm focal lengths are much wider. These also show that the photographers were right up in the action.

The photojournalist’s expression used to be “f/8 and be there” but based on this data, it will obviously have to be modified to “f/2.8 and be there.” The most common aperture setting in these images was f/2.8, used in about 29% of the photos, followed by f/4, f/1.4 (which is possible with some of the prime lenses), and f/3.2. What this means is that they are most often using a very shallow depth of field, usually in an attempt to visually separate the subject of the image from the background, and to call attention to exactly where in the image they want the viewer’s eye to fall. Plus the wide aperture lets in lots of light, which may help them be able to use the fast shutter speeds and low ISO settings they desire.

The “f/8 and be there” expression has been interpreted in a few different ways, but what it seems to say is have your camera ready, and then just be at the scene. The camera settings aren’t nearly as important in photojournalism as simply being there to capture the action.  It also shows that with f/2.8 (and other wide apertures) being used as the most common aperture setting today, photography has likely made a shift over the past few decades where shallower depth of field is much more common.  This would be interesting to investigate, but it could be the result of autofocus systems, allowing a photojournalist to be much more sure of their focus and able to use shallow dof – where as before they had to quickly manually focus and a slightly deeper dof allowed some focusing lee-way. It could also have to do with lenses now being sharper at wider apertures.

The most often used shutter speeds were 1/320, 1/250, 1/800, and 1/640. A photojournalist is often capturing action or precise moments, and thus a fast shutter speed is desired. The best thing to do in these types of situations – especially if working in Aperture Priority Mode so that you have full control over your depth of field – is to set an ISO speed (based on the lighting of the scene) that will allow the camera to select appropriately fast shutter speeds. The best shutter speed depends on the situation and how fast/ what direction the subject might be moving, but from these results it shows that anywhere from 1/250 to 1/800 can work for many scenes – although 1/1000, 1/2000, or faster will be needed for sports and fast action. So set an ISO speed that will result in this shutter speed range when your aperture is set around f/2.8 or f/5.6 (or whatever aperture range you plan to use). The results show that the photojournalists seem to choose the lowest ISO possible for the situation (based on the lighting), as this will result in the least amount of digital noise – interestingly the most used ISO settings actually went in order from 200, 400, 800, to 1600. The fact that ISO 100 came in next, but at a much smaller percentage seems to say: don’t risk it with 100 ISO – just use 200 ISO so that you don’t inadvertently use too slow of a shutter speed when the lighting level decreases but you aren’t paying attention to the exposure settings. The noise and sharpness difference between 100 and 200 is pretty negligible for most current cameras.

Don’t quite understand all these settings and the terminology?  Have a look at my Full Stop dSLR camera guides, such as Canon 5D Mark III Experience and Nikon D600 Experience, which cover not explain the functions, features, and controls of Nikon and Canon dSLR cameras, but more importantly how, when and why to make use of them in your photography.

full stop dslr photo photography camera manual guide for dummies canon nikon


Taking Control of, and Possibly Understanding Exposure

Whenever a new photographer wishes to learn about exposure, shooting modes, and working in Manual or Aperture Priority Mode, most photographers recommend the Bryan Peterson book Understanding Exposure.  It has become the go to guide because it offers explanations that no other book seems to cover as well or as thoroughly.  However, many people aren’t the biggest fans of it and wish there was another guide with a slightly different approach – perhaps an easier, less confusing way to present some of the material.

Understanding Exposure has been updated for the current digital era, but it may be better to toss many of the old notions and methods that have been carried over from film, start from scratch, and approach the subject in a practical manner that applies fully to digital SLR cameras – cameras with histograms and instant feedback of the image and the exposure settings via the rear LCD screen, not to mention the ability to head straight to your computer and study and analyze your results and EXIF data.

While I contemplate writing an exposure book for the digital era, I will begin with a quick-start tutorial to exposure and metering with a dSLR:

First, don’t start with M mode yet. Start working in Av or A – aperture priority mode.

Set the camera on Av / A (aperture priority). Go into the menus and turn off Auto Lighting Optimizer and Highlight Tone Priority on a Canon and Active D-Lighting on a Nikon.

Set the ISO to an appropriate setting based on the lighting of the scene.
outdoors in sun: 100
less sun or shade: 200-400
more shade or darker: 800
indoors: 1600-3200

Set your aperture setting to whatever aperture setting you desire based on how much depth of field you want. Want a lot of depth of field with everything in focus from near to far? Set for f/16 or f/22. Want very shallow depth of field with just the subject in focus and cool background blurring? Set for f/2.8, f/4, or f/5.6.

Aim your camera at your subject, press the shutter button halfway, and see what Shutter Speed the camera selected. Is it slower than 1/125? (such as 1/80, 1/30) Then increase your ISO setting to a higher number. If you can’t or don’t want to increase ISO, use a wider aperture setting (a “lower” F number like f/4, f/5.6).

Is your shutter speed now about 1/125 or faster? (for still subjects – use perhaps 1/500 or 1/1000 for moving subjects). Take the photo.

Now, if the exposure is not coming out how you want, use exposure compensation to adjust it and then re-take the photo.  Adjust it to the positive side to make the exposure lighter, and to the negative side to make the exposure darker.

Sound easy? It is! But of course, it all gets more complicated from here. For example, how did the camera determine what the proper exposure was? You can learn more about that, and how to better control the camera’s determination of exposure with Exploring Metering Modes.

And then now that you have the basics, and can move on to learning more about controling your autofocus system, locking focus and exposure – independently, how focal length and distance affect depth of field, composition, white balance, etc, etc!

You can learn all about these settings and functions in my e-book camera guides for Nikon and Canon dSLRs, such as Nikon D5100 Experience and Canon T3i Experience.  Click the image below to see all the available guides and to learn more:

full stop dslr photo photography camera manual guide for dummies canon nikon


Understanding and Using Exposure Compensation and Bracketing

One of the key elements for obtaining the proper exposure of your images when working in Aperture Priority or Shutter Priority modes is making use of Exposure Compensation.  Although all the exposure related settings of a dSLR are intimately intertwined (such as aperture, shutter speed, ISO setting plus the exposure metering mode you are using, etc.) and it is challenging to speak of one without addressing the others, I will focus here on exposure compensation and when and how to use it.

The following text is excerpted from my e-book guide Ten Steps to Better dSLR Photography, where you can learn more about exposure compensation plus apertures, shutter speeds, exposure metering modes, composition and more.  Click on the cover at the end of the post to learn more about the guide, preview it, or purchase it.

Why Exposure Compensation is Needed

If you take an image that turns out to be darker or lighter than you desire, based on reviewing the image and/ or its histogram on your rear LCD screen, you can use exposure compensation in the non-Auto shooting modes to “override” the exposure that the camera is selecting, in order to brighten or darken the next image’s exposure.  You may want to do this if you have seen that your highlights have run off the right side of the histogram and been blown-out, resulting in complete loss of detail in those areas of the image.  Consult your manual to determine how to adjust exposure compensation on your specific camera.  With some Canon models, you press the Exposure Compensation [+/-] button and turn the Main Dial.  With other Canon models you use the Quick Control Dial to adjust this setting.  With Nikon, Sony, Pentax, and Olympus models you typically press the Exposure Compensation [+/-] button and turn a dial.  You will then see the exposure compensation amount change in your viewfinder and/ or on the top or rear LCD screen.  If the exposure level indicator in one of these places is not changing, press the shutter button half-way to first wake up the camera, or move/ press the Lock switch/ button near the rear dial on a Canon.

Putting Exposure Compensation to Use

If you have taken a photo that is too dark and you wish to retake the image and make the next exposure of the scene lighter, adjust exposure compensation in the positive (+) direction.  To make the next exposure darker, adjust exposure compensation in the negative (-) direction.  Try changing the Exposure Compensation by perhaps 1/3, 1/2, or 2/3 in the direction you desire, retake the shot, and see if your exposure problem is solved.  Increase or decrease the exposure compensation as needed.  Remember to set the exposure compensation back to zero when you are done with that situation and move on to take different images!  This is one reason why you should check your camera’s settings often – to make sure you haven’t left the camera on the settings from a previous situation.  This can often happen with the ISO setting and exposure compensation setting.  Check your current settings on the top or rear LCD display or in the viewfinder.

To remember how to compensate – which direction to turn the dial – think of the histogram peaks on the graph.  If you wish to shift the peaks to the left, to the darker side, to make the image darker, turn the dial so that the exposure compensation level moves to the negative side (-1, -2, etc.).  If you wish to shift the peaks to the right, to the lighter side, to make the image lighter, turn the dial so that the exposure compensation level moves to the positive side (+1, +2, etc).  Curiously, some cameras put the negative side of the exposure level indicator on the left, and others put it on the right, so look in the manual or viewfinder to see how yours operates.

Bracketing

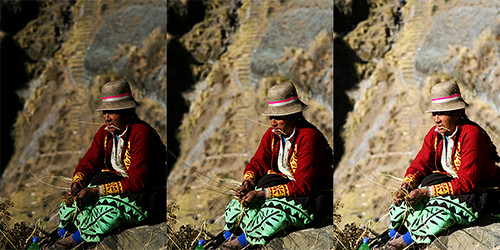
Exposure compensation can also be used to “bracket” an exposure.  Bracketing is when you take at least three photos of the same scene, one at the “proper” exposure, one under-exposed, and one over-exposed (see the image below).  For example you may take the second and third shot with the exposure compensation set at +1 and then -1.  This is done to ensure that you capture exactly the right exposure you desire.  In the days of film this was a helpful technique, especially for critical situations, since one didn’t have the immediate feedback of the image on an LCD screen and a histogram.  It can still be used today for critical situations or for test shots when determining the right exposure settings.  Digital SLR cameras typically have an auto exposure compensation feature so that this process is more automated.  You set the amount of under- and over-exposure desired (such as +1, -1 or +1 2/3, -1 2/3) and then take three images in a row.  The camera automatically adjusts the exposures for each shot in order to bracket the second and third shots.  If your camera is set on continuous drive mode, you can just hold down the shutter button and the camera will take the three shots in a row.


Weaver Constructing the Keshwa Chaca, Huinchiri, Peru – Three bracketed exposures of the same scene:  the “proper” exposure as determined by the camera (Evaluative metering mode) in the center, under-exposed -2/3 stop on the left, over-exposed +2/3 stop on the right.  The desired exposure, for my eye, lies somewhere between the “proper” exposure and the over-exposure.  With auto exposure bracketing you can often customize the order that the bracketed images are taken, for example proper/under/over or under/proper/over.  In this example they were taken proper/under/over, so they are displayed here in a different order than actually captured.  Center exposure:  Shutter speed 1/1000, aperture f/5.0, ISO 100, focal length 105mm.

Exposure compensation and bracketing are also used in HDR (high dynamic range) photography to take three or five or more photos of the same scene at various exposures.  All the images are then combined by the photographer, using HDR software, into a single image which will contain a much broader dynamic range of light and dark than is possible with a single image.

Beyond Exposure Compensation

As I mentioned at the start, exposure is determined by a number of controls and settings on your dSLR.  If you are consistently taking images that are under- or over-exposed, you may wish to explore the other metering modes, to ensure that the camera is metering your exposures exactly where and how you want.  Have a look at my previous post on Exploring Metering Modes to learn more about this, or have a look at my e-book guide Ten Steps to Better dSLR Photography to learn about all the aspects of exposure and how they relate.


Full Manual Exposure Control, Video, Live View, and the D5100

I recently received some interesting questions from two different readers on my posts about the Nikon D5100, Nikon D5100 vs D7000 vs D90 etc. and Nikon D5100 vs. Canon T3i.  Both questions point out interesting issues with the Nikon D5100 that may be important considerations if your shooting needs required these functions, or that might not affect you and your shooting at all if, like me, you never use manual exposure control in video and/ or you don’t use Live View (and M mode) when shooting stills.

Here is the first question and my reply:

Question 1:

I wanted to ask about a major differentiator, if its true and useful for someone trying to learn a bit of manual photography. Below link and video talks about D90 and D5100 not having the ability to do manual control in video. Is it true? Does it really matter. Please advise.

(video is no longer available on YouTube)

I would also like some instructions on how to use manual control – when, why, how.

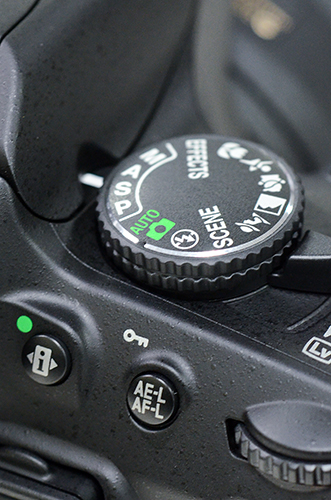
Nikon D5100 mode dial video manual exposure a s m aperture shutter
Mode dial of the Nikon D5100

My Answer:
Yes, the lack of full manual control in video mode is a very real deficiency of the of the Nikon D5100, especially for people who wish to seriously use it for video.  To answer your question “does it really matter?”, yes, it really matters if you wish to have straightforward, full manual control while shooting video.  I know that sounds like a smart-ass response to the question, but it is kind of like “if it isn’t an iPhone, it isn’t an iPhone,” blatantly stolen from “if you had invented Facebook, you would have invented Facebook.”

Wait a minute, I just realized that I was ahead of the curve and I wrote this similar smart-ass phrase before that movie even came out:
“If the 5D Mk II fits your expanding and demanding needs as a photographer, you would already pretty much know that you needed a 5D.”
See, look here, I said that earlier than August 26, 2010, and the movie came out Oct 1, 2010, and I didn’t even see it until a couple months ago!

Anyway, if you need full manual control in video, you know that you need full manual control in video based on your experience and needs, and then you need your camera to have full manual control in video.  Simple, right?  But…do you not know yet but wonder are you going to need it in the future if you grow and develop as a photographer/videographer?  That is the big unknown that no one can answer but one needs to figure out on an individual basis!

However, there is a “work-around” for this shortcoming of no full manual exposure control with the Nikon D5100.  To manually set your shutter speed, you must set the camera on Shutter-Priority Auto Mode (S) and set your desired shutter speed before going into Live View mode, use exposure compensation to obtain the aperture setting you want, and use the AE-L/AF-L Button to lock that exposure (set Custom Setting f2 for AE-Lock Hold).  If you wish to first set the aperture setting, you must set the camera on Aperture-Priority Auto Mode (A) and set your desired aperture before going into Live View mode, use exposure compensation to obtain the shutter speed setting you want, and use the AE-L/AF-L Button to lock that exposure (set Custom Setting f2 for AE-Lock Hold).

See this video I came across on YouTube for a demonstration:

As far as instruction in manual control (for still photography), see my Full Stop dSLR camera guide e-books, of course!  I don’t go into a lot of detail of full manual (M) because I don’t feel it is necessary for most beginner or intermediate photographers in most situations.  I don’t believe in M for the sake of old-school, full control, “look, I’m a skilled photographer/ martyr ‘cuz I use full manual.” It just adds an extra step (setting BOTH aperture and shutter speed rather than just one) to each photo that isn’t necessary.  Let the camera do it for you.  Pick your priority:  Aperture or Shutter Speed.  Are you concerned with depth of field (aperture) or with freezing or blurring action (shutter speed)?  Set your aperture in A (Av) mode or else set your shutter speed in S (Tv) mode, and let the camera take care of the other setting.

I know that many photographers like working in M mode, but if you are wondering if you need to use it: if you haven’t encountered a need for it, you don’t have a need for it. The aperture setting is typically my priority, hence I use Aperture Priority Mode.  Here is a detailed explanation of how I use Aperture Priority in the real world:  Deconstructing the Shot.

As my e-books say about possible situations for using M:

“There are times you may wish to use Manual Exposure Mode.  For example, if you are taking several photos to stitch together into a panorama, you want them all to be taken with the same exposure so that the lighting is consistent across the entire scene. Or if you are working in a studio setting and the lighting will remain consistent, you can set the exposure once and then not worry about it. Or in any other situation where the lighting or your desired exposure will remain consistent such as an indoor performance or sunny day portrait session where the lighting does not change.”

And I know that other situations also demand or benefit from M mode, including macro situations, but many of those situations fall under the “any other situation where the lighting or your desired exposure will remain consistent” category.  Readers, please defend M to me and tell me why you use it!

Question 2:

When I used the Nikon D5100 at a nearby camera store in Live View and Manual (M) mode, it never quite seemed to register ANY of the changes I made to shutter:  the image is supposed to go dark as the shutter speed increases right? (I was in a moderately lit room).  The weird part is that the actual image captured was dark (like it should be) but not the preview!  Is there some setting on the Nikon that is wrong on the piece I tested?  If the camera can’t display the changes it is making during Live View – leaving me to approximate the changes I’m making, then that is a deal breaker for me. I am wondering if this is a bug that was only on the piece that I saw at the showroom, or if you saw it too.

My Answer:

That is a really great question! These are the kinds of features one really has to dig into the camera, menus, or manual of a new dSLR model to determine if it is actually going to meet your needs.

It turns out that no, it is not possible to see actual exposure simulation with the Nikon D5100 in Live View while in Manual M shooting mode. However, in the P, A, or S shooting modes, the live view image will lighten or darken to simulate the exposure settings or the exp. compensation that you set. And to add insult to injury, there is no exposure meter displayed on the Live View screen, so to check your exposure you will need to temporarily leave Live View and switch to the control panel view by pressing the [i] Button.

The Canon 60D and Canon Rebel T3i both have Exposure Simulation in all modes during Live View. On the 60D you can turn this feature off and on. On the T3i it is on automatically while in Live View.

Conclusion:

Now, if you are thinking of buying a Nikon D5100 and after reading this you are suddenly concerned that it is lacking important features that you might need…be sure to first determine if you, indeed, really even need these features.  They shouldn’t be anything to worry about if you are never going to use them and never going to encounter these issues.  For example, I would never encounter the first issue, the lack of full manual control in video, because I don’t shoot video.  If you plan to use the camera to shoot production quality, professional video, this is pretty important.  If you plan to switch over to video and shoot a kid’s sporting event, it is unlikely you are going to shoot this in Manual and so it doesn’t matter.

Regarding the second issue, do you plan to use live mode AND manual shooting mode (M) AND need to preview your image exposure at the same time?  I rarely use M mode and I rarely use Live View and I rarely preview my exposure in Live View if I do use it, so for me and my photography, it will be “rare x rare raised to the rare power” (or (rare x rare) rare or is it merely rare x (rare) rare ?) that I need to use Live View AND M mode AND preview what my exposure will be.  If I needed to, I think I could get by with A mode instead, where the Exposure Simulation in Live View functions on the D5100.  But, if you are like the reader who had this question and you have a real need for this, say shooting cool macro shots of flowers and insects, then you will need to consider the Nikon D7000, Canon T3i, or Canon 60D instead.

Exploring Metering Modes

It is one thing to know that your cool new Canon or Nikon digital SLR provides you with 3 or 4 different metering modes. It’s another thing to know how and when to actually use them in the field or in different real life situations. The Canon 5D, 7D, 60D, 50D and T3i all offer four different metering modes – Evaluative, Center-Weighted, Partial, and Spot – as I’m sure you have thoroughly read about in your manual, right? Nikons, like the D7000, D51000, and D3100 generally have three different modes: Matrix, Center-Weighted, and Spot. I’ll try to cut to the chase and simplify the explanations and their uses.  Note that there are some important differences between how they work for Canon and Nikon cameras, particularly the Spot mode.

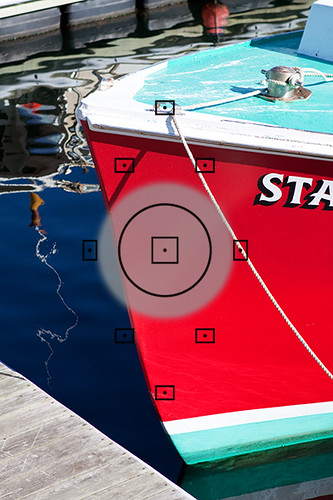
Canon T3i T2i 60D metering mode partial spot viewfinder
The viewfinder of the Canon T3i (T2i and 60D similar) showing the areas evaluated for Partial Metering (superimposed grey area) and Spot Metering (black circle in center).

Evaluative (Canon) or Matrix (Nikon): This is the default mode for your camera, and it can be used for almost every situation you shoot. Yes, maybe 90% of the time, maybe more. The camera evaluates the entire scene, as divided into several zones, and chooses the best exposure based on its knowledge of thousands of potential image situations. The current metering systems are so good, they can even be relied on for backlit or other challenging lighting situations. An important feature of this mode is that advanced cameras such as the Canon 7D, Canon 60D or Nikon D7000, D5100 take into account the selected focus point in its determination of exposure settings. It is assuming your focus point is on your most important subject, so under challenging and critical situations, it is wise to confirm that the camera has chosen the focus point you want (well, this is always wise). Even better, you should typically manually choose the focus point or cluster of focus points, as the camera has no idea what your intended image is. So in special situations, such as dramatically back-lit scenes or a situation with bright light plus deep shadows, make sure you are not using the center point to focus and meter, and then recomposing to take the shot – because some of the zones that the camera evaluated are now no longer in your shot after recomposing, and other new areas are, so the camera has set exposure for an image other than the one you are taking.


San Miguel Duenas, Guatemala

Partial (Canon only): This mode meters a smaller area, about 9.4%, in the center of the scene on the 7D and 6.5% with the 60D. Nikons do not have this mode, though some Nikons such as the D7000 offer the ability to change the size of the Center-Weighted Metering circle (see Center-Weighted Metering below), so it makes up for this.  The area is approximately a circle that reaches to the top and bottom focus points, and the metering system ignores the rest of the frame. This mode is useful where there is a dramatic difference in lighting between the foreground or subject and the background. For example, when your subject is backlit – maybe standing in front of a bright window or the sun – and consequently their face is in shadow. I know I said evaluative mode can often handle this type of situation, but if you want the face or subject to be properly exposed and not risk blowing the shot, it is worth it to quickly switch to Partial metering mode. Again, another time to use this is when there is a wide range of light in your scene, from bright sunlight to deep shadows. Remember, this mode is not linked to your focus point. The partial area that is metered is always in the center, so meter on the part of the scene that is most critical and that you want properly exposed, using the central area of the viewfinder, lock in that exposure, then recompose and take the shot.


Campo Nuevo, Guatemala

Important Note about Locking In the Metered Exposure: The metered exposure setting is sometimes locked in by pressing the shutter button half-way down or sometimes not “locked” until the image is taken (depending on your camera, or current shooting mode, or how you set it up – read your manual!).  The shutter button also typically locks focus (unless you have changed that setting).  If you wish to lock in focus and exposure separately, which you often will need to do, on a Canon use the AF-Lock (for focus) button and/ or the AE-Lock (for exposure) button – which looks like this: * – to lock in one of them before locking in the other with the half-press or full press of the shutter button. On the Nikons, you have to set one of your buttons to be the exposure lock button, either the AE-L/AF-L Button or the Fn Button on some cameras like the D7000. I suggest first metering on the subject and locking in that exposure by pressing the appropriate button, then recomposing and locking in focus right before or as you take the photo. Or else learning the advanced methods of back button focusing. Get in the habit of knowing how to do this instinctively, and if you need to hold or just press the particular button, so that it comes naturally during critical situations. On the 7D and D7000 and other cameras you can also customize how these buttons perform or set other buttons to do these tasks. You can see in the viewfinder that you have locked focus when the focus dot is lit. You can see that exposure is locked with the AE-L indication in the Nikon viewfinder or the * symbol in the Canon viewfinder.

Locking exposure and focus, independently, each in the brief seconds before you take a shot? Confusing? A little, but not impossible to figure out with some experimentation and practice. Remember, this is why you bought the fancy dSLR, so that you could make use of all these advanced features and take your photos to another level!

Center-Weighted Average: This metering mode is sort of a cross between Evaluative and Partial metering. It acknowledges that the subject is in the center and requires special metering attention, but it also takes into account all the other zones. Again, this is not linked to the focus point, but always to the center, so if your subject is off center – which it typically should be for a more dynamic image – you need to lock in exposure on your subject and then recompose. I have found that with the Canon 50D, this mode is actually more consistent than Evaluative metering, which often over exposes by 1/3 or 1/2 a stop.  Note that you can use the Custom Settings of the D7000 to change the size of the center area being weighted.

This mode can be used when you want to ensure that the subject is properly exposed, but you also want the camera to consider the background. However, if the background is much darker or lighter than the subject, and you want the camera to expose only for the subject and ignore the background, use Spot Metering…


San Miguel Duenas, Guatemala

Spot: This mode meters a small center area, 2.3% of the frame with the 7D, 2.8% with the 60D, and 2.5% with the D5100 and D7000. This area is indicated by the small circle in the center of the viewfinder of the 7D and 60D. There is no center circle in the Nikon viewfinder and you will soon find out why.  So when do you want to use Spot metering? This, again, is useful for scenes with great variation in light and shadow, or in very critical situations. One of the most common ways to use it is when metering for proper exposure on a dramatically lit face or subject, but the exposure of the rest of the scene is unimportant. Or perhaps your subject is set against a plain but consistent background, like a bird against a large blue sky. It is also used to determine proper exposure of a subject before switching the camera to manual for a controlled studio shot, or a critical shot or series of shots where the lighting is not going to change. If your background is completely dark or extremely bright, and you don’t want the exposure system to consider it at all when determining the exposure of you subject, use Spot rather than Center-Weighted or Partial. With Canon cameras, the Spot that is used to evaluate the exposure is in the center of the frame, and is often indicated by a small circle. However, with Nikon cameras like the D5100 and D7000, the Spot surrounds the active focus point and is not necessarily in the center of the frame unless you are using the center AF point. So it is wise to become familiar with how your camera operates.

A fifth metering mode is Manual metering, which isn’t actually a mode in your camera, but is a method of metering. This is where you use a light meter or use your camera as a light meter (such as described at the end in the Spot section above) and then manually set your exposure based on the meter readings. This is used when you want ultimate control of the metering and exposure.

You can learn much more about the Exposure modes of specific cameras, including the 60D, T3i, D7000 and D5100, in my e-book users guide. See my e-book website, Full Stop to learn more about them or click the banner below! The guides also go into much more detail about setting up the related metering mode Custom Functions/Custom Settings and camera controls.

full stop dslr photo photography camera manual guide for dummies canon nikon

I recently ran across an interesting article which takes this discussion to another level by addressing the use of different metering modes in the very specific situation of a wedding. Since one of the main subjects in typically all in white, and the other in black, the metering mode you select and where you meter can make a dramatic difference in the exposure. While that article is specific to weddings, it is useful and helpful to read to further understand how the different modes work, and how special situations might call for some extra thought.