The Secrets to an Interesting Photo – Unlocked!

A few days ago Reuters published a collection of the Best Photos of the Year 2012. This collection, similar to the Atlantic’s 2012: The Year in Photos, is a sometimes inspiring, often depressing look back at the events of the past year. The content and subjects of the images aside, they are both excellent presentations of some of the best in photojournalism and image making for the year, and I encourage you to not only look through the images, but to analyze the ones that you like or that move you, and determine what it is about the images that makes them so powerful. Look at the position and point of view of the camera, the aperture settings used (shallow depth of field vs. deep dof), the composition including wide vs. tight and what was put in the frame and what may have been left out, how the elements, forms, and colors in the image relate, the moment captured, etc.


Reuters photographer Joseba Etxaburu is knocked down by a wild cow during festivities in the bullring following the sixth running of the bulls of the San Fermin festival in Pamplona July 12, 2012. Etxaburu suffered some scratches on his right elbow but was able to continue shooting afterwards. Canon EOS-1D Mark IV, lens 70-200mm, f3.5, 1/640, ISO 500. http://blogs.reuters.com/fullfocus/2012/11/30/best-photos-of-the-year-2012/#a=1

In an interesting exercise, someone has compiled the type of cameras and lenses used for the photos, and the exposure settings, and then put it all into easy to read pie charts. To turn this information on its head, it seems that to have the best chance of make an interesting image, what you need is a Canon 1D Mark IV with a 16-35mm lens (likely the EF 16-35mm f/2.8L), set your aperture at f/2.8, shutter speed at 1/320, and use 200 ISO.

But to look seriously and more in-depth at the information compiled and presented in the charts, one can learn a lot about how photojournalists in the field operate:

They seem to prefer Canon dSLR cameras, with Canons used in about 90% of the images* – or it perhaps merely shows that Reuters provides, supports, and/ or encourages Canon equipment. (For example, they likely have a collection of Canon bodies and lenses at their offices for the photojournalists to use or to supplement their equipment when they need a specialized lens.) The top camera used, the Canon 1D Mark IV is a very rugged and reliable professional camera, which is interesting to note has “only” 16 megapixels (though it has a much higher quality image sensor than consumer cameras). It has recently been replaced with the more current Canon 1D X.

Prime lenses were used (rather than zooms) in about 55%* of the images, and the most common favorites were nearly equally divided over the 24mm, 50mm, and 16mm (each used about 8% of the time overall when including all lenses*).

With zoom lenses, the wide angle 16-35mm (EF 16-35mm f/2.8L) was used most often (about 19% of the time overall with all lenses*), followed by the 70-200mm (likely the EF 70-200mm f/2.8L IS version I or II). (The lens links here are for Canon lenses – I’ll try to get back to this and add similar Nikon lens links.)

(*these numbers may be off, as the numbers on Reddit seem to be inconsistent/ incomplete)

What this tells us is that wide angle lenses really are the “bread and butter” lens of the photojournalist, used to capture a wide scene or to place the subject or the action into a larger context – which is often important in telling a full and accurate story in a single image. It also means that the photographer was typically very close to the subject, right in the middle of the action. Sometimes however, a close-up portrait or detail best tells the story, or a photographer can’t get as close as desired, and that is where the 70-200mm comes in.  It is interesting to note that when I did extensive research into choosing lenses at the start of my professional career, I followed many working photographers’ advice and settled first upon these exact lenses – the 16-35mm and 70-200mm. You can do a lot of great travel and photojournalism work with those two lenses alone. One problem you will run into if you are only using one body, however, is that you sometimes have to quickly switch to the other, and that is where the more versatile 24-105mm f/4L or 24-70mm f/2.8L lenses can be more practical.  And you can see that these mid-range zooms were two of the other, lesser used zooms in the chart.

After some time with the zooms, most people want to try their hand at a prime lens – to increase image quality, help them work a bit more at composing and framing, and to provide even shallower depth of field. And as you can see, the wide primes are the most popular among photojournalists. The 50mm f/1.2L or the more affordable 50mm f/1.4 will give you a field of view approximating your normal vision (hence they are called “normal” lenses. The 24mm f/1.4L and 16mm focal lengths are much wider. These also show that the photographers were right up in the action.

The photojournalist’s expression used to be “f/8 and be there” but based on this data, it will obviously have to be modified to “f/2.8 and be there.” The most common aperture setting in these images was f/2.8, used in about 29% of the photos, followed by f/4, f/1.4 (which is possible with some of the prime lenses), and f/3.2. What this means is that they are most often using a very shallow depth of field, usually in an attempt to visually separate the subject of the image from the background, and to call attention to exactly where in the image they want the viewer’s eye to fall. Plus the wide aperture lets in lots of light, which may help them be able to use the fast shutter speeds and low ISO settings they desire.

The “f/8 and be there” expression has been interpreted in a few different ways, but what it seems to say is have your camera ready, and then just be at the scene. The camera settings aren’t nearly as important in photojournalism as simply being there to capture the action.  It also shows that with f/2.8 (and other wide apertures) being used as the most common aperture setting today, photography has likely made a shift over the past few decades where shallower depth of field is much more common.  This would be interesting to investigate, but it could be the result of autofocus systems, allowing a photojournalist to be much more sure of their focus and able to use shallow dof – where as before they had to quickly manually focus and a slightly deeper dof allowed some focusing lee-way. It could also have to do with lenses now being sharper at wider apertures.

The most often used shutter speeds were 1/320, 1/250, 1/800, and 1/640. A photojournalist is often capturing action or precise moments, and thus a fast shutter speed is desired. The best thing to do in these types of situations – especially if working in Aperture Priority Mode so that you have full control over your depth of field – is to set an ISO speed (based on the lighting of the scene) that will allow the camera to select appropriately fast shutter speeds. The best shutter speed depends on the situation and how fast/ what direction the subject might be moving, but from these results it shows that anywhere from 1/250 to 1/800 can work for many scenes – although 1/1000, 1/2000, or faster will be needed for sports and fast action. So set an ISO speed that will result in this shutter speed range when your aperture is set around f/2.8 or f/5.6 (or whatever aperture range you plan to use). The results show that the photojournalists seem to choose the lowest ISO possible for the situation (based on the lighting), as this will result in the least amount of digital noise – interestingly the most used ISO settings actually went in order from 200, 400, 800, to 1600. The fact that ISO 100 came in next, but at a much smaller percentage seems to say: don’t risk it with 100 ISO – just use 200 ISO so that you don’t inadvertently use too slow of a shutter speed when the lighting level decreases but you aren’t paying attention to the exposure settings. The noise and sharpness difference between 100 and 200 is pretty negligible for most current cameras.

Don’t quite understand all these settings and the terminology?  Have a look at my Full Stop dSLR camera guides, such as Canon 5D Mark III Experience and Nikon D600 Experience, which cover not explain the functions, features, and controls of Nikon and Canon dSLR cameras, but more importantly how, when and why to make use of them in your photography.

full stop dslr photo photography camera manual guide for dummies canon nikon


Ten Top Things to do in Cusco that are Not on Your Itinerary…Yet!

Cusco cuzco peru plaza night fountain
Cusco’s Plaza de Armas at night – all photos by the author – www.dojoklo.com

Every visitor to Cusco is likely to tour the Cathedral and a couple major museums, relax in the Plaza de Armas, and marvel at the exotic offerings in the San Pedro food market.  However there are additional essential sites and experiences that you may not find in your guidebook or that your tour guide might not take you to, which you don’t want to miss.  Most of these lie along or mere steps off the tourist trail, and with a little planning and effort can be fit into any itinerary.

EATING

All the guide books lists the popular restaurants in Cusco, and there are many worth eating at including Pachapapa for its distinct Peruvian dishes with international flair or the MAP Cafe for its creative Andean cuisine in a unique museum setting.  But the real local food is found with the local shops and vendors.

1. Picarones – An incredibly tasty snack that is a favorite among locals are Picarones, deep-fried pumpkin or squash donuts.  Although delicious by themselves, they are irresistible when covered with the syrup or molasses they are always paired with.  Shops and vendors selling picarones can be found throughout Cusco, so ask your hotel desk clerk for their favorite nearby spot.  Be sure to bring your own handi-wipes along because after eating a couple your fingers will be hopelessly sticky, and the damp cloths they provide are already too well used to work very well!

cusco cuzco peru picarones
Deep-fried and delicious Picarones

2. Tamales – As with picarones, the best tamales are found at the local shops and vendors.  As you walk around the city keep your ears open to the cry of “Tamales, Tamales!” and look for a woman with a large basket in her arms or at her feet.  There was one very popular vendor often under the colonnade at the north corner of the main Palza near Gatos market, though I don’t know if she is still there.  Be sure to try the “dulces” or sweet ones as well as the “pollo” variety that holds a tiny bit of chicken and an olive in the center.

3.  Cafe Restaurant Aldea Yanapay – Although there are many good restaurants to choose from in town, only a couple help to support social programs such as disadvantage children or orphan girls.  And only one is decorated like the inside of a dreaming child’s head!  This wonderful café-restaurant is run by the founder of Aldea Yanapay, a volunteer organization with various programs for the underprivileged children of Cusco, and all proceeds from the café benefit these programs.  Sit on pillows, play games, hold a stuffed animal, wear a silly hat, take in a playful performance, or just sit at a table and enjoy the delicious French toast, lunch and dinner entrees, or the best giant hot chocolate in town.  Ruinas 415, second floor

Aldea Yanapay Cafe Restaurant Cusco Cuzco Peru
Interior of Cafe Yanapay

Another restaurant associated with a non-profit is the Panaderia El Buen Pastor bakery and coffeeshop.  Enjoy a morning coffee while watching the racks emerge from the ovens with delicious pastries, sweets, and empanadas.  You will have to keep coming back each morning in order to try all the appetizing looking offerings.  Proceeds from this cafe benefit a home for orphan girls.  Cuesta San Blas 579 – San Blas

4. Brick Oven Pizza – While you’ve probably had great brick oven pizza, you’ve likely never watched it being made with such flair, while listening to reggae, and being warmed by the brick oven on a chilly Cusco evening.  Toss on a couple spoonfuls of the spicy aji sauce, and you won’t be able to understand how you ever ate pizza without it.  Maruri near San Agustin

CULTURE

After being fortified with Cusco’s great food, venture off to explore its cultural offerings.  Of course there are the Cathedral and Compañia facing the Plaza, the Inca walls and Coricancha Temple of the Sun, and the art and history museums.  But there are lesser known and equally as fascinating museums.

5. Andean Children’s Art Museum – Museo de Arte de Ninos Andinos, Irq’i Yachay – This unique museum displays the artwork of Quechua children from remote Andean communities.  A non-profit organization traveled to these communities to introduce the children to art and materials they had never had the opportunity to use, and the children responded with incredible creations portraying their lives, myths, dreams, and themselves.  An introductory short movie of the project and a free guided tour are provided in Spanish, and donations are encouraged.  Calle Teatro 344

Cusco Cuzco Peru Andean Children's Art Museum Museo de Arte de Ninos Andinos Irq’i Yachay Quechua Andes Andean museum kids children
Detail of a child’s painting in the Andean Children’s Art Museum

A similarly interesting local museum is the Taki Andean Music Museum, which not only exhibits Andean and Amazonian musical instruments, but is also a cultural center that organizes musical and cultural events, gatherings, workshops, sessions, lectures, concerts, teaches children to play, as well as promotes and supports traditional music groups.  Calle Hatunrumiyoc 487 #5

SHOPPING

Of course you are going to want to bring home souvenirs to remember your experiences and unique gifts for your friends and family.  Instead of grabbing the mass produced trinkets sold by every vendor and every shop, why not seek out quality handicrafts that better represents the local culture while also directly supporting local artisans and their cultural traditions.

6. Center for Traditional Textiles – A non-profit organization founded this center to preserve and continue traditional weaving, and to teach and support this work in numerous communities around Cusco.  There is a very nice museum of the history and traditions of Andean textiles, and always a live weaving demonstration in the store.  The beautiful items are more pricey than the tourist versions at stores and markets, but are truly hand crafted and naturally dyed.  Avenida el Sol 603

7.  Museo Taller Hilario Mendivil – This museum, workshop, and shop of the notable local artisan Mendivil family is famous for the unique long-necked religious figures, dressed with indigenous influences.  The space also contains a small museum of historic pieces, and the proprietress may give you a tour (in Spanish).  Numerous beautiful works of of both the “long-neck” style as well as several other styles are available for purchase.  Plazoleta San Blas (along the right side as you stand in the plaza and face the fountain)

Cusco Suzco Mendivil sargento Peru dance
My Sargento figure from the Mendivil Workshop

8. Local Food Markets – Venture beyond the covered San Pedro market to the open street markets and local covered food markets in the areas behind the main market.  Ask the vendors about exotic fruits or animal parts that you can’t quite identify, and try some such as the delicious cherimoya (or custard apple) and the maracuya (or passion fruit).  In all markets, be aware for pick-pockets and be very careful with all belongings – carry your bags in front and go with empty pockets.

Cusco Cuzco Peru market meat cow beef tongue
Various tasty cow parts at a Cusco market

EXPERIENCES

Travel isn’t just about seeing sights and eating food.  Some of your strongest and fondest memories may come from the unique experiences you can only undertake in a foreign place.  Strolling through a local market, looking behind the scenes to gain more insight into daily life, and interacting with vendors and shopkeepers can all provide these types of experiences.  There are other opportunities to take advantage of in Cusco:

9. Volunteering – It sometimes seems that Cusco may have more NGO’s per capita than any other other city, particularly any tourist-oriented city.  But this is due to real needs brought about by the inequities and social conditions that are common to many areas of Peru.  Find an NGO (non-profit organization) that serves a need which interests you.  This might include orphans, underprivileged children, single mothers, the environment, disabled children, cultural heritage, or countless other areas and needs.  The South American Explorer’s Club has extensive resources on local volunteer opportunities, and there is also a helpful list of organizations here: http://www.volunteersouthamerica.net/

volunteer aldea yanapay cusco cuzco peru
A student at Aldea Yanapay

I have volunteered for several weeks at Aldea Yanapay, mentioned in the Eating section above.  They run an after-school program and cultural center for the disadvantaged children of Cusco, as well as other projects.  You can take Spanish classes at FairPlay which in itself is an NGO that helps single mothers, and who will also assist you with volunteer placement.

10. Inti Raymi…Up Close – While many visitors to Cusco in June have the opportunity to experience the Inti Raymi Inca sun festival, those who make an extra effort can see more of the events from close-up.  The festival starts at Coricancha, the original Inca temple of the sun.  Arrive several hours early and you can grab a front-row spot near where the Inca King – Sapa Inca – greets the morning sun.  Locate your self at the top of the hill near the curving Inca wall that now forms the base of the Santo Domingo church, so that you can view the Sapa Inca atop that location and the royal court as they stand among the terraces.  Immediately after the ceremony, run just up the street to near the entrance of the church, where the procession will emerge, so that you have an up-close view of the Inca, his court, and the entire procession as they start to make their way to the Plaza de Armas.  Be sure to orient yourself so that you are in the best position for photos, where the light hits the subjects and you are not facing into the sun if possible.

Inti Raymi Inca king Sapa Inca sun festival Coricancha
The Sapa Inca greeting the sun at Coricancha

Inti Raymi Cusco Cuzco Peru Coricancha
A Ñusta (Inca Princess) in the procession leaving Coricancha

I have put together a list of some of my favorite additional places to visit in Cusco, including restaurants, shops, and practical resources such as banks.  You can view this list of Cusco Places to Visit here:  http://www.dojoklo.com/writing/cuscoplacestovisit.pdf  Be sure to do your research and plan your visit to Cusco so that you can fully take advantage of all that it offers.

Want to learn how to take better travel photos on your trip to Peru, such as the ones highlighted in my Peru and Dance photo galleries shown here?  Have a look at my blog posts about Photography Technique or my latest e-book Ten Steps to Better dSLR Photography:

The Canon 70-300mm DO Travel Companion

In some of my posts, such as the one about the Best Lenses for Travel and Humanitarian Photography, I venture to suggest a good single lens for travel. My recommendations have typically been the Canon 18-200mm f/3.5-5.6 or the more expensive Canon 24-105 f/4L. Both offer a useful focal length range for travel, image stabilization, and excellent image quality (relative to their price, of course – the professional L lens is of much higher quality). The 24-104mm also boasts the fast and quiet USM focusing motor.

One lens that I have previously failed to mention is the unique Canon 70-300mm f/4.5-5.6 DO IS USM lens. Its broad focal length range, image stabilization, and USM focusing motor with full-time manual focus* are all appealing features. (*you can over-ride or tweak the autofocus with a twist of the focus ring without switching to MF.) But what makes it a potentially great travel companion is its size and appearance. Due to its use of Diffractive Optics (the DO in its name) the lens is relatively small and light. And in addition, its exterior is black rather than the white of the L lenses. Thus it becomes a much more portable and much less obtrusive lens than the big, white 70-200mm and 70-300mm L lenses.

Canon 70-300mm DO lens diffractive optics
The unique green band of the Canon 70-33mm DO lens

The 70-300mm DO declares its uniqueness with a green band around the front of the barrel, where the red band of the L lenses sits. Diffractive Optics is a technology developed by Canon to reduce lens size while maintaining image quality and eliminating chromatic aberrations, and currently only two Canon lenses use DO. This lens has been around since 2004, and has overall received excellent reviews. For a professional photographer it will never quite replace a 70-200mm or 70-300mm L lens due to its slightly lower image quality and sharpness, and lack of the f/2.8 or f/4 maximum aperture throughout its full range, but for those just a little less demanding it could be the perfect travel companion for photographers not wishing to carry around a larger and more noticeable white lens.

Canon 70-300mm DO lens diffractive optics

There are mixed reviews on its sharpness. Some users claim it is sharp as can be, some say it loses sharpness at certain focal lengths and apertures, and other say with standard post-process sharpening there is virtually no difference between it and an L lens. One complaint that can’t be denied is its propensity for lens creep. Due to the weight of the lens elements and the fact that it zooms externally (unlike the internal zoom of the 24-105mm or the 70-200mm lenses) the zooming barrel will move on its own when pointed up or down. The lens has a locking switch for storage or for walking around, but otherwise it is going to creep. This DO lens also does not have a rubber weather-sealing ring at its mounting base, which is disappointing for a lens in this price range.

Optically the 70-300mm DO displays a couple unique characteristics as well. At certain apertures a hazy, often described as dreamy, outline will appear around bright out-of-focus areas. And due to the concentric circles of the DO optics (visible in the lens just by looking at the glass at an angle) out-of-focus spots of light also contain concentric circles, or “targets,” as shown in the image below. These rings also appear in areas of flare, so it is best not to use this lens if you are a fan of shooting into the sun to achieve purposeful lens flare.

Canon 70-300mm DO lens diffractive optics bokeh target bullseye
The interesting bullseye/ target bokeh of the 70-300mm DO lens, pronounced when at narrow apertures (f/16 here) – click image to view larger on Flickr.

The above image is a crop from the one below. Notice that in addition to the concentric circles, the bokeh of bright light spots becomes hexagonal at narrower apertures (like f/10 or f/16) as shown below, but it is nice and circular starting at f/8, without the targets being so pronounced at wider apertures (like f/5.6).

Canon 70-300mm DO lens diffractive optics bokeh
Canon 70-300mm DO lens – hexagonal bokeh with bullseye targets seen at f/16 – click image to view larger on Flickr.

So if you are looking for a high quality lens for travel with an exceptional telephoto zoom range, you may wish to consider the 70-300mm DO. It is not everyone’s ideal single lens for travel because its focal length starts at 70mm and thus lacks the wide angle range, but for those who like to zoom in close and capture faces and details, it could be a lens that stays on your camera much of the time. And even for those who already have a big, white 70-200mm lens, this could come in handy in many situations which you wish to be a little more discreet or even appear less intimidating to your subjects. Go to the store and play with one, and I think you may find that you love the size and feel of this lens, and can envision its great travel potential.

See and purchase the 70-300mm DO lens at Amazon.com

Have a look at some other reviewers’ posts to learn more about this lens, its technical specs, and its performance, as well as see images comparing its size to other lenses:

Review and description with size/ weight comparisons at The-Digital-Picture.com

Review focusing on image quality at Photo.net

Field test and very technical review at Luminous-Landscape.com

Canon’s explanation of Diffractive Optics

Why You Should Get a Model Release

Many photographers starting out often ask working photographers if it is really necessary to get a model release – permission, from a person depicted in a photo or portrait, to use that photo for commercial or other purposes.  Between the difficulties of actually getting a release, the vague or confusing legalities (editorial use vs. commercial use, etc), or the time and hassle involved, a photographer may not bother.  Additionally, a travel photographer would need releases in various local languages and would need to be able to explain to the model exactly what they are signing, so they might not make the effort.

But if you ever plan to license a photo for commercial use – say for use in a book or in an advertisement – you really will need a release.

Recently a book publisher requested to license one of my images for use in a book.  Although the use of the image in the book might be considered editorial, the editor requested a signed model release.  The photo was taken in a foreign country, over two years ago during a public celebration, and was not at all a situation where I could have approached the subject and asked for permission.  However, with the incentive of a several hundred dollar licensing fee, I set out to get it.

Since the person in the photo was the central figure in the event, I figured I had a chance to track them down.  So one month ago, I contacted the foreign authority who organized the event, through their website.  I also contacted several friends and acquaintances who live in the city where the photo was taken and asked if they could go to the organization’s office and inquire about how to contact the person in the photo.  However, my acquaintances either didn’t respond or were out of town and unable to help.  Finally, a week or so later one of them provided me with the email address of the head of the organization, along with a warning that they would not be cooperative and that as soon as they smelled money, they would want it for themselves.  So I contacted the organizers, and sure enough, they were not cooperative and failed to provide me with a name or contact info.  After doggedly pursuing them, a couple weeks into the process they finally told me that they were inquiring about the legalities of who is authorized to give permission for use of the photo.  Since they organized the event, they implied it was likely them who should sign the model release.  (They may have also been expecting me to start discussing monetary incentives for them to continue to help me.)  I no longer had the patience to tell them that is not how a model release works, and decided to pursue different routes.

I expanded my inquiries, and another friend from the city said not only did she know the name of the person, but that it was a friend of hers!  “Great!” I said, “can you get me in touch with them?”  A week or so later (people in other countries don’t always view email as an immediate back and forth as we typically do…) my friend told me, “well, he isn’t exactly a friend,” but rather my friend had once been introduced to the person four years ago.  However, in the meantime, now armed with the name, I did some bi-lingual Internet searches, and found some indirect connections to the person.  I wrote to one, and he immediately provided me with the model’s email address.  But the subject has yet to respond, so the process continues.

This situation is obviously an exception in that a model release would not have been possible in the original photo situation.  But it is also an exception that it is somewhat possible to identify and track down the subject, a couple years later and in another country.  How often would you be able to do that with a complete stranger, even in your own city, much less in a foreign country?  If you capture a photo that you think may have the possibility of being licensed, you can see it may be worth it to go through the initial effort to get a signed release.  A two minute process at the  time vs. a one month (and counting) process later!

Model releases in numerous languages can be downloaded from Getty Images here:

https://web.archive.org/web/20130225203652/https://contribute.gettyimages.com/producer/help

Becoming a Humanitarian Photograper – After the Self-Assignment

I wrote a popular previous post about How to Start Out as a Humanitarian Photographer. It discusses one of the important initial steps of this endeavor: the Self-Assignment. The self-assignment – a volunteer trip to work with and photograph an NGO or non-profit – should help you determine if humanitarian or travel photography is something you really wish to pursue. And if so, it helps you to gain experience working in the field, collaborating with NGOs, and preparing for future assignments. Once you’ve completed and returned from that trip, there is much more to be done!

8421

Editing: Your first task is to select the best images out of the hundreds or thousands of digital images you took, and then to edit and optimize those images. If you are not already adept at working with Photoshop and/ or Lightroom you need to learn the programs and begin to gain proficiency. There are numerous books for this, so try to find the ones that work best with your learning style. Some of the ones I’ve found most helpful are the books by Scott Kelby and by Chris Orwig:

The Adobe Photoshop CS5 Book for Digital Photographers by Scott Kelby

The Adobe Photoshop Lightroom 3 Book for Digital Photographers by Scott Kelby

Adobe Photoshop CS4 How-Tos: 100 Essential Techniques by Chris Orwig

Adobe Photoshop Lightroom 2 How-Tos: 100 Essential Techniques by Chris Orwig

These and other helpful photography related books can be found in my post on Essential Digital Photography Books. Don’t worry about learning every feature of the programs but concentrate on the basic color, contrast, and sharpening features, as well as layers and adjustment layers. As you gain proficiency, move into masking, retouching, advanced sharpening and black and white conversions. Develop good editing, metadata, storage, and workflow habits from the start because it becomes hard to undo bad habits later on. Begin to learn how to use actions and batch processing to more quickly process numerous images.

Contests: When you’ve finished selecting and editing your best images, begin to enter them in contests. The reason for entering contests is not to gain sudden fame, riches, and an instant professional career. Few, if any contest will lead to this, no matter what they promise. Instead, the purpose of contests is to start to develop credentials. Being selected as a finalist or winner of a photo contest will enable you to add that accomplishment to your CV, and winning will allow you to add that coveted phrase in front of your name: “Award winning photographer.” Many contests lure you with the promise of exposure to those in the photo industry or the greater public, but in reality there is very little chance that this will lead anywhere, even if you win. Photographers who are regularly published in magazines and whose name is often in front of industry insiders still struggle to obtain their next gig, so don’t expect your single photo to bring you much. Also, participating in contests will help you to see what others think of your photos. Of course you think they are great, and your friends and family rave over them, but what about others out there? It also helps to see your photos side by side with countless others to see if your images truly stand out among the masses. However, it comes back to you to be the best judge of this. The images that are chosen will often confuse and annoy you and the other entrants, and it is often difficult to understand why the judges chose particular images. It helps somewhat to look at the winners of the previous years to see what types of images catch the judges’ eyes, but it is impossible to second-guess what they are looking for year to year. Stick to entering the images you like best, but detach yourself emotionally from your photos’ subjects and the experience of taking them, and view them as an impartial observer. If contests ask for captions, descriptions or short essays to go with the photos, take time to carefully write them. Look into guidelines and recommendations for writing newspaper captions, and please, avoid saying amateurish phrases like, “I took this photo while standing…”

8387

There are a few contests (and grants) that cater to humanitarian photography, such as those run by Photoshare, Focus for Humanity, and PhotoPhilanthropy. There are countless other photography contests so search on the Internet to find some current ones. Many of your photos will likely fit well in travel photography contests or the travel category of a contest. Also be sure to look at other categories that might apply such as people or portraits. It is best to stick to the well know, reputable contests, like those run by National Geographic, Smithsonian magazine, airline magazines, travel magazines like Conde Nast Traveler, travel guidebooks like Rough Guides and Viva Travel Guides, travel websites like Peterman’s Eye, contest sites like Travel Photographer of the Year, and newspapers. Be wary of contests that charge entry fees. You can quickly spend a lot of money entering multiple photos to multiple contests in the hope of gaining notoriety. But remember that the likelihood of you winning the grand prize is small, no matter how amazing your images are, and even if you did win, it will not lead to sudden fame and an instant professional career. While some of the contests you have to pay for are well respected and legitimate, such at the International Photography Awards, and it may be worth it to enter a couple, keep in mind that the most you can expect is to be able to use this credential in your bio and descriptions. Also note that some of the prestigious contests with entry fees attract professional and commercial photographers or very highly talented amateurs, and the quality of the entries exceptional. Determine if it is worth your time and money to enter, or better to wait a few years until your skills and images improve. But also remember that, despite thousands of entrants, it is possible to win photo contests. I’ve been recognized in several contests, have won a dSLR, and had my photo selected for a travel guidebook cover.

Be sure to carefully read the fine print of a contest’s rules and guidelines, especially to determine if you are signing away the rights to your photos. Contests are often tools for a company to gather a large pool of free photos to use in their books or website, and you may be surrendering lifetime, or even exclusive rights to them just by entering. You never want to surrender your copyright or give them exclusive rights and just give away your photos for free for them to use however they wish. Recent examples of this which greatly upset many photographers including well respected professionals were a National Trust contest in the UK and a Frommer’s cover contest. If you are still determined to enter and feel that the potential benefit outweighs the cost, consider entering a photo that is similar to your best photo, but not the exact same one that you may wish to use, exhibit, and sell later.

Grants and Fellowships: In addition to contests, you should also consider applying for grants and fellowships. There are very few of these, but if you were to win, they would allow you to travel and pursue an in-depth project. I’m sure you’ve begun to think about personal projects and places you would like to travel to and photograph, so turn your idea into a compelling story. Most grant and fellowship applications require both a sample photo essay or story and an essay or proposal. Hopefully on your self-assignment you documented your project in a manner that tells a story of a place, organization, or person. If not, careful editing and captions might create a good photo essay. Some grants or fellowships require a project already in process, so keep this in mind as your travel and work. Writing the proposal is very time consuming and takes a lot of careful thought, so start working on yours well in advance of the deadline, and follow their requirements precisely.

Many of the contests, grants, and fellowships occur annually, so be sure to add them to your calendar, giving yourself a few weeks to prepare for each of them. Some online sites which list many of them are:

http://www.lightstalkers.org/
http://photographygrants.blogspot.com/
http://photojournalismlinks.com/awardsgrantsandcompetitions/

8378

Website: This is pretty self-explanatory – build a website to share your work with others. There are countless sites which are designed to host photo portfolio websites, such a PhotoShelter and Fluid Galleries, or templates you can incorporate into your own website. Try to strike the best balance you can between do-it-yourself, cost, functionality, and professionalism. Domains and hosting are very cheap through places like GoDaddy, but portfolio templates and hosting can start to add up to hundreds of dollars a year. Try to keep the costs to a minimum until you start making money from your photography. Just make sure your site looks clean and professional, functions quickly and intuitively, and that your images are large and easy to navigate. Here is a list that can get you started.

Exhibitions: Print and frame your photographs and exhibit them so that you can share them with a wider audience. Look for unique opportunities of places and events that might be eager to incorporate your photos, such as travel agency offices, local festivals, performances, and movie screenings that relate to the culture or country where your images are from, local stores, and restaurants (although I am wary of this last one as I would prefer to sell my images to them and am afraid of damages to the prints from exposure to constant cooking air).

Read: Continue to read and learn about the humanitarian issues and the countries that most interest you. A good place to start is any of the books listed in the Humanitarian Books section of the Amazon.com site I put together. Get them from your library, or purchase them through that site and help support my work! This post also has information about books, and this post talks about other resources for learning about humanitarian issues.

The next step in the process is to learn the business aspects of becoming a professional photographer. I’ll save that lesson for another time!

For related posts, be sure to check out the other entries in the Humanitarian Photography category.

One on One Digital Photography Instruction

Digital SLR Camera Lessons

I am offering one-on-one, individual instruction (or small group workshops) in all aspects of digital photography in the Boston and Cambridge, MA area. I will create a unique lesson with you that can include topics such as choosing a new digital SLR or advanced compact camera and related equipment, learning how to use the various settings and features of your digital camera, photographic composition and taking stronger images, processing and editing your images in Photoshop, and preparing for photographing while traveling.  The lesson plan is up to you and is customized to your interests, needs, level of experience, and specific equipment.  Subjects will be explained, demonstrated, and practiced in ways you will understand, remember, and use.

Please view the Lessons page here, or under Lessons in the blog menu above, to learn more details.

Douglas J. Klostermann Photography Cambridge, MA
Central Square – Cambridge, MA – “Crosswinds” mural by Daniel Galvez

Learn to use your camera with confidence, get the most out of your digital SLR photography equipment, and learn to take better images. Get in touch with me at doug (at) dojoklo (dot) com or at 347-272-Seven Thousand.

Best Canon Lenses or Which Lens Should I Buy Next

When I began my work in travel, culture, and humanitarian photography I spent a great deal of time scouring websites, reading forums, checking reviews, making lists, and agonizing before I finally settled on which lenses were best for my needs and my work. So hopefully all my effort can help you save some time and assist you in your research in selecting which lenses are best for you. In addition to travel, humanitarian, and photojournalism work, much of this advice will apply to general photography as well. After you’ve learned all about lenses here, you can have a look at this other post to see what other camera gear and accessories you might want.


Open Windows, San Miguel Duenas, Guatemala

The easy answer to the question of which lens is best for travel photography, right up front, is: an all purpose zoom that goes all the way from wide to telephoto, like an 18-200mm, or a standard zoom like a 24-105mm. See the Standard Zoom section and the One Lens For Travel sections of this post for more information about these. The more difficult answer to that question is addressed in detail by this post. The most difficult answer to this question is: it depends. It depends on you. It depends on your level, interests, and goals as a photographer. It depends on what you most enjoy taking photos of and what type of images you aim to capture. Hopefully this post will help you figure that out, and I’ll address this most complicated answer more at the end of the post.

The primary sources for me in determining which lenses to choose were looking at the websites and blogs of other photographers who do similar work, since they often list and discuss the equipment they use. The initial and most helpful source for me was Karl Grobl, since his work as a humanitarian photojournalist is closest to what I do and what I aspire to do. But some of the other ones I can recall looking at include David duChemin – (who is a travel, art, and humanitarian photographer – he seems to have moved or deleted his “Gear” page), plus Nevada Wier and Bob Krist – both dedicated travel and cultural photographers. Oh, and the books and advice of the ever-enthusiastic Rick Sammon helped out along the way. I then applied what I learned from them to my specific photographic interests, preferences, and tendencies (which can be summed up with the fact that I typically like to zoom in close). In other words, if one of them favors a 50mm prime lens but you know you prefer the versatility of zooms, then adapt what they say to your needs.

For me and many others the ideal combination is a wide angle zoom, a standard (or middle range) zoom, and a telephoto zoom. (If you are interested in just one lens for travel, have a look at the Standard Zoom section, and then also jump down to the bottom of this article for the One Lens for Travel section.) I’m going to stick to the professional level lenses and compare the Canon L lenses first, and discuss other Canon lenses in the One Lens for Travel section below. I’ll try to keep it short and simple, and let you conduct further research on the countless sites dedicated to equipment and reviews.

Click on each lens below to link to its page on Amazon.com. If you plan to purchase any of this equipment from Amazon (or other equipment, accessories, or anything else), I encourage you go to Amazon.com by clicking on the links found throughout this post, and then Amazon will give me a little something for the referral, which will help support my blog. Thanks!

If you wish to first try out a lens before buying it, click on this link to go to BorrowedLenses.com, where you can get great prices on short-term rentals of any lens as well as the latest Canon and Nikon dSLR bodies (as well as video, audio, and lighting equipment).

If you are in the UK or wish to purchase from B&H, Adorama, or direct from Canon see the information at the end of this post for those links. The lenses I chose, which work best for my needs, are indicated by (Y). I apologize to the Nikonistas out there, since all of these lenses are the Canon variety. However, Nikon typically has an equivalent lens for each of these. Just search for the same focal length and have a look at the aperture and price to determine the comparable Nikon (Nikkor) lens. For example here are some equivalents:
Canon 16-35 f/2.8L to Nikkor 14-24mm f/2.8
Canon 24-70 f/2.8L to Nikkor 24-70 f/2.8
Canon 70-200 f/2.8L IS to Nikkor 70-200 f/2.8 VR

Check out this post to better Understand Canon Lens Notations – the significance of all the various numbers and letters in a lens name.

Wide Angle Zoom
As humanitarian photojournalist Karl Grobl says, this is the “bread and butter lens” of the photojournalist. This is used for up-close-and-personal shots, for environmental portraits or photos, and for “story-telling” images which include multiple subjects or a larger context.


Open Windows, San Miguel Duenas, Guatemala

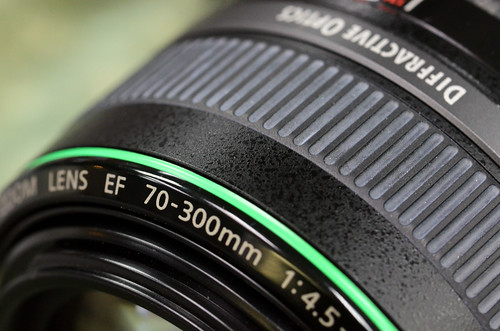
EF 16-35mm f/2.8L II USM (Y)
pros: slightly wider on the wide end which is good for cropped sensors (7D, 60D, Rebels), larger maximum aperture (“faster”) for use in low light situations or for more dramatic depth of field
cons: high price, heavier in weight
notes: get the slim UV filter to avoid vignetting, especially if using a full frame camera like the 5D
filter: 82mm slim filter fits this lens.
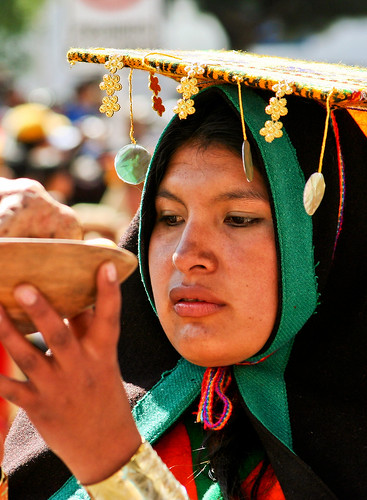
notes: The above two images of this post were with this lens. This is the wide angle zoom I chose because I wanted the “faster” f/2.8 aperture to be able to use it effectively in low light situations.

EF 17-40mm f/4L USM
pros: more zoom on the far end, lighter in weight, much lower price
cons: f/4 maximum aperture not as “fast” and slightly less dramatic for shallow depth of field, not quite as wide on the wide end
filter: 77mm slim filter fits this lens.

Standard Zoom
This is a great “walk-around” all purpose lens, especially for travel or everyday photography. If you want to head out on the streets with just one lens, this is the one to take which will serve you well in most situations you encounter.


Panajachel, Guatemala

EF 24-70 f/2.8L USM (Y)
pros: larger maximum aperture (“faster”) for use in low light situations and more dramatic depth of field
cons: heavier in weight, higher price, less zoom range, no image stabilization
filter: 77mm multi-coated filter or 77mm coated filter fits this lens.
notes: a great all-purpose walk-around lens, though relatively big and heavy. I discuss using this lens, with several photo examples, in this post here.

There is a new EF 24-70 f/2.8L II USM lens plus the new EF 24-70 f/4L IS USM lens, both with the same focal length as above.  The first one just listed is an improved, lighter version of the 24-70 f/2.8L, and the second one listed adds Image Stabilization but has an f/4 maximum aperture rather than the f/2.8 maximum aperture of the other 24-70mm lenses. Adding these two new lenses into the mix makes this an even more challenging decision in the Standard Zoom category!

EF 24-105 f/4L IS USM
pros: lighter in weight, image stabilization which will help you gain 2 or 3 stops in speed vs. hand-held non IS (*see below), more zoom range, lower price
cons: f/4 maximum aperture not as “fast” and slightly less dramatic for shallow depth of field
filter: 77mm multi-coated filter or 77mm coated filter fits this lens.

* this means for example, if the proper exposure of a scene is 1/60 at f/5.6, and you want to hold on to that f/5.6 aperture for compositional reasons and not have to sacrifice your chosen depth of field for a faster shutter speed, you could capture it without blur, whereas without the image stabilization (IS) the hand held image may have been blurry.

Telephoto Zoom
This is a great lens for portraits, close ups, details, ability to zoom in and capture something far away, sports and action shots, and ability to create dramatic depth of field or blurry backgrounds. There are four versions of the Canon 70-200mm lens – either f/2.8 or f/4, each with or without image stabilization (IS). Oh wait, there are now five versions, with the recent Mark II version of the f/2.8 IS. I think with a lens this long and heavy, you need image stabilization if you are going to be hand holding it, so I will ignore the non-IS versions.


Solola Market, Guatemala

EF 70-200, f/2.8L IS USM
pros: larger maximum aperture (“faster”) for use in low light situations and more dramatic depth of field. The Mark II version of this has a closer minimum focus distance and improved optics
cons: very heavy, very large, higher price, especially the new Mark II version
filter: 77mm multi-coated filter or 77mm coated filter fits this lens.

EF 70-200, f/4L IS USM (Y)
pros: lighter weight, smaller, lower price
cons: f/4 maximum aperture not as “fast” and less dramatic for shallow depth of field
filter: 67mm multi-coated filter or 67mm coated filter fits this lens.
notes: This is the telephoto zoom I chose. I sacrificed the one-stop of aperture for the much more manageable size and weight of the f/4. And since I primarily use it outdoors, and because it has image stabilization, the f/4 aperture only really affects the extent of background blurring. There are several example photos of this lens in action in this post here and also more nice example photos in this post here.

I haven’t used each of these lenses in the field, though I have briefly tested most of them, so my decisions and my pros and cons are sometimes based on my research and from what I’ve learned from others who use them. Consider them starting points for issues you want to consider in your selections. And while there are endless discussions and comparisons regarding image quality, sharpness, sweet spots, etc. for each pair above, I will stay out of that discussion and tell you there are highly regarded professionals who use each of these, that any Canon L series lens is professional quality, that price and/ or largest maximum aperture will often indicate the one that is generally considered “better,” and that you will never regret your choice based on these concerns. Note that many L-series lenses are sealed against and dust, water and weather. Sometimes a front filter is required to complete the weather sealing, such as with the wide angle lenses. I suggest always using a clear, protective UV filter with any lens, preferably a high quality, multi-coated B+W brand filter. If you don’t want to spend that much, at least get a high quality single-coated B+W filter rather than a cheaper Tiffen filter.

When making your choices, I highly recommend going to a store with your camera and actively testing and comparing each pair. The difference in size and weight, and even feel of the lens in your hands, is often dramatic and may help you make your decision. If you are still undecided, rent one for the weekend and work with it. And don’t think that you have to immediately get three lenses in order to do your work. Karl Grobl uses just two of them in his work, and that hasn’t limited him in either humanitarian or travel work. Consider your primary needs, and buy one or two based on that, and combine them with less expensive non-L lenses for now.

If your budget or needs don’t call for L-series lenses, see the One Lens for Travel section below, or look for the closest equivalents of the above lenses in other Canon or Sigma or Tamron, etc. lenses (or in the Nikon lenses if you are over in that camp).

Prime Lenses
Many photographers rave about prime lenses (lenses of a single focal length, that don’t zoom) for many reasons, including image quality, the purity and simplicity of working with them, and their large maximum apertures (as wide as f/1.2) for very dramatic compositions through use of shallow depth of field. The focal lengths I see used most often are (these are obviously Canon examples):

Canon 35mm f/2
Canon 50mm f/1.8 II (high image quality for about $100!)
Canon 50mm f/1.4 (Y) (a little more costly, but higher quality 50mm)
Canon 85mm f/1.8

Take into consideration if you have a full frame or a cropped sensor, since with a cropped sensor 7D , 60D, or 550D the field of view of the 50mm lens will be closer to an 80mm lens on a full frame 5D camera (or a 35mm film camera), so the field of view of a 35mm will be closer to a 50mm on a full frame or 35mm film camera.


San Miguel Dueñas, Guatemala

One Lens for Travel
I know a lot of people are interested in finding just one lens that is good for travel photography. As I mentioned above the best option is typically the standard, mid-range zoom. Look above for info on the Canon L-series lenses. My choice would be the EF 24-105 f/4L IS USM. For something less expensive Canon offers a couple other great options. For each of these lenses, I would highly recommend getting the optional lens hood (the hood comes with L-series lenses). It helps shade the lens to prevent unwanted lens flare (although lens flare can sometimes be used for a great effect when desired), helps protect the lens from bumps and drops, and makes you look cooler and more professional! And of course always get a good quality, coated B+W brand UV filter for protection – or at least a cheaper Tiffen filter. However, there is a significant difference in the clarity and lack of reflectiveness of a coated B+W filter vs. a standard Tiffen filter, which you can see if you look through them side by side, so those who are concerned about image quality should go with a coated, or better yet multi-coated B+W filter (designated MRC). Also, note that non-L-series lenses are not nearly as well sealed against dust, water and weather as most all of the L-series lenses are.

EF-S 18-135mm f/3.5-5.6 IS
pros: less expensive, lighter weight, image stabilization
cons: less zoom range on the telephoto end than the 18-200mm, not a constant minimum aperture like the L-series lenses (the f/3.5-5.6 means your largest aperture at the 18mm wide end will be f/3.5, while the largest aperture at the 135mm telephoto end will be a less dramatic f/5.6), not higher quality USM focusing motor, EF-S means this lens can only be used on cameras with the APS-C sensor, or non-full-frame sensors, so it can be used on all Digital Rebels, 20D-50D, and 7D, but cannot be used on a Canon 5D. However, that means it is optimized for those cameras, especially for the wide end.
Lens hood EW-73B fits this lens, and a 67mm coated filter or 67mm filter.
This is currently one option for the kit lens for the Canon EOS 60D, and is a good choice if you are debating between the kit lens or not.

EF-S 18-200mm f/3.5-5.6 IS
pros: more zoom range on the telephoto end, image stabilization, better image quality than the 18-135mm lens.
cons: more expensive, heavier weight, not a constant minimum aperture like the L-series lenses (see above lens), not higher quality USM focusing motor, EF-S for APS-C sensor cameras only (see above lens).
Lens hood EW-78D fits this lens and a 72mm coated filter or 72mm filter.
This is currently another option for the kit lens for the Canon EOS 60D, and is an excellent choice if you are debating between the kit lens or not.

EF 28-135mm f/3.5-5.6 IS USM
This is an older lens that seems to have been replaced for the most part by the two lenses above.
pros: less expensive, image stabilization, USM means a faster, quieter auto-focusing motor and full time manual focus (which means you can override the auto-focus by turning the focus ring without having to switch the lens to MF manual focus), EF so can be used with both APS-C and full frame cameras too if you have or wish to upgrade to a 5D.
cons: not a constant minimum aperture like the L-series lenses (see above), less range on both the wide and telephoto ends.
Lens hood EW-78BII fits this lens and a 72mm coated filter or 72mm filter.

It Depends
The actual answer to the question of which lens is best for travel photography is: it depends. As I said above, it depends on you – on your level, interests, and goals as a photographer. It depends on what you most enjoy taking photos of and what type of images you aim to capture. If you are a photography novice, or just want to be able to capture all or most situations, the all purpose zoom or standard zoom might serve you best. But if you wish to capture more of a certain type of photo that you like, photos that match your specific visual ideas and preferences, you need to reconsider. Do you like sweeping vistas and all encompassing environmental portraits? Do you typically want to capture the entire scene in your shots? Then perhaps a wide angle zoom will work better for you than a standard zoom. Certainly, you will be limited and not able to frame certain shots the way you might want, but you will capture more of the types of images you like, and might simply have to move in closer than usual to get some the other images. Do you like extreme close-ups of people’s faces with dramatically blurry backgrounds, architectural details on buildings, the look of compressed perspective? Then a telephoto zoom rather than a standard zoom will help you capture more of those images you like. Sure, you will not be able to get the wide angle view of spaces, but you might succeed in capturing many more of the dramatic photos you like. Or perhaps you best work like a classic photojournalist and want to capture scenes and portraits more closely to how you see them. Then a single prime lens like a 50mm or 85mm might be the one lens that is perfect for you.

The Best Lens for the Canon 60D
A lot of people ask, “Which is the best lens for the Canon 60D, (or the 7D, or the 550D/T2i or the 5D)?” There isn’t a specific lens that is best for a specific camera. I hope you’ve already learned that from reading this post! A lens will perform exactly the same on each of those cameras or any other camera with an APS-C size sensor. The effective focal lengths will be different with a full frame sensor dSLR, such as the Canon 5D, but they will still be wide angle zooms, medium zooms, etc. The best lens for your camera is the one that is best for you, your work, and the types of photos you take. That being said, the kit lens that Canon has paired up with the 60D, the EF-S 18-200mm f/3.5-5.6 IS is an excellent choice for an all-purpose everyday and travel lens. See the EOS 60D with the kit lens on Amazon here.

For related posts, check out other entries in the Lenses Category, the Humanitarian Photography category, and my posts about Fixed vs. Variable Aperture Lenses and Choosing a Lens beyond the Kit Lens, as well as my discussion and recommendations for gear for travel photography.

Purchasing: As I mentioned above, if you plan to purchase any of this equipment, I encourage you to do so by clicking on the links of each of the lenses listed above, which will take you to that page on Amazon.com. Or go directly to Amazon using this link or click on the Amazon logo below. If you purchase through these links, Amazon will give me a little something for the referral, which will help support my blog. Thanks, I appreciate your support!
Amazon.com

If you are in the UK, you can click here for the UK Amazon referral link. If you are in another country, click on one of my Amazon links, scroll to the bottom of the page, and click on your country for your local Amazon.

For those interested in purchasing from B&H Photo, Adorama, or direct from Canon, please click on their logos on the Gear page. Thanks!

Renting Lenses: If you wish to first try out a lens before buying it, click on this link to go to BorrowedLenses.com, where you can get great prices on short-term rentals of any lens as well as the latest Canon and Nikon dSLR bodies (as well as video, audio, and lighting equipment).

Was this post helpful?  Please let others know about it by clicking the Facebook or Twitter sharing buttons below, linking to it from your blog or website, or mentioning it on a forum.  Thanks!

The Exotic vs. The Real

(For related posts, check out other entries in the Humanitarian Photography category.)

As one grows up in the first world, they learn to see the developing world as exotic lands of vibrant color and fantastic ceremonies.  I recall that for a grade school project I made a large cut-out of the African continent, and populated it with carefully detailed stand up paper people, all dressed in their traditional local costumes, as copied from the encyclopedia.  I marveled at the variations in dress, and how each country had its own unique outfit.

This viewpoint continues on well into adulthood, encouraged by travel brochures showing smiling local people in their indigenous dress, and every traveler with a camera aims to capture those same shots on their journey (see previous post for a couple of my examples).  But after spending just a little bit of time in a developing country, one learns that these types of images are far from the “truth.”  The ones who still wear the colorful traditional outfits are almost always the poorest and most politically ignored segment of a country’s population.  Though they often smile and laugh, their lives are far from exotic and joyful.  They are often difficult, full of pain, and short.  During my recent brief trip to Guatemala, I repeatedly came face to face with these realities of life in a developing country, even more so than I ever did during my many months in Peru.  And in my photos I found I still battle with the contradictions of exotic vs. reality.


San Miguel Dueñas, Guatelmala

I was visiting a compound of several families’ concrete block houses surrounding a paved courtyard containing the shared sink and stoves.  These girls returned home in the late afternoon, and I immediately got caught up in taking photos of them.  Lost in my concentration, my traveling companion gently reprimanded me, “That’s enough, let them put it down.  It’s heavy.”  “Right, right, OK” I said and immediately stopped, embarrassed that I hadn’t realized this myself.  Although one cannot deny the momentary smile on these girls’ faces is genuine, the reality is that they are child laborers.  They had spent the day working in a coffee field, and then as they walked home they gathered and carried the wood, slung on their heads, as they do each day.  I imagine that the attention being paid to them by Elizabeth and I is a big part of the smile you see on their faces and in their eyes.


Concepcion (second from left), Kevin (second from right) and family – 11/16/2009

On another day we visited two boys and their families in order to interview and photograph them to write an article about them that will hopefully find them sponsors.  The two boys are about to enter high school, and each has lost one or both parents.  Without the help of a sponsor to pay for school, books, and supplies, they will have to leave school and begin working.  Elizabeth has written more about their stories here.  One of the boys, Kevin, is losing his mother Concepcion to cancer of the uterus, and his father died just a month earlier.  After interviewing Kevin, it occurred to us that his family probably doesn’t have a single photo of themselves or their mother, which would obviously be a nice memento now and after her passing.  We returned the next day to take a portrait.  They gently lifted their mother on her bed, where she has lied for endless weeks lacking the strength to get up, and supported her as I quickly took a couple shots, praying that they would be properly focused and exposed in the near complete darkness of the dusty, dirt-floored room.

Although she is dying of cancer, there is nothing she can do about it because the family lacks money for both doctors and trips to Guatemala City for the treatment.  And at this point, it would be physically impossible for her to get on and ride a chicken bus the 1 hour into town.  She does not have doctor’s visits, she does not even have appropriate medication for the pain.  She is dying a slow and very painful death.  Sadly, I later learned, many types of uterine cancer are preventable or successfully treatable if detected early with regular doctor visits.  In fact, conditions leading to cervical cancer can often have a 10 year window for detection and treatment.  But Concepcion has probably rarely seen a doctor in her life, and certainly did not have annual examinations.  We had learned the previous day that the other boy, Luis, had also lost his mother to uterine cancer and a very similar death.

Immediately after we left, the head of the NGO I was working with (who had dropped off food and supplies to deal with the bleeding) called a contact and got hold of some appropriately strong pain medication that they, like many of us often do, had left over in their medicine cabinet.  I went into Antigua and had an 8×10 print made, and found a simple but nice wood frame.  We returned to Kevin’s house, and presented it to Concepcion.  She sat up in bed and a huge smile washed across her face.  The pain medication had already begun to work wonders, and for the first time in weeks, maybe months, she was not in constant, unbearable pain.

See more related posts in the Humanitarian Photography category.

How to Start Out as a Humanitarian Photographer: The Self-Assignment

(For related posts, check out other entries in the Humanitarian Photography category which includes post such as choosing your camera and lenses, as well as the follow up to this post, After the Self-Assignment.)

How to Become a Humanitarian Photographer

As with many other photography specialties, there is no set course to becoming a humanitarian photographer. You must make your own path by determining your goals, piecing together the advice and experiences of others, and following your intuition. You can go to school and study photojournalism, you can create your own self-designed curriculum of classes, workshops, and experience, you can intern with an experienced photographer, or you can just strike out into the real world and learn it on your own. Starting out as a humanitarian photographer, or any type of photographer for that matter, involves learning about so many diverse areas beyond the art of making images and the skills of using a camera, a flash, and Photoshop (all of which are full time undertakings in themselves). There is also much to learn about business, copyright, marketing, branding, finances, insurance, client relations…the list goes on and on. But I’d like to go into detail about one important and practical aspect of starting out: the self-assignment.


San Francisco, Peru

In order to discover if travel or humanitarian photography is what you really want to dedicate yourself to, it is vital to get out there and really try it out. Travel to a foreign country, get out in the field, and spend days working at it, as if you were on a real assignment. One can think about it from the comfort of home, drooling over the beautiful photos of those you admire, and imagining the excitement of traveling in exotic places. But you may find that working in the field, spending weeks away from friends, family and soft toilet paper, and suffering days of intestinal distress is not all you hoped for. As any working photographer will tell you, it’s hard. Immensely gratifying and often fun, but none the less hard. I encourage anyone not to invest too much time, thought, and money into this dream until they have undertaken this important test.

Planning and executing a self assignment is challenging, but entirely do-able and realistic for anyone who is dedicated to the idea. Even if you have a full time job and aren’t making that much money, it can be done. Don’t quit your job yet to dive head first into self-employment, but use your vacation time to test the waters.


Cusco, Peru

Money: The first challenge is always money. You have to save up money for the gear, for the time away from work, and for the trip. This is done the old-fashioned way – by scrimping and saving. You’ve read it many times before, and it sometimes seems unrealistic, but it works. Save money anywhere you can – stop eating out, bring your lunch to work, cancel cable, cancel Netflix, get your books and movies from the library, stop buying stuff, use the right ATM and stop paying fees, scour the Internet for the best price on the gear you need. It may take longer than you want, it may even take a year or two, but it works. Remember, each restaurant meal you skip here equals three equivalent restaurant meals in a developing country – or better yet, it equals a week’s worth of groceries when you travel. The recession has already given everyone a head-start into living and thinking more economically, you just have to be dedicated to it a bit more and a lot longer. Also, once you begin traveling to developing countries and seeing how people find great joy in life yet live with so few possessions, your new economic lifestyle will seem that much more appropriate. I’m not just saying all these things because I’ve read them or because they sound like they will work. I’ve done them, all. Also look to Ami Vitale for inspiration. She worked long and hard and saved, then headed off and launched her career exactly this way (see the How You Finance Your Stories video at the bottom of this page: http://digitaljournalist.org/issue0301/av_intro.html). Look into counties that aren’t very expensive to fly to. For someone in the USA, that means look to South and Central America. Depending on the time of year, there are incredibly cheap deals. For example, I recently saw $84 tickets to Guatemala on a major airline. Yes, $84 each way! That’s cheaper than flying home for Christmas. Granted, it is a redeye with a long layover, but it gets you there. Be flexible and use Kayak.com to find the best prices.


Taquile Island on Lake Titicaca, Peru

Gear: You might not yet be able to afford the latest and greatest professional gear. In fact, until you are sure you really want to do this, you probably don’t want to invest in a 5D Mark III and 2 or 3 L-series lenses. Every photo forum you follow, pixel peeper you talk to, and gear review you read is going to convince you that you need the most current, top of the line gear. But you don’t. I do recommend using a dSLR and not just a point and shoot, so something like a Canon Rebel T5i / 700D and a versatile zoom lens like the Canon 18-200mm (or the Nikon equivalent) offers more than enough quality and range to start off with if you can’t afford more. On my first self-assignment all I had was an outdated, 8 megapixel Rebel XT and a single, 28-105mm lens. It didn’t prevent me from getting the shots I wanted, they’ve been exhibited, won awards, been honored by the United Nations, been used on travel guide and textbook covers, and no one has ever told me that the quality of the photos is unacceptable. (And remember that no one, outside the photo world, will ever even think to ask you what camera you used or which lens you chose.) Sometimes, with that early gear, I wasn’t able to zoom as much as I wanted for travel shots, or get wide enough for the close-ups of humanitarian work, so that is why the 18-200mm or 18-135mm (which weren’t available until more recently) would be a pretty ideal single lens solution now. (The secret fact is, I even have a couple great photos in my portfolio, a photo on a travel guidebook cover, and won a dSLR camera using an Olympus SP-320, 7 megapixel point and shoot.) Don’t go overboard with bags and accessories. Get a simple holster bag, like an M-Rock Yellowstone or whichever one fits your body and lens, or a LowePro or Tamrac bag or backpack, a couple filters (UV and polarizing), a lens pen and cloth, a rocket blower, extra batteries and memory cards, and then stop looking. You don’t need anything else. I promise. (Well, also your laptop computer, external hard drive, and some type of insurance coverage for it all. And maybe a Pac Safe 55 to secure it. And perhaps an external flash if you will be working inside. Hey, no one said this was cheap!) For insurance, look into your home-owner’s or renter’s insurance to see if it will cover it, or look at NANPA’s coverage or the discussion here. (If you happen to join NANPA to get their insurance, be sure to mention my name as a referrer, and I get $20 NANPA Bucks and save on my next renewal!) To sum it up, as culture photographer Craig Ferguson stated in a recent interview, “You don’t need to have the most expensive gear or even the newest. A plane ticket and enough money for 3 months living coupled with an entry level body and a 50mm lens will get you further than the latest pro-level body and no time or money to use it.” I discuss additional photography gear and accessories that are useful for working in the field in this post.


Altos de los Mores, Peru

Researching the NGO: Figure out what type of NGO (non-governmental organization) or non-profit organization you’d like to photograph, and which countries interest you, and start doing research. Which subjects most inspire your passion for this work? Disabled children, gender equality, health, faith-based work, community development? In every developing country there are countless NGOs doing each of these types of work and more. As a professional, you might not be able to be this specific in your choices, so take advantage of your self-assignment. Do searches on the Internet, and look on idealist.org. It is hard to imagine that any small, typically struggling organization does not want free, semi-professional quality photos for their website and newsletters, so most all will be welcoming to your offer to volunteer. But it is very important that you are quite clear that your interest and intent is to photograph their work. If you sign up to be a general volunteer, you will be expected and obligated to be doing whatever work they ask of you. Do not think you can be a volunteer and also take photos on the side. You will not do a good job of either that way. Be perfectly clear with them that you are interested in primarily photographing the work they do. That doesn’t mean you can’t spend a few days as a volunteer, and by all means you should (see below), but they should not be expecting you to be a typical volunteer.


Altos de los Mores, Peru

Ask questions and find out as much as you can about the actual work they do. Don’t just trust what you read on their website, but find out exactly what they do and where they work. They may say they work in 4 different communities, but really they might only visit 3 of them once a year for a medical visit or to bring donations. They might say they have a number of different programs, but really they may only be currently focusing on one of them based on financial reasons or staff and volunteers skills. Make sure that your area of interest is really what they are doing now. Explain to them your interests, and see if meeting your goals will be possible with them. NGOs are often run by incredibly generous, helpful, kind, friendly, flexible people, and they will want to help you at your project. But they are also incredibly busy and strapped for resources, so learn to communicate and work with them on their terms. Many organizations require that you pay to be a volunteer. This may sound strange, but you have to understand that they need money in order to keep doing the work they do. Just the fact that you are working for free does not pay the salary for the NGO’s staff. But be wary, there are many placement services that make money by being a middle-man, so make arrangements directly with the NGO. If your volunteer fee includes lodging, or even food, it is often quite reasonable to pay them. However, there are also many excellent organizations which will not charge you anything. If this is the case, be sure and support them by bringing donations (books, toys, art supplies). See my Resources Page for more information on volunteering. Some organizations run restaurants and hostels, so support them by eating and staying with them. Also, if you are thinking of joining a mission type trip, like a medical mission, find one that is being organized from your area so that you can document the planning and the departure of the group at the airport.

**Update 2010-01-28** Here is a website I just discovered which attempts to link up volunteer photographers with humanitarian projects world-wide: http://photophilanthropy.org/


Cusco, Peru

Working in the Field: It seems every photographer I admire always discusses the importance of talking to and getting to know the people you are photographing. Sometimes that means just chatting with them and buying some of their wares before you start to photograph them, other times that means living among them for several days, weeks, or months. As a photographer working with an NGO, this means you should consider being a volunteer for a day, without your camera, without photographing. Yes, that is a painful experience, to see potentially great shots slip by left and right. But this sacrifice will quickly pay off when you start to work. This gives you an opportunity to learn what the organization does and how they work. It also allows you to start to get to know the people they serve, and for them to become comfortable around you. It is obvious that this approach, rather than barging in with your face behind a camera, is going to result in much more genuine photos. Also, stay out of the way of the director and the staff when they are working. Make your arrangements and ask questions before or after the workday. Be flexible to ever-changing, never scheduled situations, but also, always remind the director of what you want to be doing. She might go running off to visit one of the client’s homes or villages, and you want her to know to always grab you and take you along on those types of trips. Take advantage of your time there to do, see, and photograph as many different types of places and situations as you can. Talk to everyone you meet – other volunteers, people at restaurants and hotels. Many other people are doing volunteer work, and they may point you in the direction of a great photographic situation.


Huinchiri, Peru

Develop, learn, and practice a good workflow for saving and backing up your images every day. It is time consuming and easy to want to put off, but if you get behind there will be no catching up. I recommend using David duChemin’s global workflow as a starting point (alternate link here). Always have your camera with you, even if you think you are just being taken to the bakery for some bread and are told you’ll be back in 5 minutes. You will inevitably be taken on a two hour detour through a part of town off the beaten path, with amazing photo opportunities, during the magic hour (best evening light). Always carefully prepare and assemble your gear before you start each day, and have new batteries and memory cards accessible while you shoot. I highly recommend you always remember to “make haste slowly.” What this means is that you will often be in a hurry, but don’t rush and act in a panic during critical moments, in preparation or in shooting. Change lenses carefully and slowly, then rush back to the action. Clean the mysterious glob off your lens carefully and delicately, then get back to shooting. There are countless opportunities to damage your gear, and while it is durable, somewhat waterproof, and stray marks and dings on your tools are not something to fret over, a dropped or scratched lens is. After this, well, I don’t know what to tell you – you’re going to learn a lot. You are going to learn your camera and its settings inside and out, you are going to learn to work under pressure, always being ready, always trying to capture the fleeting shot and changing light. You are going to start to learn what works and what doesn’t as far as compositions, camera settings, perspectives, etc. You are going to begin to learn about life in a developing country. And you are going to very quickly learn if this work is truly your passion and your calling.

Please leave a comment, ask a question. Let me know what has been helpful, and what you’d like to read more about. Let me know if you have planned or undertaken a self-assignment on your way to becoming a humanitarian photographer, and how you are addressing the challenges of this endeavor.

See my follow-up post, Becoming a Humanitarian Photographer-After the Self-Assignment for the next stage of the process.

For related posts, check out other entries in the Humanitarian Photography category.

Dreaming of a Conde Nast Dream Trip

I’ve been selected as one of the Ten Finalists in the Conde Nast $25,000 Dream Trip Contest (out of over 70,000 entries!) with my photo Boys Emerging from Chuch – Pisac. This photo was captured on my visit to Pisac where I ran into some fellow Yanapay volunteers, and then we all got on the bus going the wrong way, as documented in this post.

I was requested to submit an essay detailing my dream trip, in which I described a trip to visit and photograph the indigenous cultures of Laos, Cambodia, and Vietnam.

In addition, I won a Sony a350 digital SLR with an 18-70mm lens, and my photo was published in the October 2009 Conde Nast Traveler magazine.  If you are interested in purchasing this new, never used Sony camera, head over to eBay here. too late!

CondeNastScan