or What Pros are Doing When it Looks Like
They are Just Pointing and Clicking
You’ve probably had the experience where you locate the right spot and attempt to take the same photo as one you admire, yet the outcome is never quite the same. Or maybe you’ve stood next to a photo tour leader, and think you are taking the same photos, yet your images don’t seem to look like theirs do. Why is this? What is an experienced or professional photographer doing differently? What’s the big secret, the trick to getting those images?
It’s not impossible, it’s not luck, and it is not dependent on tricks. It’s not necessarily equipment or Photoshop skill. But rather it is a number of decisions and accumulated experience, all happening in those brief moments when a photographer sees a scene, raises their camera to their eye, frames the shot, adjusts the settings, and clicks the shutter. Here’s what the pros are doing in those moments when all you think you see them doing is pointing and clicking:

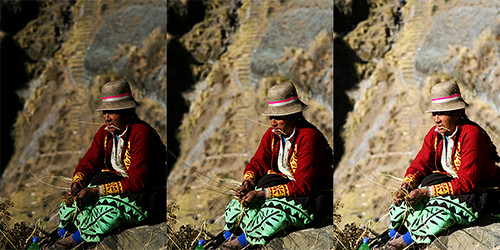
Festival de Tinajani – Ayaviri, Peru
The Right Light: A photographer is always chasing the best light. Their eye is always looking for good lighting, interesting lighting, the interplay of light and shadows, silhouettes. They are always aware of the quality of light – the color, the warmth or coolness of the light. Ideally they shoot only at the best times: in the morning and evening. But that isn’t always possible, so they must seek out interesting lighting, make the best of the available light, use a flash or off-camera lighting, or work in shaded areas. If the great light is there, but the subject isn’t, they wait for a subject to come into the scene. They consider not only the lighting on the main subject but also the lighting on the background and how it might enhance or distract from the subject. They place themselves in the best position in relation to the light and the subject to ensure their subject is illuminated as they desire, they remain aware of the light/ subject relationship, and move around as necessary as it changes.
Pre-Visualizing: The photographer begins to see the composition of the image before they raise their camera to their eye. They look at the elements and decide how they want them to relate to each other in the final image. They consider how near and distant elements will relate when compressed into two dimensions. As with the lighting, they look at not only their main subject but also the background that will appear behind it. They look for strong lines, color, weight and balance of elements, symmetry or asymmetry of the elements. They consider their main subject and the environment around it and determine how much they want to include – if they want a wide shot or wish to zoom in or move in for a closer shot. They consider which point of view will best express their subject – high, low, eye-level? They determine if the image and relationships will work best in landscape or portrait orientation, and hold the camera accordingly. They scroll through their mental file of similar images they’ve taken, and consider what was and wasn’t successful and how to improve this shot.

Festival de Tinajani – Ayaviri, Peru
Metering: When they see that interesting or challenging light they know how to meter for it. They don’t count on their camera to know how they want the scene exposed and they don’t want to blow out their highlights, so they may use partial metering or spot metering directed at the right part of the scene to determine their exposure settings. They do this quickly and instinctively because they’ve practiced and experimented with numerous types of difficult lighting scenes, and…
Camera Settings: …they know their camera inside and out. They know which settings to change and how to change those settings. They’ve customized their buttons and menus to quickly get to the settings they use most frequently. Their eye is on the aperture, shutter speed and ISO numbers in the viewfinder, and their fingers know which dials to move to adjust them without taking the camera from their eye. They know how their camera tends to under-expose or over-expose in certain situations, and they change the exposure compensation accordingly. And they (hopefully) remember to reset these settings when they move into a different lighting or subject situation.
Aperture Priority Mode: The pros often work in aperture priority mode so that they can control their aperture and depth of field and thus establish relationships of near and distant elements, foreground and background. They blur the background to call more attention to the subject, or dramatically place just a narrow plane of the subject in focus. Or perhaps they bring everything from near to far into sharp focus. They select their depth of field based on the relationships they desire to create. They know how the lens they are using renders images at its various apertures, and perhaps use the depth of field preview button to verify.

Festival de Tinajani – Ayaviri, Peru
Shutter Priority Mode: They turn their mode dial to shutter priority mode when freezing or blurring motion is key to the image. They use a high shutter speed to freeze action, or a slow one to blur or pan. They know the proper shutter speed is critical to this type of shot, and don’t let the camera choose it for them.
ISO: They check the setting that they are not controlling (the shutter speed in Aperture priority mode/ the aperture in Shutter priority mode) and adjust their ISO to bring that setting into the range they want or need. They know from experience which ISO range is appropriate for the amount of lighting they are shooting in, and change it in advance as they move between situations.
Manual Mode: They turn the mode dial to M when they have consistent lighting and a setting that they know is not going to change, or in challenging situations where both aperture and shutter speed are critical. They’ve determined their exposure by metering, and set the camera accordingly.
Auto or Program Modes: They never use these, as their lack of control scares them as much as Aperture Priority mode scares the new dSLR user.

Festival de Tinajani – Ayaviri, Peru
Framing: As they look through the viewfinder, they frame the image based on their pre-visualization and composition decisions. They scan all parts of the frame and not just the subject, from edge to edge and each corner, from near to far, to determine if there are any unwanted elements, elements not essential to their image, or undesired relationships (i.e. the tree growing out of someone’s head.) They move slightly to the left or right, or slightly up or down to bring all the elements in the frame into the desired or most dramatic relationship.
Focusing: They manually choose their auto-focus point to ensure that the camera focuses on what they want it to focus on, not on what the camera chooses to focus on. They lock the focus setting if they need to slightly reframe or wish to hold that focus for a sequence of images. If there is going to be a dramatic shift between the framing seen while focusing and the final framing of the image, they lock the exposure setting on the final intended framing before or after locking in the focusing. They use the other auto-focus modes to capture action that moves across the scene or which is too fast for manually choosing a single point.
Waiting: They wait for the right facial expression and pose, or for the subject to relax, or the moving elements to fall into place, or the peak of action and then…
Clicking the Shutter: Finally! They press the shutter, slowly and smoothly. They have their camera set for single exposure or multiple exposure based on the situation. They fire off several quick shots, or slowly take a couple to ensure they got the shot or to take variations of the image.

Festival de Tinajani – Ayaviri, Peru
Reviewing: “Chimping” is the somewhat derogatory term for looking at the rear LCD screen right after taking a photo to check out the image. When pros do it, they are not looking at the picture to see what they got. They know what they got. They know what the image looks like because they studied it when they framed and took the photo. They are looking at the histogram and looking for blinking highlights to ensure they did not blow out the highlights or in any way over- or under-expose the shot. If they did, they adjust the exposure compensation, or the aperture and shutter settings, and take it again.
Working the Scene: A pro continues to work the scene, looking for different perspectives, compositions, and points of view. They look at how relationships of subjects and objects in the scene change, even with just a slight adjustment of the camera’s position or angle. Even if they think they may have nailed the shot, they know from experience that there may be an even better image to be found or made if they continue to study and photograph the scene. And they don’t accept “good enough” and continue on to the next scene or shot. They strive to capture the best image they know they are capable of, sometimes even if it involves returning to the location at a different time of day or even a different season when the light might be better.
These are some of the things an experienced photographer is thinking and doing in those brief moments between the time they pause from scanning the scene around them, raise the camera to their eye, and take the shot. It’s not because they have a pro camera with pro lenses that they got a great image. It’s not some pro secret that was passed onto them when they read the right book and gained entry the right forum. It is the sum of an alert eye, numerous conscious decisions while visualizing and framing, knowing how to adjust their equipment and use its controls, as well as sub-conscious decisions based on taking countless images, experimenting, and learning from the results both good and bad.
To read about an actual example of this process in action in the creation of a photograph, see my post Deconstructing the Shot.