Why “How it Feels” is not a Valid Criterion for Choosing a dSLR

Despite what you may read on countless forums, the “feel” of a dSLR camera is not a valid criterion for selecting one model over another.  At least not without some further explanation of what “feel” and dSLR camera ergonomics entails.

canon nikon ergonomics feel dslr digital slr camera photography

I myself have been guilty of taking the easy road and suggesting to someone, who is trying to decide between a couple models, to go to a camera store and “see how they feel in your hands.”  However, I’ve recently concluded that this statement alone is vague and imprecise at best and more likely potentially dangerously misleading.  And I’ve always contended that this “feel” criterion is secondary to much more important factors. 

First when choosing a camera, one must determine their current and projected needs.  I go into much more detail about this in my earlier post How to Choose a New dSLR Camera (which is thankfully free of the term “feel”).  This involves not just looking at all the new and exciting features and trying to guess if you will need and use them, but rather evaluating what and how you photograph, what features and capabilities you thus need in your camera, then finding the models that fit these needs.  Since cameras boast more advanced controls, features, and capabilities as they move up the line-up (Canon T3i vs Canon 60D vs Canon 7D or Nikon D7000 vs D5100 vs D3100) this will help you narrow down the decision.  The “feel” or ergonomics should definitely not be a deciding factor at this stage.

There are many important differences between an entry level camera and a mid-level camera as far as controls, features, more sophisticated autofocus system, weather proofing, durability, etc., and the fact that one is smaller and lighter than the other is a result of these differences, NOT a feature to be compared.  To take “feel” into account at this point is like someone buying a truck who needs a full-size bed to haul the maximum amount of mulch, but then says, “yeah, but the light-duty truck is smaller so I can park it easier, so I think it ‘drives’ better.”  They wanted a truck to fulfill their needs, yet they decided on another based on the wrong criteria.  No one who needs the full frame sensor, high ISO capabilities, and durability of a Canon 5D Mk II decides instead to get a T3i just because the T3i is lighter to carry around their neck at a wedding all day and “feels” 10x more comfortable in their small hands.

Once you have successfully determined which level camera fits your needs, then you may have narrowed your choices down to the comparable Canon and Nikon models that likely share similar features, such as the Nikon D5100 vs the Canon T3i.  This is where the “feel” argument often comes in.  At this point I will grudgingly allow ergonomics into the picture as one of the deciding factors – but not without further explanation.  What is the difference between “feel” and actual ergonomics?  And what exactly does that mean, the “feel of the camera in your hands?”  For me, initially, before I actually put some thought into it, and for many other people I image, it means just that.  You pick up a D5100 and check out the weight, balance (with the kit lens attached), size of the grip (does your pinky fall off the bottom?), texture of the grip materials (ohh, bumpy!), put it up to your eye and perhaps take a shot.  Then you pick up a T3i (600D) and follow the same procedure.  Some people may prefer the body that is slightly smaller, or the one that is larger – depending on their hand size, and many would prefer a body that was lighter if there was a noticeable difference in weight.  But picking a camera up and holding it in the store is not the same as using it. How it initially feels will likely not be a true indication of how it feels when operating it and using its controls.  It is not a meaningful test of “feel” or ergonomics.

This is especially true for a new dSLR user who has never actually used one for real life shooting.  They don’t yet know how it will feel when using a dSLR because they have yet to do that.  “Feel” needs to take into account more than picking up the camera with the kit lens and holding it to the eye:

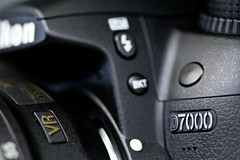
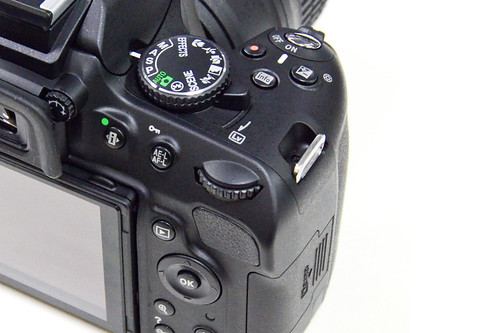
  • Ergonomics involves the placements of the buttons and controls that you will access constantly while shooting – the location of the autofocus point selection arrows or thumb joystick, the location and orientation of the main dial that will be used constantly to set aperture or shutter speed.  This is actually a significant ergonomic difference between a Canon and a Nikon that I have never once seen mentioned in a forum about “feel” and if any ergonomic criterion is truly important, I would say it is this one.  I find the top location/ orientation of the Canon dial coupled with the large rear dial a natural, ergonomic joy.  I find the horizontally orientated front and rear dials of Nikons uncomfortable and aggravating to my tenosynovitis.  So until a dSLR user knows where their fingers will be moving and what controls they will want to access with the camera held to their eye, then how can they fully judge “feel?”
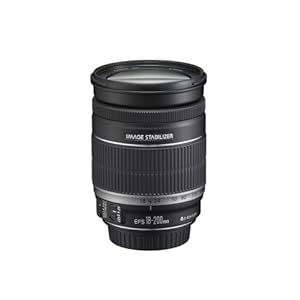
  • The ergonomics of a camera body changes, sometimes dramatically, depending on which lens is attached and used.  Most demo cameras in the shop have the small, lightweight 18-55mm kit lens attached.  If this is the lens you will use all the time for the remainder of your dSLR shooting life, then this can be a valid test (see Why You Shouldn’t Buy the Kit Lens).  If not, you should definitely try it out with a couple additional lenses such as a larger telephoto.  Not only will most other lenses be larger and heavier than the kit lens, but the camera will likely be held differently when using them.  If you are a new user, then you may not yet know which lenses you will want and use in the future.  While a small, light, entry-level dSLR body feels great with the kits lens, it can become nearly unusable with a high quality, large, heavy lens.  As one forum contributor said,

“…my 450D felt great with the kit lens, but almost unholdable with a 100-400 and ultimately I got a battery grip for it which helped a lot with that lens. I will add that at the time I bought my 450D I felt it against a 40D and preferred the lightness and size of the 450D.  Had I known then what lie ahead I would have got the 40D.”

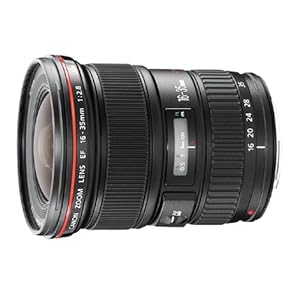
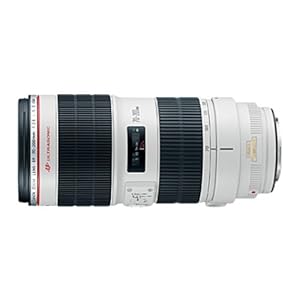
Although the 100-400 is a huge lens that many will never buy, the same weight, size, and balance issues hold true for other more “basic” high-quality lenses such as the Canon 24-105mm f/4L or the Canon 24-70mm f/2.8L, or even many non-L larger telephoto lenses.  Plus what about putting an optional external flash on top?  That will completely change the balance of any camera.

  • While everyone’s hands are different, etc, I find it hard to believe that Canon and Nikon or the other major manufacturers make a completely un-ergonomic camera for the average range of hands.  I mean other than that Nikon model with the glass shards embedded in the grip and the Canon with the 15 kilo battery.  Sure some can complain about little quirks and button placements, and some cameras are smaller and some are larger and thus feel different to different sized hands.  But remember a dSLR camera is a tool, and I refer you back up to the “full-size bed truck” analogy.
  • When you get new glasses or have dental work done, it always feels funny for a couple days. Then you get used to it and don’t notice. When you work with a camera after a bit, I would bet most would experience the same.  As another forum participant noted,

“When I was buying my first DSLR, the 450D felt weird in my hand, exactly the same as every other DSLR in the shop. The reason?  I did not know what’s what, what will I use and have never hold DSLR in my hand before. It was just a foreign object and felt weird. Got used to the DSLR and after a while it felt like an extension of my hand.”

There are good reasons why cameras and controls are designed with their specific curves, button placements, and materials. And even then, some are more careful, precise, and pleasing to the touch because they are on a pro camera catering to exacting needs.  Some are less rigorously-designed compromises to provide functionality at a lower price-point.  The user just may have to adapt a bit to their tool as they learn these reasons through use and experience.

I agree that in the end, some people just find certain cameras too big, too small, too uncomfortable, etc. for their hands.  But I just don’t think “feel” should continue to be Criteria Number One on every “which camera should I get” forum I read.  I personally have used dozens of different dSLRs, I have handled them extensively as a photographer, salesperson, reviewer, and camera guide author. I have yet to find one I can’t or won’t use due to ergonomics.  They are tools, there are reasons each is designed the way it is, and despite any design/ cost compromises each is fully functional.  In my humble opinion, I believe that ergonomics, and especially “feel,” are over-emphasized in these conversations regarding beginners – or anyone – choosing a camera.

Now don’t get me started on the related issue of “which menu system works best for you.” :)  (Come on, you’ve learned to use dozens of different menu systems with your countless software programs, point-and-shoot cameras, DVD player, TV set-up, Tivo, GPS, etc.  I think you can figure out a well designed Canon or Nikon menu.)

But all of this is moot.  In reality, people should choose a camera based on the brand that their brother-in-law once told them was really good because his father’s friend had one back in ’86 and he took really good pictures with it at a wedding once and he had a really big lens so he totally knew everything about cameras.

Ten Steps to Better dSLR Photography

Ten Steps to Better dSLR Photography is an e-book guide to help digital SLR photographers take control of their camera and the images they create.

tips tricks photography dslr learn use manual instruction tutorial for dummies guide

Capturing great images with your dSLR should not be the occasional result of chance and luck.  By taking control of your camera, its functions, and its settings you can begin to work with consistency and intention and take the photos you desire.

Readers of my popular dSLR camera guides such as Nikon D5100 Experience and Your World 60D have benefited from the clear and concise explanations of digital SLR photography functions and concepts. With Ten Steps to Better dSLR Photography all photographers can learn these essential elements necessary for taking full advantage of a dSLR including how, when and why to use the camera’s various functions and settings.

With this guide you will learn:

  • Controlling Your Autofocus System – focus where you want for sharp photos of still and moving subjects.
  • Understanding Apertures and using Aperture Priority Mode to capture dramatic depth of field.
  • Understanding Shutter Speed and using Shutter Priority Mode to freeze or express action.
  • Choosing the Metering Mode, Adjusting Exposure Compensation, and Using the Histogram for proper exposure in all lighting situations.
  • Determining proper ISO Settings and White Balance Settings.
  • Selecting JPEG or RAW image file format to save your images.
  • Improving Image Composition.
  • The Image Taking Process – a tutorial making use of all the steps learned.
  • …and more!

These are not simply photography “tips and tricks” but rather clear, concise, and useful explanations and examples of the fundamental functions, settings, and concepts of digital SLR photography. This 54 page illustrated PDF guide can help the novice or intermediate photographer better understand their camera and how to use it to its full capabilities to consistently capture better images, whether you shoot with a Canon, Nikon, Pentax, Sony, or Olympus dSLR camera.

Author:  Douglas Klostermann
Format:  PDF – Instant Download
Page Count:  54 pages, illustrated
ISBN:  978-1-4524-4764-3
Price: $8.99 new release sale!  $6.99
secure payment with PayPal or Credit card (via PayPal)
(plus 6.25% sales tax for residents of Massachusetts)

Buy Now with PayPal  or  Buy Now with your Visa/MC


Other versions of Ten Steps to Better dSLR Photography are available:

The Kindle edition is available on Amazon
The Nook version is available at BarnesandNoble.com
The iPad and iBooks version is available through iTunes or through the iBooks App on your iPhone/iPad

Take control of your dSLR camera and the images you create!

.

.

Holiday Gift Ideas for Yourself or your Favorite Photographer

I suppose I should join the photo blogger holiday tradition of putting together a holiday and Christmas gift guide for photographers or those who are shopping for the photographer in their life! If you plan to purchase any of these items through Amazon.com, I you can use the product links I set up throughout this post, which will bring you right to that product’s page on Amazon. (Amazon will then reward me with a small referral reward for my effort, which will help support my blog. Thanks! If you are in the UK or wish to purchase from B+H, see the end of this post for link information.) And now on to the shopping:

The first thing you are going to need is the Canon 24-105mm f/4 lens Mug or Nikon 24-70mm f/2.8 lens Mug to drink your hot cocoa or hazelnut coffee as you are unwrapping the rest of your gifts. These extremely popular and awesomely realistic mugs, complete with rubber ring grips, have a wide f/4 or f/2.8 opening which enables them to take in copious amounts of liquid just as your lens takes in all that light. The lens caps protects your beverage when not in use – no UV filter needed.
Canon lens mug 24-105mm f/4 Nikon Lens 24-70mm f/2.8 mug

The best gift of the season for most photographers would most likely be a brand new digital dSLR camera to upgrade what they are currently shooting with – one with a few more megapixes, improved autofocus system, faster continuous shooting speeds, and some new bells and whistles.

For many photographers this will be the new Canon EOS 60D body only or the Canon 60D with 18-135mm kit lens. The EOS 60D has continued Canon’s tradition of ease of use, great ergonomics and controls, fantastic image quality and low light performance, plus added a swiveling real LCD screen. And full HD video with more frame rate options than the competitors.
canon eos 60d
For Nikon shooters the best choice is the brand new, highly sought-after Nikon D7000. The Nikon D7000 body only or D7000 with 18-105mm lens cost a bit more than the 60D, but they provide the additional features to justify the higher cost: faster continuous shooting rate, partial magnesium body, more advanced and customizable autofocus system, and two SD memory card slots to save all those shots and HD movies. Either one makes a excellent camera that is capable of producing high quality images.
Nikon D7000
Of course you are going to want some new lenses to go with these cameras. Why not step up to the professional quality lenses to see that immediate improvement in image quality, color, contrast, as well as lens and autofocus performance? For Canon this means the L series of lenses. Expand your focal range or fill in some gaps with a high quality wide angle zoom, standard zoom, or telephoto zoom.

For wide angle zooms, look at either the Canon EF 16-35mm f/2.8L II USM or the EF 17-40mm f/4L USM

For standard zooms, which make for a great “walk-around” lens, consider the Canon EF 24-70 f/2.8L USM or EF 24-105 f/4L IS USM


And in the telephoto zoom range, look at the EF 70-200, f/2.8L II IS USM or the much less expensive and lighter EF 70-200, f/4L IS USM

One of these lenses in each pair will be both more expensive AND heavier, so be sure and handle them first before you decide on one.

This may also be a good time to start experimenting with prime lenses. Their extra wide maximum apertures will allow you to use them in much lower light, and will create great, smooth background blurring for awesome portraits. Depending on how closely you like to work to your subject, a few to consider are the Canon 35mm f/2, Canon 50mm f/1.8 II for about $100, Canon 50mm f/1.4 (a little more costly 50mm), or the Canon 85mm f/1.8.

An extremely fun lens to work with is the Canon EF 100mm f.2.8 Macro USM. It is incredibly sharp, has dramatically narrow depth of field at f/2.8, and works as a great portrait lens too. If you have never used a macro, go try one out and experience what makes them so cool. The 60D and D7000 images just above were taken with this lens, as well as the cool close up shots of the following post comparing the Nikon D7000 vs D90 vs D300s.

If you need just one versatile lens for everyday use or for travel, the three lenses to consider are the EF 24-105 f/4L IS USM in the L series lenses, or else the EF-S 18-135mm f/3.5-5.6 IS or EF-S 18-200mm f/3.5-5.6 IS.

Of course with any of these lenses, be sure to protect them with a clear or UV filter, preferably a high quality, coated B+W brand UV filter. You can read a lot more about these lenses and how to choose between them in my earlier post, Best Lenses for Everyday and Travel Photography.

Possibly the most comfortable way to carry your camera around all day, especially when using a larger, heavier lens, is the BlackRapid RS-7 Camera Strap. I highly recommended this strap, and I use the older RS-4 version daily. They have made some steady, welcomed improvements on them, including the curved shoulder pad of the RS-7, the quick release strap, and the improved connecting hardware. The base that screws into your camera is a lower profile, stronger single piece, and the securing screw surface on the clasp ring is smooth rather than knurled so that it will no longer scratch up your camera bottom. The strap is comfortable, easy to use, quick, strong, and rugged. I often use it in conjunction with wearing a backpack, and although the straps fight for space against each other on my shoulder, it still works fine. There is also now a version designed for women, the RS-W1 plus a new woman’s version in just black. They are also introducing 2 different pieces of hardware which will allow you to attach your camera to a tripod without removing the R-Strap’s base that is already attached to your camera.

You are going to need something to carry all this equipment around in. My current favorite is the Lowepro Compu Trekker AW backpack, which is now called the Lowepro ProRunner 350 AW. I use this as both my airline carry-on and my working bag during the day. The size works perfectly for both needs. It easily fits the airline carry-on size, including smaller international requirements in some regions, yet fits more that it would first appear. With careful configuration of the interior dividers, I can fit 2 Canon bodies, three lenses, a 580EX II flash, its diffuser, 2 external hard drives in cases, a couple memory card cases, and some filters. In the outside pocket, I have a couple battery chargers, extra batteries, medium Rocket Blower, miscellaneous cords, caps, and accessories. In the rear pocket designed for a laptop, I easily fit a 32″ 5 in 1 reflector. The pack is extremely comfortable, has tons of padding on the straps and the back so that its weight never bothers me and I don’t feel the reflector in my back. I often wear it for hours a day while working, and it is never a problem. The Pro Runner 450 AW might be a better carry on size so that you could carry more gear on the plane with you (if it fits the airline’s requirements) but it would be too big for daily use. There are also rolling versions of these, with an “x” in the name, thought the retractable handles and wheels add weight and size to the bags.


For adventure videographers, the item of the year is the GoPro HD HERO Cam, which you attach to your helmet, head, mountain bike, snowboard, skateboard, motorcycle, or whatever to shoot professional quality, point of view video. It comes in a variety of packages with different mounts. Film and share your adventures in full HD video! Click the image to see it on Amazon or click here to learn more and but direct at the GoPro website.


And to save all those images you are taking, memory cards will make great stocking stuffers. I like Sandisk Extreme 16 GB SD cards. If you still use CF cards, be sure to get the SanDisk Extreme 16GB CF cards. Use a Sandisk card reader to upload the images to your computer, rather than from the camera directly, in order to save the camera batteries. This Sandisk Card Reader is for the CF cards, and the 5 in 1 reads SD cards.

And for some basic stocking stuffers, here are a few simple but essential items for keeping your camera and lenses clean:

Giottos Medium Rocket Blower in the medium or large size. Always have it handy for getting dust off lenses in a hurry, because blowing on them – no matter how careful – leads to spittle on the lenses 5% of the time when it doesn’t matter and 95% of the time when you are in the most critical situations.

Pearstone LP-1 Lens Pen – Works great for cleaning off mysterious spots, smudges, and fingerprints that always appear on the lens (this is why I always use UV filters) as well as that a-fore-mentioned spittle. There is a retractable brush on one end and a cleaning head on the other end. Twist the cap to load the cleaning tip with the carbon based cleaning material, then remove the cap and use. Please read the instructions and visit the LensPen website to fully learn how to use it properly.

For more photography equipment and accessories like those above, be sure to see this previous post Equipment for Travel (and Everyday) Photography.

To edit and save all your photos, you are going to need some hard drive space and some software:

External Hard Drives – The Iomega Ego 1TB and a Lacie Rugged USB 1TB work great both at home and when traveling. There is a FireWire version of the Lacie Rugged 500GB also. Both are built solid and sturdy, and each fit perfectly in the Case Logic Portable Hard Drive Case made for these types of drives. Get the cases in different colors so you can quickly differentiate your different drives. For storage at home, consider a couple Western Digital My Book 1TB External Hard Drives.

Post-Production – After taking all these wonderful images with your new equipment, you are going to need to organize, edit, and work on all your photos. And for that, of course you are going to needAdobe Photoshop and/ or Adobe Lightroom 3. You can start off with the trial versions that you can download from the Adobe site, but sooner or later you are going to have to get the real versions. Use that student discount if you can!

Also be sure to consider all the great photo books to help you learn to use your equipment, improve you images and compositions, and be inspired. I’ve put together a post of several of my favorites that you can read here. The most recent addition to the bookshelf is:

The Photographer’s Mind: How to See and Shoot Better Digital Photos by Michael Freeman
Every time I read Freeman’s The Photographer’s Eye, I lament, usually aloud, “why doesn’t he have more books like this?” Well, my wishes appear to have been answered. His next book The Photographer’s Mind has just come out.

And don’t forget the eBooks I put together for setting up and learning to use you Canon dSLR:

Your World 60D – The Still Photographer’s Guide to Operation and Image Creation with the Canon 60D – an eBook user’s guide and tutorial I wrote to help get you up and running with the 60D, quickly and competently. You can learn more about it at this post here. In addition to the PDF version, which also looks great on the iPad, it is also available in a Kindle edition on Amazon.com here and a Nook verion on BarnesandNoble.com Plus, for the Rebel T2i / EOS 550D, I have written T2i Experience – a similar guide for Canon T2i / 550D users.

Purchasing: If you plan to purchase cameras, photo equipment, books, or anything else from Amazon.com I encourage you to do so through any of the Amazon referral links I’ve set up. Just click on the equipment name or book title within this post and you will be taken to that Amazon page. Or click here to go directly to Amazon or click on the Amazon.com logo below, and start shopping. Thanks, I appreciate your support!

If you are in the UK, you can click here for the UK Amazon referral link.

For those interested in purchasing through B&H Photo, Adorama, or directly from Canon, I have set up affiliate links with them as well – find them on the left side of this page.

Happy Holidays, and I hope you get everything on your list!

Coming Soon: Photo Book Give-Away!

Sorry, the give-away is now over!

If you read yesterday’s post about Essential Books for Digital Photography, you will see I am pretty enthusiastic about a couple photo books in particular.  One of them that I think is really wonderful, and which really opened my eyes recently, is Available Light by Don Marr.  I discussed it in depth in yesterday’s post, so I won’t repeat that here.  But anyway, I liked it so much, I contacted the publisher (Amherst Media) and asked them to send me a copy to use as a free give-away on my blog.  And they enthusiastically agreed to this!

So stay tuned for the free photo book give-away, which I will initiate as soon as I have the book in hand, hopefully sometime around Oct. 15.

Here is a photo I took immediately after reading the book, putting what I learned to use.  Notice the amazing glow of the 100% natural, available light.  This was taken on an afternoon with bright sunlight, by placing the subject under an overpass to control the direction and intensity of the light.

LSS natural light

Essential Digital Photography Books

There are countless books available about digital photography, ranging from general over-encompassing guides to specific texts on lighting or composition. Many of them discuss basically the same topics, and after reading and absorbing a few, you begin to pick up only a few new tips or pieces of knowledge here and there.

But I’ve put together a list of what I think are the best books for digital photography out there. These are the ones I believe you should read first, the ones that will give you the maximum bang for the buck, and which are consistently full of solid, useful information. They are divided into categories of Camera Guides for specific cameras, Digital Photography Guides for general information and composition, Lighting and Flash, and Post-Production for Photoshop and Lightroom.

You can click on each title to take you directly to Amazon.com. If you purchase through these links Amazon will reward me with a small referral fee, so I appreciate you helping to support my photography work and my effort of creating all these links!

Sections:

Digital Photography Guides
Camera Guides
Lighting and Flash
Post Production


Digital Photography Guides

Understanding Exposure by Bryan Peterson
I recommend this book throughout my blog for anyone who is new to digital SLR photography or ready to take their camera off Auto or Program and needs to learn and understand the relationship between aperture, shutter speed, and ISO. It is the go-to book to help you learn these essential settings, take control of your dSLR and image making process, and start to use aperture priority and shutter priority modes.

Learning to See Creatively by Bryan Peterson
By the same author as above. Once you have control of your camera after reading Understanding Exposure, you will quickly discover you need to learn how to make better compositions in order to take better photos. This book can help start you on this process. His best piece of advice is to think about and use different, more dynamic points of view in your photos. Taking a photo of a flower? What would the image look like from the flower’s point of view? Simple but brilliant.

The Photographer’s Eye: Composition and Design for Better Digital Photos by Michael Freeman
As I just said above, once you get control of your camera and its settings after reading some of the other camera and photo guides, you may wonder why your photos aren’t improving as quickly as you had hoped. That is when you need to turn to this book. It is a unique book for teaching photographic composition – which is an often difficult concept to teach beyond the basics. Most books explain concepts such as the rule of thirds or depth of field, but this book takes it to a whole new level. And he walks the reader through the example images describing the process and decisions he makes as he works a scene (which must be what inspired my Deconstructing the Shot series of posts!) It is a challenging book, and it takes some experience with working at photography and applying the basic composition techniques and experiencing specific problems and frustrations before one can get the most out of this book. So if it is too heavy for you at first reading, come back to it after you have worked at it some more. This is perhaps my favorite photography book, and I wish there were more out there that were as helpful as this one. I re-read it every few months to set these concepts into my brain.

The Photographer’s Mind: How to See and Shoot Better Digital Photos by Michael Freeman
Every time I read Freeman’s The Photographer’s Eye, I lament, usually aloud, “why doesn’t he have more books like this?” Then I did some more research and discovered an older book of his, Achieving Photographic Style, from 1984. It blew me away – it is just as good as Photographer’s Eye, but a bit dated in many ways, as it discusses the photographic trends of that period and it is pre-digital. Again, I lamented, “why can’t he update this book for today?” Well, my pleas appear to have been answered. His next book The Photographer’s Mind has just come out. I haven’t seen it yet, but I immediately ordered my copy from Amazon.

Pro Photographer’s D-SLR Handbook by Michael Freeman
This is a comprehensive handbook for everything about digital photography from equipment, lighting and accessories, to technical explanations of settings and concepts, to post-production including Photoshop and printing. It covers a lot of topics, but gives good, solid information. Like its title says, it is a handbook that is extremely handy to have as a reference guide for everything related to digital SLR photography. Essential for any serious intermediate dSLR photographer, whether you desire to be a pro or just have the knowledge of one.

The Digital Photography Book (Volume 1) by Scott Kelby
Scott Kelby’s series of books are good for the beginning or intermediate dSLR photographer. Some claim that everything they know about digital photography they learned from Scott Kelby. Other reviewers on Amazon don’t think he’s so great. Never-the-less, he doesn’t get caught up in technical explanations, but rather just tells you what settings and equipment to use and how to do something. The page-by-page brief topics each give starting points for anyone confused about the variety of subjects they may be trying to absorb from all the other books. For example, every Photoshop book explains Unsharpen Mask, but then leaves you totally clueless as to where to even start with the three sliders. Kelby simply tells you what numbers to use. (Actually that may have been from one of his Photoshop books, but that is the type of info he provides.) Keep in mind, all of his advice is intended as starting points. His word is not gospel, it is to help you begin and then you can experiment and learn from your own experience after that. These are not books to teach you the basics of digital photography, but are rather a collection of various, almost random tips about a wide variety of photo topics. Keep in mind, his instructions are not the only way to do something, and sometimes they are actually very round-about ways of doing things that can be done much more simply. His humor is annoying to some and the equipment he uses may be totally unnecessary for how you work, so take what you read with a grain of salt. As a studio photographer, Kelby is especially knowledgeable about flash and lighting. There are three books in this series, which can also be bought as a set, as seen below.

The Digital Photography Book, Volume 2 by Scott Kelby
See above description of The Digital Photography Book.

The Digital Photography Book, Volume 3 by Scott Kelby
See above description of The Digital Photography Book.

Scott Kelby’s Digital Photography Boxed Set, Volumes 1, 2, and 3 by Scott Kelby
See above description of The Digital Photography Book.

National Geographic Photography Field Guide: Secrets to Making Great Pictures, Second Edition by Peter Burian and Bob Caputo
This is a great general guide to photography, with insightful and useful nuggets of information from some of the best Nat Geo pros, like Sam Abell and Michael Nichols. However, it is a bit dated, from the films days at the verge of digital. But I feel it is still worth reading because the essentials of image making remain unchanged. The updated version is below, but I have not yet seen it, and it may be all new with different content. Maybe see if your library has this one.

National Geographic Ultimate Field Guide to Photography: Revised and Expanded by National Geographic
I haven’t yet seen this updated version, but based on the previous edition as well as the Travel Photography version, it is bound to be good.

National Geographic Ultimate Field Guide to Travel Photography by Scott Stuckey
This is an excellent introduction to most everything you need to know to work as a travel photographer with helpful information for both beginner and more advanced photographers that isn’t found in most other travel photography books. And it contains valuable contributions from several professional travel photographers like Bob Krist and Catherine Karnow. However, its title is annoying because it is not in any way a field guide. It is not designed as a quick and easy reference to any of the topics it covers, as the term field guide would imply, but rather it is a book to read before your travels, and a book to read to learn the realities of working as a travel photographer. It is also a book about how to take travel photos in the visual and editorial style of Nat Geo Traveler magazine. I highly recommend this book for someone who is truly interested in becoming a commercial travel photographer, as it competently and thoroughly covers numerous aspects of this vocation – technical, logistical, and perhaps most importantly, learning how to tell a story through photographs. Or if you don’t wish to become a pro travel photographer but want to learn to capture better travel images, it will be most helpful for someone whose travel style truly accommodates the time and effort if takes to make great travel images.

Within the Frame: The Journey of Photographic Vision by David DuChemin

VisionMongers: Making a Life and Living in Photography by David DuChemin

Rick Sammon’s Complete Guide to Digital Photography 2.0: Taking, Making, Editing, Storing, Printing, and Sharing Better Digital Images by Rick Sammon

Rick Sammon’s Travel and Nature Photography by Rick Sammon


Camera Guides

First, of course, I have to mention my e-book user’s guides! So far I have written one for each of these cameras:

Nikon D7000 Experience
Nikon D5100 Experience
Canon T3i Experience
Your World 60D
Canon 7D Experience
Canon T2i Experience

full stop dslr photo photography camera manual guide for dummies canon nikon

Plus a book for all other dSLR owners, Ten Steps to Better dSLR Photography

dslr learn improve autofocus exposure aperture shutter priority for dummies

You can learn more about them at my Full Stop ebook bookstore, (www.dojoklo.com/Full_Stop/). These guides go beyond the manuals to help you learn to use your powerful camera to its full potential so that you can improve your photography and consistently take better photos. The guides cover the settings, functions and controls of these advanced dSLR cameras, plus explain when and why to use them to improve your photography and your images. Aimed towards intermediate photographers, they also clearly explain basic dSLR camera functions and exposure concepts for those new to digital SLR photography. Take control of your camera and the images you create!

These guides are available in PDF versions as well as Kindle, Nook, and iBooks/ iTunes versions.


Canon 7D: From Snapshots to Great Shots by Nicole S. Young
This series of camera user’s guides explains everything in a way that is clear and easy to understand and put to use. They don’t get bogged down in confusing technical explanations, but instead present everything in a straightforward, user-friendly manner. The books explain not only how to use the camera, but how to use it to take better photos. Recommended for someone relatively new to digital SLR photography who wants to quickly learn to use their camera and improve their photography.

Nikon D5100: From Snapshots to Great Shots by Rob Sylvan
see above description for Canon 7D: From Snapshots to Great Shots.

There are also From Snapshots to Great Shots guides for every other camera out there including the Canon 60D, Canon G12, Nikon D7000, etc.

David Busch’s Canon EOS 7D Guide to Digital SLR Photography by David Busch
David Busch’s camera guides are all excellent books, and will help you really get to know and understand all the features and functions of you camera. They are clear and straightforward enough for the beginner, yet are also in-depth and technical for the intermediate and advanced dSLR user. Recommended as a more comprehensive and easy to understand manual than the one that comes with your camera.

David Busch’s Nikon D7000 Guide to Digital SLR Photography by David Busch
This is an all-encompassing bible for the D7000. If you wish to learn every single feature, setting, menu item, option, etc., this is the place to look. If you wish to learn all the essential features, how to use them in the real world, and be up and running with your D7000 quickly, start first with Nikon D7000 Experience before delving into this tome.

David Busch of course has guides for every other dSLR camera out there including the Canon 60D, Canon T3i / 600D, Canon 5D Mk II, and the Nikon D5100.

See all the David Busch Digital SLR Camera Guides.


Lighting and Flash

Available Light: Photographic Techniques for Using Existing Light Sources by Don Marr
This is a simple, straightforward book that immediately changed the way I see light and the way I photograph using natural light.  You often hear the idea of “taking your photography to the next level.”  This book doesn’t itself make that claim, yet it is one of the few photography books that can actually deliver that result.  It is short, easy to read and to understand, and immediately applicable to your work.  Many books discuss light – it’s direction, intensity, quality, softness, color – and you think, “Yeah! I’m keenly aware of different light and how it falls on my subject.”  But did that knowledge suddenly help you to take better photos?  Many books never fully take it the next step and really explain how to seek out, modify, and use this light.  You may or may not be able to then figure it all out on your own.  I thought I had until I read this book.

It actually guides you in exactly the right direction and truly helps to open your eyes to the intensity, direction, and quality of natural light, and then teaches you to work with it and modify it to create the softness/ hardness, direction, color, and intensity you want, whether you are working on an overcast day, at high noon, inside, outdoors, or any other type of situation.  It makes one suddenly aware of the existence and potential use of natural reflectors everywhere which will help give you the lighting you want:  a wall, the ground, a pole.  And it explains the important concept and effective practice of subtractive lighting, used to even-out or create the desired lighting instead of turning to flash to artificially add to existing lighting.  The concepts in this book are so obvious and intuitive I didn’t even write down a single note while reading it the first time.  Then the next week I used what I learned and took one of the nicest, best lit spontaneous portraits I have ever taken.

While many are happily joining the Strobist camp, this book offers a refreshing and viable alternative to that never-ending accumulation of lighting equipment and techniques, and should be read by off-camera-flash fans as well so they can learn to look for beautiful natural lighting alternatives that will give them as-good or even better images, before setting up their lighting equipment and knocking down the natural light in order to rebuild it artificially.  However the author is not against the (limited) use of flash, and certainly not against reflectors, and discusses their use in different situations.  I highly recommend this book to photographers of every level.  It is a wonderful book for beginners or intermediate photographers so that they can be aware of, understand, and use these concepts from the start, and it is just as helpful for advanced photographers who may intuitively practice some of the techniques, but will certainly become aware of even greater potential and opportunities in the use of available light.

As you can see, I’m pretty enthusiastic about this book. I even contacted the publisher and asked them for a copy that I could use as a free give-away here on my blog, and indeed they are sending me one! (The free give-away is now completed.)

On-Camera Flash Techniques for Digital Wedding and Portrait Photography by Neil van Niekerk

The Complete Guide to Light & Lighting in Digital Photography by Michael Freeman


Post-Production

The Adobe Photoshop CS5 Book for Digital Photographers by Scott Kelby
Scott Kelby is the founder and head of NAPP, the Photoshop users’ organization, so I don’t have any qualifications with the Photoshop and Lightroom recommendations as I did with his photo books above.

The Adobe Photoshop Lightroom 3 Book for Digital Photographers by Scott Kelby

Adobe Photoshop CS4 How-Tos: 100 Essential Techniques by Chris Orwig

Adobe Photoshop Lightroom 2 How-Tos: 100 Essential Techniques by Chris Orwig

And of course in able to make use of the Photoshop and Lightroom books, you are going to need the software!
Adobe Photoshop and/ or Adobe Lightroom 3 are the latest versions. Photoshop CS4 has the amazing and revolutionary content aware fill, which takes cloning and spot healing to a whole new dimension. And Lightroom has quickly become the tool of choice for photographers to work on their images.

(Descriptions of some of the above books still to come!)

Your World 60D – Canon 60D User’s Guide and Tutorial

Looking for a Canon EOS 60D book or tutorial to help you learn and begin to master your new dSLR? I’ve written an eBook user’s guide for the Canon 60D, called Your World 60D – The Still Photographer’s Guide to Operation and Image Creation. Learn to use the Canon 60D quickly and competently, and improve your photography and capture better images. The 60D is an advanced tool, and this guide explains how to start to use it to its full potential. Begin to take control of your camera, the image taking process, and the photos you create.

Canon EOS 60D book manual download for dummies user guide instruction tutorial Your World 60D

This instant download eBook guide is for those who wish to get more out of their 60D, and go beyond Auto or Program mode and shoot in Aperture Priority (Av) mode and Shutter Priority (Tv) mode. It covers basic dSLR camera functions and exposure concepts for those new to digital SLR photography, plus it also explains more advanced camera controls and operation, such as using the various metering modes and exposure compensation for correct exposure of every image, controlling autofocus modes and focus points for sharp focus of still or moving subjects, and creating dramatic depth of field for professional looking photographs. Learning to get the most out of a dSLR can involve a steep learning curve, and I believe my book can help you speed up that process.

See below for how to purchase.  You can preview Your World 60D at the following link. The preview shows the Table of Contents, Introduction, a sample Menu Settings page, a sample Custom Functions Settings page, and a sample text page.

Preview: http://www.dojoklo.com/writing/Your_World_60D-Preview.pdf

Your World 60D is a text-only PDF guide that builds upon the information offered by the camera’s manual and focuses on the essential functions and settings for real world 60D use. In addition to covering the various settings, functions and controls of the Canon 60D, its lessons explain when and why to use them. It also describes every Menu setting and Custom Function setting, with recommended settings, including Movie Mode menus. Note that it focuses on still photography and not video except for a brief introduction to menus and important video settings to get you started.

Sections include:

  • Setting Up Your 60D All of the Menu settings and Custom Function (C.Fn) settings, including movie mode menus, with brief descriptions and recommended settings for practical, everyday use. Set up and customize the advanced features of the 60D to work best for the way you photograph.
  • Aperture Priority Mode (Av) and Shutter Priority Mode (Tv) – How and when to use them to create dramatic depth of field or to freeze or express motion.
  • Auto Focusing Modes and Drive Modes – How they differ, how and when to use them to capture sharp images of both still and moving subjects. Also how and when to use focus lock and back-button focusing.
  • Exposure Metering Modes – How they differ, how and when to use them for correct exposures in every situation. Also how to make use of exposure lock.
  • Histograms, Exposure Compensation, Bracketing, and White Balance – Understanding and using these features for adjusting to the proper exposure in challenging lighting situations.
  • Composition – Brief tips, techniques, and explanations, including the creative use of depth of field.
  • The Image Taking Process – A descriptive tutorial for using the settings and controls you just learned to take photos.
  • Photography Accessories – The most useful accessories for day-to-day and travel photography
  • Introduction to Video Settings – Some basic settings to get you started

This digital field guide to the Canon EOS 60D is a 40 page, PDF format text-only document, full of helpful information applicable to the new and intermediate dSLR photographer – to turn you into an advanced digital photographer!  Begin to master your Canon 60D and start to use it to its full capabilities.

Purchase Your World 60D through PayPal here! (or click the PayPal or Credit card check-out button below)
This version is in PDF format, text-only, 8.5″x11″, which can be read on your computer screen, printed on your printer, taken with you on your laptop, and can also be read on the iPad.

Format: PDF – Instant Download
Page Count:
45
Price:  $9.99

(plus 6.25% sales tax for residents of Massachusetts)
Secure payment with PayPal or Credit card

Buy Now with PayPal! or Buy Now


Other versions of Your World 60D e-book:

The Kindle edition is available on Amazon.com
The Nook edition is available online at Barnes and Noble
The iPad and iPhone version is available through Apple’s iTunes or through the iBooks App.

What Readers are Saying about Doug Klostermann’s dSLR User’s Guides:

This book, together with the manual that came with your camera, is all you need to start discovering all the potential of this camera.
-Max M.

It’s the first guide I’ve read which has taken me through all the settings in an understandable way. I now feel that I have control over the camera.
-Peter S.

I would recommend this to anyone who wants to get a quick start to using their camera. Manuals are nice, but this eBook highlights the important information and gives a quick easy to understand explanation of most all of the functions and controls.
-Ray M.

I found the (camera’s) manual good for understanding how to set things up but not much on the why – this book really focuses on the “why.” Prior to reading the book I was setting up my metering on Spot Metering thinking it was much better than Matrix (Evaluative) – the guide helped me understand why to use specific settings for specific needs. The Custom Settings sections helps to make firm decisions on how to apply settings by understanding the usage of each in addition to knowing how to set them up. I would like to thank you for saving me time – now I’m confident that my camera is well tuned!
-Benoit A.

This manual is a clearly written, concise and useful explanation of the rationale for the seemingly infinite and often confusing settings options. Used in conjunction with the (camera’s) manual I feel a bit more confident in understanding how to at last proceed in getting better photographs.
WLS

Your World 60D was originally, briefly titled Real World 60D. It is the same eBook. If you use the Canon Rebel T2i/EOS 550D, or Canon Rebel T3i/EOS 600D have a look at my eBooks for those camera, T2i Experience and Canon T3i Experience.

Canon 60D Tutorial

I have completed an eBook tutorial and user’s guide for the new Canon 60D, called Your World 60D – The Still Photographer’s Guide to Operation and Image Creation. Learn to use your 60D, quickly and competently, to create the types of images you want to capture. You can learn more about the Your World 60D eBook and how to purchase it here.

(The eBook was originally, briefly called Real World 60D – it is the same book.)

One on One Digital Photography Instruction

Digital SLR Camera Lessons

I am offering one-on-one, individual instruction (or small group workshops) in all aspects of digital photography in the Boston and Cambridge, MA area. I will create a unique lesson with you that can include topics such as choosing a new digital SLR or advanced compact camera and related equipment, learning how to use the various settings and features of your digital camera, photographic composition and taking stronger images, processing and editing your images in Photoshop, and preparing for photographing while traveling.  The lesson plan is up to you and is customized to your interests, needs, level of experience, and specific equipment.  Subjects will be explained, demonstrated, and practiced in ways you will understand, remember, and use.

Please view the Lessons page here, or under Lessons in the blog menu above, to learn more details.

Douglas J. Klostermann Photography Cambridge, MA
Central Square – Cambridge, MA – “Crosswinds” mural by Daniel Galvez

Learn to use your camera with confidence, get the most out of your digital SLR photography equipment, and learn to take better images. Get in touch with me at doug (at) dojoklo (dot) com or at 347-272-Seven Thousand.

Choosing Between the Canon 5D vs. 7D vs. 60D vs. 550D / T2i Part III

I continue to get a large number of visits from people who are comparing the current line of Canon digital SLR cameras – the 5D Mk. II vs. 7D vs. 50D vs. 550D / T2i. I go into detail about comparing the features of these cameras in this post, including the 60D and T3i, so that is probably the post you want to read first. However, it is a long, in-depth post. If you would like to read a summary of how to make this decision and find out which camera is right for you, here it is (however, I still encourage you to read that in-depth post which is a bit more educational than this post).

Before I start I want to mention:

I have written eBook tutorials for the Canon 60D and for the Canon T2i, which cover ALL the Menu settings and Custom Function settings, with recommended settings, plus in-depth descriptions of how and and why to use the cameras’ settings and features in everyday use – Canon 7D Experience, Your World 60D, Canon T3i Experience, and T2i Experience. Learn more about the eBooks by clicking on their titles.

Longfellow House
Longfellow House – Cambridge, MA

-New to digital SLR photography and want a really nice camera for casual home and travel use? Not really sure what all those buttons and symbols are and not really interested in knowing? Get a 550D/ T2i or a Rebel XSi.

-New to digital SLR photography and want to take really great, high quality photos, but don’t ever really plan to totally get into it? Don’t really want to spend months reading about f-stops and metering modes? Plan to use Auto or Program mode most of the time? Fall asleep 3 minutes into reading the manual? Get a 550D/ T2i or a Rebel XSi.

-New to digital SLR photography and want to learn the basics of exposure: aperture, shutter speed, and ISO? Want to learn to take the camera off Auto or Program mode, and experiment with partial or spot metering and manually selected focus points? Eager to read and understand the often confusing explanations of the manual? Get a 550D/ T2i, or a 60D.

-New to digital SLR photography and want to learn everything noted above plus want to take pictures of fast moving action: kids at play, sports, dance? Consider a 60D because it can shoot 5.3 frames per second vs. 3.7 fps of the 550D. This doesn’t mean you can’t focus on and capture fast moving action with the 550D, but it means with the 60D you can fire off a faster rapid series of shots, and thus hope to capture the exact right moment.

-New to digital SLR photography but super ambitious and know you are going to be committed and dedicated enough to learn about exposure compensation and back-button focusing? Ready for Av mode now, and plan to really take your photography to the next level over the next year or two? Already read the manual online? Want to consider the possibility of professional photography in the future? Get a 60D or get a 7D if you are super-serious and if you can afford it.

-Experienced with digital SLR photography and have outgrown the limited speed and menu/ custom options of the entry level cameras? Annoyed with digital SLR users you see on the street whose cameras are nicer than yours but are left on Auto or P mode? Want to take it to the next level and maybe test the waters of professional photography? Get the 60D or get a 7D if you can afford it. Consider a 5D Mk II if you are really, really serious.

-Experienced with digital SLR photography and plan to be a top notch amateur/ semi-pro or work towards being a pro? Carry your camera everywhere and want a sturdy tool that serves you and the way you work? Already have been paid to shoot some photos, portraits, or events? Have stopped trying to read the model number of other people’s cameras because you know your photos are better than theirs even if they have a nicer camera? Get a 7D, or a 5D Mk II if you can afford it, or wait for the 5D Mk III.

-Highly experienced with digital SLR photography and are dedicating yourself to being a part-time or full time pro? Already know and understand 99.6% of what you read in this other post? Just looking for reassurance that spending $2,500 is the right decision? Get a 5D Mk II, wait for the 5D Mk III, or get a 7D if you really can’t afford the 5D yet.

Cambridge City Hall
Cambridge City Hall – Cambridge, MA

You may have been convinced by forums, reviews, or online comments to question and compare image quality, auto-focus speed, high ISO performance and noise, dynamic range, etc., but those factors are all nearly completely irrelevant. All of these cameras have more than enough quality in each of those areas. Your choice should instead be based on your experience level and expected needs as a photographer, and on which camera best serves the way you work. Remember, you don’t need a top of the line camera to take professional quality photos. Instead you need mastery of the camera you have, combined with good knowledge of composition and lighting. I encourage you to have a look at some Flickr users’ photos taken with an “old,” 8MP Rebel XT to confirm this. When you are done selecting a digital SLR body, you canread some of my other posts to learn more about the Best Lenses for Travel Photography or Why You Shouldn’t Buy the Kit Lens.

Canon 5D vs. 550D / T2i – I get an unusually high number of hits from people searching for a comparison of the 5D Mk II vs. 550D / T2i. As you can see above, there isn’t a scenario where those two cameras are together as options, as they are on opposite ends of the spectrum. It is a strange comparison between an entry level dSLR and a full frame professional dSLR that, quite frankly, confuses me. If the 5D fits your expanding needs as a photographer, you would already pretty much know that you needed a 5D after your extensive time using a Rebel or a 20D, 40D, etc. Otherwise, getting a 5D means most likely you’d be investing in far more camera than you will actually need or use. Read more about why I say that here and in the Other Important Custom Functions section here (this post is about the 7D, but it will give you a feel for how a 5D / 7D differs from a 550D in terms of features that you may need but probably don’t).

AF Microadjustment 550D / T2i, 60D – A lot of people also search for AF Micro-adjustment or focus calibration for the Canon 550D / T2i for back focus or front focus issues. Due to quality control issues, acceptable tolerances, or more rarely but not unheard of bad cameras, your camera and/or lens may focus a few notches in front of or behind the subject you focused on. If your camera happens to be 2 notches on the plus side and your lens 2 notches on the minus side, well, you are going to have some issues. While the AF Microadjustment feature is not built into the menus of the Canon 550D or new Canon 60D, here is how you micro adjust for front or back focus: send the camera and/ or lens to Canon while it is under warranty, with instructions to calibrate them. You have to pay for one way shipping and insurance (+/- $30 for one item depending on weight and coverage). Ask them to include a detailed report of what the issue was and what service they actually performed (otherwise they just repeat what you wrote and say “lens was front focusing – electrical adjustment of AF mechanism” and you don’t know if it was the camera, the lens, or your mind that was off). Then send a letter to Canon asking them why a brand new expensive Canon camera paired with a brand new expensive Canon lens that you just bought does not focus properly, and why you have to pay $30 to send it immediately back to them to fix it. This process also applies to the AF Microadjustment of the 7D, 5D, and 50D and soon the 60D. It is best to first determine if the camera or the lens is the culprit, by testing the lens on another body or the body with another lens, but it may well be a combination of both since each lens and camera is uniquely faulty. See this great post, “This Lens is Soft and Other Myths” on LensRentals.com for more info on this.

If you are pretty new to digital SLR photography and you decided on the 7D, check out this really great book I recently came across while browsing the photo section at a bookstore: Canon 7D: From Snapshots to Great Shots by Nicole Young. I think you’ll learn more from it than most other how-to photo books and expanded manual type books. Even if you have another Canon and not a 7D, you’ll still find it helpful for learning how to really use a digital SLR to take better photos. She is currently working on a version of the book for the 60D, Canon 60D: From Snapshots to Great Shots.
canon 60D great shots

And I, myself, have written eBook user guides for the Canon 7D, Canon 60D and for the Canon Rebel T2i / EOS 550D. You can learn all about them here:  Canon 7D Experience, Your World 60D, plus the mini-guide to the 60D Menus and Custom Functions (excerpted from the full version of Your World 60D), and T2i Experience.

Need a lens to go with your new camera? Read about choosing a lens other than the kit lens in this post Why You Shouldn’t Buy the Kit Lens, and learn about the Best Lenses for Travel Photography here.

Please leave a comment, ask a question. Let me know what has been helpful, and what you’d like to read more about.

If you plan to purchase any of this equipment or books, I encourage you to do so through the site I’ve set up with Amazon, Doug’s Picturing Change Digital Photography Equipment and Books or through this direct link to Amazon.com. Purchasing through any of these links to Amazon.com, or the ones below, will help support my blog and my work. Thanks! And for those of you across the pond, click here for my referral link to Amazon UK. If you are in another country, click on one of my Amazon links, scroll to the bottom of the page, and click on your country for your local Amazon.
See the T2i on Amazon.
See the 60D on Amazon.
See the 7D on Amazon.
See the Canon 5D MkII on Amazon.

Useful Site of the Week III

The Digital Photography Review is an excellent site for news, reviews, and forums relating to digital photography equipment.  They address cameras and lenses from all manufacturers, and their in depth reviews of new cameras thoroughly cover every aspect, and usually go on for over a dozen pages.  Their forums are also an great place to find answers to your questions or concerns about specific pieces of equipment.  I typically check the first page each day to keep up with the latest news and see what has been recently announced or released.