Celebrate “Read an E-Book Week”

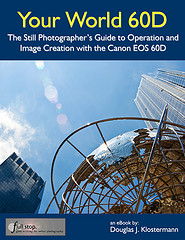
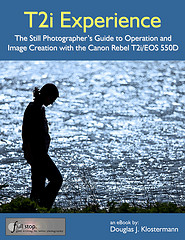
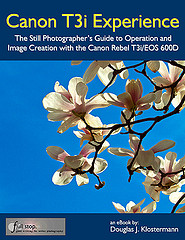
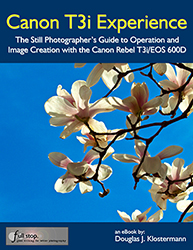
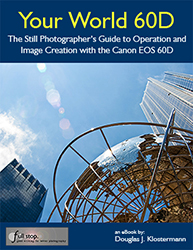
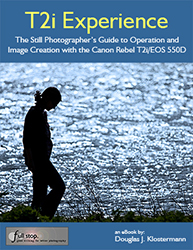
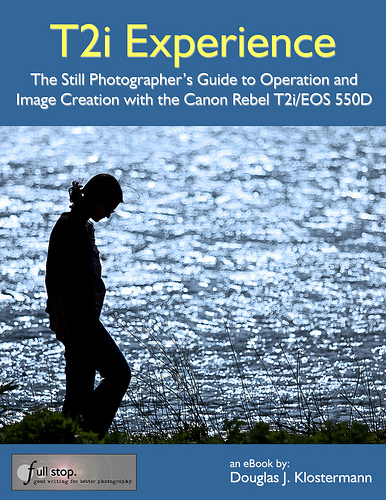
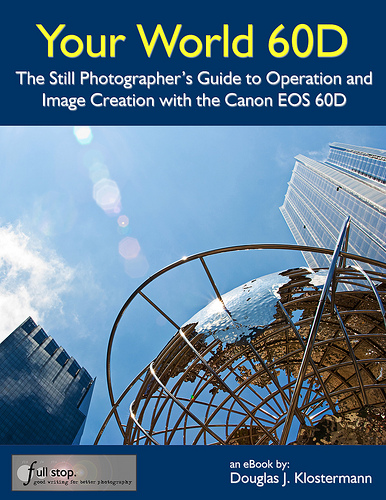
To celebrate “Read an E-Book Week” (March 6-12) as well as the release of my newest eBook Canon T3i Experience, some of my previous e books are on sale, including Your World 60D for the Canon 60D and T2i Experience for the Canon T2i / 550D.

Just go to my Full Stop ebook bookstore, (www.dojoklo.com/Full_Stop/) where you can learn all about the eBooks.

Canon EOS 60D book user guide Canon Rebel T2i / EOS 550D book user guide

Also available, the brand new Canon T3i Experience as well as Nikon D7000 Experience.

Canon T3i book Canon 600D book Canon T3i Experience by Douglas Klostermann Nikon D7000 book Nikon D7000 Experience ebook

Learn how to set up and customize the menus, settings, and functions of your Canon T3i / 600D, Nikon D7000, Canon 60D, or Canon T2i / 550D.  Then start to learn to use your powerful dSLR to its full potential so that you can improve your photography and consistently take better photos!  Download your ebook instantly and start learning right away.

Canon T3i / 600D vs T2i vs 60D vs 7D vs 5D MkII

Since several of the current Canon dSLR cameras – such as the T4i/650D (and T3i/600D), 60D, and 7D – share similar features and an 18 megapixel sensor, it can make it difficult and confusing to decide which one is best for you.  But each one is designed for different levels of photographers with specific needs, and there are significant differences that may or may not be important to how and what you photograph.

Obviously as you pay more, you get more, and this article will explain what that “more” is and help you decide if you need it.  If you are new to dSLR cameras, know that things like 9 cross-type AF points and dual Digic IV processors aren’t feature-bloated “bells and whistles” or marketing hype, but are important features for how advanced photographers work and they provide the capabilities that some demand from their equipment.  If your needs don’t demand them, don’t be swayed to invest more in a camera that provides far more than you require.  It won’t help you take better photos, and in fact may cause you to take worse photos until you figure out how to properly take control of a more advanced camera!

This comparison post has grown organically as new models have been released, so please be sure to look through the entire post to find the section that best applies to you, such as T2i vs T3i, or 60D vs 50D, the Canon 5D Mk II, or the overall Canon EOS 7D vs. 60D vs. 600D / Rebel T3i comparison which is the main point of this post.  Don’t miss the Which Canon dSLR is Right for You summary at the end of this article!

Rather than add the T4i into this post, I have written a new post to introduce and explain the features of the latest Rebel, the T4i – Introduction to the Canon Rebel T4i / EOS 650D. The additional features of the T4i make the decision between the T4i vs. 60D more challenging than ever, and so I wrote more about that in Canon Rebel T4i vs EOS 60D.

I know there is a lot to read, but you are preparing to spend a lot of money, and this post will thoroughly explain the differences of these cameras and help you decide which one if right for you! Even if some of these models become outdated, the majority of the information and comparison factors remain similar, and it is still worthwhile to read this article before heading over to the T4i articles.

If you haven’t yet committed to Canon and are interested in comparing the Canon 60D vs. Nikon D7000 , or the Canon T3i vs Nikon D5100, or the entire Nikon line-up, have a look at those posts next.

Canon Rebel T3i EOS 600D book guide manual tutorial how to instruction
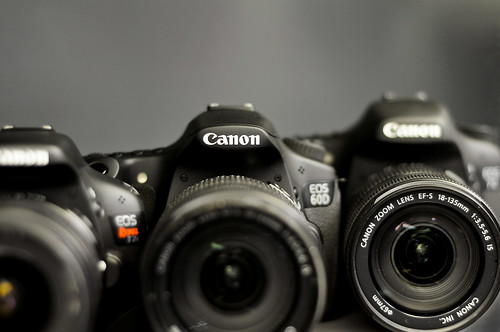
The new Canon Rebel T3i / 600D (all photos by the author, some equipment courtesy of Newtonville Camera)

Review / Comparison of Canon EOS 7D vs. 60D vs. 600D / Rebel T3i:

Sensor and Image Quality: As I said above, all three cameras share a very similar sensor with 18 megapixels, and so their image quality and low light performance will be virtually the same. All are capable of taking professional quality images.

Exposure Metering: The threecameras all share the latest 63-zone, dual-layer exposure metering system and 4 metering modes. That means they will all determine the exposure virtually identically and enable you to take properly exposed photos in most every situation, including difficult back-lit scenes. The size of the areas metered for Partial and Spot metering vary slightly between the cameras, but that isn’t anything critical.

Autofocus: The 60D shares a similar autofocus system to the T3i and the previous 50D, with 9 focus points and three auto focusing modes. However the 9 AF points of the 60D are more sensitive/ accurate than those of the T3i: all are cross-type in the 60D, only the center is cross-type in the T3i. This means that the outer focus points of the 60D will do a better job, in difficult focusing situations, of quickly and accurately focusing on the subject.  This may include, for example, lower light situations or tracking moving subjects.  The T3i does a stellar job of focusing, but if you are highly demanding or are going to be primarily shooting action and motion, this is an important difference to consider.

The 60D autofocus system in turn is much less complex than the sophisticated AF system of the 7D with its 19 AF point system and its additional Zone, Spot, and Expansion area modes.  If you shoot serious sports, action, birds, wildlife, etc., then you are going to want to consider the highly capable autofocus system of the 7D.  With its additional AF points and the ability to group them in various ways (Autofocus Area Modes), as well as the multiple Custom Functions that allow you to customize exactly how the AF system works, it is ideal for sports and action.  These Custom Functions can dictate how it tracks subjects, how it deals with objects that come between you and your initial subject, how quickly it responds to these changes of possible subjects that are at different distances from you, etc.   The entire AF system of the 7D is a bit complex, and will take some studying and experimentation if you wish to fully understand and take advantage of it.  However, if you are not an avid sports photographer, a wildlife shooter, or someone who understands, needs, and will use the elaborate features of the 7D AF system, then this shouldn’t dissuade you from the 60D.

I have written an additional post about Taking Control of Your Canon Autofocus System.

Canon EOS 7D compare 60D T3i
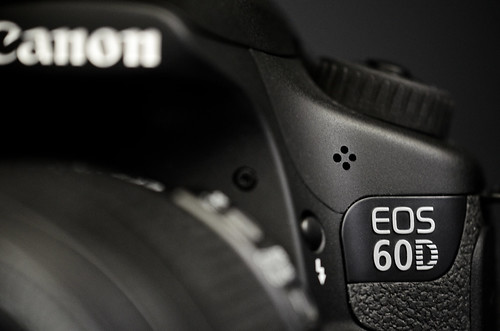
Detail of the Canon 7D

Construction: As you can probably figure out from the prices, each camera is not built the same. The 60D has relatively strong construction of an aluminum frame and polycarbonate body. It is better built than the stainless steel frame with polycarbonate body of the T3i/ 600D but not as strong as the 7D’s magnesium alloy construction. The 60D also has some amount of weather sealing – more than the 600D/T3i, less than the 7D. But for most users, including even those using the camera daily or in travel situations, the construction of any of these cameras is far more than good enough, strong enough, and durable enough.  But if you are going to be working extensively in dusty or moisture-heavy areas or situations, you will want to seriously consider the extensive weather sealing of the 7D.  While the strong magnesium construction of the 7D is impressive, that is not really needed by many people other than pros who intensively use their cameras in photo-journalist or constant-travel type situations.

ISO: Since they all share a very similar sensor, the ISO sensitivity and performance at high ISO settings is virtually the same for these three cameras. But don’t take my word for it, don’t be swayed by pixel peepers on forums, instead check out the camera sensor tests at dxomark to verify this. As you can see, they all share the exact same overall score, and show very similar performance.

Controls: As with construction, the buttons and controls vary significantly with these cameras. Unlike the T3i, the more advanced 60D and 7D have nearly every control an advanced photographer needs on the exterior of the camera and they also have the top LCD panel and rear Quick Control Dial that are not on the 600D/T3i. Do you find yourself constantly changing the ISO, the metering mode, or the autofocus mode to adapt to changing situations?  Then you will want direct access to these controls and the ability to more easily monitor them on the top LCD panel.  Or do you generally work in one of the more automatic modes and not need to deal with these settings?  With all the cameras, any controls can also be easily accessed with the Q button and Q menu or in the other menus on the rear LCD monitor. The top buttons of the 60D set only one setting each, so this is less complicated (but thus less versatile) than the multiple-setting buttons of the 7D. Canon has removed the white balance (WB) button on the 60D that the 7D and 50D have, but that isn’t a big deal – use the Q Menu. Another change on the 60D is that the Multi-controller has been moved from the thumb joystick like the 7D and 50D and placed in the middle of the rear Quick-control dial. This doesn’t change how it functions, and should just be a matter of getting used to the difference. (Unfortunately, I still really do prefer the old design and location, though I find it is easier to quickly and accurately click on the diagonal directions with the new 60D Multi-controller design).  If you plan on using your camera on Auto or Program most of the time, then the controls of the T3i are more than sufficient for your needs. If you work in Av, Tv, or M modes and need quicker and more direct access to your controls and the additional top LCD screen to view and change your current settings, then you need to look at the 60D or 7D over the T3i.

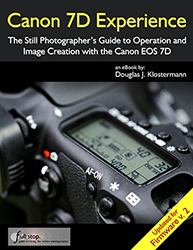
Brief commercial interruption:  I want to mention that I have written e-book user’s guides for the Canon 7D, Canon 60D, Canon Rebel T3i, and Rebel T2i. After spending so much time studying, experimenting, writing about, comparing, and discussing these cameras, I decided to put all that knowledge into e-book form! Each of these user’s guides cover all the features, settings, and controls – but more importantly when and why to use them in your photography.  This includes metering modes, aperture and shutter priority modes (Av and Tv), advanced autofocus use, and more.  They also describe all the Menu settings and Custom Function settings – with recommended settings.  Take control of your camera and the images you create!  Canon 7D Experience, Canon T3i Experience, Your World 60D and T2i Experience. Learn more about the e-books by clicking on their titles or on the covers below.

canon eos 7d book ebook firmware 2 2.0 how to manual dummies field guide instruction Canon T3i book Canon 600D book Canon T3i Experience book guide manual tutorial how to instruction by Douglas Klostermann

Canon 60D book Your World 60D by Douglas Klostermann Canon T2i book Canon 550D book T2i Experience by Douglas Klostermann

Menus and Custom Functions: These allow for greater control over customizing how the camera functions. The 60D has many more Menu and Custom Function options than the 600D/T3i and nearly as many as the 7D. These settings enable you to customize the operation, function, and controls to work how you want them to, including things like exposure increments, peripheral illuminations correction for lenses (fixes dark corners), tweaking how the autofocus system operates, setting more precise white balance settings, and customizing which button does what. These settings are very important to advanced users who wish to customize their camera to work exactly how they need it too, but aren’t nearly as critical to others who don’t have such intensive demands.  (Since many of the Menu and Custom Function settings can be complicated and confusing, my e-books on the 60D, the 7D, and on the T3i/600D cover all of these options along with my recommended settings to get you up and running quickly!)

Wireless Flash: Like the 7D, the 60D and the T3i both incorporate wireless flash triggering. It allows you to trigger multiple off camera flashes at different output levels. The  older 550D/T2i does not have this feature.

Articulating LCD Screen: The big new feature that the 60D and T3i have that the 7D and T2i do not is the articulating rear LCD screen. This may prove useful for videographers, as well as for setting up compositions while the camera is on a tripod, for macro use, or for using it from unusually low or high vantage points. Some users will be able to avoid buying an expensive angle finder because of this feature. There is also an electronic level in the 7D and 60D, visible in the viewfinder, rear LCD, or top LCD.

Viewfinder: The 60D has a large, bright pentaprism viewfinder with 96% coverage of the actual resulting image, better than the pentamirror and 95% coverage of the 600D/T3i, but not quite as nice as the nearly 100% view of the 7D pentaprism.

Processor:
The 60D shares the same Digic 4 processor as the 600D/T3i. The 7D has dual Digic 4 processors. However, if you don’t need to shoot dozens of continuous images, you probably won’t notice any processing speed issues.

Continuous Shooting Speed: The 7D can shoot a blazing 8 frames per second, in which the photos barely change from frame to frame. The 60D can shoot a respectable 5.3 fps which is actually a more useful rate, and is a higher rate than the 600D/T3i rate of 3.7 fps. If you need the extremely high fps for sports, wildlife, or other action shooting, consider the 7D. If not, don’t be swayed by this excessive feature that is designed for people like pro sports or dedicated wildlife shooters.  However, if you are shooting any type of sports, action, birds, dance, etc., the 5.3 fps of the 60D is much more useful than the slower T3i.

Canon EOS 7D compare vs 60D T3i
Detail of the Canon 7D

Memory Card: The 60D uses the SD memory card like the 600D/T3i, not the CF card of the 7D and 50D.  This doesn’t really mean too much other than the CF cards are larger and more rugged, yet prone to bending the camera’s internal connection pins.  Handle either of them with care and it shouldn’t make much of a difference.

Battery: The 60D uses the LP-E6 battery like the 7D and 5D, which is a nice feature as this battery can often last through a full day of shooting. The T3i and T2i use the smaller LP-E8 battery with less capacity.  In any case you should have an extra battery or two.

Size and Weight:
The T3i is smaller and lighter (18.2 oz/515 g) than the 60D (23.8 oz/675 g), which in turn is smaller and lighter than the 7D (28.9 oz/820 g). Go to the store and hold them to get a better feel for their size and weight. HOWEVER, please know that the size and weight of these bodies is a result of their build, features, and capabilities.  Those are the criteria that should be compared first, not the resulting size and weight.  (Also be sure to read this post of Why How it “Feels” is not a valid Criterion for Choosing an dSLR.)  But, I do realize that size and weight is important to some, perhaps many, due to physical limitations or just simple comfort and enjoyment.  So take my dramatic proclamation with a grain of salt!  The 60D and 7D “feel” like the more substantial cameras that they are. A nice improvement of the T3i is that its hand grip area has been modified, and has a different feel than that of the T2i – the area where the thumb rests is contoured differently and has a nice channel for the thumb, which allows for a much more secure one-hand-grip of the camera.

AF Microadjustment: The 7D has this feature, the 60D and T3i and T2i do not. Many are disappointed that the 60D does not include the ability to micro-adjust the focus so that each of your lenses focuses extremely accurately. However, if you have a major focus issue, send your camera and/ or lenses to Canon while under warranty and ask them to calibrate them. Bad bodies and lenses are rare, but they do exist.  Doing AF microadjustment yourself is often a maddening undertaking. You may make a good calibration under controlled conditions, but this really doesn’t replicate real life shooting.  And due to manufacturing tolerances of both cameras and lenses, there is a relatively wide range of what is considered acceptable.  If you need your camera and lens to be perfectly sharp, you are going to need to buy a $6000 pro body and a $1500 lens.  See this article This Lens is Soft and Other Myths, its follow up article, and the follow up controlled tests to learn more about this.

Locking Mode Dial: This is a new feature for a Canon dSLR, only on the 60D, that keeps the Mode dial from accidentally rotating. A nice touch, and not at all difficult to change quickly with one hand, as some people have claimed: just push the center button with your left index finger, rotate dial with thumb and middle finger.  I actually wish my 50D had this. If you wish to retrofit your 7D or 5D Mk II with this feature, Canon will do it for $100.

Full HD video: Of course they all offer this capability. Note that this is not video for your kids’ parties and soccer games. It does not have continuous autofocus while shooting, as a camcorder does. It is not designed for that kind of use, but rather for serious videographers who typically manually focus. You can adjust autofocus while shooting by pressing the shutter button or the AF button, but it may have a less than desired looking result and unless you are using an external microphone, the autofocusing sound will be picked up. The T3i has the digital zoom feature in video, which allows for nice smooth zooms while filming.

Flash Sync: A Note to Strobists -the 60D and T3i do not have a PC sync flash socket to plug in PC sync cords. The 7D has this.

Ease of operation: While beginners may find all the buttons, controls, and menus of any dSLR difficult and confusing at first, the additional controls and menus of the 7D and 60D are all quite intelligently designed, intuitive, and straightforward for the more advanced user. The menus and controls of the T3i and T2i are also pretty basic and simple to learn.  There is certainly a “price of admission” to learning and getting the most from any dSLR, and you will need to invest time and effort into both reading and using/ experimenting with your camera.  Start with the manual, then perhaps have a look at my e-book camera guides, then practice, practice, practice!

Remember that all of these comparisons and features are relative. Of course the fact that the 7D can take 126 consecutive photos at the rate of 8 frames per second makes it “better” than the other models.  Advanced features like that differentiate it from the other cameras and are also why it costs more. But is it actually “better” for you and how you plan to photograph?  Do you ever need to take 15.75 seconds of continuous photos? Ever? (Look at your watch for 15.75 seconds right now and act like you are taking continuous photos. Now what are you going to do with all those nearly identical 126 imaginary photos?!)

Purchasing:  If you plan to purchase any of these cameras, please see the Purchasing section below.

*****

Canon Rebel T3i EOS 600D book guide manual tutorial how to instruction
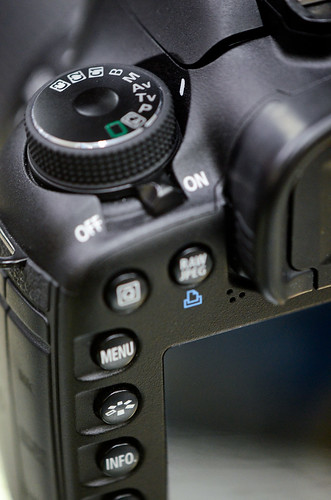
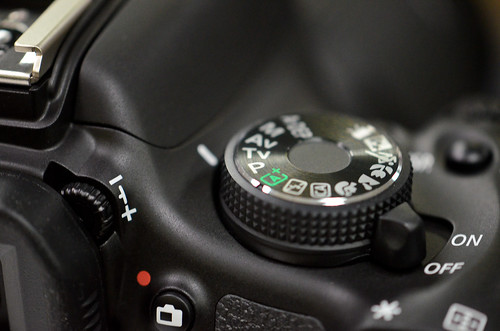
Mode dial of the Canon Rebel T3i

T3i vs T2i

Review / Comparison of Canon Rebel T3i vs T2i (600D vs 550D):  If you are trying to decide between the Canon T2i or T3i, the previous model, the T2i, already shared many important features with the 60D (and even features of the semi-pro 7D) including the 18 MP sensor, 63-zone exposure metering system, high ISO performance, HD movie capabilities, and Digic 4 image processor. Now with the addition of the vari-angle articulating rear LCD screen (aka rotating screen), remote flash capabilities, creative filters, additional movie options, and in-camera image processing features, the new Canon T3i is even closer in specifications to the 60D, which may make your choice harder. But there are some important differences, and this post will hopefully help you decide which features are important to you and the way you photograph, which ones may be unnecessary, and thus which model fits you best. As I’ve said before, you need to choose which camera is best for you based on your needs and experience as a photographer and based on how the advanced features, controls, and customization options fit those needs and serve the way you work – not the other way around where you look at the new features and speculate if you really need or will use them.

The Rebel T3i is replacing the T2i at the entry level end of the Canon line-up. (There is also the T3 in the most basic, entry level position.)  The differences are minor but possibly significant depending on your needs. Since both cameras share the same 18 megapixel sensor and Digic 4 processor, both the T2i and T3i will create images with exactly the same image quality, produce the same low light-high ISO performance, shoot at 3.7 frames per second, and have nearly the same size and build quality. They are both offered with the same 18-55mm kit lens (with some minor cosmetic differences on the new T3i kit lens). The T3i is very slightly larger and heavier due to the addition of the rotating rear LCD monitor. And that is one of the biggest differences between the two cameras: do you want and need a vari-angle rear screen or not? The other major difference is the ability of the T3i to remotely control multiple off-camera flashes. Like the 60D and 7D, you can use the built-in flash of the T3i to trigger other Canon Speedlites. This could be an important reason for choosing the T3i. However, if you don’t use or plan to use one or more off-camera flashes, this shouldn’t be important to you.

Some other minor additions to the T3i include the Scene Intelligent Auto Mode, which is a feature borrowed from point and shoot cameras. When in Auto mode, the T3i will make a determination of what type of scene you are shooting – close-up, portrait, landscape, etc. – and automatically configure the camera settings accordingly. However, if you want to use a powerful and costly digital SLR as a point and shoot, you should probably save the money and just buy a nice, high quality point and shoot like the Canon S95. Other additional but not very important upgrades include the in-camera processing Creative Filters like Grainy Black and White or Fisheye, and the ability to choose different image size ratios and to rate your images. However, this type of processing is best done on your computer with software like Photoshop or even Photoshop Elements. There is also a marginally helpful Feature Guide which gives brief descriptions of various settings and some additional video features like digital video zoom (for nice smooth zooms) and Video Snapshot, which you can use to shoot short video clips that are automatically joined together into a video, with music. Again, this is pretty easily done on your computer, and with much more control, with basic video editing software.

So if you need any of these new features, get the Canon Rebel T3i / 600D. If not, buy whichever one if offered at a cheaper price. However, if you still wish to compare the Rebel T3i to the 60D and 7D, see below. If you wish to compare the Canon T3i to the Nikon D5100, check out this post Nikon D5100 vs. Canon T3i.

see the Canon EOS Rebel T3i (Body Only) on Amazon
see the Canon EOS Rebel T3i with 18-55mm Lens on Amazon

********

Review of Canon EOS 60D vs. 50D: Since the Canon EOS 60D basically replaces the Canon 50D (well, replacement isn’t exactly the right word because the 60D doesn’t really follow the 20D to 50D progression of improvements…), the 60D or 50D decision is an easy one. The 50D shouldn’t really be considered anymore. While the Canon 50D does hold a couple interesting advantages over the 60D (faster frame per second (fps) burst rate in continuous mode, stronger construction, more comprehensive buttons and controls, complete lack of fun filters like “grainy black and white”), the sensor and exposure metering system have been greatly improved in all the newer cameras (such as the 7D or 60D or 600D/ T3i or 500D/ T2i) and I feel these features, along with the increase in megapixels, outweigh any other 50D advantages. I would definitely choose a 60D instead of a 50D. This is coming from experience, as I use a 50D professionally and on a weekly basis. Or choose a 7D instead of a 50D if your needs require it and budget allows it. (Find out below if your needs require it!) If you still wish to learn more about the differences of these two models, I write in more detail about the 50D vs. 60D comparison here from a camera features and operation point of view.

Canon Rebel T3i EOS 600D vs Canon 60D
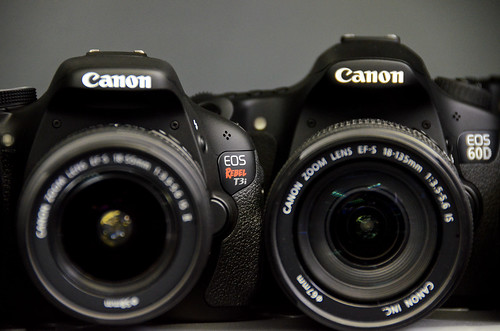
Canon Rebel T3i / 600D and the Canon 60D


Purchasing: If you plan to purchase cameras, photo equipment, books, or anything else from the retailers below I encourage you to do so through these referral links. While your price will be the same, they will give me a little something for the referral, which helps to support my blog and my work – thanks!  I appreciate your support!

Amazon

If you are in the UK, please click here for the UK Amazon referral link.

And if you are in Canada, please click here to use my Canada Amazon.ca referral link.

For those interested in purchasing through B&H Photo, Adorama, or directly from Canon, I have set up affiliate links with them as well. Just click on the logos below to start shopping:
BandH Photo   

These are all retailers that I have purchased equipment from (excluding Amazon UK/Canada), and I recommend them based on my good experiences, their extensive selection, competitive prices, great customer service and responsiveness, and fair return policies.

or use one of these direct links to Amazon:

See and buy the Canon EOS Rebel T3i (Body Only) on Amazon
See and buy the Canon EOS Rebel T3i with 18-55mm Lens on Amazon

See and buy the T2i on Amazon.

See and buy the 60D on Amazon.
See and buy the 7D on Amazon.
See and buy the Canon 5D MkII on Amazon

Canon Rebel T3i EOS 600D vs 60D vs 7D vs T2i
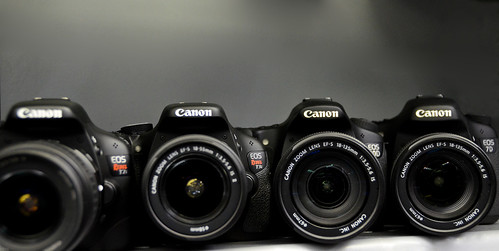
Canon Rebel T2i, T3i, 60D, and 7D – photo by author at Newtonville Camera


Which Canon dSLR is Right for You?

This section of the article, which can help you decide on a camera based on your photography experience and needs (and also includes the discussion of the Canon 5D Mk II),  has been moved to its own post here:

http://blog.dojoklo.com/2011/10/14/which-canon-dslr-is-right-for-you/


*****

Related Posts:

Comparing and Choosing Canon Lenses
Equipment for Digital Photography
Essential Books for Digital Photography

As I said above, when you are trying to determine which camera to purchase or upgrade to, you need to first consider and determine your needs, and then see which camera fills those needs. Not the other way around. Here is a post I wrote which discusses this, titled

How to Choose a New dSLR Camera


Was this post helpful?  Please let others know about it by clicking the Facebook, Twitter, or Google+ sharing buttons below, or linking to it from your blog or website, or mentioning it on a forum.  Thanks! 

Want to help support this blog with no cost or effort?  Simply click on the Amazon and B&H Photo logos on the left side of this page to go to those sites and make your purchases.  They will then give me a little referral bonus!

dSLR Photography Gear, Accessories, and Books

In my e-book user’s guide for digital SLRs I include a list of accessories and books, complete with links to purchase these products on Amazon or from the manufacturer. However, the links don’t always work with some e-book formats, so I am posting the list here too. Some accessories may have been updated since this list was last modified, such as the Nikon SB-5000 Speedlight replacing the SB-910, or the Canon 600 EX II-RT Speedlite replacing the 600 EX-RT, so be sure to check for the latest versions of the various accessories.

Below are some accessories that are handy for general and travel photography use with any dSLR camera, plus some of my favorite photography books, and camera-specific accessories mentioned in the texts of my Full Stop camera guides. Click on the links to go to the product or category pages on Amazon.com or the manufacturer’s website. Please note that these are my referral links, and I will receive a small referral fee if you use these links to make your purchases, which helps to support my blog and my work. Thanks!

Contents:

dSLR Photography Accessories
Digital Photography Books

Nikon D780 Accessories
Nikon Z8 / Z7 / Nikon Z6 / Nikon Z 7II / Nikon Z 6II Accessories
Nikon D850 Accessories
Nikon D500 Accessories
Nikon D750 Accessories
Nikon D810 Accessories
Nikon D7500 / D7200 / D7100 Accessories
Nikon D7000 Accessories
Nikon D5600 / D5500 / D5300 / D5200 / D5100 Accessories
Nikon D610 / D600 Accessories
Nikon Df Accessories
Nikon D3300 Accessories

Canon EOS R, EOS R7, EOS R6II,EOS R8 Accessories
Canon 5D Mark IV Accessories and 5DS / 5DS R Accessories
Canon 7D Mark II Accessories
Canon 80D / 77D / 70D Accessories
Canon 7D Accessories
Canon 60D Accessories
Canon T5i, T4i, T3i and T2i (EOS 700D, 650D, 600D and 550D) Accessories
Canon 5D Mark III Accessories
Canon 6D Accessories


dSLR Photography Accessories

UV Filters – Clear, protective filters for the lenses.  You should have these on at all times to protect your lenses.  Get high quality coated ones, such as B+W, especially for higher quality lenses.   Consider the MRC multi-coated versions for highest quality lenses.  While some argue that any filter may degrade image quality, a high-quality filter will show little effect, and most know that it is cheaper to replace a $100 filter than to repair a $1500 lens.  Use the slim filters for wide angle lenses to avoid vignetting.

Circular Polarizing Filter: Use this outdoors in sunlight to darken the sky, cut through haze and reflections, and increase contrast. Do not use on a wide angle lens as it will cause the sky to change from light to dark and back again across the frame. You have to turn the second ring of the filter to create the amount of lightness or darkness in the sky that you desire, or to reduce or eliminate reflections. It works best when the sun is to your left or right, but does not have any polarizing effect if the sun is directly in front or behind you. Do not use an older linear polarizing filter with a digital camera, as it will interfere with the metering and autofocus systems.

Neutral Density (ND) Filter: If shooting video in bright lighting, you will need to use a dark neutral density (ND) filter on the lens to block light in order to be able to use dramatic wide aperture settings (such as f/ 2.8 or f/4.0). These are also useful with still photography for allowing slow shutter speeds in bright light, such as for photographing waterfalls. They are available in a variety of densities to block out the amount of light to enable you to increase your exposure settings by a certain number of stops, such as 3 stops (0.9), 6 stops (1.8), 10 stops (3.0), etc. For example, when working in M or S mode and the exposure meter reads 1/30s, f/8, ISO 100, but you wish to use and aperture setting of f/2.8 while “holding” the other settings – you can use a 3-stop ND filter and the exposure meter will now read 1/30s, f/2.8, ISO 100, allowing you to obtain the wide aperture setting and resulting shallow depth of field. There are also variable ND filters, where you can adjust one of the filter’s rings to vary the amount of density, as well as the Cokin filter system that makes use of a filter holder that attaches to the front of the lens, which then holds square filters. These are useful to landscape photographers using graduated or split neutral density filters that either gradually or sharply transition from dark to light. Using the square filter in front of the lens, you can then vary the angle and location of the transition to align with the horizon.

Nikon Lens Hoods or Canon Lens Hoods: Use a lens hood on your lens to both prevent flare and to protect the front of the lens when it inevitable bangs against something or drops. Some nicer lenses typically come with a lens hood. With other lenses, buy the corresponding optional hood.

BlackRapid R-Straps: A different, more comfortable style of strap for carrying and using your camera, especially with a larger or heavier lens. There are a variety of current models, including the Curve, Metro, Kick, Sport, and Cross Shot.

Manfrotto 055XPROB Tripod Legs and Manfrotto 496RC2 Ball Head:  This is an excellent “starter” combination of tripod legs and head for the beginner or enthusiast.  They are sturdy, durable, and well built.  If you know you will be doing a lot of tripod work, such as for studio, landscape, or travel photography, it is best to invest in more advanced (expensive) versions, including lighter carbon fiber legs and a head with additional features.

Insurance: Make sure your equipment is covered by insurance. When I worked in a camera store, people came in on a weekly basis to replace the equipment that was stolen from their car, trunk, luggage, while traveling, or was in a fire. You may need special insurance or a rider if your homeowner or renter’s insurance does not cover it. I use the policy available through NANPA, though you have to join NANPA to get it. This insurance is primarily for the equipment only, so you are not paying for liability coverage geared toward a business as you are with many other photo equipment insurance plans. Please note that the NANPA membership fee covers you annually from July – they don’t pro-rate, so you will not get a full year if you join at any other time. (If you happen to join NANPA to get their insurance, mention my name as a referrer, and I save on my next membership renewal!)

Silica Packs: Keep these in your camera bags to absorb moisture. Consider using real ones that you buy in solid cases instead of the little packs that you found in your new pants pocket that may break open over time.

Sto-Fen Omni Bounce Diffuser: Works great on the optional external flash units (note some Nikon flashes come with a diffuser like this). Do not use this on your flash outdoors because all it will do outside is cause your flash to work harder. I know you see lots of people doing it. They didn’t bother reading how to use it. Don’t imitate them. Use a direct bare or gelled flash outdoors. These diffusers are designed to work as a diffuser when bounced off a surface and angled at 45 degrees or so. Not straight on, and not bouncing off the sky.

Giottos Rocket Air Blaster: Always have this manual air blower handy for getting dust off lenses in a hurry, because blowing on them with your mouth – no matter how careful – inevitably leads to spittle on the lenses. Also use for manually cleaning the sensor, carefully following sensor cleaning instructions.

Dust-Aid Platinum dSLR Sensor Filter Cleaner: If the Air Blaster does not remove all the dust during sensor cleaning, you can move to a “silicon stamp,” such as this one. This is slightly more invasive, as you will be touching the sensor with the cleaning device. Be sure to carefully read and follow the Dust-Aid instructions, as well as the manual’s sensor cleaning instructions, particularly the correct way to raise the mirror and access the sensor.

Lens Pen Cleaning System: Works great for cleaning off mysterious spots and smudges that appear on the lens. Blow dust off the lens first with the Rocket Air Blaster, brush it with the Lens Pen brush, and then follow the instructions for using the Lens Pen.

Digital Grey Card: Used to measure and set accurate custom white balance.

Rosco Strobist Collection Flash Gels: Use these to balance the color temperature of your flash to the color temperature of the ambient light in order to have a single WB setting that neutralizes the color cast of the entire scene. Tape them in place or use the LumiQuest Gel Holder which attaches to your flash with the Honl Speed Strap, an overpriced strip of Velcro.

Sandisk Extreme CF Memory Cards (CompactFlash for Canon 7D, Canon 5D Mk II, 5D Mk III):  I suggest getting a couple 16 GB or 32 GB CF cards to store your photos – more if traveling.  Be sure to check the Sandisk site for current rebates.

Sandisk Extreme Pro CF Memory Cards:  For an even faster CF memory card, look at the Extreme Pro version, which saves at 90MB/s over 60 MB/s of the Extreme CF cards.

SanDisk Extreme Pro UDMA 7 CF Memory Card:  This CF memory card will allow you to take full advantage of the high speed continuous shooting of the 5D Mk III (or the 7D) to capture up to the maximum 16,270 continuous JPEG images or 18 RAW images in a single burst (7D rates are 130 JPEG / 25 RAW).

SanDisk Extreme Pro SDXC UHS-I SD Memory Cards: I suggest getting a couple 64GB or higher capacity Secure Digital (SD) cards to capture and store your photos – more if traveling. The current version of this card is rated at up to 170 MB/s (read) and 90 MB/s (write) speed. The older version of the card, SanDisk Extreme Pro SDXC UHS-I SD, is rated at 95 MB/s (read) and 90 MB/s (write) speed, and is available in the smaller 32GB size.

SanDisk Extreme Pro SDXC UHS-II SD Memory Cards: These high speed SD cards, with 300/260 MB/s read/write speeds, will enable you to take advantage of the camera’s maximum burst rate.

Eye-Fi Wireless Flash Memory Card: This SD memory card can be used to automatically upload photos wirelessly via Wi-Fi to your computer during shooting or afterwards.

Card Reader: Use this to transfer image files from the memory cards to your computer if your computer does not have a card reader built in. They may be faster than the camera’s USB cable and will save camera batteries.

Stereo Microphones: The Rode VideoMic or the Rode VideoMic Pro are good-quality affordable external stereo microphones for recording audio while shooting video. They mount to the camera’s Hot Shoe.

Camera’s USB Cable: Always have the included camera USB cable when traveling, as a back-up method of transferring image files to your computer.

Lens and Body Caps: Don’t forget to have these in your camera bag, to protect lenses and camera body when switching and storing them.

Camera Wrap: For protecting your camera while carrying it around in dusty, misty, or sandy situations, or for protection when storing it.

Rainhood or Rainsleeve: For protecting your camera while using it in dusty, misty, rainy, or sandy situations.

Adobe Creative Cloud (with Photoshop and Lightroom): These software programs are essential for editing, processing, retouching, and manipulating your photographs, especially if you are shooting in RAW. Lightroom is designed specifically for photographers and is the processing program of choice for many of them, but it does not have the manipulation capabilities of Photoshop. Take advantage of Adobe’s significant student and teacher discounts if applicable.

Nikon Capture NX2: If you are not using Photoshop, this software will enable you to process and retouch your JPEG or RAW files, and correct things such color, contrast, and sharpening.

Camera Bags and Travel Gear: For additional gear that is helpful for travel situations, including various camera bags for different situations, have a look at my travel gear blog post:

http://blog.dojoklo.com/2009/12/01/assignment-guatemala-gear/


Digital Photography Books

Understanding Exposure: How to Shoot Great Photos with Any Camera by Bryan Peterson

Learning to See Creatively: Design, Color & Composition in Photography by Bryan Peterson

The Photographer’s Eye: Composition and Design for Better Digital Photos by Michael Freeman

The Photographer’s Mind: Creative Thinking for Better Digital Photos by Michael Freeman

Available Light: Photographic Techniques for Using Existing Light Sources by Don Marr

On-Camera Flash Techniques for Digital Wedding and Portrait Photography by Neil van Niekerk

Speedliter’s Handbook: Learning to Craft Light with Canon Speedlites by Syl Arena

Digital Photographer’s Complete Guide to HD Video by Rob Sheppard and Michael Gunchen.

Canon Speedlite System Digital Field Guide by Michael Corsentino

Nikon Speedlight Handbook: Flash Techniques for Digital Photographers by Stephanie Zettl

The New Complete Guide to Digital Photography by Michael Freeman – a comprehensive general reference guide with brief explanations of nearly every aspect of digital photography.

New Epson Complete Guide to Digital Printing by Rob Sheppard.

More Essential Digital Photography Books are listed in this post.


Nikon D780 Accessories

Nikon EN-EL15b Rechargeable Battery: It is always good to have an extra battery or two, especially when traveling, or when photographing all day, or for an event.

EH-7P Charging AC Adapter: This charging adapter allows you to directly charge the battery while in the camera, via a USB cable. Note that the camera needs to be turned off in order for it to charge, and it will not charge older EN-EL15or EN-EL15a batteries.

MC-DC2 Remote Release Cord: This corded remote will allow you to trigger the shutter of the camera remotely, allowing either self-portraits or the ability to release the shutter without pressing the Shutter Button, thus preventing possible camera shake.

WR-T10 Remote Transmitter and WR-R10 Remote Controller or WR-R10 Wireless Remote Adapter Set: These wireless remote accessories will allow you to trigger the shutter of the camera remotely, allowing either self-portraits or the ability to release the shutter without pressing the Shutter Button, thus preventing possible camera shake. The WR set communicates via radio frequencies, and does not require direct line-of-sight between the camera and the remote. You can even use multiple WR-R10 receivers on multiple cameras and trigger them simultaneously with one WR-T10remote transmitter. The WR-1 Wireless Remote Controller will allow even greater wireless control over one or multiple cameras with their own WR-1 or WR-R10 units.

Nikon SB-5000 Speedlight Flash: In addition to offering all the functions of the above flash units, this top of the line Nikon Speedlight offers optical wireless control, as well as wireless radio control (when used with the WR-R10 Wireless Remote Controller). The radio control can be triggered nearly 100 feet away and does not require line-of-sight. The flash also contains a cooling system that will allow 100 or more consecutive shots at full power. The less sophisticated SB-500 is also compatible.

SU-800 Wireless Speedlight Commander: This unit is mounted on the camera’s hot shoe, and will allow you to wirelessly control and trigger one or multiple remote Speedlights.

Nikon WT-7 Wireless Transmitter: This can be used to wirelessly transmit your images and videos to an FTP server, computer, tablet, or smart-phone as you shoot, or even use the computer or smart device to remotely and wirelessly release the camera’s shutter. It also offers a wired Ethernet port for a wired (tethered) connection. You will also need Nikon’s Camera Control Pro 2 software for the tethered or wireless computer connection, which allows you to remotely change numerous camera settings.

ME-1 Stereo Microphone: An external, stereo mic to record much better sound during movie shooting that the built-in mic. The Rode VideoMic or the Rode VideoMic Pro are also good-quality affordable external stereo microphones for recording audio while shooting video. They each mount to the camera’s Hot Shoe and connect via the External Microphone connector terminal on the side of the camera. More advanced (expensive) models and lavalier mics are recommended for professional use, along with an audio mixer such as a BeachTek dSLR audio adapter, or an external audio recorder such as the Zoom H6 Portable Recorder.

Nikon Capture NX-D: If you are not using Photoshop or Lightroom, this software will enable you to process and retouch your JPEG or RAW files, and make image adjustments such as color, contrast, sharpening, and noise. This free software is available for download from the Nikon website: https://nikonimglib.com/ncnxd/

High-Speed A to C Type, HDMI to Mini-HDMI Cable: Use this HDMI cable to connect the camera to an HDMI CEC compatible TV (or other external HDMI device), and then view images, slideshows, or video from the camera.


Nikon z8 / Z7 / Nikon Z6 / Nikon Z 7II / Nikon Z 6II Accessories

Nikon EN-EL15b Rechargeable Battery or updated  EN-EL15cIt is always good to have an extra battery or two, especially when traveling, or when photographing all day, or for an event. The MB-N10 Multi-Power Battery Pack will be offered in the future, and will hold two EN-EL15bbatteries.

EH-7P Charging AC AdapterThe Z 7 includes this charging adapter, which allows you to directly charge the battery while in the camera, via a USB cable. This adapter is also compatible with the Z 6, but is not typically included. Note that the camera needs to be turned off in order for it to charge, and it will not charge older EN-EL15or EN-EL15abatteries. This adapter is compatible with the Z 6, but is not typically included.

Nikon MB-N11 Power Battery Pack with Vertical Grip: This battery grip for the Z 7II and Z 6II accepts two EN-EL15 type batteries, while also providing a vertical grip and duplicated, customizable controls including the shutter release, AF-ON Button, Fn Buttons, and Multi Selector. Note that the thumb-joystick on the grip corresponds to the Multi Selector thumbpad on the camera body, and not to the Sub-Selector joystick on the camera.

Nikon MB-N12 Power Battery Pack with Vertical Grip: This battery grip for the Z 8 accepts two EN-EL15 type batteries, while also providing a vertical grip and duplicated, customizable controls including the shutter release, AF-ON Button, Fn Buttons, and Multi Selector.

MB-N10 Multi-Power Battery Pack: This battery grip for the Z 7 and Z 6 will hold two EN-EL15b batteries. However, it does not have any camera controls.

Nikon FTZ Adapter or newer FTZ II Mount AdapterThese lens adapters will enable you to use a large number of compatible Nikon F-mount lenses and teleconverters with the Z 7 and Z 6.

MC-DC2 Remote Release CordThis corded remote will allow you to trigger the shutter of the camera remotely, allowing either self-portraits or the ability to release the shutter without pressing the Shutter Button, thus preventing possible camera shake.

WR-T10 Remote Transmitter and WR-R10 Remote ControllerThese wireless remote accessories will allow you to trigger the shutter of the camera remotely, allowing either self-portraits or the ability to release the shutter without pressing the Shutter Button, thus preventing possible camera shake. The WR set communicates via radio frequencies, and does not require direct line-of-sight between the camera and the remote. You can even use multiple WR-R10receivers on multiple cameras and trigger them simultaneously with one WR-T10remote transmitter. The WR-1 Wireless Remote Controller will allow even greater wireless control over one or multiple cameras with their own WR-1 or WR-R10 units.

Nikon SB-5000 Speedlight FlashIn addition to offering all the functions of the above flash units, this top of the line Nikon Speedlight offers optical wireless control, as well as wireless radio control (when used with the WR-R10 Wireless Remote Controller). The radio control can be triggered nearly 100 feet away and does not require line-of-sight. The flash also contains a cooling system that will allow 100 or more consecutive shots at full power. The less sophisticated SB-500is also compatible with the Z 7 and Z 6.

SU-800 Wireless Speedlight CommanderThis unit is mounted on the camera’s hot shoe, and will allow you to wirelessly control and trigger one or multiple remote Speedlights.

Nikon WT-7 Wireless Transmitter: This can be used to wirelessly transmit your images and videos to an FTP server, computer, tablet, or smart-phone as you shoot, or even use the computer or smart device to remotely and wirelessly release the camera’s shutter. It also offers a wired Ethernet port for a wired (tethered) connection. You will also need Nikon’s Camera Control Pro 2 software for the tethered or wireless computer connection, which allows you to remotely change numerous camera settings.

Nikon GP-1A GPS UnitUse this GPS receiver for automatic geotagging of your images including location, altitude data, and UTC time. Remember that you can also make use of the camera’s wireless capabilities via the SnapBridge app, to add time and location data from your smart phone to the images on the camera, and thus perform similar capabilities as a GPS device. Here is an alternate Micnova GPS receiver if the Nikon model is no longer available.

ME-1 Stereo MicrophoneAn external, stereo mic to record much better sound during movie shooting that the built-in mic. The Rode VideoMic or the Rode VideoMic Pro are also good-quality affordable external stereo microphones for recording audio while shooting video. They each mount to the camera’s Hot Shoe and connect via the External Microphone connector terminal on the side of the camera. More advanced (expensive) models and lavalier mics are recommended for professional use, along with an audio mixer such as a BeachTek dSLR audio adapter, or an external audio recorder such as the Zoom H6 Portable Recorder.

Nikon Capture NX-DIf you are not using Photoshop or Lightroom, this software will enable you to process and retouch your JPEG or RAW files, and make image adjustments such as color, contrast, sharpening, and noise. This free software is available for download from the Nikon website: https://nikonimglib.com/ncnxd/

High-Speed A to C Type, HDMI to Mini-HDMI Cable: Use this HDMI cable to connect the camera to an HDMI CEC compatible TV (or other external HDMI device), and then view images, slideshows, or video from the camera.


Nikon D850 Accessories

Nikon D850 User’s Manuals – For PDF downloads of the Nikon D850 User’s Manual and D850 Menu Guide, see the webpage and below:

http://downloadcenter.nikonimglib.com/en/products/359/D850.html

Nikon EN-EL15a Rechargeable Battery: It is always good to have an extra battery or two, especially when traveling or when photographing all day or for an event.
Nikon MB-D18 Battery Pack/ Grip: This accessory will enable you to use an additional EN-EL15a battery, or eight alkaline, lithium, or Ni-MH AA batteries, or an EN-EL18 battery with the use of the optional BL-5 Battery Chamber Cover. This allows you to shoot longer without having to change batteries, and can allow you to share EN-EL18 batteries with the Nikon D5 body. It also increases the size of the D850 body which may be more comfortable for some shooters, especially when shooting vertically in portrait orientation. There is also an MB-D18 Battery Pack kit that comes with the battery pack, plus the BL-5 Cover and an EN-EL18b battery.

MC-30 Remote Release Cord: This corded remote will allow you to trigger the shutter of the camera remotely, thus allowing either self-portraits or the ability to release the shutter without pressing the Shutter Button thus preventing possible camera shake.

WR-T10/ WR-R10 /WR-A10 Wireless Remote Controller, Transceiver, and Adapter: This wireless remote set will allow you to trigger the shutter of the camera remotely, thus allowing either self-portraits or the ability to release the shutter without pressing the Shutter Button thus preventing possible camera shake. The WR set communicates via radio frequencies, and does not require direct line-of-sight between the camera and the remote. You can even use multiple WR-R10 receivers on multiple cameras and trigger them simultaneously with one WR-T10 remote transmitter. The WR-1 Wireless Remote Controller will allow even greater wireless control over one or multiple cameras with their own WR-1 or WR-R10 units.

Nikon SB-910 or Nikon SB-700 Speedlight Flash: These external flashes will give you significant flash power and control over output and direction. They have adjustable and rotating heads so that you can use indirect and bounce flash. They can also be used as commanders to trigger remote Speedlight flashes.

Nikon SB-5000 Speedlight Flash: In addition to offering all the functions of the above flash units, this top of the line Nikon Speedlight offers optical wireless control, as well as wireless radio control (when used with the WR-A10 Wireless Remote Adapter and WR-R10 Wireless Remote Controller). The radio control can be triggered nearly 100 feet away and does not require line-of-sight. The flash also contains a cooling system that will allow 100 or more consecutive shots at full power.

SU-800 Wireless Speedlight Commander: This unit is mounted on the camera’s hot shoe, and will allow you to wirelessly control and trigger one or multiple remote Speedlights.

Nikon WT-7 Wireless Transmitter: This can be used to wirelessly transmit your images and videos to an FTP server, computer, tablet, or smart-phone as you shoot, or even use the computer or smart device to remotely and wirelessly release the camera’s shutter. It also offers a wired Ethernet port for a wired (tethered) connection. You will also need Nikon’s Camera Control Pro 2 software for the tethered or wireless computer connection, which allows you to remotely change numerous camera settings. However for certain situations and uses, an Eye-Fi SD memory card may be a more convenient and less expensive solution for wireless transmission of full sized images.

Nikon GP-1 or GP-1A GPS Unit: Use this GPS receiver for automatic geotagging of your images including location, altitude data, and UTC time. Remember that you can also make use of the camera’s wireless capabilities to add time and location data from your smart phone to the images on the camera, and thus perform similar capabilities as a GPS device.

ME-1 Stereo Microphone: An external, stereo mic to record much better sound during movie shooting that the built-in mic. The Rode VideoMic or the Rode VideoMic Pro are also good-quality affordable external stereo microphones for recording audio while shooting video. They each mount to the camera’s Hot Shoe and connect via the External Microphone connector terminal on the side of the camera. More advanced (expensive) models and lavalier mics are recommended for professional use, along with an audio mixer such as a BeachTek dSLR audio adapter, or an external audio recorder such as the Zoom H6 Portable Recorder.

Nikon ES-2 Film Digitizing Adapter Set: This accessory for digitizing negatives using your camera includes holders for 35mm film strips and slides, and attaches to the AF-S Micro 60mm f/2.8G ED lens. This can be used with the Negative Digitizer feature of the D850 (accessed via the Live View i Button Menu), to more easily “scan” your negatives.

Nikon Capture NX-D: If you are not using Photoshop or Lightroom, this software will enable you to process and retouch your JPEG or RAW files, and make image adjustments such as color, contrast, sharpening, and noise. This free software is available for download from the Nikon website. (http://nikonimglib.com/ncnxd/)

High-Speed A to C Type, HDMI to Mini-HDMI Cable: Use this HDMI cable to connect the camera to an HDMI CEC compatible TV (or other external HDMI device), and then view images, slideshows, or video from the camera. By accessing the Setup Menu item HDMI > Device control > On, you will also be able to then control the image playback using the TV remote.


Nikon D500 Accessories

Nikon EN-EL15 Rechargeable Battery: It is always good to have an extra battery or two, especially when traveling or when photographing all day or for an event. Be sure to use the newer Li-Ion20 type of EN-EL15 battery for best results. Nikon will replace your older EN-EL15 Li-ion01 batteries with the newer version, for free. See this link for further information:

https://support.nikonusa.com/app/answers/detail/a_id/19541

Nikon MB-D17 Battery Pack/ Grip: This accessory will enable you to use an additional EN-EL15 battery, or eight alkaline, lithium, or Ni-MH AA batteries, or an EN-EL18 battery with the use of the optional BL-5 Battery Chamber Cover. This allows you to shoot longer without having to change batteries, and can allow you to share EN-EL18 batteries with the Nikon D5 body. It also increases the size of the D500 body which may be more comfortable for some shooters, especially when shooting vertically in portrait orientation.

MC-30 Remote Release Cord: This corded remote will allow you to trigger the shutter of the camera remotely, thus allowing either self-portraits or the ability to release the shutter without pressing the Shutter Button thus preventing possible camera shake.

WR-T10/ WR-R10 /WR-A10 Wireless Remote Controller, Transceiver, and Adapter: This wireless remote set will allow you to trigger the shutter of the camera remotely, thus allowing either self-portraits or the ability to release the shutter without pressing the Shutter Button thus preventing possible camera shake. The WR set communicates via radio frequencies, and does not require direct line-of-sight between the camera and the remote. You can even use multiple WR-R10 receivers on multiple cameras and trigger them simultaneously with one WR-T10 remote transmitter. The WR-1 Wireless Remote Controller will allow even greater wireless control over one or multiple cameras with their own WR-1 or WR-R10 units.

Nikon SB-910 or Nikon SB-700 Speedlight Flash: These external flashes will give you significant flash power and control over output and direction. They have adjustable and rotating heads so that you can use indirect and bounce flash. They can also be used as commanders to trigger remote Speedlight flashes.

Nikon SB-5000 Speedlight Flash: In addition to offering all the functions of the above flash units, this top of the line Nikon Speedlight offers optical wireless control, as well as wireless radio control (when used with using the WR-A10 Wireless Remote Adapter and WR-R10 Wireless Remote Controller). The radio control can be triggered nearly 100 feet away and does not require line-of-sight. The flash also contains a cooling system that will allow 100 or more consecutive shots at full power.

SU-800 Wireless Speedlight Commander: This unit is mounted on the camera’s hot shoe, and will allow you to wirelessly control and trigger one or multiple remote Speedlights.

Nikon WT-7A Wireless Transmitter: This can be used to wirelessly transmit your images and videos to an FTP server, computer, tablet, or smart-phone as you shoot, or even use the computer or smart device to remotely and wirelessly release the camera’s shutter. It also offers a wired Ethernet port for a wired (tethered) connection. You will also need Nikon’s Camera Control Pro 2 software for the tethered or wireless computer connection, which allows you to remotely change numerous camera settings. However for certain situations and uses, an Eye-Fi SD memory card may be a more convenient and less expensive solution for wireless transmission of full sized images.

Nikon GP-1 or GP-1A GPS Unit: Use this GPS receiver for automatic geotagging of your images including location, altitude data, and UTC time. Remember that you can also make use of the camera’s wireless capabilities to add time and location data from your smart phone to the images on the camera, and thus perform similar capabilities as a GPS device.

ME-1 Stereo Microphone: An external, stereo mic to record much better sound during movie shooting that the built-in mic. The Rode VideoMic or the Rode VideoMic Pro are also good-quality affordable external stereo microphones for recording audio while shooting video. They each mount to the camera’s Hot Shoe and connect via the External Microphone connector terminal on the side of the camera. More advanced (expensive) models and lavalier mics are recommended for professional use, along with an audio mixer such as one of the BeachTek Audio Adapters, or an external audio recorder such as the Zoom H6 Portable Recorder.

Nikon Capture NX-D: If you are not using Photoshop or Lightroom, this software will enable you to process and retouch your JPEG or RAW files, and make image adjustments such as color, contrast, sharpening, and noise. This free software is available for download from the Nikon website: http://nikonimglib.com/ncnxd/#

High-Speed A to C Type, HDMI to Mini-HDMI Cable: Use this HDMI cable to connect the camera to an HDMI CEC compatible TV (or other external HDMI device), and then view images, slideshows, or video from the camera. By accessing the Setup Menu item HDMI > Device control > On, you will also be able to then control the image playback using the TV remote.

Lexar 64GB Professional 2933x XQD card: The maximum continuous burst capacity specifications given by Nikon for the D500 are based on the use of this card. When set for RAW L image files and DX Image Area, this XQD card can capture up to the maximum 200 14-bit lossless compressed or 12-bit uncompressed images, without filling the buffer and having to pause. Sony also offers numerous XQD cards that are compatible with the D500, as listed on page 385 of the Nikon D500 User’s Manual.

SanDisk Extreme Pro UHS-II 280MBs SD: This is a very fast SD type card that appears to be working well with the D500. There have been issues reported with SD cards from Lexar and Transcend, which are caused by the card and not the camera. Nikon has released a firmware update that creates a workaround for errors when using a problematic UHS-II card, though it reverts to using it as a slower UHS-I card. The memory card manufacturers are working to resolve this issue.


Nikon D750 Accessories

Nikon EN-EL15 Rechargeable Battery: It is always good to have an extra battery or two, especially when traveling or when photographing all day or for an event.

Nikon MB-D16 Battery Pack/ Grip: This accessory will enable you to use a second EN-EL15 battery or else use six AA batteries, thus allowing you to shoot longer without having to change batteries. It also increases the size of the D750 body which may be more comfortable for some shooters, especially when shooting vertically in portrait orientation.

MC-DC2 Remote Release Cord: This corded remote will allow you to trigger the shutter of the camera remotely, thus allowing either self-portraits or the ability to release the shutter without pressing the Shutter Button thus preventing possible camera shake.

WR-R10/ WR-T10 Wireless Remote Controller and Transceiver: This wireless remote will allow you to trigger the shutter of the camera remotely, thus allowing either self-portraits or the ability to release the shutter without pressing the Shutter Button thus preventing possible camera shake. The WR set communicates via radio frequencies, and does not require direct line-of-sight between the camera and the remote. You can even use multiple WR-R10 receivers on multiple cameras and trigger them simultaneously with one WR-T10 remote transmitter. The WR-1 Wireless Remote Controller will allow even greater wireless control over one or multiple cameras with their own WR-1 or WR-R10 units.

Nikon SB-910 or Nikon SB-700 Speedlight Flash: These external flashes will give you significant flash power and control over output and direction. They have adjustable and rotating heads so that you can use indirect and bounce flash. They can also be used as commanders to trigger remote Speedlight flashes.

Nikon SB-5000 Speedlight Flash: In addition to offering all the functions of the above flash units, this top of the line Nikon Speedlight offers optical wireless control, as well as wireless radio control (when used with using the WR-A10 Wireless Remote Adapter and WR-R10 Wireless Remote Controller). The radio control can be triggered nearly 100 feet away and does not require line-of-sight. The flash also contains a cooling system that will allow 100 or more consecutive shots at full power.

SU-800 Wireless Speedlight Commander: This unit is mounted on the camera’s hot shoe, and will allow you to wirelessly control and trigger one or multiple remote Speedlights.

Nikon WT-5A Wireless Transmitter with the Nikon UT-1 Communication Unit: These can be used together to wirelessly transmit your images to a computer, tablet, or smart-phone as you shoot, or even use the computer or smart device to remotely and wirelessly release the camera’s shutter. The two units can also be purchased together: WT-5A and UT-1. You will also need Nikon’s Camera Control Pro 2 software for the tethered or wireless computer connection. The Nikon UT-1 Communication Unit when used alone will allow you to connect the camera to a computer or FTP server via an Ethernet cable, rather than wirelessly. However for certain situations and uses, an Eye-Fi SD memory card may be a more convenient and less expensive solution for wireless transmission.

Nikon GP-1 or GP-1A GPS Unit: Use this GPS receiver for automatic geotagging of your images including location, altitude data, and UTC time.

ME-1 Stereo Microphone: An external, stereo mic to record much better sound during movie shooting that the built-in mic. The Rode VideoMic or the Rode VideoMic Pro are also good-quality affordable external stereo microphones for recording audio while shooting video. They each mount to the camera’s Hot Shoe and connect via the External Microphone connector terminal on the side of the camera. More advanced (expensive) models and lavalier mics are recommended for professional use, along with an audio mixer such as the BeachTek DXA-SLR Pro Audio Adapter, or Mini Pro version, or an external audio recorder such as the Zoom H6 Portable Recorder.

Nikon Capture NX-D: If you are not using Photoshop, this software will enable you to process and retouch your JPEG or RAW files, and make image adjustments such as color, contrast, sharpening, and noise. This free software is available for download from the Nikon website: http://nikonimglib.com/ncnxd/#

High-Speed A to C Type, HDMI to Mini-HDMI Cable: Use this HDMI cable to connect the camera to an HDMI CEC compatible TV (or other external HDMI device), and then view images, slideshows, or video from the camera. By accessing the Setup Menu item HDMI > Device control > On, you will also be able to then control the image playback using the TV remote.


Nikon D810 Accessories

Nikon EN-EL15 Rechargeable Battery: It is always good to have an extra battery or two, especially when traveling or when photographing all day or for an event.

Nikon MB-D12 Battery Pack/ Grip: This accessory will enable you to use a second EN-EL15 battery or else use eight AA batteries, thus allowing you to shoot longer without having to change batteries. It also increases the size of the D810 body which may be more comfortable for some shooters, especially when shooting vertically in portrait orientation. And its use with AA batteries will enable the maximum 7 frames per second continuous shooting speed when using DX Image Area. If you wish to use the larger EN-EL18 battery (used with the D4 body) with this MB-D12 battery grip, you can purchase the optional BL-5 Battery Chamber Cover which accepts the EN-EL18 battery.

MC-DC2 Remote Release Cord: This corded remote will allow you to trigger the shutter of the camera remotely, thus allowing either self-portraits or the ability to release the shutter without pressing the Shutter Button thus preventing possible camera shake.

MC-30A Remote Release Cord: Another basic corded remote release, with a larger thumb button that enables you to hold it down to keep the shutter open for Bulb shooting.

MC-36a Remote Shutter Release Cord: A multi-function corded remote for shutter release with an intervalometer, which attaches via the ten-pin connector.

WR-R10/ WR-T10 Wireless Remote Controller and Transceiver: This wireless remote will allow you to trigger the shutter of the camera remotely, thus allowing either self-portraits or the ability to release the shutter without pressing the Shutter Button thus preventing possible camera shake. The WR set communicates via radio frequencies, and thus does not require direct line-of-sight between the camera and the remote. You can even use multiple WR-R10 receivers on multiple cameras and trigger them simultaneously with one WR-T10 remote transmitter. The WR-1 Wireless Remote Controller will allow even greater wireless control over one or multiple cameras with their own WR-1 or WR-R10 units.

Nikon SB-910 or Nikon SB-700 Speedlight Flash: These external flashes will give you significant flash power and control over output and direction. They have adjustable and rotating heads so that you can use indirect and bounce flash. They can also be used as commanders to trigger remote Speedlight flashes.

Nikon SB-5000 Speedlight Flash: In addition to offering all the functions of the above flash units, this top of the line Nikon Speedlight offers optical wireless control, as well as wireless radio control (when used with using the WR-A10 Wireless Remote Adapter and WR-R10 Wireless Remote Controller). The radio control can be triggered nearly 100 feet away and does not require line-of-sight. The flash also contains a cooling system that will allow 100 or more consecutive shots at full power.

SU-800 Wireless Speedlight Commander: This unit is mounted on the camera’s hot shoe, and will allow you to wirelessly control and trigger one or multiple remote Speedlights.

Nikon WT-5A Wireless Transmitter with the Nikon UT-1 Communication Unit: These can be used together to wirelessly transmit your images to a computer, tablet, or smart-phone as you shoot, or even use the computer or smart device to remotely and wirelessly release the camera’s shutter. The two units can also be purchased together: WT-5A and UT-1. You will also need Nikon’s Camera Control Pro 2 software for the tethered or wireless computer connection. The Nikon UT-1 Communication Unit when used alone will allow you to connect the camera to a computer or FTP sever via an Ethernet cable, rather than wirelessly. However for certain situations and uses, an Eye-Fi SD memory card may be more convenient and less expensive.

Nikon GP-1 or GP-1A GPS Unit: Use this GPS receiver for automatic geotagging of your images including location, altitude data, and UTC time.

ME-1 Stereo Microphone: An external, stereo mic to record much better sound during movie shooting that the built-in mic. The Rode VideoMic or the Rode VideoMic Pro are also good-quality affordable external stereo microphones for recording audio while shooting video. They each mount to the camera’s Hot Shoe and connect via the External Microphone connector terminal on the side of the camera. More advanced (expensive) models and lavalier mics are recommended for professional use, along with an audio mixer such as the BeachTek DXA-SLR Pro Audio Adapter, or Mini Pro version, or an external audio recorder such as the Zoom H6 Portable Recorder.

Nikon Capture NX-D: If you are not using Photoshop, this software will enable you to process and retouch your JPEG, TIFF, or RAW files, and make image adjustments such as color, contrast, sharpening, and noise. This free software is available for download from the Nikon website: http://nikonimglib.com/ncnxd/#

High-Speed A to C Type, HDMI to Mini-HDMI Cable: Use this HDMI cable to connect the camera to an HDMI CEC compatible TV, and then view images and slideshows from the camera. By accessing the Setup Menu item HDMI > Device control > On, you will also be able to then control the image playback using the TV remote.

Nikon D810 dSLR Filmmaker’s Kit: This package, costing about $5,000, includes the D810 camera plus everything one needs to get started with dSLR HD filmmaking. In addition to the body, the kit includes three prime lenses which are all f/1.8 (35mm, 50mm, 85mm), a video recorder with HDMI cable, the ME-1 Stereo microphone, variable ND filters so that you can take advantage of wide apertures even in brighter lighting, and two EN-EL15 batteries.

Sandisk Extreme CF Memory Cards: I suggest getting a couple 32 GB or higher CompactFlash (CF) cards to store your photos – more if traveling. Be sure to check the Sandisk site for current rebates. This card’s speed is 120 MB/s, so to achieve the buffer rates of the D810 listed in the manual you will need to use the CF card listed just below.

SanDisk Extreme Pro UMDA 7 CF Memory Card: For an even faster CF memory card, look at the Extreme Pro version, which is rated at 160 MB/s, higher than the 120 MB/s speed of the Extreme CF cards. This is the minimum card needed to achieve the buffer capacity rates listed in the D810 manual on page 489.

SanDisk Extreme Pro SDHC UHS-I SD Memory Cards: If you plan to use the camera’s SD card slot, I suggest getting a couple 32GB or higher capacity Secure Digital (SD) cards to capture and store your photos – more if traveling. Review the various ways that the camera’s two memory card slots can be used with the Primary slot selection and Secondary slot function items of the Shooting Menu. Again, be sure to check the SanDisk site for current rebates. This card is rated at 95 MB/s speed, so you may need the above CF card to achieve the maximum the buffer capacity of the D810.


Nikon D7500 / D7200 / D7100 Accessories

Nikon EN-EL15 Rechargable Battery: It is always good to have an extra battery or two, especially when traveling or when photographing all day or for an event.

Nikon MB-D15 Battery Pack/ Grip: This accessory will enable you to use a second EN-EL15 battery or else use AA batteries, thus allowing you to shoot longer without having to change batteries. It also increases the size of the D7100 body which may be more comfortable for some shooters, especially when shooting vertically in portrait orientation.

Nikon ML-L3 Wireless Remote Controller or WR-R10/ WR-T10 Wireless Remote Controller and Transceiver: These wireless remotes will allow you to trigger the shutter of the camera remotely, thus allowing either self-portraits or the ability to release the shutter without pressing the Shutter Button thus preventing possible camera shake. The WR set communicates via radio frequencies, and thus does not require direct line-of-sight between the camera and the remote. You can even use multiple WR-R10 receivers on multiple cameras and trigger them simultaneously with one WR-T10 remote transmitter. The new WR-1 Wireless Remote Controller will allow even greater wireless control over one or multiple cameras with their own WR-1 or WR-R10 unit.

MC-DC2 Remote Release Cord: This remote will allow you to trigger the shutter of the camera remotely, but is attached to the camera via a cable, rather than being wireless.

Nikon SB-910 (or SB-900, SB-800, SB-700, SB-600, SB-500) Speedlight Flash: These external flashes will give you greatly increased flash power and control compared to the built-in flash. They also have adjustable and rotating heads so that you can use indirect and bounce flash. All of them can be used as remote flashes controlled by the built-in flash, and with the exception of the SB-600 all can be used as commanders to trigger remote flashes.

Nikon SB-5000 Speedlight Flash: In addition to offering all the functions of the above flash units, this top of the line Nikon Speedlight offers optical wireless control, as well as wireless radio control (when used with using the WR-A10 Wireless Remote Adapter and WR-R10 Wireless Remote Controller). The radio control can be triggered nearly 100 feet away and does not require line-of-sight. The flash also contains a cooling system that will allow 100 or more consecutive shots at full power.

Nikon WU-1a Wireless Mobile Adapter: This can be used to wirelessly transmit your images to a tablet or smart-phone as you shoot, share your images, or even use your smart phone or tablet to remotely release the camera’s shutter – all with Nikon’s Wireless Mobile Adapter Utility app:

Nikon GP-1 GPS Unit: / GP-1A GPS Unit (check compatibly with your camera here.) Use this GPS receiver for automatic geotagging of your images including location, altitude data, and UTC time.

Nikon ME-1 Stereo Microphone: An external, stereo mic to record much better sound during movie shooting that the built-in mic. Other options include the Rode VideoMic or the Rode VideoMic Pro, which are good-quality affordable external stereo microphones for recording audio while shooting video. They mount to the camera’s Hot Shoe.

UT-1 Communication Unit: This unit is used with an Ethernet cable or wirelessly with the WT-5a Wireless Transmitter to connect to a network and transfer images to a computer or server, or to control the camera remotely from your computer. You can also purchase these two units, the UT-1 and WT-5a as a bundle.

Nikon Capture NX2: If you are not using Photoshop, this software will enable you to process and retouch your JPEG or RAW files, and correct things such color, contrast, and sharpening.


Nikon D7000 Accessories

Nikon EN-EL15 Rechargable Battery: It is always good to have an extra battery or two, especially when traveling or when photographing all day or for an event.

Nikon MB-D11 Battery Pack/ Grip: This accessory will enable you to use a second EN-EL15 battery or else use AA batteries, thus allowing you to shoot longer without having to change batteries. It also increases the size of the D7000 body which may be more comfortable for some shooters, especially when shooting vertically in portrait orientation.

Nikon ML-L3 Wireless Remote or MC-DC2 Remote Release Cord: These remotes will allow you to trigger the shutter of the camera remotely, thus allowing either self-portraits or the ability to release the shutter without pressing the Shutter Button thus preventing possible camera shake.

Nikon SB-910, SB-900, SB-800, SB-700, or SB-600 Speedlight Flashes: These external flashes will give you greatly increased flash power and control compared to the built-in flash. They also have adjustable and rotating heads so that you can use indirect and bounce flash. All of them can be used as remote flashes controlled by the built-in flash, and with the exception of the SB-600 all can be used as commanders to trigger remote flashes.

Nikon WT-4A Wireless Transmitter: This can be used to wirelessly transmit your images to a computer as you shoot. However for certain situations and uses, an Eye-Fi SD memory card may be more convenient.

Nikon Capture NX2: If you are not using Photoshop, this software will enable you to process and retouch your JPEG or RAW files, and correct things such color, contrast, and sharpening.


Nikon D5600 / D5500 / D5300 / D5200 / D5100 Accessories

Nikon EN-EL14a Rechargable Battery: It is always good to have an extra battery or two, especially when traveling or when photographing all day or for an event.

Battery Pack/ Grip: This third-party accessory will enable you to use two EN-EL14a batteries, thus allowing you to shoot longer without having to change batteries. It also increases the size of the D5600 body which may be more comfortable for some shooters, especially when shooting vertically in portrait orientation.

Nikon ML-L3 Wireless Remote Controller or WR-R10/ WR-T10 Wireless Remote Controller and Transceiver: These wireless remotes will allow you to trigger the shutter of the camera remotely, thus allowing either self-portraits or the ability to release the shutter without pressing the Shutter Button thus preventing possible camera shake. The WR set communicates via radio frequencies, and thus does not require direct line-of-sight between the camera and the remote. You can even use multiple WR-R10 receivers on multiple cameras and trigger them simultaneously with one WR-T10 remote transmitter.

MC-DC2 Remote Release Cord: This remote will allow you to trigger the shutter of the camera remotely, but is attached to the camera via a cable, rather than being wireless.

Nikon GP-1 or GP-1A GPS Unit: Use this GPS receiver for automatic geotagging of your images including location, altitude data, and UTC time.

Nikon SB-910 or SB-700 Speedlight Flash: These external flashes will give you greatly increased flash power and control compared to the built-in flash. They also have adjustable and rotating heads so that you can use indirect and bounce flash. And they can be used as commanders to control and trigger multiple remote flashes.

Nikon WU-1a Wireless Mobile Adapter: (Nikon D5200, D7100, D3200 and later cameras only) This can be used to wirelessly transmit your images to a tablet or smart-phone as you shoot, share your images, or even use your smart phone or tablet to remotely release the camera’s shutter – all with Nikon’s Wireless Mobile Adapter Utility app:

Nikon GP-1 GPS Unit: / GP-1A GPS Unit (check compatibly with your camera here.) (Not needed for D5300) Use this GPS receiver for automatic geotagging of your images including location, altitude data, and UTC time. Using this accessory, you images will also be automatically located on a map, such as when uploaded to the Flickr photo website.

ME-1 Stereo Microphone or ME-W1 Wireless Microphone: External, stereo mics to record much better sound during movie shooting that the built-in mic. The Rode VideoMic or the Rode VideoMic Pro are also good-quality affordable external stereo microphones for recording audio while shooting video. They each mount to the camera’s Hot Shoe and connect via the External Microphone connector terminal on the side of the camera.

Nikon Capture NX-D: If you are not using Photoshop or Lightroom, this software will enable you to process and retouch your JPEG or RAW files, and make image adjustments such as color, contrast, sharpening, and noise. This free software is available for download from the Nikon website: http://nikonimglib.com/ncnxd/#

High-Speed A to C Type, HDMI to Mini-HDMI Cable: Use this HDMI cable to connect the D5600 to an HDMI CEC compatible TV, and then view movies, images, and slideshows from the camera. By accessing the Playback Menu item HDMI > Device control > On, you will also be able to then control the image or video playback using the TV remote. Note that movies may not display properly, depending on the Frame size / Frame rate settings at which they were recorded.


Nikon D610 / D600 Accessories

Nikon EN-EL15 Rechargable Battery: It is always good to have an extra battery or two, especially when traveling or when photographing all day or for an event.

Nikon MB-D14 Battery Pack/ Grip: This accessory will enable you to use a second EN-EL15 battery or else use AA batteries, thus allowing you to shoot longer without having to change batteries. It also increases the size of the D600 body which may be more comfortable for some shooters, especially when shooting vertically in portrait orientation.

Nikon ML-L3 Wireless Remote or MC-DC2 Remote Release Cord: These remotes will allow you to trigger the shutter of the camera remotely, thus allowing either self-portraits or the ability to release the shutter without pressing the Shutter Button thus preventing possible camera shake.

Nikon SB-910 (or SB-900, SB-800, SB-700, SB-600, SB-500) Speedlight Flash: These external flashes will give you greatly increased flash power and control compared to the built-in flash. They also have adjustable and rotating heads so that you can use indirect and bounce flash. All of them can be used as remote flashes controlled by the built-in flash, and with the exception of the SB-600 all can be used as commanders to trigger remote flashes.

Nikon SB-5000 Speedlight Flash: In addition to offering all the functions of the above flash units, this top of the line Nikon Speedlight offers optical wireless control, as well as wireless radio control (when used with using the WR-A10 Wireless Remote Adapter and WR-R10 Wireless Remote Controller). The radio control can be triggered nearly 100 feet away and does not require line-of-sight. The flash also contains a cooling system that will allow 100 or more consecutive shots at full power.

Nikon WU-1b Wireless Mobile Adapter: This can be used to wirelessly transmit your images to a tablet or smart-phone as you shoot, or even use the smart device to remotely release the shutter. However for certain situations and uses, an Eye-Fi SD memory card may be more convenient.

Nikon GP-1 GPS Unit: / GP-1A GPS Unit (check compatibly with your camera here.) Use this GPS receiver for automatic geotagging of your images including location, altitude data, and UTC time.

ME-1 Stereo Microphone: An external, stereo mic to record much better sound during movie shooting that the built-in mic.

Nikon Capture NX2: If you are not using Photoshop, this software will enable you to process and retouch your JPEG or RAW files, and correct things such color, contrast, and sharpening.


Nikon Df Accessories

Nikon Df User’s Manual – For a PDF download of the Nikon Df manual, see the webpage below:

https://support.nikonusa.com/app/answers/detail/a_id/18767

AF-S NIKKOR 50mm f/1.8G Special Edition Lens: This lens, with its silver ring, is specifically designed to match the retro-style of the Df – though it contains the same optics of the non-special AF-S 50mm f/1.8 lens.

Nikon EN-EL14a Rechargeable Battery: It is always good to have an extra battery or two, especially when traveling or when photographing all day or for an event.

WR-R10/ WR-T10 Wireless Remote Controller and Transceiver: This wireless remote will allow you to trigger the shutter of the camera remotely, thus allowing either self-portraits or the ability to release the shutter without pressing the Shutter Button thus preventing possible camera shake. The WR set communicates via radio frequencies, and thus does not require direct line-of-sight between the camera and the remote. You can even use multiple WR-R10 receivers on multiple cameras and trigger them simultaneously with one WR-T10 remote transmitter. The new WR-1 Wireless Remote Controller will allow even greater wireless control over one or multiple cameras with their own WR-1 or WR-R10 units.

AR-3 Cable Release Cord: This remote will allow you to trigger the shutter of the camera remotely, but is attached to the camera via a cable, rather than being wireless. In keeping with the styling of the Df, it is a “retro” cable-release with a plunger.

MC-DC2 Remote Release Cord: This is also a straightforward corded remote used to trigger the shutter of the camera, and is plugged into the Accessory Terminal of the Df.

Nikon SB-910 or Nikon SB-700 Speedlight Flash: These external flashes will give you significant flash power and control over output and direction. They have adjustable and rotating heads so that you can use indirect and bounce flash. They can also be used as commanders to trigger remote Speedlight flashes.

Nikon SB-400 Speedlight: This is a much smaller and less powerful flash than the versatile SB-910, and is closer to the strength of a typical built-in flash. However you can angle it for bounce-flash purposes.

SU-800 Wireless Speedlight Commander: This unit is mounted on the camera’s hot shoe, and will allow you to wirelessly control and trigger one or multiple remote Speedlights.

Nikon WU-1a Wireless Mobile Adapter: This can be used to wirelessly transmit your images to a tablet or smart-phone as you shoot, share your images, or even use your smart phone or tablet to remotely autofocus and release the camera’s shutter.

Wireless Mobile Utility: To get started with Wi-Fi, you will also need to download Nikon’s Wireless Mobile Utility app, which is available for both iOS and Android. Note that the iPad app is available as an “iPhone Only” app in the Apple App Store, though it can still be used on the iPad. You can find links to both versions of the app below, along with links to both versions of the Wireless Mobile Utility User’s Manuals:

Nikon GP-1A GPS Unit: Use this GPS receiver for automatic geotagging of your images including location, altitude data, and UTC time.

Nikon Capture NX2: If you are not using Photoshop, this software will enable you to process and retouch your JPEG or RAW files, and correct things such color, contrast, sharpening, and noise. This version is in the process of being replaced with Capture NX-D.

CF-DC6 Semi-Soft Case or CF-DC5 Semi-Soft Case: The CF-DC6 is a retro-styled leatherette case specially designed for the Df, and is available in Black or in light Brown. The CF-DC5 is of a more contemporary style and materials.

Leather Strap in Black or in Brown: You can pair the retro-styled CF-DC6 case with a leather strap, available in similar colors.

Gariz Leather Half-Case: There is also a very nice looking leather half-case by a third-party named Gariz. It is available in black and brown, and covers the grip area and lower part of the Df body, but also allows you to open and access the battery/ memory card compartment and the side terminal covers, without removing the case. It lengthens the body of the camera in order to provide a replacement tripod socket (since the camera’s is used for attaching the case), and perhaps to enlarge the camera to offer a better grip.

Screen Protectors: This pair of screen protectors is specifically sized for the LCD screens of the Df. While I have not personally used them, and thus cannot vouch for their quality or usefulness, previous versions of this brand have gained good reviews.

High-Speed A to C Type, HDMI to Mini-HDMI Cable: Use this HDMI cable to connect the Df to an HDMI CEC compatible TV, and then view images and slideshows from the camera. By accessing the Setup Menu item HDMI > Device control > On, you will also be able to then control the image playback using the TV remote.


Nikon D3300 Accessories

Nikon D3300 Manuals: The D3300 Reference Manual can be obtained as a PDF file from the Nikon website at this link:

https://support.nikonusa.com/app/answers/detail/a_id/18824

Nikon WU-1a Wireless Mobile Adapter: This can be used to wirelessly transmit your images to a tablet or smart-phone as you shoot, to share your images, or even to use your smart phone or tablet to remotely release the camera’s shutter – all with Nikon’s Wireless Mobile Adapter Utility app.

Wireless Mobile Utility:To get started with Wi-Fi, you will first need to download Nikon’s Wireless Mobile Utility app, which is available for both iOS and Android. Note that the iPad app is available as an “iPhone Only” app in the Apple App Store, though it can still be used on the iPad. You can find links to both versions of the app below, along with links to both versions of the Wireless Mobile Utility User’s Manuals:

Nikon EN-EL14a Rechargeable Battery: It is always good to have an extra battery or two, especially when traveling or when photographing all day or for an event.

Battery Pack/ Grip: This third-party accessory will enable you to use two EN-EL14a batteries, thus allowing you to shoot longer without having to change batteries. It also increases the size of the D3300 body which may be more comfortable for some shooters, especially when shooting vertically in portrait orientation.

Nikon ML-L3 Wireless Remote Controller or WR-R10/ WR-T10 Wireless Remote Controller and Transceiver: These wireless remotes will allow you to trigger the shutter of the camera remotely, thus allowing either self-portraits or the ability to release the shutter without pressing the Shutter Button thus preventing possible camera shake. The WR set communicates via radio frequencies, and thus does not require direct line-of-sight between the camera and the remote. You can even use multiple WR-R10 receivers on multiple cameras and trigger them simultaneously with one WR-T10 remote transmitter. The new WR-1 Wireless Remote Controller will allow even greater wireless control over one or multiple cameras with their own WR-1 or WR-R10 unit.

MC-DC2 Remote Release Cord: This remote will allow you to trigger the shutter of the camera remotely, but is attached to the camera via a cable, rather than being wireless.

DK-5 Eyepiece Cap:When using any of the Release Modes such as Self-Timer or Remote, where your eye is not at the Viewfinder, be sure to cover the Viewfinder with a piece of tape or this optional eyepiece cap in order to prevent stray light from entering the camera and modifying the exposure settings.

Nikon SB-910 or SB-700 Speedlight Flash: These external flashes will give you greatly increased flash power and control compared to the built-in flash. They also have adjustable and rotating heads so that you can use indirect and bounce flash. And they can be used as remote flashes triggered by the built-in flash, and as commanders to control and trigger multiple remote flashes.

ME-1 Stereo Microphone: An external, stereo mic to record much better sound during movie shooting that the built-in mic. The Rode VideoMic or the Rode VideoMic Pro are also good-quality affordable external stereo microphones for recording audio while shooting video. They each mount to the camera’s Hot Shoe and connect via the External Microphone connector terminal on the side of the camera.

Nikon Capture NX2: If you are not using Photoshop, this software will enable you to process and retouch your JPEG or RAW files, and correct things such color, contrast, and sharpening.

High-Speed A to C Type, HDMI to Mini-HDMI Cable: Use this HDMI cable to connect the D3300 to an HDMI CEC compatible TV, and then view movies, images, and slideshows from the camera. By accessing the Playback Menu item HDMI > Device control > On, you will also be able to then control the image or video playback using the TV remote. Note that movies may not display properly, depending on the Frame size / Frame rate settings at which they were recorded.


Canon EOS R / EOS R7 / EOS R6II/ EOS R8 Accessories

Canon LP-E6N Battery or the current Canon LP-E6NH Battery: It is always good to have an extra battery or two, especially when traveling or when photographing all day or for an event.

Canon LP-E17 Battery for the EOS R8

Canon BG-E22 Battery Grip: This optional battery pack and grip for the EOS R will enable you to use two LP-E6N batteries, thus allowing you to shoot longer without having to change batteries. (No official Canon grip is available for the EOS R7.) The grip replicates the controls of the body and also increases the size of the EOS R body which may be more comfortable for some shooters, especially when using the camera in the vertical position. Note that there is a firmware update for the BG-E22 Battery Grip:

https://www.usa.canon.com/internet/portal/us/home/support/details/supplies-accessories/batteries-grips/battery-grip-bg-e22?tab=drivers_downloads

Canon EF-EOS R Mount Adapters: Canon offers three EF to EOS R mount adapters, which enable you to use EF and EF-S lenses with the EOS R mirrorless models, as well as extenders. The adapters are dust and weather sealed. One is a basic EF-EOS R adapter, the Canon Mount Adapter EF-EOS R. One includes a Control Ring similar to the one on the RF lenses, the Canon Control Ring Mount Adapter EF-EOS R. And the Canon Drop-In Filter Mount Adapter EF-EOS R allows for the use of a drop-in filter, including a variable ND filter or a circular polarizing filter. This adapter can be purchased with the Circular Polarizing Filter, with the Variable ND Filter, and you can separately purchase just the Variable ND Filter or just the Circular Polarizing Filter.

Canon Remote Switch RS-60E3Canon Wireless Remote Control RC-6or the Bluetooth Canon BR-E1 Wireless Remote Controller: These remotes will allow you to trigger the shutter of the camera remotely, allowing either self-portraits or the ability to release the shutter without pressing the Shutter Button thus preventing possible camera shake. Note that you must pair the BR-E1 remote with the camera, by first setting the Setup 5 Menu > Wireless Communication Settings > Bluetooth Function > Remoteoption. Then select the Pairing item in the Bluetooth Function menu, and simultaneously press and hold the W and Tbuttons on the remote, for 3 seconds. Infrared remote controllers such at the RC-6 are not compatible with the EOS R.

Canon Speedlite EL-1: This is the newest flagship flash, which replaces the 600EX-II-RT. This external flash will give you the most flash power and control of the Canon Speedlites, as well as continuous shooting support. It has an adjustable and rotating head so that you can use indirect and bounce flash, and includes a diffuser plus color filters for white balance. It also allows optical wireless functionality plus is compatible with the radio wave wireless flash system when controlled and triggered by the Speedlite Transmitter ST-E3-RT.

Canon Speedlite EL-5: This is a non-professional version of the EL-1 external flash. The EL-5 will provide less flash power and control, and fewer features than the top-of-the-line EL-1, however it may meet your needs if you don’t make extensive use of a flash. It also has an adjustable and rotating head so that you can use indirect and bounce flash. It allows optical wireless functionality plus is compatible with Canon’s radio wave wireless flash system when controlled and triggered by the Speedlite Transmitter ST-E3-RT.

Canon Speedlite 600EX II-RT: This external flash will give you the most flash power and control of the Canon Speedlites, as well as continuous shooting support. It has an adjustable and rotating head so that you can use indirect and bounce flash, and includes a diffuser plus color filters for white balance. The 600EX II-RT also allows optical wireless functionality plus is compatible with the radio wave wireless flash system when controlled and triggered by the Speedlite Transmitter ST-E3-RT.

Speedlite Transmitter ST-E3-RT: Use this radio wave wireless transmitter to control and trigger up to 5 groups of 15 flashes, up to 30 meters, with no line-of-site required. Compatible with the Canon 600EX II-RT Speedlite.

Note that either the 600EX II-RT Speedlite or the ST-E3-RT Transmitter can also act as a remote camera trigger for the EOS R. If either one of these units is in the Hot Shoe of the EOS R, another one of these units can fire the camera remotely, for a single frame, with the press of a button.

Speedlite 430EX III-RT external flash will provide less flash power and control, and fewer features than the top of the line 600EX II-RT, however it may meet your needs if you don’t make extensive use of a flash. It also has an adjustable and rotating head so that you can use indirect and bounce flash. The 430EX III-RT allows optical wireless functionality plus is compatible with Canon’s radio wave wireless flash system when controlled and triggered by the Speedlite Transmitter ST-E3-RT or a 600EX II-RT. And the 430EX III-RT offers an optional bounce adapter and color filter.

Speedlite 470EX-AI external flash has an auto-intelligent bounce function, meaning that the flash head will rotate and swivel automatically, to be positioned at the best angle for bounce flash, based on the subject distance and ceiling height. The 470EX-AI also allows optical wireless functionality.

Canon HTC-100 HDMI cable or a similar HDMI cable Use this HDMI cable to connect the EOS R to an HDMI CEC compatible TV, and then view movies, images, and slideshows from the camera.

WFT-E7A Wireless File Transmitter Version 2: This optional device enables fast wireless or wired Ethernet transfer of images from the camera to a computer or smart device such as an iPad or tablet. It also offers remote control and linked shooting capabilities, and offers built-in Bluetooth function.

Canon GPS Receiver GP-E2: This optional device can be used to automatically geotag your images with location data. If you are using the GP-E2, be sure to update its firmware to the latest version (Version 2.0.0 or later).


Canon 5D Mark IV Accessories and Canon 5DS / 5DS R Accessories

Canon LP-E6N Battery: It is always good to have an extra battery or two, especially when traveling or when photographing all day or for an event.

Canon BG-E20 Battery Grip: This optional battery pack and grip for the 5DIV will enable you to use two LP-E6N batteries, thus allowing you to shoot longer without having to change batteries. The grip replicates the controls of the body and also increases the size of the 5D Mark IV body which may be more comfortable for some shooters, especially when using the camera in the vertical position.

Canon Remote Switch RS-80N3 or Canon Wireless Remote Control RC-6: These remotes will allow you to trigger the shutter of the camera remotely, allowing either self-portraits or the ability to release the shutter without pressing the Shutter Button thus preventing possible camera shake. There is also the Timer Remote Controller TC-80N3 for time-lapse or long exposure photography.

Canon Speedlite 600EX II-RT: This external flash will give you the most flash power and control of the Canon Speedlites, as well as continuous shooting support. It has an adjustable and rotating head so that you can use indirect and bounce flash, and includes a diffuser plus color filters for white balance. The 600EX II-RT also allows optical wireless functionality plus is compatible with the radio wave wireless flash system when controlled and triggered by the Speedlite Transmitter ST-E3-RT.

Speedlite Transmitter ST-E3-RT: Use this radio wave wireless transmitter to control and trigger up to 5 groups of 15 flashes, up to 30 meters, with no line-of-site required. Compatible with the Canon 600EX II-RT Speedlite.

Note that either the 600EX II-RT Speedlite or the ST-E3-RT Transmitter can also act as a remote camera trigger for the 5D Mark IV. If either one of these units is in the Hot Shoe of the 5D Mark IV, another one of these units can fire the camera remotely, for a single frame, with the press of a button.

Speedlite 430EX III-RT or Speedlite 320EX: These external flashes will provide less flash power and control, and fewer features than the top of the line 600EX II-RT, however they may meet your needs if you don’t make extensive use of a flash. They also have adjustable and rotating heads so that you can use indirect and bounce flash. The 430EX III-RT allows optical wireless functionality plus is compatible with Canon’s radio wave wireless flash system when controlled and triggered by the Speedlite Transmitter ST-E3-RT or a 600EX II-RT. The 430EX III-RT offers an optional bounce adapter and color filter. The 320EX has a built in LED light for lighting video.

Canon HTC-100 HDMI cable: Use this HDMI cable to connect the 5D Mark IV to an HDMI CEC compatible TV, and then view movies, images, and slideshows from the camera. By setting the Control over HDMI menu item to Enable (Playback 3 Menu), you will also be able to then control the image or video playback using the TV remote.

WFT-E7A Wireless File Transmitter Version 2: This optional device enables fast wireless or wired Ethernet transfer of images from the camera to a computer or smart device such as an iPad or tablet. It also offers remote control and linked shooting capabilities, and offers built-in Bluetooth function.


Canon 7D Mark II Accessories

Canon LP-E6N Battery: It is always good to have an extra battery or two, especially when traveling or when photographing all day or for an event.

Canon BG-E16 Battery Grip: This optional battery pack and grip will enable you to use two LP-E6N batteries or six AA/ LR6 batteries, thus allowing you to shoot longer without having to change batteries. The grip replicates the controls of the body and also increases the size of the 7D Mark II body which may be more comfortable for some shooters, especially when using the camera in the vertical position.

Canon Remote Switch RS-80N3 or Canon Wireless Remote Control RC-6: These remotes will allow you to trigger the shutter of the camera remotely, allowing either self-portraits or the ability to release the shutter without pressing the Shutter Button thus preventing possible camera shake. There is also the Timer Remote Controller TC-80N3 for time-lapse or long exposure photography.

Canon Speedlite 600EX-RT: This most recently introduced external flash will give you the most flash power and control of the Canon Speedlites. It has an adjustable and rotating head so that you can use indirect and bounce flash, and is compatible with a specially designed color filter holder and gels (see below). The 600EX-RT also allows infrared wireless functionality plus is compatible with the new radio wave wireless flash system when controlled and triggered by the Speedlite Transmitter ST-E3-RT.

Speedlite Transmitter ST-E3-RT: Use this radio wave wireless transmitter to control and trigger up to 5 groups of 15 flashes, up to 30 meters, with no line-of-site required. Currently only compatible with the Canon 600EX-RT Speedlite.

Note that either the 600EX-RT Speedlite or the ST-E3-RT Transmitter can also act as a remote camera trigger for the 7D Mark II. If either one of these units is in the Hot Shoe of the 7D Mark II, another one of these units can fire the camera remotely, for a single frame, with the press of a button.

Canon SCH-E1 Color Filter Holder: This plastic holder attaches to the front of the 600EX-RT Speedlite and holds the gels of the Canon Color Filter Set. Use these filters (gels) to balance the color temperature of your flash to the color temperature of the ambient light in order to have a single White Balance setting that neutralizes the color cast of the entire scene.

Canon Speedlite 580EX II or Speedlite 430EX II or Speedlite 320EX: These external flashes will give you varying levels of flash power and control, with the 580EX II being the most powerful of the group. They also have adjustable and rotating heads so that you can use indirect and bounce flash. The 320EX also has a built in LED light for lighting video. To attach color filters to these models see the Rosco Strobist Collection Flash Gels section below.

Canon HTC-100 HDMI cable: Use this HDMI cable to connect the 7D Mark II to an HDMI CEC compatible TV, and then view movies, images, and slideshows from the camera. By setting the Control over HDMI menu item to Enable (Playback 3 Menu), you will also be able to then control the image or video playback using the TV remote.

WFT-E7A Wireless File Transmitter Version 2: This optional device enables fast wireless or wired Ethernet transfer of images from the camera to a computer or smart device such as an iPad or tablet. It also offers remote control and linked shooting capabilities, and offers built-in Bluetooth function. The device attaches to the base of the 7D Mark II, and is a similar size and shape as the optional battery grip.

Eh-S Super Precision Matte Focusing Screen: The 7D Mark II is able to accept this optional focusing screen, which is designed for manual focusing. However, you will need to be using a lens with a maximum aperture of f/2.8 or larger, or else it will make the Viewfinder appear darker than the standard focusing screen. This screen will display the out-of-focus areas of the scene more dramatically out-of-focus, thus helping you to better view what is in-focus. Be sure to change the C.Fn 3 Custom Function item of the Focusing Screen for Eh-S, if you make use of this screen.


Canon 80D / 77D / 70D Accessories

Canon LP-E6 Battery: It is always good to have an extra battery or two, especially when traveling or when photographing all day or for an event.

Canon BG-E14 Battery Grip: This optional battery pack and grip will enable you to use two LP-E6 batteries or six AA/ CR6 batteries, thus allowing you to shoot longer without having to change batteries. The grip replicates the controls of the body and also increases the size of the 70D body which may be more comfortable for some shooters, especially when using the camera in the vertical position.

Canon GP-E2 GPS Receiver: Use this GPS receiver for automatic geotagging of your images including location and altitude data, a digital compass, and UTC time.

Canon Remote Switch RS-80N3 or Canon Wireless Remote Control RC-6: These remotes will allow you to trigger the shutter of the camera remotely, allowing either self-portraits or the ability to release the shutter without pressing the Shutter Button thus preventing possible camera shake. There is also the Timer Remote Controller TC-80N3 for time-lapse or long exposure photography.

Canon Speedlite 600EX-RT: This most recently introduced external flash will give you the most flash power and control of the Canon Speedlites. It has an adjustable and rotating head so that you can use indirect and bounce flash, and is compatible with a specially designed color filter holder and gels (see below). The 600EX-RT also allows infrared wireless functionality plus is compatible with the new radio wave wireless flash system when controlled and triggered by the Speedlite Transmitter ST-E3-RT.

Speedlite Transmitter ST-E3-RT: Use this radio wave wireless transmitter to control and trigger up to 5 groups of 15 flashes, up to 30 meters, with no line-of-site required. Currently only compatible with the Canon 600EX-RT Speedlite.

Note that either the 600EX-RT Speedlite or the ST-E3-RT Transmitter can also act as a remote camera trigger for the 70D. If either one of these units is in the hotshoe of the 70D, another one of these units can fire the camera remotely, for a single frame, with the press of a button.

Canon SCH-E1 Color Filter Holder: This plastic holder attaches to the front of the 600EX-RT Speedlite and holds the gels of the Canon Color Filter Set. Use these filters (gels) to balance the color temperature of your flash to the color temperature of the ambient light in order to have a single White Balance setting that neutralizes the color cast of the entire scene.

Canon Speedlite 580EX II or Speedlite 430EX II or Speedlite 320EX: These external flashes will give you varying levels of flash power and control, with the 580EX II being the most powerful of the group. They also have adjustable and rotating heads so that you can use indirect and bounce flash. The 320EX also has a built in LED light for lighting video. To attach color filters to these models see the Rosco Strobist Collection Flash Gels section just above.

Canon HTC-100 HDMI cable: Use this HDMI cable to connect the 70D to an HDMI CEC compatible TV, and then view movies, images, and slideshows from the camera. By setting the Control over HDMI menu item to Enable (Playback 3 menu), you will also be able to then control the image or video playback using the TV remote. Use the Canon AVC-DC400ST Stereo AV cable for non-HD TV sets.


Canon 7D Accessories (see also the Canon 5D Mark III Accessories section for the new Canon 600EX-RT flash and its accessories)

Canon LP-E6 Battery:  It is always good to have an extra battery or two, especially when traveling or when photographing all day or for an event.

Canon BG-E7 Battery Grip:   This accessory will enable you to use two LP-E6 batteries, (or else use six AA batteries), thus allowing you to shoot longer without having to change batteries.  It also increases the size of the 7D body which may be more comfortable for some shooters, especially when shooting vertically in portrait orientation.

Canon Remote Switch RS-60E3 or Canon Wireless Remote Control RC-6:  These remotes will allow you to trigger the shutter of the camera remotely, thus allowing either self-portraits or the ability to release the shutter without pressing the Shutter Button thus preventing possible camera shake.

Canon Speedlite 580EX II or Speedlite 430EX II or Speedlite 320EX: These external flashes will give you greatly increased flash power and control compared to the built-in flash. They also have adjustable and rotating heads so that you can use indirect and bounce flash. All of them can be used as remote flashes controlled by the built-in flash. The 320EX also has a built in LED light for lighting video.  (see also the Canon 5D Mark III Accessories section for the new Canon 600EX-RT flash and its accessories).

Canon WFT-E5A Wireless File Transmitter:  Use this accessory to wirelessly transmit your images from the camera to a computer over a Wi-Fi or Gigabit Ethernet connection.  It can also be used to wirelessly control the camera via a web-enabled mobile device.

Canon GP-E2 GPS Receiver:  Use this GPS receiver for automatic geotagging of your images including location and altitude data, a digital compass, and UTC time.


Canon 60D Accessories (see also the 5D Mark III section for the new Canon 600EX-RT flash and its accessories)

Canon LP-E6 Battery: It is always good to have an extra battery or two, especially when traveling or when photographing all day or for an event.

Canon BG-E9 Battery Grip: This accessory will enable you to use two LP-E6 batteries, (or else use six AA batteries), thus allowing you to shoot longer without having to change batteries. It also increases the size of the 60D body which may be more comfortable for some shooters, especially when shooting vertically in portrait orientation.

Canon Remote Switch RS-60E3 or Canon Wireless Remote Control RC-6: These remotes will allow you to trigger the shutter of the camera remotely, thus allowing either self-portraits or the ability to release the shutter without pressing the Shutter Button thus preventing possible camera shake.

Canon Speedlite 580EX II or Speedlite 430EX II or Speedlite 320EX: These external flashes will give you greatly increased flash power and control compared to the built-in flash. They also have adjustable and rotating heads so that you can use indirect and bounce flash. All of them can be used as remote flashes controlled by the built-in flash. The 320EX also has a built in LED light for lighting video.

Canon Hand Strap E2: This hand strap provides a more secure grip and allows for easier single hand operation of the camera. It attaches on the right side of the 60D and your right hand slips between it and the camera.

Canon EF-D Focusing Screen: This is the grid focusing screen to help you keep your compositions and horizons straight and level.


Canon Rebel T5i/700D, T4i/650D, T3i/600D, and T2i/550D Accessories

Canon LP-E8 Battery: It is always good to have an extra battery or two, especially when traveling or when photographing all day or for an event.

Canon BG-E8 Battery Grip: This accessory will enable you to use two LP-E8 batteries, (or else use six AA batteries), thus allowing you to shoot longer without having to change batteries. It also increases the size of the camera’s body which may be more comfortable for some shooters, especially when shooting vertically in portrait orientation.

Canon GP-E2 GPS Receiver: Use this GPS receiver for automatic geotagging of your images including location and altitude data, a digital compass, and UTC time.

Canon Remote Switch RS-60E3 or Canon Wireless Remote Control RC-6: These remotes will allow you to trigger the shutter of the camera remotely, thus allowing either self-portraits or the ability to release the shutter without pressing the Shutter Button thus preventing possible camera shake.

Canon Speedlite 600EX-RT: This most recently introduced external flash will give you the most flash power and control of the Canon Speedlites. It has an adjustable and rotating head so that you can use indirect and bounce flash, and is compatible with a specially designed color filter holder and gels (see below). The 600EX-RT also allows infrared wireless functionality plus is compatible with the new radio wave wireless flash system when controlled and triggered by the Speedlite Transmitter ST-E3-RT.

Speedlite Transmitter ST-E3-RT: Use this radio wave wireless transmitter to control and trigger up to 5 groups of 15 flashes, up to 30 meters, with no line-of-site required. Currently only compatible with the Canon 600EX-RT Speedlite.

Note that either the 600EX-RT Speedlite or the ST-E3-RT Transmitter can also act as a remote camera trigger for the T4i. If either one of these units is in the hotshoe of the T4i, another one of these units can fire the camera remotely, for a single frame, with the press of a button.

Canon SCH-E1 Color Filter Holder: This plastic holder attaches to the front of the 600EX-RT Speedlite and holds the gels of the Canon Color Filter Set. Use these filters (gels) to balance the color temperature of your flash to the color temperature of the ambient light in order to have a single White Balance setting that neutralizes the color cast of the entire scene.

Canon Speedlite 580EX II or Speedlite 430EX II or Speedlite 320EX: These external flashes will give you greatly increased flash power and control compared to the built-in flash. They also have adjustable and rotating heads so that you can use indirect and bounce flash. All of them can be used as remote flashes controlled by the built-in flash. The 320EX also has a built in LED light for lighting video.

Canon Hand Strap E2: This hand strap, used with or without the battery grip, provides a more secure grip and allows for easier single hand operation of the camera. It attaches on the right side of the camera and your right hand slips between it and the camera.


Canon EOS 5D Mark III Accessories

Sandisk Extreme CF Memory Cards:  I suggest getting a couple 16GB, 32GB, or higher capacity CompactFlash (CF) cards to capture and store your photos – more if traveling.  Be sure to check the Sandisk site for current rebates.

Sandisk Extreme Pro CF Memory Cards:  For an even faster CF memory card, look at the Extreme Pro version, which saves at 90MB/s over 60 MB/s of the Extreme CF cards.

Sandisk Extreme SD Memory Cards:  If you plan to use the camera’s second card slot, I suggest getting a couple 16GB, 32GB, or higher capacity Secure Digital (SD) cards to capture and store your photos – more if traveling.  Review the various ways that the camera’s second card slot can be used.  Again, be sure to check the Sandisk site for current rebates.

Sandisk Extreme Pro SD Memory Cards:  For an even faster SD memory card, look at the Extreme Pro version, which saves at 95MB/s over 30 MB/s of the Extreme SD cards.

SanDisk Extreme Pro UDMA 7 CF Memory Card:  This CF memory card will allow you to take full advantage of the high speed continuous shooting of the 5D Mk III to capture up to the maximum 16,270 continuous JPEG images or 18 RAW images in a single burst.

Canon LP-E6 Battery:  It is always good to have an extra battery or two, especially when traveling or when photographing all day or for an event.

Canon BG-E11 Battery Grip:   This optional battery pack and grip will enable you to use two LP-E6 batteries or six AA/ CR6 batteries, thus allowing you to shoot longer without having to change batteries.  The grip replicates the controls of the body and also increases the size of the 5D Mk III body which may be more comfortable for some shooters, especially when using the camera in the vertical position.

Canon WFT-E7A Wireless File Transmitter:  Use this accessory to wirelessly transmit your images from the camera to a computer over a Wi-Fi or Gigabit Ethernet connection.  It can also be used to wirelessly control the camera via a web-enabled mobile device.

Canon GP-E2 GPS Receiver:  Use this GPS receiver for automatic geotagging of your images including location and altitude data, a digital compass, and UTC time.

Canon Remote Switch RS-80N3 or Canon Wireless Remote Control RC-6:  These remotes will allow you to trigger the shutter of the camera remotely, thus allowing either self-portraits or the ability to release the shutter without pressing the Shutter Button thus preventing possible camera shake.  There is also the Timer Remote Controller TC-80N3 for time-lapse or long exposure photography.

Canon Speedlite 600EX-RT:  This most recently introduced external flash will give you the most flash power and control of the Canon Speedlites.  It has an adjustable and rotating head so that you can use indirect and bounce flash, and is compatible with a specially designed color filter holder and gels (see below).  The 600EX-RT also allows infrared wireless functionality plus is compatible with the new radio wave wireless flash system when controlled and triggered by the Speedlite Transmitter ST-E3-RT.  The AF assist beam of the Canon 600EX-RT is the only current Speedlite designed to be compatible with the 61 point autofocus system of the 5D Mk III.

Speedlite Transmitter ST-E3-RT:  Use this radio wave wireless transmitter to control and trigger up to 5 groups of 15 flashes, up to 30 meters, with no line-of-site required.  Currently only compatible with the Canon 600EX-RT Speedlite.

Note that either the 600EX-RT Speedlite or the ST-E3-RT Transmitter can also act as a remote camera trigger for the 5D Mk III.  If either one of these units is in the hotshoe of the 5D Mk III, another one of these units can fire the camera remotely, for a single frame, with the press of a button.

Canon SCH-E1 Color Filter Holder:  This plastic holder attaches to the front of the 600EX-RT Speedlight and holds the gels of the Canon Color Filter Set.  Use these filters (gels) to balance the color temperature of your flash to the color temperature of the ambient light in order to have a single WB setting that neutralizes the color cast of the entire scene.

Canon Speedlite 580EX II or Speedlite 430EX II or Speedlite 320EX:  These external flashes will give you varying levels of flash power and control, with the 580EXII being the most powerful of the group.  They also have adjustable and rotating heads so that you can use indirect and bounce flash.  The 320EX also has a built in LED light for lighting video.  To attach color filters to these models see the Rosco Strobist Collection Flash Gels section just above.

Sto-Fen Omni Bounce Diffuser for the Canon 580EXII or for the Canon 600EX-RT:  Works great on the optional external flash units like the Canon 580EX II Speedlite or the newer 600EX-RT Speedlite.  Do not use this on your flash outdoors because all it will do outside is cause your flash to work harder.  I know you see lots of people doing it.  They didn’t bother reading how to use it – don’t imitate them!  Use a direct bare or gelled flash outdoors.  These diffusers are designed to work as a diffuser when bounced off a surface and angled at 45 degrees or so, not straight on, and not bouncing off the sky.


Canon EOS 6D Accessories

Canon LP-E6 Battery: It is always good to have an extra battery or two, especially when traveling or when photographing all day or for an event.

Canon BG-E13 Battery Grip: This optional battery pack and grip will enable you to use two LP-E6 batteries or six AA/ CR6 batteries, thus allowing you to shoot longer without having to change batteries. The grip replicates the controls of the body and also increases the size of the 6D body which may be more comfortable for some shooters, especially when using the camera in the vertical position.

Canon GP-E2 GPS Receiver: Use this GPS receiver for automatic geotagging of your images including location and altitude data, a digital compass, and UTC time. However the EOS 6D (WG) has built-in GPS, so this accessory is generally not necessary. Ironically, the GP-E2 is not compatible with the EOS 6D (N), the model that is sold in certain regions without built-in Wi-Fi and GPS.

Canon Remote Switch RS-80N3 or Canon Wireless Remote Control RC-6: These remotes will allow you to trigger the shutter of the camera remotely, allowing either self-portraits or the ability to release the shutter without pressing the Shutter Button thus preventing possible camera shake. There is also the Timer Remote Controller TC-80N3 for time-lapse or long exposure photography.

Canon Speedlite 600EX-RT: This most recently introduced external flash will give you the most flash power and control of the Canon Speedlites. It has an adjustable and rotating head so that you can use indirect and bounce flash, and is compatible with a specially designed color filter holder and gels (see below). The 600EX-RT also allows infrared wireless functionality plus is compatible with the new radio wave wireless flash system when controlled and triggered by the Speedlite Transmitter ST-E3-RT.

Speedlite Transmitter ST-E3-RT: Use this radio wave wireless transmitter to control and trigger up to 5 groups of 15 flashes, up to 30 meters, with no line-of-site required. Currently only compatible with the Canon 600EX-RT Speedlite.

Note that either the 600EX-RT Speedlite or the ST-E3-RT Transmitter can also act as a remote camera trigger for the 6D. If either one of these units is in the hotshoe of the 6D, another one of these units can fire the camera remotely, for a single frame, with the press of a button.

Canon SCH-E1 Color Filter Holder: This plastic holder attaches to the front of the 600EX-RT Speedlite and holds the gels of the Canon Color Filter Set. Use these filters (gels) to balance the color temperature of your flash to the color temperature of the ambient light in order to have a single White Balance setting that neutralizes the color cast of the entire scene.

Canon Speedlite 580EX II or Speedlite 430EX II or Speedlite 320EX: These external flashes will give you varying levels of flash power and control, with the 580EX II being the most powerful of the group. They also have adjustable and rotating heads so that you can use indirect and bounce flash. The 320EX also has a built in LED light for lighting video. To attach color filters to these models see the Rosco Strobist Collection Flash Gels section just above.

Viewfinder Focusing Screens: The optional Canon Eg-S Super Precision Matte focusing screen is designed to assist with manual focusing, and the optional Canon Eg-D Precision Matte focusing screen provides a grid in the Viewfinder to help keep your compositions straight and level.

T2i Experience – Canon Rebel T2i / 550D User’s Guide and Tutorial

My second eBook and Canon dSLR camera user’s guide is now available! In addition to Your World 60D, the eBook guide for the Canon 60D, I have also written a Canon Rebel T2i / EOS 550D book:

T2i Experience – The Still Photographer’s Guide to Operation and Image Creation With the Canon Rebel T2i / EOS 550D

Canon Rebel T2i EOS 550D book guide manual tutorial how to instruction T2i Experience

Looking for a Canon Rebel T2i / EOS 550D book to help you learn and begin to master your new dSLR? T2i Experience will help you learn how to use your digital SLR, quickly and competently, to create the types of images you want to capture. This camera is an advanced tool, and the guide explains how to use it to its full potential. Begin to take control of your camera, the image taking process, and the photos you create.

This instant download eBook guide is for those who wish to get more out of their T2i / 550D, and go beyond Auto or Program mode and shoot in Av mode and Tv mode. While it explains basic dSLR camera functions and exposure concepts for those new to digital SLR photography, it concentrates on teaching more advanced camera controls and operation, such as using the various metering modes and exposure compensation for correct exposure of every image, controlling autofocus modes and focus points for sharp focus of still or moving subjects, and utilizing dramatic depth of field for professional looking photographs. Learning to get the most out of a dSLR can involve a steep learning curve, and I believe my book can help you speed up that process.

You can preview it at the following link. The preview shows:
-the Table of Contents
the Introduction
-a sample Menu Settings page
-a sample Custom Functions Settings page
-and a sample text page.

Preview: http://www.dojoklo.com/writing/T2i_Experience-Preview.pdf

See below for where to purchase.

Purchase T2i Experience through PayPal here! (or click the PayPal or Credit card check-out button below)
This version is in PDF format, text-only, 8.5″x11″, which can be read on your computer screen, printed on your printer, taken with you on your laptop, and can also be read on the iPad.

Format: PDF – Instant Download
Page Count:
48
Price:
$9.99 now on Sale: $7.99
(plus 6.25% sales tax for residents of Massachusetts)
Secure payment with PayPal or Credit card

Buy now from PayPal! or Buy Now

__________

The Kindle Edition of T2i Experience is also available, at Amazon.com and the Nook Edition is available at BarnesandNoble.com.

__________

T2i Experience is a PDF guide that builds upon the information offered by the camera’s manual. In addition to covering the various settings, functions and controls of the Canon T2i / 550D, its lessons explain when and why to use them. It also describes every Menu setting and Custom Function setting, with recommended settings, including Movie Mode menus. Note that it focuses on still photography and not video except for a brief introduction to menus and important video settings to get you started.

Sections include:

  • Setting Up Your T2i All of the Menu settings and Custom Function settings, including movie mode menus, with brief descriptions and recommended settings for practical, everyday use. Set up and customize the advanced features of the T2i to work best for the way you photograph.
  • Aperture Priority Mode (Av) and Shutter Priority Mode (Tv) – How and when to use them to create dramatic depth of field or to freeze or express motion.
  • Auto Focusing Modes and Drive Modes – How they differ, how and when to use them to capture sharp images of both still and moving subjects. Also how and when to use focus lock and back-button focusing.
  • Exposure Metering Modes – How they differ, how and when to use them for correct exposures in every situation. Also how to make use of exposure lock.
  • Histograms, Exposure Compensation, Bracketing, and White Balance – Understanding and using these features for adjusting to the proper exposure in challenging lighting situations.
  • Lenses – Explanation of Canon lenses and choosing your next lens.
  • Composition – Brief tips, techniques, and explanations, including the creative use of depth of field.
  • The Image Taking Process – A descriptive tutorial for using the settings and controls you just learned to take photos.
  • Photography Accessories – The most useful accessories for day-to-day and travel photography
  • Introduction to Video Settings – Some basic settings to get you started

This digital field guide to the Canon Rebel T2i / EOS 550D is a 48 page, PDF format text-only document, full of helpful information.

It can also be purchased through PayPal on my website bookstore, Full Stop – good writing for better photography.

Master your Canon T2i and learn to use it to its full capabilities! And if you have a Canon 60D, be sure to check out Your World 60D – The Still Photographer’s Guide to Operation and Image Creation with the Canon EOS 60D.

Your World 60D – Canon 60D User’s Guide and Tutorial

Looking for a Canon EOS 60D book or tutorial to help you learn and begin to master your new dSLR? I’ve written an eBook user’s guide for the Canon 60D, called Your World 60D – The Still Photographer’s Guide to Operation and Image Creation. Learn to use the Canon 60D quickly and competently, and improve your photography and capture better images. The 60D is an advanced tool, and this guide explains how to start to use it to its full potential. Begin to take control of your camera, the image taking process, and the photos you create.

Canon EOS 60D book manual download for dummies user guide instruction tutorial Your World 60D

This instant download eBook guide is for those who wish to get more out of their 60D, and go beyond Auto or Program mode and shoot in Aperture Priority (Av) mode and Shutter Priority (Tv) mode. It covers basic dSLR camera functions and exposure concepts for those new to digital SLR photography, plus it also explains more advanced camera controls and operation, such as using the various metering modes and exposure compensation for correct exposure of every image, controlling autofocus modes and focus points for sharp focus of still or moving subjects, and creating dramatic depth of field for professional looking photographs. Learning to get the most out of a dSLR can involve a steep learning curve, and I believe my book can help you speed up that process.

See below for how to purchase.  You can preview Your World 60D at the following link. The preview shows the Table of Contents, Introduction, a sample Menu Settings page, a sample Custom Functions Settings page, and a sample text page.

Preview: http://www.dojoklo.com/writing/Your_World_60D-Preview.pdf

Your World 60D is a text-only PDF guide that builds upon the information offered by the camera’s manual and focuses on the essential functions and settings for real world 60D use. In addition to covering the various settings, functions and controls of the Canon 60D, its lessons explain when and why to use them. It also describes every Menu setting and Custom Function setting, with recommended settings, including Movie Mode menus. Note that it focuses on still photography and not video except for a brief introduction to menus and important video settings to get you started.

Sections include:

  • Setting Up Your 60D All of the Menu settings and Custom Function (C.Fn) settings, including movie mode menus, with brief descriptions and recommended settings for practical, everyday use. Set up and customize the advanced features of the 60D to work best for the way you photograph.
  • Aperture Priority Mode (Av) and Shutter Priority Mode (Tv) – How and when to use them to create dramatic depth of field or to freeze or express motion.
  • Auto Focusing Modes and Drive Modes – How they differ, how and when to use them to capture sharp images of both still and moving subjects. Also how and when to use focus lock and back-button focusing.
  • Exposure Metering Modes – How they differ, how and when to use them for correct exposures in every situation. Also how to make use of exposure lock.
  • Histograms, Exposure Compensation, Bracketing, and White Balance – Understanding and using these features for adjusting to the proper exposure in challenging lighting situations.
  • Composition – Brief tips, techniques, and explanations, including the creative use of depth of field.
  • The Image Taking Process – A descriptive tutorial for using the settings and controls you just learned to take photos.
  • Photography Accessories – The most useful accessories for day-to-day and travel photography
  • Introduction to Video Settings – Some basic settings to get you started

This digital field guide to the Canon EOS 60D is a 40 page, PDF format text-only document, full of helpful information applicable to the new and intermediate dSLR photographer – to turn you into an advanced digital photographer!  Begin to master your Canon 60D and start to use it to its full capabilities.

Purchase Your World 60D through PayPal here! (or click the PayPal or Credit card check-out button below)
This version is in PDF format, text-only, 8.5″x11″, which can be read on your computer screen, printed on your printer, taken with you on your laptop, and can also be read on the iPad.

Format: PDF – Instant Download
Page Count:
45
Price:  $9.99

(plus 6.25% sales tax for residents of Massachusetts)
Secure payment with PayPal or Credit card

Buy Now with PayPal! or Buy Now


Other versions of Your World 60D e-book:

The Kindle edition is available on Amazon.com
The Nook edition is available online at Barnes and Noble
The iPad and iPhone version is available through Apple’s iTunes or through the iBooks App.

What Readers are Saying about Doug Klostermann’s dSLR User’s Guides:

This book, together with the manual that came with your camera, is all you need to start discovering all the potential of this camera.
-Max M.

It’s the first guide I’ve read which has taken me through all the settings in an understandable way. I now feel that I have control over the camera.
-Peter S.

I would recommend this to anyone who wants to get a quick start to using their camera. Manuals are nice, but this eBook highlights the important information and gives a quick easy to understand explanation of most all of the functions and controls.
-Ray M.

I found the (camera’s) manual good for understanding how to set things up but not much on the why – this book really focuses on the “why.” Prior to reading the book I was setting up my metering on Spot Metering thinking it was much better than Matrix (Evaluative) – the guide helped me understand why to use specific settings for specific needs. The Custom Settings sections helps to make firm decisions on how to apply settings by understanding the usage of each in addition to knowing how to set them up. I would like to thank you for saving me time – now I’m confident that my camera is well tuned!
-Benoit A.

This manual is a clearly written, concise and useful explanation of the rationale for the seemingly infinite and often confusing settings options. Used in conjunction with the (camera’s) manual I feel a bit more confident in understanding how to at last proceed in getting better photographs.
WLS

Your World 60D was originally, briefly titled Real World 60D. It is the same eBook. If you use the Canon Rebel T2i/EOS 550D, or Canon Rebel T3i/EOS 600D have a look at my eBooks for those camera, T2i Experience and Canon T3i Experience.

Canon 5D vs 7D vs 60D vs 50D vs 550D / T2i

I previously wrote a post to compare these cameras, the Canon 5D vs.7D vs. 50D vs. 550D / Rebel T2i – with the exception of the Canon 60D – which you can read here:

http://blog.dojoklo.com/2010/05/03/canon-7d-vs-5d-vs-50d-part-ii/

It still applies to helping you make the decision between these cameras, including the 60D, but it doesn’t yet address its specific new features. Those can be read about in this post. So I hope those two posts together can start to answer your questions. And until I rewrite it to include the 60D, here is some additional input.

canon t2i 550D vs 50d vs 60d
photo by author, courtesy of Newtonville Camera, Newton, Mass.

When you are trying to determine which camera to purchase or upgrade to, you need to first consider and determine your needs, and then see which camera fills those needs. Not the other way around where you look at the new features and determine if you really need or will use them. I will discuss how to go about this in more detail below.

Canon 60D vs. 50D: Since the Canon 60D basically replaces the Canon 50D (well, replacement isn’t exactly the right word because the 60D doesn’t really follow the 20D to 50D progression of improvements…), the 60D or 50D decision is an easy one. The 50D shouldn’t really be considered anymore. While the Canon 50D does hold a couple interesting advantages over the 60D (faster FPS in continuous mode, stronger construction, more comprehensive buttons and controls, complete lack of fun filters like “grainy black and white”), the sensor and exposure metering system have been greatly improved in all the newer cameras (7D or 60D or 500D/ T2i) and I feel these features, along with the increase in mega pixels, outweigh any other 50D advantages. I would definitely choose a 60D instead of a 50D. Or a 7D instead of a 50D if your needs require it and budget allows it. (Find out below if your needs require it!)

So the decision now comes down to the Canon 7D or 60D or 550D / Rebel T2i. (What about the 60D vs. 5D Mk II? Just wait, I’m getting to that!) This decision has become infinitely more difficult (or perhaps infinitely simpler?), as all three of these cameras now share so many specifications and features. And because they share an image sensor that is very similar, and all with 18 MP, the image quality of these three cameras will be nearly identical. The Canon consumer/ pro-sumer lineup has never been so alike as it is now. So as I like to profess, you need to choose which camera is best for you based on your needs and experience as a photographer and based on how the advanced features, controls, and customization options fit those needs and serve the way you work.

Here is a brief, mostly serious summary to help you make this decision:

Get a Canon 550D / Rebel T2i if you are new to photography or to digital SLR photography, or want to upgrade from an older Rebel because you want higher image quality and more mega-pixels (or HD video). If you have been happy with the features and controls of your previous dSLR camera and have not discovered the need, in your use of it, for any specific additional features, there is no need to look beyond the 550D.

Canon EOS 60D

Get a Canon 60D if you have outgrown the capabilities of an older Rebel like an XTi or T1i due to your greater experience and more demanding shooting needs which require more direct or sophisticated controls and customization options. Or you have been pretty pleased with your 20D or 40D and its features but wish to upgrade for the increased image quality and mega pixels (or HD video). And/ or you need a more rugged camera for your frequent and demanding shooting and off-the-beaten-path traveling needs. Or you really like swiveling LCD screens. If you typically shoot on Auto or Program mode, you do not need a 60D. If you do not manually select your own focus point and have never used exposure compensation you do not need a 60D. If you have never used the AE-Lock [*] button to lock exposure you do not need a 60D. Please save the money or use it towards a better lens.

Get a Canon 7D if you have extensive experience with a Rebel (xxxD series like 350D, 400D) or with an older xxD series (20D, 40D) camera, and you know and understand most of the 7D’s controls and advanced custom features, and you specifically need some of them for your demanding shooting needs. If you have never used Av aperture priority mode or M manual mode, you do not need a 7D. If you have never used autofocus tracking settings to track a moving subject across your frame and worried how an interfering object would affect your focus you do not need a 7D. If you have never used spot metering to determine a critical exposure level or experimented with back-button focusing you do not need a 7D. Please save the money or use it towards a better lens. However, if you often need to take 126 consecutive photos at the rate of 8 frames per second, you do need the 7D. Immediately. Even if you just sometimes need that. Totally worth it. That’s 15.75 seconds of continuous shooting. Who doesn’t need that? You’d make Eadweard Muybridge proud.

(Please note, the 550D, 60D and 7D all have these features I just listed: manually selected focus points, exposure compensation, AE-Lock, auto-focus tracking, spot metering, and back-button focusing. I’m just using them as a determination of your experience level and needs)

Canon EOS 5D Mk II mark 2

The Canon 5D Mark II is in a separate league than the other cameras, being a full frame professional camera, and thus I’m not going to compare it to the others in this context. As I said in a previous post,

If the 5D Mk II fits your expanding and demanding needs as a photographer, you would already pretty much know that you needed a 5D after your extensive time using a Rebel or a 20D, 40D, etc. Otherwise, getting a 5D means most likely you’d be investing in far more camera than you will actually need or use.

If you don’t already know that you need a 5D, you probably don’t need a 5D. Plus, as is often the case, those who could really take full advantage of a 5D are those who can’t afford a 5D. (I’m thinking about the talented photographers I come across on Flickr, etc. who are making amazing images with entry-level Rebels.) Feel free to spend $2,500 on a 5D Mk II if you want, but unless you have extensive experience with photography and with a digital SLR, using a 5D is completely unnecessary and is unlikely to help you take “better” pictures than you will be able to with a 550D. And besides, it is becoming old technology. You should wait for the 5D Mark III.

As I said above, when you are trying to determine which camera to purchase or upgrade to, you need to first consider and determine your needs, and then see which camera fills those needs. Not the other way around.

For example, I began shooting with a Rebel XT and took it on an extended trip where I shot lots of travel photos, plus outdoor festivals and dance (see the Peru and Dance galleries here for the results – those are all shot with a Rebel XT.) I soon discovered this camera wasn’t fulfilling my growing needs and I made a mental list of what my next camera needed to serve me better in the specific ways that I work and take photos:

  • more focus points which are more strategically positioned (the Rebel XT only has 7 focus points in a simple cross pattern which did not suit the way I focus and compose)
  • faster frame rate in continuous shooting mode (it only has 3 fps which wasn’t good enough for catching a good burst at the peak of action)
  • better sealed body (I ended up in several very dusty or wet situations)
  • integrated sensor cleaning (see “dusty” above)
  • more megapixels (the 8 MP of the XT just weren’t sufficient when it came to cropping and post-processing)
  • battery with longer capacity (I used it on weekend trips to the middle of nowhere but didn’t want to have to buy and take more than 3 batteries)
  • larger LCD screen to better review photos (the XT has a tiny screen)
  • grid in the viewfinder (I just can’t keep it straight sometimes)

These are the features I looked for in my next camera. I didn’t work backwards and wonder, “Do I need or will I ever need auto lighting optimizer and highlight tone priority?” If I had exposure issues on my list, I would have looked for these kinds of features, but I didn’t. I didn’t wonder, “Do I need multiple flash remote firing? Should I worry about that?” That wasn’t on my list because it wasn’t a need I ran into, ever, in months of daily shooting. I don’t even own multiple flashes and wish to minimize using the one. I didn’t ask myself, “Do I need an extensively redesigned focus system with AF Point Expansion and Zone focusing?” I nearly always choose my own focus point – I don’t want the camera choosing the closest point which is bound to be a dancer’s flying hand and not their face, so I don’t need that. No matter how awesome and advanced it is. Even if the subjects are moving. I’m pretty quick with the focus point selection. I just need more and better placed focus points. If you haven’t run into a need for certain features in your months or years of extensive shooting, you aren’t going to suddenly need it just because it is now offered on a camera. Sit down and make your list, then look at the cameras’ offerings.

And please be aware, none of these cameras will help you instantly create better photos. Or better yet, all of these cameras will help you take better photos, but equally so, none any better than the others. If you wish to take better photos, just chose one of the cameras and get out and shoot. Learn how to use the basic settings (aperture, shutter speed, ISO, focusing modes and focus points, exposure metering modes, histograms) and then concentrate on composition and telling a story through your images. See the posts listed below to help you on your way.

How Pros Photograph

Deconstructing the Shot

Need a lens to go with your new camera? Read about choosing a lens other than the kit lens in this post Why You Shouldn’t Buy the Kit Lens, and learn about the Best Lenses for Travel Photography here.

If you do choose the 60D, it is always wise not to buy a Canon dSLR or lens in the first several months after it is introduced. They have a solid history of quality control and design flaws in early models, including, most notoriously, their top of the line offerings (autofocus issues with cameras, flare issues with lenses). I myself took this risk with the 7D, brought it on a trip, and suffered the consequences (see the bottom of this previous post).


Canon 5D vs 7D vs 60D vs 50D vs 550D / T2i

This post has been revised and updated to include the new Canon Rebel T3i / EOS 600D. Please proceed over to this post to read the most current information:

Canon T3i/600D vs T2i/550D vs. 60D vs. 7D, etc.

Like many others out there, you are asking yourself, “should I buy the Canon 7D or 60D or 50D or 550D / T2i?” It’s a difficult question because at this point the three dSLRs in the current Canon consumer line-up (EOS 60D, EOS 7D, Rebel T2i/ EOS 550D) all share a number of specifications and features, a similar exposure metering system, as well as an image sensor that is nearly the same, and all with 18 megapixels. So how do you choose between the Canon 60D, the T2i (550D) or the 7D? This decision has become infinitely more difficult (or perhaps infinitely simpler?) because the image quality and ISO performance of these three cameras will be nearly identical, and all are capable of taking high quality images. So as I like to profess, you need to choose which camera is best for you based on your needs and experience as a photographer and based on how the advanced features, controls, and customization options fit those needs and serve the way you work.

Canon T2i vs 60D vs 7D
photo by author

When you are trying to determine which camera to purchase or upgrade to, you need to first consider and determine your needs, and then see which camera fills those needs. Not the other way around where you look at the new features and speculate if you really need or will use them. I will discuss how to go about this in more detail below.

Review of Canon EOS 60D vs. 50D: Since the Canon EOS 60D basically replaces the Canon 50D (well, replacement isn’t exactly the right word because the 60D doesn’t really follow the 20D to 50D progression of improvements…), the 60D or 50D decision is an easy one. The 50D shouldn’t really be considered anymore. While the Canon 50D does hold a couple interesting advantages over the 60D (faster frame per second (fps) burst rate in continuous mode, stronger construction, more comprehensive buttons and controls, complete lack of fun filters like “grainy black and white”), the sensor and exposure metering system have been greatly improved in all the newer cameras (7D or 60D or 500D/ T2i) and I feel these features, along with the increase in mega pixels, outweigh any other 50D advantages. I would definitely choose a 60D instead of a 50D. This is coming from experience, as I use a 50D professionally and on a daily basis. Or choose a 7D instead of a 50D if your needs require it and budget allows it. (Find out below if your needs require it!) Digital cameras are somewhat disposable. Yes, even $1000 digital cameras. Within 5 years, your new camera will have become old, outdated equipment. The 50D is already two year old technology, so if you start with one now, in 4 more years it will be absolutely archaic! (Actually, since the 50D was just the 40D with a couple more megapixels, it is even older technology than that.) With digital SLRs, I advise buying a recent model, at whatever price range you can currently afford. Of course as with everything in digital photography, this is relative. The 50D is still an excellent camera. And camera companies have to keep coming out with new models every 12-18 months because that is what they do. The trouble comes in 2-3 years when your 50D is still perfectly good and still pretty new to you, but it can no longer compete with the latest offerings in terms of megapixels, ISO performance, and autofocus systems. If this hasn’t convinced you and you still want to consider the 50D for cost or other reasons, I write in more detail about the 50D vs. 60D comparison here from a camera features and operation point of view.

Before I get more into it, I want to mention that I have written eBook user’s guides for the Canon Rebel T3i/ EOS 600D, the Canon Rebel T2i/EOS 550D, and the Canon EOS 60D. After spending so much time studying, experimenting, writing about, comparing, and discussing these cameras, I decided to put all that knowledge into eBook form! Each of these user’s guides cover all the Menu settings, Movie Mode menus, and Custom Function settings – with recommended settings – plus discussions of how, when, and why to use the cameras’ settings and features, (metering modes, aperture and shutter priority modes, advanced autofocus use, and more) for everyday and travel use, to help you take better photos – Your World 60D, Canon T3i Experience, and T2i Experience. Learn more about the eBooks by clicking on their titles.

Back to the Comparison:

Review of Canon EOS 7D vs. 60D vs. 550D / Rebel T2i: So the decision now comes down to the Canon 7D or 60D or 550D / Rebel T2i. (What about the 5D Mk II? Just wait, I’m getting to that! And if you haven’t yet committed to Canon and are interested in comparing the Canon 60D vs. Nikon D7000, have a look at this post.) Below are comparisons of some of the similarities and differences of these three cameras. Remember that all of these comparisons and features are relative. Of course the fact that the 7D can take 126 consecutive photos at the rate of 8 frames per second makes it “better.” Advanced features like that differentiate it from the other models and are also why it costs more. But do you ever need to take 15.75 seconds of continuous photos? Ever? (Look at your watch for 15.75 seconds right now and act like you are taking continuous photos. Now what are you going to do with all those imaginary photos?!)

Sensor and Image Quality: As I said above, all three cameras share a very similar sensor and 18 megapixels, and so their image quality will be virtually the same. All are capable of taking professional quality images.

Exposure Metering: The three cameras all share the latest 63-zone exposure metering system and 4 metering modes. That means they will all determine the exposure virtually identically and enable you to take properly exposed photos in most every situation, including difficult back-lit scenes. The size of the areas metered for Partial and Spot metering vary slightly between the cameras, but that isn’t anything critical.

Autofocus: The 60D shares a similar autofocus system to the T2i and the previous 50D, with 9 focus points and three auto focusing modes. However the 9 AF points of the 60D are more sensitive than those of the T2i: all are cross-type in the 60D, only the center is cross-type in the T2i. The 60D autofocus system is much less complex than the sophisticated AF system of the 7D with its 19 AF point system and its additional Zone, Spot, and Expansion focus modes. These various modes address how you want to deal with and group these numerous AF points. Plus the custom settings of the 7D allow one to customize how the AF system works – how it tracks subjects, how it deals with objects that come between you and your initial subject, how quickly it responds to these changes of possible subjects that are at different distances from you, etc. However, if you are not an avid sports photographer, a wildlife shooter, or someone who understands, needs, and will use the elaborate features of the 7D AF system, then this shouldn’t dissuade you from the 60D.

Construction: As you can probably figure out from the prices, each camera is not built the same. The 60D has relatively strong construction of aluminum and polycarbonate. It is better built than the 550D but not as strong as the 7D’s magnesium alloy frame. The 60D also has some amount of weather sealing – more than the 550D/T2i, less than the 7D. But for most users, including even those using the camera daily or in travel situations, the construction of any of these cameras is far more than good enough, strong enough, and durable enough.

ISO: Since they all share a very similar sensor, the ISO sensitivity and performance at high ISO settings is virtually the same for these three cameras. But don’t take my word for it, don’t be swayed by pixel peepers on forums, instead check out the camera sensor tests at dxomark to verify this. As you can see, they all share the exact same overall score, and show very similar performance.

Controls:
As with construction, the buttons and controls vary with these cameras. Unlike the T2i, the 60D and 7D have nearly every control an advanced photographer needs on the exterior of the camera and they also have the top LCD panel and rear Quick Control Dial that are not on the 550D/T2i. With all the cameras, any controls can also be easily accessed with the Q button and menu or in the other menus on the rear LCD monitor. The top buttons of the 60D set only one setting each, so this is less complicated than the multiple-setting buttons of the 7D. Canon has removed the white balance (WB) button on the 60D that the 7D and 50D have, but that isn’t a big deal – use the Q Menu. Another change on the 60D is that the Multi-controller has been moved from the thumb joystick like the 7D and 50D and placed in the middle of the rear Quick-control dial. This doesn’t change how it functions, and should just be a matter of getting used to the difference. (Unfortunately, I still really do prefer the old design and location.) If you plan on using your camera on Auto or Program most of the time, then the controls of the T2i are more than sufficient for your needs.

Menus and Custom Functions: These allow for greater control over customizing how the camera functions. The 60D has many more Menu and Custom Function settings than the 550D/T2i and nearly as many as the 7D. These settings enable you to customize the operation, function, and controls to work how you want them to, including things like exposure increments, peripheral illuminations correction for lenses (fixes dark corners) and customizing which button does what. Since many of the Menu and Custom Function settings can be complicated and confusing, my eBooks on the 60D and on the T2i/550D cover all of these options along with my recommended settings to get you up and running quickly!

Wireless Flash: Like the 7D, the 60D incorporates wireless flash triggering. It allows you to trigger multiple off camera flashes at different output levels. The 550D/T2i does not have this feature.

Articulating LCD Screen: The big new feature that the 60D has that the other two cameras do not is the articulating rear LCD screen. This may prove useful for videographers, as well as for setting up compositions while the camera is on a tripod, for macro use, or for using it from unusually low or high vantage points. Some users will be able to avoid buying an expensive angle finder because of this feature. There is also an electronic level in the 7D and 60D, visible in the viewfinder, rear LCD, or top LCD.

Viewfinder: The 60D has a large, bright viewfinder with 96% coverage of the actual resulting image, a tiny bit better than the 95% of the 550D/T2i but not quite as nice as the nearly 100% view of the 7D.

Processor:
The 60D shares the same Digic 4 processor as the 550D/T2i. The 7D has dual Digic 4 processors. However, if you don’t need to shoot dozens of continuous images, you probably won’t notice any processing speed issues.

Continuous Shooting Speed: The 7D can shoot a blazing 8 frames per second, in which the photos barely change from frame to frame. The 60D can shoot a respectable 5.3 fps which is actually a more useful rate, and is a higher rate than the 550D/T2i rate of 3.7 fps. If you need the extremely high fps for sports, wildlife, or other action shooting, get the 7D. If not, don’t be swayed by this excessive feature.

Memory Card: The 60D uses the SD memory card like the 550D/T2i, not the CF card of the 7D and 50D.

Battery: The 60D uses the LP-E6 battery like the 7D and 5D, which is a nice feature as this battery can often last through a full day of shooting. The T2i uses a smaller battery with less capacity.

Size and Weight:
The 60D is larger and heavier than the 550D/T2i, smaller and lighter than the 7D. Go to the store and hold them to get a better feel for their size, weight, and feel.
AF Microadjustment:
The 7D has this feature, the 60D and T2i do not. Many are disappointed that the 60D does not include the ability to micro-adjust the focus so that each lens is completely accurate. However, if you have a focus issue, send your camera and/ or lenses to Canon while under warranty and ask them to calibrate them. Doing AF microadjustment yourself is often a maddening, never ending undertaking. You may make a good calibration under controlled conditions, but this really doesn’t replicate real life shooting.

Locking Mode Dial: This is a new feature for a Canon dSLR, only on the 60D, that keeps the Mode dial from accidentally rotating. A nice touch, and not at all difficult to change quickly with one hand, as some people have claimed: just push the center button with your left index finger, rotate dial with thumb and middle finger.

Full HD video: Of course they all offer this capability. Note that this is not video for your kids’ parties and soccer games. It does not have continuous autofocus while shooting, as a camcorder does. It is not designed for that kind of use, but rather for serious videographers who typically manually focus. You can adjust autofocus while shooting by pressing the shutter button or the AF button, but it may have a less than desired looking result.

Flash Sync: A Note to Strobists -the 60D and T2i do not have a PC sync flash socket to plug in PC sync cords. The 7D has this.

Ease of operation: While beginners may find all the buttons, controls, and menus of any dSLR difficult and confusing at first, the additional controls and menus of the 7D and 60D are all quite intelligently designed, intuitive, and straightforward for the more advanced user.

*****

Purchasing: If you plan to buy any of these cameras through Amazon.com, (or just wish to purchase anything from Amazon) I would appreciate it if you use this referral link to Amazon or one of the camera links just below. Your price will be the same, and they will give me a little something for referring you, which will help support this blog. Thanks!  And due to popular request, if you are in the UK, here is my new referral link to Amazon UK. If you are in another country, click on one of my Amazon links, scroll to the bottom of the page, and click on your country for your local Amazon. And for those wishing to purchase from B+H Photo, just click here for my referral link to B+H. Thanks for supporting my blog!

See and buy the T2i on Amazon.
See and buy the 60D on Amazon.
See and buy the 7D on Amazon.
See and buy the Canon 5D MkII on Amazon.

I wrote a previous post that also goes in-depth into comparing and choosing between these cameras, but was written before the introduction of the EOS 60D. It does however have some additional info that may prove useful: Canon 7D vs. 5D vs. 50D (Plus 550D/T2i) Part II

Lenses, Accessories and Books: Now that you are on your way to deciding on a camera, you should also start looking into lenses, photography gear, accessories, and books. Check out this link, Best Lenses for Travel Photography, which also applies to general photography, Equipment for Travel Photography, which discusses useful and practical photo accessories and equipment for both everyday and travel photography. This post lists and describes Essential Books for Digital Photography, including the best user’s guides for each of these cameras.

And to sum it all up, here is a brief, mostly serious synopsis to help you make the camera decision:

Get a Canon 550D / Rebel T2i if you are new to photography or to digital SLR photography, or want to upgrade from an older Rebel because you want higher image quality and more mega-pixels (or HD video). If you have been happy with the features and controls of your previous dSLR camera and have not discovered the need, in your use of it, for any specific additional features, there is no need to look beyond the 550D. See the T2i on Amazon.

Get a Canon 60D if you have outgrown the capabilities of an older Rebel like an XTi or T1i due to your greater experience and more demanding shooting needs which require more direct or sophisticated controls and customization options. Or you have been pretty pleased with your 20D or 40D and its features but wish to upgrade for the increased image quality and mega pixels (or HD video). And/ or you need a more rugged camera for your frequent and demanding shooting and off-the-beaten-path traveling needs. Or if you need the increased 5.3 frames per second continuous rate to shoot sports or action. Or you really like swiveling LCD screens. If you typically shoot on Auto or Program mode, you do not need a 60D. If you do not manually select your own focus point and have never used exposure compensation you do not need a 60D. If you have never used the AE-Lock [*] button to lock exposure you do not need a 60D. If you don’t understand the relationship between aperture, shutter speed and ISO you don’t need a 60D. Or unless you plan to dedicate yourself to learning this camera and the principles of SLR photography and grow into this more advanced camera, please save the money or use it towards a better lens. See the 60D on Amazon.

Get a Canon 7D if you have extensive experience with a Rebel (xxxD series like 350D, 400D) or with an older xxD series (20D, 40D) camera, and you know and understand most of the 7D’s controls and advanced custom features, and you specifically need some of them for your demanding shooting needs. If you haven’t passed the above “criteria” for a 60D, you definitely don’t need a 7D. If you have never used Av aperture priority mode or M manual mode, you do not need a 7D. If you have never used autofocus tracking settings to track a moving subject across your frame and worried how an interfering object would affect your focus you do not need a 7D. If you have never used spot metering to determine a critical exposure level or experimented with back-button focusing you do not need a 7D. Or unless you plan to dedicate yourself to learning this camera and the principles of SLR photography and grow into this very advanced camera, please save the money or use it towards a better lens. However, if you often need to take 126 consecutive photos at the rate of 8 frames per second, you do need the 7D. Immediately. Even if you just sometimes need that. Totally worth it. That’s 15.75 seconds of continuous shooting. Who doesn’t need that? You’d make Eadweard Muybridge proud. See the 7D on Amazon.

(Please note, the T2i/550D, 60D and 7D all have these features I just listed: manually selected focus points, exposure compensation, AE-Lock, auto-focus tracking, spot metering, and back-button focusing. I’m just using them as a determination of your experience level and needs)

The Canon 5D Mark II is in a separate league than the other cameras, being a full frame professional camera, and thus I’m not going to compare it to the others in this context. As I said in a previous post,

If the 5D Mk II fits your expanding and demanding needs as a photographer, you would already pretty much know that you needed a 5D after your extensive time using a Rebel or a 20D, 40D, etc. Otherwise, getting a 5D means most likely you’d be investing in far more camera than you will actually need or use.

If you don’t already know that you need a 5D, you probably don’t need a 5D. Plus, as is often the case, those who could really take full advantage of a 5D are those who can’t afford a 5D. (I’m thinking about the talented photographers I come across on Flickr, etc. who are making amazing images with entry-level Rebels.) Feel free to spend $2,500 on a 5D Mk II if you want, but unless you have extensive experience with photography and with a digital SLR, using a 5D is completely unnecessary and is unlikely to help you take “better” pictures than you will be able to with a 550D. In fact, until you figure out the controls, features, menus, and custom functions of a 5D or 7D, you may be taking worse pictures! And besides, the 5D MkII becoming old technology. You should wait for the 5D Mark III :) See the Canon 5D MkII on Amazon.

*****
Lenses: Lenses for Travel Photography
Accessories and Equipment: Equipment for Digital Photography
Books: Essential Books for Digital Photography

As I said above, when you are trying to determine which camera to purchase or upgrade to, you need to first consider and determine your needs, and then see which camera fills those needs. Not the other way around. Here is a post I wrote which discusses this, titled How to Choose a New dSLR Camera.

Choosing Between the Canon 5D vs. 7D vs. 60D vs. 550D / T2i Part III

I continue to get a large number of visits from people who are comparing the current line of Canon digital SLR cameras – the 5D Mk. II vs. 7D vs. 50D vs. 550D / T2i. I go into detail about comparing the features of these cameras in this post, including the 60D and T3i, so that is probably the post you want to read first. However, it is a long, in-depth post. If you would like to read a summary of how to make this decision and find out which camera is right for you, here it is (however, I still encourage you to read that in-depth post which is a bit more educational than this post).

Before I start I want to mention:

I have written eBook tutorials for the Canon 60D and for the Canon T2i, which cover ALL the Menu settings and Custom Function settings, with recommended settings, plus in-depth descriptions of how and and why to use the cameras’ settings and features in everyday use – Canon 7D Experience, Your World 60D, Canon T3i Experience, and T2i Experience. Learn more about the eBooks by clicking on their titles.

Longfellow House
Longfellow House – Cambridge, MA

-New to digital SLR photography and want a really nice camera for casual home and travel use? Not really sure what all those buttons and symbols are and not really interested in knowing? Get a 550D/ T2i or a Rebel XSi.

-New to digital SLR photography and want to take really great, high quality photos, but don’t ever really plan to totally get into it? Don’t really want to spend months reading about f-stops and metering modes? Plan to use Auto or Program mode most of the time? Fall asleep 3 minutes into reading the manual? Get a 550D/ T2i or a Rebel XSi.

-New to digital SLR photography and want to learn the basics of exposure: aperture, shutter speed, and ISO? Want to learn to take the camera off Auto or Program mode, and experiment with partial or spot metering and manually selected focus points? Eager to read and understand the often confusing explanations of the manual? Get a 550D/ T2i, or a 60D.

-New to digital SLR photography and want to learn everything noted above plus want to take pictures of fast moving action: kids at play, sports, dance? Consider a 60D because it can shoot 5.3 frames per second vs. 3.7 fps of the 550D. This doesn’t mean you can’t focus on and capture fast moving action with the 550D, but it means with the 60D you can fire off a faster rapid series of shots, and thus hope to capture the exact right moment.

-New to digital SLR photography but super ambitious and know you are going to be committed and dedicated enough to learn about exposure compensation and back-button focusing? Ready for Av mode now, and plan to really take your photography to the next level over the next year or two? Already read the manual online? Want to consider the possibility of professional photography in the future? Get a 60D or get a 7D if you are super-serious and if you can afford it.

-Experienced with digital SLR photography and have outgrown the limited speed and menu/ custom options of the entry level cameras? Annoyed with digital SLR users you see on the street whose cameras are nicer than yours but are left on Auto or P mode? Want to take it to the next level and maybe test the waters of professional photography? Get the 60D or get a 7D if you can afford it. Consider a 5D Mk II if you are really, really serious.

-Experienced with digital SLR photography and plan to be a top notch amateur/ semi-pro or work towards being a pro? Carry your camera everywhere and want a sturdy tool that serves you and the way you work? Already have been paid to shoot some photos, portraits, or events? Have stopped trying to read the model number of other people’s cameras because you know your photos are better than theirs even if they have a nicer camera? Get a 7D, or a 5D Mk II if you can afford it, or wait for the 5D Mk III.

-Highly experienced with digital SLR photography and are dedicating yourself to being a part-time or full time pro? Already know and understand 99.6% of what you read in this other post? Just looking for reassurance that spending $2,500 is the right decision? Get a 5D Mk II, wait for the 5D Mk III, or get a 7D if you really can’t afford the 5D yet.

Cambridge City Hall
Cambridge City Hall – Cambridge, MA

You may have been convinced by forums, reviews, or online comments to question and compare image quality, auto-focus speed, high ISO performance and noise, dynamic range, etc., but those factors are all nearly completely irrelevant. All of these cameras have more than enough quality in each of those areas. Your choice should instead be based on your experience level and expected needs as a photographer, and on which camera best serves the way you work. Remember, you don’t need a top of the line camera to take professional quality photos. Instead you need mastery of the camera you have, combined with good knowledge of composition and lighting. I encourage you to have a look at some Flickr users’ photos taken with an “old,” 8MP Rebel XT to confirm this. When you are done selecting a digital SLR body, you canread some of my other posts to learn more about the Best Lenses for Travel Photography or Why You Shouldn’t Buy the Kit Lens.

Canon 5D vs. 550D / T2i – I get an unusually high number of hits from people searching for a comparison of the 5D Mk II vs. 550D / T2i. As you can see above, there isn’t a scenario where those two cameras are together as options, as they are on opposite ends of the spectrum. It is a strange comparison between an entry level dSLR and a full frame professional dSLR that, quite frankly, confuses me. If the 5D fits your expanding needs as a photographer, you would already pretty much know that you needed a 5D after your extensive time using a Rebel or a 20D, 40D, etc. Otherwise, getting a 5D means most likely you’d be investing in far more camera than you will actually need or use. Read more about why I say that here and in the Other Important Custom Functions section here (this post is about the 7D, but it will give you a feel for how a 5D / 7D differs from a 550D in terms of features that you may need but probably don’t).

AF Microadjustment 550D / T2i, 60D – A lot of people also search for AF Micro-adjustment or focus calibration for the Canon 550D / T2i for back focus or front focus issues. Due to quality control issues, acceptable tolerances, or more rarely but not unheard of bad cameras, your camera and/or lens may focus a few notches in front of or behind the subject you focused on. If your camera happens to be 2 notches on the plus side and your lens 2 notches on the minus side, well, you are going to have some issues. While the AF Microadjustment feature is not built into the menus of the Canon 550D or new Canon 60D, here is how you micro adjust for front or back focus: send the camera and/ or lens to Canon while it is under warranty, with instructions to calibrate them. You have to pay for one way shipping and insurance (+/- $30 for one item depending on weight and coverage). Ask them to include a detailed report of what the issue was and what service they actually performed (otherwise they just repeat what you wrote and say “lens was front focusing – electrical adjustment of AF mechanism” and you don’t know if it was the camera, the lens, or your mind that was off). Then send a letter to Canon asking them why a brand new expensive Canon camera paired with a brand new expensive Canon lens that you just bought does not focus properly, and why you have to pay $30 to send it immediately back to them to fix it. This process also applies to the AF Microadjustment of the 7D, 5D, and 50D and soon the 60D. It is best to first determine if the camera or the lens is the culprit, by testing the lens on another body or the body with another lens, but it may well be a combination of both since each lens and camera is uniquely faulty. See this great post, “This Lens is Soft and Other Myths” on LensRentals.com for more info on this.

If you are pretty new to digital SLR photography and you decided on the 7D, check out this really great book I recently came across while browsing the photo section at a bookstore: Canon 7D: From Snapshots to Great Shots by Nicole Young. I think you’ll learn more from it than most other how-to photo books and expanded manual type books. Even if you have another Canon and not a 7D, you’ll still find it helpful for learning how to really use a digital SLR to take better photos. She is currently working on a version of the book for the 60D, Canon 60D: From Snapshots to Great Shots.
canon 60D great shots

And I, myself, have written eBook user guides for the Canon 7D, Canon 60D and for the Canon Rebel T2i / EOS 550D. You can learn all about them here:  Canon 7D Experience, Your World 60D, plus the mini-guide to the 60D Menus and Custom Functions (excerpted from the full version of Your World 60D), and T2i Experience.

Need a lens to go with your new camera? Read about choosing a lens other than the kit lens in this post Why You Shouldn’t Buy the Kit Lens, and learn about the Best Lenses for Travel Photography here.

Please leave a comment, ask a question. Let me know what has been helpful, and what you’d like to read more about.

If you plan to purchase any of this equipment or books, I encourage you to do so through the site I’ve set up with Amazon, Doug’s Picturing Change Digital Photography Equipment and Books or through this direct link to Amazon.com. Purchasing through any of these links to Amazon.com, or the ones below, will help support my blog and my work. Thanks! And for those of you across the pond, click here for my referral link to Amazon UK. If you are in another country, click on one of my Amazon links, scroll to the bottom of the page, and click on your country for your local Amazon.
See the T2i on Amazon.
See the 60D on Amazon.
See the 7D on Amazon.
See the Canon 5D MkII on Amazon.

Canon 7D vs. 5D Mk II vs. 50D – part II (plus 550D / Rebel T2i)

NOTE: Some of the information in this post has been updated to include the current Canon dSLR models, the 60D and the Rebel T3i / 600D. Please check out my blog post at the following link to read the most current information:

http://blog.dojoklo.com/2011/02/20/canon-t3i-600d-vs-t2i-550d-vs-60d-vs-7d-etc/

Original Post: I’ve had a lot of visits to my previous post comparing these cameras – the Canon 7D, Canon 5D Mark II, and the Canon 50D – and since that really wasn’t much of a comparison post, but rather just a link to an impartial, technically based testing site, I’ll try to give a little more insight into helping you make this decision. Please note, this is aimed towards still photographers and not videographers. I know that videographers have different priorities when making this selection, and I am not knowledgeable enough to address them. I have written some updated comparison posts which also address the Canon 60D here and here.

I’ve used the 50D and the 7D pretty extensively, so I can speak with a bit of confidence about them. I’m very familiar with the features of the 5D Mk II and how they compare to the other cameras, so I will discuss them too. I’ll address the 550D (Rebel T2i) at the end of this post. Also, all the precise specifications of these cameras can be researched online and compared, so I will discuss them on a user-experience level, but I encourage you to decide which factors are most important to you for further research. I know it is a long post with a lot to read, but if you are investing several hundred or thousands of dollars in a dSLR and lenses, you should be thorough! On a final note before I begin, you may have been convinced by forums, reviews, or online comments to question and compare image quality, auto-focus speed, ISO and noise, etc., but those factors are all nearly completely irrelevant. Each of these cameras has more than enough quality in all of those areas. Your choice should instead be based on your level and needs as a photographer, and on which camera best serves the way you work. If you wish to see this complicated choice summarized in an easy to read format, view this post (it is a bit tongue-in-cheek, but mostly accurate). And when you are done selecting a camera body, you can learn more about lenses here.

While I have your attention, I want to mention that I have written eBook tutorials for the Canon 60D and for the Canon T2i, which cover ALL the Menu settings and Custom Function settings, with recommended settings, plus in-depth descriptions of how and and why to use the cameras’ settings and features in everyday use – Your World 60D and T2i Experience. Learn more about the eBooks by clicking on their titles.

Also, please let me know about broken links in my posts, as they seem to mysteriously happen from time to time.


Hudson River – Cold Spring, NY (this image is entirely in color – look at the plants!)

Sensor Size: If you are, or plan to be a professional photographer, and you’ve limited your selection down to two or three of these cameras, you are going to want to seriously consider the 5D MkII. This is due primarily to the fact that it has a full frame sensor (a sensor approximately the size of a frame of 35mm film), which is pretty much expected for you to have as a professional. (Note that whenever I say 5D in this post, I am referring to the 5D Mark II).  The 7D and the 50D have smaller sensors, with a 1.6 crop factor. This means that their sensors are a bit smaller than a frame of traditional 35mm film. A wide angle lens will not produce as wide of a field of view on a cropped sensor as on the 5D: a 16mm will give the field of view of a 16 x 1.6 = 25mm lens, but a telephoto on a cropped sensor will appear to zoom closer, thus making a 200mm lens appear to be a 200 x 1.6 = 320mm lens. You can begin down the professional path with a 50D or 7D, but you are eventually going to experience the limitations of the smaller sensors and start to understand the need for full frame. BUT…there are a few problems with this choice…

Price and Obsolescence: First, you probably haven’t run out to get a 5D MkII because of its cost. As of 5/2010, the price is $2,500. AND, the 5D MkII dates from 9/2008, and is due for an upgrade, likely in 2012, maybe as soon as later in 2011. In some respects, the 7D – being newer – has better features than the 5D, such as the advanced auto focus and metering systems and faster frame rate. Not to mention the fact that if you wait around long enough, a 7D type camera WITH a full frame sensor but a lower price than the 5D is bound to come out! But you need a camera now, so let’s continue. The 7D is $1,600 or $1,700 depending on current promotions, and the 50D is about $1,000. The 50D however, is also the closest one to being replaced (by the 60D or whatever it may be called). This doesn’t mean that it isn’t still a very capable and feasible camera – people are still happily using 20D and 30D cameras, just that it is reaching the end of its production life. So as far as the newest model, that is the 7D (and the 550d/ T2i).

Megapixels / Image Quality: Regarding megapixels, it really isn’t much of an issue unless you plan on printing out billboard size prints. All of these cameras have more than enough megapixels and image quality for most photographers’ needs. The 7D is at 18mp, the 5D Mk II at 21mp, and the 50D at 15mp. I have found that more megapixels give you more lee-way to push and pull the image around in Photoshop before it starts to fall apart and look over manipulated. In this respect there is a significant difference between 8 megapixels of a Rebel XT and 15 or 18 mp. The 8mp barely allow you to do a regular amount of exposure, contrast, and color correction before it starts to really show, but there is little to be concerned about between the 15mp of the 50D and 18mp of the 7D (unless you are a hard-core pixel peeper, in which case you will be deeply offended by these kinds of statements). Be aware that sensors with more megapixels more readily show the shortcomings of cheaper lenses, and thus demand higher quality lenses, like the Canon L series, for the sharpest, most detailed image across the entire frame. From experience, I can tell you there is a huge improvement in clarity, color, and overall image quality when using an L lens with a 50D or 7D.


Marquee – Tarrytown, NY

HD Video: If you are concerned about HD video, then you choice is narrowed down to the 7D and the 5D Mk II. With firmware updates and 3rd party Magic Lantern firmware, they are about on par as far as frame rates etc., so cost and sensor size is again the differing factor here. If you are not going to need or use video, it is definitely worth considering the 50D, which will give you 85-90% of the still photography features and performance of the 7D at a much lower price.

ISO, Frame Rate, File Size: For ISO performance, you can look at the testing site mentioned above to see that they are incredibly similar. Being a professional camera, the 5D has a broader ISO range on both ends, lower noise at higher ISOs, and a better dynamic/ tonal range. This is a large factor in why you pay $2400 for this camera. But for the non-pro, in general you hardly ever want to go above ISO 1,600, so unless you have a specific reason for needing really high ISO and photos with the lowest possible noise at high ISOs (for example shooting lots of indoor or dark events like concerts, weddings and receptions), then this isn’t much of a deciding factor. And if you are concerned about dynamic range, well, don’t be. Anyone who actually needs to be concerned about dynamic range is a commercial photographer who is not reading this post because they are busy choosing between a $7,000 camera and a $10,000 camera. The frame rate performance, however, may be an important factor depending on how you work and what you take photos of. The 7D has a continuous rate of 3fps and a high speed continuous rate of 8fps. Personally, I’m unhappy with this choice of rates. The 3fps is too slow for action situation, and the 8fps is ridiculously high, giving me far too many unwanted photos that quickly fill up the memory card. I wish for a rate closer to 5 or 6 fps. The 5D has one rate of 3.9fps, which again seems a bit too slow for action situations, and limits its use for capturing sports action. The 50D offers 3fps and 6.3fps, which I find ideal. Oh, also, the file size of the 7D images are much larger than the files of the 50D and somewhat larger than the files of the 5D. While this indicates that the files contain more information and detail, this affects size and number of memory cards you will need, plus size and expense of storage on your hard drive and external hard drives, PLUS the time it takes to download, transfer, copy, open, save, and upload files. It is a significant hidden cost in storage dollars and time of the 7D that should not be ignored. (Is this apparent difference of the 7D and 50D images visible to the naked eye of anyone other than pixel peepers and people making jumbo prints? Not necessarily. The image quality you need is available from any of these cameras, so it is more productive as a photographer to focus on image content!)


St. Patrick’s Day Parade – Brooklyn, NY

Features, Customization: Being the newest camera, the 7D has the most advanced features. As I mentioned above, it has an advanced auto focus system, providing more focus points, more focus modes (single point, spot, zone, expansion, etc.) and numerous options for how the focus points perform and select and track a subject. I’ve written a bit more about these features here, along with links to additional resources. There are advanced custom functions for auto focusing and tracking, flash control (the 7D is the only one which offers remote flash capabilities, which will save you a couple hundred dollars on Pocket Wizards if you are going to use this), and customization of buttons and displays. Again, I’ve explained a lot of these features in this post. Read through them. Do you understand them? Are you going to learn them? Are you going to need and use them? Probably not. They are nice to have, make you feel like you have a really powerful camera you are in control of if you learn how to choose, set and use them, but in everyday shooting I rarely, if ever, make use of them. The live view (which the 50D has as well) and the built in level are cool, but will you ever use them? I don’t. (The built in level will be most useful to landscape photographers). Of all the features and customizations of the 7D that are not on the older 50D, the only ones I miss are the remote flash capability, the grid overlay in the viewfinder, the larger more inclusive viewfinder, the spring loaded doors of the 7D, and the ability to switch functions of the top dial and back dial in Manual mode. (It is such a nice feature on the 7D – since I use Av mode most of the time, the top dial controls aperture. But when I switch to M mode, the top dial now controls shutter speed. So with the 50D I have to overcome muscle memory and use the back dial for aperture. But with the 7D, one can switch the dials’ functions.) Unless you are an intense sports or animal shooter who needs to customize how the camera selects and auto focuses on a moving object, how it addresses an object that moves in front of your subject, and how fast it responds to this new object before it addresses or ignores it, then you don’t need these features. And when you compare the features of the 7D to the 5D or 50D, you find that the older cameras are not outdated dinosaurs as forums will lead you to believe – but rather they also have many of these features and customizations as well. As far as all the new auto focus features of the 7D, it turns out they barely mattered to me because I manually select my auto focus point 99% of the time. I don’t want the camera necessarily focusing on the closest object, and it certainly does not know what I wish to focus on, so I don’t leave it up to chance, and I select the point myself. Therefore I rarely use any of these advanced auto-focus modes. In addition, it is much easier and quicker to manually select an auto focus point on the 5D and the 50D when you are selecting from 9 focus points rather than the 19 focus points of the 7D! However, if you photograph fast moving objects that you would prefer the camera to locate, track, and properly focus on, most of the time, all by itself, then the 7D is the camera for you. Also, note that due to the fact that the 5D is a professional body and not a consumer level camera, it does not have a built in pop-up flash. If you plan to use a flash with it, you will need to buy the Canon 580EX II flash (which you should do with any of these camera anyway).


San Miguel Dueñas, Guatemala

It is expected that the 5D Mk III and possibly the 60D (or whatever it may be called) will also incorporate this new 7D type focusing system when they come out. The 5D, 7D, and 50D all have AF microadjustment capability, which means that you can adjust the auto-focusing of each lens individually, in the camera, if they happen to front- or back-focus a little bit. The problem is that it is a maddening procedure, and you can never get it quite right because the focusing typically varies slightly for each focus point, as well as for different distances and apertures. (You may get it exactly sharp for the center focus point at 15 feet at f/4, yet find that it is still off for the upper left focus point when you shoot under real life conditions that vary from those settings.) I feel that if you need an excessive amount of AF microadjustment, you should probably send the camera or lens back for repair, calibration, or replacement. Personally, if I were using a non-L-series lens, I wouldn’t worry about a few mm of front- or back-focusing. And if I were using an L-series lens that didn’t focus dead on, I would send it back to Canon for recalibration – which in fact is something I have done. (I don’t understand people’s celebration of AF microadjustment – isn’t it a built in admission of poor manufacturing quality control, especially when pairing a Canon lens with a Canon body?) Finally, be aware that the mode dials of the 7D and 5D do not have most of the “basic zone” mode settings such as sports, portrait, and landscape. As the user of such an advanced camera, you are expected to know how to change the camera’s settings (aperture, shutter speed, ISO, etc.) yourself for these types of situations. If you don’t, and/ or if you plan on keeping your camera set on Auto (so called “green box mode”) or Program (P) mode, you probably shouldn’t be considering a 5D, 7D or 50D anyway, because you’ll be paying for far more camera than you will be using! Start with the 550D or one of the other Rebels for now and upgrade later if you feel you have outgrown its capabilities. If you are concerned about the best image quality, your image quality difference between a 7D on Auto and a 550D on Auto will be negligible. (Note that these cameras also have a Creative Auto mode, which is a weird “transitional” mode between Auto and actually learning how to make use of aperture settings and exposure compensation in Av, Tv or M mode. Since using aperture settings to dictate desired depth of field is essential to photographic composition, it is best you actually learn it directly.)

Metering: The 7D has an advanced metering system compared to the 5D Mk II and the 50D, and this is actually one very important advantage. The 7D has a more precise 63 zone metering system vs. the 35 zone system of the 5D and 50D. With the 7D, I can confidently leave it on evaluative metering 97% of the time, and it meters the subject exceptionally well 98% of those times. Canon claims that it will meter properly for a wide variety of subjects, including back lit and extreme contrast subjects. I have found this to be true. Compared to the 50D, this is significant. I have found that the 50D regularly overexposes by about 1/3 or 1/2 a stop, and I have exposure compensation on -1/3 all the time to avoid blown out highlights (except in dark situations, where it tends to under-expose). Also, the 50D just does not always correctly expose in unusual or difficult lighting situations. And for dramatic and powerful photos, you want unusual or difficult lighting situations, so I have found that I am using exposure compensation, or having to change to center weighted, partial, or spot metering often. While this is sharpening my metering eye and skills, it is a pain and it leads to the risk of lost shots. I would prefer that it just got the exposure right the majority of the time, as the 7D does. (I have subsequently found that using center-weighted averaging mode on the 50D all the time results in more consistent exposures than evaluative metering mode). You can learn more about the various metering modes, and when to use them, in this post.


Vinnie – Brooklyn, NY

550D / Rebel T2i: The Canon 550D or Rebel T2i has some impressive specs, and shares many features of the 50D and the 7D, and it is actually the newest model of all of them. It has 18mp and HD video like the 7D, but only 3.7fps continuous shooting mode frame rate. And it has 9 AF points and less complex auto focus options, like the 50D. It is fully capable of taking photos that are virtually the same quality as the 7D and the 50D, and if you don’t have intensive shooting and ego demands (ie, wanting the biggest, most expensive body whether or not you actually understand, need, or use its advanced features), it is worth seriously considering. But the 550D can’t have every feature and custom function of the higher level cameras, otherwise it would just be a 7D! If you are concerned about comparing image quality, ISO performance, auto-focusing speed, etc, all of these cameras have more than enough of what you need. You should instead be comparing the features and advanced options of the cameras which are most important to how you work. The top of the line camera won’t help you take better photos. But mastery of the tool that best fits your need just might (when combined with good knowledge of composition and lighting). I encourage you look at Flickr users’ photos taken with an “old,” 8MP Rebel XT to confirm this. Also, don’t rule out the Canon Rebel XSi if you are just starting out with digital SLRs.

If you are comparing a 5D Mk II vs. 550D (5D vs. T2i) you are looking at a professional full frame camera vs. a consumer, entry level dSLR, and skipping 2 pro-sumer cameras in between. So while the features of the 550D are nearly on par with the 7D in many ways, the 550D vs. 5D MkII is an odd comparison that quite frankly confuses me. Are you new to digital SLRs? Get a 550D (or a 50D/ 60D if you wish to spend more money or need the higher frame rate for sports or photojournalism). Have you outgrown all the features, capabilities, or limitations after extensive use of a 20D, 40D or 50D? Get a 5D MkII.  (Note that whenever I say 5D, I am referring to the 5D Mark II, the current model at this time).  Are the images you’ve been taking with your Rebel or 40D no longer living up to your professional level needs in terms of dynamic range and noise at high ISOs? Get a 5D. Want to spend $2,400 on a camera body? Get a 5D. Want to spend $800 and still have a tool that is fully capable of taking professional quality images? Get the 550D.

There are a few reasons why you would need a 7D or a 50D over a 550D / T2i. A major one is the advanced controls over camera settings. The more expensive models have additional buttons, controls, and displays on the exterior of the camera to enable quicker changes of important settings and easier viewing of what the current settings are. The 550D is capable of changing all these settings too, it is just done in a different way. For example, the 7D and 50D have the big dial on the back for quickly scrolling through menus, images, and for quick exposure compensation changes and changes of other settings. They also have the little toggle joystick on the back, primarily for quickly changing focus points. These 2 cameras also have the additional display screen and buttons on the top to easily view and change a number of settings such as ISO, drive mode, white balance, and metering mode – among others. These cameras are designed for a professional or advanced user who makes use of all these settings and needs to quickly change them while working. However, with a little practice, these settings can also be quickly changed using the buttons and big screen on the back of the 550D. The 7D and 50D also have advanced menus which give the user more customization options, like those discussed above (27 custom functions on the 7D vs. 12 on the 550D), and additional features desired by advanced users or pros, such as 1/3 ISO increments where the 550D has full increments (100-200-400 etc.).

What you are also paying for with the 7D and the 50D are stronger, better constructed metal bodies to handle daily use and abuse as well as some weatherproofing of the buttons and doors. (However, Canon cameras have fallen from elephants and airplanes and have survived, so they are all generally pretty rugged. At pitcher of water was thrown on the back of my Rebel XT and it was fine.) All these features give the 7D and 50D a bigger and heavier body than the smaller, lighter 550D, which may be an important consideration for some users. Also, the 7D, and 50D have AF microadjustment capability, but the 550D does not. AF Microadjustment means that you can adjust the auto-focusing for each lens, in the camera menu, if they happen to front- or back-focus a little bit. I don’t think this is a very important feature, as I discuss above in Features. (The problem is that it is a maddening procedure, and you may get the focus exactly sharp for the center focus point at 15 feet at f/4, yet find that it is still off for the upper left focus point when you shoot under real life conditions that vary from those settings.) As I said above, if you need an excessive amount of AF microadjustment, you should probably send the camera or lens back for repair, calibration, or replacement. Or if you are that obsessed about pixels, you should be looking at a pro-sumer or pro camera and L series lenses. Finally, the 550D also uses SD type memory cards, while the other cameras all use CF, and the smaller battery of the 550D will not last for as many shots as the other cameras.

Also, as I discussed above, be aware that the mode dials of the 7D and 5D MkII do not have most of the “basic zone” mode settings such as sports, portrait, and landscape. If you are starting to learn dSLR photography, these modes are helpful for seeing the results from different camera settings, and are good shortcuts until you have learned more about apertures and shutter speeds. Or if you never intend to use or learn more about the advance settings, the basic modes are good for helping you get better looking results than Auto or Program modes. So if you plan on keeping your camera set on Auto, Program, or the basic modes (sports, landscape, etc.), start with the 550D or one of the other Rebels for now and upgrade later if you feel you have outgrown its capabilities. Your image quality difference between a 7D on Auto and a 550D on Auto will be negligible.

So there you have it. You can read great, in depth reviews of each of these cameras on DPreview.com. There are probably numerous features and points that I forgot to mention, but hopefully this will give you a starting point in determining which features are important to you, and what warrants further research to help you in making your decision. The important thing is to choose one that fits your needs and budget, then stop comparing and get out and shoot! As I said above, your camera choice should be based on your level and needs as a photographer, and on which camera best serves the way you work. Whichever one you choose, I highly encourage you to get the the applicable Canon Guide to Digital SLR Photography from David Busch, or a similar book like the Magic Lantern Guides. They are much more user friendly versions of the camera’s manual, and will get you up and running quickly and assist you in fully understanding the settings, controls, and functions of your dSLR.

Need a lens to go with your new camera? Read about choosing a lens other than the kit lens in this post Why You Shouldn’t Buy the Kit Lens, and learn about the Best Lenses for Travel Photography here.

Please leave a comment, ask a question. Let me know what has been helpful, and what you’d like to read more about.

If you plan to purchase any of this equipment or books, I encourage you to do so through the site I’ve set up with Amazon, Doug’s Picturing Change Digital Photography Equipment and Books. Purchasing through this site or one of the direct-to-Amazon.com links below will help support my blog and my work. Thanks! And for those of you across the pond, click here for my referral link to Amazon UK. If you are in another country, click on one of my Amazon links, scroll to the bottom of the page, and click on your country for your local Amazon.
See the T2i on Amazon.
See the 60D on Amazon.
See the 7D on Amazon.
See the Canon 5D MkII on Amazon.

Exploring Metering Modes

It is one thing to know that your cool new Canon or Nikon digital SLR provides you with 3 or 4 different metering modes. It’s another thing to know how and when to actually use them in the field or in different real life situations. The Canon 5D, 7D, 60D, 50D and T3i all offer four different metering modes – Evaluative, Center-Weighted, Partial, and Spot – as I’m sure you have thoroughly read about in your manual, right? Nikons, like the D7000, D51000, and D3100 generally have three different modes: Matrix, Center-Weighted, and Spot. I’ll try to cut to the chase and simplify the explanations and their uses.  Note that there are some important differences between how they work for Canon and Nikon cameras, particularly the Spot mode.

Canon T3i T2i 60D metering mode partial spot viewfinder
The viewfinder of the Canon T3i (T2i and 60D similar) showing the areas evaluated for Partial Metering (superimposed grey area) and Spot Metering (black circle in center).

Evaluative (Canon) or Matrix (Nikon): This is the default mode for your camera, and it can be used for almost every situation you shoot. Yes, maybe 90% of the time, maybe more. The camera evaluates the entire scene, as divided into several zones, and chooses the best exposure based on its knowledge of thousands of potential image situations. The current metering systems are so good, they can even be relied on for backlit or other challenging lighting situations. An important feature of this mode is that advanced cameras such as the Canon 7D, Canon 60D or Nikon D7000, D5100 take into account the selected focus point in its determination of exposure settings. It is assuming your focus point is on your most important subject, so under challenging and critical situations, it is wise to confirm that the camera has chosen the focus point you want (well, this is always wise). Even better, you should typically manually choose the focus point or cluster of focus points, as the camera has no idea what your intended image is. So in special situations, such as dramatically back-lit scenes or a situation with bright light plus deep shadows, make sure you are not using the center point to focus and meter, and then recomposing to take the shot – because some of the zones that the camera evaluated are now no longer in your shot after recomposing, and other new areas are, so the camera has set exposure for an image other than the one you are taking.


San Miguel Duenas, Guatemala

Partial (Canon only): This mode meters a smaller area, about 9.4%, in the center of the scene on the 7D and 6.5% with the 60D. Nikons do not have this mode, though some Nikons such as the D7000 offer the ability to change the size of the Center-Weighted Metering circle (see Center-Weighted Metering below), so it makes up for this.  The area is approximately a circle that reaches to the top and bottom focus points, and the metering system ignores the rest of the frame. This mode is useful where there is a dramatic difference in lighting between the foreground or subject and the background. For example, when your subject is backlit – maybe standing in front of a bright window or the sun – and consequently their face is in shadow. I know I said evaluative mode can often handle this type of situation, but if you want the face or subject to be properly exposed and not risk blowing the shot, it is worth it to quickly switch to Partial metering mode. Again, another time to use this is when there is a wide range of light in your scene, from bright sunlight to deep shadows. Remember, this mode is not linked to your focus point. The partial area that is metered is always in the center, so meter on the part of the scene that is most critical and that you want properly exposed, using the central area of the viewfinder, lock in that exposure, then recompose and take the shot.


Campo Nuevo, Guatemala

Important Note about Locking In the Metered Exposure: The metered exposure setting is sometimes locked in by pressing the shutter button half-way down or sometimes not “locked” until the image is taken (depending on your camera, or current shooting mode, or how you set it up – read your manual!).  The shutter button also typically locks focus (unless you have changed that setting).  If you wish to lock in focus and exposure separately, which you often will need to do, on a Canon use the AF-Lock (for focus) button and/ or the AE-Lock (for exposure) button – which looks like this: * – to lock in one of them before locking in the other with the half-press or full press of the shutter button. On the Nikons, you have to set one of your buttons to be the exposure lock button, either the AE-L/AF-L Button or the Fn Button on some cameras like the D7000. I suggest first metering on the subject and locking in that exposure by pressing the appropriate button, then recomposing and locking in focus right before or as you take the photo. Or else learning the advanced methods of back button focusing. Get in the habit of knowing how to do this instinctively, and if you need to hold or just press the particular button, so that it comes naturally during critical situations. On the 7D and D7000 and other cameras you can also customize how these buttons perform or set other buttons to do these tasks. You can see in the viewfinder that you have locked focus when the focus dot is lit. You can see that exposure is locked with the AE-L indication in the Nikon viewfinder or the * symbol in the Canon viewfinder.

Locking exposure and focus, independently, each in the brief seconds before you take a shot? Confusing? A little, but not impossible to figure out with some experimentation and practice. Remember, this is why you bought the fancy dSLR, so that you could make use of all these advanced features and take your photos to another level!

Center-Weighted Average: This metering mode is sort of a cross between Evaluative and Partial metering. It acknowledges that the subject is in the center and requires special metering attention, but it also takes into account all the other zones. Again, this is not linked to the focus point, but always to the center, so if your subject is off center – which it typically should be for a more dynamic image – you need to lock in exposure on your subject and then recompose. I have found that with the Canon 50D, this mode is actually more consistent than Evaluative metering, which often over exposes by 1/3 or 1/2 a stop.  Note that you can use the Custom Settings of the D7000 to change the size of the center area being weighted.

This mode can be used when you want to ensure that the subject is properly exposed, but you also want the camera to consider the background. However, if the background is much darker or lighter than the subject, and you want the camera to expose only for the subject and ignore the background, use Spot Metering…


San Miguel Duenas, Guatemala

Spot: This mode meters a small center area, 2.3% of the frame with the 7D, 2.8% with the 60D, and 2.5% with the D5100 and D7000. This area is indicated by the small circle in the center of the viewfinder of the 7D and 60D. There is no center circle in the Nikon viewfinder and you will soon find out why.  So when do you want to use Spot metering? This, again, is useful for scenes with great variation in light and shadow, or in very critical situations. One of the most common ways to use it is when metering for proper exposure on a dramatically lit face or subject, but the exposure of the rest of the scene is unimportant. Or perhaps your subject is set against a plain but consistent background, like a bird against a large blue sky. It is also used to determine proper exposure of a subject before switching the camera to manual for a controlled studio shot, or a critical shot or series of shots where the lighting is not going to change. If your background is completely dark or extremely bright, and you don’t want the exposure system to consider it at all when determining the exposure of you subject, use Spot rather than Center-Weighted or Partial. With Canon cameras, the Spot that is used to evaluate the exposure is in the center of the frame, and is often indicated by a small circle. However, with Nikon cameras like the D5100 and D7000, the Spot surrounds the active focus point and is not necessarily in the center of the frame unless you are using the center AF point. So it is wise to become familiar with how your camera operates.

A fifth metering mode is Manual metering, which isn’t actually a mode in your camera, but is a method of metering. This is where you use a light meter or use your camera as a light meter (such as described at the end in the Spot section above) and then manually set your exposure based on the meter readings. This is used when you want ultimate control of the metering and exposure.

You can learn much more about the Exposure modes of specific cameras, including the 60D, T3i, D7000 and D5100, in my e-book users guide. See my e-book website, Full Stop to learn more about them or click the banner below! The guides also go into much more detail about setting up the related metering mode Custom Functions/Custom Settings and camera controls.

full stop dslr photo photography camera manual guide for dummies canon nikon

I recently ran across an interesting article which takes this discussion to another level by addressing the use of different metering modes in the very specific situation of a wedding. Since one of the main subjects in typically all in white, and the other in black, the metering mode you select and where you meter can make a dramatic difference in the exposure. While that article is specific to weddings, it is useful and helpful to read to further understand how the different modes work, and how special situations might call for some extra thought.

New Canon 550D / Rebel T2i Announced

Canon has just announced a new model in their Rebel lineup of digital SLRs, the T2i or 550D.  I encourage anyone who is just entering into digital SLR photography to have a look at my previous post Why You Shouldn’t Buy the Kit Lens before you simply buy the T2i kit without considering another lens that may be a better choice for you and your photography.  Also, have a look at my post comparing several of the Canon dSLR cameras, including information about the 550D / T2i.


Antigua, Guatemala                             photo by dojoklo

Equipment for Travel (and Everyday) Photography

My recent trip to Guatemala to photograph for an NGO gave me an opportunity to field test a bunch of new gear under real working conditions – jumping on and off chicken buses, crammed into the seat of a van for hours with all of it on my lap, roaming around the streets of Antigua trying to be discreet as possible carrying a 70-200mm lens and a backpack full of equipment, and photographing for long hours at a time. I had done a bunch of Internet research to choose the best and the most appropriate gear, made a couple trips to B+H to look at it all, and it all worked out as good, or often better than expected. I’m not sponsored or compensated by any of these companies (but wouldn’t be opposed to it if they happen to be reading…), but I do recommend all of this gear without reservation. (Update: I’ve now been using all of this equipment constantly for the past 11 months, and still recommend it all!) I discuss the camera I used on the trip, the Canon 7D, in this previous post.

Most all of this equipment will be equally essential for day-to-day photography, culture and travel photography, humanitarian photography, and photojournalism. And the equipment will be useful with any dSLR, Canon or Nikon.

If you plan to purchase any of this equipment, I encourage you to do so through the links I’ve created below which will take you directly to Amazon.com. Your price will be the same as always, and I will get a small referral fee. Or you can go directly to Amazon.com here. I appreciate your support! If you are in the UK, or wish to purchase from B+H Photo, see the end of this post for information on those links.


Antigua, Guatemala

Camera Backpack: I use the Lowepro Compu Trekker AW as both my carry-on and my working bag during the day. The current version of this is the Lowepro Pro Runner 350 AW. The size works perfectly for both needs. It easily fits the airline carry-on size, including smaller international requirements in some regions, yet fits more that it would first appear. With careful configuration of the interior dividers, I can fit 2 Canon bodies (a Rebel XT and a Canon 7D or 50D), a 70-200mm f/4L IS, a 16-35mm f/2.8L II wide angle zoom, a 28-105mm standard zoom (an older lens, here is a link to the better 24-105mm f/4L), all lenses stored with their hoods turned backwards, a 580EX II flash, its diffuser, 2 external hard drives in cases, a couple memory card cases, and some filters. In the outside pocket, I have a couple battery chargers, extra batteries, medium Rocket Blower, miscellaneous cords, caps, and accessories. In the rear pocket designed for a laptop, I easily fit a 32″ 5 in 1 reflector. Once I am in the field, I play around with the dividers until I have a set-up that best fits my flexible daily needs, and allows quick preparations or lens changes. The pack is extremely comfortable, has tons of padding on the straps and the back so that its weight never bothers me and I don’t feel the reflector in my back. I often wear it for hours a day while working, and it is never a problem. In fact, on my final night in Guatemala when I went out to dinner in Antigua without it on my back for the first time in 2 weeks, I commented that I felt a bit naked. The top handle is strong enough to grab and carry with, as is often necessary while jumping in and out of cars or putting it down and picking it up. There is also a waist belt that I use when I have it fully loaded, like going to the airport, to relieve my shoulders of some of the weight. And it comes with a built in rain cover that stows away at the base of the bag that has done its job on a couple occasions. The Compu Trekker Plus (now the Pro Runner 450 AW) might be a better carry on size so that you could carry more gear on the plane with you (if it fits the airline’s requirements) but it would be too big for daily use. There are also rolling versions of these, with an “x” in the name, thought the retractable handles and wheels add weight and size to the bags. The Compu Trekker has a tripod strap system that I don’t use, and another outside pocket that is, conveniently, exactly the size of a Lonely Planet guidebook. Here are some photos of the backpack in action at the Chichicastenango Market, taken by my travel companion Elizabeth Jimenez:

If you just need a holster style bag to carry one body and one lens, I highly recommend the M Rock Holster Bags.  I used the Yellowstone model for months while traveling in South America, and I love its durability, pockets, and built-in rain cover, plus it comes with extra back-up straps.  Make sure you get the right bag for your body/ lens combination – you will need a longer bag for a telephoto zoom lens.  As far as a satchel bag to carry a body or two plus two or three lenses and/ or a flash as you set out for the day but don’t want a backpack type bag, have a look at the Think Tank Retrospective line (there are a few sizes, the 10, 20 and 30, etc.) or the Crumpler Million Dollar Homes. Again, there are several sizes to choose from, called the 5 Million, 6 Million, etc. The 7 Million Dollar Home is my satchel of choice for carrying my gear about town while working.  It holds a large dSLR (5D line, 6D, 60D, etc.) with a mid-range telephoto attached (24-105mm), plus a 70-200mm, and another lens or a flash, all in the inside compartments. There is then some extra space and a couple front/ flap pockets to hold chargers, memory cards, batteries, etc. To keep moisture from accumulating in your equipment and bag, throw in a durable desiccant pack like this one.  Just be sure that it isn’t loose in your bag and scratching against your equipment.

Security: A couple great additions to the bag are Eagle Creek combo locks and Eagle Creek Pack It Sacs in the small size to hold batteries, memory cards in cases, LensPen, camera and lens body caps, and various wires and cables. The medium size Pack It Sacs are great for medicines bottles and other loose stuff in your luggage. The backpack’s zippers are rugged enough to handle constant abuse from the combo locks, which although they are weighty, are far better than keyed locks in the field so that you don’t need to go digging for the key when you are in a hurry. You just have to be a little careful when opening and closing the bag – the locks dangle and flip around, and could easily bang into something fragile in the backpack. With the Pack It Sacs, I clipped some rubber bands to the key clip within the outside pocket of the backpack and then attached them to the clips on the Sacs, so that way the Sacs won’t accidentally fall out if I flip the bag open and close while the outer pocket is open. There’s enough play to access them and then shove them back into the bag.

Another great accessory for this backpack is the PacSafe 55 wire mesh security system. It fits perfectly around this size bag, and secures your bag and your gear in a hotel room or wherever. It has a long cable that you loop around something secure and lock in place. It also comes with a small, compact storage case for when not in use.


Chichicastenango, Guatemala

SanDisk Extreme 16GB CF Memory Cards – I talked about these in the previous post. Once again, no particular reason why I use these rather than Lexar or Delkin…maybe a sponsorship would help seal my loyalties… :). Be sure to get the Sandisk Extreme 16 GB SD version if you are using the 60D or Rebel T2i. I use a Sandisk card reader to upload the images to my laptop, rather than from the camera directly, in order to save the camera batteries. This Sandisk Card Reader is for the CF cards, and the 5 in 1 reads SD cards.

Spare Batteries – I always have 3 batteries for each camera body. The Canon 60D, 7D and 5D use the Canon LP-E6 Battery. Stick with the Canon brand batteries rather than the unpredictable third-party brands.

BlackRapid RS-4 Camera Strap – The R-Strap is wonderful, and I highly recommend it. I was hesitant and suspicious at first, but I quickly adored it and will always use it. I had even emailed BlackRapid before purchasing to ask about shortcomings of earlier models, and they addressed my concerns thoroughly and completely. I was very impressed with the time and personal attention they paid to my questions. The strap is comfortable, easy to use, quick, strong, and rugged. I often use it in conjunction with wearing the backpack, and although the straps fight for space against each other on my shoulder, it still works fine. I’m a bit envious of the RS-7 that just came out, since it has a curved, ergonomic shoulder pad that will work better by itself on your shoulder and next to a backpack strap. There is also now a version designed for women, the RS-W1. Watch some of the videos out there as to how to use it, and be sure to moisten the rubber gasket before attaching it to your camera – this will make a firm seal that will never budge. The big pain is that the part attached to your camera body is best left in place, yet that makes it less easy to place the camera down on a table or in your bag, and will have to be removed to use a tripod. Also, the textured tightening screw part of the connector may rub up against your camera body in various situations, so I put some black duct tape on the bottom edges of the camera to protect it.

B+W brand UV Filters – clear, protective filters for the lenses, slim for the wide angle. The slim is probably not needed with a crop sensor camera, but is recommended for a full frame camera. The slim comes with a lens cap that does not stay on well after a little bit of use, as there are no front threads for the Canon cap to fit on. If I had to do it over, I would probably get the regular filter so that I could use the Canon lens cap.

B+W brand Circular Polarizer Filter – a polarizer serves to darken skies, boost contrast, cut through haze and reflections in water and glass, and block out a stop or two of light in bright situations. I keep it on my lens much of the time when doing outside work. Polarizing filters work to their maximum degree when the sun is to your right or left, but not when it is directly in front or behind you. Be sure to turn the moving part of the filter to dial in the degree of polarizing that you desire. They are typically not used on wide angle lenses because the darkening effect would vary across a wide swath of sky, and usually look strange.

Sto-Fen Omni Bounce Diffuser – works great on the Canon 580EX II flash, although very snug and is always difficult to get on and off in a hurry. Squeeze it and stretch it first to help it go on easier. Please don’t use the diffuser outside! Even if you see “pros” doing it. It doesn’t do anything outside but make your flash work harder. You can’t bounce light off the clouds.

Honl Color Correction Filters and Speed Strap – These are essential for using with flash to balance the white balance of the scene – to make the color of the flash the same as the color of the ambient light. This way when you correct the WB of your subject your backgrounds won’t be vivid orange (incandescent ambient lighting) or sickly green (fluorescent). You can’t use them in conjunction with the diffuser – the Omni-Bounce can’t fit over the Speed Strap, but that had not occurred to me when I bought them – so I’m going to have to figure out a solution to that. And I’m going to continue experimenting with the full or 1/2 CTO to add warmth to outside fill flash, as recommended by Nevada Wier (actually she uses a Kodak Wratten 81A gel, but I think they are similar). The kit is very slim and fits perfectly in one of the inside pockets of the backpack.


Antigua, Guatemala

Giottos Medium Rocket Blower – I initially used the small size in order to save a bit of space, but it didn’t have the power I wanted, so I sprung for the medium. Always have it handy for getting dust off lenses in a hurry, because blowing on them – no matter how careful – leads to spittle on the lenses 5% of the time when it doesn’t matter and 95% of the time when you are in the most critical situations. The large size may be a good choice as well.

Pearstone LP-1 Lens Pen – Works great for cleaning off mysterious spots, smudges, and fingerprints that always appear on the lens (this is why I always use UV filters) as well as that a-fore-mentioned spittle. There is a retractable brush on one end and a cleaning head on the other end. Twist the cap to load the cleaning tip with the carbon based cleaning material, then remove the cap and use. Please read the instructions and visit the LensPen website to fully learn how to use it properly.

32″ 5 in 1 Reflector – This size is perfect for travel and fits in the backpack, however I never actually used it during the trip so I don’t know if the size is useful in the field. It is best suited for set-up situations and portraits, which I didn’t have the opportunity to do on this assignment. I could have used it once to block some stray sunlight falling into a very dark room and potentially messing up the exposure, but I didn’t think about it until later. I did, however, carry it around a lot and never noticed because it is lightweight and very durable.

External Hard Drives – I use a Iomega Ego 500GB and a Lacie Rugged USB 500GB when traveling. I’ve used the Iomega on extended trips before, and love it. I’ve never had any problems with it, and it is solid and sturdy. I also decided to try out the Lacie Rugged USB for this trip. It is lighter than the Iomega, and doesn’t feel as solid and sturdy, but it worked just fine. They both fit perfectly in the Case Logic Portable Hard Drive Case made for these types of drives, which I recommend getting in different colors so you can quickly differentiate your different drives. I leave them in the cases at all times, but you have to pull the Ego slightly out to plug in the cord, and place the Lacie upside down in the case for the cord to fit without removing the drive each time. For storage at home, I use the Western Digital My Book 1TB External Hard Drives.

Hakuba Digital Media Storage Wallet – These are great, soft sided, thin memory card cases that hold 6 CF memory cards each. I picked up this recommendation from Karl Grobl’s website. There are a lot of bulky, hard-sided cases out there, which make you feel like your memory cards need excessive protection. I’m sure there has been a situation where an elephant stepped on a memory card case and all photos were miraculously saved by a hard sided case, but as far as my needs, the soft ones work just fine. Get into the habit of inserting blank cards face up and used cards face down into the cases’ pockets. Since this is the size for CF cards, have a look at this one if you use SD cards.

‘da Products Screen Protector – (product no longer available) – This is the second camera I have used this product with, and I am once again very happy with it. It is a very inexpensive yet high quality screen protector for your LCD, made with acrylic. Get ‘da40D Protector for the 7D – it is the perfect size. It is a slow, careful, time consuming process to attach the adhesive strips, get it clean, dust and fingerprint free, and perfectly centered, but once it’s on, its there to stay (unless you want to remove it – in that case, to remove the ‘da screen protector use dental floss to break the seal at the bottom corners, then slowly peel off.) I know that today’s LCD screens are durable, but I feel more comfortable and carefree about constantly wiping off my protector with my fingers or shirt than I would directly on the built in screen. This is also why I use B+W UV filters on the lenses.  However, if you have a camera with a rotating screen such as a 60D, T3i, or D5100, this type of screen protector won’t work.  You will need to use a thin adhesive film protector like this one.

Calumet micro fiber lens cloth – Stores perfectly in another slim inside pocket of the backpack, and always handy to have.


Chichicastenango, Guatemala

Insurance – Although I am a member of NPPA – National Press Photographers Association, I also joined NANPA – North American Nature Photography Association, in order to get their equipment insurance, which is much cheaper and has a much lower deductible than NPPA’s, even including the extra $100 to join NANPA. The insurance is primarily for the equipment only, so you are not paying for liability coverage geared toward a business as you are with every other photo equipment insurance plan I researched. Please note that the NANPA membership fee covers you from June to June or something like that – they don’t pro-rate, so you will not get a full year if you join at any other time. The insurance covers photo and computer equipment at home and while traveling. (If you happen to join NANPA to get their insurance, be sure to mention my name as a referrer, and I get $20 NANPA Bucks and save on my next renewal!)

Skooba Satchel 2.0 Laptop Bag – This is typically my second carry on, in which I carry my laptop, some books, misc. charging cords, some toiletries. This is a wonderful laptop bag, and you won’t believe how much will fit in it! As they say themselves, it is deceptively slim looking and incredibly light. It has these great little air squares for cushion everywhere – like bubble wrap made from durable rubber, and has an extremely comfortable and ergonomic strap.

Lowa Tempest Lo Hiking Shoes – I’ve worn these shoes, this same pair, nearly everyday, for almost 4 years straight now, and they still have a little life left in them. I wore them every single day for a total of 7 months in Peru, walking the cobbled streets of Cusco, and traveling the country. And I wore them nearly every day for 3 years walking the streets of Brooklyn and Manhattan, and now Cambridge. (I don’t have a car, so I actually walk, a lot.) They are so comfortable I never notice them. They are light, durable, and somewhat waterproof if treated regularly. I recently bought a backup pair for the inevitable day that I have to give them up. After 3.5 years one one them developed a tear at the front-side where they crease when crouching to take photos, but they are still fine except in the rain.

Post-Production – Once you get back you are going to need to organize, edit, and work on all your photos. And for that, of course you are going to need
Adobe Photoshop and/ or Adobe Lightroom 3. You can start off with the trial versions that you can download from the Adobe site, but sooner or later you are going to have to get the real versions. Use that student discount while you still can!

Purchasing: If you plan to purchase any of this equipment, accessories, or anything else from Amazon.com I encourage you to do so through the links I set up throughout this post. Just click on the equipment above and you will be taken directly to that Amazon page. Your purchasing price will be the same, and they will give me a little something for referring you, which will help support my blog. Thanks! Or click on the Amazon.com logo below to enter Amazon and start shopping. I appreciate your support!

If you are in the UK or Canada, please use these Amazon links:

UK: my Amazon.co.uk link

Canada: my Amazon.ca link

For those interested in purchasing through B&H Photo I have set up affiliate links with them as well – find it on the left side of this page.