Nikon Z6III Experience User Guide Now Available!

My latest Full Stop e-book, Nikon Z6III Experience  user guide to the Nikon Z6III mirrorless camera is now available!

This e-book goes beyond the manual to help you learn the features, settings, and controls of the powerful and highly customizable Nikon Z6III. Plus most importantly it explains how, when, and why to use the functions, settings, menu options, and controls in your photography.

Written in the clear, concise, and comprehensive style of all Full Stop guides, Nikon Z6III Experience will help you learn to use your Nikon Z 6III quickly and competently, to consistently make the types of images you desire. This e-book is available in either PDF or EPUB format for reading on your computer, tablet, iPad, e-reader, etc.

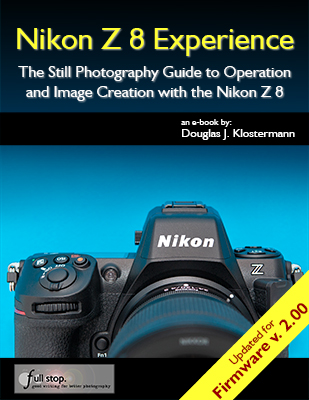
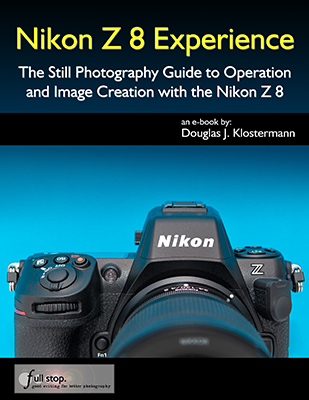
Nikon Z8 Experience book manual guide how to tips tricks field guide quick start Firmware 2 2.0 2.00

Learn more about this Nikon Z6 III guide, view a preview, and purchase it here:

https://www.fullstopbooks.com/nikon-z-6-iii-experience/

As one reader has said about Full Stop guides:

I don’t know how I could fully take advantage of all the features the camera has to offer without this publication! It’s well-organized, easy to understand, and succinct enough to keep your attention while still containing a wealth of information to get the most out of your camera.”

Nikon Z6III book manual learn tips tricks master dummies how to tutorial use. Nikon Z6III book manual learn tips tricks master dummies how to tutorial use

Nikon Z6III Experience is designed for users ranging from enthusiasts to experienced:

For Intermediate and Enthusiast Photographers: This instant download Nikon Z6III e-book is designed for enthusiast photographers who wish to take fuller advantage of the capabilities of their camera:

-Go beyond Program mode and shoot competently in A, S, and M modes.

-Take full control of the powerful autofocus system to capture sharp images of still and moving subjects. Learn to take advantage of the face, eye, and subject detection, plus subject tracking features.

-Set up your camera with clear explanations and recommended settings for the numerous Menu options and Custom Settings of the Nikon Z6 III. The text of the book includes a link to a free download of my comprehensive Nikon Z6II Menu Setup Spreadsheet.

-Learn how, when, and why to use and customize the various controls, buttons, and features of the Z 6III.

-Understand the various metering modes, exposure compensation, and exposure lock for correct exposure of every image, even in challenging lighting situations.

Nikon Z6III Experience book manual guide how to tips tricks field guide quick start controls sttings. Nikon Z6III Experience book manual guide how to tips tricks field guide quick start controls sttings

For Experienced Photographers coming to the Z6III from previous models, this guide explains the new and advanced features in order to quickly have you taking advantage of these capabilities, including the AF System and its Focus Modes, AF-Area Modes, eye detection, subject detection / tracking, and Custom Settings. Attention is given to the new features including the customizable controls, Focus Shift Shooting, in-camera image stabilization, new menu items and options, 6K and 4K video, Time-Lapse and Interval Timer, plus using F-mount lenses with the FTZ II Adapter. And it covers using the Wi-Fi and Bluetooth capabilities with SnapBridge.

This 509 page digital guide to the Nikon Z6III is an illustrated e-book that goes beyond the Z6III manual to explain how, when, and why to use the features, settings, and controls of the Z6III to help you take control of your camera and the images you create.

Learn more about Nikon Z6III Experience, view a preview, and purchase it on my Full Stop website here:

www.fullstopbooks.com/nikon-z-6-iii-experience

Nikon Z6III Experience book manual guide how to tips tricks field guide quick start controls sttings  Nikon Z6III Experience book manual guide how to tips tricks field guide quick start controls sttings

Take control of your camera and the images you create!

Hands On with the Nikon Z6III

I recently had the opportunity to use the new Nikon Z6III mirrorless camera, in mid-June 2024 at a Nikon “Touch and Try” event at Hunt’s Camera in Melrose (Boston) Mass. The pre-release event was so notable that the president of Nikon USA, Naoki Onozato, was even in attendance! 
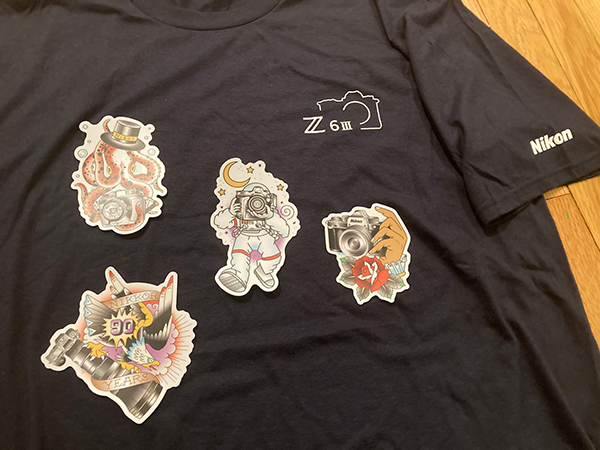
Nikon swag from the Z 6III event.

The presentation from the Nikon reps boasted about many of the features of the Z6III, which are not just updated from the Z 6II, but some of which even surpass the Nikon Z 8 / Z 9. Many of the improved features are due to the “partially-stacked sensor,” a technology introduced for the first time on the Z6III. What this means is that the camera has speed and functionality approaching the stacked sensors of the Z 8 and Z 9, but at a lower cost. A “stacked sensor” such as on the Z 8 and Z 9 locates some of the electronics immediately behind the image sensor, which increases the speed of the sensor readout. This has advantages for the speed and operation of the AF system, reduces the rolling shutter effect, allows for faster continuous shooting speeds, as well as a smoother performance of the electronic viewfinder to reduce blackout during continuous shooting. The partially-stacked sensor of the Z6III locates some of the electronics directly above and below the image sensor. While the speeds and improvements are not as dramatic as with the Z 8 and Z 9, they are still a significant improvement over the sensor of the Z6II, including a smooth view of the scene when shooting at 20fps.

While the Z6III has similar subject detection choices as the Z 8 and Z 9, including people, eyes, animals, vehicles, and airplanes, the Z6III does not have a dedicated Birds choice. In order to make use of bird detection, you will need to set subject detection for Auto or Animal. The Z6III also does not have a sensor shield, but there is a mechanical shutter that will protect the sensor when a lens is removed. Also, the Z6III does not offer the Auto Capture option of the Z 8 and Z 9. However, it does have the Pre-Release Capture feature, which will buffer images for up to 300 seconds as the Shutter Button is half-pressed, and will save the previous 1 second of images when the Shutter Button is fully pressed. You will need to be using the C30, C60, or C120 release mode, which captures JPEG images only.

The Z6III also boasts 8-stop in-body image stabilization (vibration reduction), plus a Focus Point VR option which ensures that the image stabilization is working effectively at the location of the active focus point, which is where your main subject will be located.

Models at the Nikon Z6III event, shot with the Z 6III and NIKKOR Z 50mm f/1.2 S lens. 1/5000, f/1.2, 3200 ISO. Clearly I should have lowered the shutter speed and ISO, but I was handed the camera and a brief moment to make my adjustments and shots before handing the camera to the next user.

For continuous bursts, the Continuous Low (CL) option can be set for 1 to 7 fps. Nikon’s specs say that Continuous High (CH) ranges from 1 to 8.1 fps (up to 16 fps with electronic shutter, and that Continuous High Extended (CH+) ranges from 1 to 14 fps (up to 20 fps with electronic shutter. However in the Z6III menu does not offer the option to adjust the CH and CH+ settings, so perhaps they are fixed at a maximum of 8.1/16 and 14/20 fps, and may be lower based on shutter speed and pother camera settings. It is also important to note that the Z6III does not include a battery charger for the En-EL15c battery, in the box. You will need to use an older charger from a previous camera, a purchase a battery charger unit, or an AC charger and power delivery (PD) USB cable that connects to the camera and charges the batteries in-camera. The optional Nikon MB-N14 Power Battery Pack with Vertical Grip can also be plugged-in to charge the batteries in the grip.

Several of the buttons of the Z6III can be customized to your desired functions, such as the Fn1 and Fn2 Buttons. By default, The Fn1 button is set for White Balance. Press the button and turn the rear Command Dial to change the WB setting and the front Sub-Command Dial to change any sub-options, such as the Auto WB sub-options of A0, A1, and A2. The Fn2 Button is set to AF Mode / AF-Area Mode. This is handy for changing these settings, as the Z6III does not have the AF Mode Button that the Z 8 and Z 9 has. Part of the rear screen can also be used for a custom function, similar to assigning a function to one of the camera buttons. For example, you can tap the designated portion of the screen to display the level while shooting. The Z6III also includes an Illumination Button for the top LCD screen. Press it once to illuminate that top screen, then press it again to turn it off. With the Z 8 and Z 9, when accessing f2 and g2 to customize the buttons, you can press the Delete Button to reset the selected button back to its default, or press and hold the Delete Button to reset all the buttons. The Z6III does not appear to have this reset option.

Most notably, the word of the day at the Nikon Z6III presentation was “nits,” a term which describes brightness of the Electronic Viewfinder. (A nit is the unit of measurement that describes how bright a television, smartphone, computer monitor, laptop screen, or another type of display is. The higher the number of nits, the brighter the display.) While a screen such as the iPhone 15 can display at up to 2000 nits, the viewfinder of the Nikon Z6III is a blindingly bright 4000 nits! The viewfinder brightness can be adjusted with your eye at the viewfinder, by pressing the i Button and accessing the Monitor/Viewfinder Brightness options. It can be set for Auto, or for the brightness level of your choice.

When working in an extremely dark room, the viewfinder brightness can be increased to its maximum, and looking through the camera, the room will appear to be a bright at high noon. Not only is the scene in the viewfinder bright, but it retains a nice dynamic range, without appearing contrasty or washed out. And not only can you easily view any subject in this scene, the autofocus system and subject / eye detection works down to -10EV, which means the Z6II can quickly and easily find the subject’s eye, and follow it around the frame. These features, working together, can be incredibly helpful when shooting a wedding reception or event in a very dark space.

The Z6III uses a different style of articulating screen, similar to the one introduced on the Nikon Zf. While it does not extend and rotate as dramatically as the rear screen of the Z 8 and Z 9, it can now be opened outward to the side, and rotated up and down, similar to many Canon rear screens. This also allows the screen to be flipped around and closed, which will protect the screen when not in use. And as with the Z 8 and Z 9 , the view on the screen can be rotated when the camera is used in the vertical (portrait) orientation, for ease of viewing.

As with the Z 8 and Z9, the Z6III has the option for the vertical rotation of the information on the rear screen. This means that the text and icons on the shooting, playback ,and menu screens can be set to rotate when the camera is held in the vertical position.

Similar to the Z 8 screens shown here, the views on the rear screen of the Z6III can be rotated along with the vertical orientation of the camera. As you can see, the text and icons on the screen rotate, for ease of viewing.

The Z6III offers the Pixel Shift option, to create high-resolution images up to 96 MP. The camera will capture 4, 8, 16, or 32 images, which can be combined in Nikon’s NX Studio software to create the high megapixel image. Not only will this provide a high-resolution image, but it can significantly reduce moire and noise, and increase the dynamic range of an image. You will need to use a tripod to capture the images that will be combined. The 16 and 32 image setting will capture an image dedicated to noise reduction.

The Z6III includes the High-Frequency Flicker Reduction feature found on the Z 8 and Z 9. This enables you to set an exact shutter speed, such as 1/60.3, which can allow you to reduce or eliminate flicker in the images that can be caused by certain types of lighting, or when photographing illuminated screens such as TVs, computer monitors, or big-screens found in a sports stadium.

There are also a number of video improvements in the Nikon Z6III. It can record in-camera RAW video (ProRex / NRAW), including full-frame 6K at 60p, 5.4K at 60p and Full HD 240p, plus slow motion video options. There is a 125 minute video recording time limit, and the microphone jack now also performs as a line-in audio input, allowing for the use of additional audio equipment and mics such as a direct connection to a sound board or boom mic.

It is also notable that the name “Z6III” is now written without any space between the “Z” and the numbers, as it is with previous Z models such as the Z 9 and Z 7II.

Some Nikon Z6III JPEG images, straight out of the camera. The full JPEG and RAW versions can be found here:
https://www.flickr.com/…/dojoklo/albums/72177720318125691

My comprehensive guide to the mirrorless Z6III, Nikon Z6III Experience by Douglas Klostermann, will be available by Fall 2024. There will be a companion Menu Setup Spreadsheet as well, which includes detailed listings of suggested Menu Settings and Custom Settings for various types of shooting situations, including Travel/Street, Action/Sports, Wildlife/Birds, Studio/Portrait, and Performance/Concert.

You can learn about and purchase the book and the menu setup spreadsheet at my Full Stop website here:

https://www.fullstopbooks.com/nikon-z-6iii-experience/

Purchase the Nikon Z6III body or kit here!

B+H Photo: Z 6III Body only:
https://www.bhphotovideo.com/c/product/1834803-REG/nikon_z6_iii_mirrorless_camera.html/BI/7364/KBID/7886/kw/NIZ63/DFF/d10-v2-t1-xNIZ63

B+H Photo: Z 6III with Z 24-70mm f/4 S Lens
https://mer54715.datafeedfile.com/widget_prdt_click.php?aff_num=7886&aff_net=7364&type=text_link&size=na&mode=na&sku=NIZ632470

Amazon: Z6III Body or Body with Lens:
https://amzn.to/45rPisz

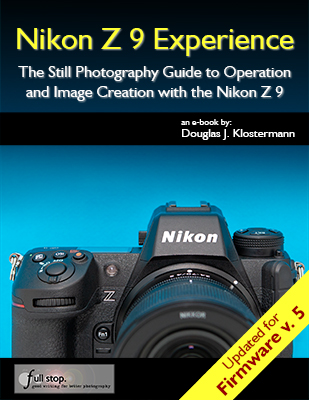
Nikon Z9 Experience User Guide Now Available!

My latest Full Stop e-book, Nikon Z 9 Experience  user guide to the Nikon Z9 mirrorless camera is now available!

And it has been updated for Firmware 5!

This e-book goes beyond the manual to help you learn the features, settings, and controls of the powerful and highly customizable Nikon Z 9. Plus most importantly it explains how, when, and why to use the functions, settings, menu options, and controls in your photography.

Written in the clear, concise, and comprehensive style of all Full Stop guides, Nikon Z 9 Experience will help you learn to use your Nikon Z9 quickly and competently, to consistently make the types of images you desire. This e-book is available in either PDF or EPUB format for reading on your computer, tablet, iPad, e-reader, etc.

Nikon Z9 Experience user guide book manual reference how to master dummies firmware 5

Learn more about this Nikon Z9 guide, view a preview, and purchase it here:

www.fullstopbooks.com/nikon-z-9-experience/

As one reader has said about Full Stop guides:

I don’t know how I could fully take advantage of all the features the camera has to offer without this publication! It’s well-organized, easy to understand, and succinct enough to keep your attention while still containing a wealth of information to get the most out of your camera.”

Nikon Z9 Experience book manual user guide how to tips tricks field guide quick start controls settings Firmware 5Nikon Z9 Experience book manual user guide how to tips tricks field guide quick start controls settings Firmware 5

Nikon Z 9 Experience is designed for users ranging from enthusiasts to experienced:

For Experienced Photographers coming to the Z9 from previous models, this guide explains the new and advanced features in order to quickly have you taking advantage of these capabilities, including the AF System and its Focus Modes, AF-Area Modes, eye detection, subject detection / tracking, and Custom Settings. Attention is given to the new features including the customizable controls, Focus Shift Shooting, Auto Capture, in-camera image stabilization, new menu items and options, 8K and 4K video, Time-Lapse and Interval Timer, plus using F-mount lenses with the FTZ II Adapter. And it covers using the Wi-Fi and Bluetooth capabilities with SnapBridge.

Nikon Z9 Experience book manual user guide how to tips tricks field guide quick start controls settings Firmware 5Nikon Z9 Experience book manual user guide how to tips tricks field guide quick start controls settings Firmware 5

For Intermediate and Enthusiast Photographers: This instant download Nikon Z9 e-book is designed for enthusiast photographers who wish to take fuller advantage of the capabilities of their camera:

-Go beyond Program mode and shoot competently in A, S, and M modes.

-Take full control of the powerful autofocus system to capture sharp images of still and moving subjects. Learn to take advantage of the face, eye, and subject detection, plus subject tracking features.

-Set up your camera with clear explanations and recommended settings for the numerous Menu options and Custom Settings of the Nikon Z9. Includes a free download of my comprehensive Nikon Z9 Menu Setup Spreadsheet.

-Learn how, when, and why to use and customize the various controls, buttons, and features of the Z 9.

-Understand the various metering modes, exposure compensation, and exposure lock for correct exposure of every image, even in challenging lighting situations.

This 510 page digital guide to the Nikon Z9 is an illustrated e-book that goes beyond the Z9 manual to explain how, when, and why to use the features, settings, and controls of the Z9 to help you take control of your camera and the images you create.

Learn more about Nikon Z 9 Experience, view a preview, and purchase it on my Full Stop website here:

www.fullstopbooks.com/nikon-z-9-experience

Nikon Z9 Experience book manual user guide how to tips tricks field guide quick start controls settings Firmware 5Nikon Z9 Experience book manual user guide how to tips tricks field guide quick start controls settings Firmware 5

Take control of your camera and the images you create!

Nikon Z8 Experience User Guide Now Updated for Firmware 2!

My latest Full Stop e-book, Nikon Z 8 Experience  user guide to the Nikon Z8 mirrorless camera has been fully updated for the changes and additions of camera Firmware 2.00! This e-book goes beyond the manual to help you learn the features, settings, and controls of the powerful and highly customizable Nikon Z 8. Plus most importantly it explains how, when, and why to use the functions, settings, menu options, and controls in your photography.

Nikon Z8 Experience book manual guide how to tips tricks field guide quick start Firmware 2 2.0 2.00

You can learn more about this Nikon Z8 guide, view a preview, and purchase it here:

www.fullstopbooks.com/nikon-z-8-experience/

Here is a summary of the Firmware 2.00 updates, which have all been incorporated into the Nikon Z 8 Experience book:

In February of 2024, Nikon released a Firmware 2.00 update for the Z 8. This firmware includes significant additions and changes to the camera, and borrows features from the flagship Z 9 and the Z f models. These include bird subject detection, Auto Capture to set up the camera to automatically capture images based on specific parameters, and new Picture Controls for stills and video. The update also adds Pixel Shift Shooting to create up to a 180 MP image from several exposures, new shutter sound options, and more options for customizing the camera controls. The performance of 3D-Tracking AF-Area Mode has been improved for certain situations including small, fast-moving subjects. Additional video options include new Slow-Motion Video, Low ISO settings for N-Log video, and changes to Hi-Res Zoom speeds.

Nikon has created a Supplementary Firmware Update Manual that includes all these Firmware 2.00 changes. This document and the file with the latest firmware can be downloaded here:

https://downloadcenter.nikonimglib.com/en/products/616/Z_8.html

The firmware changes have been incorporated into the text of this book in the appropriate sections.

Left: The new Birds option in the AF Subject Detection Options. Right: The camera detected a bird, and placed the autofocusing frame at its eye.

Still Photography: Subject Detection now includes the Birds option. The camera has added new Bracketing increments such as 1.3 and 1.7, three new Picture Controls including Flat Monochrome,  Deep Tone Monochrome, and Rich Tone Portrait, and the Large size option for the JPEG (HEIF) Primary – JPEG (HEIF) Secondary recording. Additions also include Pixel Shift Shooting for creating high resolution images, and Auto Capture where you can set up the camera to automatically capture an image based on subject type, motion, and distance. Pre-Release Capture will now buffer for up to 300 seconds when the shutter button is half-pressed, and new shutter sound options have been added.

Left: The new Auto Capture feature and its various options. Right: Selecting the desired subject Direction for Auto Capture.

Video Recording: Subject Detection now includes the Birds option, and the camera has added three new Picture Controls, Auto Capture, Slow-Motion Videos, and a change in color for the Hi-Res Zoom in-focus display. Low ISO sensitivity settings for N-Log video have been added (down to 200 ISO equivalent), as well as changes to the Hi-Res Zoom speed options.

Playback: In the Playback i Menu the behavior of the Select for Upload option has changed. Select for upload will now mark an image for transfer and place it in the upload queue, and Select for Priority Upload will mark an image for immediate upload to a computer or FTP. Playback Speed has been added to the Video Playback i Menu. In the Playback Menu, Series Playback now includes Auto Series Playback Options such as loop, delay, and speed, and the Auto Image Rotation item has been added for playback.

Controls: Support for Power Zoom has been added for PZ lenses, including the ability to customize controls such as the Zoom-in and Zoom-out Buttons or the Fn1 and Fn2 Buttons to operate Power Zoom. The size of the Focus Point Border Width can be changed for the Focus Point Display, so that it can be more easily seen. Exposure Delay Mode has been added to delay shutter release up to 3 seconds after pressing the shutter. A Half-Press to Cancel Zoom (MF) option has been added so that a zoomed-in view of the displays will be cancelled by half-pressing the Shutter Button, and the full view of the frame can be seen before capturing an image when manually focusing. If a button has be assigned to the Recall Shooting Functions (Hold) option, exposure compensation and white balance can now be changed while shooting, and the new setting will be retained by the recall function.

Left: Additional buttons can now be customized, including the Focus Mode Button, Playback Button, and BKT Button. Right: The new Cycle AF-Area Mode option, which can be assigned to the Focus Mode Button or various other buttons.

The Playback Button, BKT Button, WB Button, and Focus Mode Button can now be customized for shooting, and a few new options are available for the customizable controls including Switch Eyes, Cycle AF-Area Mode, Pixel Shift Shooting, Power Zoom, and Exposure Delay Mode. The Cycle AF-Area Mode option can be used to select, for example, three of your most commonly used AF-Area Modes, and then quickly cycle through them with the press of a button. For image playback, several controls can now be customized including the Playback Button, ISO Button, Exposure Compensation Button, BKT Button, WB Button, and Lens Fn and Fn2 Buttons. Some new roles are available for playback controls, including Frame Advance Zoom Position and Playback Zoom Face Selection. If a button has been customized for shooting, video, or playback, you can now reset it back to the default setting by pressing the delete button.

When formatting a CFexpress memory card using the Format Memory Card item of the Setup Menu, the procedure has changed for selecting a Quick Format or Full Format, with the Delete Button now used for a full format. The Non-CPU Lens Data menu item now allows you to add a name to a registered lens, as well as manually enter in a specific focal length and maximum aperture. When entering IPTC information, the character limit for the Category entry is increased to 256 characters, and new options have been added to the Setup Menu > Camera Sounds item, including 5 types of shutter sounds.

Displays: Previously the shooting display could be magnified up to 200%, and that has been increased to 400%. The Finder Display Size (Photo LV) menu item has been changed to Viewfinder Display Size, and applies to photo and video shooting. A Distance Units item has been added to the Setup Menu, to select Meters or Feet for the manual focus distance display.

Left: The new Keep Connection option for the Connect to FTP Server function. Right: The new Overwrite Copyright Info option for the Connect to Other Cameras function.

Networks: Changes have been made to the Connect to FTP Server item of the Network Menu, including the number of available network profiles and an auto reconnect Keep Connection option. Changes have also been made to the Connect to Other Cameras item of the Network Menu, used for synchronized release of multiple Z 8 cameras, including the procedure to set up synchronized release and the ability to group cameras. Up to 16 other Z 8 cameras can be remotely controlled using the Nikon NX Field remote capture software. When connecting to other cameras, the Overwrite Copyright Info option has been added, so that the copyright info from the master camera can be applied to the images from the remote cameras. And when using an MC-N10 remote grip and AirGlu accessories, Bluetooth will no longer be disabled.

In addition, various issues have been corrected and performance improvements have been made to the Z 8, as listed on the firmware update page. The firmware update page on the Nikon website includes instructions for updating the firmware. You will download the new firmware file, and copy it to the root folder of a memory card that has been formatted in the camera. Insert the memory card with the new firmware into Slot 1, turn on the camera, and make sure the Photo Shooting Menu > Primary Slot Selection menu item is assigned to Slot 1, and that the other memory card slot is empty. Access Setup Menu > Firmware Version, and follow the instructions on the screen.

Learn more about Nikon Z 8 Experience, view a preview, and purchase it on my Full Stop website here:

www.fullstopbooks.com/nikon-z-8-experience

Take control of your camera and the images you create!

Hidden Features of the Nikon Z8

Camera users are often curious about “hidden” features that their camera may have, though typically most advanced models really don’t have many, as long as one carefully goes through all of the Menu and Custom Settings items, and reads through the manual or a guide.

However, with so many options and functions, there are a few items that are actually a bit hidden away on the Nikon Z8. It’s not that the Z 8 manual doesn’t mention them, or that they can’t be found with careful investigation of the camera, but you may need to have them called to your attention to learn how to locate them and how to take advantage of them. And there are a few button shortcuts to access features and settings that you simply need to learn if you wish to take advantage of, because once you are using your camera, they are not indicated in any menus or button icons.

These article is adapted from a section in my comprehensive Nikon Z 8 Experience user guide to the Nikon Z8. All of these “hidden” features, as well as all of the other features, functions, settings, and controls of the Z 8 are discussed in detail, in the guide. Many of these features were included in previous Nikon Z models, but they may still be new for those coming from older dSLR models.

Nikon Z8 Experience book manual guide how to tips tricks field guide quick start controls sttings

Figure 1 – Detail of the controls of the Nikon Z8

Several of these features are accessed with the i Button when working in the appropriate mode, or by assigning the function to a button. Others are accessible in the menus but may require an understanding of the options as they are listed, or might require additional steps of sub-menu navigation to locate them.

Displays and Button Settings – When the Information Display or the Live View scene is active on the rear Monitor, you can press some of the camera buttons to change the corresponding settings as you view them on the rear Monitor, including the top buttons, Fn Buttons, and the Focus Mode Button. Or you can also view and change them in the electronic Viewfinder, while shooting. For example, by default, the Fn1 Button is assigned to Shooting Menu Banks and the Fn2 Button is assigned to Choose Image Area. When you press the buttons, you can view and change those settings, and the screen will even indicate which Command Dial to use for each setting (see Figure 2 – left). If you customize buttons for another setting such as Multiple Exposure or HDR Overlay, you will be able to view and change those settings on the displays, as you press the assigned button and turn the Command Dials. If you would like to view the scene that you are shooting on the rear display without any shooting information or icons, you will need to assign one of the buttons to the Live view info display off setting. By default the Video Record Button is set to this option.

Nikon Z8 Experience book manual guide how to tips tricks field guide quick start controls sttings

Figure 2 – Left: Using the WB Button and the Command Dials to change the White Balance setting on the rear Monitor. Right: Changing the AF Area Mode and Subject Detection Options via the Photo Shooting i Menu.

i Button Features – As noted above, you can press the i Button to access different contextual i Menus during photo shooting, video shooting, and image playback. The Z 8 also adds the ability to change additional sub-options of various settings, via the i Menu, without having to dig into the menus to set those options. For example, when using the WB item on the Photo-Mode i Menu to select Auto White Balance, you will also be able to select which of the three AutoWhite Balance sub-options you would like. And you will be able to directly fine-tune a White Balance setting using the adjustment grid. If you replace some of the default i Menu items with options such as HDR, Auto Bracketing, or Multiple Exposure, you will be able to directly access and change the various settings for those features (see Figure 2 – right).

In some situations, the i Menu it is the only way to access and change certain of these “hidden” features. For example, the Photo Shooting i Menu will allow you to access the Split-screen display zoom feature. You will first need to use Custom Setting f1 – Customize i Menu and assign Split-screen display zoom to the Photo Shooting i Menu. Then when you are composing an image, you can access this feature which allows you to simultaneously zoom-in at two different areas of the scene, to help verify focus and to ensure that the composition is level across the scene (see Figure 3). This can come in handy for landscape and architectural photographers.

Nikon Z8 Experience book manual guide how to tips tricks field guide quick start controls sttings

Figure 3 – Left: Press the i Button to access the i Menu screen with various shooting settings. You can use Custom Setting f1 to customize this menu, and add items such as Split-Screen Display Zoom. Right: Split-Screen Display Zoom shown in use, to compare two areas of the same scene to help determine if the framing is level.

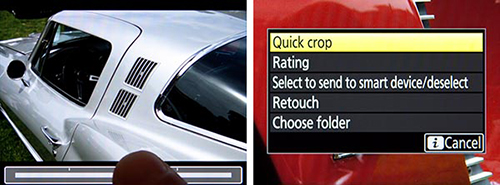
The Playback i Menu will allow you to access the Quick Crop feature. When you zoom-in on an image during playback, you can press the i Button to access the Playback i Menu, and select the Quick Crop option. This option will automatically crop the image and save a new image with the crop and framing that is currently seen on the display (see Figure 4).

Nikon Z8 Experience book manual guide how to tips tricks field guide quick start controls sttings

Figure 4 – Quick Crop feature – Zoom in on an image during playback and frame as desired (left), then press the i Button to view the Playback i Menu and access the Quick Crop feature (right).

The Setup Menu contains a new Auto Rotate Info Display item. When the camera is rotated, the shooting and playback displays on the rear screen and in the Viewfinder can also rotate. This was not a feature of most previous Nikon models. It means that the text and icons on the display will rotate, so that they are in the same orientation of the camera, making them easier to read.

There is no longer a Retouch Menu tab, though Retouch can be accessed via the image playback i Menu. And as mentioned above, when a Multiple Exposure series is in progress, you can press the Playback Button to view the last image. If you then press the i Button, you will access a menu that allows you to view the Multiple Exposure progress, as well as edit the series by retaking or discarding the last exposure if desired. 

Live View Exposure Preview – An important function to make note of is that you need to set Custom Setting d8 – View mode (Photo LV) to Show effects of settings in order to view the scene, in the Viewfinder and on the rear Monitor, with the current camera and exposure settings applied. This will allow you to better preview the resulting image and make exposure adjustments, and will also enable you to access the Live View Histogram of the scene by pressing the DISP Button.

Custom Control Assignments – A few other “hidden” features of the Nikon Z 8 can only be accessed by customizing one of the camera buttons to assign it to that function, using Custom Setting f2. As mentioned above, you can assign a button to the Live view info display off option, for the uncluttered view of your scene on the rear Monitor display. The Recall shooting functions customization will allow you to press a hold one of the Fn Buttons to temporarily switch to different shooting settings, such as a different Metering Mode, AF Area Mode, and exposure settings (see Figure 5 – left). If you will be using non-CPU, F-mount lenses with the Z 8, you can register the lens to the camera in the Non-CPU lens data menu, and thus gain additional functions such as in-camera Vibration Reduction. You will need to use f2 to assign the Choose non-CPU lens number option to one of the buttons, so that you can tell the camera which registered lens is in use.

If you are making use of an optional wireless remote to trigger multiple cameras, there is also a “hidden” setting for this in the Custom Setting f2 button assignments. You can choose to assign a button such as the Fn1 Button, Fn2 Button, or Sub-Selector Center press to the Sync. Release selection option, which is used in conjunction with Custom Setting d4 – Sync. Release Mode Options. You can set up the camera so that, for example, when using the Z 8 as a master camera to remotely trigger other cameras, you can press the Fn1 (or Fn2) Button while taking the shot, and then just the master camera will shoot, or just the remote cameras and not the master, based on your settings.

Nikon Z8 Experience book manual guide how to tips tricks field guide quick start controls sttings

Figure 5 – Custom Control Assignments – Left: Assigning the Fn1 Button to the Recall Shooting Functions option, to temporarily switch to different shooting settings with the press of the button. Right: The Customize Command Dials, Sub-Dial Frame Advance options, to use a dial to jump ahead 10 images during image playback.

Sub-Dial Frame Advance during Playback – If you wish to quickly scroll through your images as you view them on the rear Monitor during playback, you can use the rear Main Dial to advance one image at a time, and use the front Sub-Command Dial to advance 10 or 50 images. To set this up, access Custom Setting f3 – Custom Controls (Playback) > Sub-Command Dial. The Sub-Command Dial can be used to jump 10 or 50 images at a time, based on the Frame advance setting, or you can also choose to jump to protected images, rated images, still images or movies only, or to a different folder (see Figure 5 – right).

One Button Playback Zoom / Histogram – Using Custom Setting f3 – Custom Controls (Playback) > OK Button, you can assign the OK Button so that during image playback it will immediately zoom-in, at the magnification level of your choice, centered at the area of the active focus point so that you can closely inspect your image. Or you can instead assign the button press to display a large histogram with the image, so that you can evaluate your exposure (see Figure 6 – left).

Nikon Z8 Experience book manual guide how to tips tricks field guide quick start controls sttings

Figure 6 – Left: Use Custom Setting f3 – Custom Controls (Playback) > OK Button to set the OK Button to show a magnified view or to show a large histogram. Right: Touch the bottom of the screen during full-image playback to access the “Frame Advance Bar” touch screen feature.

Frame Advance Bar – This image playback feature enables you to use the touch screen to quickly scroll through images without having to swipe one-by-one (see Figure 6 – right). And when viewing a magnified detail of an image, use the touch screen arrows to view the same magnified area of other images, so that you can compare details of similar images.

Flash Information Screen – You can use Custom Setting f1 to customize the i Menu and add the Flash info item. With a compatible optional Speedlight flash attached and turned on, such as the SB-5000, use the i Button to access this menu and view the current flash settings such as the Group Flash setting (see Figure 7).

Nikon Z8 Experience book manual guide how to tips tricks field guide quick start controls sttings

Figure 7 – Left: Customize the i Menu for Flash Info (left), then access it to view the current flash settings such as the Group Flash setting (right).

Voice Memo – You can add a voice memo to an image. In order to do this, you will first need to use Custom Setting f2 to assign a button such as the Video Record Button to the Voice Memo option. Then during image playback, select the desired image, and press and hold the assigned button to record the voice memo. The voice memo can be played back when viewing the image by accessing the Voice Memo item of the Playback i Menu (see Figure 8 – left). When deleting an image, you can delete just the voice memo (see Figure 8 – right). Voice Memos will be saved as a WAV files to the memory card.

Nikon Z8 Experience book manual guide how to tips tricks field guide quick start controls sttings

Figure 8 – Left: Access the Playback i Menu to Play Voice Memo. Right: When deleting an image with a Voice Memo, choose what to delete.

Nikon Z8 Menu Setup Guide

In addition to my comprehensive Nikon Z 8 Experience user guide, I also offer a Z8 Menu Setup Spreadsheet, with suggested settings and starting points for most all of the camera menu settings and Custom Settings. The Excel spreadsheet includes separate listings for different shooting situations including Landscape, Studio, Action, etc. You can download the spreadsheet here:

http://www.fullstopbooks.com/setup-guides/

Again, all of these hidden features and settings, and other unique features, as well as all of the other features, functions, settings, and controls of the Z8 are discussed in detail, in my comprehensive Nikon Z 8 Experience user guide.

Nikon Z8 Experience book manual guide how to tips tricks field guide quick start

Be sure to share your portraits and other photos on my Nikon Z Experience Facebook page, covering all the Nikon Z models:

https://www.facebook.com/groups/nikonz7z6z5

Nikon Z8 Experience User Guide Now Available!

My latest Full Stop e-book, Nikon Z 8 Experience  user guide to the Nikon Z8 mirrorless camera is now available!

And it has been updated for Firmware 2.0!

This e-book goes beyond the manual to help you learn the features, settings, and controls of the powerful and highly customizable Nikon Z 8. Plus most importantly it explains how, when, and why to use the functions, settings, menu options, and controls in your photography.

Written in the clear, concise, and comprehensive style of all Full Stop guides, Nikon Z 8 Experience will help you learn to use your Nikon Z8 quickly and competently, to consistently make the types of images you desire. This e-book is available in either PDF or EPUB format for reading on your computer, tablet, iPad, e-reader, etc.

Nikon Z8 Experience book manual guide how to tips tricks field guide quick start Firmware 2 2.0 2.00

Learn more about this Nikon Z8 guide, view a preview, and purchase it here:

www.fullstopbooks.com/nikon-z-8-experience/

As one reader has said about Full Stop guides:

I don’t know how I could fully take advantage of all the features the camera has to offer without this publication! It’s well-organized, easy to understand, and succinct enough to keep your attention while still containing a wealth of information to get the most out of your camera.”

Nikon Z8 Experience book manual guide how to tips tricks field guide quick start controls sttings

Nikon Z 8 Experience is designed for users ranging from enthusiasts to experienced:

For Intermediate and Enthusiast Photographers: This instant download Nikon Z8 e-book is designed for enthusiast photographers who wish to take fuller advantage of the capabilities of their camera:

-Go beyond Program mode and shoot competently in A, S, and M modes.

-Take full control of the powerful autofocus system to capture sharp images of still and moving subjects. Learn to take advantage of the face, eye, and subject detection, plus subject tracking features.

-Set up your camera with clear explanations and recommended settings for the numerous Menu options and Custom Settings of the Nikon Z8. Includes a free download of my comprehensive Nikon Z8 Menu Setup Spreadsheet.

-Learn how, when, and why to use and customize the various controls, buttons, and features of the Z8.

-Understand the various metering modes, exposure compensation, and exposure lock for correct exposure of every image, even in challenging lighting situations.

Nikon Z8 Experience book manual guide how to tips tricks field guide quick start controls sttings

For Experienced Photographers coming to the Z8 from previous models, this guide explains the new and advanced features in order to quickly have you taking advantage of these capabilities, including the AF System and its Focus Modes, AF-Area Modes, eye detection, subject detection / tracking, and Custom Settings. Attention is given to the new features including the customizable controls, Focus Shift Shooting, in-camera image stabilization, new menu items and options, 8K and 4K video, Time-Lapse and Interval Timer, plus using F-mount lenses with the FTZ II Adapter. And it covers using the Wi-Fi and Bluetooth capabilities with SnapBridge.

This 480 page digital guide to the Nikon Z8 is an illustrated e-book that goes beyond the Z8 manual to explain how, when, and why to use the features, settings, and controls of the Z8 to help you take control of your camera and the images you create.

Learn more about Nikon Z 8 Experience, view a preview, and purchase it on my Full Stop website here:

www.fullstopbooks.com/nikon-z-8-experience

Take control of your camera and the images you create!

Setting Up the Canon EOS R8 Menus

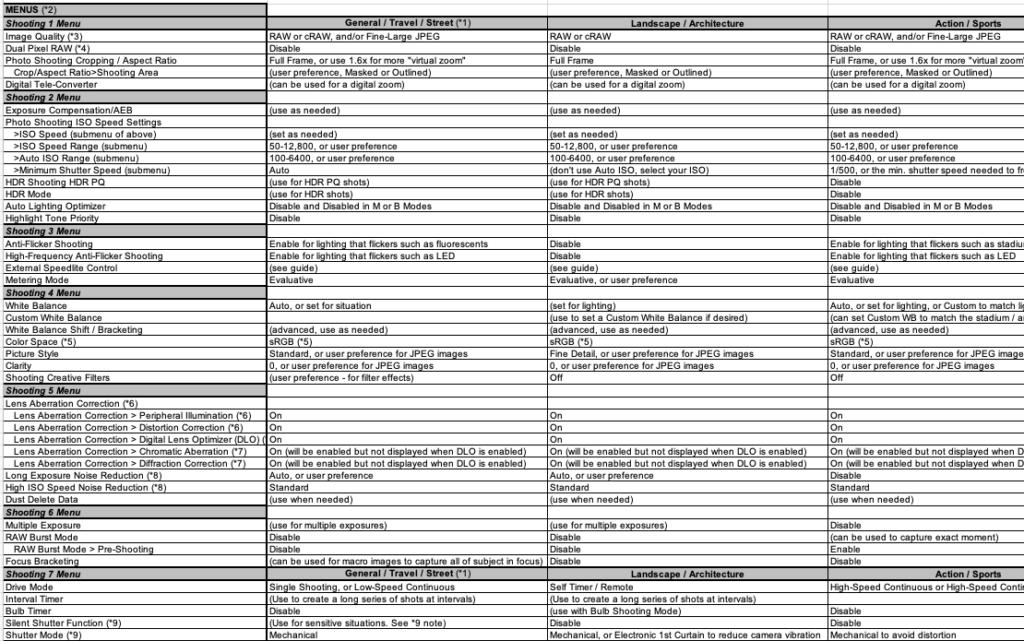
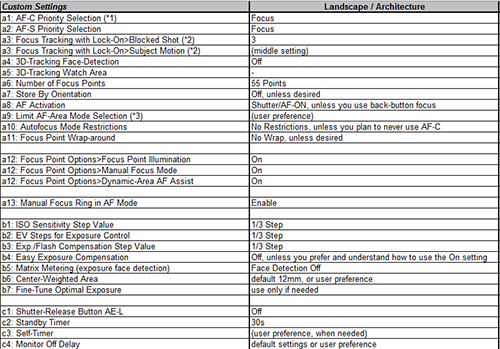
The Canon EOS R8 mirrorless camera offers numerous menu items and customization options. In order to take full advantage of this camera, you are going to need to dig into the Menus and Custom Functions, and set up the camera to work best for how you shoot and for the type of situations you are shooting. To assist you with this, I have created a detailed and comprehensive Canon EOS R8 Menu Setup Spreadsheet, which lists suggested settings and starting points for the various Menus and the Custom Functions. It has complete and separate camera setup recommendations for different types of shooting, including:

General / Travel / Street
Landscape / Architecture
Action / Sports
Moving Wildlife / Birds
Studio / Portraits
Concert / Performance

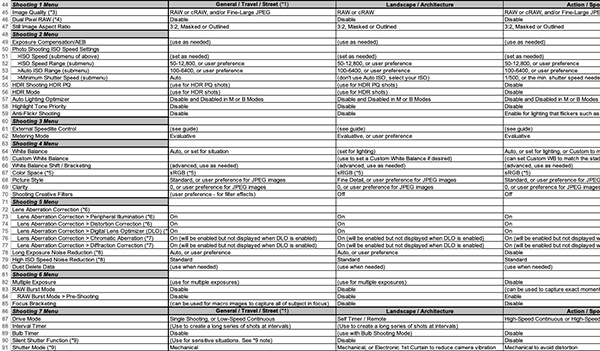
A detail from the Canon EOS R8 Menu Spreadsheet

The Canon EOS R8 Menu Setup Spreadsheet can be downloaded from my website here. Printing instructions are also included on that page.

http://www.fullstopbooks.com/setup-guides/

The EOS R8 Menus are similar to the Canon EOS R7 menus, and I have also created a Canon EOS R7 Menu Setup video, which walks through all the items and settings of the Photo Menu, with explanations and suggested settings. Watch it on YouTube here, and be sure to subscribe to my channel to be notified when additional EOS R7 Menu Setup videos are posted.

To take full control of your EOS R, be sure to download my Canon EOS R8 Experience e-book, a comprehensive guide to the camera and all of its features and functions, including the powerful autofocus system with subject detection and subject tracking, available at http://www.fullstopbooks.com/canon-eos-r8-experience/

Canon EOS R6 Mark II Experience User Guide Now Available!

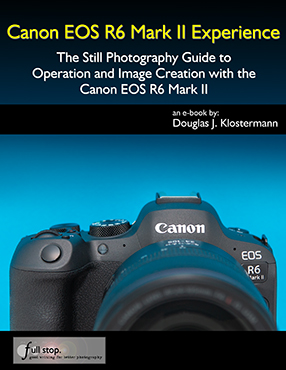
My latest Full Stop e-book, Canon EOS R6 Mark II Experience  user guide to the Canon EOS R6 II is now available! This e-book goes beyond the manual to help you learn the features, settings, and controls of the powerful and customizable Canon EOS R6 Mk II. Plus most importantly it explains how, when, and why to use the functions, settings, menu options, and controls in your photography.

Written in the clear, concise, and comprehensive style of all Full Stop guides, Canon EOS R6 Mark II Experience will help you learn to use your EOS R6II quickly and competently, to consistently create the types of images you desire. This e-book is available in either PDF or EPUB format for reading on your computer, tablet, iPad, e-reader, etc.

Canon EOS R6 Mark II Experience book manual guide how to tutorial quick start tip tricks dummies master

Learn more about this EOS R6 Mark II guide, view a preview, and purchase it here:

www.fullstopbooks.com/canon-eos-r6ii-experience/

As one Canon user has said about Full Stop guides:

I don’t know how I could fully take advantage of all the features the camera has to offer without this publication! It’s well-organized, easy to understand, and succinct enough to keep your attention while still containing a wealth of information to get the most out of your camera.”

Canon EOS R6 II Mark II Mk II book manual guide tips tricks quick start dummies master use learn control autofocus AFCanon EOS R6 II Mark II Mk II book manual guide tips tricks quick start dummies master use learn control autofocus AF

For Intermediate and Enthusiast Photographers: This instant download Canon EOS R6 Mark II e-book is designed for enthusiast dSLR photographers who wish to take fuller advantage of the capabilities of their camera:

-Go beyond Auto+ and Program modes and shoot competently in Av, Tv, Fv, and M modes.

-Take full control of the powerful autofocus system to capture sharp images of still and moving subjects. Learn to take advantage of the face, eye, and subject detection, plus powerful subject tracking features.

-Set up your camera with clear explanations and recommended settings for all Menu options and Custom Settings of the EOS R6II. Includes a free download of my comprehensive EOS R6II Menu Setup Spreadsheet.

-Learn how, when, and why to use and customize the various controls, buttons, and features of the EOS R6 Mk II, including the touchscreen and M-Fn Button.

-Understand the various metering modes, exposure compensation, and exposure lock for correct exposure of every image, even in challenging lighting situations.

Canon EOS R6 II Mark II Mk II book manual guide tips tricks quick start dummies master use learn control autofocus AFCanon EOS R6 II Mark II Mk II book manual guide tips tricks quick start dummies master use learn control autofocus AF

For Experienced Photographers coming to the EOS R6II from previous models, this guide explains the new and advanced features and settings in order to quickly help you take advantage of these capabilities. Plus it explains the camera controls and how to customize them. You will learn how to take advantage of the new features including the autofocus system with face, eye, and subject detection and tracking, Fv shooting mode, Silent Shutter, in-camera image processing and editing, HDR, Multiple Exposure, cRAW file format, and manual focusing aids. It introduces the 4k, HD, High Frame Rate, and Time-Lapse video capabilities, and guides you through all the EOS R6 MkII Menu and Custom Function items in order to help you best set up your camera for your specific shooting needs.

This 518 page digital guide to the Canon EOS R6 Mark II is an illustrated e-book that goes beyond the EOS R6II manual to explain how, when, and why to use the features, settings, and controls of the EOS R6II to help you take control of your camera and the images you create.

Learn more about Canon EOS R6 Mark II Experience, view a preview, and purchase it on my Full Stop website here:

www.fullstopbooks.com/canon-eos-r6ii-experience/

Canon EOS R6 II Mark II Mk II book manual guide tips tricks quick start dummies master use learn control autofocus AFCanon EOS R6 II Mark II Mk II book manual guide tips tricks quick start dummies master use learn control autofocus AF

Take control of your camera and the images you create!

Setting Up the Canon EOS R6 Mark II Menus

Canon EOS R7 book manual guide tips tricks quick start dummies master use learn control autofocus AFCanon EOS R7 book manual guide tips tricks quick start dummies master use learn control autofocus AF

The Canon EOS R6 Mark II mirrorless camera offers numerous menu items and customization options. In order to take full advantage of this camera, you are going to need to dig into the Menus and Custom Functions, and set up the camera to work best for how you shoot and for the type of situations you are shooting. To assist you with this, I have created a detailed and comprehensive Canon EOS R6 Mark II Menu Setup Spreadsheet, which lists suggested settings and starting points for the various Menus and the Custom Functions. It has complete and separate camera setup recommendations for different types of shooting, including:

General / Travel / Street
Landscape / Architecture
Action / Sports
Moving Wildlife / Birds
Studio / Portraits
Concert / Performance

Canon EOS R6 Mark II menu setup tips tricks quick start
A detail of the comprehensive EOS R6 Mark II Menu Setup Spreadsheet

The Canon EOS R6 Mark II Menu Setup Spreadsheet can be downloaded from my website here. Printing instructions are also included on that page.

http://www.fullstopbooks.com/setup-guides/

I have also created a menu setup video for the Canon EOS R7, which walks through all the items and settings of the Photo Menu, with explanations and suggested settings. These menu items will be mostly the same for the EOS R6 II, and so this video should be helpful for setting up that camera as well. Watch it on YouTube here, and be sure to subscribe to my channel to be notified when additional Menu Setup videos are posted.

To take full control of your EOS R6 Mark II, be sure to download my Canon EOS R6 Mark II Experience ebook, a comprehensive guide to the camera and all of its features and functions, including the powerful autofocus system with subject detection and subject tracking, available at http://www.fullstopbooks.com/canon-eos-r6ii-experience/

Canon EOS R6 Mark II Experience book manual guide how to tutorial quick start tip tricks dummies master

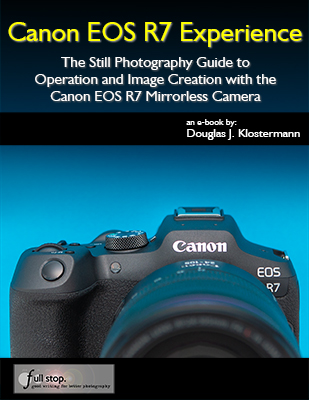
Canon EOS R7 Experience User Guide Now Available!

My latest Full Stop e-book, Canon EOS R7 Experience  user guide to the Canon EOS R7 is now available! This e-book goes beyond the manual to help you learn the features, settings, and controls of the powerful and customizable Canon EOS R7. Plus most importantly it explains how, when, and why to use the functions, settings, menu options, and controls in your photography.

Written in the clear, concise, and comprehensive style of all Full Stop guides, Canon EOS R7 Experience will help you learn to use your EOS R7 quickly and competently, to consistently create the types of images you desire. This e-book is available in either PDF or EPUB format for reading on your computer, tablet, iPad, e-reader, etc.

Canon EOS R7 Experience book manual guide how to learn master quick start tips tricks

Learn more about this EOS R7 guide, view a preview, and purchase it here:

www.fullstopbooks.com/canon-eos-r7-experience/

As one Canon user has said about Full Stop guides:

I don’t know how I could fully take advantage of all the features the camera has to offer without this publication! It’s well-organized, easy to understand, and succinct enough to keep your attention while still containing a wealth of information to get the most out of your camera.”

Canon EOS R7 book manual guide tips tricks quick start dummies master use learn control autofocus AFCanon EOS R7 book manual guide tips tricks quick start dummies master use learn control autofocus AF

For Intermediate and Enthusiast Photographers: This instant download Canon EOS R7 e-book is designed for enthusiast dSLR photographers who wish to take fuller advantage of the capabilities of their camera:

-Go beyond Auto+ and Program modes and shoot competently in Av, Tv, Fv, and M modes.

-Take full control of the powerful autofocus system to capture sharp images of still and moving subjects. Learn to take advantage of the face, eye, and subject detection, plus subject tracking features.

-Set up your camera with clear explanations and recommended settings for all Menu options and Custom Settings of the EOS R7. Includes a free download of my comprehensive EOS R7 Menu Setup Spreadsheet.

-Learn how, when, and why to use and customize the various controls, buttons, and features of the EOS R7, including the touchscreen and M-Fn Button.

-Understand the various metering modes, exposure compensation, and exposure lock for correct exposure of every image, even in challenging lighting situations.

Canon EOS R7 book manual guide tips tricks quick start dummies master use learn control autofocus AFCanon EOS R7 book manual guide tips tricks quick start dummies master use learn control autofocus AF

For Experienced Photographers coming to the EOS R7 from previous models, this guide explains the new and advanced features and settings in order to quickly help you take advantage of these capabilities. Plus it explains the camera controls and how to customize them. You will learn how to take advantage of the new features including the autofocus system with face, eye, and subject detection and tracking, Fv shooting mode, Silent Shutter, in-camera image processing and editing, HDR, Multiple Exposure, cRAW file format, and manual focusing aids. It introduces the 4k, HD, High Frame Rate, and Time-Lapse video capabilities, and guides you through all the EOS R7 Menu and Custom Function items in order to help you best set up your camera for your specific shooting needs.

This 490 page digital guide to the Canon EOS R7 is an illustrated e-book that goes beyond the EOS R7 manual to explain how, when, and why to use the features, settings, and controls of the EOS R7 to help you take control of your camera and the images you create.

Learn more about Canon EOS R7 Experience, view a preview, and purchase it on my Full Stop website here:

www.fullstopbooks.com/canon-EOS-R7-experience

Canon EOS R7 book manual guide tips tricks quick start dummies master use learn control autofocus AFCanon EOS R7 book manual guide tips tricks quick start dummies master use learn control autofocus AF

Take control of your camera and the images you create!

Setting Up the Canon EOS R7 Menus

Canon EOS R7 body setup menu how to tutorial
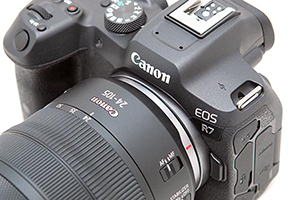
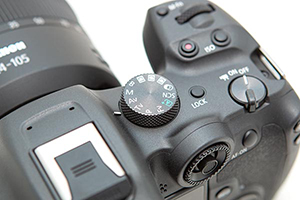
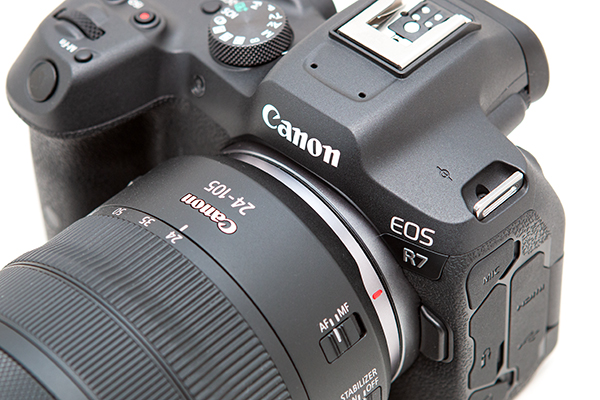
Detail of the Canon EOS R7 Mirrorless Camera

The Canon EOS R7 mirrorless camera offers numerous menu items and customization options. In order to take full advantage of this camera, you are going to need to dig into the Menus and Custom Functions, and set up the camera to work best for how you shoot and for the type of situations you are shooting. To assist you with this, I have created a detailed and comprehensive Canon EOS R7 Menu Setup Spreadsheet, which lists suggested settings and starting points for the various Menus and the Custom Functions. It has complete and separate camera setup recommendations for different types of shooting, including:

General / Travel / Street
Landscape / Architecture
Action / Sports
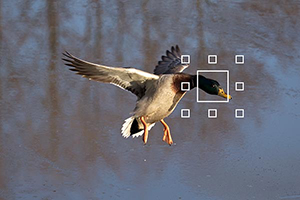
Moving Wildlife / Birds
Studio / Portraits
Concert / Performance

Canon EOS R7 Menu Setup Spreadsheet
A detail of the comprehensive EOS R7 Menu Setup Spreadsheet

The Canon EOS R7 Menu Setup Spreadsheet can be downloaded from my website here. Printing instructions are also included on that page.

http://www.fullstopbooks.com/setup-guides/

I have also created a Canon EOS R7 Menu Setup video, which walks through all the items and settings of the Photo Menu, with explanations and suggested settings. Watch it on YouTube here, and be sure to subscribe to my channel to be notified when additional EOS R7 Menu Setup videos are posted.

To take full control of your EOS R7, be sure to download my Canon EOS R7 Experience e-book, a comprehensive guide to the camera and all of its features and functions, including the powerful autofocus system with subject detection and subject tracking, available at http://www.fullstopbooks.com/canon-eos-r7-experience/

Canon EOS R7 Experience book manual guide how to dummies quick start tips tricks

Hidden Features of the Nikon Z7II and Nikon Z6II

Camera users are often curious about “hidden” features that their camera may have, though typically most advanced models really don’t have many, as long as one carefully goes through all of the Menu and Custom Settings items, and reads through the manual or a guide. However, with so many options and functions, there are a few items that are actually a bit hidden away on the Nikon Z7II and the Nikon Z6II. It’s not that the Z 7II and Z 6II manuals don’t mention them, or that they can’t be found with careful investigation of the camera, but you may need to have them called to your attention to learn how to locate them and how to take advantage of them. And there are a few button shortcuts to access features and settings that you simply need to learn if you wish to take advantage of, because once you are using your camera, they are not indicated in any menus or button icons.

These article is adapted from a section in my in my comprehensive Nikon Z 7II / Z 6II Experience user guide to the Nikon Z7II and Nikon Z6II. All of these “hidden” features, as well as all of the other features, functions, settings, and controls of the Z 7II and Z 6II are discussed in detail, in the guide. Many of these features were included on the original Z 7 and Z 6 models, but they may still be new for those coming from older dSLR models.

Nikon Z7II Nikon Z6II manual guide how to tips tricks

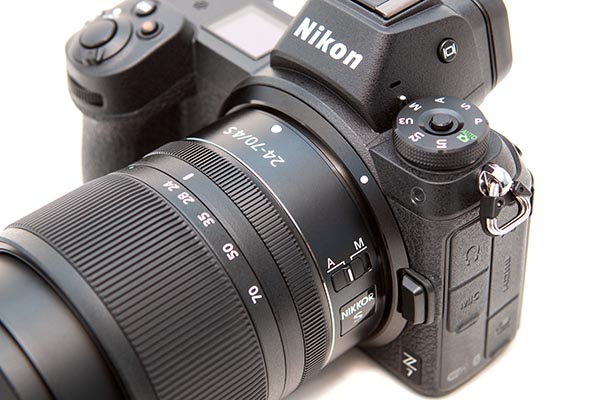
Figure 1 – Detail of the controls of the Nikon Z7II

Displays and Button Settings – When the Information Display or the Live View scene is active on the rear Monitor, you can press some of the camera buttons to change the corresponding settings as you view them on the rear Monitor. Or you can also view and change them in the electronic Viewfinder, while shooting. For example, by default, the Fn1 Button is assigned to White Balance and the Fn2 Button is assigned to Focus Mode/AF-Area Mode. When you press these buttons, you can view and change those settings, and the screen will even indicate which Command Dial to use for each setting (see Figure 2 – left). If you customize those buttons for another setting such as Auto Bracketing or HDR, you will be able to view and change those settings on the displays, as you press the assigned button and turn the Command Dials. 

Nikon Z7 Nikon Z6 tips and tricks

Figure 2 – Left: Using a Fn Button and the Command Dials to change the White Balance setting on the rear Monitor. Right: Changing the HDR options via the Photo-Mode i Menu.

The Z 7II and Z 6II also have a new display option, where you can view the scene on the rear Monitor without any of the shooting information or icons cluttering up the display. But setting up or making use of this feature is a bit hidden. You will need to assign one of the buttons to the Live view info display off setting. By default the Movie Record Button is set to this option.

i Button Features – You can press the i Button to access different contextual i Menus during photo shooting, video, and image playback. The Z7II and Z6II also add the ability to change additional sub-options of various settings, via the i Menu, without having to dig into the menus to set those options. For example, when using the WB item on the Photo-Mode i Menu to select Auto White Balance, you will also be able to select which of the three Auto White Balance sub-options you would like. And you will be able to directly fine-tune a White Balance setting using the adjustment grid. If you replace some of the default i Menu items with options such as HDR, Auto Bracketing, or Multiple Exposure, you will be able to directly access and change the various settings for those features (see Figure 2 – right).

In some situations, the i Menu it is the only way to access and change certain of these hidden features. For example, the Photo-Mode i Menu will allow you to access the Split-screen display zoom feature. You will first need to use Custom Setting f1 – Customize i Menu and assign Split-screen display zoom to the Photo-Mode i Menu. Then when you are composing an image, you can access this feature which allows you to simultaneously zoom-in at two different areas of the scene, to help verify focus and to ensure that the composition is level across the scene (see Figure 3). This can come in handy for landscape and architectural photographers.

Nikon Z7 Nikon Z6 tips and tricks

Figure 3 – Left: Press the i Button to access the i Menu screen with various shooting settings. You can use f1 to customize this menu, and add items such as Split-Screen Display Zoom. Right: Split-Screen Display Zoom shown in use, to compare two areas of the same scene to help determine if the framing is level.

The Playback i Menu will allow you to access a hidden feature, the Quick Crop option. During image playback, you can magnify an image and adjust the framing as desired. If you then press the i Button to access the Playback i Menu, and select the Quick Crop option, you can automatically crop the image and save a new image with the crop that is currently seen on the display (see Figure 4 – left). 

Nikon Z7 Nikon Z6 tips and tricks

Figure 4 – Left: Accessing the Quick Crop feature via the image Playback i Menu. Right: The Peaking Stack Image preview was available on the original Z7 and Z6, but not on the Z7II or Z6II.

And when a Multiple Exposure series is in progress, you can press the Playback Button to view the last image. If you then press the i Button, you will access a menu that allows you to view the Multiple Exposure progress, as well as edit the series by retaking or discarding the last exposure if desired.

There are a couple different ways to change the settings on the i Menu. You can highlight the desired icon (see Figure 5 – left) then press the OK Button and view all the options. This method will even allow you to access and change various applicable sub-options. Or you can highlight the desired icon, and turn the rear Main Command Dial to directly change the setting on that screen. If a setting option includes sub-options, such as the three available Auto White Balance options, or the Continuous Low frame rates (see Figure 5- right), you will use the front Sub-Command Dial to change the sub-options.

Nikon Z7 Nikon Z6 tips and tricks

Figure 5 – Left: Photo-Mode i Menu, accessed by pressing the i Button. After highlighting the desired setting, either press the OK Button, or use the Command Dials to change the settings. Right: The rear Main Command Dial will select the setting, and the front Sub-Command Dial can be used for any available sub-options, such as the Continuous Low frame rate.

Monitor Mode Button – This button isn’t hidden, but it is causing some users a bit of confusion when they are not able to see any menus or playback images on their rear Monitor screen. In order to select if the Monitor or the Viewfinder will be in use, you will need to press the Monitor Mode Button, which is located on the side of the Viewfinder “bump.” Press it repeatedly until you see the Prioritize viewfinder option, as you look on the rear Monitor or in the Viewfinder. Set it for this option for now, so that you can make use of both the Viewfinder and the rear Monitor. If you are pressing the Playback Button or the Menu Button and not seeing anything appear on the rear Monitor, be sure to look in the Viewfinder and set the Monitor Mode to Prioritize viewfinder.

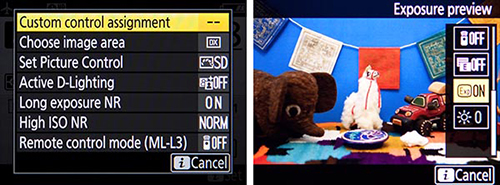
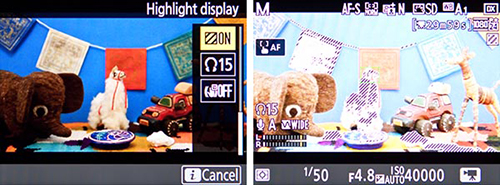
Live View Exposure Preview – An important function to make note of is that you need to enable Custom Setting d9 – Apply Settings to Live View in order to view the scene, in the Viewfinder and on the rear Monitor, with the current camera and exposure settings applied. This will allow you to better preview the resulting image and make exposure adjustments, and will also enable you to access the Live View Histogram of the scene by pressing the DISP Button.

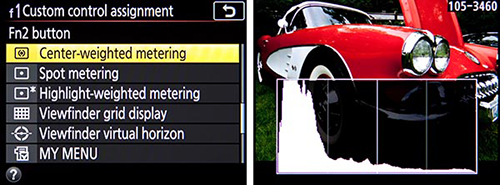
Custom Control Assignments – A few other hidden features of the Nikon Z7II and Z6II can only be accessed by customizing one of the camera buttons to assign it to that function, using Custom Setting f2. As mentioned above, you can assign a button to the Live view info display off option, for the uncluttered view of your scene on the rear Monitor display. A customization will allow you to press a hold one of the Fn Buttons to temporarily switch to a different Metering Mode, such as Spot Metering (see Figure 6 – left). If you will be using non-CPU, F-mount lenses with the Z7II or Z6II, you can register the lens to the camera, and thus gain additional functions such as in-camera Vibration Reduction. You will need to use f2 to assign the Choose non-CPU lens number option to one of the buttons, so that you can tell the camera which lens number is in use.

If you are making use of an optional wireless remote to trigger multiple cameras, there is also a “hidden” setting for this in the Custom Setting f2 button assignments. You can choose to assign the Fn1 Button, Fn2 Button, or Sub-Selector Center press to the Sync. Release selection option, which is used in conjunction with Custom Setting d3 – Sync. Release Mode Options. You can set up the camera so that, for example, when using the Z7II or Z6II as a master camera to remotely trigger other cameras, you can press the Fn1 (or Fn2) Button while taking the shot, and then just the master camera will shoot, or just the remote cameras and not the master, based on your settings.

Nikon Z7 Nikon Z6 tips and tricks

Figure 6 – Custom Control Assignments – Left: Assigning the Fn1 Button to the Spot Metering function, to temporarily switch to a different Metering Mode with the press of the button. Right: The Customize Command Dials, Sub-Dial Frame Advance options, to use a dial to jump ahead 10 images during image playback.

Sub-Dial Frame Advance during Playback – If you wish to quickly scroll through your images as you view them on the rear Monitor during playback, you can use the rear Main Dial to advance one image at a time, and use the front Sub-Command Dial to advance 10 or 50 images. To set this up, access Custom Setting f5 – Customize Command Dials, and set the Menus and playback option for On. The Sub-Command Dial will then be used to jump 10 or 50 images at a time, based on the Sub-dial frame advance setting. Set the Sub-dial frame advance item for 10 images or 50 images, or you can also choose to jump to protected images, still images or movies only, or to a different folder (see Figure 6 – right).

One Button Playback Zoom / Histogram – Using Custom Setting f3 – OK Button, you can assign the OK Button so that during image playback it will immediately zoom-in, at the magnification level of your choice, centered at the area of the active focus point so that you can closely inspect your image. Or you can instead assign the button press to display a large histogram with the image, so that you can evaluate your exposure (see Figure 7 – left).

Nikon Z7 Nikon Z6 tips and tricks

Figure 7 – Left: Use Custom Setting f3 – OK Button, Playback Mode to set the OK Button to show a magnified view or to show a large histogram. Right: Touch the bottom of the screen during full-image playback in order to access the “Frame Advance Bar” touch screen feature.

Frame Advance Bar – This image playback feature enables you to use the touch screen to quickly scroll through images without having to swipe one-by-one (see Figure 7 – right). And when viewing a magnified detail of an image, use the touch screen arrows to view the same magnified area of previous or following images.

Interval Timer Shooting vs. Time-Lapse Movie – The Nikon Z7II and Z6II include both the Interval Timer Shooting and the Time-Lapse Movie functions. In general, Interval Timer Shooting is used to create a series of images, taken at a specific time interval, which can later be combined into a time-lapse movie using software. Interval Timer also allows you to take a burst of multiple images at each interval, if desired. Time-Lapse Movie is used to take a series of individual images at a specified interval, that are automatically combined into a movie, by the camera, and saved to the desired memory card.

Due to a new addition to these cameras, these two functions now overlap a bit more. With the Z7II and Z6II, the the Interval Timer Shooting menu now has an Options item which will enable you to shoot a series of bracketed images, or to automatically create a time-lapse movie from the interval timer images. The advantage of doing this is that the camera will save all of the individual interval timer images, as well as create and save the time-lapse movie.

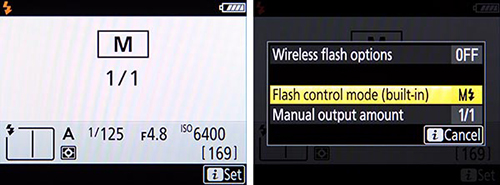
Flash Information Screen – With a compatible optional Speedlight flash attached and turned on, such as the SB-5000 or SB-500, press the DISP Button repeatedly to access the Flash Information Screen showing the current flash settings, and then press the i Button to view and change the various settings and options, including Wireless Flash Options (see Figure 8).

Nikon Z7 Nikon Z6 tips and tricks

Figure 8 – Left: When using an optional Speedlight flash, press the DISP Button to access the Flash Information Screen showing the current flash settings. Right: Then press the i Button to view and change the various settings and options.

Voice Memo (Z 6II only) – With the firmware 1.30 upgrade to the Z 6II, you can add a voice memo to an image. In order to do this, you will first need to use Custom Setting f2 to assign the Movie Record Button to the Voice Memo option. Then during image playback, select the desired image, and press and hold the Movie Record Button to record the voice memo, which can be played back when viewing the image, and will be saved as a WAV file to the memory card.

Nikon Z7II / Nikon Z6II Menu Setup Guide

In addition to my Nikon Z 7II / Z 6II Experience user guide., I also offer a Z7II / Z6II Menu Setup Spreadsheet, with suggested settings and starting points for most all of the camera menu settings and Custom Settings. The Excel spreadsheet includes separate listings for different shooting situations including Landscape, Studio, Action, etc. You can download the spreadsheet here:

http://www.fullstopbooks.com/setup-guides/

Again, all of these hidden features and settings, and other unique features, as well as all of the other features, functions, settings, and controls of the Z7II and Z6II are discussed in detail, in my comprehensive Nikon Z 7II / Z 6II Experience user guide.

Nikon Z7II Nikon Z6II manual guide how to tips tricks

Be sure to share your portraits and other photos on my Nikon Z Experience Facebook page, covering all the Nikon Z models:

https://www.facebook.com/groups/nikonz7z6z5

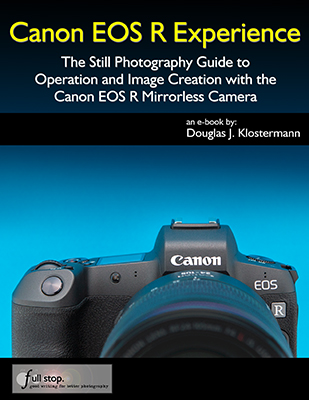
Canon EOS R Experience user-guide Now Available!

My latest Full Stop e-book, Canon EOS R Experience  user-guide to the Canon EOS R is now available! This e-book goes beyond the manual to help you learn the features, settings, and controls of the powerful and customizable Canon EOS R. Plus most importantly it explains how, when, and why to use the functions, settings, menu options, and controls in your photography.

Written in the clear, concise, and comprehensive style of all Full Stop guides, Canon EOS R Experience will help you learn to use your EOS R quickly and competently, to consistently create the types of images you desire. This e-book is available in either PDF or EPUB format for reading on your computer, tablet, iPad, e-reader, etc.

Canon EOS R Experience book manual guide how to learn master quick start tips tricks

Learn more about this EOS R guide, view a preview, and purchase it here:

www.fullstopbooks.com/canon-eos-r-experience/

As one Canon user has said about Full Stop guides:

I don’t know how I could fully take advantage of all the features the camera has to offer without this publication! It’s well-organized, easy to understand, and succinct enough to keep your attention while still containing a wealth of information to get the most out of your camera.”

For Intermediate and Enthusiast Photographers: This instant download Canon EOS R e-book is designed for enthusiast dSLR photographers who wish to take fuller advantage of the capabilities of their camera:

-Go beyond Auto+ and Program modes and shoot competently in Av, Tv, Fv, and M modes.

-Take full control of the powerful autofocus system to capture sharp images of still and moving subjects.

-Set up your camera with clear explanations and recommended settings for all Menu options and Custom Settings of the EOS R.

-Learn how, when, and why to use and customize the various controls, buttons, and features of the EOS R, including the touchscreen, new M-Fn Bar, and M-Fn Button.

-Understand the various metering modes, exposure compensation, and exposure lock for correct exposure of every image, even in challenging lighting situations.


For Experienced Photographers coming to the EOS R from previous models, this guide explains the new and advanced features and settings in order to quickly help you take advantage of these capabilities. Plus it explains the camera controls and how to customize them including the new M-Fn Bar and M-Fn Button. You will learn how to take advantage of the new features including the autofocus system with face and eye-detection, Fv shooting mode, Silent Shutter, in-camera image processing and editing, HDR, Multiple Exposure, cRAW file format, and manual focusing aids. It introduces the 4k, HD, High Frame Rate, and Time-Lapse video capabilities, and guides you through all the EOS R Menu and Custom Function items in order to help you best set up your camera for your specific shooting needs.

This 458 page digital guide to the Canon EOS R is an illustrated e-book that goes beyond the EOS R manual to explain how, when, and why to use the features, settings, and controls of the EOS R to help you take control of your camera and the images you create.

Learn more about Canon EOS R Experience, view a preview, and purchase it on my Full Stop website here:

www.fullstopbooks.com/canon-EOS-R-experience

Take control of your camera and the images you create!

Hidden Features of the Nikon Z7 and Nikon Z6

Camera users are often curious about “hidden” features that their camera may have, though typically most advanced models really don’t have many, as long as one carefully goes through all of the Menu and Custom Settings items, and reads through the manual or a guide. However, with so many options and functions, there are a few items that are actually a bit hidden away on the Nikon Z7 and the Nikon Z6. It’s not that the Z7 and Z6 manuals doesn’t mention them, or that they can’t be found with careful investigation of the camera, but you may need to have them called to your attention to learn how to locate them and how to take advantage of them. And there are a few button shortcuts to access features and settings that you simply need to learn if you wish to take advantage of, because once you are using your camera, they are not indicated in any menus or button icons.

These article is adapted from a section in my in my comprehensive Nikon Z 7 / Z 6 Experience user guide to the Nikon Z7 and Nikon Z6. All of these “hidden” features, as well as all of the other features, functions, settings, and controls of the Z7 and Z6 are discussed in detail, in the guide.

Nikon Z7 Nikon Z6 body controls detail tips tricks

Figure 1 – Detail of the controls of the Nikon Z7

Displays and Button Settings – When the Information Display or the Live View scene is active on the rear Monitor, you can press some of the camera buttons to change the corresponding settings as you view them on the rear Monitor. Or you can also view and change them in the electronic Viewfinder, while shooting. For example, by default, the Fn1 Button is assigned to White Balance and the Fn2 Button is assigned to Focus Mode/AF-Area Mode. When you press these buttons, you can view and change those settings, and the screen will even indicate which Command Dial to use for each setting (see Figure 2 – left). If you customize those buttons for another setting such as Auto Bracketing or HDR, you will be able to view and change those settings on the displays, as you press the assigned button and turn the Command Dials.

Nikon Z7 Nikon Z6 tips and tricks

Figure 2 – Left: Using a Fn Button and the Command Dials to change the White Balance setting on the rear Monitor. Right: Changing the HDR options via the Photo-Mode i Menu.

i Button Features – You can press the i Button to access different contextual i Menus during photo shooting, video, and image playback. The Z7 and Z6 also add the ability to change additional sub-options of various settings, via the i Menu, without having to dig into the menus to set those options. For example, when using the WB item on the Photo-Mode i Menu to select Auto White Balance, you will also be able to select which of the three Auto White Balance sub-options you would like. And you will be able to directly fine-tune a White Balance setting using the adjustment grid. If you replace some of the default i Menu items with options such as HDR, Auto Bracketing, or Multiple Exposure, you will be able to directly access and change the various settings for those features (see Figure 2 – right).

In some situations, the i Menu it is the only way to access and change certain of these hidden features. For example, the Photo-Mode i Menu will allow you to access the Split-screen display zoom feature. You will first need to use Custom Setting f1 – Customize i Menu and assign Split-screen display zoom to the Photo-Mode i Menu. Then when you are composing an image, you can access this feature which allows you to simultaneously zoom-in at two different areas of the scene, to help verify focus and to ensure that the composition is level across the scene (see Figure 3). This can come in handy for landscape and architectural photographers.

Nikon Z7 Nikon Z6 tips and tricks

Figure 3 – Left: Press the i Button to access the i Menu screen with various shooting settings. You can use f1 to customize this menu, and add items such as Split-Screen Display Zoom. Right: Split-Screen Display Zoom shown in use, to compare two areas of the same scene to help determine if the framing is level.

The Playback i Menu will allow you to access two hidden features, the Quick Crop option and the Peaking Stack Image preview. During image playback, you can magnify an image and adjust the framing as desired. If you then press the i Button to access the Playback i Menu, and select the Quick Crop option, you can automatically crop the image and save a new image with the crop that is currently seen on the display (see Figure 4 – left). If you have used the Focus Shift Shooting feature to create a series of images that will later be combined into a focus-stacked image, you can view a monochrome preview of the final, stacked image. To view this preview, first use image playback to view any of the images from the Focus Shift Shooting series. Then press the i Button and select the Display peaking stack image option to view the preview image. Note that this preview image is only available when using certain lenses (see Figure 4 – right).

Nikon Z7 Nikon Z6 tips and tricks

Figure 4 – Left: Accessing the Quick Crop feature via the image Playback i Menu. Right: The Peaking Stack Image preview, accessed with the Playback i Menu when viewing one of the images from a Focus Shift Shooting series.

And when a Multiple Exposure series is in progress, you can press the Playback Button to view the last image. If you then press the i Button, you will access a menu that allows you to view the Multiple Exposure progress, as well as edit the series by retaking or discarding the last exposure if desired.

There are a couple different ways to change the settings on the i Menu. You can highlight the desired icon (see Figure 5 – left) then press the OK Button and view all the options. This method will even allow you to access and change various applicable sub-options. Or you can highlight the desired icon, and turn the rear Main Command Dial to directly change the setting on that screen. If a setting option includes sub-options, such as the three available Auto White Balance options, or the Continuous Low frame rates (see Figure 5- right), you will use the front Sub-Command Dial to change the sub-options.

Nikon Z7 Nikon Z6 tips and tricks

Figure 5 – Left: Photo-Mode i Menu, accessed by pressing the i Button. After highlighting the desired setting, either press the OK Button, or use the Command Dials to change the settings. Right: The rear Main Command Dial will select the setting, and the front Sub-Command Dial can be used for any available sub-options, such as the Continuous Low frame rate.

Monitor Mode Button – This button isn’t hidden, but it is causing some users a bit of confusion when they are not able to see any menus or playback images on their rear Monitor screen. In order to select if the Monitor or the Viewfinder will be in use, you will need to press the Monitor Mode Button, which is located on the side of the Viewfinder “bump.” Press it repeatedly until you see the Prioritize viewfinder option, as you look on the rear Monitor or in the Viewfinder. Set it for this option for now, so that you can make use of both the Viewfinder and the rear Monitor. If you are pressing the Playback Button or the Menu Button and not seeing anything appear on the rear Monitor, be sure to look in the Viewfinder and set the Monitor Mode to Prioritize viewfinder.

Live View Exposure Preview – An important function to make note of is that you need to enable Custom Setting d8 – Apply Settings to Live View in order to view the scene, in the Viewfinder and on the rear Monitor, with the current camera and exposure settings applied. This will allow you to better preview the resulting image and make exposure adjustments, and will also enable you to access the Live View Histogram of the scene by pressing the DISP Button.

Custom Control Assignments – A few other hidden features of the Nikon Z7 and Z6 can only be accessed by customizing one of the camera buttons to assign it to that function, using Custom Setting f2. For example, a customization will allow you to press a hold one of the Fn Buttons to temporarily switch to a different Metering Mode, such as Spot Metering (see Figure 6 – left). If you will be using non-CPU, F-mount lenses with the Z7 or Z6, you can register the lens to the camera, and thus gain additional functions such as in-camera Vibration Reduction. You will need to use f2 to assign the Choose non-CPU lens number option to one of the buttons, so that you can tell the camera which lens number is in use.

If you are making use of an optional wireless remote to trigger multiple cameras, there is also a “hidden” setting for this in the Custom Setting f2 button assignments. You can choose to assign the Fn1 Button, Fn2 Button, or Sub-Selector Center press to the Sync. Release selection option, which is used in conjunction with Custom Setting d3 – Sync. Release Mode Options. You can set up the camera so that, for example, when using the Z7 or Z6 as a master camera to remotely trigger other cameras, you can press the Fn1 (or Fn2) Button while taking the shot, and then just the master camera will shoot, or just the remote cameras and not the master, based on your settings.

Nikon Z7 Nikon Z6 tips and tricks

Figure 6 – Custom Control Assignments – Left: Assigning the Fn1 Button to the Spot Metering function, to temporarily switch to a different Metering Mode with the press of the button. Right: The Customize Command Dials, Sub-Dial Frame Advance options, to use a dial to jump ahead 10 images during image playback.

Sub-Dial Frame Advance during Playback – If you wish to quickly scroll through your images as you view them on the rear Monitor during playback, you can use the rear Main Dial to advance one image at a time, and use the front Sub-Command Dial to advance 10 or 50 images. To set this up, access Custom Setting f5 – Customize Command Dials, and set the Menus and playback option for On. The Sub-Command Dial will then be used to jump 10 or 50 images at a time, based on the Sub-dial frame advance setting. Set the Sub-dial frame advance item for 10 images or 50 images, or you can also choose to jump to protected images, still images or movies only, or to a different folder (see Figure 6 – right).

One Button Playback Zoom / Histogram – Using Custom Setting f3 – OK Button, you can assign the OK Button so that during image playback it will immediately zoom-in, at the magnification level of your choice, centered at the area of the active focus point so that you can closely inspect your image. Or you can instead assign the button press to display a large histogram with the image, so that you can evaluate your exposure (see Figure 7 – left).

Nikon Z7 Nikon Z6 tips and tricks

Figure 7 – Left: Use Custom Setting f3 – OK Button, Playback Mode to set the OK Button to show a magnified view or to show a large histogram. Right: Touch the bottom of the screen during full-image playback in order to access the “Frame Advance Bar” touch screen feature.

Frame Advance Bar – This image playback feature enables you to use the touch screen to quickly scroll through images without having to swipe one-by-one (see Figure 7 – right). And when viewing a magnified detail of an image, use the touch screen arrows to view the same magnified area of previous or following images.

Flash Information Screen – With a compatible optional Speedlight flash attached and turned on, such as the SB-5000 or SB-500, press the DISP Button repeatedly to access the Flash Information Screen showing the current flash settings, and then press the i Button to view and change the various settings and options, including Wireless Flash Options (see Figure 8).

Nikon Z7 Nikon Z6 tips and tricks

Figure 8 – Left: When using an optional Speedlight flash, press the DISP Button to access the Flash Information Screen showing the current flash settings. Right: Then press the i Button to view and change the various settings and options.

Nikon Z7 / Nikon Z6 Menu Setup Guide

In addition to my Nikon Z 7 / Z 6 Experience user guide, I also offer a Z7 / Z6 Menu Setup Guide, with suggested settings and starting points for most all of the camera menu settings and Custom Settings. The Excel spreadsheet includes separate listings for different shooting situations including Landscape, Studio, Action, etc. You can download the spreadsheet here:

http://www.fullstopbooks.com/setup-guides/

Again, all of these hidden features and settings, and other unique features, as well as all of the other features, functions, settings, and controls of the Z7 and Z6 are discussed in detail, in my comprehensive Nikon Z 7 / Z 6 Experience user guide.

Nikon, Nikon Z7, Nikon Z6, Z7, Z6, book, menu, guide, tips, tricks, how to

And for any portrait photographers using the Nikon Z7 / Z6, here is an interesting article I recently came across at the Pixpa.com blog, which discusses all the numerous aspects to consider when creating a portrait, including lighting, background, angles, and making the subject relaxed and natural. It is a helpful tutorial for new portrait photographers, and a nice refresher for those already making portraits.

https://www.pixpa.com/blog/master-portrait-photography

Be sure to share your portraits and other photos on my Nikon Z7 / Z6 Setup and User Tips Facebook page:

https://www.facebook.com/groups/285030165630126

Sony a7R III / a7 III Tips, Tricks, and Hidden Features

Both the Sony a7R III and the Sony a7 III mirrorless cameras have provided exciting upgrades to their predecessors. Important improvements and new features included improved hybrid autofocus systems with AF points positioned widely across the entire frame, faster continuous shooting frame rates, and the addition of the Multi Selector joystick to quickly select the desired AF Point while shooting.

Sony a7R III tips tricks recommended settings

Detail of the Sony a7R III Mirrorless Camera

However, they both make use of a complex menu system that can be a challenge to navigate. While the numerous menu options allow for a tremendous amount of control and customization of the cameras, they can also cause confusion with similarly named items, or with items whose functions are unclear at first. To help you better understand all of the menu items and functions of the camera, I have created quick-start Menu Setup Guides, which explain every menu item along with suggested starting points. There are the two separate books, Sony Alpha a7R III Menu Setup Guide and Sony Alpha a7 III Menu Setup Guide, both of which can be purchased at my FullStopBooks.com website. I have also created a Menu Setup Spreadsheet for these cameras, which list suggested settings for each menu item, with different listing for various shooting situations such as Landscape, Portrait, Action, Studio, Birds, etc. The spreadsheets can be downloaded from my website here: www.fullstopbooks.com/setup-guides/.

Information from these guides is excerpted here, to explain some of the tips, tricks, and “hidden” features of the cameras. While none of the camera features are actually hidden if you read through the manual or help guide, or explore the menu items, some of them can be a bit challenging to find or to make use of if you don’t know they exist, and so I will explain them here.

Attach the Spot Metering Point to the Active AF Point

When making use of Spot Metering Mode, the actual spot that is used to determine the exposure settings can either be located in the center of the frame, or it can surround the active AF Point. Often it is more useful to have this point surround the active AF Point, because for example, you may be focusing on a specific face, and you would also like that face to be used to determine the exposure settings. If the Spot Metering circle is located in the center of the frame, you would have to first meter on the face using the center of the frame, lock the exposure settings (AEL), and then recompose, focus, and capture the image. If the Spot Metering circle is located surrounding the active AF Point, then you simply need to autofocus and capture the image, and the camera will simultaneously use the area of the active AF Point to also determine the exposure.

If this is how you wish to work, I suggest setting the Spot Metering Point item of the Camera Settings 1 Menu to “Focus Point Link” in order to have the spot metering point surround the active AF Point.

Know that you can also select the size of the Spot Metering point. When selecting Spot Metering in the Metering Mode menu item of the Camera Settings 1 Menu, or via the Fn Button and Function Menu, be sure to press left or right to choose Spot Large, Medium, or Small.

You can also use the Custom Key settings of the Camera Settings 2 Menu to assign a button to temporarily make use of Spot Metering when that button is pressed, so that you can quickly meter for a precise or specific area without having to take your eye from the Viewfinder as you change the Metering Mode.

Take Advantage of Face Priority and Eye Priority Autofocus

The a7R III and the a7 III both have excellent autofocus systems, which are able to identify and lock onto faces and subject’s eyes found in the scene. In the Camera Settings 1 Menu, you will want to access the Set Face Priority in AF menu item, where you will enable the Face Priority in AF sub-option, in order to take advantage of the autofocusing face detection feature. If the camera detects a face at or near the area of the active AF Point or Zone, the camera will automatically detect, track, and focus on the face. You will still need to use the Multi-Selector to position the active AF Point or Zone at the desired face before focusing, so that the camera knows which part of the scene to look at and locate your desired subject. Then half-press the Shutter Button, and the active face detection frame will turn white.

When working in Single-shot AF (AF-S) Focus Mode, the camera will also automatically detect and focus on the subject’s eyes. When working in Continuous AF (AF-C) Focus Mode, the camera will only detect, focus, and track faces unless you press the center button of the Control Wheel, and then eye detection and tracking will become active as well.

This Face Priority and eye detection feature works extremely well, and thus you may wish to take advantage of it for various shooting situations that involve faces, whether for still subjects or moving subjects. You are even able to register and rank specific faces (in the Face Registration setting later in the Camera Settings 1 Menu), so that the camera will prioritize them in a scene with multiple faces.

Sony a7R III tips tricks recommended settings

Detail of the Sony a7R III Mirrorless Camera

Quickly Switch to a Different Group of Shooting Settings with the Press of a Button

The Register Custom Shooting Settings of the Camera Settings 1 Menu is a powerful option that will let you assign a group of exposure, shooting, and autofocus settings to one of the camera’s custom buttons (C1, C2, or C3 Button). You can then press and hold that button while shooting to temporarily switch to an entirely different group of camera settings.

To make use of this feature, access this menu item, then select which button you wish to register (such as Recall Custom hold 1), then go through the next menu screen and select and set all of the available settings, such as Shooting Mode, Aperture, Drive Mode, Metering Mode, Focus Mode, and Focus Area. Then select Register. Or if you wish, you can set your camera in advance to all of your desired settings, access this menu, and then select Import Current Setting.

In this menu, you can enable or disable the check-mark next to the settings to choose if they will be registered or not. For example, you may wish to register various autofocus and camera settings, but not register specific exposure settings. Then when you make use of this feature during shooting by pressing and holding the C1, C2, or C3 Button, the enabled settings will temporarily change, but the camera’s exposure settings will remain as you currently have them set.

This customization might be used if you are shooting a still situation that might suddenly change to an action situation, such as a standing bird suddenly taking flight. Or it can be used in an action type of situation where you immediately wish to switch to different shooting parameters for a completely different type of action, such as a baseball batting situation vs. a running situation. Or if you are shooting a subject that is actively moving between sun and shade, the various shooting settings (such as the ISO, Metering Mode, and White Balance) can be set up to instantly accommodate the shade situation.

Use the Focus Magnifier to Zoom in on the Live View Scene

The Sony a7 cameras don’t have the same zoom-in and zoom-out buttons for viewing the Live View scene that you may be used to with a Canon or Nikon camera. Instead you will need to make use of the Focus Magnifier of the Camera Settings 1 Menu. You can also assign the Focus Magnifier to a button of your choice, such as the down button on the Control Wheel. The menu items that come after Focus Magnifier are used to customize exactly how the feature will work.

Focus MagnifierAccess this menu item, then press the center of the Multi-Selector to zoom-in on the scene while viewing either the rear Monitor or the Viewfinder. Use the Multi-Selector to move the magnified area about the screen, or press the Delete Button to move it to the center of the screen. You can continue to press the Multi-Selector Center to zoom-in closer. If using manual focus, this can assist you in focusing more precisely on the desired detail. Turn the manual focus ring on the lens to focus. If Touch Operation is set for On, then you can double-tap on the rear Monitor to magnify the desired area. Note that you cannot access this function when using AF-C Focus Mode.

If set for autofocus, you will need to set the AF in Focus Magnification item, just below, to determine how autofocus works with focus magnification. If set for On, the camera will autofocus when half-pressing the Shutter Button. If set for Off, the Focus Magnifier is cancelled and the view returns to the full scene, when the Shutter Button is half-pressed. The next two menu items will determine the time that the Focus Magnifier remains active, and the amount of magnification of the focus magnifier.

Focus Magnifier TimeWhen making use of the Focus Magnifier, this setting will determine how long the magnification remains active, so that you can view and focus on the desired detail. You can select 2 seconds, 5 seconds, or No Limit. With the No Limit setting, magnification will end when you half-press or fully-press the Shutter Button (based on the AF in Focus Magnification setting below). I suggest you set this for No Limit, so that you can examine the area and make your manual focus or autofocus adjustments.

Initial Focus Magnification (still image) – When making use of the Focus Magnifier, this setting will specify the initial amount of magnification. The x1.0 setting will activate the Focus Magnifier, but you will still view the entire scene. Continue to press the Multi-Selector Center to zoom-in closer. The x6.2 (a7R III) or x5.9 (a7 III) setting will immediately enlarge the image by about 6 times, when Focus Magnifier is used. I suggest you set if for x1.0, then activate the Focus Magnifier, adjust the area of focus with the Multi-Selector, then continue to zoom, by pressing the Multi-Selector Center or the Control Wheel Center Button.

AF in Focus Magnification (still image) – This setting determines how autofocus works with the Focus Magnifier. If set for On, the camera will retain the magnification of the screen and autofocus when half-pressing the Shutter Button. The camera will focus at the “+” symbol seen in the center of the screen. The camera will return to the full view of the scene once the image is captured. If set for Off, the Focus Magnifier is cancelled and the view returns to the full scene, when the Shutter Button is half-pressed. I suggest setting this for On so that you can make use of the magnified view to precisely autofocus.

Know the Difference Between AEL Hold and AEL Toggle

When using the Custom Key options of the Camera Settings 2 Menu to customize the function of various camera buttons, you can choose to assign Auto Exposure Lock (AEL) to the button of your choice. Typically you will assign the AEL Button to be used to lock the current exposure settings. For example, if you are using Center Metering or Spot Metering, you would half-press the Shutter Button to begin metering, aim the camera to position the metering area over the desired part of the scene, then press the AEL Button to lock the exposure settings that the camera determined. You will see an asterisk icon (*) on the screen to indicate that exposure lock is active. You can then recompose and fully press the Shutter Button to capture the image.

There are a few different Auto Exposure Lock options. The AEL hold option means that exposure is locked only as you hold down the button. The AEL toggle options means that you can press and release the button to activate exposure lock. The options with the Spot Metering icon, [.] AEL hold and [.] AEL toggle means that Spot Metering will temporarily be activated to determine the exposure settings, and those settings will simultaneously be locked, with either the “hold” option or the “toggle” option that was just explained. This can be a very useful option if you are shooting in a situation where you are not using Spot Metering, but you may temporarily wish to use Spot Metering to determine the exposure settings such as for a portrait.

Choose the Best Refresh Rate for the Electronic Viewfinder

The a7R III offers the Finder Frame Rate option in the Camera Settings 2 Menu. This adjusts the frame rate of the electronic Viewfinder display. The High setting will display moving subjects more smoothly, however the Viewfinder resolution will be reduced. The Standard setting will make use of the normal frame rate, and will be used automatically when the camera’s internal temperature becomes high. However with its higher resolution, you will want to use the Standard setting for situations such as still subjects, studio use, macro, and landscapes. It is recommended that you set for High for general use and moving subjects, and Standard for still subjects.

Assign the C3 Button to Rating or Protect

The Custom C3 Button, located at the upper-left on the rear of the camera, is labeled for the Protect function. This will protect an image from accidental deletion. However, know that reformatting a memory card will delete all images, including protected images. You can also use the Custom Key options of the Camera Setting 2 Menu to assign this button to another function, such as Rating. This may be a more useful feature, as you can mark an image with 1 to 5 stars. This can be used to quickly locate specific images when you later view them on your computer.

The Rating Set item of the Playback Menu can be used in conjunction with this button assignment. If you assign a Custom Button to the Rating feature, then you can select which rating amounts are available to choose from, with each subsequent button press. For example, you may only wish to make use of the 1, 3, and 5 star ratings, and thus you can disable the other rating values so that you don’t have to click through them every time. Then you would press the button one time for 1-star, two times for 3-stars, and three times for 5-stars.

There are numerous other menu options, features, and functions that are discussed in my quick-start menu guides for these cameras, Sony Alpha a7R III Menu Setup Guide and Sony Alpha a7 III Menu Setup Guide, both of which can be purchased at my FullStopBooks.com website. I have also created a Menu Setup Spreadsheet for these cameras, which list suggested settings for each menu item, with different listing for various shooting situations such as Landscape, Portrait, Action, Studio, Birds, etc. The spreadsheets can be downloaded from my website here: www.fullstopbooks.com/setup-guides/.

Sony Alpha a7R III Menu Setup Guide – Updates Page

Updates and corrections for Sony Alpha a7R III Menu Setup Guide.

All guides available at my Full Stop website – http://www.fullstopbooks.com/

Sony Alpha a7R III menu setup guide manual tips tricks how to

2018-05-24 – Version 1.0 published in PDF, EPUB, and MOBI formats – No updates

2018-06-01 – Version 1.1b published in PDF, EPUB, and MOBI (Amazon Kindle) formats, including FullStopBooks, Kobo, iTunes, Amazon, Apple, Barnes and Noble.

There were a few mentions of “dSLR” or “digital SLR” in the guide. As the a7R III is a mirrorless camera and not an SLR, there errors have been corrected to say “mirrorless” camera.

“Future Updates to the Text” chapter, information, and links added to the guide.

2018-06-04 – Version 1.2 published in PDF, EPUB, and MOBI (Amazon Kindle) formats, including FullStopBooks, Kobo, iTunes, Amazon, Apple, Barnes and Noble.

To my great embarrassment, there was a typo (extra word) on the very first page of the text. That has been corrected.


Firmware Update: A Firmware update was made available for the a7R III, Firmware Version 1.10. You can download the firmware at the Sony Support site, under the Drivers and Software tab:

https://esupport.sony.com/US/p/model-home.pl?mdl=ILCE7RM3&template_id=1&region_id=1&tab=download#/downloadTab

The firmware update provides the following benefits:

-Adds the menu option to select Pixel Shift Multi Shooting (On: Shooting Interval 0.5sec)

Notes:

When using an A-mount lens via an adaptor (LA-EA1/ LA-EA2/ LA-EA3/ LA-EA4), the interval might be slightly longer

When the camera is connected to PC, please use the latest version of the Imaging Edge software

-Adds support for bracketing during silent shooting with uncompressed RAW

-Adds support for tuning of the peaking display level for S-Log shooting

-Makes improvements for a condition where the Eye AF does not work with certain camera settings

-Makes improvements for a condition where Viewfinder Brightness is not reflected correctly in the Manualsetting

-Improves overall stability of camera

~ ~ ~


Sign up to receive notices of updates to the text of Sony Alpha a7R III Menu Setup Guide, as well as to be eligible to receive free copies of the updated e-book file (for major updates):

http://blog.dojoklo.com/ebooks/sign-up-for-full-stop-e-book-updates/

Quick Start Setup for the Sony a7R III

The Sony Alpha a7R III mirrorless camera offers numerous improved features and updates from previous versions of the camera, including an improved autofocus system with more effective eye-detection, faster continuous shooting at up to 10 frames per second, better in-camera stabilization, and a faster processor. Boasting 42.2 megapixels, the image resolution is excellent enough to meet most any photographer’s needs.

The a7R III offers numerous menu options, features, and customizations, and you may have found that the menus can be challenging to navigate, and some options are confusing or difficult to understand. In fact there are over 180 menu items, spread across 35 menu pages, and organized under 5 separate tabs. However, it is important to properly set up the options to match your shooting needs, and essential to understand what the features are doing and how the camera is operating, so that you can take full advantage of all that that a7R III offers.

I have put together a comprehensive Sony a7R III Menu Setup Guide Spreadsheet to help walk you through all the Camera Settings and Setup Menus. The spreadsheet contains separate listings of suggested settings and starting points for various types of shooting situations, including:

General / Travel / Street
Landscape / Architecture
Action / Sports
Moving Wildlife / Birds
Studio / Portraits
Concert / Performance

Below is a small detail of the setup guide. You can download the Sony a7R III Menu Setup Guide Spreadsheet at the link below, where you will also find instructions for printing the spreadsheet. This spreadsheet is available for free for a limited time!

http://www.fullstopbooks.com/setup-guides/

Sony a7R III setup quick start guide how to manual

I also offer a companion text guide, which provides more detailed explanations of all the Sony a7R III menu items, recommendations for setting them up, and for making use of the various camera features and functions, along with some a7R III tips and tricks. This more detailed text guide, Sony a7R III Menu Setup Guide, will be available in May 2018. The text guide and the setup guide spreadsheet work hand-in-hand, to help you set up and get the most from your camera.

Take control of your a7R III and the images you create!

Sony a7R III manual menu setup guide how to use quick start

Recommended Nikon D850 Settings

I’ve put together a comprehensive Nikon D850 Menu Setup Spreadsheet, with suggested settings for various types of shooting situations, such as Landscape, Action/Sports, Portrait, Concert, etc. The Excel spreadsheet covers all of the Photo Shooting Menu items, all of the Custom Settings, and various other camera and exposure settings. A free link to the spreadsheet is included inside my Nikon D850 Experience guide if you purchase that, otherwise you can purchase and download the spreadsheet here, where you will also find instructions for printing it out:

http://www.fullstopbooks.com/setup-guides/

Here is an image of just a small portion of the comprehensive spreadsheet:

Nikon D850 setup guide menu custom setting spreadsheet quick start tips tricks

The setup guide spreadsheet is a great companion to my full D850 guide, Nikon D850 Experience, which is a clear and comprehensive guide to the camera. The full guide explains all the Menu and Custom Settings items, as well as all of the other camera features, functions, and controls.

Nikon D850 Experience book manual how how to use tips tricks

New and Hidden Features of the Nikon D7500

Introduction to the New and Hidden Features of the Nikon D7500

If you are a user of a previous Nikon dSLR and upgraded to the Nikon D7500, and you are already familiar with the typical features, functions, and controls, you will want to become familiar with the various new and improved features of the camera. Here is a summary of what has been added, changed, or improved with the D7500 compared to the D7200 and other previous Nikon models. Some of these features were included on the D7200, but may be unfamiliar to those coming from an earlier or different Nikon model.

The D7500 also contains a few “hidden” features. It is not that they aren’t explained in the Nikon manual, however then can be difficult to locate when using the camera since they aren’t directly accessed with a button or with a menu item. Several of them are accessed via the i Button and i Button Menus, which vary with the current camera function (viewfinder shooting, Live View shooting, image playback, etc.). Or some of these items must be assigned to a specific button using the Custom Settings.

All of these new and hidden features and items are explained in more detail in my Nikon D7500 Experience user guide to the camera, from which this material is based on.

Nikon D7500 body controls buttons touch screen monitor tilting dial

Figure 1 – The Nikon D7500 dSLR.

-Articulating Touch Screen Monitor – The large 3.2” high-resolution (922K-dot), tilting, touch-screen LCD Monitor can be color customized with the Monitor Color Balance item of the Setup Menu. The touch screen capability allows you to view, zoom, and scroll through playback images, enter text with the on-screen keyboard, as well as select an autofocus area and Spot White Balance area when working in Live View, and to release the shutter in Live View (Touch Shutter). The “Frame Advance Bar” for image review enables you to use the touch screen to quickly scroll through images without having to swipe one-by-one.

Figure 2 – Use the tilting rear monitor to help take photos from low or high vantage points.

-Expanded Native ISO Sensitivity Range – The ISO range is expanded to include ISO 100 to 51,200. This can assist photographers with decreased noise at higher ISO settings. Additional ISO settings down to 50 and up to the excessively noisy 1,640,000 can also be used.

Figure 3 – Left: The ISO Sensitivity Settings and Auto ISO options. Right: Selecting the Minimum Shutter Speed the camera will use with Auto ISO, including the “Auto” option which will be based on the lens focal length.

-Auto ISO – As with other current Nikon models, the D7500 offers a powerful Auto ISO option, which will change the ISO setting if necessary in order to obtain a proper exposure. You can set the parameters of Auto ISO, including the Maximum Sensitivity and Minimum Shutter Speed that the camera will use for Auto ISO, as well as the new Maximum sensitivity with flash option (see Figure 3 – left). One powerful option is that if you set the Minimum Shutter Speed to its Auto setting, the camera will select a minimum shutter speed based on the focal length of the lens (see Figure 3 – right). For example, a longer telephoto lens requires a faster shutter speed to avoid blur from camera movement. But, if you are unhappy with the settings that the camera is choosing, you can continue to press right in the Minimum Shutter Speed > Auto setting, and access the option to fine-tune this setting so that the camera selects a faster or slower Auto shutter speed. And in the new Movie Shooting Menu, you can also set the Auto ISO parameters separately for movie shooting.

-Group-Area AF Area Mode – A group of five AF Points, configured in a cross-shaped pattern, can all be used together to help focus on a subject, in situations where using a single AF Point may not work as well (see Figure 4).

Figure 4 – Group Area AF Area Mode, where five AF Points work together to focus on a subject. The central point of the group is also active, but not seen in the Viewfinder. 

-Highlight-Weighted Metering Mode – This Metering Mode helps to prevent the overexposure of highlights, such as a subject under bright stage lighting, particularly in situations with moving subject where Spot Metering becomes impractical.

Flicker Reduction – With this new anti-flicker option, the camera will detect the flickering of certain types of lighting often found in stadiums and arenas, and will adjust the timing of the shutter release in order to maintain more consistent exposures.

Electronic Front-Curtain Shutter – This feature, found in Custom Setting d4, can help to reduce camera vibrations and thus potential blur in controlled situations such as landscape and macro shots (see Figure 5 – left). It is used with the Mirror Up (Mup) Release Mode during either Viewfinder or Live View shooting. With the high resolution 20.9 megapixel sensor of the D7500, these slight movements can become more apparent in images.

Figure 5 – Left: Custom Setting d4, to enable the Electronic Front Curtain Shutter feature used with Mirror-Up release mode. Right: Picture Controls menu, including the new Clarity setting as well as the ability to adjust the settings in 0.25 increments.

Picture Controls – The D7500 offers the Auto Picture Control where the camera will determine the best settings, though the Auto setting can also be slightly adjusted by the user. The camera also includes the recent Flat Picture Control, which is desired by videographers as it provides the greatest latitude for post-processing, by helping to retain details in both highlights and shadows. It can also be used for still images that are going to be heavily processed. Also, the Picture Control options include a Clarity parameter, and the Brightness adjustment allows a wider range. The parameters allow finer (0.25 step) adjustment increments, as well as an Auto option for each parameter (see Figure 5 – right).

Figure 6 – Left: Simultaneously press the AF Mode Button and Movie Record Button to perform the Autofocus Auto Fine-Tune procedure when in Live View. Right: The Live View Spot White Balance feature, in use.

Auto AF Fine-Tune – The Autofocus Auto Fine-Tune feature will enable you to use Live View focusing to automatically fine tune the autofocusing of individual lenses, to correct for back-focus or front-focus issues. The data acquired by the process is entered into the AF fine-tune item of the Setup Menu, and registered for the attached lens. The procedure involves autofocusing in Live View and then simultaneously pressing the AF Mode Button and Movie Record Button to perform the process (see Figure 6 – left).

White Balance Improvements – The D7500 offers two Auto White Balance options, including Normal and Keep warm lighting colors which will preserve the warm glow created by incandescent bulbs and add a warmer touch to outdoor photos. You can now store up to six Preset (PRE) White Balance settings, as well as make use of the Live View Spot White Balance measurement feature (which was also available on the previous D7200), (see Figure 6 – right). The Live View Spot White Balance feature enables you to take a white balance measurement of a precise area of the scene when working in Live View.

White Balance Color Temperature Selection – When making use of the K – Choose Color Temp White Balance Setting, you can select the desired color temperature in the White Balance menu item, or you can quickly adjust this setting during shooting by pressing the WB Button and turning the front Sub-Command Dial while viewing the setting on the top Control Panel or on the Live View Screen. If you wish to directly enter a value, you can press the WB Button and use the Multi Selector to select and change the digits, again either on the top Control Panel or on the Live View screen.

Auto Exposure Bracketing – Either 2, 3, 5, 7, or up to 9 shots can be automatically taken when bracketing, at increments of 0.3 EV, or up to 3 EV increments.

Batch Processing for NEF (RAW) images – In-camera batch processing is now possible, using the new options in the NEF (RAW) Processing item of the Retouch Menu. These options give you the ability to select and simultaneously process multiple individual images, using the same processing settings. Or you can use the Select date option to process all images taken on a certain date, or Select all images to process all images on the memory card (see Figure 7 – left).

Figure 7 – Left: The NEF (RAW) Processing menu, including the options to batch process multiple images by selection, date, or all images. Right: Selecting images to be transferred to a smart device, as soon as a wireless connection is made between the camera and the device.

Bluetooth and Wi-Fi – Used in conjunction with Nikon’s SnapBridge app, these wireless connections between the camera and a smart device can be used to remotely control the camera, share GPS information from the phone to the camera, and to transfer images to the device (see Figure 7 – right).

New Menu and Custom Settings Options – In addition to the above improvements, the D7500 offers several new options in various menu items and Custom Settings. These include new Multiple Exposure overlay options of Add, Average, Lighten and Darken, which will allow you to further process multiple exposure images, and Exposure Smoothing options for Interval Timer and Time-Lapse shooting to help maintain consistency among the individual exposures.

Figure 8 – Left: Selecting one of the Ultra High Definition, 4K video Frame Size / Frame Rate options. Right: Enabling the Electronic Vibration Reduction feature for movie shooting.

Video – The D7500 now offers Ultra High Definition 4K video (3840 x 2160) at 30p, 25p, and 24p frame rates (see Figure 8 – left). Although note that when recording at 4K, the camera will make use of a smaller 1.5x cropped Image Area and not the entire width of the frame. The camera also offers Full HD video (1920 x 1080) at all the typical frame rates (60/50/30/25/24p). Plus the camera offers new Electronic Vibration Reduction to help stabilize the scene when hand-holding (see Figure 8 – right), and the Active D-Lighting option for full HD recording. The D7500 includes the Highlight Display “zebra stripes” feature for viewing highlights and potentially overexposed areas, a built-in stereo microphone, simultaneous recording to an internal memory card and external recorder, selectable audio frequency range (the standard Wide range or the narrower Voice range), and Auto ISO during Manual (M) Exposure Mode for smooth exposure transitions while retaining the desired aperture and shutter speed settings. The new Power Aperture feature will allow you to smoothly adjust the aperture setting while recording. There is also a new Movie Shooting Menu tab, where you can easily access most all of the movie settings, as well as set some of them independently from the similar settings used during still photography, such as the Picture Control and White Balance.

i Button – The D7500 also includes the i Button, (also present on the previous D7200), which is used to quickly access context-appropriate settings that will differ for Viewfinder shooting, Live View, Movie, and image playback. Pressing the i Button when shooting will allow you to access and change several settings via the i Button menu, such as Choose image area, Active D-Lighting, and High ISO Noise Reduction (see Figure 9 – left). The Custom control assignment option will allow you to assign your desired function to various camera buttons including the Fn1 Button, Fn2 Button, and AE-L/AF-L Button. When working in Live View, you can press the i Button to access and adjust settings such as the Image Area, Image Quality, Picture Controls, Exposure Preview, and Live View Monitor Brightness (see Figure 9 – right).

Figure 9 – Press the i Button during Viewfinder shooting (left), or when in Live View (right), to access the applicable i Button Menu screen.

Live View Exposure Preview – When working in Live View, press the i Button to enable the Exposure preview item (see Figure 9 – right), which will display the Exposure Indicator scale on the screen, and the brightness of the screen will reflect the current exposure settings rather than simply showing the scene at an optimal brightness level. This will allow you to better preview the resulting image and make exposure adjustments.

i Button in Movie Live View – Some “hidden” features can be accessed with the i Button when working in Movie Live View. The “zebra stripes” feature is accessed with the Highlight Display item of the i Button menu (see Figure 10). This will display diagonal lines on the screen at potentially over-exposed areas of the scene, thus helping you to adjust to the proper exposure. You will also need to press the i Button if you wish to adjust the Movie Live View Monitor Brightness and the Headphone Volume if monitoring the audio with optional headphones. The i Button will also access the Multi-selector power aperture feature, where you can press up or down on the Multi Selector to smoothly adjust the aperture setting while recording. Power aperture can also be assigned to the Fn1 and Fn2 Buttons using Custom Setting g1. The new Electronic Vibration Reduction can also be accessed via the i Button, or by using the Movie Shooting Menu.

Figure 10 – The Highlight Display (zebra stripes) video feature, to check for overexposure, is accessed via the Movie Shooting i Button Menu.

Flash Information Screen – With the built-in flash, or with an optional Speedlight flash attached and turned on, press the Info Button twice to access the Flash Information Screen showing the current flash settings, and then press the i Button to view and change the various settings and options, including Wireless Flash Options (see Figure 11).

Figure 11 – When using the built-in flash or an optional Speedlight flash, press the Info Button twice to access the Flash Information Screen showing the current flash settings (left), then press the i Button to view and change the various settings and options (right).

Camera Controls Assignments – A few other “hidden” features of the Nikon D7500 can only be accessed by customizing one of the camera buttons to assign it to that function. For example, you can make use of the Viewfinder Virtual Horizon, which is a camera level that you can display in the Viewfinder. It will show an electronic level along the bottom of the screen as well as one on the right side, so that you can see both pitch and roll of the camera body. In order to use this feature, you need to use Custom Setting f1 to assign either the Fn1 Button or Fn2 Button to the Viewfinder Virtual Horizon option. You can also assign the Fn1 or Fn2 Button to the 1 Step Speed / Aperture setting, which will allow you to quickly change the shutter speed or the aperture setting in 1 EV (full stop) increments, rather than the typical 1/3 EV adjustments that are made when you turn Command Dials. Another handy customization will allow you to press and hold the Fn1 Button or Fn2 Button to temporarily switch to a different Metering Mode (see Figure 12 – left).

Figure 12 – Left: Assigning the Fn2 Button to temporarily switch to a different Metering Mode. Right: The OK Button has been customized to display a large histogram, when pressed during image playback.

One Button Playback Zoom / Histogram – Using Custom Setting f2, you can assign the OK Button so that during image playback it will immediately zoom-in, at the magnification level of your choice (including 100% zoom), centered at the area of the active focus point so that you can closely inspect your image. Or you can instead assign the button press to display a large histogram with the image, so that you can evaluate your exposure (see Figure 12 – right).

Figure 13 – Left: Frame Advance Bar – Touch the bottom of the Monitor touch screen during image playback, and use the Frame Advance Bar to quickly scroll through multiple images. Right: Quick Crop – Magnify an image during playback and adjust to the desired framing, then press the i Button and select the Quick Crop option to crop the image and create a new image that is cropped to the framing shown on the Monitor.

Playback Scroll and Playback Zoom Cropping – Other “hidden” playback features include the ability to quickly scroll through multiple images using the touch screen, and a Quick crop feature. When viewing an image during playback, touch the bottom of the Monitor and the Frame Advance Bar will appear. Move your finger left and right to quickly scroll trough multiple images (see Figure 20 – left). To make use of the Quick crop feature, zoom-in on an image during playback, use the Multi Selector or touch screen to adjust the framing of the image as desired, and then press the i Button (see Figure 13 – right). Choose the Quick crop option, which will crop the image and create a new image that will be cropped to the framing currently shown on the Monitor.

All of the other features, menu items, Custom Settings, and controls of the Nikon D7500 are explained in my clear and comprehensive guide to the camera, Nikon D7500 Experience. Also be sure to have a look at my free D7500 Setup Guide Spreadsheet, to help you set up the Photo Shooting Menu items and the Custom Settings of the camera.

Nikon D7500 book manual guide how to use learn tips tricks setup setting quick start

Canon 77D vs 80D Beyond the Specs – Hands On Differences

Since the introduction of the Canon EOS 77D, there have been numerous articles comparing the 77D to the Canon 80D. However, most of those articles merely compare the specifications of the two cameras, simply showing information that can be found on a spec sheet without ever having to actually touch the cameras. And most all of those articles completely fail to explain the actual, hands on differences between the 77D and 80D. In fact, based on the information they share (and fail to share), it becomes obvious that most of them have not actually used the new 77D!

Canon 77D body controls button dials

Detail of the Canon 77D body and controls.

While working on my guide for the 77D, Canon 77D Experience, I have found that the important differences between the two cameras lie in their Menus and the Custom Functions. These are the options which enable you to customize the camera for your needs and preferences, and for the different types of shooting situations in which you will be using the camera. (My guide for the 80D, Canon 80D Experience is available here.)

Canon 77D example sample image

Example image from Canon 77D Experience guide – non-cropped image of swan, taken with the 77D.

To review the more “superficial” comparisons, the Canon 77D and 80D share some important features such as the 45-point viewfinder autofocus system, which helps you to locate an AF point on your subject without necessarily having to first focus then recompose, as well as enables you to better track and retain focus on a moving subject. Then both have Canon’s revolutionary Dual Pixel live view autofocus system, which allows for fast autofocusing as well as much more accurate tracking of a moving subject in live view (for stills and video) than previous models. (What most of the comparison articles fail to point out is that the 77D includes a new Smooth Zone AF method in live view, which allows you to place the zone most anywhere on the screen, not just in 9 preset locations as with the 80D – a pretty significant upgrade to be overlooked.) They also both share a 24.3 megapixel sensor, 3″ articulating touch screen, and similar buttons and controls on the body of the camera including a top Main Dial as well as the rear Quick Control Dial. Being newer, the 77D has a faster Digic 7 processor (vs. the Digic 6 of the 80D), an expanded ISO range (up to the unusable 51,200) allowing for cleaner images in low light situations, a larger buffer for more shots during continuous shooting, and the addition of Bluetooth for connecting to a smart phone or tablet. (Interestingly, none of the comparison articles seem to have tried to use the Bluetooth connection with iOS, which will immediately ask you to switch to Wi-Fi in order to use any of the wireless functions. So it is a feature you can really only make use of with Android. Or else you can use it with the new Canon BR-E1 Bluetooth Wireless Remote Control.)

The 77D, however, lacks the weather-sealing and headphone jack of the 80D. The 80D also boasts a better pentaprism viewfinder, slightly faster maximum shooting speed of 7 fps vs 6 fps, faster maximum shutter speed of 1/8000 vs 1/4000, and a faster 1/250 flash sync speed vs. the 1/200 speed of the 77D. The larger battery of the 80D will allow for more shots or longer live view sessions. The 77D is also a few hundred dollars cheaper than the 80D.

These various pros and cons can make it difficult to choose between the two cameras, because they mainly present figures from a spec sheet, and for the most part these types of differences are not significant. They certainly don’t tell the full story.

Canon 77D example, sample image

Example image of great blue heron taken with the 77D, from Canon 77D Experience guide.

While the two cameras share the same 45-point viewfinder autofocus system, they do not have the autofocus capabilities because the 80D includes numerous autofocus customizations in the Custom Functions that are not on the 77D, particularly for how the camera responds to moving subjects as you are tracking them and trying to retain focus. The items on the 80D that are absent on the 77D include the options for adjusting Tracking Sensitivity, Acceleration/Deceleration Tracking, and AF Point Auto Switching. These options are adjusted in order to help the camera better retain focus on different types of moving subjects, such as one moving smoothly and consistently vs. one moving erratically and switching speed and direction. They allow you to adjust the camera differently to track the distinct types of movements of (for example) a runner, a race car, a tennis player, or a bird in flight. While the 77D is fully capable of capturing sharp images of moving subjects, as demonstrated in the image of the flying heron above, the 80D allows you the ability to adapt the camera to different types of subjects, to better ensure that you capture more in-focus shots of moving subjects when capturing a burst of images.

Some of the autofocus-related Custom Function options of the 80D that are not offered on the 77D.

The 80D also includes the 1st Image/2nd Image Priority options, which enable you to tell the camera to prioritize shutter release vs. focus. In other words, you can choose if you want the camera to capture all images in a burst in-focus, or if you just wish to maintain the rapid frame rate at the possible expense of missing focus on some of the images. And the 80D offers the option of Orientation Linked AF Point, where the camera can automatically switch AF Point / Zones as well as AF Area Modes (Single Point vs. Zone of multiple points) when you turn the camera to a different orientation. For example, if you are capturing a portrait subject and are using one of the upper-right AF Points, when you turn the camera to the vertical orientation, the camera can automatically select an upper-right AF Point so that you don’t have to move the active AF Point yourself. The 80D also has the AF Point Selection Movement option, which allows you to tell the camera how to address AF Point selection when you reach an outer point. The AF Point selection can stop at the edge, or it can “wrap around” to the other side. I believe that with the 77D, the AF Point selection will always just stop at the edge. Another autofocus-related Custom Function on the 80D that is missing from the 77D is AF Microadjustment, which allows you to adjust the focus of each lens in order to obtain (ideally) exact focus. With the 77D, you are going to have to accept any slight front-focus or back-focus issues with your various lenses.

AF Microadjustment options on the 80D that are not included on the 77D.

Example image from Canon 77D Experience guide – Cropped detail of great blue heron in-flight, with fish, taken with the 77D, showing the ability to capture a sharp, detailed image of a difficult moving subject. Cropped from a similar distance as the above heron image.

Some of these options you can live without and might never miss, but once you start taking advantage of them with a camera that offers them, you might never wish to do without them again! Other features of the 80D that are not included on the 77D are the Silent Shooting Drive Modes that allow for quieter shutter release. The 77D however, adds the Self-Timer Continuous option, which allows you to specify the number of continuous images to be taken with the self-timer. The 80D will only take one image with the self-timer. The 77D is also missing the in-camera HDR Mode, Multiple Exposure shooting, and in-camera RAW processing of images. During image playback, the 77D will display the blinking highlights only when you view the smaller thumbnail view of the image along with the histogram. With the 80D, you can choose to view the blinking highlights on the full-screen image playback. These “blinkies” allow you to see if you have over-exposed parts of an image. The 80D also offers a playback grid, which can help you to assess the composition.

Viewing the blinking highlights on the full-screen image on the 80D (left) or on the thumbnail (right). The 77D only offers the blinking highlights on the thumbnail / histogram view (right).

While both cameras offer Auto ISO, the 80D allows for additional Auto ISO options such as adjusting or specifying the minimum shutter speed that the camera can select when using Auto ISO. For example, if you are using Auto ISO and Aperture-Priority Shooting Mode, you may find that the camera is selecting a shutter speed that is slower than you may want, thus risking blur from camera movement. With the 80D, you can adjust this setting accordingly. The 80D will also allow you to select ISO speeds in 1/3 stop increments, rather than the full stops (100, 200, 400) of the 77D. The 80D also includes the Safety Shift option, where the camera will automatically adjust the exposure settings for you if the current settings are going to result in a poorly exposed image. For example, you may be taking images at a concert or performance using Aperture-Priority mode, and you have set your desired aperture setting. But if the lighting suddenly becomes much brighter, and your combination of exposure settings are going to result in a bad exposure, the camera will adjust that aperture setting to enable you to capture a proper exposure.

The additional Auto ISO adjustments of the 80D that are not included on the 77D.

Some additional features offered on the 80D but not on the 77D are the Custom C1 and C2 shooting modes on the Mode Dial, which allow you to register a pre-set selection of shooting settings and menu settings. For example, you might assign all your sports-related camera settings to the C1 mode, and all your landscape-related settings to the C2 mode, and thus be able to quickly switch to a different camera set-up. The 80D allows you to customize what is displayed on the various Live View display screens as you press the INFO Button (such as the shooting settings, grid, level, and histogram). The 77D offers these various information displays as you press the INFO Button, but you can’t customize what is shown with each click of the button. Both cameras offer Auto Exposure Bracketing, but the 80D allows you to customize the bracketing sequence as well as the number of bracketed shots up to 7 (only 3 shots with the 77D). And the 80D will allow you to set a precise Kelvin (K) White Balance temperature, while the 77D does not have this option. And while the 77D allows you to customize 4 major controls / buttons of the camera, the 80D provides the option of customizing several additional controls. These types of customizations enable you to set up the camera controls exactly how you want them, for quick access to various functions while shooting.

The Custom Controls of the 80D that can be customized. The 77D only enables you to customize the Shutter Button, AF-ON Button, AE-L (*) Button, and SET Button.

Regarding movie shooting, the 80D offers more format and compression options (MOV vs. MP4, ALL-I vs. IPB), while the 77D only records with MP4 and IPB. The 77D however offers the in-camera 5-axis electronic image stabilization for video.

Which Camera is Best for You?

While I’ve noted several of the functions and features of the of the 80D that are not included on the 77D, it is important to realize that you may never miss many of those features. Many shooters never really take advantage of some of these features, or they set them once and then forget they are there. And some of the features are the types of options you will start to realize you need only after using your camera for a while and then getting to the point where you say “I wish my camera would do ___.” At that point, you might be ready for an upgrade, and then choose a higher-end model.

As noted above, even without these added features of the 80D, the 77D is fully capable of capturing high-quality, sharp images, even of difficult moving subjects such as birds in flight. In fact, even without several of the AF customization options that the 80D offers, I was able to capture just as many bird in flight “keepers” with the 77D as I have with higher-end models! Some of this was due to luck and timing, but the 77D can obviously do it. As the 77D shares the same 24.3 MP sensor of the 80D, the 77D is a great camera for enthusiasts who desire great image quality, sharpness, clarity, and low-light performance, but don’t have the time or desire to dig into the menus, settings, and customizations to adjust the camera for different photo shoots. And the 77D has the necessary features and controls for those who wish to take more control of the camera and its settings. The 77D is also good for enthusiast or occasional videographers who don’t need all the movie file type options.

If you are interested in digging into the menus and Custom Functions of either camera, and learning to take full control, be sure to read my guides Canon 80D Experience and Canon 77D Experience!

But if your primary subjects are sports, action, wildlife, or birds, you will want to upgrade to the Canon 80D (or 7D Mark II), particularly for their additional autofocus settings and customizations for tracking different types of moving subjects. Plus those models offer faster continuous shooting rates. And for those who want to take full advantage of the camera controls in order to change and adjust settings on-the-fly, the 80D offers far more Custom Controls options.

If you are planning to purchase your Canon 77D or Canon 80D online, please consider using my affiliate links and help support this blog – thanks!

You can purchase the new Canon 77D from Amazon here. $899.00 body only.

And you can purchase the Canon 80D from Amazon here. $1099.00 body only.

My guides to the cameras, Canon 77D Experience and Canon 80D Experience are available at www.fullstopbooks.com