Hands On with the Nikon Z6III

I recently had the opportunity to use the new Nikon Z6III mirrorless camera, in mid-June 2024 at a Nikon “Touch and Try” event at Hunt’s Camera in Melrose (Boston) Mass. The pre-release event was so notable that the president of Nikon USA, Naoki Onozato, was even in attendance! 
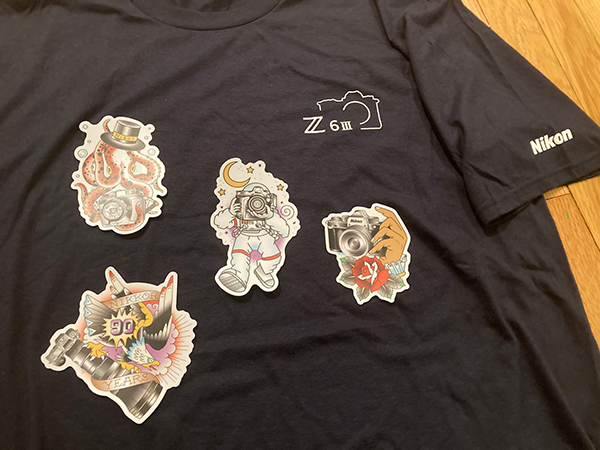
Nikon swag from the Z 6III event.

The presentation from the Nikon reps boasted about many of the features of the Z6III, which are not just updated from the Z 6II, but some of which even surpass the Nikon Z 8 / Z 9. Many of the improved features are due to the “partially-stacked sensor,” a technology introduced for the first time on the Z6III. What this means is that the camera has speed and functionality approaching the stacked sensors of the Z 8 and Z 9, but at a lower cost. A “stacked sensor” such as on the Z 8 and Z 9 locates some of the electronics immediately behind the image sensor, which increases the speed of the sensor readout. This has advantages for the speed and operation of the AF system, reduces the rolling shutter effect, allows for faster continuous shooting speeds, as well as a smoother performance of the electronic viewfinder to reduce blackout during continuous shooting. The partially-stacked sensor of the Z6III locates some of the electronics directly above and below the image sensor. While the speeds and improvements are not as dramatic as with the Z 8 and Z 9, they are still a significant improvement over the sensor of the Z6II, including a smooth view of the scene when shooting at 20fps.

While the Z6III has similar subject detection choices as the Z 8 and Z 9, including people, eyes, animals, vehicles, and airplanes, the Z6III does not have a dedicated Birds choice. In order to make use of bird detection, you will need to set subject detection for Auto or Animal. The Z6III also does not have a sensor shield, but there is a mechanical shutter that will protect the sensor when a lens is removed. Also, the Z6III does not offer the Auto Capture option of the Z 8 and Z 9. However, it does have the Pre-Release Capture feature, which will buffer images for up to 300 seconds as the Shutter Button is half-pressed, and will save the previous 1 second of images when the Shutter Button is fully pressed. You will need to be using the C30, C60, or C120 release mode, which captures JPEG images only.

The Z6III also boasts 8-stop in-body image stabilization (vibration reduction), plus a Focus Point VR option which ensures that the image stabilization is working effectively at the location of the active focus point, which is where your main subject will be located.

Models at the Nikon Z6III event, shot with the Z 6III and NIKKOR Z 50mm f/1.2 S lens. 1/5000, f/1.2, 3200 ISO. Clearly I should have lowered the shutter speed and ISO, but I was handed the camera and a brief moment to make my adjustments and shots before handing the camera to the next user.

For continuous bursts, the Continuous Low (CL) option can be set for 1 to 7 fps. Nikon’s specs say that Continuous High (CH) ranges from 1 to 8.1 fps (up to 16 fps with electronic shutter, and that Continuous High Extended (CH+) ranges from 1 to 14 fps (up to 20 fps with electronic shutter. However in the Z6III menu does not offer the option to adjust the CH and CH+ settings, so perhaps they are fixed at a maximum of 8.1/16 and 14/20 fps, and may be lower based on shutter speed and pother camera settings. It is also important to note that the Z6III does not include a battery charger for the En-EL15c battery, in the box. You will need to use an older charger from a previous camera, a purchase a battery charger unit, or an AC charger and power delivery (PD) USB cable that connects to the camera and charges the batteries in-camera. The optional Nikon MB-N14 Power Battery Pack with Vertical Grip can also be plugged-in to charge the batteries in the grip.

Several of the buttons of the Z6III can be customized to your desired functions, such as the Fn1 and Fn2 Buttons. By default, The Fn1 button is set for White Balance. Press the button and turn the rear Command Dial to change the WB setting and the front Sub-Command Dial to change any sub-options, such as the Auto WB sub-options of A0, A1, and A2. The Fn2 Button is set to AF Mode / AF-Area Mode. This is handy for changing these settings, as the Z6III does not have the AF Mode Button that the Z 8 and Z 9 has. Part of the rear screen can also be used for a custom function, similar to assigning a function to one of the camera buttons. For example, you can tap the designated portion of the screen to display the level while shooting. The Z6III also includes an Illumination Button for the top LCD screen. Press it once to illuminate that top screen, then press it again to turn it off. With the Z 8 and Z 9, when accessing f2 and g2 to customize the buttons, you can press the Delete Button to reset the selected button back to its default, or press and hold the Delete Button to reset all the buttons. The Z6III does not appear to have this reset option.

Most notably, the word of the day at the Nikon Z6III presentation was “nits,” a term which describes brightness of the Electronic Viewfinder. (A nit is the unit of measurement that describes how bright a television, smartphone, computer monitor, laptop screen, or another type of display is. The higher the number of nits, the brighter the display.) While a screen such as the iPhone 15 can display at up to 2000 nits, the viewfinder of the Nikon Z6III is a blindingly bright 4000 nits! The viewfinder brightness can be adjusted with your eye at the viewfinder, by pressing the i Button and accessing the Monitor/Viewfinder Brightness options. It can be set for Auto, or for the brightness level of your choice.

When working in an extremely dark room, the viewfinder brightness can be increased to its maximum, and looking through the camera, the room will appear to be a bright at high noon. Not only is the scene in the viewfinder bright, but it retains a nice dynamic range, without appearing contrasty or washed out. And not only can you easily view any subject in this scene, the autofocus system and subject / eye detection works down to -10EV, which means the Z6II can quickly and easily find the subject’s eye, and follow it around the frame. These features, working together, can be incredibly helpful when shooting a wedding reception or event in a very dark space.

The Z6III uses a different style of articulating screen, similar to the one introduced on the Nikon Zf. While it does not extend and rotate as dramatically as the rear screen of the Z 8 and Z 9, it can now be opened outward to the side, and rotated up and down, similar to many Canon rear screens. This also allows the screen to be flipped around and closed, which will protect the screen when not in use. And as with the Z 8 and Z 9 , the view on the screen can be rotated when the camera is used in the vertical (portrait) orientation, for ease of viewing.

As with the Z 8 and Z9, the Z6III has the option for the vertical rotation of the information on the rear screen. This means that the text and icons on the shooting, playback ,and menu screens can be set to rotate when the camera is held in the vertical position.

Similar to the Z 8 screens shown here, the views on the rear screen of the Z6III can be rotated along with the vertical orientation of the camera. As you can see, the text and icons on the screen rotate, for ease of viewing.

The Z6III offers the Pixel Shift option, to create high-resolution images up to 96 MP. The camera will capture 4, 8, 16, or 32 images, which can be combined in Nikon’s NX Studio software to create the high megapixel image. Not only will this provide a high-resolution image, but it can significantly reduce moire and noise, and increase the dynamic range of an image. You will need to use a tripod to capture the images that will be combined. The 16 and 32 image setting will capture an image dedicated to noise reduction.

The Z6III includes the High-Frequency Flicker Reduction feature found on the Z 8 and Z 9. This enables you to set an exact shutter speed, such as 1/60.3, which can allow you to reduce or eliminate flicker in the images that can be caused by certain types of lighting, or when photographing illuminated screens such as TVs, computer monitors, or big-screens found in a sports stadium.

There are also a number of video improvements in the Nikon Z6III. It can record in-camera RAW video (ProRex / NRAW), including full-frame 6K at 60p, 5.4K at 60p and Full HD 240p, plus slow motion video options. There is a 125 minute video recording time limit, and the microphone jack now also performs as a line-in audio input, allowing for the use of additional audio equipment and mics such as a direct connection to a sound board or boom mic.

It is also notable that the name “Z6III” is now written without any space between the “Z” and the numbers, as it is with previous Z models such as the Z 9 and Z 7II.

Some Nikon Z6III JPEG images, straight out of the camera. The full JPEG and RAW versions can be found here:
https://www.flickr.com/…/dojoklo/albums/72177720318125691

My comprehensive guide to the mirrorless Z6III, Nikon Z6III Experience by Douglas Klostermann, will be available by Fall 2024. There will be a companion Menu Setup Spreadsheet as well, which includes detailed listings of suggested Menu Settings and Custom Settings for various types of shooting situations, including Travel/Street, Action/Sports, Wildlife/Birds, Studio/Portrait, and Performance/Concert.

You can learn about and purchase the book and the menu setup spreadsheet at my Full Stop website here:

https://www.fullstopbooks.com/nikon-z-6iii-experience/

Purchase the Nikon Z6III body or kit here!

B+H Photo: Z 6III Body only:
https://www.bhphotovideo.com/c/product/1834803-REG/nikon_z6_iii_mirrorless_camera.html/BI/7364/KBID/7886/kw/NIZ63/DFF/d10-v2-t1-xNIZ63

B+H Photo: Z 6III with Z 24-70mm f/4 S Lens
https://mer54715.datafeedfile.com/widget_prdt_click.php?aff_num=7886&aff_net=7364&type=text_link&size=na&mode=na&sku=NIZ632470

Amazon: Z6III Body or Body with Lens:
https://amzn.to/45rPisz

Setting Up the Nikon Zf Menus

Nikon Zf book manual guide menu setup how to learn use tips tricks quick start use learn

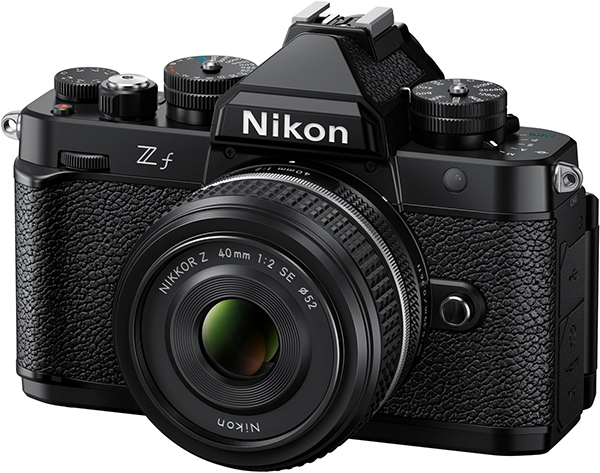
The retro-styled mirrorless Nikon Zf offers far more menu items and customization options than many previous cameras in the Z line-up. In order to take full advantage of this sophisticated camera, you are going to need to dig into the Menus and Custom Settings, and set up the camera to work best for how you shoot and for the type of situations you are shooting.

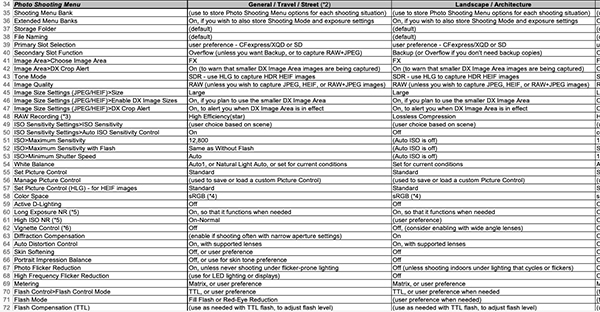
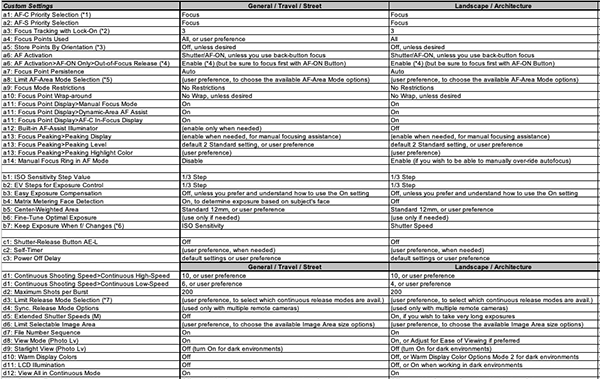
To assist you with this, I have created a detailed and comprehensive Nikon Zf Menu Setup Spreadsheet, which lists suggested settings and starting points for the Photo Shooting Menu and the Custom Settings. The spreadsheet has been updated for Firmware 2.0! It has complete and separate camera setup recommendations for different types of shooting, including:

General / Travel / Street
Landscape / Architecture
Action / Sports
Moving Wildlife / Birds
Studio / Portraits
Concert / Performance

Detail of the Nikon Zf Menu Setup Spreadsheet

The Nikon Zf Setup Spreadsheet can be downloaded from my website here. Printing instructions are also included on that page.

http://www.fullstopbooks.com/setup-guides/

Setting Up the Nikon Z9 Menus

Nikon Z9 how to set up menus custom settings tips tricks

The flagship mirrorless Nikon Z9 offers far more menu items and customization options than most previous cameras in the Z line-up, and they continue to be updated and expanded with firmware updates. In order to take full advantage of this sophisticated camera, you are going to need to dig into the Menus and Custom Settings, and set up the camera to work best for how you shoot and for the type of situations you are shooting.

To assist you with this, I have created a detailed and comprehensive Nikon Z9 Menu Setup Spreadsheet, which lists suggested settings and starting points for the Photo Shooting Menu and the Custom Settings. It has complete and separate camera setup recommendations for different types of shooting, including:

General / Travel / Street
Landscape / Architecture
Action / Sports
Moving Wildlife / Birds
Studio / Portraits
Concert / Performance

The Nikon Z9 Setup Spreadsheet has been updated for Firmware 5.0. It can be downloaded from my website here. Printing instructions are also included on that page.

http://www.fullstopbooks.com/setup-guides/

For explanations of all the menu items, controls, features, functions, and autofocus system of the Z9, have a look at my clear and comprehensive guide for the Nikon Z8, Nikon Z8 Experience. While I don’t yet offer a Z9 guide, the functions, features, autofocus system, menus, and custom settings of the Z9 and the Z8 are nearly identical. This user-friendly guide will help you to take control of your camera, and the images you create. Learn more about it and purchase it at my website here:

http://www.fullstopbooks.com/nikon-z-8-experience/

Setting Up the Nikon Z8 Menus

Nikon Z8 book manual guide how to learn use tips tricks quick start setup use learn

The powerful mirrorless Nikon Z8 offers far more menu items and customization options than most previous cameras in the Z line-up. In fact, most of the menu items and options are the same as the professional Z9 model. In order to take full advantage of this sophisticated camera, you are going to need to dig into the Menus and Custom Settings, and set up the camera to work best for how you shoot and for the type of situations you are shooting.

To assist you with this, I have created a detailed and comprehensive Nikon Z8 Menu Setup Spreadsheet, which lists suggested settings and starting points for the Photo Shooting Menu and the Custom Settings. The spreadsheet has been updated for Firmware 2.0! It has complete and separate camera setup recommendations for different types of shooting, including:

General / Travel / Street
Landscape / Architecture
Action / Sports
Moving Wildlife / Birds
Studio / Portraits
Concert / Performance

Detail of the Nikon Z8 Menu Setup Spreadsheet

The Nikon Z8 Setup Spreadsheet can be downloaded from my website here. Printing instructions are also included on that page.

http://www.fullstopbooks.com/setup-guides/

For explanations of all the menu items, controls, features, functions, and autofocus system of the Z8, have a look at my clear and comprehensive Nikon Z8 Experience e-book guide. This user-friendly guide will help you to take control of your camera, and the images you create. Learn more about it and purchase it at my website here:

http://www.fullstopbooks.com/nikon-z-8-experience/

Setting Up the Nikon Z9 Menus

Nikon Z9 Menu Setup Settings

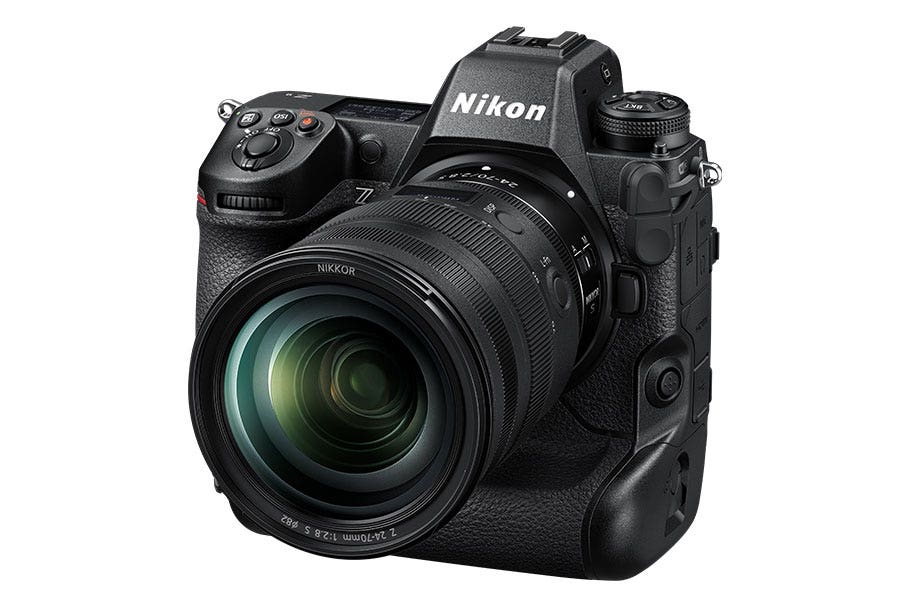
The pro-level mirrorless Nikon Z9 offers far more menu items and customization options than the previous cameras in the Z line-up. In order to take full advantage of this powerful camera, you are going to need to dig into the Menus and Custom Settings, and set up the camera to work best for how you shoot and for the type of situations you are shooting. To assist you with this, I have created a detailed and comprehensive Nikon Z9 Menu Setup Spreadsheet, which lists suggested settings and starting points for the Photo Shooting Menu and the Custom Settings. It has complete and separate camera setup recommendations for different types of shooting, including:

General / Travel / Street
Landscape / Architecture
Action / Sports
Moving Wildlife / Birds
Studio / Portraits
Concert / Performance

Detail of the Nikon Z9 Menu Setup Spreadsheet

The Nikon Z9 Setup Spreadsheet can be downloaded from my website here. Printing instructions are also included on that page.

http://www.fullstopbooks.com/setup-guides/

Nikon Z7II / Z6II Menu Setup Guide

Nikon, Nikon Z7II, Z6II, Nikon Z6II, Nikon Z7II Z6II Experience, book, ebbok, learn, use, quick start, dummies, master, manual, guide, how to, use, tutorial, PDFsetup, tips and tricks, quick start, recommended setting
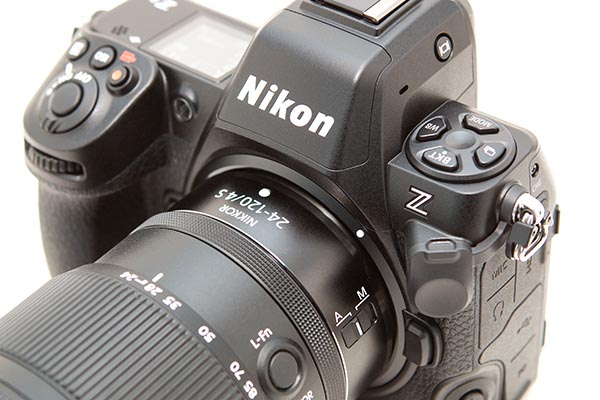
Detail of the Nikon Z 7II Mirrorless Camera

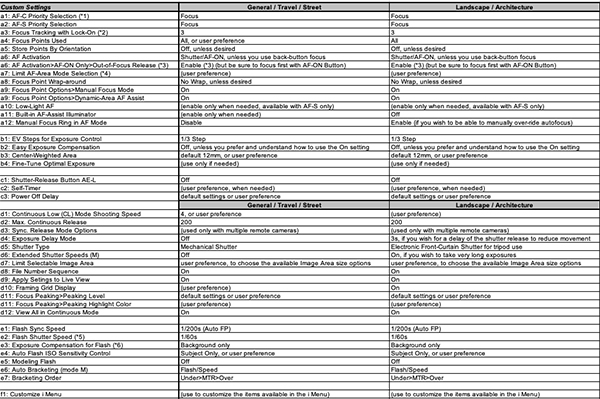
In order to take full advantage of the Nikon Z 7II and Z 6II, you are going to need to dig into the Menus and Custom Settings of these cameras, and set them up to work best for how you shoot and for the type of situations you are shooting. To assist you with this, I have created a detailed and comprehensive Nikon Z 7II / Z 6II Menu Setup Spreadsheet, which lists suggested settings and starting points for the Photo Shooting Menu and the Custom Settings. It has complete and separate camera setup recommendations for different types of shooting, including:

General / Travel / Street
Landscape / Architecture
Action / Sports
Moving Wildlife / Birds
Studio / Portraits
Concert / Performance

Detail of the Nikon Z 7II / Z 6II Menu Setup Spreadsheet.

The Nikon Z 7II / Z 6II Menu Setup Spreadsheet can be downloaded from my website here. Printing instructions are also included on that page.

http://www.fullstopbooks.com/setup-guides/

Take control of your camera, and the images you create, with the help of my comprehensive, user-friendly e-book, Nikon Z 7II / Z 6II Experience.

Nikon Z 7 / Z 6 – Exploring the Menu Settings

As with all new mirrorless and dSLR cameras, the lists of specifications don’t tell the entire story. Many of the important functions, options, and additions of a new camera can be found in the menus and Custom Settings. These are the types of options that can really differentiate a camera, from a user-experience perspective, and yet these options are often over-looked by reviewers and spec comparison posts. For example, two cameras may share the same autofocus AF Modes and AF Area Modes, and thus look equal on a spec comparison sheet. But one will be much better suited for photographing action and movement because it has additional menu options and Custom Settings which allow the user to tweak and customize the AF system for their specific needs and shooting style.

Nikon Z 7 Nikon Z 6 Custom Settings

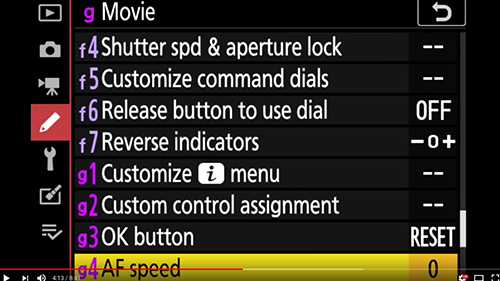
Some of the Custom Settings options of the Nikon Z 7

A video of all the Nikon Z 7 menu items has been posted on YouTube by Jeff Curtner. You can find the video here. It is simply a video of someone navigating all the Z 7 menu items, the i Menu, and the Live View display, but lots of information can be gathered from this, including a few menu options that have not been mentioned in Nikon’s materials or by other reviews of the Nikon Z 7 and Nikon Z 6. All of the screenshots in this post have been taken from this video.

Despite being a mirrorless camera, and thus differing from a Nikon dSLR, a large number of the menu items and options are similar to the Nikon D850 and other recent Nikon models. I will not go into detail about any of those items, since if you are currently using a D850, D500, D7500, D750, etc, you will already be familiar with those menu items and their options. You can consult one of my Menu Setup Spreadsheets to learn about suggested settings for those menu items, or have a look at my comprehensive user-guides for these cameras, such as Nikon D850 Experience. A comprehensive user-guide for the Z 7 and Z 6, Nikon Z 7 / Z 6 Experience, will be available in November or December 2018. You can learn more about it here:

http://www.fullstopbooks.com/nikon-z-7-z-6-experience/

Menu Setup Spreadsheets:

http://www.fullstopbooks.com/setup-guides/

Comprehensive User Guides for most Nikon dSLR models:

http://www.fullstopbooks.com

And now a look at some of the Menu and Custom Setting options of the Nikon Z 7 and Nikon Z 6 that have not been discussed in many recent Z 7 and Z 6 camera reviews. Some of the most important ones are in the Custom Settings items, but we will start at the top of the Menu tabs, with the Photo Shooting Menu:

Photo Shooting Menu

The Expeed 6 processor of the Nikon Z 7 and Z 6 offers processing speed that allows for some new features, including Diffraction Compensation, a Mid-Range Sharpening Picture Control parameter in addition to the Sharpening and Clarity parameters, and the new Creative Picture Controls. As an in-camera processing feature, Diffraction Compensation may potentially slow down the maximum continuous frame rate a tiny bit, though perhaps not – we will have to read the fine-print of the Nikon Z 7 User’s Manual when it is available. The Creative Picture Controls are found in the Set Picture Control menu, and listed after all the typical Picture Controls. If you don’t wish to separately set the three Picture Control sharpening parameters, you can use the new Quick Sharp option to adjust these sharpening-related parameters together.

Nikon Z 7 Z 6 menu

Diffraction Compensation menu item (left), and the Creative Picture Controls as found in the Set Picture Control menu (right). The Movie Picture Control option is shown here, but a similar menu is also found in the Photo Shooting Menu, for still image shooting.

The White Balance menu item is located in the Photo Shooting Menu, though for quick access it can also be assigned to one of the Function Buttons, or changed via the i Button Menu on the rear Monitor or in the Viewfinder. As with recent Nikon models, the Z 7 and Z 6 offer three different Auto White Balance options, Keep White, Normal, and Keep Warm Lighting Colors. The cameras also offer the recently added Natural Light Auto option, designed to reproduce colors as the eye sees them in natural light. And there are the other standard Nikon WB options, including multiple Fluorescent sub-options such as Day White and Cool-White. To access these options quickly while shooting, you can assign WB to one of the customizable buttons, and then press that button and change the WB setting as you view it in the electronic Viewfinder or on the rear Monitor, as shown in the figure below.

Nikon Z 7 Z 6 menu setup

Left: Photo Shooting Menu – White Balance options, including three Auto WB options, and the Natural Light Auto option. Right: If WB is assigned to one of the camera  buttons, you can also quickly access and change this setting in the Viewfinder or on the rear Monitor.

The Z 7 and Z 6 offer in-camera, 5-axis Vibration Reduction, for both still image and video shooting. This image stabilization also works with F-mount lenses, including non-VR lenses, via the Nikon FTZ Adapter. (Image stabilization will be limited to 3-axis VR with non-VR lenses.) I’m not sure if this menu item shown below is for enabling the in-body electronic image stabilization, or if it is an option that is used with newer Nikon lenses that have VR, but don’t have the VR and VR Mode switches on the lens itself. I will update when more information is known.

Nikon Z 7 Z 6 menu settings setup

Left: Vibration Reduction menu item, to enable VR and to set the VR Mode. It is possible that this is not the in-camera Electronic Vibration Reduction menu item, but rather it is possibly for enabling VR on newer lenses that don’t have the VR and VR Mode switches on the lens itself. Right: Focus Shift Shooting options (Focus stacking), including the Peaking Stack Image preview image option.

The focus stacking feature of the Z 7 and Z 6 is called Focus Shift Shooting, and is accessed in the Photo Shooting Menu. You will use this menu to set the Number of Shots, Focus Step Width, and Interval between shots. It will also allow you to lock the exposure on the first frame, enable completely Silent Photography for the process, and create a new storage folder to save the focus stack images where you can quickly locate them. The new Peaking Stack Image option will display a monochrome preview of the final focus-stacked images, which can be viewed after the focus stacking function is performed. Beware that the Silent Photography option can result in banding in the images, particularly under artificial lighting that cycles. So if you are using this option, it is best to verify that your images are clean before initiating the Focus Shift process.

Custom Settings Menu

Many of the importation functions, options, and customizations for the Z 7 and Z 6 can be found in the Custom Settings Menu. These menu items are often where the important, powerful functions of a Nikon camera are found. For example, the on-camera, phase-detection aspect of the hybrid autofocus system of the Z 7 and Z 6 allows for Face-Detection autofocusing, with both Viewfinder shooting and Live View shooting. This feature can only be used with the Auto-Area AF area mode, and is enabled with Custom Setting a4. The Custom Setting a5 – Focus Points Used, can be used to limit the number of selectable focus points. The Z 7 has 493 AF Points, and the the Z 6 has 273 AF Points, so that is a ridiculous number of focus points to have to click across in order to locate the active AF Point where you want it to be. I will have to confirm this, but I believe that this menu item will be used to limit the number of selectable points, so that you can more quickly and easily select the AF Point you desire. I am going to speculate that all the the AF Points will actually be used by the camera when automatically tracking a moving subject.

Nikon Z 7 Z 6 Custom Setting menu setup

Left: Custom Setting a4, to enable AF Face Detection when working in Auto-Area AF area mode. Right: Custom Setting a5, to limit the number of selectable AF Points.

The Z 7 and Z 6 also offer a Dynamic Area AF area mode, where the selected AF Point is used to focus on the subject, but the immediate surrounding points will help retain focus on the subject if it momentarily strays from the initial point. This is similar to the 9-Point Dynamic-Area AF of previous Nikon dSLR models. The Custom Setting a10 – Focus Point Options offers the Dynamic-Area AF Assist item, which applies to this area mode. If enabled, you will be able to also view the active surrounding AF Points, in the Viewfinder when shooting, and not just see the single selected AF Point. The Custom Setting a11 – Low-Light AF is a new option for the Z 7 and Z 6, and is used to make the autofocusing system even more sensitive when working in low light. However, enabling this option may cause a slight lag in autofocusing.

Nikon Z 7 Z 6 Custom Settings menu setup

Left: Custom Setting a10, to enable the Dynamic-Area AF Assist option in order to view all the active AF Points when using that AF Area Mode. Right: Low-Light AF, to assist with focusing in low light situations.

The Z 7 and Z 6 offer an Electronic Front-Curtain Shutter option, found in Custom Setting d5. This feature makes use of an electronic shutter, using the sensor itself as the shutter, and thus eliminates the sound and the motion of the first curtain of the mechanical shutter. This can help to eliminate slight internal camera movements and vibrations when capturing an image, and is useful for tripod shooting such as landscape and macro shots. The cameras also offer a Silent Shutter option, which will be completely silent. However, that can cause banding when used with artificial lighting that cycles. When Custom Setting d8 – Apply Settings to Live View is enabled, all of the various camera settings and exposure settings will be applied to the scene as viewed on the rear Monitor during Live View. This will include the White Balance setting, Picture Control, and Exposure Compensation amount. Thus you will better be able to preview the appearance of the final image.

Nikon Z 7 Z 6 Custom Settings menu setup options

Left: Custom Setting d5, to enable the Electronic Front-Curtain Shutter. Right: Custom Setting d8 – Apply Settings to Live View, where the scene on the rear Monitor will reflect the current camera settings and exposure settings.

The cameras offer a newly designed i Menu, which will allow you to quickly access and change various settings. This menu can be accessed on the rear Monitor, and also in the electronic Viewfinder. This offers the advantage of changing various camera settings, while shooting, without taking the camera down from your eye. Custom Setting f1 enables you to Customize i Menu, so that you will be able to access the settings and functions you use most frequently. For example, if you often use the in-camera HDR or Bracketing features, you can add them to this menu. Custom Setting f2 – Custom Control Assignment allows you to customize various buttons and controls on the camera, including the Fn1 and Fn2 Button, and the Movie-Record Button. For example, you can assign WB or AF Modes to the Fn Buttons, and then press the button and turn the dials to quickly adjust those settings. The Multi-Selector Center Press can be assigned to a function such as AE/AF Lock, or I believe it will be able to be used to quickly, temporarily switch to a different AF Mode / AF Area Mode. This is useful if you need to quickly switch between shooting a still subject and a moving subject, while shooting.

Nikon Z 7 Z 6 Custom Settings menu suggested setting setup

Left: Custom Setting f1, used to customize the functions available on the i Menu. Right: Custom Setting f2 – Custom Control Assignment, to customize the various camera buttons.

Setup Menu

There are a few additional notable new features located in the Setup Menu, including the ability to adjust the Brightness and the Color Balance of both the rear Monitor and the electronic Viewfinder. The HDMI menu item allows you to adjust the video settings when recording to an optional external device, including 8-bit or 10-bit, and enabling N-Log, and View Assist to preview the appearance of the final image.

Nikon Z 7 Z 6 Custom Setting menu setup options

Setup Menu options for adjusting Monitor Color Balance (left), and the advanced HDMI settings for recording video to an optional external device (right).

Of course there are additional menu items and functions that have not been discussed here, including many of the features found on previous models such as the D850. You can learn more about many of the new features and functions of the Nikon Z 7 and Nikon Z 6 in my previous blog post Nikon Z 7 and Z 6 – Beyond the Specifications:

http://blog.dojoklo.com/2018/08/24/nikon-z-7-and-z-6-specifications/

And be sure to join the Nikon Z6 and Z7 Setup and User Tips Facebook page, to learn, share, and ask more about using your Z 6 / Z 7.

~ ~ ~

To learn about all the features, functions, controls, and customizations of the Nikon Z 7 and Nikon Z 6, be sure to have a look at my Nikon Z 7 / Z 6 Experience user guide, to be available in November or December 2018. It is a comprehensive 350+ page guide, to help you take control of your camera, and the images you create.

Nikon, Nikon Z7, Nikon Z6, Z7, Z6, book, menu, guide, tips, tricks, how to

My Nikon Z 7 / Z 6 Menu Setup Spreadsheet Excel document will be available in October 2018. It will be free for a limited time after the introduction of the camera, and will be available for download here:

http://www.fullstopbooks.com/setup-guides/

If you want to pre-order or order the Nikon Z 7 or Nikon Z 6, please consider using my affiliate links below. Your price will be the same, but they will give me a small commission – thanks!

Nikon Z 7 at Amazon: https://amzn.to/2MPaiU5 – $3396.95

Nikon Z 7 at B and H:
https://www.bhphotovideo.com/c/buy/Mirrorless_System_Cameras/ci/16158/N/4288586281/BI/7364/KBID/7886/kwid/000/DFF/d10-v1-t3-z4288586281

Nikon Z 6 at Amazon: https://amzn.to/2MKHSe0$1996.95

Nikon Z 6 at B and H:
https://www.bhphotovideo.com/c/buy/Mirrorless_System_Cameras/ci/16158/N/4288586281/BI/7364/KBID/7886/kwid/000/DFF/d10-v1-t3-z4288586281

Sony Alpha a7R III Menu Setup Guide – Updates Page

Updates and corrections for Sony Alpha a7R III Menu Setup Guide.

All guides available at my Full Stop website – http://www.fullstopbooks.com/

Sony Alpha a7R III menu setup guide manual tips tricks how to

2018-05-24 – Version 1.0 published in PDF, EPUB, and MOBI formats – No updates

2018-06-01 – Version 1.1b published in PDF, EPUB, and MOBI (Amazon Kindle) formats, including FullStopBooks, Kobo, iTunes, Amazon, Apple, Barnes and Noble.

There were a few mentions of “dSLR” or “digital SLR” in the guide. As the a7R III is a mirrorless camera and not an SLR, there errors have been corrected to say “mirrorless” camera.

“Future Updates to the Text” chapter, information, and links added to the guide.

2018-06-04 – Version 1.2 published in PDF, EPUB, and MOBI (Amazon Kindle) formats, including FullStopBooks, Kobo, iTunes, Amazon, Apple, Barnes and Noble.

To my great embarrassment, there was a typo (extra word) on the very first page of the text. That has been corrected.


Firmware Update: A Firmware update was made available for the a7R III, Firmware Version 1.10. You can download the firmware at the Sony Support site, under the Drivers and Software tab:

https://esupport.sony.com/US/p/model-home.pl?mdl=ILCE7RM3&template_id=1&region_id=1&tab=download#/downloadTab

The firmware update provides the following benefits:

-Adds the menu option to select Pixel Shift Multi Shooting (On: Shooting Interval 0.5sec)

Notes:

When using an A-mount lens via an adaptor (LA-EA1/ LA-EA2/ LA-EA3/ LA-EA4), the interval might be slightly longer

When the camera is connected to PC, please use the latest version of the Imaging Edge software

-Adds support for bracketing during silent shooting with uncompressed RAW

-Adds support for tuning of the peaking display level for S-Log shooting

-Makes improvements for a condition where the Eye AF does not work with certain camera settings

-Makes improvements for a condition where Viewfinder Brightness is not reflected correctly in the Manualsetting

-Improves overall stability of camera

~ ~ ~


Sign up to receive notices of updates to the text of Sony Alpha a7R III Menu Setup Guide, as well as to be eligible to receive free copies of the updated e-book file (for major updates):

http://blog.dojoklo.com/ebooks/sign-up-for-full-stop-e-book-updates/