
Both the Sony a7R III and the Sony a7 III mirrorless cameras have provided exciting upgrades to their predecessors. Important improvements and new features included improved hybrid autofocus systems with AF points positioned widely across the entire frame, faster continuous shooting frame rates, and the addition of the Multi Selector joystick to quickly select the desired AF Point while shooting.
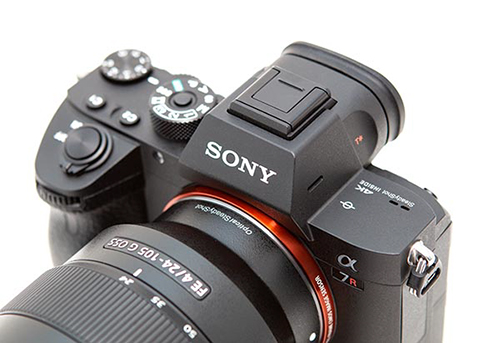
Detail of the Sony a7R III Mirrorless Camera
However, they both make use of a complex menu system that can be a challenge to navigate. While the numerous menu options allow for a tremendous amount of control and customization of the cameras, they can also cause confusion with similarly named items, or with items whose functions are unclear at first. To help you better understand all of the menu items and functions of the camera, I have created quick-start Menu Setup Guides, which explain every menu item along with suggested starting points. There are the two separate books, Sony Alpha a7R III Menu Setup Guide and Sony Alpha a7 III Menu Setup Guide, both of which can be purchased at my FullStopBooks.com website. I have also created a Menu Setup Spreadsheet for these cameras, which list suggested settings for each menu item, with different listing for various shooting situations such as Landscape, Portrait, Action, Studio, Birds, etc. The spreadsheets can be downloaded from my website here: www.fullstopbooks.com/setup-guides/.
Information from these guides is excerpted here, to explain some of the tips, tricks, and “hidden” features of the cameras. While none of the camera features are actually hidden if you read through the manual or help guide, or explore the menu items, some of them can be a bit challenging to find or to make use of if you don’t know they exist, and so I will explain them here.
Attach the Spot Metering Point to the Active AF Point
When making use of Spot Metering Mode, the actual spot that is used to determine the exposure settings can either be located in the center of the frame, or it can surround the active AF Point. Often it is more useful to have this point surround the active AF Point, because for example, you may be focusing on a specific face, and you would also like that face to be used to determine the exposure settings. If the Spot Metering circle is located in the center of the frame, you would have to first meter on the face using the center of the frame, lock the exposure settings (AEL), and then recompose, focus, and capture the image. If the Spot Metering circle is located surrounding the active AF Point, then you simply need to autofocus and capture the image, and the camera will simultaneously use the area of the active AF Point to also determine the exposure.
If this is how you wish to work, I suggest setting the Spot Metering Point item of the Camera Settings 1 Menu to “Focus Point Link” in order to have the spot metering point surround the active AF Point.
Know that you can also select the size of the Spot Metering point. When selecting Spot Metering in the Metering Mode menu item of the Camera Settings 1 Menu, or via the Fn Button and Function Menu, be sure to press left or right to choose Spot Large, Medium, or Small.
You can also use the Custom Key settings of the Camera Settings 2 Menu to assign a button to temporarily make use of Spot Metering when that button is pressed, so that you can quickly meter for a precise or specific area without having to take your eye from the Viewfinder as you change the Metering Mode.
Take Advantage of Face Priority and Eye Priority Autofocus
The a7R III and the a7 III both have excellent autofocus systems, which are able to identify and lock onto faces and subject’s eyes found in the scene. In the Camera Settings 1 Menu, you will want to access the Set Face Priority in AF menu item, where you will enable the Face Priority in AF sub-option, in order to take advantage of the autofocusing face detection feature. If the camera detects a face at or near the area of the active AF Point or Zone, the camera will automatically detect, track, and focus on the face. You will still need to use the Multi-Selector to position the active AF Point or Zone at the desired face before focusing, so that the camera knows which part of the scene to look at and locate your desired subject. Then half-press the Shutter Button, and the active face detection frame will turn white.
When working in Single-shot AF (AF-S) Focus Mode, the camera will also automatically detect and focus on the subject’s eyes. When working in Continuous AF (AF-C) Focus Mode, the camera will only detect, focus, and track faces unless you press the center button of the Control Wheel, and then eye detection and tracking will become active as well.
This Face Priority and eye detection feature works extremely well, and thus you may wish to take advantage of it for various shooting situations that involve faces, whether for still subjects or moving subjects. You are even able to register and rank specific faces (in the Face Registration setting later in the Camera Settings 1 Menu), so that the camera will prioritize them in a scene with multiple faces.
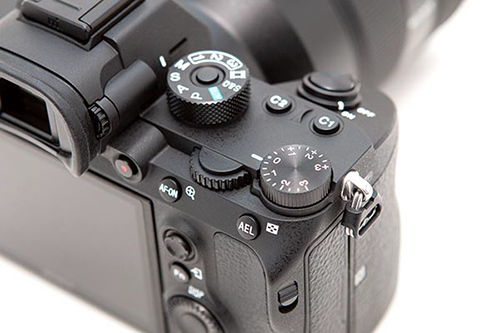
Detail of the Sony a7R III Mirrorless Camera
Quickly Switch to a Different Group of Shooting Settings with the Press of a Button
The Register Custom Shooting Settings of the Camera Settings 1 Menu is a powerful option that will let you assign a group of exposure, shooting, and autofocus settings to one of the camera’s custom buttons (C1, C2, or C3 Button). You can then press and hold that button while shooting to temporarily switch to an entirely different group of camera settings.
To make use of this feature, access this menu item, then select which button you wish to register (such as Recall Custom hold 1), then go through the next menu screen and select and set all of the available settings, such as Shooting Mode, Aperture, Drive Mode, Metering Mode, Focus Mode, and Focus Area. Then select Register. Or if you wish, you can set your camera in advance to all of your desired settings, access this menu, and then select Import Current Setting.
In this menu, you can enable or disable the check-mark next to the settings to choose if they will be registered or not. For example, you may wish to register various autofocus and camera settings, but not register specific exposure settings. Then when you make use of this feature during shooting by pressing and holding the C1, C2, or C3 Button, the enabled settings will temporarily change, but the camera’s exposure settings will remain as you currently have them set.
This customization might be used if you are shooting a still situation that might suddenly change to an action situation, such as a standing bird suddenly taking flight. Or it can be used in an action type of situation where you immediately wish to switch to different shooting parameters for a completely different type of action, such as a baseball batting situation vs. a running situation. Or if you are shooting a subject that is actively moving between sun and shade, the various shooting settings (such as the ISO, Metering Mode, and White Balance) can be set up to instantly accommodate the shade situation.
Use the Focus Magnifier to Zoom in on the Live View Scene
The Sony a7 cameras don’t have the same zoom-in and zoom-out buttons for viewing the Live View scene that you may be used to with a Canon or Nikon camera. Instead you will need to make use of the Focus Magnifier of the Camera Settings 1 Menu. You can also assign the Focus Magnifier to a button of your choice, such as the down button on the Control Wheel. The menu items that come after Focus Magnifier are used to customize exactly how the feature will work.
Focus Magnifier – Access this menu item, then press the center of the Multi-Selector to zoom-in on the scene while viewing either the rear Monitor or the Viewfinder. Use the Multi-Selector to move the magnified area about the screen, or press the Delete Button to move it to the center of the screen. You can continue to press the Multi-Selector Center to zoom-in closer. If using manual focus, this can assist you in focusing more precisely on the desired detail. Turn the manual focus ring on the lens to focus. If Touch Operation is set for On, then you can double-tap on the rear Monitor to magnify the desired area. Note that you cannot access this function when using AF-C Focus Mode.
If set for autofocus, you will need to set the AF in Focus Magnification item, just below, to determine how autofocus works with focus magnification. If set for On, the camera will autofocus when half-pressing the Shutter Button. If set for Off, the Focus Magnifier is cancelled and the view returns to the full scene, when the Shutter Button is half-pressed. The next two menu items will determine the time that the Focus Magnifier remains active, and the amount of magnification of the focus magnifier.
Focus Magnifier Time – When making use of the Focus Magnifier, this setting will determine how long the magnification remains active, so that you can view and focus on the desired detail. You can select 2 seconds, 5 seconds, or No Limit. With the No Limit setting, magnification will end when you half-press or fully-press the Shutter Button (based on the AF in Focus Magnification setting below). I suggest you set this for No Limit, so that you can examine the area and make your manual focus or autofocus adjustments.
Initial Focus Magnification (still image) – When making use of the Focus Magnifier, this setting will specify the initial amount of magnification. The x1.0 setting will activate the Focus Magnifier, but you will still view the entire scene. Continue to press the Multi-Selector Center to zoom-in closer. The x6.2 (a7R III) or x5.9 (a7 III) setting will immediately enlarge the image by about 6 times, when Focus Magnifier is used. I suggest you set if for x1.0, then activate the Focus Magnifier, adjust the area of focus with the Multi-Selector, then continue to zoom, by pressing the Multi-Selector Center or the Control Wheel Center Button.
AF in Focus Magnification (still image) – This setting determines how autofocus works with the Focus Magnifier. If set for On, the camera will retain the magnification of the screen and autofocus when half-pressing the Shutter Button. The camera will focus at the “+” symbol seen in the center of the screen. The camera will return to the full view of the scene once the image is captured. If set for Off, the Focus Magnifier is cancelled and the view returns to the full scene, when the Shutter Button is half-pressed. I suggest setting this for On so that you can make use of the magnified view to precisely autofocus.
Know the Difference Between AEL Hold and AEL Toggle
When using the Custom Key options of the Camera Settings 2 Menu to customize the function of various camera buttons, you can choose to assign Auto Exposure Lock (AEL) to the button of your choice. Typically you will assign the AEL Button to be used to lock the current exposure settings. For example, if you are using Center Metering or Spot Metering, you would half-press the Shutter Button to begin metering, aim the camera to position the metering area over the desired part of the scene, then press the AEL Button to lock the exposure settings that the camera determined. You will see an asterisk icon (*) on the screen to indicate that exposure lock is active. You can then recompose and fully press the Shutter Button to capture the image.
There are a few different Auto Exposure Lock options. The AEL hold option means that exposure is locked only as you hold down the button. The AEL toggle options means that you can press and release the button to activate exposure lock. The options with the Spot Metering icon, [.] AEL hold and [.] AEL toggle means that Spot Metering will temporarily be activated to determine the exposure settings, and those settings will simultaneously be locked, with either the “hold” option or the “toggle” option that was just explained. This can be a very useful option if you are shooting in a situation where you are not using Spot Metering, but you may temporarily wish to use Spot Metering to determine the exposure settings such as for a portrait.
Choose the Best Refresh Rate for the Electronic Viewfinder
The a7R III offers the Finder Frame Rate option in the Camera Settings 2 Menu. This adjusts the frame rate of the electronic Viewfinder display. The High setting will display moving subjects more smoothly, however the Viewfinder resolution will be reduced. The Standard setting will make use of the normal frame rate, and will be used automatically when the camera’s internal temperature becomes high. However with its higher resolution, you will want to use the Standard setting for situations such as still subjects, studio use, macro, and landscapes. It is recommended that you set for High for general use and moving subjects, and Standard for still subjects.
Assign the C3 Button to Rating or Protect
The Custom C3 Button, located at the upper-left on the rear of the camera, is labeled for the Protect function. This will protect an image from accidental deletion. However, know that reformatting a memory card will delete all images, including protected images. You can also use the Custom Key options of the Camera Setting 2 Menu to assign this button to another function, such as Rating. This may be a more useful feature, as you can mark an image with 1 to 5 stars. This can be used to quickly locate specific images when you later view them on your computer.
The Rating Set item of the Playback Menu can be used in conjunction with this button assignment. If you assign a Custom Button to the Rating feature, then you can select which rating amounts are available to choose from, with each subsequent button press. For example, you may only wish to make use of the 1, 3, and 5 star ratings, and thus you can disable the other rating values so that you don’t have to click through them every time. Then you would press the button one time for 1-star, two times for 3-stars, and three times for 5-stars.
There are numerous other menu options, features, and functions that are discussed in my quick-start menu guides for these cameras, Sony Alpha a7R III Menu Setup Guide and Sony Alpha a7 III Menu Setup Guide, both of which can be purchased at my FullStopBooks.com website. I have also created a Menu Setup Spreadsheet for these cameras, which list suggested settings for each menu item, with different listing for various shooting situations such as Landscape, Portrait, Action, Studio, Birds, etc. The spreadsheets can be downloaded from my website here: www.fullstopbooks.com/setup-guides/.