Becoming a Humanitarian Photograper – After the Self-Assignment

I wrote a popular previous post about How to Start Out as a Humanitarian Photographer. It discusses one of the important initial steps of this endeavor: the Self-Assignment. The self-assignment – a volunteer trip to work with and photograph an NGO or non-profit – should help you determine if humanitarian or travel photography is something you really wish to pursue. And if so, it helps you to gain experience working in the field, collaborating with NGOs, and preparing for future assignments. Once you’ve completed and returned from that trip, there is much more to be done!

8421

Editing: Your first task is to select the best images out of the hundreds or thousands of digital images you took, and then to edit and optimize those images. If you are not already adept at working with Photoshop and/ or Lightroom you need to learn the programs and begin to gain proficiency. There are numerous books for this, so try to find the ones that work best with your learning style. Some of the ones I’ve found most helpful are the books by Scott Kelby and by Chris Orwig:

The Adobe Photoshop CS5 Book for Digital Photographers by Scott Kelby

The Adobe Photoshop Lightroom 3 Book for Digital Photographers by Scott Kelby

Adobe Photoshop CS4 How-Tos: 100 Essential Techniques by Chris Orwig

Adobe Photoshop Lightroom 2 How-Tos: 100 Essential Techniques by Chris Orwig

These and other helpful photography related books can be found in my post on Essential Digital Photography Books. Don’t worry about learning every feature of the programs but concentrate on the basic color, contrast, and sharpening features, as well as layers and adjustment layers. As you gain proficiency, move into masking, retouching, advanced sharpening and black and white conversions. Develop good editing, metadata, storage, and workflow habits from the start because it becomes hard to undo bad habits later on. Begin to learn how to use actions and batch processing to more quickly process numerous images.

Contests: When you’ve finished selecting and editing your best images, begin to enter them in contests. The reason for entering contests is not to gain sudden fame, riches, and an instant professional career. Few, if any contest will lead to this, no matter what they promise. Instead, the purpose of contests is to start to develop credentials. Being selected as a finalist or winner of a photo contest will enable you to add that accomplishment to your CV, and winning will allow you to add that coveted phrase in front of your name: “Award winning photographer.” Many contests lure you with the promise of exposure to those in the photo industry or the greater public, but in reality there is very little chance that this will lead anywhere, even if you win. Photographers who are regularly published in magazines and whose name is often in front of industry insiders still struggle to obtain their next gig, so don’t expect your single photo to bring you much. Also, participating in contests will help you to see what others think of your photos. Of course you think they are great, and your friends and family rave over them, but what about others out there? It also helps to see your photos side by side with countless others to see if your images truly stand out among the masses. However, it comes back to you to be the best judge of this. The images that are chosen will often confuse and annoy you and the other entrants, and it is often difficult to understand why the judges chose particular images. It helps somewhat to look at the winners of the previous years to see what types of images catch the judges’ eyes, but it is impossible to second-guess what they are looking for year to year. Stick to entering the images you like best, but detach yourself emotionally from your photos’ subjects and the experience of taking them, and view them as an impartial observer. If contests ask for captions, descriptions or short essays to go with the photos, take time to carefully write them. Look into guidelines and recommendations for writing newspaper captions, and please, avoid saying amateurish phrases like, “I took this photo while standing…”

8387

There are a few contests (and grants) that cater to humanitarian photography, such as those run by Photoshare, Focus for Humanity, and PhotoPhilanthropy. There are countless other photography contests so search on the Internet to find some current ones. Many of your photos will likely fit well in travel photography contests or the travel category of a contest. Also be sure to look at other categories that might apply such as people or portraits. It is best to stick to the well know, reputable contests, like those run by National Geographic, Smithsonian magazine, airline magazines, travel magazines like Conde Nast Traveler, travel guidebooks like Rough Guides and Viva Travel Guides, travel websites like Peterman’s Eye, contest sites like Travel Photographer of the Year, and newspapers. Be wary of contests that charge entry fees. You can quickly spend a lot of money entering multiple photos to multiple contests in the hope of gaining notoriety. But remember that the likelihood of you winning the grand prize is small, no matter how amazing your images are, and even if you did win, it will not lead to sudden fame and an instant professional career. While some of the contests you have to pay for are well respected and legitimate, such at the International Photography Awards, and it may be worth it to enter a couple, keep in mind that the most you can expect is to be able to use this credential in your bio and descriptions. Also note that some of the prestigious contests with entry fees attract professional and commercial photographers or very highly talented amateurs, and the quality of the entries exceptional. Determine if it is worth your time and money to enter, or better to wait a few years until your skills and images improve. But also remember that, despite thousands of entrants, it is possible to win photo contests. I’ve been recognized in several contests, have won a dSLR, and had my photo selected for a travel guidebook cover.

Be sure to carefully read the fine print of a contest’s rules and guidelines, especially to determine if you are signing away the rights to your photos. Contests are often tools for a company to gather a large pool of free photos to use in their books or website, and you may be surrendering lifetime, or even exclusive rights to them just by entering. You never want to surrender your copyright or give them exclusive rights and just give away your photos for free for them to use however they wish. Recent examples of this which greatly upset many photographers including well respected professionals were a National Trust contest in the UK and a Frommer’s cover contest. If you are still determined to enter and feel that the potential benefit outweighs the cost, consider entering a photo that is similar to your best photo, but not the exact same one that you may wish to use, exhibit, and sell later.

Grants and Fellowships: In addition to contests, you should also consider applying for grants and fellowships. There are very few of these, but if you were to win, they would allow you to travel and pursue an in-depth project. I’m sure you’ve begun to think about personal projects and places you would like to travel to and photograph, so turn your idea into a compelling story. Most grant and fellowship applications require both a sample photo essay or story and an essay or proposal. Hopefully on your self-assignment you documented your project in a manner that tells a story of a place, organization, or person. If not, careful editing and captions might create a good photo essay. Some grants or fellowships require a project already in process, so keep this in mind as your travel and work. Writing the proposal is very time consuming and takes a lot of careful thought, so start working on yours well in advance of the deadline, and follow their requirements precisely.

Many of the contests, grants, and fellowships occur annually, so be sure to add them to your calendar, giving yourself a few weeks to prepare for each of them. Some online sites which list many of them are:

http://www.lightstalkers.org/
http://photographygrants.blogspot.com/
http://photojournalismlinks.com/awardsgrantsandcompetitions/

8378

Website: This is pretty self-explanatory – build a website to share your work with others. There are countless sites which are designed to host photo portfolio websites, such a PhotoShelter and Fluid Galleries, or templates you can incorporate into your own website. Try to strike the best balance you can between do-it-yourself, cost, functionality, and professionalism. Domains and hosting are very cheap through places like GoDaddy, but portfolio templates and hosting can start to add up to hundreds of dollars a year. Try to keep the costs to a minimum until you start making money from your photography. Just make sure your site looks clean and professional, functions quickly and intuitively, and that your images are large and easy to navigate. Here is a list that can get you started.

Exhibitions: Print and frame your photographs and exhibit them so that you can share them with a wider audience. Look for unique opportunities of places and events that might be eager to incorporate your photos, such as travel agency offices, local festivals, performances, and movie screenings that relate to the culture or country where your images are from, local stores, and restaurants (although I am wary of this last one as I would prefer to sell my images to them and am afraid of damages to the prints from exposure to constant cooking air).

Read: Continue to read and learn about the humanitarian issues and the countries that most interest you. A good place to start is any of the books listed in the Humanitarian Books section of the Amazon.com site I put together. Get them from your library, or purchase them through that site and help support my work! This post also has information about books, and this post talks about other resources for learning about humanitarian issues.

The next step in the process is to learn the business aspects of becoming a professional photographer. I’ll save that lesson for another time!

For related posts, be sure to check out the other entries in the Humanitarian Photography category.

Books for Humanitarians (and Humanitarian Photographers)

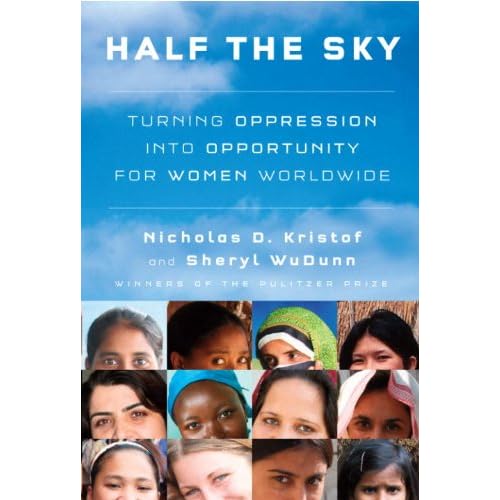
I’ve been intending to write a post about Nicholas Kristof’s wonderful book Half the Sky: Turning Oppression into Opportunity for Women Worldwide, and how it should be required reading for humanitarian photographers. I haven’t gotten around to that yet…but I have set up an Amazon collection of required reading for humanitarians – please take a look at the Humanitarian Books section of the store I’ve set up with Amazon.com for quick and easy links to these books.  (Purchasing from Amazon.com through that site helps to support my work!)

Half the Sky cover

Best Canon Lenses or Which Lens Should I Buy Next

When I began my work in travel, culture, and humanitarian photography I spent a great deal of time scouring websites, reading forums, checking reviews, making lists, and agonizing before I finally settled on which lenses were best for my needs and my work. So hopefully all my effort can help you save some time and assist you in your research in selecting which lenses are best for you. In addition to travel, humanitarian, and photojournalism work, much of this advice will apply to general photography as well. After you’ve learned all about lenses here, you can have a look at this other post to see what other camera gear and accessories you might want.


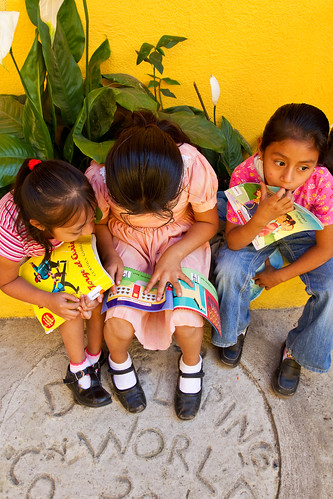
Open Windows, San Miguel Duenas, Guatemala

The easy answer to the question of which lens is best for travel photography, right up front, is: an all purpose zoom that goes all the way from wide to telephoto, like an 18-200mm, or a standard zoom like a 24-105mm. See the Standard Zoom section and the One Lens For Travel sections of this post for more information about these. The more difficult answer to that question is addressed in detail by this post. The most difficult answer to this question is: it depends. It depends on you. It depends on your level, interests, and goals as a photographer. It depends on what you most enjoy taking photos of and what type of images you aim to capture. Hopefully this post will help you figure that out, and I’ll address this most complicated answer more at the end of the post.

The primary sources for me in determining which lenses to choose were looking at the websites and blogs of other photographers who do similar work, since they often list and discuss the equipment they use. The initial and most helpful source for me was Karl Grobl, since his work as a humanitarian photojournalist is closest to what I do and what I aspire to do. But some of the other ones I can recall looking at include David duChemin – (who is a travel, art, and humanitarian photographer – he seems to have moved or deleted his “Gear” page), plus Nevada Wier and Bob Krist – both dedicated travel and cultural photographers. Oh, and the books and advice of the ever-enthusiastic Rick Sammon helped out along the way. I then applied what I learned from them to my specific photographic interests, preferences, and tendencies (which can be summed up with the fact that I typically like to zoom in close). In other words, if one of them favors a 50mm prime lens but you know you prefer the versatility of zooms, then adapt what they say to your needs.

For me and many others the ideal combination is a wide angle zoom, a standard (or middle range) zoom, and a telephoto zoom. (If you are interested in just one lens for travel, have a look at the Standard Zoom section, and then also jump down to the bottom of this article for the One Lens for Travel section.) I’m going to stick to the professional level lenses and compare the Canon L lenses first, and discuss other Canon lenses in the One Lens for Travel section below. I’ll try to keep it short and simple, and let you conduct further research on the countless sites dedicated to equipment and reviews.

Click on each lens below to link to its page on Amazon.com. If you plan to purchase any of this equipment from Amazon (or other equipment, accessories, or anything else), I encourage you go to Amazon.com by clicking on the links found throughout this post, and then Amazon will give me a little something for the referral, which will help support my blog. Thanks!

If you wish to first try out a lens before buying it, click on this link to go to BorrowedLenses.com, where you can get great prices on short-term rentals of any lens as well as the latest Canon and Nikon dSLR bodies (as well as video, audio, and lighting equipment).

If you are in the UK or wish to purchase from B&H, Adorama, or direct from Canon see the information at the end of this post for those links. The lenses I chose, which work best for my needs, are indicated by (Y). I apologize to the Nikonistas out there, since all of these lenses are the Canon variety. However, Nikon typically has an equivalent lens for each of these. Just search for the same focal length and have a look at the aperture and price to determine the comparable Nikon (Nikkor) lens. For example here are some equivalents:
Canon 16-35 f/2.8L to Nikkor 14-24mm f/2.8
Canon 24-70 f/2.8L to Nikkor 24-70 f/2.8
Canon 70-200 f/2.8L IS to Nikkor 70-200 f/2.8 VR

Check out this post to better Understand Canon Lens Notations – the significance of all the various numbers and letters in a lens name.

Wide Angle Zoom
As humanitarian photojournalist Karl Grobl says, this is the “bread and butter lens” of the photojournalist. This is used for up-close-and-personal shots, for environmental portraits or photos, and for “story-telling” images which include multiple subjects or a larger context.


Open Windows, San Miguel Duenas, Guatemala

EF 16-35mm f/2.8L II USM (Y)
pros: slightly wider on the wide end which is good for cropped sensors (7D, 60D, Rebels), larger maximum aperture (“faster”) for use in low light situations or for more dramatic depth of field
cons: high price, heavier in weight
notes: get the slim UV filter to avoid vignetting, especially if using a full frame camera like the 5D
filter: 82mm slim filter fits this lens.
notes: The above two images of this post were with this lens. This is the wide angle zoom I chose because I wanted the “faster” f/2.8 aperture to be able to use it effectively in low light situations.

EF 17-40mm f/4L USM
pros: more zoom on the far end, lighter in weight, much lower price
cons: f/4 maximum aperture not as “fast” and slightly less dramatic for shallow depth of field, not quite as wide on the wide end
filter: 77mm slim filter fits this lens.

Standard Zoom
This is a great “walk-around” all purpose lens, especially for travel or everyday photography. If you want to head out on the streets with just one lens, this is the one to take which will serve you well in most situations you encounter.


Panajachel, Guatemala

EF 24-70 f/2.8L USM (Y)
pros: larger maximum aperture (“faster”) for use in low light situations and more dramatic depth of field
cons: heavier in weight, higher price, less zoom range, no image stabilization
filter: 77mm multi-coated filter or 77mm coated filter fits this lens.
notes: a great all-purpose walk-around lens, though relatively big and heavy. I discuss using this lens, with several photo examples, in this post here.

There is a new EF 24-70 f/2.8L II USM lens plus the new EF 24-70 f/4L IS USM lens, both with the same focal length as above.  The first one just listed is an improved, lighter version of the 24-70 f/2.8L, and the second one listed adds Image Stabilization but has an f/4 maximum aperture rather than the f/2.8 maximum aperture of the other 24-70mm lenses. Adding these two new lenses into the mix makes this an even more challenging decision in the Standard Zoom category!

EF 24-105 f/4L IS USM
pros: lighter in weight, image stabilization which will help you gain 2 or 3 stops in speed vs. hand-held non IS (*see below), more zoom range, lower price
cons: f/4 maximum aperture not as “fast” and slightly less dramatic for shallow depth of field
filter: 77mm multi-coated filter or 77mm coated filter fits this lens.

* this means for example, if the proper exposure of a scene is 1/60 at f/5.6, and you want to hold on to that f/5.6 aperture for compositional reasons and not have to sacrifice your chosen depth of field for a faster shutter speed, you could capture it without blur, whereas without the image stabilization (IS) the hand held image may have been blurry.

Telephoto Zoom
This is a great lens for portraits, close ups, details, ability to zoom in and capture something far away, sports and action shots, and ability to create dramatic depth of field or blurry backgrounds. There are four versions of the Canon 70-200mm lens – either f/2.8 or f/4, each with or without image stabilization (IS). Oh wait, there are now five versions, with the recent Mark II version of the f/2.8 IS. I think with a lens this long and heavy, you need image stabilization if you are going to be hand holding it, so I will ignore the non-IS versions.


Solola Market, Guatemala

EF 70-200, f/2.8L IS USM
pros: larger maximum aperture (“faster”) for use in low light situations and more dramatic depth of field. The Mark II version of this has a closer minimum focus distance and improved optics
cons: very heavy, very large, higher price, especially the new Mark II version
filter: 77mm multi-coated filter or 77mm coated filter fits this lens.

EF 70-200, f/4L IS USM (Y)
pros: lighter weight, smaller, lower price
cons: f/4 maximum aperture not as “fast” and less dramatic for shallow depth of field
filter: 67mm multi-coated filter or 67mm coated filter fits this lens.
notes: This is the telephoto zoom I chose. I sacrificed the one-stop of aperture for the much more manageable size and weight of the f/4. And since I primarily use it outdoors, and because it has image stabilization, the f/4 aperture only really affects the extent of background blurring. There are several example photos of this lens in action in this post here and also more nice example photos in this post here.

I haven’t used each of these lenses in the field, though I have briefly tested most of them, so my decisions and my pros and cons are sometimes based on my research and from what I’ve learned from others who use them. Consider them starting points for issues you want to consider in your selections. And while there are endless discussions and comparisons regarding image quality, sharpness, sweet spots, etc. for each pair above, I will stay out of that discussion and tell you there are highly regarded professionals who use each of these, that any Canon L series lens is professional quality, that price and/ or largest maximum aperture will often indicate the one that is generally considered “better,” and that you will never regret your choice based on these concerns. Note that many L-series lenses are sealed against and dust, water and weather. Sometimes a front filter is required to complete the weather sealing, such as with the wide angle lenses. I suggest always using a clear, protective UV filter with any lens, preferably a high quality, multi-coated B+W brand filter. If you don’t want to spend that much, at least get a high quality single-coated B+W filter rather than a cheaper Tiffen filter.

When making your choices, I highly recommend going to a store with your camera and actively testing and comparing each pair. The difference in size and weight, and even feel of the lens in your hands, is often dramatic and may help you make your decision. If you are still undecided, rent one for the weekend and work with it. And don’t think that you have to immediately get three lenses in order to do your work. Karl Grobl uses just two of them in his work, and that hasn’t limited him in either humanitarian or travel work. Consider your primary needs, and buy one or two based on that, and combine them with less expensive non-L lenses for now.

If your budget or needs don’t call for L-series lenses, see the One Lens for Travel section below, or look for the closest equivalents of the above lenses in other Canon or Sigma or Tamron, etc. lenses (or in the Nikon lenses if you are over in that camp).

Prime Lenses
Many photographers rave about prime lenses (lenses of a single focal length, that don’t zoom) for many reasons, including image quality, the purity and simplicity of working with them, and their large maximum apertures (as wide as f/1.2) for very dramatic compositions through use of shallow depth of field. The focal lengths I see used most often are (these are obviously Canon examples):

Canon 35mm f/2
Canon 50mm f/1.8 II (high image quality for about $100!)
Canon 50mm f/1.4 (Y) (a little more costly, but higher quality 50mm)
Canon 85mm f/1.8

Take into consideration if you have a full frame or a cropped sensor, since with a cropped sensor 7D , 60D, or 550D the field of view of the 50mm lens will be closer to an 80mm lens on a full frame 5D camera (or a 35mm film camera), so the field of view of a 35mm will be closer to a 50mm on a full frame or 35mm film camera.


San Miguel Dueñas, Guatemala

One Lens for Travel
I know a lot of people are interested in finding just one lens that is good for travel photography. As I mentioned above the best option is typically the standard, mid-range zoom. Look above for info on the Canon L-series lenses. My choice would be the EF 24-105 f/4L IS USM. For something less expensive Canon offers a couple other great options. For each of these lenses, I would highly recommend getting the optional lens hood (the hood comes with L-series lenses). It helps shade the lens to prevent unwanted lens flare (although lens flare can sometimes be used for a great effect when desired), helps protect the lens from bumps and drops, and makes you look cooler and more professional! And of course always get a good quality, coated B+W brand UV filter for protection – or at least a cheaper Tiffen filter. However, there is a significant difference in the clarity and lack of reflectiveness of a coated B+W filter vs. a standard Tiffen filter, which you can see if you look through them side by side, so those who are concerned about image quality should go with a coated, or better yet multi-coated B+W filter (designated MRC). Also, note that non-L-series lenses are not nearly as well sealed against dust, water and weather as most all of the L-series lenses are.

EF-S 18-135mm f/3.5-5.6 IS
pros: less expensive, lighter weight, image stabilization
cons: less zoom range on the telephoto end than the 18-200mm, not a constant minimum aperture like the L-series lenses (the f/3.5-5.6 means your largest aperture at the 18mm wide end will be f/3.5, while the largest aperture at the 135mm telephoto end will be a less dramatic f/5.6), not higher quality USM focusing motor, EF-S means this lens can only be used on cameras with the APS-C sensor, or non-full-frame sensors, so it can be used on all Digital Rebels, 20D-50D, and 7D, but cannot be used on a Canon 5D. However, that means it is optimized for those cameras, especially for the wide end.
Lens hood EW-73B fits this lens, and a 67mm coated filter or 67mm filter.
This is currently one option for the kit lens for the Canon EOS 60D, and is a good choice if you are debating between the kit lens or not.

EF-S 18-200mm f/3.5-5.6 IS
pros: more zoom range on the telephoto end, image stabilization, better image quality than the 18-135mm lens.
cons: more expensive, heavier weight, not a constant minimum aperture like the L-series lenses (see above lens), not higher quality USM focusing motor, EF-S for APS-C sensor cameras only (see above lens).
Lens hood EW-78D fits this lens and a 72mm coated filter or 72mm filter.
This is currently another option for the kit lens for the Canon EOS 60D, and is an excellent choice if you are debating between the kit lens or not.

EF 28-135mm f/3.5-5.6 IS USM
This is an older lens that seems to have been replaced for the most part by the two lenses above.
pros: less expensive, image stabilization, USM means a faster, quieter auto-focusing motor and full time manual focus (which means you can override the auto-focus by turning the focus ring without having to switch the lens to MF manual focus), EF so can be used with both APS-C and full frame cameras too if you have or wish to upgrade to a 5D.
cons: not a constant minimum aperture like the L-series lenses (see above), less range on both the wide and telephoto ends.
Lens hood EW-78BII fits this lens and a 72mm coated filter or 72mm filter.

It Depends
The actual answer to the question of which lens is best for travel photography is: it depends. As I said above, it depends on you – on your level, interests, and goals as a photographer. It depends on what you most enjoy taking photos of and what type of images you aim to capture. If you are a photography novice, or just want to be able to capture all or most situations, the all purpose zoom or standard zoom might serve you best. But if you wish to capture more of a certain type of photo that you like, photos that match your specific visual ideas and preferences, you need to reconsider. Do you like sweeping vistas and all encompassing environmental portraits? Do you typically want to capture the entire scene in your shots? Then perhaps a wide angle zoom will work better for you than a standard zoom. Certainly, you will be limited and not able to frame certain shots the way you might want, but you will capture more of the types of images you like, and might simply have to move in closer than usual to get some the other images. Do you like extreme close-ups of people’s faces with dramatically blurry backgrounds, architectural details on buildings, the look of compressed perspective? Then a telephoto zoom rather than a standard zoom will help you capture more of those images you like. Sure, you will not be able to get the wide angle view of spaces, but you might succeed in capturing many more of the dramatic photos you like. Or perhaps you best work like a classic photojournalist and want to capture scenes and portraits more closely to how you see them. Then a single prime lens like a 50mm or 85mm might be the one lens that is perfect for you.

The Best Lens for the Canon 60D
A lot of people ask, “Which is the best lens for the Canon 60D, (or the 7D, or the 550D/T2i or the 5D)?” There isn’t a specific lens that is best for a specific camera. I hope you’ve already learned that from reading this post! A lens will perform exactly the same on each of those cameras or any other camera with an APS-C size sensor. The effective focal lengths will be different with a full frame sensor dSLR, such as the Canon 5D, but they will still be wide angle zooms, medium zooms, etc. The best lens for your camera is the one that is best for you, your work, and the types of photos you take. That being said, the kit lens that Canon has paired up with the 60D, the EF-S 18-200mm f/3.5-5.6 IS is an excellent choice for an all-purpose everyday and travel lens. See the EOS 60D with the kit lens on Amazon here.

For related posts, check out other entries in the Lenses Category, the Humanitarian Photography category, and my posts about Fixed vs. Variable Aperture Lenses and Choosing a Lens beyond the Kit Lens, as well as my discussion and recommendations for gear for travel photography.

Purchasing: As I mentioned above, if you plan to purchase any of this equipment, I encourage you to do so by clicking on the links of each of the lenses listed above, which will take you to that page on Amazon.com. Or go directly to Amazon using this link or click on the Amazon logo below. If you purchase through these links, Amazon will give me a little something for the referral, which will help support my blog. Thanks, I appreciate your support!
Amazon.com

If you are in the UK, you can click here for the UK Amazon referral link. If you are in another country, click on one of my Amazon links, scroll to the bottom of the page, and click on your country for your local Amazon.

For those interested in purchasing from B&H Photo, Adorama, or direct from Canon, please click on their logos on the Gear page. Thanks!

Renting Lenses: If you wish to first try out a lens before buying it, click on this link to go to BorrowedLenses.com, where you can get great prices on short-term rentals of any lens as well as the latest Canon and Nikon dSLR bodies (as well as video, audio, and lighting equipment).

Was this post helpful?  Please let others know about it by clicking the Facebook or Twitter sharing buttons below, linking to it from your blog or website, or mentioning it on a forum.  Thanks!

Haiti Photos of Hope

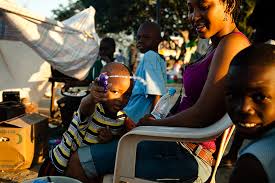
There are many grim, depressing, disturbing, and disheartening photos of the aftermath of the earthquake in Haiti, such as this series on The Big Picture.  But today I came across a series of photos that show a different side of the conditions in Haiti.  Photographer Alice Smeets had taken revealing photos of the lives of people and children in Haiti before the earthquake (see the “Documentary” section), and she recently returned to document the aftermath in this series of amazing photos.  Although it is a relatively long slideshow, I encourage you to look at the entire series.  The “life goes on” section in the middle is particularly wonderful.  From a photographic standpoint, I was often struck by her amazing use of light – using the low, warm sun of morning or late afternoon, and often shooting into the sun to accentuate it.

Smeets-Haiti
photo by Alice Smeets

Documentary photographer Robert Coles wrote “Who we are, to some variable extent, determines what we notice and…what we regard as worthy of notice, what we find significant.”  It is obvious from Smeets’ series of Haiti photos that what she regards as worthy of notice differs greatly from many of the photographers working in Haiti and/ or their photo editors at home.  She communicates a much more human and hopeful perspective of the situation.  All the photos from Haiti show a view of the reality there, but which one is more worth focusing on?

Great Photo Book

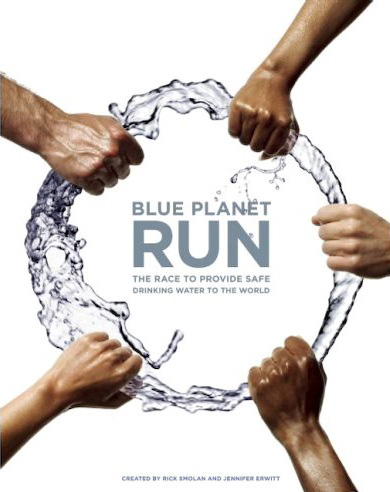
I’ve recently discovered the excellent book Blue Planet Run, which I came across after seeing photographer Rick Smolan’s TED lecture.  He’s the guy behind the “Day in the Life” series of photo books that were so ubiquitous awhile ago.  Anyway, Blue Planet Run is a book he created, full of amazing photos, statistics, and essays about the worldwide water crisis.  It was originally offered as a free e-book, and after a little hunting around, I found a pdf copy of it to download on RapidShare.  It seems to be virus free and is definitely worth having a look at, either in hard copy or e-version.

blue-planet-run-cover-page
Click cover for hard-copy version on Amazon

Working as a Humanitarian Photographer – Ethics and Images

(For related posts, check out other entries in the Humanitarian Photography category.)

The National Press Photographers Association (NPPA), “a professional society that promotes the highest standards in visual journalism,” has a code of ethics that all members are required to endorse. Whether or not you are a member, I think that they are excellent guidelines for any photographer working in the field, documenting people and humanitarian situations.


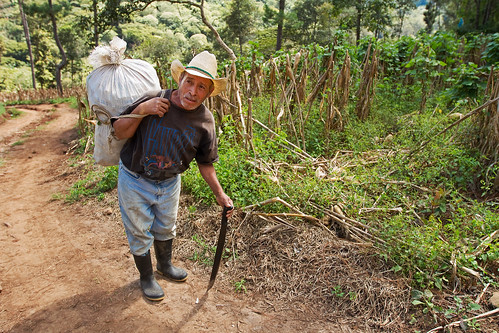
Campo Nuevo, Jalapa, Guatemala

While they appear to be common sense principles, they need to be listed and occasionally reviewed because they are sometimes challenging. For example, the first one is “Be accurate and comprehensive in the representation of subjects.” As anyone using high-speed continuous shooting mode knows, a facial expression can change in a split second, and the difference in the resulting images can be dramatic. They may tell completely different stories or give opposing impressions of the subject. There are many other examples of how composition, point of view, and time can change the perceived reality of an image. Which representation is most accurate? The photographer must act as an editor and decide based on all they know about the subject and the situation.


San Miguel Duenas, Guatemala

The third one is equaling challenging. It reads, in part, “Avoid stereotyping individuals and groups. Recognize and work to avoid presenting one’s own biases in the work.” Of course a humanitarian photographer in the field doesn’t want to turn the subject into a stereotype, but in many ways they are working against a lifetime of education and image viewing. As I discussed in my previous “Exotic vs. Real” post, those in the developed world grow up learning to see the developing world and its people as exotic and colorful, but this is often far from the reality. A photographer cannot simply decide to portray a subject without bias and preconceived ideas, but he or she must dedicate themself to learning as much as they can about the subject, their life, culture, and situation. Cultural biases are so deeply embedded one often does not even realize they are there and simply assumes all other humans think and feel the same way. For example, in a classroom when a student gives the wrong answer, a teacher often asks another student to correct them and give the right answer. In certain cultures this action is deeply offensive and insulting, and would never be done by a teacher. It is impossible to know and understand how those in another culture think – expats living a foreign country for years will verify this. But one must make the effort to learn as much as they can about the cultures they work in, and to recognize the multitude of biases they carry with them.


San Antonio Aguas Calientes, Guatemala

The third standard also says “Be complete and provide context when photographing or recording subjects.” In addition to the numerous layers of meaning and importance this has as an ethical guideline, this is also an excellent compositional guideline. Show the context of the subject and the environment around them. This is why photojournalists often work with a wide angle lens such as a 16-35mm. By doing this, the photograph gives a more complete story of the subject, and it often makes for a more interesting composition.


San Miguel Duenas, Guatemala

The fourth guideline has been a subject of discussion in the media in response to the images being shown from the earthquake in Haiti. “Treat all subjects with respect and dignity. Give special consideration to vulnerable subjects and compassion to victims of crime or tragedy. Intrude on private moments of grief only when the public has an overriding and justifiable need to see.” Images of dead and unclothed bodies have been prominently shown in newspapers and websites, and have offended some viewers. The Public Editor of the New York Times gave an excellent response and defense to this controversy in this article. One of his responses, which I have often read from other photographers and have experienced myself, is that the subjects very often want the photos to be taken and to be seen. They want their story told, and they themselves have no method or channels for effectively telling their important story.

As far as treating subjects with respect and dignity, nearly all humanitarian photographers, including myself, speak these words in some form on their website. But what do they really mean, in the field? For me it means treating the subject with respect and dignity both in the interactions with them, and in the representations of them in the images. As I’ve written about before, it starts with not entering into a situation with the camera to your face, immediately snapping shots. The photographer should first introduce themself, talk with the subject, or communicate as best a possible. They should explain what they are doing and why. And even before that, as mentioned above, it means educating oneself in advance about the people and culture. It means trying to understand the situation from the subject’s point of view, and then striving to capture that visually. There are an infinite number of visual realities that can be taken of a subject and a situation, but it means capturing and presenting the one that both tells the story and celebrates the subject.


Campo Nuevo, Jalapa, Guatemala

The final NPPA ethical guideline that I will address here is the fifth one, “While photographing subjects do not intentionally contribute to, alter, or seek to alter or influence events.” There is a difference between photojournalism for the media and humanitarian photography for a client. A humanitarian photographer may be posing a subject in order to get a portrait or to show a certain component of a project. But that does not mean the humanitarian photographer cannot follow this guideline as well. I believe that in many situations, an unaltered, uninfluenced shot will make a more natural, and thus much stronger image. In my work I have found that it is often easy to disappear into a situation, and become the fly on the wall. While subjects may initially strut and pose for the camera, or begin to act self-consciously, if you just stay in place, and let a minute or two pass, they will begin to ignore you and forget you are there taking photos.


Open Windows, San Miguel Duenas, Guatemala

I encourage you to have a look at the other guidelines I have not discussed here and think about how they apply to your work. Please leave a comment, ask a question. Let me know what has been helpful, and what you’d like to read more about.

For related posts, check out other entries in the Humanitarian Photography category.

The Exotic vs. The Real

(For related posts, check out other entries in the Humanitarian Photography category.)

As one grows up in the first world, they learn to see the developing world as exotic lands of vibrant color and fantastic ceremonies.  I recall that for a grade school project I made a large cut-out of the African continent, and populated it with carefully detailed stand up paper people, all dressed in their traditional local costumes, as copied from the encyclopedia.  I marveled at the variations in dress, and how each country had its own unique outfit.

This viewpoint continues on well into adulthood, encouraged by travel brochures showing smiling local people in their indigenous dress, and every traveler with a camera aims to capture those same shots on their journey (see previous post for a couple of my examples).  But after spending just a little bit of time in a developing country, one learns that these types of images are far from the “truth.”  The ones who still wear the colorful traditional outfits are almost always the poorest and most politically ignored segment of a country’s population.  Though they often smile and laugh, their lives are far from exotic and joyful.  They are often difficult, full of pain, and short.  During my recent brief trip to Guatemala, I repeatedly came face to face with these realities of life in a developing country, even more so than I ever did during my many months in Peru.  And in my photos I found I still battle with the contradictions of exotic vs. reality.


San Miguel Dueñas, Guatelmala

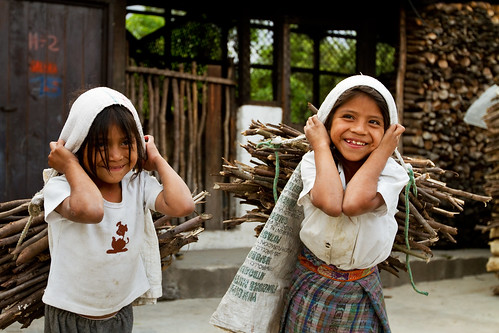
I was visiting a compound of several families’ concrete block houses surrounding a paved courtyard containing the shared sink and stoves.  These girls returned home in the late afternoon, and I immediately got caught up in taking photos of them.  Lost in my concentration, my traveling companion gently reprimanded me, “That’s enough, let them put it down.  It’s heavy.”  “Right, right, OK” I said and immediately stopped, embarrassed that I hadn’t realized this myself.  Although one cannot deny the momentary smile on these girls’ faces is genuine, the reality is that they are child laborers.  They had spent the day working in a coffee field, and then as they walked home they gathered and carried the wood, slung on their heads, as they do each day.  I imagine that the attention being paid to them by Elizabeth and I is a big part of the smile you see on their faces and in their eyes.


Concepcion (second from left), Kevin (second from right) and family – 11/16/2009

On another day we visited two boys and their families in order to interview and photograph them to write an article about them that will hopefully find them sponsors.  The two boys are about to enter high school, and each has lost one or both parents.  Without the help of a sponsor to pay for school, books, and supplies, they will have to leave school and begin working.  Elizabeth has written more about their stories here.  One of the boys, Kevin, is losing his mother Concepcion to cancer of the uterus, and his father died just a month earlier.  After interviewing Kevin, it occurred to us that his family probably doesn’t have a single photo of themselves or their mother, which would obviously be a nice memento now and after her passing.  We returned the next day to take a portrait.  They gently lifted their mother on her bed, where she has lied for endless weeks lacking the strength to get up, and supported her as I quickly took a couple shots, praying that they would be properly focused and exposed in the near complete darkness of the dusty, dirt-floored room.

Although she is dying of cancer, there is nothing she can do about it because the family lacks money for both doctors and trips to Guatemala City for the treatment.  And at this point, it would be physically impossible for her to get on and ride a chicken bus the 1 hour into town.  She does not have doctor’s visits, she does not even have appropriate medication for the pain.  She is dying a slow and very painful death.  Sadly, I later learned, many types of uterine cancer are preventable or successfully treatable if detected early with regular doctor visits.  In fact, conditions leading to cervical cancer can often have a 10 year window for detection and treatment.  But Concepcion has probably rarely seen a doctor in her life, and certainly did not have annual examinations.  We had learned the previous day that the other boy, Luis, had also lost his mother to uterine cancer and a very similar death.

Immediately after we left, the head of the NGO I was working with (who had dropped off food and supplies to deal with the bleeding) called a contact and got hold of some appropriately strong pain medication that they, like many of us often do, had left over in their medicine cabinet.  I went into Antigua and had an 8×10 print made, and found a simple but nice wood frame.  We returned to Kevin’s house, and presented it to Concepcion.  She sat up in bed and a huge smile washed across her face.  The pain medication had already begun to work wonders, and for the first time in weeks, maybe months, she was not in constant, unbearable pain.

See more related posts in the Humanitarian Photography category.

How to Start Out as a Humanitarian Photographer: The Self-Assignment

(For related posts, check out other entries in the Humanitarian Photography category which includes post such as choosing your camera and lenses, as well as the follow up to this post, After the Self-Assignment.)

How to Become a Humanitarian Photographer

As with many other photography specialties, there is no set course to becoming a humanitarian photographer. You must make your own path by determining your goals, piecing together the advice and experiences of others, and following your intuition. You can go to school and study photojournalism, you can create your own self-designed curriculum of classes, workshops, and experience, you can intern with an experienced photographer, or you can just strike out into the real world and learn it on your own. Starting out as a humanitarian photographer, or any type of photographer for that matter, involves learning about so many diverse areas beyond the art of making images and the skills of using a camera, a flash, and Photoshop (all of which are full time undertakings in themselves). There is also much to learn about business, copyright, marketing, branding, finances, insurance, client relations…the list goes on and on. But I’d like to go into detail about one important and practical aspect of starting out: the self-assignment.


San Francisco, Peru

In order to discover if travel or humanitarian photography is what you really want to dedicate yourself to, it is vital to get out there and really try it out. Travel to a foreign country, get out in the field, and spend days working at it, as if you were on a real assignment. One can think about it from the comfort of home, drooling over the beautiful photos of those you admire, and imagining the excitement of traveling in exotic places. But you may find that working in the field, spending weeks away from friends, family and soft toilet paper, and suffering days of intestinal distress is not all you hoped for. As any working photographer will tell you, it’s hard. Immensely gratifying and often fun, but none the less hard. I encourage anyone not to invest too much time, thought, and money into this dream until they have undertaken this important test.

Planning and executing a self assignment is challenging, but entirely do-able and realistic for anyone who is dedicated to the idea. Even if you have a full time job and aren’t making that much money, it can be done. Don’t quit your job yet to dive head first into self-employment, but use your vacation time to test the waters.


Cusco, Peru

Money: The first challenge is always money. You have to save up money for the gear, for the time away from work, and for the trip. This is done the old-fashioned way – by scrimping and saving. You’ve read it many times before, and it sometimes seems unrealistic, but it works. Save money anywhere you can – stop eating out, bring your lunch to work, cancel cable, cancel Netflix, get your books and movies from the library, stop buying stuff, use the right ATM and stop paying fees, scour the Internet for the best price on the gear you need. It may take longer than you want, it may even take a year or two, but it works. Remember, each restaurant meal you skip here equals three equivalent restaurant meals in a developing country – or better yet, it equals a week’s worth of groceries when you travel. The recession has already given everyone a head-start into living and thinking more economically, you just have to be dedicated to it a bit more and a lot longer. Also, once you begin traveling to developing countries and seeing how people find great joy in life yet live with so few possessions, your new economic lifestyle will seem that much more appropriate. I’m not just saying all these things because I’ve read them or because they sound like they will work. I’ve done them, all. Also look to Ami Vitale for inspiration. She worked long and hard and saved, then headed off and launched her career exactly this way (see the How You Finance Your Stories video at the bottom of this page: http://digitaljournalist.org/issue0301/av_intro.html). Look into counties that aren’t very expensive to fly to. For someone in the USA, that means look to South and Central America. Depending on the time of year, there are incredibly cheap deals. For example, I recently saw $84 tickets to Guatemala on a major airline. Yes, $84 each way! That’s cheaper than flying home for Christmas. Granted, it is a redeye with a long layover, but it gets you there. Be flexible and use Kayak.com to find the best prices.


Taquile Island on Lake Titicaca, Peru

Gear: You might not yet be able to afford the latest and greatest professional gear. In fact, until you are sure you really want to do this, you probably don’t want to invest in a 5D Mark III and 2 or 3 L-series lenses. Every photo forum you follow, pixel peeper you talk to, and gear review you read is going to convince you that you need the most current, top of the line gear. But you don’t. I do recommend using a dSLR and not just a point and shoot, so something like a Canon Rebel T5i / 700D and a versatile zoom lens like the Canon 18-200mm (or the Nikon equivalent) offers more than enough quality and range to start off with if you can’t afford more. On my first self-assignment all I had was an outdated, 8 megapixel Rebel XT and a single, 28-105mm lens. It didn’t prevent me from getting the shots I wanted, they’ve been exhibited, won awards, been honored by the United Nations, been used on travel guide and textbook covers, and no one has ever told me that the quality of the photos is unacceptable. (And remember that no one, outside the photo world, will ever even think to ask you what camera you used or which lens you chose.) Sometimes, with that early gear, I wasn’t able to zoom as much as I wanted for travel shots, or get wide enough for the close-ups of humanitarian work, so that is why the 18-200mm or 18-135mm (which weren’t available until more recently) would be a pretty ideal single lens solution now. (The secret fact is, I even have a couple great photos in my portfolio, a photo on a travel guidebook cover, and won a dSLR camera using an Olympus SP-320, 7 megapixel point and shoot.) Don’t go overboard with bags and accessories. Get a simple holster bag, like an M-Rock Yellowstone or whichever one fits your body and lens, or a LowePro or Tamrac bag or backpack, a couple filters (UV and polarizing), a lens pen and cloth, a rocket blower, extra batteries and memory cards, and then stop looking. You don’t need anything else. I promise. (Well, also your laptop computer, external hard drive, and some type of insurance coverage for it all. And maybe a Pac Safe 55 to secure it. And perhaps an external flash if you will be working inside. Hey, no one said this was cheap!) For insurance, look into your home-owner’s or renter’s insurance to see if it will cover it, or look at NANPA’s coverage or the discussion here. (If you happen to join NANPA to get their insurance, be sure to mention my name as a referrer, and I get $20 NANPA Bucks and save on my next renewal!) To sum it up, as culture photographer Craig Ferguson stated in a recent interview, “You don’t need to have the most expensive gear or even the newest. A plane ticket and enough money for 3 months living coupled with an entry level body and a 50mm lens will get you further than the latest pro-level body and no time or money to use it.” I discuss additional photography gear and accessories that are useful for working in the field in this post.


Altos de los Mores, Peru

Researching the NGO: Figure out what type of NGO (non-governmental organization) or non-profit organization you’d like to photograph, and which countries interest you, and start doing research. Which subjects most inspire your passion for this work? Disabled children, gender equality, health, faith-based work, community development? In every developing country there are countless NGOs doing each of these types of work and more. As a professional, you might not be able to be this specific in your choices, so take advantage of your self-assignment. Do searches on the Internet, and look on idealist.org. It is hard to imagine that any small, typically struggling organization does not want free, semi-professional quality photos for their website and newsletters, so most all will be welcoming to your offer to volunteer. But it is very important that you are quite clear that your interest and intent is to photograph their work. If you sign up to be a general volunteer, you will be expected and obligated to be doing whatever work they ask of you. Do not think you can be a volunteer and also take photos on the side. You will not do a good job of either that way. Be perfectly clear with them that you are interested in primarily photographing the work they do. That doesn’t mean you can’t spend a few days as a volunteer, and by all means you should (see below), but they should not be expecting you to be a typical volunteer.


Altos de los Mores, Peru

Ask questions and find out as much as you can about the actual work they do. Don’t just trust what you read on their website, but find out exactly what they do and where they work. They may say they work in 4 different communities, but really they might only visit 3 of them once a year for a medical visit or to bring donations. They might say they have a number of different programs, but really they may only be currently focusing on one of them based on financial reasons or staff and volunteers skills. Make sure that your area of interest is really what they are doing now. Explain to them your interests, and see if meeting your goals will be possible with them. NGOs are often run by incredibly generous, helpful, kind, friendly, flexible people, and they will want to help you at your project. But they are also incredibly busy and strapped for resources, so learn to communicate and work with them on their terms. Many organizations require that you pay to be a volunteer. This may sound strange, but you have to understand that they need money in order to keep doing the work they do. Just the fact that you are working for free does not pay the salary for the NGO’s staff. But be wary, there are many placement services that make money by being a middle-man, so make arrangements directly with the NGO. If your volunteer fee includes lodging, or even food, it is often quite reasonable to pay them. However, there are also many excellent organizations which will not charge you anything. If this is the case, be sure and support them by bringing donations (books, toys, art supplies). See my Resources Page for more information on volunteering. Some organizations run restaurants and hostels, so support them by eating and staying with them. Also, if you are thinking of joining a mission type trip, like a medical mission, find one that is being organized from your area so that you can document the planning and the departure of the group at the airport.

**Update 2010-01-28** Here is a website I just discovered which attempts to link up volunteer photographers with humanitarian projects world-wide: http://photophilanthropy.org/


Cusco, Peru

Working in the Field: It seems every photographer I admire always discusses the importance of talking to and getting to know the people you are photographing. Sometimes that means just chatting with them and buying some of their wares before you start to photograph them, other times that means living among them for several days, weeks, or months. As a photographer working with an NGO, this means you should consider being a volunteer for a day, without your camera, without photographing. Yes, that is a painful experience, to see potentially great shots slip by left and right. But this sacrifice will quickly pay off when you start to work. This gives you an opportunity to learn what the organization does and how they work. It also allows you to start to get to know the people they serve, and for them to become comfortable around you. It is obvious that this approach, rather than barging in with your face behind a camera, is going to result in much more genuine photos. Also, stay out of the way of the director and the staff when they are working. Make your arrangements and ask questions before or after the workday. Be flexible to ever-changing, never scheduled situations, but also, always remind the director of what you want to be doing. She might go running off to visit one of the client’s homes or villages, and you want her to know to always grab you and take you along on those types of trips. Take advantage of your time there to do, see, and photograph as many different types of places and situations as you can. Talk to everyone you meet – other volunteers, people at restaurants and hotels. Many other people are doing volunteer work, and they may point you in the direction of a great photographic situation.


Huinchiri, Peru

Develop, learn, and practice a good workflow for saving and backing up your images every day. It is time consuming and easy to want to put off, but if you get behind there will be no catching up. I recommend using David duChemin’s global workflow as a starting point (alternate link here). Always have your camera with you, even if you think you are just being taken to the bakery for some bread and are told you’ll be back in 5 minutes. You will inevitably be taken on a two hour detour through a part of town off the beaten path, with amazing photo opportunities, during the magic hour (best evening light). Always carefully prepare and assemble your gear before you start each day, and have new batteries and memory cards accessible while you shoot. I highly recommend you always remember to “make haste slowly.” What this means is that you will often be in a hurry, but don’t rush and act in a panic during critical moments, in preparation or in shooting. Change lenses carefully and slowly, then rush back to the action. Clean the mysterious glob off your lens carefully and delicately, then get back to shooting. There are countless opportunities to damage your gear, and while it is durable, somewhat waterproof, and stray marks and dings on your tools are not something to fret over, a dropped or scratched lens is. After this, well, I don’t know what to tell you – you’re going to learn a lot. You are going to learn your camera and its settings inside and out, you are going to learn to work under pressure, always being ready, always trying to capture the fleeting shot and changing light. You are going to start to learn what works and what doesn’t as far as compositions, camera settings, perspectives, etc. You are going to begin to learn about life in a developing country. And you are going to very quickly learn if this work is truly your passion and your calling.

Please leave a comment, ask a question. Let me know what has been helpful, and what you’d like to read more about. Let me know if you have planned or undertaken a self-assignment on your way to becoming a humanitarian photographer, and how you are addressing the challenges of this endeavor.

See my follow-up post, Becoming a Humanitarian Photographer-After the Self-Assignment for the next stage of the process.

For related posts, check out other entries in the Humanitarian Photography category.

Equipment for Travel (and Everyday) Photography

My recent trip to Guatemala to photograph for an NGO gave me an opportunity to field test a bunch of new gear under real working conditions – jumping on and off chicken buses, crammed into the seat of a van for hours with all of it on my lap, roaming around the streets of Antigua trying to be discreet as possible carrying a 70-200mm lens and a backpack full of equipment, and photographing for long hours at a time. I had done a bunch of Internet research to choose the best and the most appropriate gear, made a couple trips to B+H to look at it all, and it all worked out as good, or often better than expected. I’m not sponsored or compensated by any of these companies (but wouldn’t be opposed to it if they happen to be reading…), but I do recommend all of this gear without reservation. (Update: I’ve now been using all of this equipment constantly for the past 11 months, and still recommend it all!) I discuss the camera I used on the trip, the Canon 7D, in this previous post.

Most all of this equipment will be equally essential for day-to-day photography, culture and travel photography, humanitarian photography, and photojournalism. And the equipment will be useful with any dSLR, Canon or Nikon.

If you plan to purchase any of this equipment, I encourage you to do so through the links I’ve created below which will take you directly to Amazon.com. Your price will be the same as always, and I will get a small referral fee. Or you can go directly to Amazon.com here. I appreciate your support! If you are in the UK, or wish to purchase from B+H Photo, see the end of this post for information on those links.


Antigua, Guatemala

Camera Backpack: I use the Lowepro Compu Trekker AW as both my carry-on and my working bag during the day. The current version of this is the Lowepro Pro Runner 350 AW. The size works perfectly for both needs. It easily fits the airline carry-on size, including smaller international requirements in some regions, yet fits more that it would first appear. With careful configuration of the interior dividers, I can fit 2 Canon bodies (a Rebel XT and a Canon 7D or 50D), a 70-200mm f/4L IS, a 16-35mm f/2.8L II wide angle zoom, a 28-105mm standard zoom (an older lens, here is a link to the better 24-105mm f/4L), all lenses stored with their hoods turned backwards, a 580EX II flash, its diffuser, 2 external hard drives in cases, a couple memory card cases, and some filters. In the outside pocket, I have a couple battery chargers, extra batteries, medium Rocket Blower, miscellaneous cords, caps, and accessories. In the rear pocket designed for a laptop, I easily fit a 32″ 5 in 1 reflector. Once I am in the field, I play around with the dividers until I have a set-up that best fits my flexible daily needs, and allows quick preparations or lens changes. The pack is extremely comfortable, has tons of padding on the straps and the back so that its weight never bothers me and I don’t feel the reflector in my back. I often wear it for hours a day while working, and it is never a problem. In fact, on my final night in Guatemala when I went out to dinner in Antigua without it on my back for the first time in 2 weeks, I commented that I felt a bit naked. The top handle is strong enough to grab and carry with, as is often necessary while jumping in and out of cars or putting it down and picking it up. There is also a waist belt that I use when I have it fully loaded, like going to the airport, to relieve my shoulders of some of the weight. And it comes with a built in rain cover that stows away at the base of the bag that has done its job on a couple occasions. The Compu Trekker Plus (now the Pro Runner 450 AW) might be a better carry on size so that you could carry more gear on the plane with you (if it fits the airline’s requirements) but it would be too big for daily use. There are also rolling versions of these, with an “x” in the name, thought the retractable handles and wheels add weight and size to the bags. The Compu Trekker has a tripod strap system that I don’t use, and another outside pocket that is, conveniently, exactly the size of a Lonely Planet guidebook. Here are some photos of the backpack in action at the Chichicastenango Market, taken by my travel companion Elizabeth Jimenez:

If you just need a holster style bag to carry one body and one lens, I highly recommend the M Rock Holster Bags.  I used the Yellowstone model for months while traveling in South America, and I love its durability, pockets, and built-in rain cover, plus it comes with extra back-up straps.  Make sure you get the right bag for your body/ lens combination – you will need a longer bag for a telephoto zoom lens.  As far as a satchel bag to carry a body or two plus two or three lenses and/ or a flash as you set out for the day but don’t want a backpack type bag, have a look at the Think Tank Retrospective line (there are a few sizes, the 10, 20 and 30, etc.) or the Crumpler Million Dollar Homes. Again, there are several sizes to choose from, called the 5 Million, 6 Million, etc. The 7 Million Dollar Home is my satchel of choice for carrying my gear about town while working.  It holds a large dSLR (5D line, 6D, 60D, etc.) with a mid-range telephoto attached (24-105mm), plus a 70-200mm, and another lens or a flash, all in the inside compartments. There is then some extra space and a couple front/ flap pockets to hold chargers, memory cards, batteries, etc. To keep moisture from accumulating in your equipment and bag, throw in a durable desiccant pack like this one.  Just be sure that it isn’t loose in your bag and scratching against your equipment.

Security: A couple great additions to the bag are Eagle Creek combo locks and Eagle Creek Pack It Sacs in the small size to hold batteries, memory cards in cases, LensPen, camera and lens body caps, and various wires and cables. The medium size Pack It Sacs are great for medicines bottles and other loose stuff in your luggage. The backpack’s zippers are rugged enough to handle constant abuse from the combo locks, which although they are weighty, are far better than keyed locks in the field so that you don’t need to go digging for the key when you are in a hurry. You just have to be a little careful when opening and closing the bag – the locks dangle and flip around, and could easily bang into something fragile in the backpack. With the Pack It Sacs, I clipped some rubber bands to the key clip within the outside pocket of the backpack and then attached them to the clips on the Sacs, so that way the Sacs won’t accidentally fall out if I flip the bag open and close while the outer pocket is open. There’s enough play to access them and then shove them back into the bag.

Another great accessory for this backpack is the PacSafe 55 wire mesh security system. It fits perfectly around this size bag, and secures your bag and your gear in a hotel room or wherever. It has a long cable that you loop around something secure and lock in place. It also comes with a small, compact storage case for when not in use.


Chichicastenango, Guatemala

SanDisk Extreme 16GB CF Memory Cards – I talked about these in the previous post. Once again, no particular reason why I use these rather than Lexar or Delkin…maybe a sponsorship would help seal my loyalties… :). Be sure to get the Sandisk Extreme 16 GB SD version if you are using the 60D or Rebel T2i. I use a Sandisk card reader to upload the images to my laptop, rather than from the camera directly, in order to save the camera batteries. This Sandisk Card Reader is for the CF cards, and the 5 in 1 reads SD cards.

Spare Batteries – I always have 3 batteries for each camera body. The Canon 60D, 7D and 5D use the Canon LP-E6 Battery. Stick with the Canon brand batteries rather than the unpredictable third-party brands.

BlackRapid RS-4 Camera Strap – The R-Strap is wonderful, and I highly recommend it. I was hesitant and suspicious at first, but I quickly adored it and will always use it. I had even emailed BlackRapid before purchasing to ask about shortcomings of earlier models, and they addressed my concerns thoroughly and completely. I was very impressed with the time and personal attention they paid to my questions. The strap is comfortable, easy to use, quick, strong, and rugged. I often use it in conjunction with wearing the backpack, and although the straps fight for space against each other on my shoulder, it still works fine. I’m a bit envious of the RS-7 that just came out, since it has a curved, ergonomic shoulder pad that will work better by itself on your shoulder and next to a backpack strap. There is also now a version designed for women, the RS-W1. Watch some of the videos out there as to how to use it, and be sure to moisten the rubber gasket before attaching it to your camera – this will make a firm seal that will never budge. The big pain is that the part attached to your camera body is best left in place, yet that makes it less easy to place the camera down on a table or in your bag, and will have to be removed to use a tripod. Also, the textured tightening screw part of the connector may rub up against your camera body in various situations, so I put some black duct tape on the bottom edges of the camera to protect it.

B+W brand UV Filters – clear, protective filters for the lenses, slim for the wide angle. The slim is probably not needed with a crop sensor camera, but is recommended for a full frame camera. The slim comes with a lens cap that does not stay on well after a little bit of use, as there are no front threads for the Canon cap to fit on. If I had to do it over, I would probably get the regular filter so that I could use the Canon lens cap.

B+W brand Circular Polarizer Filter – a polarizer serves to darken skies, boost contrast, cut through haze and reflections in water and glass, and block out a stop or two of light in bright situations. I keep it on my lens much of the time when doing outside work. Polarizing filters work to their maximum degree when the sun is to your right or left, but not when it is directly in front or behind you. Be sure to turn the moving part of the filter to dial in the degree of polarizing that you desire. They are typically not used on wide angle lenses because the darkening effect would vary across a wide swath of sky, and usually look strange.

Sto-Fen Omni Bounce Diffuser – works great on the Canon 580EX II flash, although very snug and is always difficult to get on and off in a hurry. Squeeze it and stretch it first to help it go on easier. Please don’t use the diffuser outside! Even if you see “pros” doing it. It doesn’t do anything outside but make your flash work harder. You can’t bounce light off the clouds.

Honl Color Correction Filters and Speed Strap – These are essential for using with flash to balance the white balance of the scene – to make the color of the flash the same as the color of the ambient light. This way when you correct the WB of your subject your backgrounds won’t be vivid orange (incandescent ambient lighting) or sickly green (fluorescent). You can’t use them in conjunction with the diffuser – the Omni-Bounce can’t fit over the Speed Strap, but that had not occurred to me when I bought them – so I’m going to have to figure out a solution to that. And I’m going to continue experimenting with the full or 1/2 CTO to add warmth to outside fill flash, as recommended by Nevada Wier (actually she uses a Kodak Wratten 81A gel, but I think they are similar). The kit is very slim and fits perfectly in one of the inside pockets of the backpack.


Antigua, Guatemala

Giottos Medium Rocket Blower – I initially used the small size in order to save a bit of space, but it didn’t have the power I wanted, so I sprung for the medium. Always have it handy for getting dust off lenses in a hurry, because blowing on them – no matter how careful – leads to spittle on the lenses 5% of the time when it doesn’t matter and 95% of the time when you are in the most critical situations. The large size may be a good choice as well.

Pearstone LP-1 Lens Pen – Works great for cleaning off mysterious spots, smudges, and fingerprints that always appear on the lens (this is why I always use UV filters) as well as that a-fore-mentioned spittle. There is a retractable brush on one end and a cleaning head on the other end. Twist the cap to load the cleaning tip with the carbon based cleaning material, then remove the cap and use. Please read the instructions and visit the LensPen website to fully learn how to use it properly.

32″ 5 in 1 Reflector – This size is perfect for travel and fits in the backpack, however I never actually used it during the trip so I don’t know if the size is useful in the field. It is best suited for set-up situations and portraits, which I didn’t have the opportunity to do on this assignment. I could have used it once to block some stray sunlight falling into a very dark room and potentially messing up the exposure, but I didn’t think about it until later. I did, however, carry it around a lot and never noticed because it is lightweight and very durable.

External Hard Drives – I use a Iomega Ego 500GB and a Lacie Rugged USB 500GB when traveling. I’ve used the Iomega on extended trips before, and love it. I’ve never had any problems with it, and it is solid and sturdy. I also decided to try out the Lacie Rugged USB for this trip. It is lighter than the Iomega, and doesn’t feel as solid and sturdy, but it worked just fine. They both fit perfectly in the Case Logic Portable Hard Drive Case made for these types of drives, which I recommend getting in different colors so you can quickly differentiate your different drives. I leave them in the cases at all times, but you have to pull the Ego slightly out to plug in the cord, and place the Lacie upside down in the case for the cord to fit without removing the drive each time. For storage at home, I use the Western Digital My Book 1TB External Hard Drives.

Hakuba Digital Media Storage Wallet – These are great, soft sided, thin memory card cases that hold 6 CF memory cards each. I picked up this recommendation from Karl Grobl’s website. There are a lot of bulky, hard-sided cases out there, which make you feel like your memory cards need excessive protection. I’m sure there has been a situation where an elephant stepped on a memory card case and all photos were miraculously saved by a hard sided case, but as far as my needs, the soft ones work just fine. Get into the habit of inserting blank cards face up and used cards face down into the cases’ pockets. Since this is the size for CF cards, have a look at this one if you use SD cards.

‘da Products Screen Protector – (product no longer available) – This is the second camera I have used this product with, and I am once again very happy with it. It is a very inexpensive yet high quality screen protector for your LCD, made with acrylic. Get ‘da40D Protector for the 7D – it is the perfect size. It is a slow, careful, time consuming process to attach the adhesive strips, get it clean, dust and fingerprint free, and perfectly centered, but once it’s on, its there to stay (unless you want to remove it – in that case, to remove the ‘da screen protector use dental floss to break the seal at the bottom corners, then slowly peel off.) I know that today’s LCD screens are durable, but I feel more comfortable and carefree about constantly wiping off my protector with my fingers or shirt than I would directly on the built in screen. This is also why I use B+W UV filters on the lenses.  However, if you have a camera with a rotating screen such as a 60D, T3i, or D5100, this type of screen protector won’t work.  You will need to use a thin adhesive film protector like this one.

Calumet micro fiber lens cloth – Stores perfectly in another slim inside pocket of the backpack, and always handy to have.


Chichicastenango, Guatemala

Insurance – Although I am a member of NPPA – National Press Photographers Association, I also joined NANPA – North American Nature Photography Association, in order to get their equipment insurance, which is much cheaper and has a much lower deductible than NPPA’s, even including the extra $100 to join NANPA. The insurance is primarily for the equipment only, so you are not paying for liability coverage geared toward a business as you are with every other photo equipment insurance plan I researched. Please note that the NANPA membership fee covers you from June to June or something like that – they don’t pro-rate, so you will not get a full year if you join at any other time. The insurance covers photo and computer equipment at home and while traveling. (If you happen to join NANPA to get their insurance, be sure to mention my name as a referrer, and I get $20 NANPA Bucks and save on my next renewal!)

Skooba Satchel 2.0 Laptop Bag – This is typically my second carry on, in which I carry my laptop, some books, misc. charging cords, some toiletries. This is a wonderful laptop bag, and you won’t believe how much will fit in it! As they say themselves, it is deceptively slim looking and incredibly light. It has these great little air squares for cushion everywhere – like bubble wrap made from durable rubber, and has an extremely comfortable and ergonomic strap.

Lowa Tempest Lo Hiking Shoes – I’ve worn these shoes, this same pair, nearly everyday, for almost 4 years straight now, and they still have a little life left in them. I wore them every single day for a total of 7 months in Peru, walking the cobbled streets of Cusco, and traveling the country. And I wore them nearly every day for 3 years walking the streets of Brooklyn and Manhattan, and now Cambridge. (I don’t have a car, so I actually walk, a lot.) They are so comfortable I never notice them. They are light, durable, and somewhat waterproof if treated regularly. I recently bought a backup pair for the inevitable day that I have to give them up. After 3.5 years one one them developed a tear at the front-side where they crease when crouching to take photos, but they are still fine except in the rain.

Post-Production – Once you get back you are going to need to organize, edit, and work on all your photos. And for that, of course you are going to need
Adobe Photoshop and/ or Adobe Lightroom 3. You can start off with the trial versions that you can download from the Adobe site, but sooner or later you are going to have to get the real versions. Use that student discount while you still can!

Purchasing: If you plan to purchase any of this equipment, accessories, or anything else from Amazon.com I encourage you to do so through the links I set up throughout this post. Just click on the equipment above and you will be taken directly to that Amazon page. Your purchasing price will be the same, and they will give me a little something for referring you, which will help support my blog. Thanks! Or click on the Amazon.com logo below to enter Amazon and start shopping. I appreciate your support!

If you are in the UK or Canada, please use these Amazon links:

UK: my Amazon.co.uk link

Canada: my Amazon.ca link

For those interested in purchasing through B&H Photo I have set up affiliate links with them as well – find it on the left side of this page.

Assignment: Guatemala – Canon 7D Tutorial and Review

I recently returned from a trip to Guatemala, where I was taking photos for an NGO that works with children, literacy, and education. It gave me the perfect opportunity to try out a bunch of new equipment and really put it to the test in the field.


San Miguel Duenas, Guatemala – Canon 7D, 70-200mm f/4L IS lens at 78mm, 1600 ISO, 1/100, f/5.6

Jump to the Custom Function section

First and foremost, it was the first time I really had the opportunity to use the Canon 7D body (I discuss the additional gear in this related post). The camera performed wonderfully in many ways, however, I did have autofocus related problems – namely a serious front focus issue. With both wide angle and telephoto L-series lenses, the camera was consistently focusing several inches or more in front of the subjects. I played around briefly with the AF Microadjustments, with the intention of taking a closer look at the situation when I returned home.  (Body was later exchanged for another that focuses properly.)

I had another, odd and unexpected complaint in the field, and that is with the high speed shooting modes. One has the choice of 3fps or 8fps, yet I needed something more like 5fps! I’ve included some images throughout the post that are straight from the camera (I merely converted from RAW to JPEG). Anyway, on to the review and instructions for many of the camera’s settings, and how and when to use them in real world situations. And at the end there is some info about video tutorials available for downloading and watching.

If any of the digital photography terms you come across in this post are unfamiliar, be sure to refer to this great glossary for assistance.

Design – The camera is extremely comfortable to hold and use, especially due to the size, shape, and material of the grip, and it felt to be designed perfectly for my hands. It is nicely weighted with both a 16-35 f/2.8L II and a 70-200 f/4, and carries well with an R-Strap attached to the camera body (the 70-200 f/4 doesn’t come with a collar). Due to its similar design and button placement as previous Canon models, it was easy to get used to changing various settings on the fly – everything from ISO right up on top to Flash Control in the menus. There are a few settings that I quickly fell into, but that I would like to experiment with a little more with before I settle permanently into. Here are a few notes, in no particular order of importance:

Av Mode – I set the camera to Av mode for 99% of the time, as that is how I typically work (because I always want to control the depth of field). About the only time I took it out was when I was experimenting in an HDR type situation where I was in Manual and bracketing, trying to properly expose both a dark colonnade I was under and the cathedral in bright sunlight beyond. I haven’t yet worked on combining the exposures, but here is a nice shot that came from that situation:


Antigua, Guatemala – Canon 7D, 16-35 f/2.8L lens at 16mm, 1600 ISO, 1/500, f/16

(edit – I added the camera and lens information to these images.  Please note that the camera settings used for these various images may not necessarily be the “best” or “ideal” settings to use in the specific situations, but camera settings are always the result of changing situations and lighting, coming from another scene, going back and forth between action and still subjects, adapting, experimenting, and sometime just plain not paying attention!)

ISO – I had high hopes for Auto ISO, thinking I would finally be given the freedom to stop worrying where I left it set, but I quickly found that in Av, I didn’t like the slow shutter speeds that were resulting when I selected the aperture and the camera selected the ISO. So I ended up never using it. I would like to experiment with it some more, and figure out if there is something I can do to keep the shutter speeds in a better range. It is wonderful to have the versatility to change ISO on the fly, but one often gets caught up in shooting, and forgets to change it to an appropriate setting, and thus sometimes the shutter speed isn’t the most ideal. So, I just have to stay in the habit of paying attention to where all three settings are as I go from indoor to out or change lenses, etc. This is aided by these settings being visible in the 7D viewfinder.

High Speed Continuous Shooting – many people marvel at the 7D’s ability to shoot 8fps in High Speed Continuous Mode. However, for my purposes on this trip, that proved far too excessive. I often shoot a burst of photos when someone or something is in motion and I want to capture the peak of action or a flattering pose, or when a gesture or facial expression might change rapidly. Unfortunately, 8fps results in a lot of unwanted files, and as I will soon address, these files are HUGE and rapidly fill up a hard drive. But sadly, the Low Speed Continuous drive setting is only 3fps, which is too slow to capture the rapid changes in a scene. The 3fps speed was one of the main drawbacks of my previous body, and a major reason for upgrading. What I need is something in between, maybe 5fps! Perhaps Canon or someone will tweek the firmware to allow this…


San Miguel Duenas, GuatemalaCanon 7D, 16-35 f/2.8L lens at 35mm, 800 ISO, 1/500, f/3.5

Custom Functions – In order for you to get the most out of the 7D, and to set it to function best how you work, you need to dig into the Custom Functions. One of the settings I use is customizing My Menu, and then having My Menu always appear first when I hit the Menu button. (My Menu Settings / Display from My Menu=enable) I played around with different items on My Menu, but have settled for now on the ones that I use most often or that I may quickly need and want to access without digging into the menus. They are:

Flash Control
– you can quickly adjust all the settings for the built in flash, external flash, wireless flash. You can even control all the setting of the 580EX II remotely – when it is not attached to your camera. Very cool.
Exposure Compensation/ AEB – exposure compensation is easy to change at any time with the big dial, so this shortcut is for using when I want to bracket (AEB).
Review Time – I found that I was often shooting away without chimping (looking at the LCD), so I often just turn off the LCD review altogether. Other times, however, I want to review.
ISO Expansion – I haven’t used this yet, but I wanted it handy in case I want to use the high ISO. I typically have this turned off because I didn’t want the camera to default to High ISO during any situations. But considering I wasn’t using Auto ISO, this all seems unnecessary, and now that I realize this, I will have to replace this with something else on the menu! I never went above 1600 ISO, which I did have to use sometimes in very dark classroom settings along with the flash. Upon quick review of those images, the lack of noise in these files is really good.
Format – this is to format the memory card in preparation for use the next day. Always reformat the card, never simply erase them or use the Erase All option if your camera had that (the 7D does not). However, after formatting, turn the dial to select another menu item so that next time you hit Menu, Format isn’t still selected and you quickly make a grave mistake of pressing it.
Highlight Tone Priority (II-3) – this is a great setting to use in a high key situation, or with a bright subject or scene. It helps to retain detail in the highlights so they don’t get blown out, such as a white wedding dress, or a snow or beach scene. I never did use it, but I keep it in this menu to remind me it is there for the day when I do need it!


Chichicastenango, Guatemala – Canon 7D, 70-200mm f/4L IS lens at 155mm, 200 ISO, 1/80, f/4

Other important Custom Function Settings

(please note, this post was initially written to explain how I used these settings in a specific travel situation.  I go into more detail about each of the Custom Function settings, with clear explanations of what they are and when and why to use them, in my e-book Canon 7D Experience, which is discussed below.)

Safety Shift (I-6) – I sometimes enable this setting. It allows the camera to shift the shutter speed or aperture automatically, without your expressed permission, in order to get the shot. This is great for situations where the light suddenly and dramatically changes, such as at a concert.  However if you are carefully choosing your settings, or working with a flash, you will want to disable this so that the camera isn’t overriding your careful settings.

AI Servo Tracking Sensitivity (III-1) – This dictates how quickly focus tracking switches to another subject when it momentarily loses the initial subject, such as when another subject passes in front of it. You can choose to have it stay focused on the initial subject (Slow), or focus quickly on a new subject that moves in front of your initial subject (Fast). Typically I want to stay focused on my selected subject, and ignore someone or something that momentarily passes between us. If you want to quickly focus on different subjects at different distances, put it on fast.

AI Servo 1st/2nd (III-2) – Is your priority focusing on the subject, tracking the subject, firing off rapid shots? Look at the manual to see which situation works best for how you shoot.Personally I think 0 or 1, with the autofocus (AF) Priority, is best. (The camera makes sure it focuses first before taking the shot. It may cost you a microsecond of time however.) Regarding tracking vs. drive, I keep it at 0. Setting 0 continues to prioritize focusing possibly at the expense of speed, while setting 1 will prioritize the speed of subsequent shutter releases at the expense of focus.

AI Servo AF Tracking Method (III-3) – This works with autofocus modes where more than one AF point is active. The names of the choices are a little confusing but what they do is Setting 0 will focus on a closer subject that enters into your view, not necessarily in front of your subject. while setting 1 will remain focused on the initial subject. I keep mine on 1, since I want to stay focused on my initial subject.


San Juan del Obisbo, GuatemalaCanon 7D, 70-200mm f/4L IS lens at 200mm, 100 ISO, 1/1000, f/4

AF Focus Mode (III-6) – I enabled all the AF modes in the Custom Functions – by default, several of them are not available to you unless you change that setting. I started out using Single Point, but sometimes changed to Spot for more precision. The cost of using Spot is that it may not focus as quickly or as well when hand held or with a moving subject, and is generally not necessary unless you are trying to focus on a very small, precise area, such as through a fence to a subject beyond.  I occasionally used AF Point Expansion when photographing rapidly moving children. I don’t know how other photographers work (according to a Canon rep who gave a 7D presentation at B+H, there are big name professionals who still just focus with the center point and recompose), but I always choose the focus point I want manually, using the Multi-Controller button. This takes a little longer, now that I am dealing with 19 focus points, but that enables me to quickly get the composition I want, makes sure the camera focuses on what I want it to, and to get subsequent shots without too much reframing. There is an important menu setting so that you can use the Multi-Controller directly to change the AF point without having to press the AF thumb button first – I believe it is on the screen where you can customize all the camera’s buttons. Oh, and I changed the custom settings so that all the focus points always show, and that they light up upon achieving focus, even in bright sunlight (which they would not do if you had this setting on Auto or Disable). That way I always know when it has focused.  And I set Custom Function III-7 to stop focus point selection when I reach the edge and not loop around to the other side. I’m also thrilled that the 7D has a grid display that you can turn on in the viewfinder, which helps me keep my horizons and compositions straight. The viewfinder looks pretty busy, filled up with AF points and the grid, but when you are shooting away and focusing on your subject, you don’t even notice they are there.

Single Point Focus vs. Spot Focus Size – This controls the size of the area being looked at for focusing purposes on the 7D.  With Single Point AF Area Mode, the camera is actually looking at a cross shape area (all focus points are cross type, center point is dual diagonal as well at certain apertures) that extends about 2x as big as the actual square you see in the viewfinder. With Spot AF Area Mode, the size of the cross is about the size of the square you see, I think perhaps slightly larger.  Now you might think that using Spot AF will be more accurate all the time and sounds like a great idea and will get you sharper pictures, but this is not necessarily the case.  Since Spot AF is so precise, and since autofocus works by looking for an area of contrast, Spot AF may not focus as well or as quickly in many general situations (because it may be looking at such a precise area that is all one color or  tone).

Spot AF is for when you need a really precise “focus beam” to pinpoint, for example a bird in a tree, and not the branches and leaves surrounding it and all around it, which may be closer to you and the camera.  Or if, say, you are shooting through a chain link fence and you want the camera to focus on the animal beyond and not on the fence.  If you were to use Spot AF all the time, you would have to continue to act in a slower and more precise manner, so that you ensure you are focusing on an area of contrast or a nice line.  For example, if you capture a shot of a person, you want to focus on the eye typically.  If you do this quickly with Single Point AF, you can aim at the general area of the eye and you will likely include it in the area being looked at by the camera.  However if you grab a quick shot with Spot AF, you may  be a little off and the camera is looking at an area of cheek to focus on, which will be difficult since there isn’t much contrast there.

Orientation Linked AF Point – This setting allows you to choose your favorite AF points, and when you are hold the camera horizontally or vertically, those points are automatically selected. However, it is very complicated to set, so much so that is would seem Canon doesn’t even understand it. The Canon rep did not fully explain it properly at the B+H presentation, the instructions in the manual do not work, and after 3 different instructions by email from Canon, I may finally have the correct way. I still have to try their latest directions. (note- nope, latest instructions still don’t work properly) **12/17/2009** AHA!! Here it is, finally explained in its entirety.

I also changed the button/ dial function settings so that in Manual mode, the big dial controls shutter speed and the top dial controls aperture. The default is the opposite. I changed this because I almost always shoot in Av mode, where the top dial controls aperture, so when I switch to Manual mode, I want that to remain the same.

Additional edit – August 2011:
I have written a popular e-book user’s guide for the Canon 7D
called Canon 7D Experience. It not only explains all of the features, functions, and controls of this powerful, sophisticated, and highly customizable camera, but also when and why to use them in your photography – including EVERY Menu item and Custom Function setting, with explanations and recommended settings for real-life use.  You can learn more about the guide, preview it, and purchase it here.


AF Microadjustments – This is a setting on the 7D which enables you to tweak the auto-focusing to your different lenses. A site about AF micro adjustments that look to be helpful is below:

http://www.northlight-images.co.uk/article_pages/cameras/1ds3_af_micoadjustment.html#Anchor-Canon-49575

Here is a micro-adjustment focus test chart you can use.

Viewfinder – The viewfinder on the 7D is big and bright and wonderful. It is nearly 100% view of the image you will capture. The aperture and shutter speed info is of course displayed below, along with the current ISO setting, which one should get in the habit of glancing at often. See the AF Focus Mode category above for more info on what you can view in the viewfinder to assist with focusing and composition.

Picture Style – I had this on Standard, since I shoot in RAW and intend to post-process, however, I would like to do a comparison of the styles to see which one best matches my visual preferences – although the Picture Styles will only affect JPEGs and, it is important to know, the image you see on your rear LCD screen when shooting RAW.


Jalapa, GuatemalaCanon 7D, 16-35 f/2.8L lens at 35mm, 800 ISO, 1/2000, f/8

File Size – I shot RAW for almost the entire trip, and quickly discovered that these files are HUGE. The files range from about 21MB to around 31MB each. I used SanDisk Extreme III 16GB cards, which worked great, and one card often lasted much of the day. I have no good reason for using SanDisk over Lexar, other than the fact that the Lexar people haven’t approached me about sponsorship… :) The Extreme III cards have been replaced by the new Extreme and Extreme Pro cards, and are thus the old ones are much cheaper at the moment, especially with current rebates. At 30MB/s, they were fast enough for the types of shooting and short bursts I was doing. However, downloading them to my computer and external HD were pretty slow using the SanDisk ImageMate CF card reader. Eventually I’m going to have to spring for a card reader that goes right into the PC slot. I used Adobe Bridge to simultaneously save the day’s files to 2 external hard drives. The 160GB Iomega Ego filled up before the trip was over, but fortunately I also had a Lacie 500GB. I am dreading the number of external hard drives I am going to have to buy for travel and for home storage, but once you go RAW, it’s hard to go back to shooting just JPEG. I’m going to have to look into the Drobo system that many rave about.

Battery Life – The battery life of the 7D is excellent. When you get new batteries, first charge them all the way. Do not recharge until they are completely drained. Do this one or two cycles. I know they say you no longer have to do this, but some claim that seasoning the batteries like this will maximize their charge life. Anyway, one battery lasted well into 2 days of shooting, maybe longer, I didn’t keep track. They just keep going, even with heavy use, chimping (LCD reviewing), frequent use of an external Speedlite flash, and use of image stabilization (IS) on the 70-200 lens. I carried 3 batteries, but probably could have gotten away with 2. The spring-loaded battery door that pops right open for quick battery changes is a nice touch.


Antigua, Guatemala – Canon 7D, 70-200mm f/4L IS lens at 78mm, 100 ISO, 1/250, f/4

Automatic Sensor Cleaning – Like most good dSLRs these days, the 7D automatically cleans the sensor at start up and shut down. Since the dust that is shaken off is collected on a tiny sticky strip at the base of the sensor, it seems to me that you should hold the camera straight as this happens. I’m not sure if this is actually true, but I think I read in the manual that it even says to place the camera flat on a table as you use this, so I have gotten in the habit of holding it straight and still as I turn it off and on. Yeah! No more having to clean the sensor manually with a Rocket Blower!

Video – I did not have a chance to even experiment with the HD video on the 7D yet…so much to learn, so little time…

The next post will review all the other gear I used on the trip – the camera backpack, R-strap, accessories, etc. – and perhaps some of the other lessons learned. Read it here.

Purchasing: If you plan to buy the Canon 7D or any other camera or equipment from Amazon.com, I would appreciate it if you use my referral link by clicking on the text or logo below. Your price will be the same, and they will give me a little something for referring you, which will help support this blog. Thanks!


See and buy the Canon 7D on Amazon

And due to popular request, if you are in the UK, here is my referral link to Amazon UK.

And for those wishing to purchase from B&H Photo, Adorama, or directly from Canon just click their logos on the left side of the page.


Jalapa, GuatemalaCanon 7D, 70-200mm f/4L IS lens at 200mm, 200 ISO, 1/1600, f/4

Again, be sure to check out my e-book user’s guide for the Canon 7D called Canon 7D Experience. It not only explains all the features, functions, and controls of this powerful, sophisticated, and highly customizable camera, but also when and why to use them in your photography. You can learn more about the guide, preview it, and purchase it here.

I’ve run across a nice set of video tutorials (link below) for using the Canon 7D. You can watch them online, or even download them to your camera for viewing. The one on AF Custom Fuctions is especially helpful at clarifying those setting. Be sure to look around on the Canon Digital Learning Center to find all kinds of other cool stuff about using your camera plus useful tips and instructions from pros who use them.

link to Canon 7D Video Tutorials

The distinctive voice you hear in the 7D tutorial videos is Canon guru Rudy Winston, and the photo samples are his images as well. If you are in NYC, you can often find him leading workshops and presentations at places like B+H and Adorama. I went to a wonderfully informative introduction to the 7D that he gave a B+H a month or 2 ago, and these videos are pretty much the same presentation.

Here is additional information from Canon Europe about custom functions of the 7D:

United Nations – Humanizing Development Campaign

My photo Women in the Plaza – Combapata, Peru, was one of 50 selected – from thousands of photos from over 100 countries – to represent the United Nations Development Programme and their Humanizing Development campaign.

The photos will be published in a book sponsored by the Presidency of Brazil, and are currently on exhibit at the headquarters of the United Nation’s International Policy Center for Inclusive Growth (IPC-IG) in Brasilia, Brazil.  The exhibit will tour major international cities throughout 2010, including NYC, Bangkok, London, São Paulo, Rio de Janeiro, Johannesburg and Bonn.

According to the IPC-IG, “The meaning of ‘Humanizing Development’ cannot be expressed in numbers. It shows examples of people winning the battle against poverty, social exclusion and marginalisation. It calls for the humane face of development. It spreads hope, initiative and determination. It transmits inspiration to each of us and feeds our dream of transforming the world we live in into a just place. A world that enables all of us, regardless of our birth place, social and economic status, sex, sexual orientation, race, ethnicity, religion and ideology, opportunities to fulfilling our potential as individuals, human beings and members of our society.”

As a photographer dedicated to documenting the work of  humanitarian organizations throughout the world, I’m extremely thrilled and proud to have been selected for this honor, and can’t wait to see the exhibit in NYC.

The women in the photo are queued in the main plaza of Combapata, Peru to receive monthly Juntos program benefits. The Juntos (Together) program, a conditional cash transfer (CCT) government program, provides cash to the poorest families if they meet certain criteria. Recipients must have children under the age of 14, enroll their children in school and have them vaccinated. Pregnant mothers are required to utilize mandatory pre- and post-natal healthcare programs. Peru’s Juntos program, similar to CCT programs in other Latin American countries, was launched in 2005.  I captured this image on my way to Huinchiri to see the annual reconstruction of the Keshwa Chaca, the last remaining traditional Inca straw bridge.  That journey was detailed in this post.