Click here to jump down to Nikon (Nikkor) Lens Notations
Canon Lens Notations
You have probably noticed that Canon lens descriptions have numerous notations, and may be wondering what some of those letters and numbers mean. For example EF-S 18-135mm f/3.5-5.6 IS is the full name of the kit lens that you may have purchased with the camera. A lens with a somewhat similar focal length, but which is much more expensive, is the EF 24-105mm f/4L IS USM lens. Each of those notations is significant, and all are important to know and understand when you are researching additional lenses to buy for your camera. And since I have a hard time remembering them all, I have also added a quick reference to the end for Nikon lenses and a link to a more thorough site.

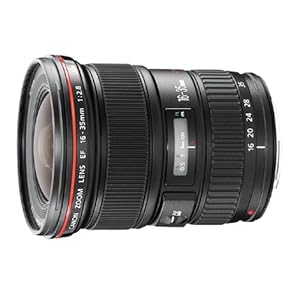
Canon EF 16-35mm f/2.8L II
EF and EF-S are two different Canon lens mounts. EF lenses can be used on any Canon dSLR, while EF-S lenses are designed for, and can only be used on Canon dSLRs with 1.6x cropped sensors, including the 60D, all Rebels such as the T3i, plus the 7D, 50D and others, but not the full frame 5D or 5D Mk II. The rear of EF-S lenses reaches further into the camera body, and thus will damage the mirror of the 5D cameras if you attempt to attach it. These lenses are optimized for the 1.6X cropped sensor cameras, and have a shorter back-focus distance which gives them the ability to be more effective as wide-angle lenses on the cameras with smaller sensors. EF-S lenses are mounted by lining-up the white square on the lens with the white square on the camera. EF lenses match red dot to red dot. If you someday plan to upgrade to a full-frame camera, such as a 5D Mk II or its eventual replacement, or if you suspect that in the future full-frame cameras will become much more affordable and replace most cropped frame cameras, you shouldn’t invest in too many EF-S lenses.
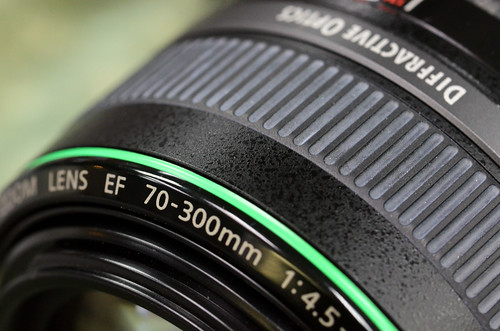
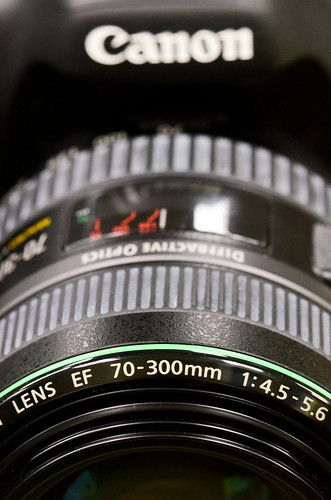
18-135mm or 24-105mm is the focal length of the lens. These are both zoom lenses, which cover a range of focal lengths. There are wide-angle zooms – typically within the 10-40mm range, standard zooms – typically within the 17-135mm range, and telephoto zooms – typically within the 70-300mm range. See this page for all of Canon’s lens offerings:
A Prime lens has only a single focal length, such as 50mm or 85mm. It will not zoom in and out, and thus you have to “zoom with your feet” as they say. However, without the additional mechanisms required by zooms, you generally get more quality for the price with a prime lens, plus typically very wide apertures for great low light use and blurry backgrounds.
f/3.5-5.6 or f/4 indicates the largest maximum aperture. See my post Fixed Maximum Aperture vs. Variable Maximum Aperture for more information on what this means and why one lens has a range of numbers and the other lens just has one.
L lenses are Canon’s top of the line lenses, identifiable by the red band around the front end of the lens. L lenses are generally higher quality lenses than the standard lenses in just about every way possible. They typically offer:
- Better sharpness throughout the full range of focal lengths and apertures, as well as better sharpness, color, contrast, and image quality across the image frame from the center to the corners. They accomplish this in part by precisely and accurately resolving all the light wavelengths (colors) on the sensor plane. (Think of a cheap printing job you’ve seen where the colors don’t all align and thus the words or images always look out of focus. This is an exaggerated example of what a lower quality lens might do.)
- Higher quality and stronger construction, durability, and seals for increased dust, water, and weather resistance.
- Higher quality glass (or even fluorite crystal) and coatings to prevent flare and internal reflections.
- Larger maximum apertures and fixed maximum apertures.
- Image stabilization.
- Higher quality, quieter, and faster auto focus mechanisms and full time manual focus (ability to override auto-focus for manually tweaking focus while remaining in AF).
- Internal zoom mechanisms, meaning the lens does not extend when you zoom, which also allows for better weather sealing.
- Metal lens mounts (the part that attaches onto the camera) for better durability, sealing, and electrical connections (less expensive lenses sometimes have plastic mounts that wear and then the lens wobbles and loses electrical connection).
However, several non-L lenses, including some EF-S lenses, have many of these features and characteristics too, and some approach the L lenses in terms of quality. One thing to keep in mind with lenses is that you almost always get what you pay for. More expensive lenses offer higher image quality, construction quality, and features.
IS means image stabilization, and allows you to hand-hold your camera at slower shutter speeds and still obtain an in-focus image. The IS system in the lens monitors vibration and moves the internal lens elements to counteract camera movement, which might normally cause camera-shake to blur the resulting image. A lens with IS allows you to use a shutter speed up to 4 stops slower than normally possible when taking an image while hand holding the camera. Image stabilization isn’t critical to have for wide-angle and standard focal length lenses, but becomes pretty important when working in the 150mm, 200mm or 300mm focal lengths. This is because those lenses are typically longer and heavier, and because you are often zooming in on something further away and a slight movement of the lens translates to a large movement over that distance (think of trying to hold your view of a distant bird steady while looking through binoculars). Image stabilization does not correct for subject movement, but rather for camera movement, such as from an unsteady hand. You need to use a fast shutter speed to freeze subject movement.
USM stands for ultrasonic motor, and means the lens has a high quality, precise, rapid, and quiet motor for auto focusing.
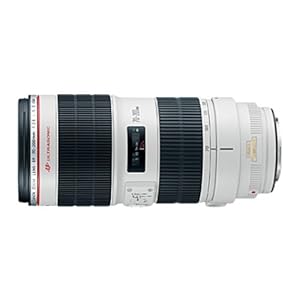
II means it is the second version of that lens. For example the 70-200mm f/2.8L IS USM lens was recently replaced with a new version which now has a II in its name. Most often, the second version of a lens boasts improvements in quality and construction.
Have a look that this other post to learn the difference between Fixed Maximum Aperture vs. Variable Maximum Aperture.
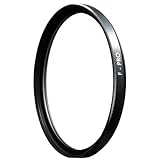
And the little “circle with a line through it,” found on the front of the lens, indicates the filter size that will fit on the lens, such as a protective UV filter or a circular polarizing filter.
Purchasing: If you plan to purchase a new lens from Amazon, or any other equipment, I encourage you to do so by clicking on the Amazon logo below (or on the links of the lenses mentioned above). If you purchase through this link, Amazon will give me a little something for the referral, which will help support my blog. Thanks, I appreciate your support!

If you are in the UK, you can click here for the UK Amazon referral link.
For those interested in purchasing through B&H Photo, Adorama, or directly from Canon, I have set up affiliate links with them as well – find them on the left side of this page.
Renting Lenses: If you wish to first try out a lens before buying it, check out LensProToGo, where you can get great prices on short-term rentals of any lens as well as the latest Canon and Nikon dSLR bodies.
Nikon (Nikkor) Lens Notations
Here are some the most common Nikon (Nikkor) lens notations of current lenses that you will run across, many of which deal with a lens’s ability for metering, aperture control, and autofocus:
F-Mount – This is the Nikon bayonet-type lens mount that was introduced in 1959 and is still in use on Nikon dSLR cameras today.
AF – Auto-focus: Although these lenses are capable of autofocusing, they do not have a built-in autofocus motor in the lens. They require a camera body with a built-in autofocus motor in order to fully function, such as a Nikon D7100 or D610. These lenses will not autofocus with Nikon dSLRs that do not have an internal autofocus motor, such as the D5200, D3200, and D40. You will need to use and AF-S lens with those cameras if you wish to autofocus.
AF-S – Auto-focus with an integrated silent wave motor: The autofocus motor is in the lens and thus not required to be in the camera body. You can use these lenses with any Nikon dSLR, but know that you need AF-S lenses in order to autofocus with a camera that lacks an AF motor in the body, such as the D5200 or D3200.
CPU – CPU lenses are autofocus lenses that can communicate information with the camera, such as the aperture setting, via electronic contacts.
AI – These lenses have an Ai coupling system that makes use of a small lever on the camera’s lens mount to communicate the aperture setting between camera and lens.
AI-S –
Non-AI (also called A or Pre-AI) –
D – Distance: The lens communicated the focus distance to the camera, so for example that info will be part of your image metadata and assists, I believe, with the flash metering.
DC – Defocus Control: Allows the photographer to change the degree of spherical aberration in the out-of-focus areas to provide for better bokeh (background blurring).
DX – Made for non-full-frame (crop sensor) cameras, such as the D7000, D5100, D3100.
ED – Contains extra low dispersion glass elements, which helps to reduce various optical aberrations.
G – No aperture ring on the lens. Since an aperture ring is no longer required with a dSLR, most common current lenses, with the exception of a 50mm for one, are G lenses.
IF – Internal Focusing: Focusing movement occurs inside the lens and so no external lens elements are moving during focusing (well, other than the focusing ring of course).
N – Nano coating: A crystalline coating on the lens elements eliminates internal lens element reflections, helping to reduce ghosting and flare.
PC – Perspective control: Used to correct perspective (converging horizontals) such as for an architectural photographer.
VR or VR II– Vibration Reduction: Image stabilization incorporated into the lens, which corrects for camera movement (but not subject movement!).
A more thorough list of notations, including older ones, and detailed explanation can be found here: http://www.bythom.com/