New Nikon Camera and Canon Lenses

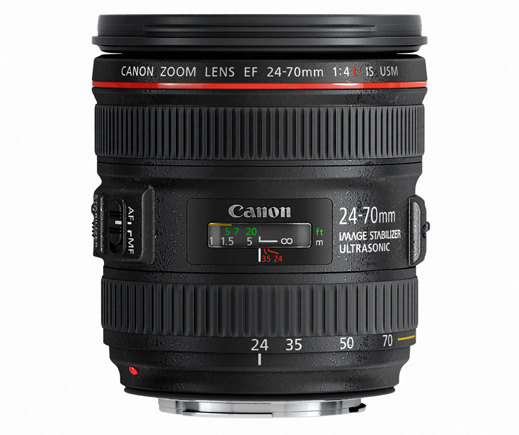
There is a lot of exciting news today, and not just with the US Presidential election but also on the dSLR front. Nikon has announced the new Nikon D5200 upper-entry-level dSLR and Canon has announced the Canon EF 24-70mm f/4L IS USM lens.  Yes, a 24-70mm with Image Stabilization! Plus they announced  the EF 35mm f/2 IS USM lens.

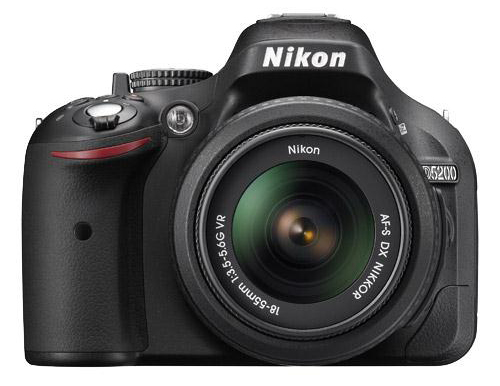
The Nikon D5200 is a pretty big leap for an upper-entry level camera in that not only does it boast the 24 megapixels of the new Nikon D600, it also incorporates the 39-point autofocus system of the D7000 (and D600).  This is a sophisticated, complex AF system that was challenging for many experienced enthusiasts to learn, so it is going to be an interesting challenge for those with much less dSLR experience. A very interesting move by Nikon.

Nikon D5200 dslr 39 point autofocus AF

The new Canon 24-70mm F/4L IS, with Image Stabilization, is designed to be the kit lens for the upcoming Canon 6D, though it will also make a great lens for any other Canon dSLR. It is going to create a very difficult decision for photographers who will have to weigh the pros and cons of the 25-105 f/4 IS (with Image Stabilization too), the original 24-70 f/2.8L or newer 24-70 f/2L II (both without Image Stabilization), and the brand new 24-70 f/4L IS – which adds Image Stabilization.

Canon 24-70mm lens ef is image stabilization f4 f/4

The original 24-70 f/2.8L quickly became my main walk-about lens immediately after obtaining it, so I can say that it is a wonderful lens and a great focal length.  Have the additional reach of the 24-105mm f/4L IS would be great, but I didn’t want to give up the wide f/2.8 aperture which creates even greater background blurring. Now people are going to have to analyze the Image Stabilization vs. the f/2.8 or f/4 aperture vs. the additional reach of the 24-105mm (especially on a full-frame camera) vs. the price vs. image quality vs. size and weight.  Not an easy decision! Perhaps when I get a chance, I will try to break it down and try to help with the decision.  Just know, before you lose your mind analyzing the pros and cons of each element, each of these lenses has amazing performance, built, and image quality.  You really can’t go wrong with any of them. Just pick one and start shooting!

And perhaps most exciting, Canon has introduced the Mark II lens caps! Finally, a center-pinch cap that can easily be accessed inside a lens hood.  I know you had to copy Nikon to do this, but thank you Canon!

Canon lens cap center centre pinch new

Full Manual Exposure Control, Video, Live View, and the D5100

I recently received some interesting questions from two different readers on my posts about the Nikon D5100, Nikon D5100 vs D7000 vs D90 etc. and Nikon D5100 vs. Canon T3i.  Both questions point out interesting issues with the Nikon D5100 that may be important considerations if your shooting needs required these functions, or that might not affect you and your shooting at all if, like me, you never use manual exposure control in video and/ or you don’t use Live View (and M mode) when shooting stills.

Here is the first question and my reply:

Question 1:

I wanted to ask about a major differentiator, if its true and useful for someone trying to learn a bit of manual photography. Below link and video talks about D90 and D5100 not having the ability to do manual control in video. Is it true? Does it really matter. Please advise.

(video is no longer available on YouTube)

I would also like some instructions on how to use manual control – when, why, how.

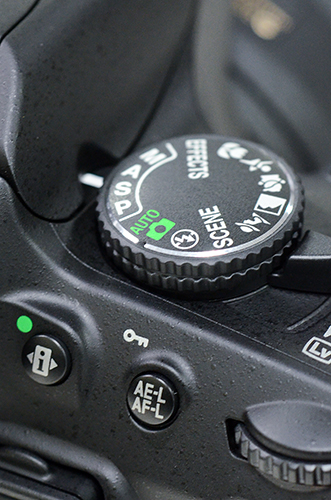
Nikon D5100 mode dial video manual exposure a s m aperture shutter
Mode dial of the Nikon D5100

My Answer:
Yes, the lack of full manual control in video mode is a very real deficiency of the of the Nikon D5100, especially for people who wish to seriously use it for video.  To answer your question “does it really matter?”, yes, it really matters if you wish to have straightforward, full manual control while shooting video.  I know that sounds like a smart-ass response to the question, but it is kind of like “if it isn’t an iPhone, it isn’t an iPhone,” blatantly stolen from “if you had invented Facebook, you would have invented Facebook.”

Wait a minute, I just realized that I was ahead of the curve and I wrote this similar smart-ass phrase before that movie even came out:
“If the 5D Mk II fits your expanding and demanding needs as a photographer, you would already pretty much know that you needed a 5D.”
See, look here, I said that earlier than August 26, 2010, and the movie came out Oct 1, 2010, and I didn’t even see it until a couple months ago!

Anyway, if you need full manual control in video, you know that you need full manual control in video based on your experience and needs, and then you need your camera to have full manual control in video.  Simple, right?  But…do you not know yet but wonder are you going to need it in the future if you grow and develop as a photographer/videographer?  That is the big unknown that no one can answer but one needs to figure out on an individual basis!

However, there is a “work-around” for this shortcoming of no full manual exposure control with the Nikon D5100.  To manually set your shutter speed, you must set the camera on Shutter-Priority Auto Mode (S) and set your desired shutter speed before going into Live View mode, use exposure compensation to obtain the aperture setting you want, and use the AE-L/AF-L Button to lock that exposure (set Custom Setting f2 for AE-Lock Hold).  If you wish to first set the aperture setting, you must set the camera on Aperture-Priority Auto Mode (A) and set your desired aperture before going into Live View mode, use exposure compensation to obtain the shutter speed setting you want, and use the AE-L/AF-L Button to lock that exposure (set Custom Setting f2 for AE-Lock Hold).

See this video I came across on YouTube for a demonstration:

As far as instruction in manual control (for still photography), see my Full Stop dSLR camera guide e-books, of course!  I don’t go into a lot of detail of full manual (M) because I don’t feel it is necessary for most beginner or intermediate photographers in most situations.  I don’t believe in M for the sake of old-school, full control, “look, I’m a skilled photographer/ martyr ‘cuz I use full manual.” It just adds an extra step (setting BOTH aperture and shutter speed rather than just one) to each photo that isn’t necessary.  Let the camera do it for you.  Pick your priority:  Aperture or Shutter Speed.  Are you concerned with depth of field (aperture) or with freezing or blurring action (shutter speed)?  Set your aperture in A (Av) mode or else set your shutter speed in S (Tv) mode, and let the camera take care of the other setting.

I know that many photographers like working in M mode, but if you are wondering if you need to use it: if you haven’t encountered a need for it, you don’t have a need for it. The aperture setting is typically my priority, hence I use Aperture Priority Mode.  Here is a detailed explanation of how I use Aperture Priority in the real world:  Deconstructing the Shot.

As my e-books say about possible situations for using M:

“There are times you may wish to use Manual Exposure Mode.  For example, if you are taking several photos to stitch together into a panorama, you want them all to be taken with the same exposure so that the lighting is consistent across the entire scene. Or if you are working in a studio setting and the lighting will remain consistent, you can set the exposure once and then not worry about it. Or in any other situation where the lighting or your desired exposure will remain consistent such as an indoor performance or sunny day portrait session where the lighting does not change.”

And I know that other situations also demand or benefit from M mode, including macro situations, but many of those situations fall under the “any other situation where the lighting or your desired exposure will remain consistent” category.  Readers, please defend M to me and tell me why you use it!

Question 2:

When I used the Nikon D5100 at a nearby camera store in Live View and Manual (M) mode, it never quite seemed to register ANY of the changes I made to shutter:  the image is supposed to go dark as the shutter speed increases right? (I was in a moderately lit room).  The weird part is that the actual image captured was dark (like it should be) but not the preview!  Is there some setting on the Nikon that is wrong on the piece I tested?  If the camera can’t display the changes it is making during Live View – leaving me to approximate the changes I’m making, then that is a deal breaker for me. I am wondering if this is a bug that was only on the piece that I saw at the showroom, or if you saw it too.

My Answer:

That is a really great question! These are the kinds of features one really has to dig into the camera, menus, or manual of a new dSLR model to determine if it is actually going to meet your needs.

It turns out that no, it is not possible to see actual exposure simulation with the Nikon D5100 in Live View while in Manual M shooting mode. However, in the P, A, or S shooting modes, the live view image will lighten or darken to simulate the exposure settings or the exp. compensation that you set. And to add insult to injury, there is no exposure meter displayed on the Live View screen, so to check your exposure you will need to temporarily leave Live View and switch to the control panel view by pressing the [i] Button.

The Canon 60D and Canon Rebel T3i both have Exposure Simulation in all modes during Live View. On the 60D you can turn this feature off and on. On the T3i it is on automatically while in Live View.

Conclusion:

Now, if you are thinking of buying a Nikon D5100 and after reading this you are suddenly concerned that it is lacking important features that you might need…be sure to first determine if you, indeed, really even need these features.  They shouldn’t be anything to worry about if you are never going to use them and never going to encounter these issues.  For example, I would never encounter the first issue, the lack of full manual control in video, because I don’t shoot video.  If you plan to use the camera to shoot production quality, professional video, this is pretty important.  If you plan to switch over to video and shoot a kid’s sporting event, it is unlikely you are going to shoot this in Manual and so it doesn’t matter.

Regarding the second issue, do you plan to use live mode AND manual shooting mode (M) AND need to preview your image exposure at the same time?  I rarely use M mode and I rarely use Live View and I rarely preview my exposure in Live View if I do use it, so for me and my photography, it will be “rare x rare raised to the rare power” (or (rare x rare) rare or is it merely rare x (rare) rare ?) that I need to use Live View AND M mode AND preview what my exposure will be.  If I needed to, I think I could get by with A mode instead, where the Exposure Simulation in Live View functions on the D5100.  But, if you are like the reader who had this question and you have a real need for this, say shooting cool macro shots of flowers and insects, then you will need to consider the Nikon D7000, Canon T3i, or Canon 60D instead.

Deconstructing the Shot – Photo 3

This post is the third in an occasional series in which I describe the making of a photograph, from both a technical and artistic standpoint. I’ll go through the camera settings and why they were chosen, as well as the thought processes going through my head regarding composition and the creation of the image. These types of posts will be concrete examples of a previous post of mine called How Pros Photograph, which describes the various decisions that may be going through a photographer’s head as they work a scene and make photos. The first post in this series can be read here, and the second post is here.

This one can be called the Aperture Edition or Depth of Field Edition, as you will learn below.
Douglas J. Klostermann Photography
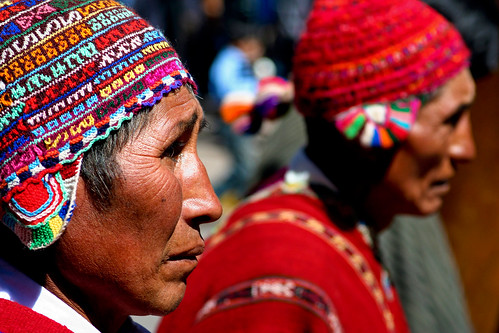
Men on Avenida el Sol – Cusco, Peru – 2008

The Photo: The photo I’ve selected for this example (seen just above) is one I took in Cusco, Peru in June 2008, called Men on Avenida el Sol. It was taken during the Cusco Week festivities, which is a series of events, dances, parades, and performances leading up to Inti Raymi, the Inca Festival of the Sun that occurs each year at the solstice. The wonderful thing about this week of activities is that it offers so many opportunities for a photographer to capture cultural, dance, and people photos. And because they are all public events where people expect, and even enjoy being photographed, it eliminates the difficulties and hesitations many photographers have about approaching individuals for photographs – although that is something any serious photographer needs to overcome, and it is actually quite easy. You approach the subject, make direct eye contact, and ask, “Do you mind if I take a photograph of you?” If they speak another language, hold up and nod towards your camera with a cheerful, inquisitive look on your face. They will either agree or not – problem solved!

Although I took hundreds of photos of the events over the week, I selected this one for this exercise because I learned something very definitively in the process of capturing it. More on that later. Although great subjects and action are directly in front of you during a parade or performance, there is a bit more to capturing good photos than just clicking away. I write a bit about that, with some tips and suggestions, in this post Cambridge Carnival.

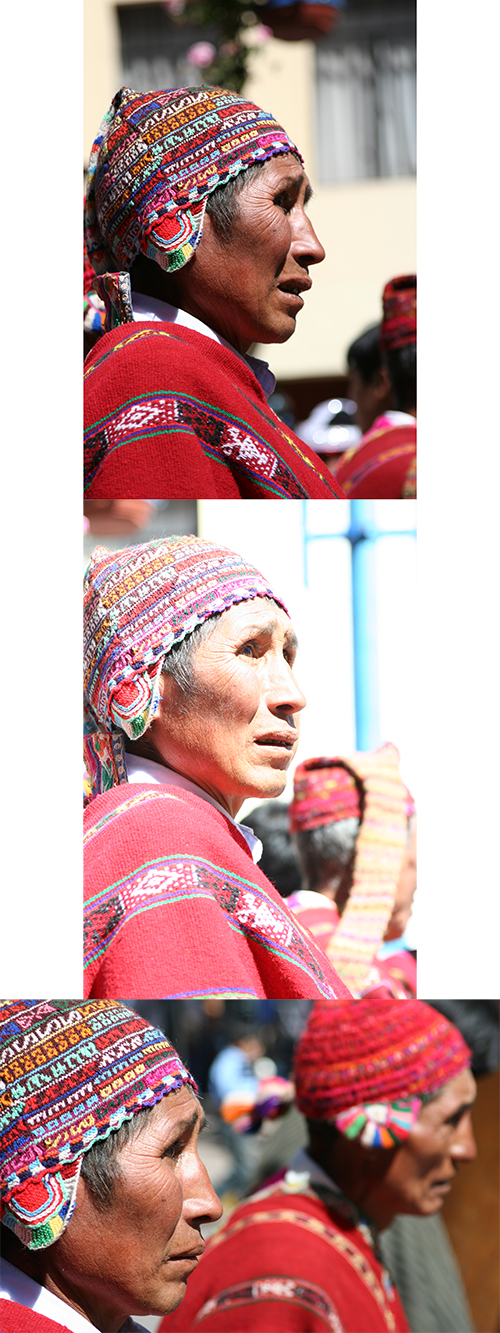
This particular event was a parade down a main street of Cusco leading into the central plaza. I’ve created some strips of photos to show a selection of images as I worked this scene:

process01

The Process: I was heading back home after taking dance photos in the plaza, and made my way down Avenida el Sol looking for additional quick shots. Most of the people and groups were standing about, waiting to move forward to perform or parade through the plaza, where the spectators were, so there were not many interesting opportunities. However, this group of older men captured my attention due to their wonderful expressive faces and their colorful traditional outfits. My intention was merely to capture these faces and subjects. However, they were a bit bored, just standing around waiting, so you can see most of the images do not really stand out.

I was using a Canon Rebel XT with a 28-105mm f/3.5-4.5 II lens. I stood on the sidewalk near the group, and set my camera on Aperture Priority mode (Av on Canon, A on Nikon). This was so I could control the depth of field and call attention to single or multiple subjects and make the background a bit blurry and less distracting. I experimented with various aperture settings, ranging from f/4.5 to f/13 depending on if I wanted one of the men to be in focus or a row of two or three of them to be in focus. A wide open aperture such as f/4.5 will have a narrow depth of field so that just one of the men is in focus, where a narrower aperture such as f/8 or f/11 will have a deeper depth of field so that the entire row of men might be in focus. With the wide apertures, I focused on the eyes of the man I wanted in-focus, and with narrower apertures, I focused about 1/3 or 1/2 way into the area I wanted to be in focus, meaning if there was a row of three faces, I focused on the middle one. The ISO was set at 200 which allowed the camera to choose fast shutter speeds of around 1/1000 s. This is because I had been capturing dance and action scenes, and wanted to be ready for the same. The metering mode was set on the general Evaluative Metering, which did a decent job of capturing the proper exposures. A couple images were mysteriously overexposed, possibly due to where I locked exposure while I was locking focus – which is why I now use a back-button focusing technique and/or lock exposures separately from focus. White Balance was set on Auto, but would have worked on Sunny as well.

As you hopefully know by now, depth of field is controlled by the aperture setting. I write more about it in these posts Depth of Field Simplified and Mastering Depth of Field. Since your specific depth of field in any situation will vary based not only on the aperture setting but also on the lens focal length and your distance from the subject, it is often difficult to predetermine what exactly is going to be in focus in the resulting image. You can try using the depth of field preview button on your camera, but it is difficult to see in the tiny, dim viewfinder what the preview is showing. You can also use your rear LCD and trial and error to view a series of experiments. But again, this is only a small screen with relatively low resolution, so it is difficult to see the precise results. And in many situations you simply don’t have the time for these methods. You just have to get a feel for your lenses and their different apertures through experience and studying your results. But one thing is certain: to get minimum, shallow depth of field and thus maximum background blurriness with any lens, zoom in as close as you can, (for example, zoom to 200mm on a 70-200mm lens) situate yourself as close as you can to your subject while still obtaining the framing you want, and use the widest aperture possible (for example f/2.8 or f/4). Work back from that if you wish to increase the depth of field – for example to have a slightly deeper depth of field in focus, use an aperture of f/5 or f/5.6, or increase your distance away from the subject, or remain close but use a shorter focal length like 28mm or 50mm.

As you can see, most of the images are very “busy,” with a lot of extraneous and distracting background people and activity. I wasn’t very pleased with the images, but I continued to take basically the same image over and over. I knew the faces, outfits, and colors were interesting, and I hoped the resulting images would be as well. I zoomed in as close as I could with most of the images, working in the 75mm to 105mm range of my lens. However, without a lens that had the 100mm to 200mm range, I could not zoom closer and could not obtain the “compression” I was looking for, where the more distant faces would appear to be closer behind the closest subject.

process02

What I didn’t do that I should have been doing, instead of trying to take the same photo over and over, was to change my position and point of view. Doing so would change the backgrounds, perhaps make them less busy or distracting (such as the spectators and the white sign), and would allow for the camera to be on the same level or looking up towards the subjects rather than looking slightly down at them.

I took a series of 60 images over a period of 7.5 minutes. Besides the selected image, only a couple other ones are mildly interesting. I knew I wasn’t capturing what I wanted, my companion was becoming impatient, and eventually I decided to move on. But then I took a few final images. My point of view had slightly changed. I was directly to the side of the men and slightly closer. The last image finally got what I had wanted. It stands out dramatically among all the other ones. It is more simple and straightforward, less cluttered, and the subjects fill the frame.
process03

The Post Process: To create the final image, I adjusted the color and contrast in Adobe Camera Raw (ACR) and in Photoshop (PS). As you can see by the unprocessed images, the color and contrast is a little dull and lifeless straight out of the camera. The original file was a JPEG file, and the Picture Style was Standard (I hadn’t started using RAW yet). In ACR, the Blacks were increased to about 7 or 10 to give it the nice deep blacks, which helps to make the bright colors pop even more. Some Recovery was used to bring back the overexposed highlights on the man’s face. Clarity and Vibrance were used to give it some, well, clarity and vibrance. In Photoshop, the contrast was increased with Curves using the preset setting of Linear Contrast. In Levels, the midtones were darkened to .93 to give a deeper more realistic color to the faces. I did some additional burning on the faces to try to reduce the hot-spots. The image was sharpened using Unsharpen Mask, probably at Amount: 85 or 100, Radius: 1, and Threshold: 4. I may have used the Hue/Saturation to reduce the saturation and lightness of the red color, though I should have done that a little more, as you can see by the man’s face which appears too red and the rear hat where the red is blown out. The Rebel XT sensor, and other digital SLR sensors often overexpose the color red. It is similar to blowing out the highlights, where the color red is blown out and there is just red and not other detail in those areas. You can use the RGB histogram rather than the brightness histogram to monitor for this on the camera’s rear LCD screen while reviewing images. I didn’t crop the image at all, as you can see. It is best to try to get the framing you want when you capture the photo, especially when using an 8 megapixel camera that doesn’t allow for much cropping! (A cropped image would have much lower image quality because the resulting resolution would be much less – it would not allow for much manipulation, and would appear pixellated when enlarged.)

The Final Image:
Douglas J. Klostermann Photography
Canon Rebel XT, 28-105mm f/3.5-4.5 II at 93mm, ISO 200, f/5, 1/1000s

The Lesson: We should always learn from our photos, so that next time we are in a similar situation, we can create an even better image. The valuable lesson I learned in this situation, in addition to perhaps always grabbing one final frame, is to make a change when the composition is not working. Change your perspective, angle, or point of view. Zoom in or out to change the framing. Don’t continue to take the same image that isn’t working, over and over again. If the subject is interesting, there is an interesting composition that can be found to best express that subject. Mentally envision the scene from a variety of positions and angles, and move around the scene as much as possible to see the options. Some other improvements I could have made to this image include using a polarizing filter. Because I was working in the bright, harsh mid-day sun at a high altitude, this could have improved the exposure, color rendition, and contrast of the original image. Since it was overexposed a bit, causing hot-spots on the subject’s face, I should have paid more attention to my histogram and adjusted the exposure compensation accordingly, or used a different metering mode such as Partial or Spot to meter directly off the man’s face.

So hopefully you can see from this explanation and from my previous posts that photographs don’t necessarily just happen. They are created through a combination of thought processes, a series of decisions, and the application of camera settings based on these decisions and on the situation at hand.

See the Related Posts section just below for links to parts 1 and 2 in this series.  And learn more about how to take control of your camera and the images you create with my Full Stop e-book camera and photography guides.

Full Stop photography e book camera user guide Nikon Canon dSLR

The Difference Between f/4 vs. f/2.8

This weekend I followed my own advice, and rented a lens to try out before deciding whether or not to buy it. As I suggest in my post Why You Shouldn’t Buy the Kit Lens, if you are considering purchasing an expensive lens or want to compare a couple similar lenses to decide which one to go with, rent one or both of them for a day or a weekend, and see how you like using them. Check with camera stores near you, or look into online lens rental sites that mail the lens to you, like LensRentals.com. I went to Calumet to rent, since there is a store near me and it’s pretty cheap for the weekend rate.

(click on any product links in the text to view the lenses on Amazon.com)

I rented the Canon 24-70mm f/2.8L since I’m curious how it compares to the Canon 24-105mm f/4L IS. While they have a similar focal-length range and can each serve as a great walk-around lens for everyday use, they have some differences that make it difficult to choose between the two. The 24-70mm is larger, significantly heavier (2.1 lbs. vs. 1.48 lbs.) and extends externally as you zoom. The 24-105mm has an internal zoom mechanism, and also has image stabilization (IS). But a major difference is the maximum aperture: f/2.8 vs. f/4.

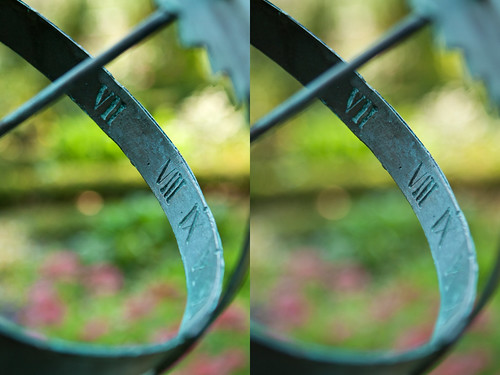
side by side bokeh
click here to view these images larger on Flickr – from the garden at the Longfellow House, Cambridge, MA

The wider maximum aperture of the 24-70mm makes it a “faster” lens, allowing it to be used in lower light, although the IS of the 24-105mm can make up for that shortcoming. Visually, the wider maximum aperture allows for shallower depth of field (dof) which provides more dramatically blurred backgrounds, or bokeh. While I have resisted using the term bokeh in my writing, I can’t really avoid it in this discussion because the difference between f/4 vs. f/2.8 is all in the bokeh. The above image demonstrates what that means. It refers to the “circles of confusion” of the out-of-focus areas of an image – their size, shape, edges, and quality. Both of the images are taken with the 24-70mm lens – at f/4 on the left, and f/2.8 on the right. You can see that while they both demonstrate dramatically shallow depth of field and background blurring, the image taken with the aperture set at f/2.8 shows a smoother blend of the background colors and contrasts. The images are from the garden of the Longfellow House in Cambridge, MA.

When I got my Canon 70-200mm f/4L IS lens, I chose the f/4 version rather than the f/2.8 IS version because it was smaller and significantly lighter, and I knew I would not dread using it on a long day of shooting as I feared I would with the 3.24 pound f/2.8 IS version. Three and a quarter pounds! (According to the Canon website. I’m not sure if that is right – Amazon says it is 2.9 lbs.) Anyway, that kind of weight might be an important consideration for someone traveling with a lens or using it for consecutive full days of shooting. I know it is a consideration for me. So, even though I got the f/4, I’ve wondered what I have been missing image-wise by not being able to open up to f/2.8. So I took these two images with the 24-70mm to see the difference, and it is more considerable than I had thought it would be.

I was very pleased with the 24-70mm. I had been concerned that I would want more range on the telephoto end, and I did end up with a lot of images taken at the 70mm focal length, but I didn’t usually feel like I needed or wanted to zoom in any closer. It really is a great range for everyday use. It is a big lens, but other than the weight, it feels great and is comfortable to use. You can’t deny its image quality, the bokeh is wonderful, but the weight is still a consideration and may dissuade me in the end.

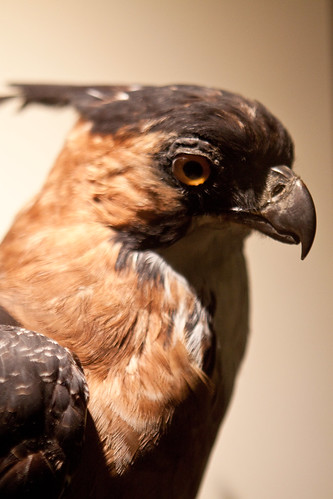
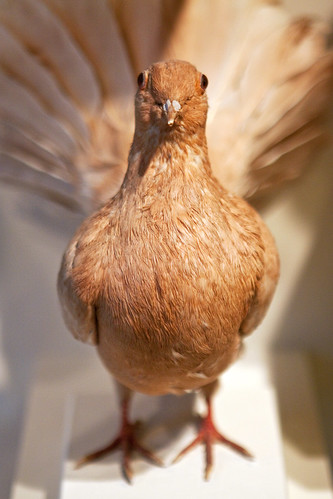
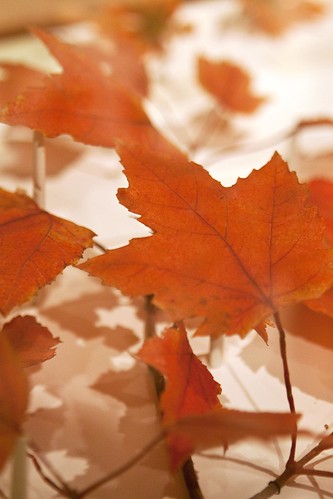
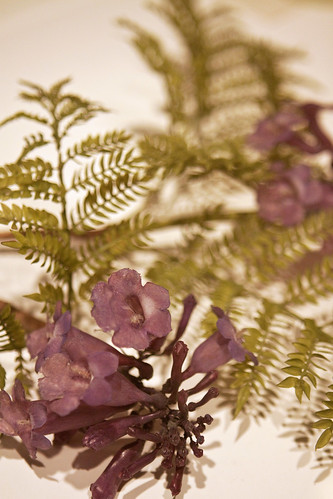
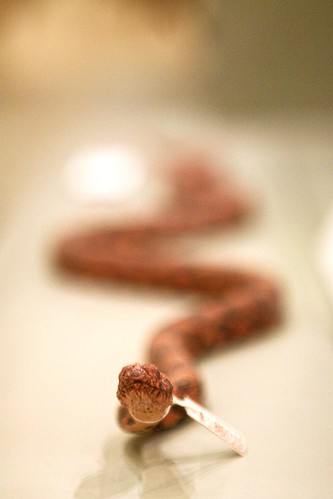
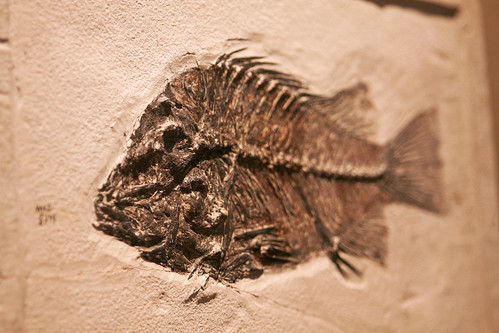
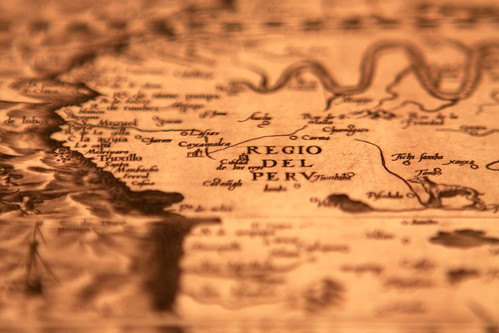
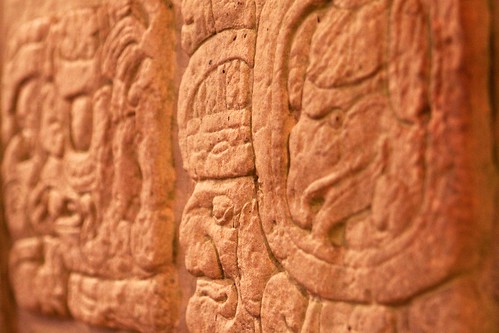
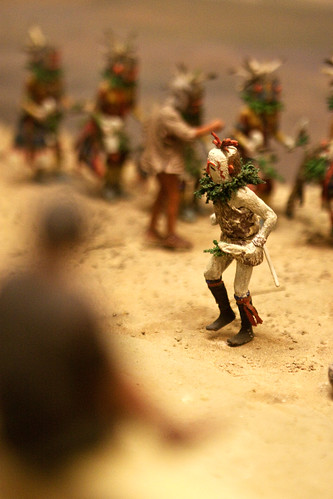
Here is a great site at The-Digital-Picture.com to compare lenses, side by side. You can compare test images taken at various focal lengths and apertures. I will leave all the pixel peeping and debating of the merits of the 24-70mm vs. the 24-105mm to the forums, and just share a few photos I took with the 24-70mm at the Harvard Museum of Natural History and the adjoining Peabody Museum of Archaeology and Ethnology. All the images are hand-held, without flash, in very low lighting. The leaves and flowers in the images below are from the world renowned glass flower collection. Yes, they are made entirely of glass! Even those fall leaves. It is mind boggling, especially when viewing them in person.

If you are considering buying any of these lenses from Amazon.com, please use the links above, and I will get a little something for referring you. Or use this link to go directly to Amazon.com. I appreciate your support!

HMNH cat

HMNH bird-hawk

HMNH bird-dove

HMNH autumn leaves
glass leaves above, glass flowers below. yes 100% made of glass!
HMNH purple flowers

HMNH snake

HMNH fish fossil

HMNH Peru map

HMNH Mayan stones

HMNH Indian diorama

HMNH Indian diorama 2

Fixed Aperture vs. Variable Aperture Lenses

I responded to a comment on one of my posts, and my response ended up being the size of a blog post, so I’m just going to turn it into one! Please note that the title of this post should actually, technically be “Fixed Maximum Aperture vs. Variable Maximum Aperture,” as I will explain in a second.

If you are getting into dSLR cameras and lenses, you may have noticed that some lenses have a fixed maximum aperture, while others have a variable maximum aperture.  This is spelled out in the name of the lens.  For example, the Canon EF-S 17-55mm f/2.8 IS USM lens has a fixed maximum aperture of f/2.8 at all focal lengths, while the Canon EF 28-135mm f/3.5-5.6 IS USM has a variable maximum aperture which ranges from f/3.5 to f/5.6, depending on which focal length you are using.  (the EF vs. EF-S means that EF lenses can be used on any Canon dSLR, while EF-S lenses are designed for, and can only be used on Canon dSLRs with 1.6x cropped sensors, including all Rebels, 50D, 60D, 7D, T2i/550D, but not the full frame 5D.  IS means image stabilization.  USM means ultrasonic motor, and means the lens has a high quality, rapid, and quiet motor for auto focusing.) The term fixed aperture usually does not mean that the lens only has one aperture setting you can use, but rather that is a common way of saying it has a fixed maximum aperture. So you can change the aperture of a “fixed aperture” lens and set it anywhere from its maximum aperture, possibly f/2.8, to its minimum aperture, perhaps f/32.

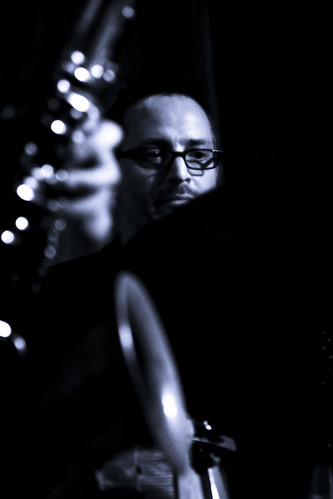
Barbes drummer face
Barbes, Brooklyn, NY

With variable aperture lenses, the largest, maximum aperture you can choose when you zoom to the telephoto end will not be as wide open as the largest aperture you can choose at the wide angle end. For example with the 28-135mm f/3.5-5.6, with the lens set at the focal length of 28mm (the wide end), you can use the f/3.5 aperture setting. But with the lens zoomed to 135mm, the widest aperture you can use is f/5.6. This will slightly affect the amount of background blurring – or foreground blurring in the image above, and will decrease the amount of light entering the lens.  Wider, larger apertures like f/2.8 or f/3.5 blur the background the most, which helps to create dramatic images.  The reason not all lenses have fixed apertures is that they require more sophisticated internal parts and mechanisms, such as more lens elements, which thus makes them very expensive (and heavy), so variable aperture is a compromise in order to offer more reasonably priced lenses.

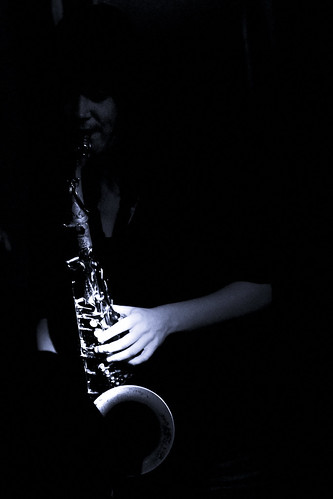
Barbes sax hands
Barbes, Brooklyn, NY

Also, the wider apertures (f/2.8, f/4) are best for low light situations because they allow more light to enter the camera and thus allow you to select a fast shutter speed that won’t blur the image while hand-holding the camera. If you are typically working outside, this shouldn’t be too much of a concern, but if you work indoors or in low light, lenses with wide apertures like f/2.8 or f/1.4 are desirable.

Now, why is f/2.8 called a large aperture and f/22 a small aperture?  2.8 seems like a smaller number than 22, right?  No, f/2.8 and f/22 are fractions.  So if f were to equal 1, a slice of pie that is 1/2.8 of the pie is a bigger piece that a slice that is 1/22 of the pie, right?!  So f/2.8 is a large aperture, which means a large opening, which lets in lots of light all at once, but which then causes objects not in the plane of focus, such as the background, to be blurry.  f/22 is a small aperture, a small opening which lets in just a little light.  But everything from near to far is in focus, like when you squint to see a street sign clearer!  (The letter f in the fraction stands for the focal length of the lens.)

Please leave a comment, ask a question.  Let me know what has been helpful, and what you’d like to read more about.

For additional posts about lenses see Best Lenses for Travel and Humanitarian Photography and Why You Shouldn’t Buy the Kit Lens.

Purchasing: If you plan to purchase any of this equipment, I encourage you to do so by clicking on the links of the lenses listed above, which will take you to that page on Amazon.com. Or go directly to Amazon using this link or click on the Amazon logo below. If you purchase through these links, Amazon will give me a little something for the referral, which will help support my blog. Thanks, I appreciate your support!
Amazon.com

If you are in the UK, you can click here for the UK Amazon referral link.

For those interested in purchasing through B&H Photo, Adorama, or directly from Canon, I have set up affiliate links with them as well – find them on the left site of this page.

Depth of Field Simplified

I’ve noticed that a lot of searches regarding depth of field (and how to use your aperture to create a blurred or blurry background in your photos, or what is called bokeh) have led to my blog.  I’ve also received some good follow up questions from my previous post about depth of field.  Unfortunately, my post on Mastering Depth of Field may be a bit advanced for those who are still learning about how to use their digital SLR, as it is intended for more experienced photographers.

As I explained in that post:

“depth of field is…the range of distances in which the objects in the photograph will be acceptably sharp. For example, if I am using a 100mm lens, set my aperture at f/5.6, and focus on a subject 10 feet away, everything from 9.69′ to 10.3′ away from me will be acceptably sharp or in focus in the resulting image.”


Open Windows, San Miguel Duenas, Guatemala

Depth of field, then, can mean that everything is in focus from a few feet away to infinity (deep depth of field), or it can mean that a person’s eyes and nose are in focus, but their ears and hair and everything behind (and in front) of them is blurry (shallow depth of field).  One of the best ways to make use of depth of field is to create dramatic, shallow depth of field – the subject is in focus, but the background is blurry.  This technique helps to call attention to your intended subject and minimize distracting background elements, and to make your photos look much, much more like those of the pros.

All of the numbers and fractions and settings and seemingly reverse logic are intimidating at first, and most books add to the complication and confusion.  But it is really quite simple.  Depth of field is controlled by the aperture.  A small aperture size (which is an aperture number like f/16 or f/22) will create deep depth of field, with everything in focus.  A large aperture size (which is an aperture number like f/2.8 or f/4) will create a shallow, dramatic depth of field.  (Since “f/number” is a fraction, f/16 is a smaller number and size than f/4, so I’m avoiding using small number vs. large number terminology, as I said I would try to keep this from becoming too confusing…)   So here is the quick and simple way to create dramatic depth of field:


Open Windows, San Miguel Duenas, Guatemala

Set your camera on Aperture Priority Mode.  On a Canon, rotate the mode dial to Av, on Nikon set the dial to A.

Set your camera to Auto ISO.  Or else if you wish to control the ISO, if you are indoors or in dim light without a flash, set it to 800 or 1600 ISO.  If you are outside in bright sun, set it to 100 or 200 ISO.  If it is a bit cloudy or you are in the shade set it to 200 or 400 ISO.

Look in you manual for how to change the aperture setting of the lens.  For a Canon dSLR in Av mode, that means rotate the little finger dial up there by the shutter button.  On a Nikon it means rotate one of the dials at the top right front or back of the camera, depending on your camera and settings.)  Turn the dial until you see f/2.8 or f/4 or f/5.6 on your screen or in the viewfinder. Since you are in Aperture Priority Mode, the camera automatically selects an appropriate shutter speed.  If you’ve selected the ISO yourself, or even if you are using Auto ISO, you may want to verify that an appropriate shutter speed is being selected.  For example, I found that with the Canon 7D, Auto ISO often selects a much slower shutter speed than what is best for a situation.  Press the shutter button half way down and check the shutter speed.  If it is anywhere from 1/100 to 1/250 or higher, you are fine if your subject isn’t moving.  If the subject is moving, make sure the shutter speed is 1/250 to 1/1000.  If it is any higher or lower than the range you want, you should adjust the ISO until the shutter speed it falls into that range (raise the ISO, keep the aperture the same, and this should result in the camera selecting a faster shutter speed setting).

Focus on your subject using the focus mode of your choice, and take the photo.  Preferably, use single point focus mode and select the focus point you want, so that you have complete control over where the camera focuses.  If the subject is a person or animal, focus on the eyes or eyebrows.  If it is something else, focus on what you want to be sharpest in the photo.

A good book to read to continue learning about this is Understanding Exposure by Bryan Peterson (Third Edition).  Click on the link to see it on Amazon.  It is geared towards photographers just learning about apertures, shutter speeds, and ISO, and helps to explain the concepts better than most other guides.

Let me know how the photos come out! Note in the first photo above that dramatic depth of field can be used to make the foreground blurry as well, not just the background.

Continue reading Mastering Depth of Field.

Mastering Depth of Field

(for a related post, see Depth of Field Simplified)

I recently came across an excellent website regarding depth of field (dof), including a handy online calculator for determining dof based on the focal length of the lens, the aperture, and distance from the subject. It even takes into account different sensor sizes, including the APS-C size sensor of the Canon 7D. You can also view and print dof tables as well as create, print, and assemble a field dof calculator based on focal lengths of your choosing. And if you have an iPhone, there is an app for that!  Have a look at the DOFMaster depth of field app.


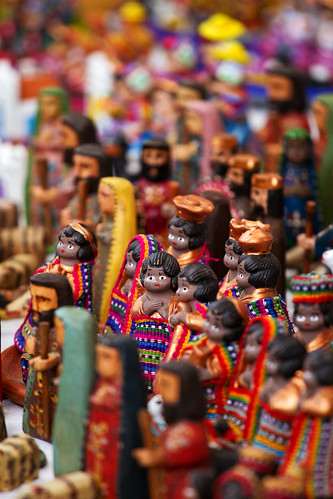
Chichicastenango Market, Guatemala – 200mm, f/4, subject distance 2.7m
One figurine in focus, surrounding figurines dramatically out of focus – achieved by standing close, zooming way in and choosing wide aperture

Why is this all important? Well first, if you aren’t familiar with what depth of field is, it is the range of distances in which the objects in the photograph will be acceptably sharp. For example, if I am using a 100mm lens, set my aperture at f/5.6, and focus on a subject 10 feet away, everything from 9.69′ to 10.3′ away from me will be acceptably sharp or in focus in the resulting image. If none of this is clear to you, or only partially understood, then go out and read Bryan Peterson’s Understanding Exposure first, and then come back to rejoin us. It is a bit complicated and difficult at first, but if explained properly – as he will do better than I could – it will soon click. Also, I have posted a simplified explanation and quick and easy lesson for using dramatic depth of field here.

So, according to George Schaub in Using Your Digital Camera (I have no idea who this is, but borrowed the quote from the above website) “(Depth of field) is one of the most creative and profound effects available to photographers.” I absolutely agree with this. My photography improved 2000%, virtually overnight, when I understood and began to use the creative and visual power of dof. And this is why I shoot on Aperture Priority Mode (Av) 98.5% of the time.

I don’t want to go into the technical aspects of dof, and it can get extremely technical, but I will touch on some of the practical aspects of it. The ability to control dof is one of the many advantages of a digital SLR vs. a digital compact camera. Due to the small focal length, small sensor, and limited aperture sizes, a compact can typically not create the dramatic dof available to a dSLR user. And if one has a super-zoom type camera that will allow better use of dof, the controls to utilize it may be more cumbersome that with a dSLR.


Chichicastenango Market, Guatemala – 200mm, f/4, subject distance 7.4m (image cropped)
Man in focus, surrounding people slightly out of focus – achieved by being a few dozen feet away, zooming all the way in with 200mm, wide aperture

So why does one utilize dof? One reason is to better call attention to, or even isolate the intended subject of your photograph. When looking at an image, the eye tends to first go to what is sharply in focus as well as to what is lighter. If it is a busy scene with lots of possible subjects, the eye wanders aimlessly around all parts of the photo, and won’t necessarily focus on the subject you intended them to look at. By placing your intended subject in sharp focus, and the background and other elements out of focus to a lesser or greater degree, the viewer zeros in on what you intended them to. It can also be used to create various relationships between your subject and their environment or between your subject and other subjects in the frame. For example, a person who is your subject could be in sharp focus, while the background or elements around them are very much out of focus. This visually draws the subject out and leads the viewer to see this person as the sole subject of the photo. However, if the background or surrounding elements were just slightly out of focus, the viewer then sees the person as well as their surroundings, and starts to consider the relationships between them. By manipulating dof, you can work towards suggesting, defining and creating these types of relationships in your compositions.


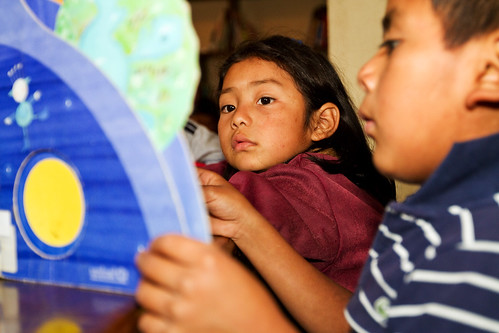
San Miguel Duenas, Guatemala – 97mm, f/4, subject distance 3.3m
Girl in focus, boy and background environment (their home) slightly out of focus – achieved by standing a dozen feet away or so, zooming in to 97mm, wide aperture

And why does one need the dof calculators? Since dof varies so widely depending on the lens being used, the distance to the subject, and the aperture, it is difficult to know precisely what distance range is going to be in focus. One can use the dof preview button on the camera, but it is often difficult to determine through the viewfinder what the dof will be. So with the dof calculator, you can plug in various numbers and learn how a certain lens is going to act in a particular situation. Then, by using your lenses often, and experimenting with various apertures and various camera-to-subject distances, one can begin to get an intuitive feel for how each lens works, and how dramatically different a 16mm at f/4 aperture is from a 200mm at f/4 aperture. And when you are in a situation that allows it, you can pull out your iPhone or your field calculator, and determine a precise dof in advance.


Antigua, Guatemala – 127mm, f/5, subject distance 5.3m
Woman in focus, statue on distant church facade out of focus yet recognizable – achieved by standing a few dozen feet away, zooming in to 127mm, wide but not widest aperture

I like using a very wide aperture (like f/4 or f/5.6) to create very shallow, dramatic dof in many of my images. However, I typically don’t want it to be so shallow that a person’s nose is in focus and their ear is out of focus (though this is a dramatic and sometimes desired portrait “trick”). Also, when photographing action, such as dance, I want a little leeway so that if I focus on a hat instead of a face, or if the person moves forward a bit, there is a enough dof that their face will still be in focus. And this is why I originally began to search for depth of field tables, so I could better understand how my lenses were going to respond in certain situations.

Now, as a little, technical side note, I was always taught in school to be aware of the 1/3 – 2/3 rule which says that 1/3 of the in-focus area will be in front of the spot where you focus, and 2/3 will be behind it. So if you were standing at the front of a row of people, and turned back around to look down the line and take a photo, and focused on the 8th guy in line, this rule says that perhaps (due to your particular lens/ aperture/ distance choice) one person in front of him will be in focus too, and 2 people behind him will be. It turns out, this really isn’t accurate at all. Most often it is closer to 1/2 the distance in front of the focus spot and 1/2 behind it. I have no idea why they taught us 1/3 – 2/3.