The First Nikon D850 guide, Now Available!

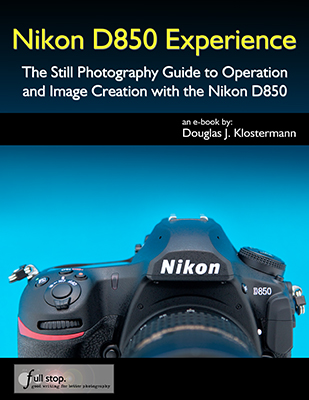
Nikon D850 Experience, my latest Full Stop e book and the first D850 user’s guide, is now available! This e book goes beyond the manual to help you learn the features, settings, and controls of the powerful, versatile, and highly customizable Nikon D850. Plus most importantly it explains how, when, and why to use the functions, settings, menu options, and controls in your photography – including the sophisticated autofocus system with its Group-Area AF mode, the Highlight-Weighted metering mode, the touch screen, customizable buttons and Sub-Selector control, plus UHD 4K video and several video improvements. It covers the new features of the camera such as Focus Shift Shooting for focus stacking, Negative Digitizer for creating positive images from film negatives, Bluetooth connection via Nikon’s SnapBridge app, and completely silent shooting modes.

Nikon D850 Experience book manual how how to use tips tricks

Written in the clear, concise, and comprehensive style of all Full Stop dSLR guides, Nikon D850 Experience will help you learn to use your full-frame D850 quickly and competently, to consistently make the types of images you desire. This e-book is available in either PDF or EPUB format for reading on your computer, tablet, iPad, e-reader, etc.

As one reader has said about Full Stop guides,

“I don’t know how I could fully take advantage of all the features the camera has to offer without this publication! It’s well-organized, easy to understand, and succinct enough to keep your attention while still containing a wealth of information to get the most out of your camera.”

Take Control of your Nikon D850 with this Clear and Comprehensive User Guide!

E-Book Format: Available in two instant-download formats to choose from. (Learn more about the differences of these two formats, later on this page).

Buy Now with PayPal or Credit Card!

Buy Now with PayPal or Credit Card!

This guide is designed for both intermediate and experienced photographers:

For Intermediate / Enthusiast Photographers: This instant download Nikon D850 Experience user guide is designed to help you take fuller advantage of the capabilities of your camera. It covers standard dSLR camera functions and exposure concepts for those learning digital SLR photography, and explains more advanced camera controls and operations for experienced enthusiasts.

-Go beyond Program mode and shoot competently in A, S, and M shooting modes.

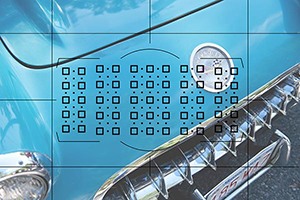
-Take full advantage of the sophisticated 153 point autofocus system and its Focus modes, AF-area modes, and Custom Settings – for sharp focus of still or moving subjects.

-Set up your camera with clear explanations and recommended settings for all Menu options and Custom Settings of the D850.

-Learn how, when, and why to use and customize the controls, buttons, touch screen, and features of the D850 to best fit your shooting needs.

-Understand the various metering modes, exposure compensation, and exposure lock for correct exposure of every image, even in challenging lighting situations.

  

For Experienced Photographers coming to the D850 from previous Nikon models, this Nikon D850 Experience user guide explains the new and advanced features in order to quickly get you up and running and taking advantage of these capabilities, including the advanced 153-point Autofocus System and all its AF Modes, AF-Area Modes, and Custom Settings, for capturing both still and moving subjects. It also covers back-button focusing and trap focus techniques with the D850, the Group-Area AF mode, and newly added subject-tracking parameters. Plus it explains the camera controls and how to customize them for your shooting needs, features such as Highlight-Weighted Metering Mode, Focus Shift Shooting, Negative Digitizer, and the HDR, Multiple Exposure, and Time-Lapse Shooting features.

The guide also introduces the HD and 4K UHD video features and settings, and guides you through all the Playback, Shooting, and Setup Menus, Custom Settings, and Movie Mode Menu settings of the D850 in order to help you best set up the camera and its controls for your specific shooting needs, and includes the helpful, comprehensive Nikon D850 Menu Setup Spreadsheet created by the author.

You can preview Nikon D850 Experience user guide at the following link. The preview shows the complete Table of Contents and excerpts from the Introduction, Menu Settings section, Custom Settings section, and Autofocus section.

IMPORTANT NOTE to Mozilla Firefox browser users: the current built-in PDF viewer in Firefox may not work well and may cause the PDF preview to appear in a low resolution. Please download and/ or view the PDF preview with Adobe Acrobat Reader to see the proper, full resolution.

Click here to Preview Nikon D850 Experience
   Nikon D850 Experience book manual guide

Nikon D850 Experience not only covers the various settings, functions and controls of the Nikon D850, but most importantly it also explains when and why to use them for your photography. The guide focuses on still-photography with an introduction to the movie functions, settings, and menus to get you up and running with HD and 4K UHD video. Sections include:

-Setting Up Your D850 – All of the D850 Custom Settings and Playback, Shooting, and Setup Menus, including Movie Mode Menus, with explanations and recommended settings for practical, everyday use. Set up and customize the advanced features of your dSLR to work best for the way you photograph. Plus a free link to the D850 Menu Setup Spreadsheet for assistance and reference.

-Aperture Priority (A), Shutter Priority (S), and Manual (M) Modes – How and when to use them to create dramatic depth of field, freeze or express motion, or take total control over exposure settings.

-Auto Focusing Modes and Area Modes and Release (Drive) Modes – The new 153-point D850 autofocus system is a powerful tool, and taking control of it will enable you to successfully capture more sharp images, in both still and action situations. Learn the AF Modes, AF Area Modes, and AF Custom Settings including the subject-tracking options, how they differ, how and when to take advantage of them to capture both still and moving subjects. Plus how and when to use focus lock and back-button focusing.

-Exposure Metering Modes of the Nikon D850 – How they differ, including the new Highlight-Weighted Metering Mode, how and when to use them for correct exposures in every situation, and how to customize them for your needs. Plus how to make use of exposure lock.

-Histograms, Exposure Compensation, Bracketing, and White Balance – Understanding and using these features for adjusting to the proper exposure in challenging lighting situations, and customizing the controls for easy access to these features. Plus making use of the new Auto White Balance options, and setting a custom white balance.

-The Image Taking Process – Descriptive tutorials for using the settings and controls you just learned to take photos of both still and moving subjects.

-Introduction to Video Settings – Settings and explanations to get you started shooting HD and 4K UHD video.

-Photography Accessories – The most useful accessories, including those specific to the D850.

-Lenses – Nikon (Nikkor) lenses compatibility with the D850, and explanations of Nikon lens notations.

-Composition – Tips, techniques, and explanations, including the creative use of depth of field.

  

This 465 page Nikon D850 Experience user guide is a digital e-book, illustrated with over 350 images, diagrams, and screen shots. It goes beyond the manual to clearly explain how, when, and why to use the features, settings, and controls of the Nikon D850 to help you get the most from your camera.

Title: Nikon D850 Experience
Author:
Douglas Klostermann
Page Count: 465 pages, illustrated
Price: $14.99 – Now Available!
E-Book Format:
Available in two instant-download formats to choose from:

Buy Now with PayPal or Credit Card! PDF format for reading on your computer or printing on your printer using the latest version of Adobe Reader. Or transferring and reading on some e-readers and most tablet devices. PDF is the most versatile format. Instructions for transferring a PDF to an iPad or e-reader device are on the FAQ Page. (Please note that the PDF security settings may prevent transfer to a Kindle or Playbook. Please contact me for a MOBI or EPUB version if you encounter this issue with your PDF on your e-reader device/ tablet.)

Buy Now with PayPal or Credit Card!EPUB format for reading on a Nook, Sony Reader, other e-reader device, or on the iPad using iBooks. Or on an Android tablet (Galaxy, Xoom, Playbook, etc.) using an ePub reader app such as the free OverDrive Media Console. Or viewing on your computer with free Adobe Digital Editions software. (EPUB not able to be printed on your printer.) If you are unable to transfer or read the EPUB on your Kindle, please contact me for a MOBI format version of the book.

MOBI format for Kindle – please contact me.

Over 95,000 readers in more than 75 countries are taking control of their cameras and improving their photography with Full Stop e book camera guides!

 

What Readers are Saying about Doug’s previous guides, including Nikon D750 Experience and Nikon D7100 Experience:

A well written, professional helpful guide – Brilliant, just what I was looking for! A manual that was exciting, clear to follow, had examples and was used by a professional who gave just the right amount of technical info with explanations of why you use those settings, when to use those settings and so on, all properly explained. The book is a revelation, a joy to follow, well thought through and well written. Nikon should be employing Doug to write every one of their cameras manuals.
-R.D.C.

All You Need – This book, together with the manual that came with your camera, is all you need to start discovering the full potential of the camera.
-Max M.

It is like I have a personal instructor on-call! I have learned so much about this dSLR and continue to learn more each time I review various sections.
-John C.

Excellent. I use this book the most! I bought several books, paperback and Kindle, after buying the D750 and have noticed I use this book by far the most. I recommend this book without reservation.
-D. Cardona

Really practical and tremendously helpful. Readers of this e-book can expect to benefit from a more rewarding photographic experience using this superb camera, and be better able to exploit its potential to match their personal objectives and photographic style. Highly recommended.
-M.M.

This manual is a clearly written, concise and useful explanation of the rationale for the seemingly infinite and often confusing settings options for the camera. Used in conjunction with the Nikon manual I feel more confident in understanding how to at last proceed in getting better photographs.
-W.L.S.

This is the most helpful manual I’ve ever used. There is no comparison to the book Nikon includes with the camera, this book outshines it completely. No serious user should be without this. I find myself referring back to this book quite often and find it very easy to find what I need and even easier to understand.
-S.B.

Better Than the Manual – Douglas Klostermann has done a great job of not only producing a very accessible guide but he also offers very useful and sensible suggestions for getting the best results from the camera. Reading the guide was like one photographer talking to another. Thanks Doug.
-Malcolm

I would recommend this to anyone who wants to get a quick start to using the camera. Manuals are nice, but this eBook highlights the important information and gives a quick, easy to understand explanation of most all of the functions and controls.
-Ray M.

It’s clear, concise and gets to the heart of the camera’s multiple and often confusing options. Very highly recommended – for experienced user and beginner alike.
-G.S.A.

Amazing – Mr. Klostermann has done an amazing job with this book. He’s outlined every detail, option, feature, and use of this camera possible, and actually surpasses the expectations of use of the camera. I moved from an old SLR to a modern full frame digital SLR, and found it to be more than I expected. This book really helped me come more to grips on what I was doing wrong. Not to mention the fact that this book, at the price you pay, is a steal. If you have a Nikon, I HIGHLY recommend you buy this book!!!
-Jacob King

Valuable Resource and Time Saver – If you’re contemplating purchasing this book I would recommend doing so without hesitation. Not only are the explanations behind the individual settings enlightening but the general theory on auto-focus and its associated uses is among some of the easiest to understand that I’ve come across. Definitely a good investment. As a result of his thoroughness, my confidence in being able to use a new piece of equipment soared. Additionally, the time required to figure out the differences between my previous camera and my new purchase was reduced sharply.
-Bryan L.

Really focuses on the WHY – I found the Nikon manual good for understanding how to set things up but not much on the why – this book really focuses on the WHY. The guide helped me understand why to use specific settings for specific needs. The Custom Settings sections helps to make firm decisions on how to apply settings by understanding the usage of each in addition to knowing how to set them up.
-Benoit A.

More than a Guide – I am a passionate photographer and cinematographer. Not only did I find Doug Klostermann’s guide well written and informative, but I really enjoyed the manner in which he shared his image-making philosophy. This is much more than a camera guide and I really appreciate the links to other authors found throughout the text as well as the chapter on suggested photography accessories.
Simon Wilkie

A Very Easy to Read but Detailed Guide – I have just bought this camera, and whilst I have been using digital SLRs for years i realize that I am not really getting the full potential out of all those buttons. Now I understand and use them.
-G.F.

Great Source of Information! – I have been a Nikon user for decades and was of the view that I was very knowledgeable about these products. Still, once I started working with the camera I concluded that there was a good deal that was still to be learned. This book provided me with the information required, and has proven to be a very valuable resource: well set out, a comprehensive Table of Contents, and well written. The personal preferences and setting recommendations are most helpful. Job well done!
-T. E. Valentine

Hands On Review of the Nikon D5200 for dSLR Video

I was recently conversing with one of my readers – a Nikon D5200 user who was putting the camera through its paces for professional-level video shooting. He has given the camera a thorough field test, so I asked him to put together a review and a tutorial of the camera in regards to its video performance. So for today’s guest post, I introduce:

by Steve MacDonald of 5dhdvideo
I have recently put the Nikon D5200 through its video capability paces, in a couple of different shooting scenarios.  Scenario one was a bright sunny outdoor situation with mixtures of heavy sunlight and shaded areas, and the second was an indoor, controlled lighting situation.

Scenario one was tested with a Nikon 17-55mm f2.8 making use of a Schneider 4×4 polarizer and Schneider 4×4 1.6 graduated ND filters. Mind you, these are probably the harshest video acquisition lighting conditions.

Nikon D5200 video dslr manual movie mode
Still from dSLR video taken with the Nikon D5200, by Steve MacDonald

One of the biggest challenges of shooting with any dSLR camera is setting critical focus. One camera feature that can help is a really decent LCD screen. I found the Nikon D5200 screen to be less the stellar, but I suppose that is to be expected from a mid-level consumer camera. Using a Hoodman loupe on the back of this unit, at first, I thought the inability to see a somewhat sharp image was the kit lens. But even with a very expensive Nikon 17-55mm f2.8 zoom lens, manually achieving critical focus was challenging. Using the cameras focus assist the image never really seemed all that sharp, so it’s was a guessing game of finding what would be the sharpest focus point. I quickly abandoned using the LCD for critical focusing and used the cameras viewfinder with a right-angle viewer by Seagull. This worked much better, but it’s something I’m not used to, having come from shooting with many Canon DSLR models.

I decided to give auto-focusing a try, since, a lot of my shots that day were stationary subjects – and that feature seemed to be dead on. The only downside to using this is that in certain lighting situation, the Nikon will throw a beam of light from the AF-Assist Illuminator. Not a big deal, untill you realize the AF-Assist Illuminator is eating into your battery faster than you can imagine.  (Note – you can turn off the Built-in AF-Assist Illuminator using Custom Setting a3.) The battery life of the EN EL14 has already been documented as being less than adequate, which I can confirm.

Nikon D5200 video dslr manual movie mode
Still from dSLR video taken with the Nikon D5200, by Steve MacDonald

Another quirk I found with this Nikon is discrepancies between metering in the viewfinder then switching back to live view. Many times after setting a dead zero meter in the viewfinder and not moving anything, switching back to live view, could at times , show an almost full stop difference. Switching metering methods didn’t seem to change the situation.

We’re all familiar with the nagging Nikon situation of having to come out of live view to change aperture settings, which is indeed a pain, but what I didn’t realize is if you keep the camera pointed at your subject, it will meter that subject in live view. This brings me to the subject of trying to run and gun with this camera: in two words, very difficult. The reason being is having to come out of live view to change the aperture, making a moving subject next to impossible to keep properly exposed. The way around this is to buy manual lenses with the aperture on the barrel and not controlled by the camera. Or, one would think that is a viable work around – not so. Nikon has further limited video functions on this camera by not offering any metering with a manual lens attached, which in my opinion renders this camera far less than ideal from a professional video acquisition standpoint. (Note: the Nikon D7100 and D7000 offers the ability to register non-CPU lenses in the camera, thus allowing access to additional functions including color-matrix metering – though they suggest you make use of Center-Weighted or Spot Metering in these situations.  The D7100 and D7000 also offer the ability to assign aperture selection to the aperture ring on lenses which have this ring, thus allowing aperture change while shooting video.)

Nikon D5200 video dslr manual movie mode
Still from dSLR video taken with the Nikon D5200, by Steve MacDonald

It goes without saying, for professional use an EVF (electronic viewfinder / monitor), such as the SmallHD DP4 EVF, is pretty much a must with any DSLR. False color, peaking, and many other features they offer make for a better user experience.  Sure, you could rely on an EVF to set proper exposure levels with a manual lens attached to the D5200, but you’re going to pay a grand for a good one.

The indoor shooting scenario was a two camera interview situation, with the other camera being a Canon T3i. One feature I really liked was Nikon’s ability to tweak the White Balance presets in movie mode, in order to dial in a match between the two cameras. The picture quality of the Nikon looks very good, and the ability to output a clean HDMI will no doubt attract many. Shooting the indoor scenario was much easier, although none of the issues mentioned above disappeared.

At the end of the day, my take on this camera is that it just isn’t full equipped for demanding or professional-level videography. It takes fantastic still images, since as with any of these dSLRs, that is their main function. While its video capabilities and performance may fulfill the needs of a casual video user, there are just too many roadblocks with this camera to make it a sensible choice when it comes to professional video work. One should instead consider the additional video capabilities of the D7000 or D7100, which both improve upon some of these video shortcomings of the D5200.

Nikon D5200 video dslr manual movie mode
Still from dSLR video taken with the Nikon D5200, by Steve MacDonald

Manual exposure and white balance for the videographer with the Nikon D5200

Although the Nikon D5200 has the quirk of having to come out of live view to change aperture, and the fact it won’t meter a manual lens, this section of the article focuses on methods to help you gain proper exposure for shooting video.

Recently, I purchased two Rokinon Cine Lenses for the D5200, knowing full well the camera would not meter these lenses. If you don’t know what that means, basically, the built in light meter of the D5200 will not give you a reading with these lenses or any manual lens. My main reasons for buying these manual lenses was to avoid having to come out of live view to change the aperture, not to mention, for the price, these are great prime lenses!

So my quest after buying these Rokinon’s was to find a way to get a proper exposure, without having to resort to buying a light meter. Don’t get me wrong, having a light meter is well worth having,  but I just spent a chunk on these lenses, so that’ll have to wait. What I did buy was a Photovision one-shot target.  Targets are used to set 18% gray level, but with this particular target, it also has a white and black section outside the middle gray, so in essence, it sets your highlight and black level as well. The target works by first lighting your scene, then setting the target in front of that scene and taking a photo of the target.  You’ll want to make sure the white side of the target is towards the key light of your scene, and that the entire target is filling your screen with the white, gray, and black columns in sharp focus.  You’ll also want to make sure your shutter speed and ISO are set for your video shoot at hand. Next, set your D5200 play back display options by accessing the menu, highlighting the display icon, top icon on the left, then making sure all those options have a check mark beside them. Now, hit your playback button and bring up that photo of the target.

By clicking on the bottom portion of the multi-selector you can scroll through the various information provided for that particular photo. What you’re looking for is the histogram display. This histogram display will show you three distinct spikes. The left most spike being the black level, the middle gray, and the far right spike is your highlight. It’s this highlight we want to set so that it’s not clipping.  Clipping would have the far right spike at or very near the far right side of the histogram. Now, by adjusting your f-stop (aperture setting) for subtle changes in exposure, and taking a photo of the target after each f-stop adjustment, you’ll be able to view that photo in playback and determine if that exposure gives you the proper histogram.

After determining which histogram suits your best exposure, you’ll want to set that target photo as a custom white balance within your D5200.  Note: although by default the camera sets the last photo you’ve taken as your white balance, I choose to select the photo just to make sure its definitely the right one. You’ve now not only set a proper white balance, but you’ve also set an exposure level. One thing to keep in mind is that you need to light your scene for proper levels because the target has no idea how light or dark your subject is, it only reflects what lights you’ve set up for a particular scene.

Now, with all that being said, this target wouldn’t work in a run and gun situation, it would just take way to much time. For these types of situations, you can still utilize the histogram feature of the D5200 to get a proper exposure. To do that, set your f-stop (aperture), take a photo of your scene, review that photo and look at your histogram. If the highlights are slammed against the right side, lower your f-stop (aperture), take another photo and review it’s histogram reading.  The advantage of using the histogram in this manner, is that you’ll soon recognize what’s over exposed just by viewing it in the LCD, because you’ve been in these situations enough times and have looked at enough histograms to know what’s over exposed just from viewing your scene from the LCD.Utilizing the one-shot target, as well as, learning to read your histograms will give you a big advantage in gaining proper exposures with your Nikon D5200.

Introduction to the Canon Rebel T4i / 650D

Canon Rebel T4i / EOS 650D:

(After learning about the features of the new T4i here, see this other post for a comparison of the Canon Rebel T4i vs. EOS 60D)

Each year as Canon updates its high end Rebel (or xxxD) model, they borrow additional features from their more advanced (and more expensive) dSLR cameras, resulting in higher and higher quality consumer models that incorporate previous “pro” and “pro-sumer” features. The T2i then T3i added the improved 63 zone exposure metering system, 18 megapixel sensor, wireless controlled external flash, and full HD video of the pro-sumer models, plus threw in some additional menu items, custom function options, and in-camera processing features that were lacking in previous Rebels.

Canon Rebel T4i EOS 650D features compare
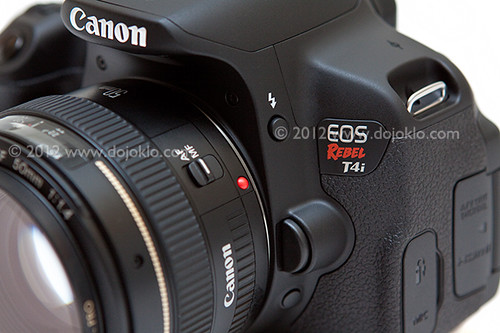
The Canon Rebel T4i / EOS 650D (image by the author)

Trickle-Down Features: The new Canon Rebel T4i / 650D demonstrates a significant leap in this “trickle-down” trend by taking the all-cross-type 9 point autofocus system and faster continuous shooting speed from the 60D and introducing these to the Rebel line. Although these previous omissions were seemingly necessary to differentiate the Rebels from the mid-level 50D/ 60D line, they resulted in two of the few but important “shortcomings” of the Rebels: they always had a less precise autofocus system with only one cross-type AF point (the center one), and a slower frames-per-second maximum continuous shooting speed. (Learn more about why cross-type points are so great just below.) Now with these improved features, the differences between the T4i and the mid-level 60D have been significantly reduced. (The 60D still offers additional external buttons and controls, slightly more rugged build and weatherproofing, and additional Custom Function options.)

All New LCD and Movie Focus: In addition, the T4i adds a first for a Canon dSLR: a touch-screen LCD that can be used for settings selection, image review, menu navigation, and even autofocusing or shutter release in Live View. Plus it offers a totally revamped hybrid autofocus system for Live View and Movie shooting that makes use of phase detection and contrast detect, allowing for another Canon dSLR first: continuous autofocus during Live View and Movie shooting. The phase detection aspect of the new AF system allows the camera to determine both the out-of-focus distance and the direction in which to correct, finally eliminating the slow and awkward focus hunting of previous models. Add one of the new “step motor” STM lenses such as the 18-135mm kit lens or the 40mm “pancake” and the lens will now silently focus during movie shooting, thus eliminating the autofocus motor noise previously picked up by the camera’s microphone. (Did I mention the built-in mic is now a stereo mic! And there is a stereo mic input jack.) Plus the image stabilization of the 18-135mm EF-S IS STM lens is designed to counteract camera shake caused by walking while shooting video.

Canon T4i EOS 650D Rebel T3i autofocus viewfinder 9 point cross type
Simulated view of the Canon T3i/ T4i viewfinder with 9 autofocus (AF) points. (Image by author)

All Cross-Type AF Points:  Cross-type autofocus points are more accurate and more desired because they can grab focus on a wider range of subjects. If your non-cross-type point is oriented only in the vertical direction, and you aim it at a subject displaying a strong line also also in the vertical direction (such as the side of a door frame) it will not be able to detect the line or a change in contrast, and will not be able to focus. Aim it at the strong horizontal line of the top of the door, and it will lock right on. (learn more about autofocus concepts here.)

So the fact that the T4i uses cross-type AF sensors for all 9 AF points means that the autofocus system is significantly more accurate, and you can confidently use not just the center AF point but all the outer points as well to focus on or track a subject. Not to mention that the center AF point is now also an even more accurate diagonal cross-type sensor when using an f/2.8 lens.

Faster Frame Rate: The T4i now boasts a more rapid 5 frames per second maximum continuous shooting speed, and incorporates the speedy Digic 5 processor, narrowing another major difference with the mid-level 60D. These features will allow you to capture quicker shots in a burst thus giving you the greater possibility of capturing just the right moment of action or the best facial expression or pose.

As mentioned, the Canon T4i also finally brings us great quality touch-sensitive (not old-fashioned pressure-sensitive) touch-screen capabilities on a Canon dSLR (with smear-resistance!). You can select and change your settings on the Quick Control Screen (Q Screen) simply by touching your choice, or use it to tell the camera where to focus during Live View shooting. It can also be used to navigate the menus, and during image playback you can easily swipe and zoom with iPhone-like multi-touch motions and response. Early reports indicate that the screen responds incredibly well, and the graphic layout of icons and options make it easy to use. This 1 million pixel LCD screen is fully articulating, as with the T3i and 60D.

New Live View/ Movie AF Modes: So in addition to the upgraded AF system during stills shooting, Canon has modified the Live View and Movie Shooting autofocus system, which now offers Face Detection+Tracking, FlexiZone-Multi, and FlexiZone-Single AF modes rather than the previous Quick, Live, and Face AF Modes. Quick Mode AF is still also available for Live View shooting. (With Quick Mode you use the 9 auto focus points, similar to the viewfinder AF Points, as displayed on the LCD Monitor. But since the camera is using the autofocus sensor to focus, it momentarily interrupts the Live View on the LCD Monitor when it flips the mirror back down to access the AF sensor.)

All of these features contribute to the T4i / 650D being quite an amazing consumer level camera. In most ways it is a higher-quality, more capable camera that the pro-sumer 50D of just a few years ago, and it will definitely fulfill the needs and expectations of most any enthusiast shooter. The only reasons one would need to step up to the 60D would be if you need more direct access to controls, buttons, and settings on the body of the camera in order to change and adjust settings on the fly, if you needed a slightly more rugged and dust/water-proof body, and wanted greater ability to customize the controls and functions of the camera with its additional Custom Functions.

Borrowing from the 5D MkIII:  The specs also note that due to the faster Digic 5 processor, the T4i has Lens Aberration Correction and Chromatic Aberration Correction features as first seen on the 5D3, as well as a new Ambient Light Correction.

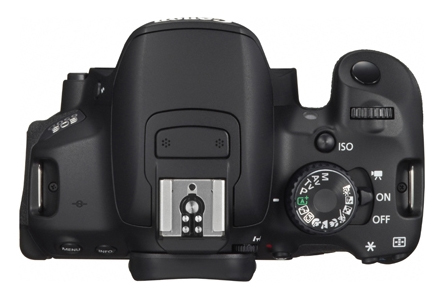
Canon Rebel T4i EOS 650D mode dial
Note the additional Mode Dial options and Power Switch change (Movie Shooting Mode) to the Canon T4i (image courtesy of Canon USA)

Some Extras: And in addition to the standard Creative Zone shooting modes (Av, Tv, P, M) and the Basic Zone modes (Flash Off, Creative Auto, Portrait, Landscape, Close-Up, Sports, Night Portrait) the T4i eliminates the Automatic Depth of Field mode on the dial and adds Night shooting without a tripod and HDR backlight compensation. Movie Shooting mode is removed from the Shooting Mode dial and is added to the On-Off switch. The T4i includes the Auto+ Shooting Mode (Scene Intelligent Auto) introduced on the T3i and even used on the 5D Mark III, where the camera analyzes the specific scene in order to automatically determine the best and most appropriate exposure, white balance, Picture Style, focus, and other settings.

The T4i shares the same battery (the LP-E8) and the same battery grip (the BG-E8) as the T3i and T2i. The fun filter (Creative Filters) effects introduced in the previous models (including Grainy Black and White, Soft Focus, Fish-eye Effect, Toy Camera Effect, Miniature Effect) are all still available, plus a couple new ones such as Water Painting and Art Bold.

Order your T4i from Amazon or B and H Photo today:

(If you plan to purchase the T4i, or any photo equipment or books etc., I encourage you to do so through these referral links. While your price will be the same, they will give me a little something for the referral, which helps to support my blog and my work – thanks!  I appreciate your support!)

Canon T4i from Amazon – body only, 18-55mm kit, or new 18-135mm STM kit

Canon T4i from B&H Photo – body only, 18-55mm kit, or new 18-135mm STM kit


Remember to check out this other post for a comparison of the Canon Rebel T4i vs. EOS 60D.

For a full list of Rebel T4i / EOS 650D specifications and features, have a look here:

http://www.usa.canon.com/cusa/consumer/products/cameras/slr_cameras/eos_rebel_t4i_18_135mm_is_stm_lens_kit#Specifications


Full Manual Exposure Control, Video, Live View, and the D5100

I recently received some interesting questions from two different readers on my posts about the Nikon D5100, Nikon D5100 vs D7000 vs D90 etc. and Nikon D5100 vs. Canon T3i.  Both questions point out interesting issues with the Nikon D5100 that may be important considerations if your shooting needs required these functions, or that might not affect you and your shooting at all if, like me, you never use manual exposure control in video and/ or you don’t use Live View (and M mode) when shooting stills.

Here is the first question and my reply:

Question 1:

I wanted to ask about a major differentiator, if its true and useful for someone trying to learn a bit of manual photography. Below link and video talks about D90 and D5100 not having the ability to do manual control in video. Is it true? Does it really matter. Please advise.

(video is no longer available on YouTube)

I would also like some instructions on how to use manual control – when, why, how.

Nikon D5100 mode dial video manual exposure a s m aperture shutter
Mode dial of the Nikon D5100

My Answer:
Yes, the lack of full manual control in video mode is a very real deficiency of the of the Nikon D5100, especially for people who wish to seriously use it for video.  To answer your question “does it really matter?”, yes, it really matters if you wish to have straightforward, full manual control while shooting video.  I know that sounds like a smart-ass response to the question, but it is kind of like “if it isn’t an iPhone, it isn’t an iPhone,” blatantly stolen from “if you had invented Facebook, you would have invented Facebook.”

Wait a minute, I just realized that I was ahead of the curve and I wrote this similar smart-ass phrase before that movie even came out:
“If the 5D Mk II fits your expanding and demanding needs as a photographer, you would already pretty much know that you needed a 5D.”
See, look here, I said that earlier than August 26, 2010, and the movie came out Oct 1, 2010, and I didn’t even see it until a couple months ago!

Anyway, if you need full manual control in video, you know that you need full manual control in video based on your experience and needs, and then you need your camera to have full manual control in video.  Simple, right?  But…do you not know yet but wonder are you going to need it in the future if you grow and develop as a photographer/videographer?  That is the big unknown that no one can answer but one needs to figure out on an individual basis!

However, there is a “work-around” for this shortcoming of no full manual exposure control with the Nikon D5100.  To manually set your shutter speed, you must set the camera on Shutter-Priority Auto Mode (S) and set your desired shutter speed before going into Live View mode, use exposure compensation to obtain the aperture setting you want, and use the AE-L/AF-L Button to lock that exposure (set Custom Setting f2 for AE-Lock Hold).  If you wish to first set the aperture setting, you must set the camera on Aperture-Priority Auto Mode (A) and set your desired aperture before going into Live View mode, use exposure compensation to obtain the shutter speed setting you want, and use the AE-L/AF-L Button to lock that exposure (set Custom Setting f2 for AE-Lock Hold).

See this video I came across on YouTube for a demonstration:

As far as instruction in manual control (for still photography), see my Full Stop dSLR camera guide e-books, of course!  I don’t go into a lot of detail of full manual (M) because I don’t feel it is necessary for most beginner or intermediate photographers in most situations.  I don’t believe in M for the sake of old-school, full control, “look, I’m a skilled photographer/ martyr ‘cuz I use full manual.” It just adds an extra step (setting BOTH aperture and shutter speed rather than just one) to each photo that isn’t necessary.  Let the camera do it for you.  Pick your priority:  Aperture or Shutter Speed.  Are you concerned with depth of field (aperture) or with freezing or blurring action (shutter speed)?  Set your aperture in A (Av) mode or else set your shutter speed in S (Tv) mode, and let the camera take care of the other setting.

I know that many photographers like working in M mode, but if you are wondering if you need to use it: if you haven’t encountered a need for it, you don’t have a need for it. The aperture setting is typically my priority, hence I use Aperture Priority Mode.  Here is a detailed explanation of how I use Aperture Priority in the real world:  Deconstructing the Shot.

As my e-books say about possible situations for using M:

“There are times you may wish to use Manual Exposure Mode.  For example, if you are taking several photos to stitch together into a panorama, you want them all to be taken with the same exposure so that the lighting is consistent across the entire scene. Or if you are working in a studio setting and the lighting will remain consistent, you can set the exposure once and then not worry about it. Or in any other situation where the lighting or your desired exposure will remain consistent such as an indoor performance or sunny day portrait session where the lighting does not change.”

And I know that other situations also demand or benefit from M mode, including macro situations, but many of those situations fall under the “any other situation where the lighting or your desired exposure will remain consistent” category.  Readers, please defend M to me and tell me why you use it!

Question 2:

When I used the Nikon D5100 at a nearby camera store in Live View and Manual (M) mode, it never quite seemed to register ANY of the changes I made to shutter:  the image is supposed to go dark as the shutter speed increases right? (I was in a moderately lit room).  The weird part is that the actual image captured was dark (like it should be) but not the preview!  Is there some setting on the Nikon that is wrong on the piece I tested?  If the camera can’t display the changes it is making during Live View – leaving me to approximate the changes I’m making, then that is a deal breaker for me. I am wondering if this is a bug that was only on the piece that I saw at the showroom, or if you saw it too.

My Answer:

That is a really great question! These are the kinds of features one really has to dig into the camera, menus, or manual of a new dSLR model to determine if it is actually going to meet your needs.

It turns out that no, it is not possible to see actual exposure simulation with the Nikon D5100 in Live View while in Manual M shooting mode. However, in the P, A, or S shooting modes, the live view image will lighten or darken to simulate the exposure settings or the exp. compensation that you set. And to add insult to injury, there is no exposure meter displayed on the Live View screen, so to check your exposure you will need to temporarily leave Live View and switch to the control panel view by pressing the [i] Button.

The Canon 60D and Canon Rebel T3i both have Exposure Simulation in all modes during Live View. On the 60D you can turn this feature off and on. On the T3i it is on automatically while in Live View.

Conclusion:

Now, if you are thinking of buying a Nikon D5100 and after reading this you are suddenly concerned that it is lacking important features that you might need…be sure to first determine if you, indeed, really even need these features.  They shouldn’t be anything to worry about if you are never going to use them and never going to encounter these issues.  For example, I would never encounter the first issue, the lack of full manual control in video, because I don’t shoot video.  If you plan to use the camera to shoot production quality, professional video, this is pretty important.  If you plan to switch over to video and shoot a kid’s sporting event, it is unlikely you are going to shoot this in Manual and so it doesn’t matter.

Regarding the second issue, do you plan to use live mode AND manual shooting mode (M) AND need to preview your image exposure at the same time?  I rarely use M mode and I rarely use Live View and I rarely preview my exposure in Live View if I do use it, so for me and my photography, it will be “rare x rare raised to the rare power” (or (rare x rare) rare or is it merely rare x (rare) rare ?) that I need to use Live View AND M mode AND preview what my exposure will be.  If I needed to, I think I could get by with A mode instead, where the Exposure Simulation in Live View functions on the D5100.  But, if you are like the reader who had this question and you have a real need for this, say shooting cool macro shots of flowers and insects, then you will need to consider the Nikon D7000, Canon T3i, or Canon 60D instead.

Videography with the Nikon D300s and Canon 7D

I recently ran across this video made by the wonderfully talented photojournalist Ami Vitale.  It was commissioned by Nikon to showcase the HD video capabilities of the D300s, a camera very similar to the Canon 7D:

[youtube=http://www.youtube.com/watch?v=54aiz8Syqs0&hl=en_US&fs=1&rel=0&hd=1]

Like this new class of cameras, the short video is itself a hybrid of photography and video – each scene is like a still photograph come to life with motion.  With her background and extensive experience in photography, it is no surprise that Ami approached this video as a series of still, yet moving photographs.  What I mean is that the language of videography – the pans, zooms, transitions, etc. –  is not explored, but rather the camera is typically kept in place while the activity and motion occurs in front of it.

This seems to be an excellent example for photographers who are beginning to explore the video capabilities of their new cameras.  Many have predicted that video is going to be the future of visual journalism and storytelling, and the fact that photographers now have HD video in their hands encourages this possibility.  But video and film have a language all their own, much different than photography.  If one is truly dedicated to video storytelling, they will need to invest much time and effort into learning this language.  So while they are striving to see, film, and edit with new eyes and now ears, it will be helpful to begin with a language they are already familiar with – the language of composition, color, point of view, framing, contrast, etc., which they already know from photography.

With this approach, one can begin to capture the element of time (not to mention sound) that a still photograph can only allude to, just as Ami captured the dancing light on the women in the street, the sari fluttering in the wind, the motion of water and change of reflections, the movement of shadows across sand dunes, and the time-lapse effects of various modes of transportation.

According to a recent interview, Ami is now studying videography in a master’s program, so there is no doubt she will soon be telling more amazing and beautiful stories through video.