Why Nikon Isn’t Concerned about the Z 7 vs. a7R III

After years of speculation and anticipation, Nikon has finally introduced the new Nikon Z 7 and Nikon Z 6 full-frame mirrorless cameras. Initial reactions have been heated and emotional, as people debate whether or not the single XQD memory card slot will be its downfall, or whether the autofocusing system will be up to the needs and expectations of Nikon dSLR users. And of course there are endless comparisons of whether they live up to the offerings of the comparable Sony a7R III and a7 III full-frame mirrorless models.

Comparing the specifications, the two sets of cameras are similar on many points. The Z 7 and the a7R III are the high resolution models, while the Z 6 and the a7 III are the little brothers, with most all of the same features as their big brothers, but with a lower mega-pixel count. With some features, such as eye-detection autofocus, burst rates, and buffer rates, the Sonys appear to come out ahead, and with many other features the Nikons seem equal or better.

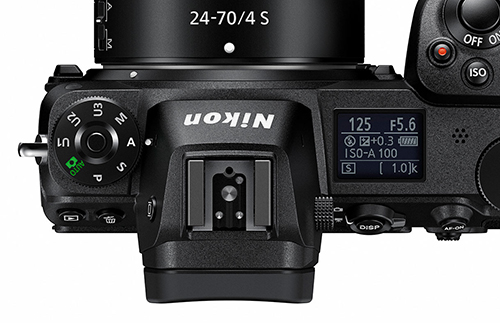
Detail of an official Nikon Press Photo of the Nikon Z7 body.

But I contend that, while Nikon certainly considered the Sony models when designing the new Z series, this Nikon vs. Sony comparison is not their primary concern. Nikon put that aside, and concentrated on Nikon. They designed a “future-proof” lens system with the new Z-mount, which will begin to make a large difference with the introduction of future wide-angle and fast lenses. There is already an f/0.95 lens that has been announced, the 58mm f/ 0.95 S Noct Lens. Most importantly, they designed a mirrorless camera that looks like a Nikon, feels like a Nikon, and functions like a Nikon. The camera buttons will all be familiar to a Nikon dSLR user, and just as important, the camera menus and navigation will be the same.

As anyone who has used a Sony a7 model will tell you, navigating the menus, finding the setting you are seeking, then interpreting a setting and its options can be painful. I can attest to that, I wrote the book on it! (Sony a7R III Menu Setup Guide and Sony a7 III Menu Setup Guide). It is a very different experience from using a Nikon or Canon menu, and it takes a bit of getting used to. Some of the Sony buttons, controls, and functions offer the same issue, and are not necessarily intuitive to either a new user or to a user coming from Nikon. And that is where Nikon wins… with existing Nikon users.

The Z cameras are not necessarily designed for camera users trying to decide between the Sony a7 and the Nikon Z. If a dedicated Nikon user wanted to try out or to jump to a mirrorless system, a Nikon user would have already bought a Sony a7 camera (or a Fuji or one of the other offerings). Instead, the Z cameras are designed for Nikon users trying to decide between buying a mirrorless camera or not buying a mirrorless camera. If they are going to buy a mirrorless camera, there is a high likelihood they will now be buying a Z 7 or Z 6. Nikon has greatly reduced the friction of converting to mirrorless, by offering a familiar camera. And in addition to the camera body, buttons, menus, options, functions, and features being similar to their current Nikon dSLR, Nikon users can painlessly bring along all their F-mount lenses, with the simple addition of the FTZ Lens Adapter. And Nikon users can expect that the image quality is going to be there.

Beyond the hype and chatter, the pre-orders for the Z cameras appear to be happening, and I believe that these cameras are going to be a success. Nikon has finally entered the full-frame mirrorless camera market, and they are here to stay.

If you want help setting up the Menus and Custom Settings of the Nikon Z 7, Nikon Z 6, Sony a7R III, or Sony a7 III, have a look at my comprehensive Menu Setup Spreadsheets, which are all free for a limited time after the introduction of each of the cameras. Or they are always free with a link included within the text guides for each of the cameras, which can be found at my FullStopBooks website, including the new Nikon Z 7 / Z 6 Experience comprehensive user guide to the Nikon Z 7 and Nikon Z 6.

And if you want to continue to learn, discuss, and ask questions about the settings, features, and functions of the Z 7 and Z 6 from a user-standpoint, please join the Nikon Z 7 / Z 6 Setup and User Tips Facebook group!

Nikon, Nikon Z7, Nikon Z6, Z7, Z6, book, menu, guide, tips, tricks, how to

If you want to learn more about some of the features and specifications of the Nikon Z 7 and Nikon Z 6, have a look at my blog post Nikon Z 7 and Z 6 – Beyond the Specifications.

If you want to pre-order or order the Nikon Z 7 or Nikon Z 6, please consider using my affiliate links below. Your price will be the same, but they will give me a small commission – thanks!

Nikon Z 7 at Amazon: https://amzn.to/2MPaiU5 – $3396.95

Nikon Z 7 at B and H:
https://www.bhphotovideo.com/c/buy/Mirrorless_System_Cameras/ci/16158/N/4288586281/BI/7364/KBID/7886/kwid/000/DFF/d10-v1-t3-z4288586281

Nikon Z 6 at Amazon: https://amzn.to/2MKHSe0$1996.95

Nikon Z 6 at B and H:
https://www.bhphotovideo.com/c/buy/Mirrorless_System_Cameras/ci/16158/N/4288586281/BI/7364/KBID/7886/kwid/000/DFF/d10-v1-t3-z4288586281

Nikon FTZ Lens Adapter

Nikon Z 7 and Z 6 – Beyond the Specifications

After several years of speculation and anticipation, Nikon has just introduced their first full-frame mirrorless cameras, the Nikon Z 7 and the Nikon Z 6. The Z 7 is a high-resolution model boasting 45.7 MP, and the Z 6 is nearly the same camera, but has 24.5 MP, and costs $1996 vs. $3396 for the Z 7. There are some additional differences such as the number of autofocus points, and the ISO ranges.

Nikon Z 7 body detail

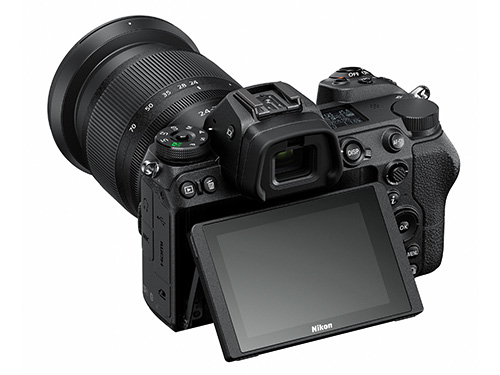
Detail of the Nikon Z 7 full-frame mirrorless camera, including the 3.2″ tilting touch-screen monitor. Official Nikon image.

If you have been reading about these models, you have likely found numerous comparison posts between the two cameras, the Nikon D850 dSLR, plus the competing Sony a7R III and Sony a7 III mirrorless models. Simply comparing the specifications on the surface can be a helpful starting point, but we need to dig a little deeper in order to make true, user experience comparisons.

Continuous Frame Rate and Buffer

For example, the Nikon D850 dSLR lists a 9fps maximum burst rate, but users quickly discovered that this was based on the use of the optional MB-D18 battery grip and EN-EL18a/b battery. The maximum frame rate without the battery grip is 7 fps, and even then that rate is not achievable without the use of specific settings including AF-S, M or S shooting mode with a 1/250 or faster shutter speed, and various settings like VR and auto ISO turned off.

The Nikon Z 7 has a similar situation, with the maximum frame rate listed as 9 fps. However, this is rate can only be attained when capturing JPEG or 12-bit RAW files, and the exposure will be locked at the first frame of the burst. The camera will continue to update focus for each shot, when using AF-C focus mode, but not the exposure settings. When using Silent Mode, where shutter sound is completely eliminated, the maximum fps will be 8 fps. When capturing 14-bit RAW files, the maximum frame rate is reduced to 5.5 fps, however this will enable continuous focus, and exposure will be determined for each shot in the burst, and not just locked at the first shot. The maximum rate can be maintained for up to 18 continuous 14-bit compressed RAW images,or 23 12-bit lossless compressed images. Note that the Sony a7R III achieves up to 10 fps (with viewfinder blackout), or 8 fps without blackout, and exposure is not locked on the first exposure with either frame rate, unless desired. The Sony maximum rate can be attained for 40 RAW images, or 89 compressed RAW images. That is a significant difference, which Nikon will need to improve in future models.

Detail of the Nikon Z 7 full-frame mirrorless camera, including the new Z-mount lens mount. Official Nikon image.

Electronic Viewfinder and Touch Screen

Compared to a dSLR, mirrorless cameras such as the Z 7 and Z 6 make use of an electronic viewfinder (3690K dots) rather than an optical viewfinder. An electronic viewfinder can take a little bit to get accustomed to if you are used to working with the optical viewfinder of a dSLR, as there can be a little lag, the brightness changes with the scene and exposure, and it consumes battery life. However it has its advantages. An electronic viewfinder will reflect many of the actual camera settings, such as exposure, white balance, and Picture Control. This not only helps you envision the final image, but can save you in situations where you may have the wrong WB set. It also allows you to see and change certain camera settings, such as metering mode and autofocus modes, while looking through the viewfinder (by pressing the i Button to access a customizable settings screen). It also allows you to review images and movies in the viewfinder, without taking your eye away to view the rear screen.

The Z 7 and Z 6 provide a couple different ways to confirm focus, when manual focusing through the Viewfinder or on the rear Monitor. There is a Rangefinder feature, as found on many Nikon dSLR models, where you place the AF Point on your desired subject or detail, and as you manually focus, the AF Point will illuminate when that detail comes into focus. You can also enable Focus Peaking, where high-contrast edges of the actual subject or detail in the scene will illuminate when that distance is in focus. You can select which color is used to indicate focus. Focus Peaking is often used when manually focusing when shooting video, and still photographers have adapted the use of the feature as well.

The 3.2″ rear monitor has touch-screen capabilities for Live View, navigating menus, changing settings, and for locating your AF Point and autofocusing. This differs from the Sony a7R III, where the touch-screen is only used for Live View and for autofocusing.

Nikon Z 7 body

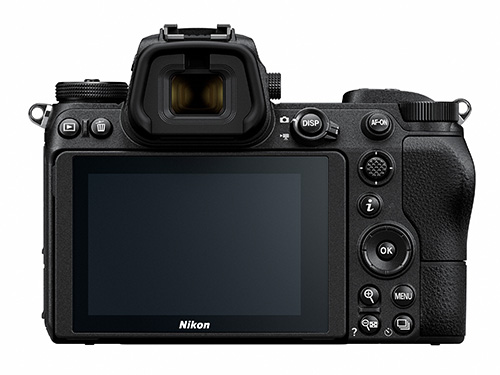
Detail of the Nikon Z 7 full-frame mirrorless camera, including the rear monitor and controls. Official Nikon image.

Autofocus System

The AF system of the Z 7 and Z 6 is going to be slightly different than you may be used to with a Nikon dSLR. The hybrid AF system (phase-detection and contrast-detection) of the Z 7 has 493 AF points, and the Z 6 has 273 points, both covering 90% of the frame. That means you will be able to focus on and track subjects throughout almost the entire frame, without necessarily having to lock focus and recompose. The on-sensor phase-detection AF system is similar to Live View autofocusing, and thus should be spot-on without having to calibrate lenses (except for lenses that can’t take full advantage of the hybrid AF system, and instead rely on the contrast-detection system).

You will be able to use AF-S Focus Mode for still subjects, and AF-C for tracking moving subjects. The AF Area Modes differ slightly from a Nikon dSLR. You will be able to choose from Pinpoint AF for very precise AF Point positioning (in AF-S mode only), Single-Point AF, 9-point Dynamic-Area AF (in AF-C mode), Wide-Area AF, and Auto-Area AF. If you wish to take advantage of face detection, you will have to set for Auto-Area AF, and enable the Auto-Area AF Face Detection item of the menu. Nikon says that the face-detection will also look at the upper body of the subject, and thus will continue to track it even if the face is momentarily out of view.

Tracking a subject throughout the frame, similar to Nikon’s 3D-Tracking on a dSLR, will be done in Auto-Area AF and AF-C. The implementation of it is a bit different, however, and DP Review goes into detail about the new process. It is a bit more cumbersome than how it is done on a dSLR:

https://www.dpreview.com/reviews/nikon-z7-first-impressions-review/5

Nikon Z 7 mirrorless autofocus AF 493 point

The 493 AF Points of the Nikon Z 7, covering 90% of the frame. Official Nikon image.

Other Features and Functions

The ISO range of the Z 7 is 64 – 25,600, expandable to 32 – 102,400. With its different sensor, the Z 6 has a wider ISO range on the high end, of 100 – 51,200, expandable to 50 – 204,800.

New Z-mount lens mount – Wider, which will allow for lenses such as the 52mm f/0.9 NOCT lens, coming from Nikon. Three lenses will be available at first, along with a Z to F ZTF Adapter to use Nikon F-mount lenses.

EXPEED 6 processor, new mid-range sharpening parameter, new Creative Picture Controls to create dramatically processed images, such as Dream, Bleached, and Graphite.

5-axis in-camera image stabilization, which will work with both lenses without VR, and lenses with VR.

~ ~ ~

To learn about all the features, functions, controls, and customizations of the Nikon Z 7 and Nikon Z 6, be sure to have a look at my Nikon Z 7 / Z 6 Experience. user guide, to be available in November or December 2018. It is a comprehensive 350+ page guide, to help you take control of your camera, and the images you create.

Nikon, Nikon Z7, Nikon Z6, Z7, Z6, book, menu, guide, tips, tricks, how to

If you want to pre-order or order the Nikon Z 7 or Nikon Z 6, please consider using my affiliate links below. Your price will be the same, but they will give me a small commission – thanks!

Nikon Z 7 at Amazon: https://amzn.to/2MPaiU5 – $3396.95

Nikon Z 7 at B and H:
https://www.bhphotovideo.com/c/buy/Mirrorless_System_Cameras/ci/16158/N/4288586281/BI/7364/KBID/7886/kwid/000/DFF/d10-v1-t3-z4288586281

Nikon Z 6 at Amazon: https://amzn.to/2MKHSe0$1996.95

Nikon Z 6 at B and H:
https://www.bhphotovideo.com/c/buy/Mirrorless_System_Cameras/ci/16158/N/4288586281/BI/7364/KBID/7886/kwid/000/DFF/d10-v1-t3-z4288586281

The First Nikon D850 guide, Now Available!

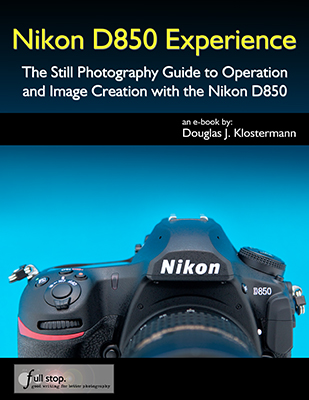
Nikon D850 Experience, my latest Full Stop e book and the first D850 user’s guide, is now available! This e book goes beyond the manual to help you learn the features, settings, and controls of the powerful, versatile, and highly customizable Nikon D850. Plus most importantly it explains how, when, and why to use the functions, settings, menu options, and controls in your photography – including the sophisticated autofocus system with its Group-Area AF mode, the Highlight-Weighted metering mode, the touch screen, customizable buttons and Sub-Selector control, plus UHD 4K video and several video improvements. It covers the new features of the camera such as Focus Shift Shooting for focus stacking, Negative Digitizer for creating positive images from film negatives, Bluetooth connection via Nikon’s SnapBridge app, and completely silent shooting modes.

Nikon D850 Experience book manual how how to use tips tricks

Written in the clear, concise, and comprehensive style of all Full Stop dSLR guides, Nikon D850 Experience will help you learn to use your full-frame D850 quickly and competently, to consistently make the types of images you desire. This e-book is available in either PDF or EPUB format for reading on your computer, tablet, iPad, e-reader, etc.

As one reader has said about Full Stop guides,

“I don’t know how I could fully take advantage of all the features the camera has to offer without this publication! It’s well-organized, easy to understand, and succinct enough to keep your attention while still containing a wealth of information to get the most out of your camera.”

Take Control of your Nikon D850 with this Clear and Comprehensive User Guide!

E-Book Format: Available in two instant-download formats to choose from. (Learn more about the differences of these two formats, later on this page).

Buy Now with PayPal or Credit Card!

Buy Now with PayPal or Credit Card!

This guide is designed for both intermediate and experienced photographers:

For Intermediate / Enthusiast Photographers: This instant download Nikon D850 Experience user guide is designed to help you take fuller advantage of the capabilities of your camera. It covers standard dSLR camera functions and exposure concepts for those learning digital SLR photography, and explains more advanced camera controls and operations for experienced enthusiasts.

-Go beyond Program mode and shoot competently in A, S, and M shooting modes.

-Take full advantage of the sophisticated 153 point autofocus system and its Focus modes, AF-area modes, and Custom Settings – for sharp focus of still or moving subjects.

-Set up your camera with clear explanations and recommended settings for all Menu options and Custom Settings of the D850.

-Learn how, when, and why to use and customize the controls, buttons, touch screen, and features of the D850 to best fit your shooting needs.

-Understand the various metering modes, exposure compensation, and exposure lock for correct exposure of every image, even in challenging lighting situations.


For Experienced Photographers coming to the D850 from previous Nikon models, this Nikon D850 Experience user guide explains the new and advanced features in order to quickly get you up and running and taking advantage of these capabilities, including the advanced 153-point Autofocus System and all its AF Modes, AF-Area Modes, and Custom Settings, for capturing both still and moving subjects. It also covers back-button focusing and trap focus techniques with the D850, the Group-Area AF mode, and newly added subject-tracking parameters. Plus it explains the camera controls and how to customize them for your shooting needs, features such as Highlight-Weighted Metering Mode, Focus Shift Shooting, Negative Digitizer, and the HDR, Multiple Exposure, and Time-Lapse Shooting features.

The guide also introduces the HD and 4K UHD video features and settings, and guides you through all the Playback, Shooting, and Setup Menus, Custom Settings, and Movie Mode Menu settings of the D850 in order to help you best set up the camera and its controls for your specific shooting needs, and includes the helpful, comprehensive Nikon D850 Menu Setup Spreadsheet created by the author.

You can preview Nikon D850 Experience user guide at the following link. The preview shows the complete Table of Contents and excerpts from the Introduction, Menu Settings section, Custom Settings section, and Autofocus section.

IMPORTANT NOTE to Mozilla Firefox browser users: the current built-in PDF viewer in Firefox may not work well and may cause the PDF preview to appear in a low resolution. Please download and/ or view the PDF preview with Adobe Acrobat Reader to see the proper, full resolution.

Click here to Preview Nikon D850 Experience

   Nikon D850 Experience book manual guide

Nikon D850 Experience not only covers the various settings, functions and controls of the Nikon D850, but most importantly it also explains when and why to use them for your photography. The guide focuses on still-photography with an introduction to the movie functions, settings, and menus to get you up and running with HD and 4K UHD video. Sections include:

-Setting Up Your D850 – All of the D850 Custom Settings and Playback, Shooting, and Setup Menus, including Movie Mode Menus, with explanations and recommended settings for practical, everyday use. Set up and customize the advanced features of your dSLR to work best for the way you photograph. Plus a free link to the D850 Menu Setup Spreadsheet for assistance and reference.

-Aperture Priority (A), Shutter Priority (S), and Manual (M) Modes – How and when to use them to create dramatic depth of field, freeze or express motion, or take total control over exposure settings.

-Auto Focusing Modes and Area Modes and Release (Drive) Modes – The new 153-point D850 autofocus system is a powerful tool, and taking control of it will enable you to successfully capture more sharp images, in both still and action situations. Learn the AF Modes, AF Area Modes, and AF Custom Settings including the subject-tracking options, how they differ, how and when to take advantage of them to capture both still and moving subjects. Plus how and when to use focus lock and back-button focusing.

-Exposure Metering Modes of the Nikon D850 – How they differ, including the new Highlight-Weighted Metering Mode, how and when to use them for correct exposures in every situation, and how to customize them for your needs. Plus how to make use of exposure lock.

-Histograms, Exposure Compensation, Bracketing, and White Balance – Understanding and using these features for adjusting to the proper exposure in challenging lighting situations, and customizing the controls for easy access to these features. Plus making use of the new Auto White Balance options, and setting a custom white balance.

-The Image Taking Process – Descriptive tutorials for using the settings and controls you just learned to take photos of both still and moving subjects.

-Introduction to Video Settings – Settings and explanations to get you started shooting HD and 4K UHD video.

-Photography Accessories – The most useful accessories, including those specific to the D850.

-Lenses – Nikon (Nikkor) lenses compatibility with the D850, and explanations of Nikon lens notations.

-Composition – Tips, techniques, and explanations, including the creative use of depth of field.


This 465 page Nikon D850 Experience user guide is a digital e-book, illustrated with over 350 images, diagrams, and screen shots. It goes beyond the manual to clearly explain how, when, and why to use the features, settings, and controls of the Nikon D850 to help you get the most from your camera.

Title: Nikon D850 Experience
Author:
Douglas Klostermann
Page Count: 465 pages, illustrated
Price: $14.99 – Now Available!
E-Book Format:
Available in two instant-download formats to choose from:

Buy Now with PayPal or Credit Card! PDF format for reading on your computer or printing on your printer using the latest version of Adobe Reader. Or transferring and reading on some e-readers and most tablet devices. PDF is the most versatile format. Instructions for transferring a PDF to an iPad or e-reader device are on the FAQ Page. (Please note that the PDF security settings may prevent transfer to a Kindle or Playbook. Please contact me for a MOBI or EPUB version if you encounter this issue with your PDF on your e-reader device/ tablet.)

Buy Now with PayPal or Credit Card!EPUB format for reading on a Nook, Sony Reader, other e-reader device, or on the iPad using iBooks. Or on an Android tablet (Galaxy, Xoom, Playbook, etc.) using an ePub reader app such as the free OverDrive Media Console. Or viewing on your computer with free Adobe Digital Editions software. (EPUB not able to be printed on your printer.) If you are unable to transfer or read the EPUB on your Kindle, please contact me for a MOBI format version of the book.

MOBI format for Kindle – please contact me.

Over 95,000 readers in more than 75 countries are taking control of their cameras and improving their photography with Full Stop e book camera guides!


What Readers are Saying about Doug’s previous guides, including Nikon D750 Experience and Nikon D7100 Experience:

A well written, professional helpful guide – Brilliant, just what I was looking for! A manual that was exciting, clear to follow, had examples and was used by a professional who gave just the right amount of technical info with explanations of why you use those settings, when to use those settings and so on, all properly explained. The book is a revelation, a joy to follow, well thought through and well written. Nikon should be employing Doug to write every one of their cameras manuals.
-R.D.C.

All You Need – This book, together with the manual that came with your camera, is all you need to start discovering the full potential of the camera.
-Max M.

It is like I have a personal instructor on-call! I have learned so much about this dSLR and continue to learn more each time I review various sections.
-John C.

Excellent. I use this book the most! I bought several books, paperback and Kindle, after buying the D750 and have noticed I use this book by far the most. I recommend this book without reservation.
-D. Cardona

Really practical and tremendously helpful. Readers of this e-book can expect to benefit from a more rewarding photographic experience using this superb camera, and be better able to exploit its potential to match their personal objectives and photographic style. Highly recommended.
-M.M.

This manual is a clearly written, concise and useful explanation of the rationale for the seemingly infinite and often confusing settings options for the camera. Used in conjunction with the Nikon manual I feel more confident in understanding how to at last proceed in getting better photographs.
-W.L.S.

This is the most helpful manual I’ve ever used. There is no comparison to the book Nikon includes with the camera, this book outshines it completely. No serious user should be without this. I find myself referring back to this book quite often and find it very easy to find what I need and even easier to understand.
-S.B.

Better Than the Manual – Douglas Klostermann has done a great job of not only producing a very accessible guide but he also offers very useful and sensible suggestions for getting the best results from the camera. Reading the guide was like one photographer talking to another. Thanks Doug.
-Malcolm

I would recommend this to anyone who wants to get a quick start to using the camera. Manuals are nice, but this eBook highlights the important information and gives a quick, easy to understand explanation of most all of the functions and controls.
-Ray M.

It’s clear, concise and gets to the heart of the camera’s multiple and often confusing options. Very highly recommended – for experienced user and beginner alike.
-G.S.A.

Amazing – Mr. Klostermann has done an amazing job with this book. He’s outlined every detail, option, feature, and use of this camera possible, and actually surpasses the expectations of use of the camera. I moved from an old SLR to a modern full frame digital SLR, and found it to be more than I expected. This book really helped me come more to grips on what I was doing wrong. Not to mention the fact that this book, at the price you pay, is a steal. If you have a Nikon, I HIGHLY recommend you buy this book!!!
-Jacob King

Valuable Resource and Time Saver – If you’re contemplating purchasing this book I would recommend doing so without hesitation. Not only are the explanations behind the individual settings enlightening but the general theory on auto-focus and its associated uses is among some of the easiest to understand that I’ve come across. Definitely a good investment. As a result of his thoroughness, my confidence in being able to use a new piece of equipment soared. Additionally, the time required to figure out the differences between my previous camera and my new purchase was reduced sharply.
-Bryan L.

Really focuses on the WHY – I found the Nikon manual good for understanding how to set things up but not much on the why – this book really focuses on the WHY. The guide helped me understand why to use specific settings for specific needs. The Custom Settings sections helps to make firm decisions on how to apply settings by understanding the usage of each in addition to knowing how to set them up.
-Benoit A.

More than a Guide – I am a passionate photographer and cinematographer. Not only did I find Doug Klostermann’s guide well written and informative, but I really enjoyed the manner in which he shared his image-making philosophy. This is much more than a camera guide and I really appreciate the links to other authors found throughout the text as well as the chapter on suggested photography accessories.
Simon Wilkie

A Very Easy to Read but Detailed Guide – I have just bought this camera, and whilst I have been using digital SLRs for years i realize that I am not really getting the full potential out of all those buttons. Now I understand and use them.
-G.F.

Great Source of Information! – I have been a Nikon user for decades and was of the view that I was very knowledgeable about these products. Still, once I started working with the camera I concluded that there was a good deal that was still to be learned. This book provided me with the information required, and has proven to be a very valuable resource: well set out, a comprehensive Table of Contents, and well written. The personal preferences and setting recommendations are most helpful. Job well done!
-T. E. Valentine

Nikon D600 vs. D7000 vs. D300s

Comparing the Nikon D600 vs. D7000 vs. D300s:

I’ve written a previous post comparing the Nikon D7000 vs D90 vs D300s, as well as one comparing the current Nikon dSLR line-up of the Nikon D7000 vs. D5100 vs. D90 vs. D3100.   Now that the full frame Nikon D600 has been introduced (and almost immediately made available for sale), I need to revisit these comparisons to include this latest Nikon dSLR.  I am going to focus on the D600 vs D7000 vs D300s here, with some D90 specs thrown in, but leaving out the D5100 plus the more expensive D800 full frame (FX) model for now until I get the chance to incorporate them into the discussion.
Nikon D600 vs D700 vs D300s compare choose which one decide review full frame fx dx size body weight
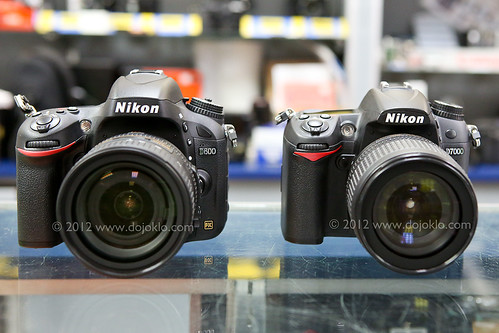
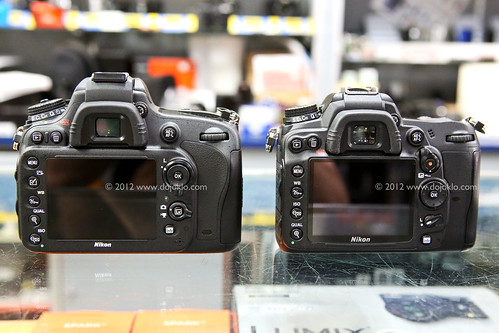
Nikon D600 vs Nikon D7000 – comparison of body size and controls of the full frame FX vs the APS-C sized DX format dSLR cameras – image by author, courtesy of Newtonville camera of Newton, Mass.

The introduction of the full frame (a.k.a. FX format) sensor sized Nikon D600 has expanded the Nikon dSLR line-up, and perhaps made it even more challenging to determine which camera is right for you.  To get a sense of where the D600 sits, it is designed to be the first full frame dSLR aimed at the photography “enthusiast” – in both features and price (about $2100).  (Full frame or FX format means that the sensor is the same size as a frame of 35mm film.) It does not have quite all the features, continuous frame rate speed, larger and more rugged body, external controls, and customization options as a professional level dSLR like the Nikon D800, yet it still offers more than enough in terms of image quality, features, controls, and durable construction for most any serious enthusiast.  I would even contend that it is plenty capable as a semi-pro’s full frame body or second body, or even a smaller, lighter weight option for sometime-use by a pro.

Sitting Between the D7000 and D800: The D600 has been described by Nikon as sitting between the APS-C sensor sized (DX) D7000 and the full frame (FX) D800.  What that means is that, first, it has the approximate size, weight, and “feel” of the pro-sumer D7000.  This “FX camera in a DX body” is a desirable feature for a lot of photographers, especially those carrying and using their camera all day such as when traveling.  Plus it incorporates the sophisticated and customizable 39 point autofocus system of the D7000, along with that camera’s “user-friendly” interface and controls (the autofocus system has actually even been improved over the D7000 in terms of greater sensitivity).  This makes it an easy transition for D7000 users wanting to go full frame, or wanting to simultaneously work with both bodies.  Yet is also boasts some technology borrowed from the higher end D800 like the HDMI output, uncompressed video recording, and improved exposure metering.
Nikon D600 vs D700 vs D300s compare choose which one decide review full frame fx dx
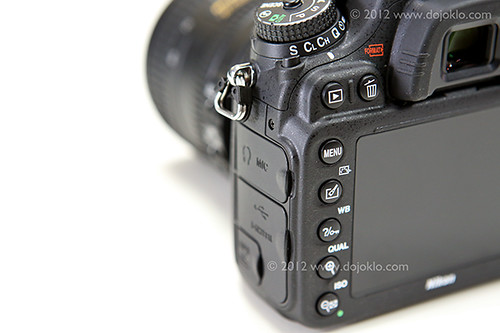
Detail of the Nikon D600 full frame dSLR camera – image by author

The Second Highest Rated Sensor:  Previously, in order to offer a high-quality, fully featured yet affordable camera for enthusiasts and semi-pros, the compromise was a smaller sensor – the APS-C sized sensor (or what Nikon calls the DX format) which is about two-thirds of the size of a full frame sensor.  Larger sensors have always been desired for several reasons:  they typically deliver better performance in terms of improved resolution, increased dynamic range, and improved low light / high ISO performance.  In other words, the images have much better detail and can withstand serious cropping, display a fuller range of colors and tones, and are cleaner with less digital noise, especially in low light situations.  And indeed the sensor of the D600 lives up to these expectations – in fact it is the second highest rated sensor on DXOmark, behind only the Nikon D800E and D800 (the D800E is the D800 without the anti-aliasing filter in front of the sensor). So in terms of image quality for the price, the D600 really can’t be beat at this point.

The full frame sensor will also affect the field of view of your lenses. For those moving from an APS-C sized (DX) sensor camera to a full frame body, a 50mm lens will now act as a true 50mm lens – no more 1.5x crop factor to consider. This means that your wide angle lenses will now act as true wide angle lenses, but your telephoto lenses will no longer have quite as much reach as you may be used to.  But in the interest of lens compatibility, Nikon DX lenses can be used with the D600 and the camera will automatically crop the images as if using a DX sized sensor (so the sensor is reduced to 10.5 MP).

I first introduced the Nikon D600 in my post The First Affordable Full Frame dSLR, and there you can learn about a lot of the camera’s specifications and what they mean as far as real-life photographic use.  Here I will try to spell out the difference in specs and how that might affect your choice.  As I always like to point out, when you are trying to determine which camera to purchase or upgrade to, you need to first consider and determine your needs, and then see which camera fills those needs. Not the other way around where you look at the new features and speculate if you really need or will use them. The latest cameras almost always have more impressive features and specifications than the preceding models, but if your needs and shooting style don’t required those upgrades then it is possible that you can save some money and be completely happy with a less expensive or earlier model (and spend your money on better lenses!)
Nikon D600 vs D700 vs D300s compare choose which one decide review full frame fx dx size body weight
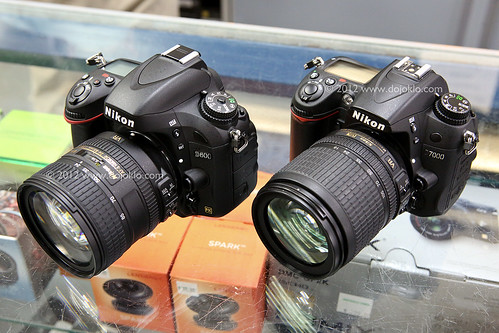
Nikon D600 vs Nikon D7000 – comparison of body size and controls of the full frame FX vs the APS-C sized DX format dSLR cameras – Click on this image to have a closer look.  Image by author, courtesy of Newtonville camera of Newton, Mass.

Sensor and Image Quality: The image sensor of the D7000 was greatly improved over both the D90 and the D300s, and now the sensor of the D600 is an even greater leap.  The D7000 has 16.2 megapixels, where the D90 and D300s each have 12.3 megapixels.  The D600 boasts 24.3 megapixels.  In addition to its dramatic improvement in resolution, I noted above the other image quality advantages of a full frame sensor, as well as how that will affect your lenses’ field of view.  This increase in resolution will also allow for more intrusive editing of the files in Photoshop, the ability to crop a picture and still obtain an image with high enough resolution for printing or display, and allow for larger prints.  You can have a look at dxomark.com to compare the sensors – run your mouse along the red-to-green color bar to the right of the Measurement graphs (such as Dynamic Range) to see how these differences affect images.  You can see from the charts that there are some significant improvements over the sensor of the D7000.

Exposure Metering: As with the D7000, the D600 has a 2016 pixel RGB metering sensor – although Nikon has stated that this latest version is improved over the D7000.  Both of these are certainly improved compared to the D90 and D300s, and will result in better TTL metering performance of straightforward and complex lighting scenes, such as back-lit situations.  All of these Nikon cameras offer Matrix metering, Center-weighted average metering, and Spot metering. With center-weighted metering, the D600 offers the option of an 8, 12, 15, or 20mm center circle for its weighting, or simply an old-fashioned Average reading.  The D90 makes use of your choice of a 6, 8, or 10mm center circle for its weighting, while the D7000 and D300s add a 13mm circle option to that.  A nice feature of Nikon dSLR cameras is that the Spot Metering is linked to the active AF Point, so in the image below, the AF Point was placed on the subject’s face, and the camera determined metering there (rather than requiring me to first meter where I wanted and then lock the exposure as Canon Spot Metering requires).

Nikon D600 full frame FX sensor backlit backlighting active d lighting exposure metering spot
Nikon D600 – Use of Spot Metering and Active-D Lighting in severe backlit situation.  As you can see, you still need to know how to make use of the metering modes and determine a proper exposure, as the camera can’t perform magic.  Use of fill flash in this situation resulted in better exposure and contrast on the subject.

Autofocus: The autofocus system of the D600 is similar to the D7000 AF system, with its 39 AF points and 9 more sensitive cross-type points (clustered in the center).  However, you can see that the AF points are spread much more widely across the viewfinder with the DX sized D7000:

Nikon D7000 vs D600 viewfinder DX FX compare choose vs which one af autofocus point 39
Simulated view of Nikon D7000 viewfinder, showing the location of all the autofocus AF points (and the viewfinder grid that can be turned on or off)- image by author.
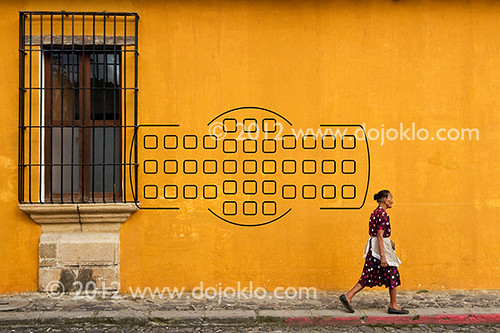
Nikon D7000 vs D600 viewfinder DX FX compare choose vs which one af autofocus point 39
Simulated view of Nikon D600 viewfinder, showing the location of all the autofocus AF points (viewfinder grid not show but is available to view)- image by author.

Each of these above images show the full simulated framing as seen in the viewfinder, and you can clearly see how the 39 AF Points of the D600 are limited more to the central area of the frame.  This means that you are likely going to have to do some significant “focus-lock and recomposing” as you create interesting compositions where the subject is off-center.  This will also impact the use of the AF Points when using AF-C Continuous Autofocus Mode to track moving subjects.  The moving subject will have to remain within the area of the AF Points in order for the camera to continue tracking it, so you will have to move the camera around to follow the subject more closely.  This again is going to seriously limit your compositions when using AF-C and tracking a subject, as the subject is always going to have to be located in the central part of the frame.  If you are a serious action, sports, bird, or wildlife photographer, you are going to have to seriously consider if this AF Point arrangement of the D600 is going to work for you.  Or else consider using the camera in DX Crop “mode,” where you use just a DX-sized portion of the sensor to capture the image.  Although you will only be making use of 10 megapixels, the AF Points will in effect be spread out over more of the frame, more similar to what you see in the D7000 viewfinder.

As mentioned above, the 39 AF Points of the D600 are more sensitive than those of the D7000, with 33 of them sensitive down to f/8.  This means when you use a teleconverter (such as with a long lens in order to turn a 200mm lens into a 400mm lens) which reduces the effective maximum aperture of your lens by a stop or 2 or 3, you can sill make full use of most of the AF Points.  As with the D7000, you can limit the number of selectable AF Points to 11 if you prefer to manually select your AF Point (as you typically should) and you find 39 too many to contend with.  Since the AF system of the D600 as well as its controls and autofocus Custom Settings are so similar to the D7000, you can have a look at this post Taking Control of your D7000 Autofocus System to begin to learn how to get the most out of it.  The AF systems of the D600 and D7000 (and D300s) allow for you to use the numerous autofocus points in various ways to best capture still subjects (typically using AF-S autofocus mode) or track and capture moving subjects (using AF-C autofocus mode), including Automatic AF point selection, Single Point AF, and Dynamic Area AF using your choice of 9 points, 21 points, all points, or all points with 3D-Tracking.

Regarding the D90 and D300s, the autofocus system of the D90 has 11 autofocus (AF) points with only the center one being the more accurate cross type. The D300s offers 51 AF points with 15 being cross type, and thus is ideal for sports, action, and wildlife – although it has begun to become outdated and superseded by many of the other features of the D7000.
Nikon D600 book ebook guide manual tutorial how to dummies instruction fieldBrief commercial interruption: I would like to mention that I have written an e-book user’s guide for the D7000 called Nikon D7000 Experience, and will be offering an e-book guide for the D600Nikon D600 Experience. The guides discuss not only how to use the features, controls, autofocus systems, and various settings of the cameras, but more importantly when and why to make use of them in your photography.  They also explain the metering modes, aperture and shutter priority modes and manual shooting, focus lock, exposure lock, and more.  Plus they describe all of the Menu options and Custom Settings, with recommended settings.  Learn more about my Full Stop dSLR camera guides here!

Body, Construction and Size/ Weight: The D600 and D7000 (and even the older D90) appear very similar at first glance, and both have a rugged partial magnesium alloy body (top and rear) with a polycarbonate front.  However, the D600 is actually slightly lighter than the D7000: 1.68 lbs. vs 1.7 lbs.  The D300s is slightly larger than the other 2 bodies, and weighs in at 2.2 lbs, with full magnesium construction. The sturdier construction of the D600 and the D7000, including their nice rubber gripping surfaces, creates the feel of a more professional body. The D600, D7000, and D300s all have weather sealing at the memory card and battery doors.  The D600 has a slightly larger rear LCD Monitor at 3.2″ vs. the 3″ rear LCD screen of the D7000 and D300s.

ISO: As mentioned in the Sensor/ Image Quality section above, the high ISO performance of the D600 is improved over the D7000, which was already improved over both the D90 and the D300s. The tests at dxomark.com tell this story.  The native ISO range of the D600 and D7000 is 100-6400 expandable up to 25,600.  The D300s and D90 have a native ISO range of 200-3200 expandable to 6400. This means that with the D600 you can use high ISO settings when required, such as in low light situations, and not have any difficulty with digital noise, particularly in the shadow areas of images. You can view my informal ISO test images on this post of Nikon D600 ISO Test Sample Images to see the excellent high ISO performance when shooting JPEG images.

Controls: The controls of the D600 are very similar to the D7000, with some minor changes such as the locking Mode Dial switch (a nice touch), the different Live View / Movie switch and relocated Record Button, and in the “why did they do that?” category the reversing of the zoom in and zoom out buttons.  The Multi-Selector thumb pad size has also been reduced on the D600, which I find to be less comfortable than the larger D7000 Multi-Selector.  Overall, all of the controls are easily accessible, user friendly, and quick and easy to access and use for changing settings on the fly.  Many controls make use of a button press and then either of the Command Dials to change the setting.  For example, press the AF-Mode Button at the base of the lens and then turn the Main Command Dial to change the AF Mode or the Sub-Command Dial to change the AF Area Mode, as you look on the top LCD Control Panel to see your choices.  I found myself always intuitively turning the wrong dial in conjunction with the ISO Button, but that will just take some practice (one dial enables Auto ISO while the other changes the ISO setting).
Nikon D600 vs D7000 controls buttons size compare side by side
Nikon D600 vs Nikon D7000 – comparison of body size and controls of the full frame FX vs the APS-C sized DX format dSLR cameras – image by author, courtesy of Newtonville camera of Newton, Mass.

The D300s has entirely different switches, dials, and buttons than the D600 and D7000, however this allows for quicker and easier direct access to a few more features and settings on the D300s.  As with the D7000, the D600 offers two customizable user settings (U1, U2) on the mode dial for pre-setting a combination of camera settings and Custom Settings.  For example, you can set up your camera for landscape photography with all the settings you use for that and assign these settings to U1, and then configure your camera for studio/ portrait use and assign that combination of settings to the U2 mode.  You can also assign numerous functions of your choice to certain buttons such as the Fn Button, such as quickly and temporarily changing to Spot Metering Mode or turning on the built-in level display.

Wireless Flash: All of these Nikon cameras allow for advanced wireless lighting using the built in flash as a remote Commander for Nikon Speedlights, allowing you to make use of and remotely control simple or complex off-camera lighting set-ups.

Viewfinder: As with the D7000 and D300s, the D600 has a large, bright 100% optical viewfinder coverage.

Processor: The D90 and D300s have the Nikon Expeed Processor, the D7000 has the improved Expeed II processor, and the D600 boasts the speedier Expeed 3 processor. This allows for more video options including full 1080p HD at all the frame rates and overall faster processing of stills and video files especially when using in-camera processing features while shooting such as Vignetting Control or High ISO Noise Reduction.  The fast processor also allows for quick results when taking in-camera HDR or Multiple Exposure images.

Continuous Shooting Speed: The D600 can shoot at a maximum continuous frame rare of 5.5 frames per second (fps) up to 100 images when shooting JPEG or up to 16 images when shooting at the best RAW setting.  This allows you to capture exactly the right moment of an action situation, or a rapidly changing expression on a subject.  The D90 can shoot 4.5 frames per second (fps) up to 100 images, the D7000 shoots 6 fps up to 100 shots, and the D300s shoots 7 fps – or 8fps with the battery grip. If you often capture action and really need the highest frame rate, such as for sports or wildlife shooting, you are going to have to seriously consider the D300s or D800 over the D600.  Otherwise, 7 or 8 fps is often complete overkill in typical real-life use.

Memory Card: Like the D7000, the D600 accepts 2 SD cards, where the second card can be used in a variety of ways: overflow, JPEG on one / RAW on the other, or mirrored backup of the first card. The D300s uses 1 CF card and 1 SD card, which also can be configured in a variety of ways. The second card can definitely come in handy if one is shooting a lot of still and video files or wants instant back-up of all images.  There is a “trick” for choosing which memory card slot is viewed during image playback:  Press and hold the BKT Button and then press Up on the Multi-Selector and follow the prompts to make your choice.

Battery: The D600 and D7000 both use the high capacity EN-EL15 battery, which will last for over 1000 shots.  TheD600 accepts the optional, new MB-D14 battery grip for the use of two batteries – and to perhaps make the camera more comfortable for some users particularly when using larger lenses or working often in portrait orientation.  Similarly, the D7000 accepts the optional MB-D11 battery pack/ vertical grip,  and the D300s uses the EN-EL3e battery and the optional MB-D10 battery pack/ vertical grip. The D90 also uses the EN-EL3e battery and its optional battery pack/ vertical grip is the MB-D80.

Full HD video: The D600 offers full HD video with manual control and all the usual frame rates (1080p at 30/25/24 fps and 720p at 60/50/30 fps), for up to 20 minutes of recording at the highest settings. As with stills, you can switch to DX (as if you were using a smaller DX sized sensor) for a “telephoto boost,” and it is capable of full time autofocus, though most dedicated videographers still prefer manually focusing. The camera records mono audio but is compatible with optional stereo mics, and has a headphone jack for audio monitoring.  The D90 and D300s offer 720p video at 24 fps, with a 5 minute shooting time. The D7000 improved upon that with full 1080p HD video at 24 fps for up to 20 minutes with full-time continuous autofocus. Plus it offers 720p at 30, 24, and 25 fps.

Price: Just under $2100 – may vary slightly at different retailers.

Shooting Experience: The D600 feels and performs absolutely wonderfully. Its body and controls are comfortable and responsive in the hands, with the exception of what I think is a too-small Multi-Selector pad.   All controls are easily accessible for quickly changing all the essential settings such as autofocusing modes, ISO, white balance, metering modes, bracketing, etc. The Shutter Button is thankfully less sensitive than that of the D7000, thus allowing focus lock or exposure lock using a half-press, without accidentally taking the shot.  The Matrix Metering works great to properly determine exposure in a wide variety of situations, and the Auto White Balance even captures sunset colors nicely rather than turning them into less warm daylight colors as many previous cameras might have done.  The D600 has carried over all of the nice touches from the D7000 such as the optional grid in the viewfinder, the ability to limit the AF points to 11 – for quicker manual selection, the ability to change the continuous low shooting speed between 1 to 5 shots (which Canon has yet to do on their non-pro cameras), and the versatility to change the size of the central spot size for center weighted metering.

Choosing a Camera:  So which camera is best for your needs? At this point I would be hesitant to recommend to D300s to most users, simply due to the fact that it is an “older” model.  While it is still a highly capable camera, the image resolution and many of the features have been improved upon by the current models.  So if you plan to use your dSLR for several more years, just consider how “outdated” it will be in 4 more years.

The D600 and D7000 are similar in so many ways that a big part of the decision comes down to the full frame sensor vs. the APS-C sized sensor.  Of course the D600 has improved resolution, dynamic range, etc, but remember that all that is relative. You can still capture excellent, professional quality images on the D7000, or even the D90.  Pixel peepers will certainly find a difference, but it may not be significant enough for many users.  The full frame will also allow you to capture wider more sweeping views with your wide angle lenses, and indirectly more dramatically shallow depth of field.

This is because depth of field is affected by not only your aperture setting but also by the camera-to-subject distance.  So say that you were to use the full frame D600 to frame a shot with a 50mm focal length and f/2.0 aperture, from 10 feet away.  To “recreate” this same shot with the APS-C sensor-sized D7000 and a 50mm focal length, you would have to back up several feet to have the same field of view.  The full frame sensor will capture a wider field of view, while the APS-C “crops” the scene due to its smaller size.  Even though you use the same f/2.0 aperture setting, the depth of field does not appear as dramatically shallow because the camera-to-subject distance has increased.  So…indirectly…a full frame camera can contribute to more dramatic depth of field. (However, this all gets a bit more complicated and a lot of photographers, including myself until recently, misunderstand the role of the focal length in this – namely that it does not affect this issue: http://www.bluesky-web.com/dofmyth.htm)

However, since the autofocus points of the D600 are grouped more closely to the center of the frame, they are not as useful as the more widely spread AF points of the D7000 for tracking and capturing moving subjects when working in AF-C autofocus mode.  If you intend to shoot lots of sports, action, birds or other wildlife, the D7000 may work better.  The faster continuous frame rate of the D7000 will greatly assist with action photography as well.  Plus the D7000’s DX sensor will “extend” the reach of your telephoto lenses in these situations.  You can always use the D600 in DX Mode to “widen” you AF point spread and “extend” your telephoto reach, but the tradeoff is that you will only be using 10 megapixels of your sensor.

Purchasing these cameras: If you plan to buy any of these cameras, accessories, or anything else through Amazon.com or B and H Photo, I would appreciate it if you use my referral links. Your price will be the same, and they will give me a little commission for referring you, which will help support my blog.  Thank you for supporting my efforts!

Order your D600 today on Amazon or B and H – it is already available and shipping!

Nikon D600 on Amazon (body only or kit)

Nikon D600 at B and H Photo – body only

Nikon D600 at B and H Photo – with the 24-85mm f/3.5-4.5G ED VR Lens

Purchasing from the UK? Use my Amazon UK referral link here.


Nikon D600 book ebook guide manual tutorial how to dummies instruction fieldBrief commercial interruption: And don’t forget, I will be offering an e-book guide for the D600Nikon D600 Experience. The guide discusses not only how to use the features, controls, autofocus systems, and various settings of the cameras, but more importantly when and why to make use of them in your photography.  It also explains the metering modes, aperture and shutter priority modes and manual shooting, focus lock, exposure lock, and more.  Plus it goes over all of the Menu options and Custom Settings, with recommended settings.  Learn more about my Full Stop dSLR camera guides here!