I was recently conversing with one of my readers – a Nikon D5200 user who was putting the camera through its paces for professional-level video shooting. He has given the camera a thorough field test, so I asked him to put together a review and a tutorial of the camera in regards to its video performance. So for today’s guest post, I introduce:
by Steve MacDonald of 5dhdvideo
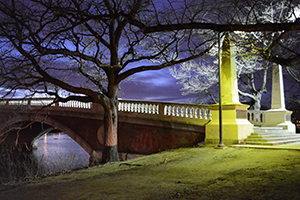
I have recently put the Nikon D5200 through its video capability paces, in a couple of different shooting scenarios. Scenario one was a bright sunny outdoor situation with mixtures of heavy sunlight and shaded areas, and the second was an indoor, controlled lighting situation.
Scenario one was tested with a Nikon 17-55mm f2.8 making use of a Schneider 4×4 polarizer and Schneider 4×4 1.6 graduated ND filters. Mind you, these are probably the harshest video acquisition lighting conditions.

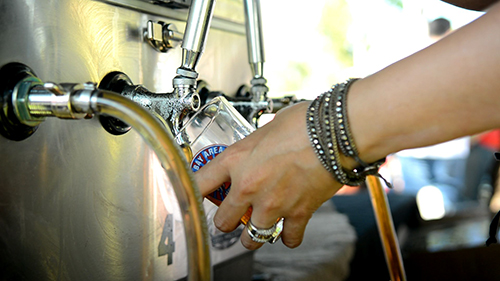
Still from dSLR video taken with the Nikon D5200, by Steve MacDonald
One of the biggest challenges of shooting with any dSLR camera is setting critical focus. One camera feature that can help is a really decent LCD screen. I found the Nikon D5200 screen to be less the stellar, but I suppose that is to be expected from a mid-level consumer camera. Using a Hoodman loupe on the back of this unit, at first, I thought the inability to see a somewhat sharp image was the kit lens. But even with a very expensive Nikon 17-55mm f2.8 zoom lens, manually achieving critical focus was challenging. Using the cameras focus assist the image never really seemed all that sharp, so it’s was a guessing game of finding what would be the sharpest focus point. I quickly abandoned using the LCD for critical focusing and used the cameras viewfinder with a right-angle viewer by Seagull. This worked much better, but it’s something I’m not used to, having come from shooting with many Canon DSLR models.
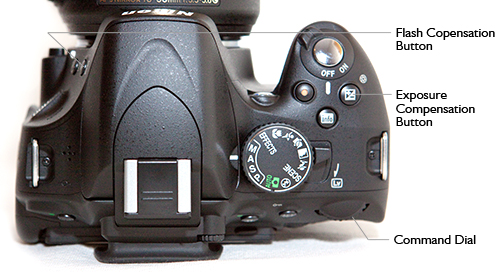
I decided to give auto-focusing a try, since, a lot of my shots that day were stationary subjects – and that feature seemed to be dead on. The only downside to using this is that in certain lighting situation, the Nikon will throw a beam of light from the AF-Assist Illuminator. Not a big deal, untill you realize the AF-Assist Illuminator is eating into your battery faster than you can imagine. (Note – you can turn off the Built-in AF-Assist Illuminator using Custom Setting a3.) The battery life of the EN EL14 has already been documented as being less than adequate, which I can confirm.

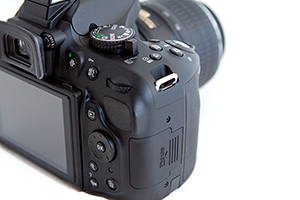
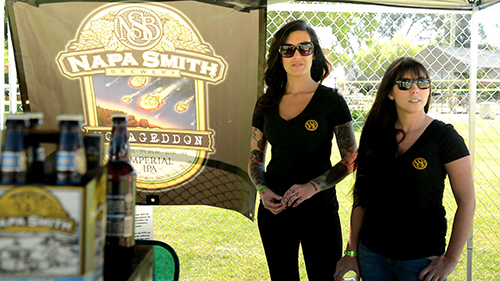
Still from dSLR video taken with the Nikon D5200, by Steve MacDonald
Another quirk I found with this Nikon is discrepancies between metering in the viewfinder then switching back to live view. Many times after setting a dead zero meter in the viewfinder and not moving anything, switching back to live view, could at times , show an almost full stop difference. Switching metering methods didn’t seem to change the situation.
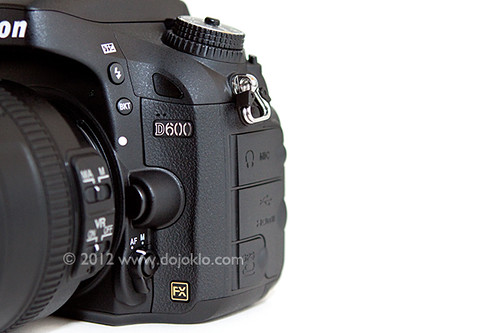
We’re all familiar with the nagging Nikon situation of having to come out of live view to change aperture settings, which is indeed a pain, but what I didn’t realize is if you keep the camera pointed at your subject, it will meter that subject in live view. This brings me to the subject of trying to run and gun with this camera: in two words, very difficult. The reason being is having to come out of live view to change the aperture, making a moving subject next to impossible to keep properly exposed. The way around this is to buy manual lenses with the aperture on the barrel and not controlled by the camera. Or, one would think that is a viable work around – not so. Nikon has further limited video functions on this camera by not offering any metering with a manual lens attached, which in my opinion renders this camera far less than ideal from a professional video acquisition standpoint. (Note: the Nikon D7100 and D7000 offers the ability to register non-CPU lenses in the camera, thus allowing access to additional functions including color-matrix metering – though they suggest you make use of Center-Weighted or Spot Metering in these situations. The D7100 and D7000 also offer the ability to assign aperture selection to the aperture ring on lenses which have this ring, thus allowing aperture change while shooting video.)
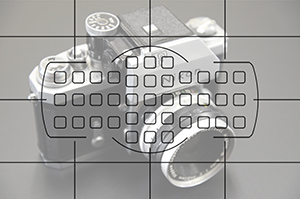
Still from dSLR video taken with the Nikon D5200, by Steve MacDonald
It goes without saying, for professional use an EVF (electronic viewfinder / monitor), such as the SmallHD DP4 EVF, is pretty much a must with any DSLR. False color, peaking, and many other features they offer make for a better user experience. Sure, you could rely on an EVF to set proper exposure levels with a manual lens attached to the D5200, but you’re going to pay a grand for a good one.
The indoor shooting scenario was a two camera interview situation, with the other camera being a Canon T3i. One feature I really liked was Nikon’s ability to tweak the White Balance presets in movie mode, in order to dial in a match between the two cameras. The picture quality of the Nikon looks very good, and the ability to output a clean HDMI will no doubt attract many. Shooting the indoor scenario was much easier, although none of the issues mentioned above disappeared.
At the end of the day, my take on this camera is that it just isn’t full equipped for demanding or professional-level videography. It takes fantastic still images, since as with any of these dSLRs, that is their main function. While its video capabilities and performance may fulfill the needs of a casual video user, there are just too many roadblocks with this camera to make it a sensible choice when it comes to professional video work. One should instead consider the additional video capabilities of the D7000 or D7100, which both improve upon some of these video shortcomings of the D5200.
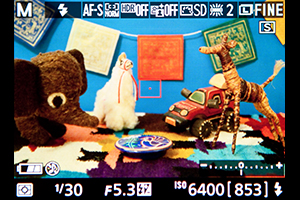
Still from dSLR video taken with the Nikon D5200, by Steve MacDonald
Manual exposure and white balance for the videographer with the Nikon D5200
Although the Nikon D5200 has the quirk of having to come out of live view to change aperture, and the fact it won’t meter a manual lens, this section of the article focuses on methods to help you gain proper exposure for shooting video.
Recently, I purchased two Rokinon Cine Lenses for the D5200, knowing full well the camera would not meter these lenses. If you don’t know what that means, basically, the built in light meter of the D5200 will not give you a reading with these lenses or any manual lens. My main reasons for buying these manual lenses was to avoid having to come out of live view to change the aperture, not to mention, for the price, these are great prime lenses!
So my quest after buying these Rokinon’s was to find a way to get a proper exposure, without having to resort to buying a light meter. Don’t get me wrong, having a light meter is well worth having, but I just spent a chunk on these lenses, so that’ll have to wait. What I did buy was a Photovision one-shot target. Targets are used to set 18% gray level, but with this particular target, it also has a white and black section outside the middle gray, so in essence, it sets your highlight and black level as well. The target works by first lighting your scene, then setting the target in front of that scene and taking a photo of the target. You’ll want to make sure the white side of the target is towards the key light of your scene, and that the entire target is filling your screen with the white, gray, and black columns in sharp focus. You’ll also want to make sure your shutter speed and ISO are set for your video shoot at hand. Next, set your D5200 play back display options by accessing the menu, highlighting the display icon, top icon on the left, then making sure all those options have a check mark beside them. Now, hit your playback button and bring up that photo of the target.
By clicking on the bottom portion of the multi-selector you can scroll through the various information provided for that particular photo. What you’re looking for is the histogram display. This histogram display will show you three distinct spikes. The left most spike being the black level, the middle gray, and the far right spike is your highlight. It’s this highlight we want to set so that it’s not clipping. Clipping would have the far right spike at or very near the far right side of the histogram. Now, by adjusting your f-stop (aperture setting) for subtle changes in exposure, and taking a photo of the target after each f-stop adjustment, you’ll be able to view that photo in playback and determine if that exposure gives you the proper histogram.
After determining which histogram suits your best exposure, you’ll want to set that target photo as a custom white balance within your D5200. Note: although by default the camera sets the last photo you’ve taken as your white balance, I choose to select the photo just to make sure its definitely the right one. You’ve now not only set a proper white balance, but you’ve also set an exposure level. One thing to keep in mind is that you need to light your scene for proper levels because the target has no idea how light or dark your subject is, it only reflects what lights you’ve set up for a particular scene.
Now, with all that being said, this target wouldn’t work in a run and gun situation, it would just take way to much time. For these types of situations, you can still utilize the histogram feature of the D5200 to get a proper exposure. To do that, set your f-stop (aperture), take a photo of your scene, review that photo and look at your histogram. If the highlights are slammed against the right side, lower your f-stop (aperture), take another photo and review it’s histogram reading. The advantage of using the histogram in this manner, is that you’ll soon recognize what’s over exposed just by viewing it in the LCD, because you’ve been in these situations enough times and have looked at enough histograms to know what’s over exposed just from viewing your scene from the LCD.Utilizing the one-shot target, as well as, learning to read your histograms will give you a big advantage in gaining proper exposures with your Nikon D5200.