edit 3012-05-07: While this post was originally written for the Nikon D5100, all of these tips also apply to the D5200. So while I work on an updated Nikon D5200 Tips and Tricks post, start out by making use of these tips. And of course, they all still apply to the D5100.
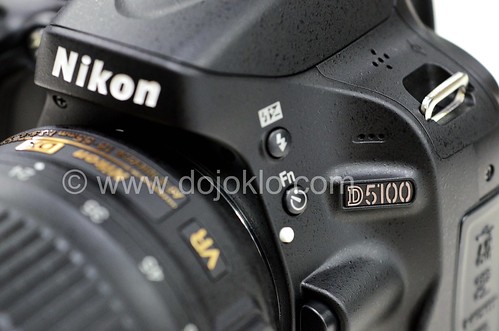
Detail of the Nikon D5100
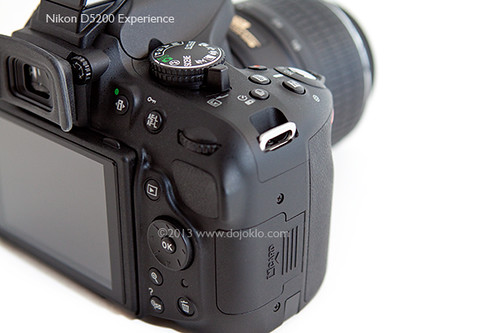
Detail of the Nikon D5200
I’ve spent quite a bit of time with the Nikon D5100 as I researched and wrote my eBook user’s guide Nikon D5100 Experience (and now Nikon D5200 Experience also!), and here are some of the handy “tips and tricks” I’ve learned that may prove useful for you as you set up and use your D5100. This camera has many features, Menu settings and Custom Settings you can use to make it operate how you want it to and to match your needs and shooting style, so it is worth-while to learn them and/ or to set them up according to your preferences. For example, in no particular order:
1. Change the Flash Mode and Flash Exposure Compensation Quickly: You can quickly set your desired Flash Mode and then adjust the amount of Flash Exposure Compensation with the press of a button or two and the Command Dial. Press the Flash Mode Button to raise the flash in P, A, S, or M mode, then press and hold it and turn the Command Dial to change the Flash Mode (Fill Flash, Red-Eye Reduction, Rear-Curtain Sync, etc.). Press the Flash Mode Button (also the Flash Compensation Button) and the Exposure Compensation Button and turn the Command Dial, and you can quickly change the Flash Compensation as you view it on the Information Display Screen.
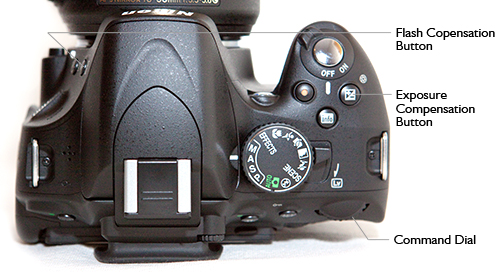
Top of the Nikon D5100 with flash settings controls
2. Assign the Function (Fn) Button: You can use Custom Setting f2 to assign a different function to the Function (Fn) Button than the default Self-Timer setting. Figure out which setting you change most often or need handy at your fingertips. Some that I think are most useful are ISO Sensitivity, White Balance, or Auto Bracketing. You can also assign it to +RAW so that if you are shooting in JPEG but have a great image you want an NEF(RAW) copy of also, press the Fn Button first then take the photo, and you will save a copy of the image in both formats.
3. Adjust the Auto Off Timers: Use Custom Setting c2 to set how long the various displays stay visible on the rear LCD Monitor. Though it may be convenient for them to stay on a long while, that will drain your battery more quickly. But if they turn off too soon, it is annoying and could affect your shooting in a demanding situation. So find a happy compromise. You can set them all to stay on for a reasonable length by setting for NORM, or you can adjust them individually. My preference is Playback/ menus 20s or 1min; Image review 4s or 8s; Live View 3 min or 5 min; Auto meter-off 20s or 1 min. The first person to leave a comment on this post correctly telling the difference between Playback and Image Review will get a FREE copy of my latest eBook user’s guide for the Nikon D5100 called Nikon D5100 Experience! See later in this post for more info on this user’s guide – the only guide currently available for the Nikon D5100!
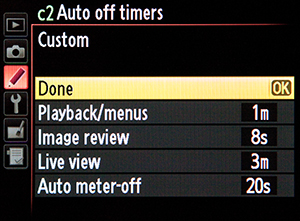
Custom Setting c2 – Auto-off timers
4. See if You Have Over-Exposed Your Highlights: You have to tell the camera which playback views you would like the option of seeing when you look at your images on the rear LCD Monitor, and thus be able to view your histograms and over-exposed highlights. In the Playback Menu under Playback Display Options, check the ones you want to be able to view. Two of the most important ones are Highlights and Overview. These two will let you know if you’ve blown-out (over-exposed) your highlights. The Highlights view will do this by having those areas of your image blink. The Overview view will show you by displaying the histogram, which will show you if your highlights or shadows have run off the graph, indicating that those areas of the image contain no detail in the highlights or shadows other than pure white or pure black.

Overview playback view showing the histogram – (note you should set your JPEGs for FINE not NORMAL as I realized the camera default is set at)
5. Set a Precise Fluorescent White Balance: When you change the White Balance (WB) setting using the i Button and Information Display Screen, you can choose from several white balance options including Fluorescent White Balance. However, there are several types of fluorescent light bulbs ranging in temperature from perhaps 3,000K to 6,5000K. To tell the camera which one to adjust for, you have to go behind the scenes to the WB options in the Shooting Menu. There you can set which fluorescent option to use, such as Warm-white or Cool-white. You can also access this menu item to set your own custom Preset White Balance using a couple different methods.
6. Put Your Most Used Settings in My Menu: Instead of digging into the menus and Custom Settings all the time to find your most used settings, such as the White Balance settings just described, you can create your own custom menu called My Menu, which is then quickly and easily accessed with the Menu Button. You can even decide what order to list the items in. Some possible items to add could be perhaps auto bracketing or HDR if you often make use of those.
Brief Commercial Interruption: How did I learn all these useful and convenient settings? I just completed an eBook user’s guide for the Nikon D5100 called Nikon D5100 Experience. (and now Nikon D5200 Experience also). Following in the footsteps of my bestselling Nikon D7000 Experience, these guides cover all the Menus, Custom Settings, functions and controls of the Nikon D5100 and D5200, focusing modes, exposure modes, shooting modes, white balance, etc., PLUS when and why you want to use them when shooting. As one reader has said of my previous D7000 guide, “This book, together with the manual, is all you need to start discovering all the camera’s potential.” It will help you to take control of your camera and the images you create! Learn more about the features and settings discussed in the tips and tricks here and much more. To read more about them, preview them, and purchase, see my Full Stop bookstore website here!
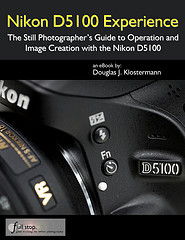
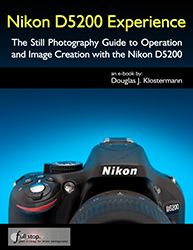
Nikon D5100 Experience eBook user’s guide
7. Lock Your Focus and/ or Your Exposure Settings Before Recomposing Your Shot: When you press and hold the Shutter-Release Button, the focus distance is locked (or you start tracking the subject in AF-C and AF-A modes), but the exposure is determined when the photo is taken. You can customize how this button and the AE-L/AF-L button function so that you can do back-button focusing, lock the exposure, swap the function of the two buttons, or several other options dealing with focus and exposure.
8. Create Images with More Impact Without Photoshop, Using Picture Controls: If you are not going to be processing all your images in Photoshop, Lightroom, Aperture, etc, you can set or create a Picture Control so that your JPEG images (and videos) have the look you want. Boost the contrast and saturation, or sharpen them a bit. You can even shoot in black and white or sepia (though it is best to shoot in color and capture an image with all the original information first). You can save your custom Picture Controls, create your own with the included software, or find ones online then load them on your camera. Some available online include Picture Controls that mimic the look of roll films such as Kodachrome or Velvia. But be careful with setting or adjusting Picture Controls if shooting in RAW. Find out why in my user’s guide!
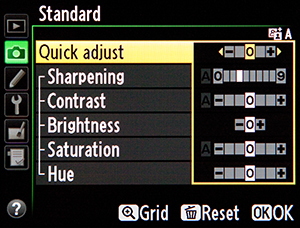
Adjusting the Picture Control settings
9. Set the ISO Sensitivity Control to Help you out in Difficult Situations: Of course you can adjust the ISO setting on the fly, but you can also set up the camera to automatically adjust some settings if you are in a situation where the lighting changes and the camera determines you will not be able to get the shot without some adjustments to the ISO and/ or shutter speed. You can set this in the Shooting Menu under ISO Sensitivity Settings, where you can turn this option on, then tell the camera the maximum ISO and minimum shutter speed to use in these situations. I suggest you set the ISO no higher than 3200 or 6400 if you are willing to accept some noise, and the minimum shutter speed for around 1/30, which you can still hand-hold if careful. However, if you are carefully metering and adjusting your settings and you don’t like the camera making these types of settings changes without your expressed permission, be sure to turn this setting off.
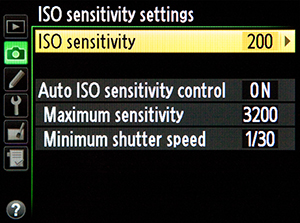
Setting the ISO Sensitivity Settings
10. Have the Camera Assist You with Manual Focusing: Although digital SLR cameras are designed to be used with their sophisticated autofocus systems, some users prefer to manually focus or are using older manual focus lenses. And situations such as close up and macro photography sometimes require precise manual focusing. If you are going to be turning off the autofocus on your camera and lens, you can have the camera assist you in focusing with the Rangefinder. The camera uses the exposure indicator in the viewfinder to tell you if you are focusing in front of or behind your subject, or if you are in focus.
There are numerous other cool settings you can take advantage of with your D5100 or D5200, including things like Auto Bracketing for Exposure, in-camera HDR, reversing the direction of your Command Dial or exposure indicator, changing the format and color of your Information Display, adjusting your file sizes and types to maximize your maximum continuous burst rate, and determining your best settings for video shooting. All of these and more are discussed in my e-book user’s guides, Nikon D5100 Experience and Nikon D5200 Experience, both available now. Learn more about the books, preview them, and purchase at my Full Stop website here. Learn to take control of your camera and the images you create!
Also, please know that there aren’t really any tips or tricks for better photography. To improve your photography, simply learn your camera inside and out and learn the techniques of dSLR photography (with my e-book!) and then practice, practice, practice taking images, study the results, and look at and learn from the work of talented photographers.
I put together a video and a more in-depth article to introduce and further explain the D5100 autofocus system:
For more detailed information read the article Taking Advantage of the Nikon D5100 Autofocus System.
Still haven’t purchased your Nikon D5100, or need a better lens? Check them out on Amazon below. I appreciate it if you use these referral links to make your purchase – Amazon will give me a small referral bonus which helps support this blog! Or use the other camera store links on the left side of this page. Thanks!
See and buy the Nikon D5100 with 18-55mm Lens on Amazon
See and buy the Nikon D5100 – Body Only on Amazon
Look for a new Nikon Lens on Amazon – I suggest considering the high quality, versatile, all-purpose
Nikon 18-200mm f/3.5-5.6G VR
Was this post helpful? Please let others know about it by clicking the Facebook or Twitter sharing buttons below, linking to it from your blog or website, or mentioning it on a forum. Thanks!

