My recent trip to Guatemala to photograph for an NGO gave me an opportunity to field test a bunch of new gear under real working conditions – jumping on and off chicken buses, crammed into the seat of a van for hours with all of it on my lap, roaming around the streets of Antigua trying to be discreet as possible carrying a 70-200mm lens and a backpack full of equipment, and photographing for long hours at a time. I had done a bunch of Internet research to choose the best and the most appropriate gear, made a couple trips to B+H to look at it all, and it all worked out as good, or often better than expected. I’m not sponsored or compensated by any of these companies (but wouldn’t be opposed to it if they happen to be reading…), but I do recommend all of this gear without reservation. (Update: I’ve now been using all of this equipment constantly for the past 11 months, and still recommend it all!) I discuss the camera I used on the trip, the Canon 7D, in this previous post.
Most all of this equipment will be equally essential for day-to-day photography, culture and travel photography, humanitarian photography, and photojournalism. And the equipment will be useful with any dSLR, Canon or Nikon.
If you plan to purchase any of this equipment, I encourage you to do so through the links I’ve created below which will take you directly to Amazon.com. Your price will be the same as always, and I will get a small referral fee. Or you can go directly to Amazon.com here. I appreciate your support! If you are in the UK, or wish to purchase from B+H Photo, see the end of this post for information on those links.

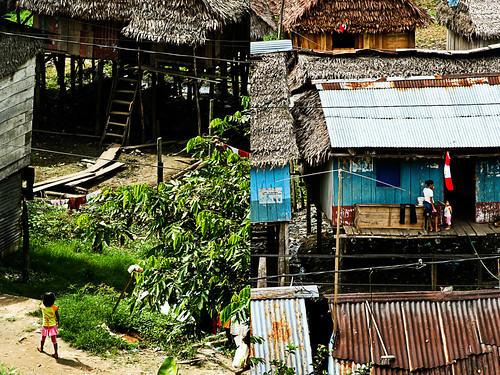
Antigua, Guatemala
Camera Backpack: I use the Lowepro Compu Trekker AW as both my carry-on and my working bag during the day. The current version of this is the Lowepro Pro Runner 350 AW. The size works perfectly for both needs. It easily fits the airline carry-on size, including smaller international requirements in some regions, yet fits more that it would first appear. With careful configuration of the interior dividers, I can fit 2 Canon bodies (a Rebel XT and a Canon 7D or 50D), a 70-200mm f/4L IS, a 16-35mm f/2.8L II wide angle zoom, a 28-105mm standard zoom (an older lens, here is a link to the better 24-105mm f/4L), all lenses stored with their hoods turned backwards, a 580EX II flash, its diffuser, 2 external hard drives in cases, a couple memory card cases, and some filters. In the outside pocket, I have a couple battery chargers, extra batteries, medium Rocket Blower, miscellaneous cords, caps, and accessories. In the rear pocket designed for a laptop, I easily fit a 32″ 5 in 1 reflector. Once I am in the field, I play around with the dividers until I have a set-up that best fits my flexible daily needs, and allows quick preparations or lens changes. The pack is extremely comfortable, has tons of padding on the straps and the back so that its weight never bothers me and I don’t feel the reflector in my back. I often wear it for hours a day while working, and it is never a problem. In fact, on my final night in Guatemala when I went out to dinner in Antigua without it on my back for the first time in 2 weeks, I commented that I felt a bit naked. The top handle is strong enough to grab and carry with, as is often necessary while jumping in and out of cars or putting it down and picking it up. There is also a waist belt that I use when I have it fully loaded, like going to the airport, to relieve my shoulders of some of the weight. And it comes with a built in rain cover that stows away at the base of the bag that has done its job on a couple occasions. The Compu Trekker Plus (now the Pro Runner 450 AW) might be a better carry on size so that you could carry more gear on the plane with you (if it fits the airline’s requirements) but it would be too big for daily use. There are also rolling versions of these, with an “x” in the name, thought the retractable handles and wheels add weight and size to the bags. The Compu Trekker has a tripod strap system that I don’t use, and another outside pocket that is, conveniently, exactly the size of a Lonely Planet guidebook. Here are some photos of the backpack in action at the Chichicastenango Market, taken by my travel companion Elizabeth Jimenez:


If you just need a holster style bag to carry one body and one lens, I highly recommend the M Rock Holster Bags. I used the Yellowstone model for months while traveling in South America, and I love its durability, pockets, and built-in rain cover, plus it comes with extra back-up straps. Make sure you get the right bag for your body/ lens combination – you will need a longer bag for a telephoto zoom lens. As far as a satchel bag to carry a body or two plus two or three lenses and/ or a flash as you set out for the day but don’t want a backpack type bag, have a look at the Think Tank Retrospective line (there are a few sizes, the 10, 20 and 30, etc.) or the Crumpler Million Dollar Homes. Again, there are several sizes to choose from, called the 5 Million, 6 Million, etc. The 7 Million Dollar Home is my satchel of choice for carrying my gear about town while working. It holds a large dSLR (5D line, 6D, 60D, etc.) with a mid-range telephoto attached (24-105mm), plus a 70-200mm, and another lens or a flash, all in the inside compartments. There is then some extra space and a couple front/ flap pockets to hold chargers, memory cards, batteries, etc. To keep moisture from accumulating in your equipment and bag, throw in a durable desiccant pack like this one. Just be sure that it isn’t loose in your bag and scratching against your equipment.
Security: A couple great additions to the bag are Eagle Creek combo locks and Eagle Creek Pack It Sacs in the small size to hold batteries, memory cards in cases, LensPen, camera and lens body caps, and various wires and cables. The medium size Pack It Sacs are great for medicines bottles and other loose stuff in your luggage. The backpack’s zippers are rugged enough to handle constant abuse from the combo locks, which although they are weighty, are far better than keyed locks in the field so that you don’t need to go digging for the key when you are in a hurry. You just have to be a little careful when opening and closing the bag – the locks dangle and flip around, and could easily bang into something fragile in the backpack. With the Pack It Sacs, I clipped some rubber bands to the key clip within the outside pocket of the backpack and then attached them to the clips on the Sacs, so that way the Sacs won’t accidentally fall out if I flip the bag open and close while the outer pocket is open. There’s enough play to access them and then shove them back into the bag.
Another great accessory for this backpack is the PacSafe 55 wire mesh security system. It fits perfectly around this size bag, and secures your bag and your gear in a hotel room or wherever. It has a long cable that you loop around something secure and lock in place. It also comes with a small, compact storage case for when not in use.

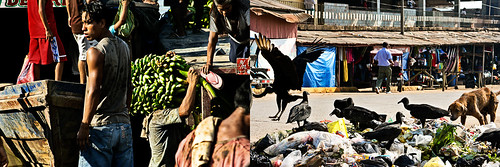
Chichicastenango, Guatemala
SanDisk Extreme 16GB CF Memory Cards – I talked about these in the previous post. Once again, no particular reason why I use these rather than Lexar or Delkin…maybe a sponsorship would help seal my loyalties… :). Be sure to get the Sandisk Extreme 16 GB SD version if you are using the 60D or Rebel T2i. I use a Sandisk card reader to upload the images to my laptop, rather than from the camera directly, in order to save the camera batteries. This Sandisk Card Reader is for the CF cards, and the 5 in 1 reads SD cards.
Spare Batteries – I always have 3 batteries for each camera body. The Canon 60D, 7D and 5D use the Canon LP-E6 Battery. Stick with the Canon brand batteries rather than the unpredictable third-party brands.
BlackRapid RS-4 Camera Strap – The R-Strap is wonderful, and I highly recommend it. I was hesitant and suspicious at first, but I quickly adored it and will always use it. I had even emailed BlackRapid before purchasing to ask about shortcomings of earlier models, and they addressed my concerns thoroughly and completely. I was very impressed with the time and personal attention they paid to my questions. The strap is comfortable, easy to use, quick, strong, and rugged. I often use it in conjunction with wearing the backpack, and although the straps fight for space against each other on my shoulder, it still works fine. I’m a bit envious of the RS-7 that just came out, since it has a curved, ergonomic shoulder pad that will work better by itself on your shoulder and next to a backpack strap. There is also now a version designed for women, the RS-W1. Watch some of the videos out there as to how to use it, and be sure to moisten the rubber gasket before attaching it to your camera – this will make a firm seal that will never budge. The big pain is that the part attached to your camera body is best left in place, yet that makes it less easy to place the camera down on a table or in your bag, and will have to be removed to use a tripod. Also, the textured tightening screw part of the connector may rub up against your camera body in various situations, so I put some black duct tape on the bottom edges of the camera to protect it.
B+W brand UV Filters – clear, protective filters for the lenses, slim for the wide angle. The slim is probably not needed with a crop sensor camera, but is recommended for a full frame camera. The slim comes with a lens cap that does not stay on well after a little bit of use, as there are no front threads for the Canon cap to fit on. If I had to do it over, I would probably get the regular filter so that I could use the Canon lens cap.
B+W brand Circular Polarizer Filter – a polarizer serves to darken skies, boost contrast, cut through haze and reflections in water and glass, and block out a stop or two of light in bright situations. I keep it on my lens much of the time when doing outside work. Polarizing filters work to their maximum degree when the sun is to your right or left, but not when it is directly in front or behind you. Be sure to turn the moving part of the filter to dial in the degree of polarizing that you desire. They are typically not used on wide angle lenses because the darkening effect would vary across a wide swath of sky, and usually look strange.
Sto-Fen Omni Bounce Diffuser – works great on the Canon 580EX II flash, although very snug and is always difficult to get on and off in a hurry. Squeeze it and stretch it first to help it go on easier. Please don’t use the diffuser outside! Even if you see “pros” doing it. It doesn’t do anything outside but make your flash work harder. You can’t bounce light off the clouds.
Honl Color Correction Filters and Speed Strap – These are essential for using with flash to balance the white balance of the scene – to make the color of the flash the same as the color of the ambient light. This way when you correct the WB of your subject your backgrounds won’t be vivid orange (incandescent ambient lighting) or sickly green (fluorescent). You can’t use them in conjunction with the diffuser – the Omni-Bounce can’t fit over the Speed Strap, but that had not occurred to me when I bought them – so I’m going to have to figure out a solution to that. And I’m going to continue experimenting with the full or 1/2 CTO to add warmth to outside fill flash, as recommended by Nevada Wier (actually she uses a Kodak Wratten 81A gel, but I think they are similar). The kit is very slim and fits perfectly in one of the inside pockets of the backpack.

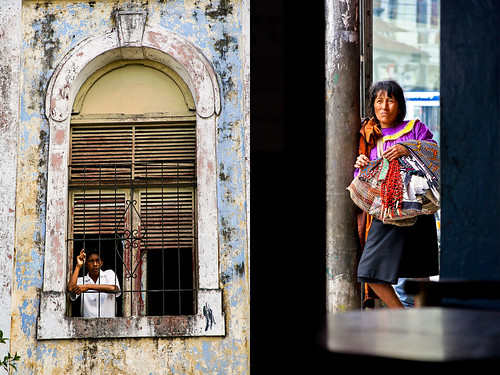
Antigua, Guatemala
Giottos Medium Rocket Blower – I initially used the small size in order to save a bit of space, but it didn’t have the power I wanted, so I sprung for the medium. Always have it handy for getting dust off lenses in a hurry, because blowing on them – no matter how careful – leads to spittle on the lenses 5% of the time when it doesn’t matter and 95% of the time when you are in the most critical situations. The large size may be a good choice as well.
Pearstone LP-1 Lens Pen – Works great for cleaning off mysterious spots, smudges, and fingerprints that always appear on the lens (this is why I always use UV filters) as well as that a-fore-mentioned spittle. There is a retractable brush on one end and a cleaning head on the other end. Twist the cap to load the cleaning tip with the carbon based cleaning material, then remove the cap and use. Please read the instructions and visit the LensPen website to fully learn how to use it properly.
32″ 5 in 1 Reflector – This size is perfect for travel and fits in the backpack, however I never actually used it during the trip so I don’t know if the size is useful in the field. It is best suited for set-up situations and portraits, which I didn’t have the opportunity to do on this assignment. I could have used it once to block some stray sunlight falling into a very dark room and potentially messing up the exposure, but I didn’t think about it until later. I did, however, carry it around a lot and never noticed because it is lightweight and very durable.
External Hard Drives – I use a Iomega Ego 500GB and a Lacie Rugged USB 500GB when traveling. I’ve used the Iomega on extended trips before, and love it. I’ve never had any problems with it, and it is solid and sturdy. I also decided to try out the Lacie Rugged USB for this trip. It is lighter than the Iomega, and doesn’t feel as solid and sturdy, but it worked just fine. They both fit perfectly in the Case Logic Portable Hard Drive Case made for these types of drives, which I recommend getting in different colors so you can quickly differentiate your different drives. I leave them in the cases at all times, but you have to pull the Ego slightly out to plug in the cord, and place the Lacie upside down in the case for the cord to fit without removing the drive each time. For storage at home, I use the Western Digital My Book 1TB External Hard Drives.
Hakuba Digital Media Storage Wallet – These are great, soft sided, thin memory card cases that hold 6 CF memory cards each. I picked up this recommendation from Karl Grobl’s website. There are a lot of bulky, hard-sided cases out there, which make you feel like your memory cards need excessive protection. I’m sure there has been a situation where an elephant stepped on a memory card case and all photos were miraculously saved by a hard sided case, but as far as my needs, the soft ones work just fine. Get into the habit of inserting blank cards face up and used cards face down into the cases’ pockets. Since this is the size for CF cards, have a look at this one if you use SD cards.
‘da Products Screen Protector – (product no longer available) – This is the second camera I have used this product with, and I am once again very happy with it. It is a very inexpensive yet high quality screen protector for your LCD, made with acrylic. Get ‘da40D Protector for the 7D – it is the perfect size. It is a slow, careful, time consuming process to attach the adhesive strips, get it clean, dust and fingerprint free, and perfectly centered, but once it’s on, its there to stay (unless you want to remove it – in that case, to remove the ‘da screen protector use dental floss to break the seal at the bottom corners, then slowly peel off.) I know that today’s LCD screens are durable, but I feel more comfortable and carefree about constantly wiping off my protector with my fingers or shirt than I would directly on the built in screen. This is also why I use B+W UV filters on the lenses. However, if you have a camera with a rotating screen such as a 60D, T3i, or D5100, this type of screen protector won’t work. You will need to use a thin adhesive film protector like this one.
Calumet micro fiber lens cloth – Stores perfectly in another slim inside pocket of the backpack, and always handy to have.

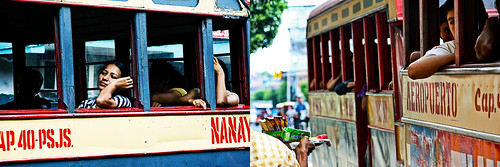
Chichicastenango, Guatemala
Insurance – Although I am a member of NPPA – National Press Photographers Association, I also joined NANPA – North American Nature Photography Association, in order to get their equipment insurance, which is much cheaper and has a much lower deductible than NPPA’s, even including the extra $100 to join NANPA. The insurance is primarily for the equipment only, so you are not paying for liability coverage geared toward a business as you are with every other photo equipment insurance plan I researched. Please note that the NANPA membership fee covers you from June to June or something like that – they don’t pro-rate, so you will not get a full year if you join at any other time. The insurance covers photo and computer equipment at home and while traveling. (If you happen to join NANPA to get their insurance, be sure to mention my name as a referrer, and I get $20 NANPA Bucks and save on my next renewal!)
Skooba Satchel 2.0 Laptop Bag – This is typically my second carry on, in which I carry my laptop, some books, misc. charging cords, some toiletries. This is a wonderful laptop bag, and you won’t believe how much will fit in it! As they say themselves, it is deceptively slim looking and incredibly light. It has these great little air squares for cushion everywhere – like bubble wrap made from durable rubber, and has an extremely comfortable and ergonomic strap.
Lowa Tempest Lo Hiking Shoes – I’ve worn these shoes, this same pair, nearly everyday, for almost 4 years straight now, and they still have a little life left in them. I wore them every single day for a total of 7 months in Peru, walking the cobbled streets of Cusco, and traveling the country. And I wore them nearly every day for 3 years walking the streets of Brooklyn and Manhattan, and now Cambridge. (I don’t have a car, so I actually walk, a lot.) They are so comfortable I never notice them. They are light, durable, and somewhat waterproof if treated regularly. I recently bought a backup pair for the inevitable day that I have to give them up. After 3.5 years one one them developed a tear at the front-side where they crease when crouching to take photos, but they are still fine except in the rain.
Post-Production – Once you get back you are going to need to organize, edit, and work on all your photos. And for that, of course you are going to need
Adobe Photoshop and/ or Adobe Lightroom 3. You can start off with the trial versions that you can download from the Adobe site, but sooner or later you are going to have to get the real versions. Use that student discount while you still can!
Purchasing: If you plan to purchase any of this equipment, accessories, or anything else from Amazon.com I encourage you to do so through the links I set up throughout this post. Just click on the equipment above and you will be taken directly to that Amazon page. Your purchasing price will be the same, and they will give me a little something for referring you, which will help support my blog. Thanks! Or click on the Amazon.com logo below to enter Amazon and start shopping. I appreciate your support!

If you are in the UK or Canada, please use these Amazon links:
UK: my Amazon.co.uk link
Canada: my Amazon.ca link
For those interested in purchasing through B&H Photo I have set up affiliate links with them as well – find it on the left side of this page.