
I just came across a certain review of the new Canon 5D Mark III and am compelled to respond. It is one thing to write a critical review, but a whole other thing to list various perceived shortcomings and deficiencies that simply don’t actually exist in the camera. After having spent several intimate weeks with the 5D Mk III (as I wrote the Canon 5D Mark III Experience camera guide), it is disappointing to then read about alleged issues and faults which actually don’t exist but were merely assumed by a reviewer because effort wasn’t put into reading the manual and properly learning the camera.
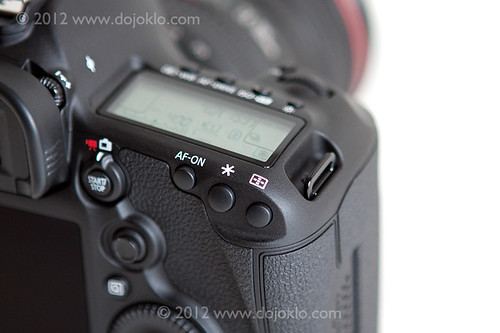
Detail of the Canon 5D Mark III by dojoklo
I have put together a list of some of my responses. KR quotes are in italics and blue, and my replies below them.
Slower Autofocus – With so much more to set, learn and get in the way, the new AF system will slow you down until you master it. The 5D Mark III’s AF system is that is about ten times more complicated than earlier cameras. Now it will take you forever to learn how to use it, and if you do, you’ll discover that the Auto AF Area Select mode takes much longer to select which of the 61 points it feels like using, while the original 5D and the 5D Mark II instantly selected among their 9 points..
Yes, the sophisticated and highly customizable autofocus system of this professional camera needs to be fully learned and understood in order to take full advantage of it and to gain proficiency at using it. But the AF system and menus are designed to be powerful yet easy to get the most from, and this proves to be true once the user puts some effort into learning and setting it up. Then you will find that there are numerous solutions to quickly accessing it, changing it, and making full use of the Canon 5D Mk 3 autofocus system, including:
- Limiting the number of selectable AF points in the AF4 menu to just 15, 9, or 41 cross-type (while all of the 61 AF Points will still be available for use by the camera to find, track, and capture subjects).
- Setting up all the AF menu and Custom Function items initially to best suit your style of shooting and then not dealing with them anymore.
- Or better yet, tweaking any of the Autofocus Case presets to your liking, then quickly choosing among the Cases based on your shooting situation.
- Setting up your favorite combination of AF settings, modes, tracking settings, etc, which can then all be registered and called up with the press of the DOF button.
- Adding any of the AF menu items to My Menu, setting My Menu to come up with one button push, then quickly accessing the AF menu items you need to change.
A different response to the Canon 5D Mk III autofocus system would be to marvel at the incredible, never-before-possible opportunities to customize and use a state-of-the-art AF system to track, retain focus, and capture shots that could not have previously been captured, through pre-setting the camera to be aware of the rates of speed and amount of erratic movement to expect from the subject, as well as take into account the user’s desire to either retain focus on a subject/ distance or to quickly be able to change to another subject/ distance. Not to mention the various configurations of AF points and Zones which can be chosen to most accurately focus on and track a variety of subjects and situations.
AF is much more complicated, not necessary better than the original 5D and 5D Mark II.
Anyone who has used the 5D and 5DII autofocus system for more than 6 minutes and then used the 5DIII AF system will tell you that:
1. there were some major shortcomings with the 5D and 5DII autofocus, particularly in lower light, and
2. the AF speed, accuracy, and low light focusing abilities of the 5DIII are on a whole new performance level than those previous models.
It’s not any different from other AF cameras as far as low-light is concerned.
As indicated above, I found quite the opposite to be the case as, for example, I quickly and easily grabbed focus on a black furry face in incredibly dim lighting, which could never have been accomplished so easily with the 5D II or 50D:

Canon 5D Mark III – 25,600 ISO, JPEG straight from camera. 25,600 ISO plus 1/640 plus f/1.4 will help indicate the light level.
The finder’s AF display is inferior. Instead of discrete LEDs that only blinked as needed, the Mark III’s new screen uses solid black LCD boxes that get in the way of seeing your subject’s subtleties — like when they smile.
The big, bright, glorious viewfinder of the 5D3 offers several options for how and when to display and/ or illuminate the AF points as they are seen in the viewfinder, including different options to have them visible and/ or blink just when used or needed, as listed below. See the AF5 Menu, AF Point Display During Focus item as well as other menu items to set up exactly how and when they illuminate such as VF Display Illumination.
Selected (constant) – The selected AF Point (or points) is always visible, but not all of the other 61 AF Points.
All (constant) – All of the 61 AF Points are always visible. Recommended: this will make it easier to always know where the other points are for when you quickly need to select a different point. These AF Points are typically too important to hide!
Selected (pre-AF, Focused) – The selected AF Point(s) is visible when the camera is ready to shoot even before you have started any AF operations, when you are selecting an AF Point or zone, and when focused is achieved by the camera (except when working in AI Servo AF mode).
Selected (focused) – The selected AF Point(s) is visible only when you are selecting an AF Point or zone, and when focus is achieved (except when working in AI Servo AF mode).
Disable display – The selected AF point(s) will only be displayed when selecting an AF Point or zone.
Plus you can turn the grid display off or on. I myself find seeing all the AF points as well as the grid indispensable to taking full advantage of the AF system while keeping my framing straight and level.
The AF points are now poorly lit. An LED lights up the entire screen and sort of helps you see the dark LCD AF point boxes in the dark. The older cameras were much better.
Again, I did not find this to be the case, and had no problem making use of the AF points in the dark as I took these images. In fact I rather enjoyed using the AF system in the dark as I shot these images, and marveled at how pleasant it made night shooting. However, other 5D3 users have shared KR’s complaint regarding the black AF Points in dark situations, and it sounds like Canon is going to address this with a future firmware update.

Canon 5D Mark III – In-Camera Multiple Exposure feature

Canon 5D Mark III – In-camera HDR Shooting Mode – Art Embossed setting, +/-3 EV
No Highlight AND Shadow optimization – While all Nikons and the 5D Mark II can optimize both highlights and shadows at the same time, the 5D Mark III no longer can do this.
Auto Lighting Optimizer is designed to automatically adjust contrast and brightness and helps to maintain detail in both the shadow and highlight areas. The new HDR shooting mode, when set to Natural, can also capture a wider range of shadows to highlights. ALO and Highlight Tone Priority were never designed to be used simultaneously.
A huge defect in the 5D Mark III’s AF system is that no longer can I switch among the AF modes I use with one click, without stopping or taking my eye from my subject.
The DOF Button can be set to instantly switch between One-Shot and AI-Servo AF Modes on the 5D Mk III. I’m not sure how one did this “one-click switch” with the Mk II in a way that can’t also be done with the Mk III.
No Zoomed-in Histogram – When you zoom, the histogram goes away.
With the new side-by-side Comparative Playback, you can view the entire image with histogram on one side of the screen, and a zoomed in detail from that image in the other window.
Not to mention that the incredibly versatile side-by-side image playback feature offers numerous other review and comparison opportunities never before available.
Impossible-to-set custom manual white balances – It still takes about ten steps to set a custom manual white balance.
Add Custom White Balance to My Menu and access it much faster. Then take your WB photo, access Custom WB through My Menu, select that photo you just took, and set the camera WB setting to Custom with the quick press of a button and turn of a dial. I count 4 steps to access an advanced feature that very few photographers employ on a regular basis. Not really that hard.
No Custom White Balance Memories
True, but you could register the custom WB as part of one of the C1, C2, or C3 Custom Shooting Modes.
The Ratings button is a waste of a button, unless you really like to edit in-camera.
That may be true if you find you don’t use it. I have unexpectedly grown fond of the Rating feature, and use it to save much time later when back at my computer. In addition, the 5D Mk III offers an incredible amount of options for customizing the buttons and controls of the camera, as demonstrated by the grid of choices on pages 322-323 of the manual, plus several additional options discussed with the functions they control.
As I’m learning to use the AF system, I’ve realized that it will never make sense because the AF-Area settings were removed from the Quick Control screen. Now we always will have to look in two different places to set the AF Mode (AI SERVO, AI FOCUS or ONE SHOT), and someplace else to select the manner in which the various AF areas are used.
If you first press the INFO Button and access the Shooting Settings screen and then press any of the three setting-selection buttons on the top of camera (including AF Mode), you can view and change their settings on the rear LCD Monitor, also using either the Main Dial or the Quick Control Dial as you would when changing the function while viewing the top LCD Panel. In other words, an amazingly awesome and handy Quick Control Screen specifically for each of the top button’s paired functions. This will also work with the AF Point Selection Button after pressing the INFO Button and accessing the Shooting Settings screen, and then you can view and select an AF Area Selection Mode on its very own Quick Control Screen. BUT, the reason that the 5D Mark III has buttons that the T3i does not have is so that a knowledgeable user can quickly and easily access these functions on the fly (such as AF Mode and AF Area Mode) without using a Quick Control Screen. Sigh.
To learn much more about how to use and take advantage of all of the features, controls, and capabilities of the Canon 5D Mark III, have a look at my guide Canon 5D Mark III Experience.
Canon 5D Mark III Experience – The Still Photography Guide to Operation and Image Creation is an e-book user’s guide that goes beyond the manual to help you learn the features, settings, and controls of this sophisticated, powerful, and highly customizable camera. Most importantly, it explains not only how but also when and why to use the features, settings, and controls in your photography.
 Written in the clear, concise, and comprehensive manner of all Full Stop guides, Canon 5D Mark III Experience will help you learn to use your EOS 5D Mk III quickly and competently, to consistently create the types of images you want to capture.
As one Canon user has said about Full Stop guides:
“I don’t know how I could fully take advantage of all the features the camera has to offer without this publication! It’s well-organized, easy to understand, and succinct enough to keep your attention while still containing a wealth of information to get the most out of your camera.”
Take control of your Canon 5D Mk III, and the images you create!