OK, I admit, I’m being a bit deceptive. While this post will include “tips” for taking full advantage of the Canon EOS 5D Mk III, it won’t really contain any “tricks.” That is because with digital photography, especially a camera as powerful and complex as the 5D3, there really aren’t any tricks. Tricks implies shortcuts, and to paraphrase Euclid, there is no royal road to dSLR photography. Instead there are techniques and camera controls that can and should be learned. These will then allow you to adapt not just to a specific situation or emulate a certain image or style, but will give you the tools and knowledge to adapt to any situation and create the images you desire.
I spent several intimate weeks with the Canon 5D Mk III as I researched and wrote my dSLR camera guide, Canon 5D Mark III Experience, the first (and hopefully best!) book available for the 5D Mk III. In the process I learned and discovered a few obvious and not so obvious things about the 5D3 that will help you get the most from your camera.

Detail of the Canon 5D Mark III
Learn and Take Advantage of the Autofocus System
First and foremost is to learn, understand, and make full use of the new 61 Point autofocus system. This powerful and highly customizable AF system will allow you to capture more sharp images of a variety of moving subjects which was not previously possible with the 5DII, or even the 7D. But to do this you will need to take control of it in order to focus on, or begin tracking, your intended subject. This involves making use of the AF Modes as well as the AF Area Selection Modes and AF Points.
For moving subjects you can then employ the AF Cases and their settings to let the camera know what to expect as far as subject movement. AF subject tracking works in part by predicting where the subject will be when the Shutter is pressed, so if the camera knows the subject is going to be moving erratically about the frame and changing its rate of speed, then it can take measures to better follow this than if it is set for a subject that is expected to move smoothly at a steady rate. Ten tips could easily be written about the autofocus system alone, but I will limit it to a few (my e-book guide Canon 5D Mark III Experience contains extensive explanation of the AF system and all its elements, if you wish to learn it inside and out.)

Simulated image of the Canon 5D Mark III viewfinder showing the 61 autofocus points, with the desired AF Point shown as the larger black square.
One of the essential steps in taking a successful and sharp photo is controlling where the camera autofocuses. If you allow the camera to autofocus by automatically choosing its own focus point(s) (such as in Auto+ Shooting Mode or with One-Shot AF Mode and Auto Selection – 61 Point AF Area Selection Mode) it typically focuses on the closest object. This may or may not be what you want to focus on, so you should select or at least narrow down where the camera focuses using the autofocus AF Points or Zones. By doing so you are telling the camera exactly where to autofocus or to look to find a moving subject to track. For example, you often want to focus on a subject’s eyes, but if you allow the camera to choose the autofocus point itself, it may select another part of the face, or somewhere else on the body, or even a raised hand that is nearer to the camera than the face to focus most sharply on. If you are capturing an image of a bird in a tree, the camera has no idea you want the autofocus system to zero in on the bird so that it is in sharp focus and not the branches or leaves near it or the perhaps even the leaves closer to you.
You will select an AF Mode based on whether the subject is still or moving, and select an AF Area Selection Mode based on how large of an area you want the camera to look at to find your intended subject – ranging from a small spot to a wider Zone to all the available 61 AF Points. You can set the AF Modes and AF Area Selection Modes in a variety of combinations based on what and how you are shooting.
Activate all the Available AF Area Selection Modes at first and experiment with them all. Then if you decide that you will never or rarely use one or more of them, de-activate those modes so that you don’t have to “click” through them every time to select your desired mode.
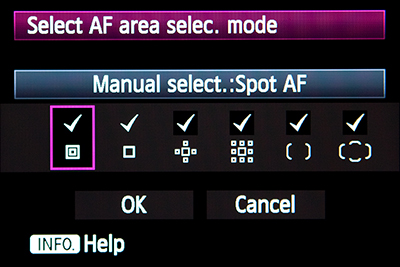
Available AF Area Selection Modes of the Canon 5D Mark III
Spot AF is Not Necessarily More Accurate than Single-Point AF. You may be inclined to use Spot AF all the time, assuming it will be more accurate than Single-Point AF, but this is not advised. Spot AF is designed for specific situations and autofocusing challenges, where you need to focus on a very precise area and avoid any surrounding or foreground objects that the AF system may otherwise lock onto. This can include making sure you zero-in on a bird that is sitting among leaves and branches, or perhaps shooting through a fence to a subject beyond. In those situations you may find that Single-Point AF searches back and forth between the near leaves/ fence and the further subject, because the area it is looking at to find the subject encompasses both potential subjects. Spot AF will allow you to target in on a more precise area. Although Spot AF is indicated in the Viewfinder by the tiny square within the larger selected AF Point square, Spot AF will actually pinpoint the focus to an area about the size of the larger square.
So while Spot AF will be more accurate in certain situations as described, it should not be used for general use. Because it is so precise, the area it looks at to find contrast or a detail on which to focus may be an area of solid color. For example if you used Spot AF to quickly focus on the general cheek and eye area of a face, it may be aimed at an area of skin without contrast, whereas the Single-Point AF area might encompass the cheek and the eye and thus find enough contrast to be able to properly and quickly focus.
Decide How Many Selectable AF Points you wish to Choose From. If you are coming from a Canon 5D Mark II, the 60D, or any number of other previous Canon dSLR cameras, you may be used to only having 9 AF Point to choose from. If you still wish to manually select a specific point or zone, you may find that 61 points are a bit overwhelming at first. Even if you are used to the 19 AF Points of the Canon 7D, you may not wish to suddenly jump up to 61 AF Points. So you can limit the number of AF Points you wish to choose from to either 15 or 9, or to just the more accurate cross-type points. Unfortunately, the 9 points are not in the nice diamond pattern of previous EOS cameras, but you may find them to be more manageable.
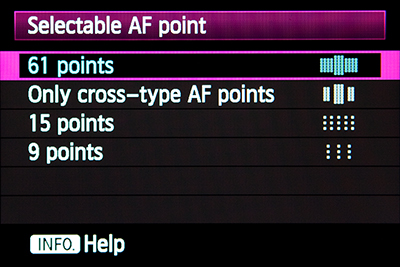
Limit your Selectable AF Points if 61 are too many to deal with.
Choose Your Priority when Working in AI Servo – Focus or Release. You will need to tell the camera what your priority is when shooting in AI Servo AF mode – is it to ensure that the subject is in focus, or that the shutter is release immediately, whether or not the subject is in focus? There are two menu items to set the priority for the first image and the second and subsequent images if shooting in Continuous Shooting Mode.
For AI Servo 1st Image Priority, Release priority will prioritize shutter release, or immediately capturing the initial shot at the possible expense of exact focus. Generally when taking a photo, you are supposed to half-press the Shutter Button, allow the camera to focus, then continue the full-press of the Shutter Button to take the image. If you simply “mash” down the Shutter Button, this setting will cause the camera to take the photo without bothering to focus first. Sometimes when photographing sports, news, or events, capturing the “decisive moment” may take priority over exact focus.
Setting for Focus priority will prioritize focus for the first shot, ensuring that the subject is in focus before the picture is taken. So when you fully press the Shutter Button, this setting may cause a brief, perhaps micro-seconds delay while the camera confirms focus before actually releasing the shutter.
Equal priority is a slight compromise between Release and Focus priorities. It allows a brief (perhaps micro-seconds) pause for the camera to possibly find focus before releasing the shutter. It does not guarantee that the image will be in focus, but merely gives it more of a chance to find focus. It generally seems to make more sense to choose Release or Focus based on your priority.
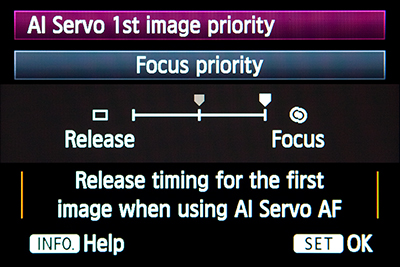
AI Servo 1st Image Priority menu to determine if capturing the shot or getting the subject in-focus is the priority.
AI Servo 2nd Image Priority is similar except that it applies to the second and subsequent images in the burst. Setting for Speed (Shooting speed priority) will prioritize shutter release, or continuing the high speed burst at the possible expense of exact focus.
Setting for Focus will prioritize focus tracking for the following shot(s), ensuring that the subject is in focus as you continue to take the burst of images. Again, this may cause a brief, perhaps micro-seconds delay while the camera confirms focus before releasing the shutter for each image.
Equal priority again allows a slight pause before each of the subsequent shots to perhaps give the camera time to find focus before releasing the shutter. This pause may be slightly more pronounced when shooting in low light or low contrast situations.
These 1st Image Priority and 2nd Image Priority settings should be set in conjunction with each other, based on the type of situation you are photographing and thus your priorities. Generally, it sharp images are your goal, you will want to set both for Focus Priority. You may sacrifice the maximum 6 frames per second (fps) continuous shooting speed (if you have the Drive Mode set for High Speed Continuous) as there might be a couple micro-seconds or more delays as the camera ensures that the subject is in focus before taking the subsequent shots. If you are capturing a “decisive moment” such as a runner at the finish line or a goal being scored, you will want to set one or both of the settings to Release Priority/ Speed Priority, but ensure somehow that you have pre-focused on the subject distance so the result is not wildly out of focus. Again, I go into much more detail about the various combinations and when to make use of them in my e-book.
Set the Custom Controls for Multi-Controller Direct. This will allow you to manually select your AF Point or Zone more quickly by simply toggling the Multi-Controller thumb joystick, without having to first press the AF Point Selection Button. You have probably noticed, to the dismay of your muscle memory, that the AF Point Selection Button no longer controls image zoom. This is because there are many more image review options that are now made possible by Comparative Playback (side by side image review), discussed just below.
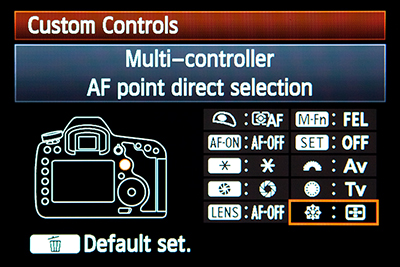
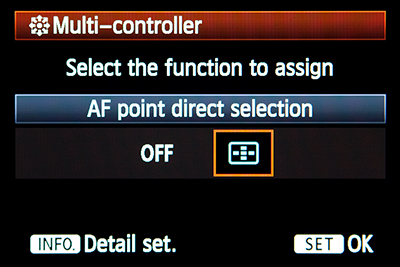
Set the Multi-Controller for AF Point Direct Selection for ease and speed.
Take Advantage of Comparative Playback (Side by Side Image Review). Of course you can instantly review the image you just captured on the rear LCD Monitor, but the 5D Mk III now also offers Comparative Image Playback Mode (Two-Image Display) which gives you the ability to simultaneously compare two images or two different sections of the same image. Whereas before, one would have to “flip” back and forth between two images and navigate around the images, this feature allows for some extremely helpful and flexible image analysis that was previously only possible once you were back at your computer.
To enter Comparative Playback Mode during image playback or review, press the Creative Photo / Comparative Playback Button (at the top of the row on the left of the camera back), which is also indicated by the side-by-side blue squares icon for side-by-side image playback. Use the SET Button to highlight which of the two image windows you wish to navigate, then use the Quick Control Dial or Main Dial to scroll or jump to the desired image, the Magnify Button followed by the top Main Dial to zoom in or out of the selected image, and the Multi-Controller to navigate around the selected image frame. You can press the INFO Button repeatedly to change the Shooting Information Display in order to view shooting information and/ or the Histograms. If you zoom in on a specific area of one image and wish to zoom in on the other image to the same magnification and same area of the image, press the SET Button to switch to the other image window, then press the [Q] Button. Also, press and hold the Playback Button to view the highlighted image as a single, full-screen image.
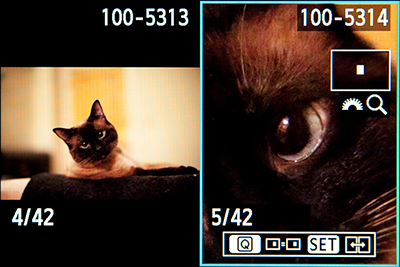
Comparative Playback Mode view of two different images, also showing the images’ Histograms.
There are several different viewing options and potential uses for Comparative Playback, whether you are simultaneously viewing two separate images or two areas of the same image.
-Display the active AF point(s).
-Preview alternate cropping guides.
-View the thumbnail plus the Luminance Histogram.
-View the thumbnail plus the RGB Histograms.
-View the thumbnail plus basic exposure information.
For two different images:
-Compare the compositions of two images simultaneously.
-Zoom in and simultaneously compare a specific area for focus or exposure.
-View the thumbnails along with histograms or basic exposure information of both images.
For the same image:
-Zoom in and simultaneously compare two separate areas of the same image to have a closer look at focus or exposure.
-View the entire image for overall composition while also zooming in to view an area of detail for focus or exposure (see Figure 61).
Set the Default Magnification for Image Review. In order to immediately review your images according to your preferences, you should set the initial magnification and position that you will view an image during image review (Playback) when you press the Magnify Button. You can set for no magnification (1x) and then use the top Main Dial to zoom in and out. This can be handy if you have the image review set to initially show the Shooting Information Display with the Histogram. Since the image in that view is a thumbnail, you can then press the Magnify Button to show the full size image. After this initial zoom, you can then use the Main Dial to zoom in or out.
Or set for 2x, 4x, 8x, or 10x magnification and it will instantly zoom to that magnification when the Magnify Button is pressed. Again, after this initial zoom, you can then use the Main Dial to zoom in or out. Each of these magnifications will zoom from the center of the image. Or you can set it to quickly zoom in to full size, 100% view of the pixels, zoomed into the AF Point where focus was achieved, using setting Actual size (from selected pt). This can be useful to quickly check for precise focus, though note that if you focused with a selected AF Point and recomposed, it will zoom into the final position of that AF Point in the composition, not the actual position where you used it to focus on your subject. But if you only recomposed slightly, it will often be easy to quickly navigate to the actual area of focus. The setting Same as last magnif. (from ctr) will zoom in at the same magnification that you last viewed an image at, centered at the image center.
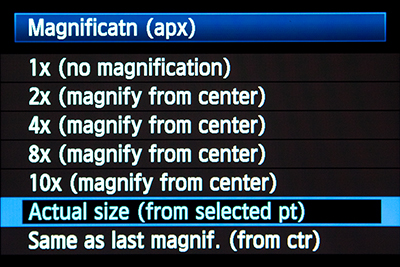
Magnification menu to set how images are initially viewed during Playback when the Magnify Button is pressed.
I’m still putting this post together but wanted to share what I had already written. Next week I will go into more detail about the tips below:
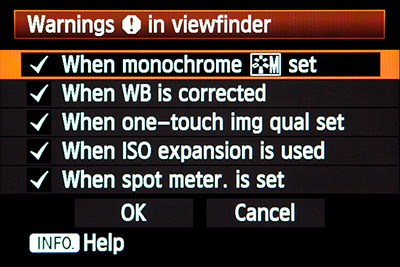
Turn on the Viewfinder Warnings
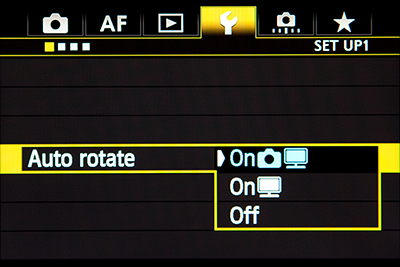
Auto Rotate Images in the Camera and on Your Computer
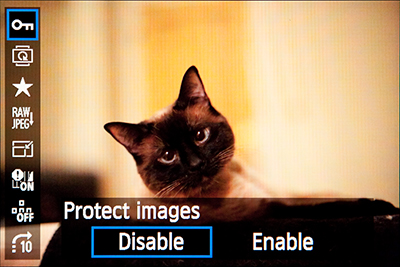
Use the Q Button for Quick Access to a Variety of Features for Still Images
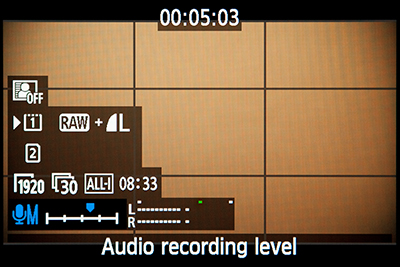
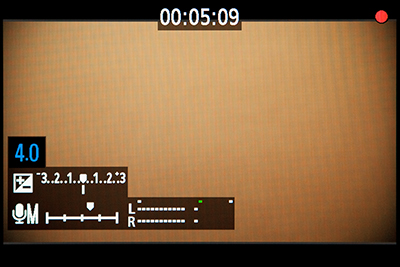
Make Use of the Silent Control Touch Pad and Q Button for Movie Shooting
All of the above information – and much, much more – can be found in Canon 5D Mark III Experience, my latest Full Stop dSLR user’s guide e book, which goes beyond the manual to help you learn the features, settings, and controls of the powerful and highly customizable EOS 5D Mk III, plus most importantly how, when, and why to use the functions, settings, and controls in your photography.
Written in the clear, concise, and comprehensive style of all Full Stop guides, Canon 5D Mark III Experience will help you learn to use your Canon 5D Mk 3 quickly and competently, to consistently create the types of images you want to capture. The e-book is available in either PDF, EPUB, or MOBI format for reading on any device.
Learn more about it, preview it, and purchase it here:
http://www.dojoklo.com/Full_Stop/Canon_5DMkIII_Experience.htm
As one Canon user has said about Full Stop guides, “I don’t know how I could fully take advantage of all the features the camera has to offer without this publication! It’s well-organized, easy to understand, and succinct enough to keep your attention while still containing a wealth of information to get the most out of your camera.”
Take control of your 5D Mk III, the image taking process, and the photos you create!


