Canon 5D vs 7D vs 60D vs 50D vs 550D / T2i

This post has been revised and updated to include the new Canon Rebel T3i / EOS 600D. Please proceed over to this post to read the most current information:

Canon T3i/600D vs T2i/550D vs. 60D vs. 7D, etc.

Like many others out there, you are asking yourself, “should I buy the Canon 7D or 60D or 50D or 550D / T2i?” It’s a difficult question because at this point the three dSLRs in the current Canon consumer line-up (EOS 60D, EOS 7D, Rebel T2i/ EOS 550D) all share a number of specifications and features, a similar exposure metering system, as well as an image sensor that is nearly the same, and all with 18 megapixels. So how do you choose between the Canon 60D, the T2i (550D) or the 7D? This decision has become infinitely more difficult (or perhaps infinitely simpler?) because the image quality and ISO performance of these three cameras will be nearly identical, and all are capable of taking high quality images. So as I like to profess, you need to choose which camera is best for you based on your needs and experience as a photographer and based on how the advanced features, controls, and customization options fit those needs and serve the way you work.
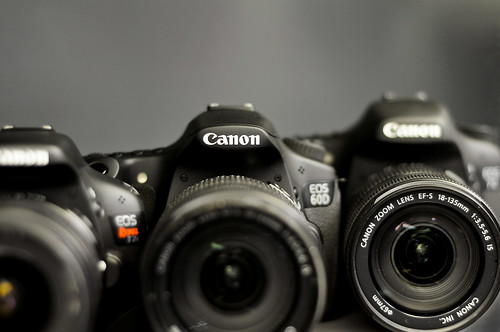
Canon T2i vs 60D vs 7D
photo by author

When you are trying to determine which camera to purchase or upgrade to, you need to first consider and determine your needs, and then see which camera fills those needs. Not the other way around where you look at the new features and speculate if you really need or will use them. I will discuss how to go about this in more detail below.

Review of Canon EOS 60D vs. 50D: Since the Canon EOS 60D basically replaces the Canon 50D (well, replacement isn’t exactly the right word because the 60D doesn’t really follow the 20D to 50D progression of improvements…), the 60D or 50D decision is an easy one. The 50D shouldn’t really be considered anymore. While the Canon 50D does hold a couple interesting advantages over the 60D (faster frame per second (fps) burst rate in continuous mode, stronger construction, more comprehensive buttons and controls, complete lack of fun filters like “grainy black and white”), the sensor and exposure metering system have been greatly improved in all the newer cameras (7D or 60D or 500D/ T2i) and I feel these features, along with the increase in mega pixels, outweigh any other 50D advantages. I would definitely choose a 60D instead of a 50D. This is coming from experience, as I use a 50D professionally and on a daily basis. Or choose a 7D instead of a 50D if your needs require it and budget allows it. (Find out below if your needs require it!) Digital cameras are somewhat disposable. Yes, even $1000 digital cameras. Within 5 years, your new camera will have become old, outdated equipment. The 50D is already two year old technology, so if you start with one now, in 4 more years it will be absolutely archaic! (Actually, since the 50D was just the 40D with a couple more megapixels, it is even older technology than that.) With digital SLRs, I advise buying a recent model, at whatever price range you can currently afford. Of course as with everything in digital photography, this is relative. The 50D is still an excellent camera. And camera companies have to keep coming out with new models every 12-18 months because that is what they do. The trouble comes in 2-3 years when your 50D is still perfectly good and still pretty new to you, but it can no longer compete with the latest offerings in terms of megapixels, ISO performance, and autofocus systems. If this hasn’t convinced you and you still want to consider the 50D for cost or other reasons, I write in more detail about the 50D vs. 60D comparison here from a camera features and operation point of view.

Before I get more into it, I want to mention that I have written eBook user’s guides for the Canon Rebel T3i/ EOS 600D, the Canon Rebel T2i/EOS 550D, and the Canon EOS 60D. After spending so much time studying, experimenting, writing about, comparing, and discussing these cameras, I decided to put all that knowledge into eBook form! Each of these user’s guides cover all the Menu settings, Movie Mode menus, and Custom Function settings – with recommended settings – plus discussions of how, when, and why to use the cameras’ settings and features, (metering modes, aperture and shutter priority modes, advanced autofocus use, and more) for everyday and travel use, to help you take better photos – Your World 60D, Canon T3i Experience, and T2i Experience. Learn more about the eBooks by clicking on their titles.

Back to the Comparison:

Review of Canon EOS 7D vs. 60D vs. 550D / Rebel T2i: So the decision now comes down to the Canon 7D or 60D or 550D / Rebel T2i. (What about the 5D Mk II? Just wait, I’m getting to that! And if you haven’t yet committed to Canon and are interested in comparing the Canon 60D vs. Nikon D7000, have a look at this post.) Below are comparisons of some of the similarities and differences of these three cameras. Remember that all of these comparisons and features are relative. Of course the fact that the 7D can take 126 consecutive photos at the rate of 8 frames per second makes it “better.” Advanced features like that differentiate it from the other models and are also why it costs more. But do you ever need to take 15.75 seconds of continuous photos? Ever? (Look at your watch for 15.75 seconds right now and act like you are taking continuous photos. Now what are you going to do with all those imaginary photos?!)

Sensor and Image Quality: As I said above, all three cameras share a very similar sensor and 18 megapixels, and so their image quality will be virtually the same. All are capable of taking professional quality images.

Exposure Metering: The three cameras all share the latest 63-zone exposure metering system and 4 metering modes. That means they will all determine the exposure virtually identically and enable you to take properly exposed photos in most every situation, including difficult back-lit scenes. The size of the areas metered for Partial and Spot metering vary slightly between the cameras, but that isn’t anything critical.

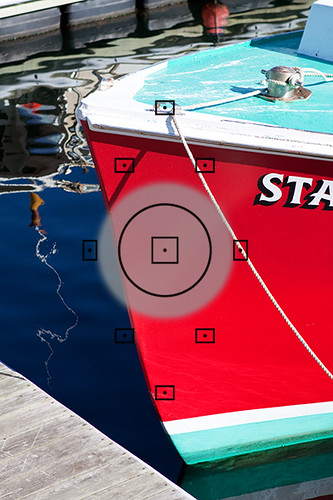
Autofocus: The 60D shares a similar autofocus system to the T2i and the previous 50D, with 9 focus points and three auto focusing modes. However the 9 AF points of the 60D are more sensitive than those of the T2i: all are cross-type in the 60D, only the center is cross-type in the T2i. The 60D autofocus system is much less complex than the sophisticated AF system of the 7D with its 19 AF point system and its additional Zone, Spot, and Expansion focus modes. These various modes address how you want to deal with and group these numerous AF points. Plus the custom settings of the 7D allow one to customize how the AF system works – how it tracks subjects, how it deals with objects that come between you and your initial subject, how quickly it responds to these changes of possible subjects that are at different distances from you, etc. However, if you are not an avid sports photographer, a wildlife shooter, or someone who understands, needs, and will use the elaborate features of the 7D AF system, then this shouldn’t dissuade you from the 60D.

Construction: As you can probably figure out from the prices, each camera is not built the same. The 60D has relatively strong construction of aluminum and polycarbonate. It is better built than the 550D but not as strong as the 7D’s magnesium alloy frame. The 60D also has some amount of weather sealing – more than the 550D/T2i, less than the 7D. But for most users, including even those using the camera daily or in travel situations, the construction of any of these cameras is far more than good enough, strong enough, and durable enough.

ISO: Since they all share a very similar sensor, the ISO sensitivity and performance at high ISO settings is virtually the same for these three cameras. But don’t take my word for it, don’t be swayed by pixel peepers on forums, instead check out the camera sensor tests at dxomark to verify this. As you can see, they all share the exact same overall score, and show very similar performance.

Controls:
As with construction, the buttons and controls vary with these cameras. Unlike the T2i, the 60D and 7D have nearly every control an advanced photographer needs on the exterior of the camera and they also have the top LCD panel and rear Quick Control Dial that are not on the 550D/T2i. With all the cameras, any controls can also be easily accessed with the Q button and menu or in the other menus on the rear LCD monitor. The top buttons of the 60D set only one setting each, so this is less complicated than the multiple-setting buttons of the 7D. Canon has removed the white balance (WB) button on the 60D that the 7D and 50D have, but that isn’t a big deal – use the Q Menu. Another change on the 60D is that the Multi-controller has been moved from the thumb joystick like the 7D and 50D and placed in the middle of the rear Quick-control dial. This doesn’t change how it functions, and should just be a matter of getting used to the difference. (Unfortunately, I still really do prefer the old design and location.) If you plan on using your camera on Auto or Program most of the time, then the controls of the T2i are more than sufficient for your needs.

Menus and Custom Functions: These allow for greater control over customizing how the camera functions. The 60D has many more Menu and Custom Function settings than the 550D/T2i and nearly as many as the 7D. These settings enable you to customize the operation, function, and controls to work how you want them to, including things like exposure increments, peripheral illuminations correction for lenses (fixes dark corners) and customizing which button does what. Since many of the Menu and Custom Function settings can be complicated and confusing, my eBooks on the 60D and on the T2i/550D cover all of these options along with my recommended settings to get you up and running quickly!

Wireless Flash: Like the 7D, the 60D incorporates wireless flash triggering. It allows you to trigger multiple off camera flashes at different output levels. The 550D/T2i does not have this feature.

Articulating LCD Screen: The big new feature that the 60D has that the other two cameras do not is the articulating rear LCD screen. This may prove useful for videographers, as well as for setting up compositions while the camera is on a tripod, for macro use, or for using it from unusually low or high vantage points. Some users will be able to avoid buying an expensive angle finder because of this feature. There is also an electronic level in the 7D and 60D, visible in the viewfinder, rear LCD, or top LCD.

Viewfinder: The 60D has a large, bright viewfinder with 96% coverage of the actual resulting image, a tiny bit better than the 95% of the 550D/T2i but not quite as nice as the nearly 100% view of the 7D.

Processor:
The 60D shares the same Digic 4 processor as the 550D/T2i. The 7D has dual Digic 4 processors. However, if you don’t need to shoot dozens of continuous images, you probably won’t notice any processing speed issues.

Continuous Shooting Speed: The 7D can shoot a blazing 8 frames per second, in which the photos barely change from frame to frame. The 60D can shoot a respectable 5.3 fps which is actually a more useful rate, and is a higher rate than the 550D/T2i rate of 3.7 fps. If you need the extremely high fps for sports, wildlife, or other action shooting, get the 7D. If not, don’t be swayed by this excessive feature.

Memory Card: The 60D uses the SD memory card like the 550D/T2i, not the CF card of the 7D and 50D.

Battery: The 60D uses the LP-E6 battery like the 7D and 5D, which is a nice feature as this battery can often last through a full day of shooting. The T2i uses a smaller battery with less capacity.

Size and Weight:
The 60D is larger and heavier than the 550D/T2i, smaller and lighter than the 7D. Go to the store and hold them to get a better feel for their size, weight, and feel.

AF Microadjustment:
The 7D has this feature, the 60D and T2i do not. Many are disappointed that the 60D does not include the ability to micro-adjust the focus so that each lens is completely accurate. However, if you have a focus issue, send your camera and/ or lenses to Canon while under warranty and ask them to calibrate them. Doing AF microadjustment yourself is often a maddening, never ending undertaking. You may make a good calibration under controlled conditions, but this really doesn’t replicate real life shooting.

Locking Mode Dial: This is a new feature for a Canon dSLR, only on the 60D, that keeps the Mode dial from accidentally rotating. A nice touch, and not at all difficult to change quickly with one hand, as some people have claimed: just push the center button with your left index finger, rotate dial with thumb and middle finger.

Full HD video: Of course they all offer this capability. Note that this is not video for your kids’ parties and soccer games. It does not have continuous autofocus while shooting, as a camcorder does. It is not designed for that kind of use, but rather for serious videographers who typically manually focus. You can adjust autofocus while shooting by pressing the shutter button or the AF button, but it may have a less than desired looking result.

Flash Sync: A Note to Strobists -the 60D and T2i do not have a PC sync flash socket to plug in PC sync cords. The 7D has this.

Ease of operation: While beginners may find all the buttons, controls, and menus of any dSLR difficult and confusing at first, the additional controls and menus of the 7D and 60D are all quite intelligently designed, intuitive, and straightforward for the more advanced user.

*****

Purchasing: If you plan to buy any of these cameras through Amazon.com, (or just wish to purchase anything from Amazon) I would appreciate it if you use this referral link to Amazon or one of the camera links just below. Your price will be the same, and they will give me a little something for referring you, which will help support this blog. Thanks!  And due to popular request, if you are in the UK, here is my new referral link to Amazon UK. If you are in another country, click on one of my Amazon links, scroll to the bottom of the page, and click on your country for your local Amazon. And for those wishing to purchase from B+H Photo, just click here for my referral link to B+H. Thanks for supporting my blog!

See and buy the T2i on Amazon.
See and buy the 60D on Amazon.
See and buy the 7D on Amazon.
See and buy the Canon 5D MkII on Amazon.

I wrote a previous post that also goes in-depth into comparing and choosing between these cameras, but was written before the introduction of the EOS 60D. It does however have some additional info that may prove useful: Canon 7D vs. 5D vs. 50D (Plus 550D/T2i) Part II

Lenses, Accessories and Books: Now that you are on your way to deciding on a camera, you should also start looking into lenses, photography gear, accessories, and books. Check out this link, Best Lenses for Travel Photography, which also applies to general photography, Equipment for Travel Photography, which discusses useful and practical photo accessories and equipment for both everyday and travel photography. This post lists and describes Essential Books for Digital Photography, including the best user’s guides for each of these cameras.

And to sum it all up, here is a brief, mostly serious synopsis to help you make the camera decision:

Get a Canon 550D / Rebel T2i if you are new to photography or to digital SLR photography, or want to upgrade from an older Rebel because you want higher image quality and more mega-pixels (or HD video). If you have been happy with the features and controls of your previous dSLR camera and have not discovered the need, in your use of it, for any specific additional features, there is no need to look beyond the 550D. See the T2i on Amazon.

Get a Canon 60D if you have outgrown the capabilities of an older Rebel like an XTi or T1i due to your greater experience and more demanding shooting needs which require more direct or sophisticated controls and customization options. Or you have been pretty pleased with your 20D or 40D and its features but wish to upgrade for the increased image quality and mega pixels (or HD video). And/ or you need a more rugged camera for your frequent and demanding shooting and off-the-beaten-path traveling needs. Or if you need the increased 5.3 frames per second continuous rate to shoot sports or action. Or you really like swiveling LCD screens. If you typically shoot on Auto or Program mode, you do not need a 60D. If you do not manually select your own focus point and have never used exposure compensation you do not need a 60D. If you have never used the AE-Lock [*] button to lock exposure you do not need a 60D. If you don’t understand the relationship between aperture, shutter speed and ISO you don’t need a 60D. Or unless you plan to dedicate yourself to learning this camera and the principles of SLR photography and grow into this more advanced camera, please save the money or use it towards a better lens. See the 60D on Amazon.

Get a Canon 7D if you have extensive experience with a Rebel (xxxD series like 350D, 400D) or with an older xxD series (20D, 40D) camera, and you know and understand most of the 7D’s controls and advanced custom features, and you specifically need some of them for your demanding shooting needs. If you haven’t passed the above “criteria” for a 60D, you definitely don’t need a 7D. If you have never used Av aperture priority mode or M manual mode, you do not need a 7D. If you have never used autofocus tracking settings to track a moving subject across your frame and worried how an interfering object would affect your focus you do not need a 7D. If you have never used spot metering to determine a critical exposure level or experimented with back-button focusing you do not need a 7D. Or unless you plan to dedicate yourself to learning this camera and the principles of SLR photography and grow into this very advanced camera, please save the money or use it towards a better lens. However, if you often need to take 126 consecutive photos at the rate of 8 frames per second, you do need the 7D. Immediately. Even if you just sometimes need that. Totally worth it. That’s 15.75 seconds of continuous shooting. Who doesn’t need that? You’d make Eadweard Muybridge proud. See the 7D on Amazon.

(Please note, the T2i/550D, 60D and 7D all have these features I just listed: manually selected focus points, exposure compensation, AE-Lock, auto-focus tracking, spot metering, and back-button focusing. I’m just using them as a determination of your experience level and needs)

The Canon 5D Mark II is in a separate league than the other cameras, being a full frame professional camera, and thus I’m not going to compare it to the others in this context. As I said in a previous post,

If the 5D Mk II fits your expanding and demanding needs as a photographer, you would already pretty much know that you needed a 5D after your extensive time using a Rebel or a 20D, 40D, etc. Otherwise, getting a 5D means most likely you’d be investing in far more camera than you will actually need or use.

If you don’t already know that you need a 5D, you probably don’t need a 5D. Plus, as is often the case, those who could really take full advantage of a 5D are those who can’t afford a 5D. (I’m thinking about the talented photographers I come across on Flickr, etc. who are making amazing images with entry-level Rebels.) Feel free to spend $2,500 on a 5D Mk II if you want, but unless you have extensive experience with photography and with a digital SLR, using a 5D is completely unnecessary and is unlikely to help you take “better” pictures than you will be able to with a 550D. In fact, until you figure out the controls, features, menus, and custom functions of a 5D or 7D, you may be taking worse pictures! And besides, the 5D MkII becoming old technology. You should wait for the 5D Mark III :) See the Canon 5D MkII on Amazon.

*****
Lenses: Lenses for Travel Photography
Accessories and Equipment: Equipment for Digital Photography
Books: Essential Books for Digital Photography

As I said above, when you are trying to determine which camera to purchase or upgrade to, you need to first consider and determine your needs, and then see which camera fills those needs. Not the other way around. Here is a post I wrote which discusses this, titled How to Choose a New dSLR Camera.

Canon 60D Introduced

The Canon 60D was just introduced!

Canon 60D

image of 60D from Canon website

As it had been widely rumored, the 60D has the articulating LCD screen. Although it doesn’t exactly replace the 50D in the sense that it doesn’t add upon the advancement of the 20D, 30D, 40D, 50D progression, it now takes that position between the 550D and the 7D. If you thought it was difficult to choose between a Canon 550D, 50D, and 7D, the choice just became infinitely more difficult, as all three of these cameras now share so many features. And because they share an image sensor that is very similar, and all with 18 MP, the image quality of these three cameras will be nearly identical. The Canon consumer/ pro-sumer lineup has never been so similar as it now becomes. So as I like to profess, you need to choose which camera is best for you based on the advanced features and customization options that are important to you and the way you work. See this post for what I mean.

Before I get into it, I want to mention that I will be selling a Canon 60D eBook tutorial, which covers ALL the Menu settings and Custom Function settings of the 60D (except movie menus), with recommended settings, PLUS in-depth descriptions of how and and why to use its settings and features in everyday use – Your World 60D – The Still Photographer’s Guide to Operation and Image Creation. Learn more about it here: http://blog.dojoklo.com/2010/09/16/canon-60d-users-guide-and-tutorial/

Strangely, the 60D takes a step back from the 50D in continuous shooting speed, in construction, and in use of an SD memory card, and lack of AF Microadjustment capability. They must have determined the smaller size and weight was an important consideration for the target consumer. But basically it is a Canon 550D/ T2i with a larger, more rugged body, advanced buttons and controls, and more advanced menu and customization options (or is it a stripped down 7D?!) One of the only functional differences between the 60D and the 550D is the faster continuous shooting speed. The elimination of the 50D’s thumb joystick and moving that control to inside the large control dial on the back is an interesting decision. While I think I prefer the location of the 50D thumb button, the new controller on the 60D may be easier to control on the diagonals, which I still struggle with on the 50D. In reality, it may just be a matter of getting used to the new control (although dpreview isn’t very pleased with it in actual use). The new 60D uses the same battery as the 7D and 5D, the LP-E6 – an unusual choice considering it is bigger than the 50D battery, but a good choice. Another great feature that Canon incorporated is the locking Mode dial, so that the top mode dial doesn’t accidentally move from, for example, Av mode to Landscape mode, which happens occasionally with my cameras as I take them in and out of their bags or as they lay against my leg hanging from the R-Strap.

Canon has added a lot of in-camera processing abilities which may prove to be useful and time saving to those who shoot a lot of photos and need fast turn-around. Most importantly, this includes the in-camera RAW processing, turning your RAW files into JPGS with the settings you desire, without opening them up and making the changes in Adobe Camera Raw and Photoshop or Lightroom. This also includes in-camera image resizing, while maintaining the original file. According to Canon,

“In-camera RAW image processing features include Picture Style, White Balance (WB), Color Space, High-ISO Noise Reduction, Peripheral Illumination Correction, linear distortion correction and chromatic aberration correction. These powerful in-camera editing tools will allow photographers in the field to produce optimized images on the spot and generate JPEG files at various resolution and compression settings for immediate sharing, without affecting the original RAW data.”

“Another great new feature for photographers-on-the-go is Canon’s new image resizing function. After capturing full resolution or smaller JPEG images, the camera can generate lower-resolution copies using menu commands. New lower-resolution settings include 1920×1280 for optimal display on HD televisions, or 720×480, ideal for immediate uploading to social networking and other photo sharing web sites. The original high resolution files remain unaffected by the image resizing function.”

And also, they’ve included some new fun filters, including the unexpected “toy camera” and tilt-shift-like “miniature” filters:

  • The Soft Focus effect filter helps dramatize an image and smooth over shiny reflections.
  • The Grainy Black and White filter can give a different nostalgic perspective to any shot.
  • Canon’s “Toy Camera” filter deliberately adds vignetting and color shift for a creative option when shooting a colorful scene.
  • Users can also make a scene appear like a small-scale model, simulating the look from a tilt-shift lens, with Canon’s Miniature Effect filter, great when shooting any scene from a high vantage point.

These kinds of inclusions, along with the size and weight reduction, indicate that the 60D is moving down the pro/pro-sumer/consumer scale towards the consumer end, with the Canon 7D now being the pro-sumer camera. (However, I still profess that any of these cameras, from the 550D on up, can give you professional quality images). Unfortunately the new 60D is a camera designed with product positioning (to fill a spot and a price point between the 7D and 550D and its position in relation to Nikon) and marketing (to appeal to a certain target of customers) as a priority more than with technology, innovation, and advancement in mind, which is disappointing to Canon photographers accustomed to the xxD progression of improvements.

Is it more accurately the 60D vs. 7D? Or the 60D vs. 550D / T2i? Here was my analysis and speculation from this previous post, three months ago (I know it is silly and pointless to make these predictions, but I’m pretty proud of my earlier assessment):

“It seems that it [the 60D] will sit at a new position that will no longer be a bridge between pro and consumer cameras (pro-sumer) as the 7D now fills that role (as the 50D once did), but will now be considered a very advanced consumer level camera.”

As dpreview now states,

“With the 60D Canon has unashamedly moved the X0D range out of the ‘semi pro’ bracket and instead focused on the enthusiast photographer looking to upgrade from their Rebel. As a result, it’s not the obvious continuation of the 30D – 40D – 50D pattern that its naming might suggest. Rather than being a direct upgrade replacement for the 50D, it’s perhaps better understood as a ‘Super Rebel.”

And later they call it,

“…essentially a new tier of EOS SLR, perhaps best described as a ‘high end Rebel.”

Let’s see how the actual 60D specs line up with my predictions!

Canon 60D

  • 18 MP APS-C CMOS sensor
  • Vari-angle 7.7cm (3.0”) 3:2 ratio LCD
  • Full HD movies with manual control
  • DIGIC 4
  • 5.3fps shooting for up to 58 JPEGs
  • 9-point cross type AF System
  • iFCL metering with 63-zone Dual-layer Sensor
  • Integrated Speedlite transmitter
  • Estimate Retail Price $1,099
  • 96% Viewfinder
  • ISO 100-6400, H:12800
  • SD memory cards

My Predictions from this previous post

  • 18MP 1.6x sensor – same!
  • 3″ 3:2 LCD – articulating – same!
  • HD video – same!
  • single Digic processor- same!
  • 6 or so FPS at high speedclose but the 60D is a little slower than expected
  • 9 or so point autofocus system, less advanced than 7D – same!
  • 63 zone metering – same!
  • (I didn’t know what to predict for the wireless flash – glad to see they included it!)
  • cost: $1,100-$1,300 – same! B+H is listing it for $1,100. The kit is with the EF-S 18-135mm f/3.5-5.6 IS Lens for $1,399.
  • 98%+ viewfinder – I was off with this one. It is disappointing the 60D doesn’t have a viewfinder quite as big and bright as the 7D, but it is close. It also uses interchangeable focusing screens but it looks like it doesn’t have the nice light up grid option as in the 7D.
  • all other features of 50D (construction, custom functions, AF microadjustment, live view, etc.)- same for the most part. Slightly smaller and lighter. This is due in part to the unfortunate use of a “polycarbonate resin with glass fibre on aluminum chassis” body rather than the more rugged magnesium allow of the 50D and 7D. The 60D also eliminates the thumb joystick for choosing focus points and locates it within the large control dial on back. Again, a strange choice. The 60D does not have AF Microadjustment capability, so again this makes it closer to the 550D than the 7D. The 60D also does not have a PC terminal for connecting external flashes via a cable.
  • Doesn’t use CF memory cards – strange. Seems like a backwards step, but I suppose it contributes to the slightly smaller size.

Lack of AF Microadjustment: Since the Canon 60D does not have Auto Focus Calibration, AF Microadjustment, see the bottom of this previous post for how to deal with that. Canon is hearing from those disappointed that the 60D does not have AF Microadjustment and they may decide to update the firmware and include it in the 60D when it actually goes on sale. However, I still don’t understand why many are so adamant about AF Microadjustment. Have you ever tried to calibrate a zoom lens? Not just with the center point at one focal length, but rather to calibrate it for real life circumstances? At various focal lengths and with different focus points? It is an infuriating, possibly impossible task. AF Microadjustment is a built in admission of lack of quality control of cameras and lenses, and not a positive, much less deal-breaking, feature. I would love to hear from people who disagree because they have had positive and beneficial experiences with calibrating their lenses.

So, who is the Canon 60D for? Canon says,

“For the hobbyist looking for their first “professional-style” camera, or the enthusiast aiming to take their photography to the next level, the EOS 60D makes a sensible choice…For travelling photographers, the high resolution APS-C sensor will capture all the details while at the same time keeping the body and lenses small and light enough to avoid weighing you down.”

Fair enough, I would have to agree with that. See this other post to help you decide between a Canon 7D vs. 60D vs. 550D.

Here is a great quote from Photo.net to sum it all up:

“You can look at the EOS 60D as a Rebel T2i but with a better viewfinder, better AF, higher frame rate, a tilt and swivel LCD, an electronic level, a rear QCD, a larger capacity battery and overall better ergonomics. Alternative you can look at the 60D as an EOS 7D, but with a less advanced AF system, less weather sealing, a slower frame rate, no vertical electronic level, a smaller JPEG buffer and using an SD(HC) card rather than CF. The unique feature of the EOS 60D is the tilt and swivel LCD screen.”

See their hands-on preview here.

more info here:

http://www.dpreview.com/news/1008/10082620canoneos60d.asp

If you are interested in researching or purchasing the equipment I use, discuss, or recommend, please have a look at the site I’ve set up on Amazon.com.

Please leave a comment and let me know if my posts have been helpful, and what you’d like to learn more about.

Choosing Between the Canon 5D vs. 7D vs. 60D vs. 550D / T2i Part III

I continue to get a large number of visits from people who are comparing the current line of Canon digital SLR cameras – the 5D Mk. II vs. 7D vs. 50D vs. 550D / T2i. I go into detail about comparing the features of these cameras in this post, including the 60D and T3i, so that is probably the post you want to read first. However, it is a long, in-depth post. If you would like to read a summary of how to make this decision and find out which camera is right for you, here it is (however, I still encourage you to read that in-depth post which is a bit more educational than this post).

Before I start I want to mention:

I have written eBook tutorials for the Canon 60D and for the Canon T2i, which cover ALL the Menu settings and Custom Function settings, with recommended settings, plus in-depth descriptions of how and and why to use the cameras’ settings and features in everyday use – Canon 7D Experience, Your World 60D, Canon T3i Experience, and T2i Experience. Learn more about the eBooks by clicking on their titles.

Longfellow House
Longfellow House – Cambridge, MA

-New to digital SLR photography and want a really nice camera for casual home and travel use? Not really sure what all those buttons and symbols are and not really interested in knowing? Get a 550D/ T2i or a Rebel XSi.

-New to digital SLR photography and want to take really great, high quality photos, but don’t ever really plan to totally get into it? Don’t really want to spend months reading about f-stops and metering modes? Plan to use Auto or Program mode most of the time? Fall asleep 3 minutes into reading the manual? Get a 550D/ T2i or a Rebel XSi.

-New to digital SLR photography and want to learn the basics of exposure: aperture, shutter speed, and ISO? Want to learn to take the camera off Auto or Program mode, and experiment with partial or spot metering and manually selected focus points? Eager to read and understand the often confusing explanations of the manual? Get a 550D/ T2i, or a 60D.

-New to digital SLR photography and want to learn everything noted above plus want to take pictures of fast moving action: kids at play, sports, dance? Consider a 60D because it can shoot 5.3 frames per second vs. 3.7 fps of the 550D. This doesn’t mean you can’t focus on and capture fast moving action with the 550D, but it means with the 60D you can fire off a faster rapid series of shots, and thus hope to capture the exact right moment.

-New to digital SLR photography but super ambitious and know you are going to be committed and dedicated enough to learn about exposure compensation and back-button focusing? Ready for Av mode now, and plan to really take your photography to the next level over the next year or two? Already read the manual online? Want to consider the possibility of professional photography in the future? Get a 60D or get a 7D if you are super-serious and if you can afford it.

-Experienced with digital SLR photography and have outgrown the limited speed and menu/ custom options of the entry level cameras? Annoyed with digital SLR users you see on the street whose cameras are nicer than yours but are left on Auto or P mode? Want to take it to the next level and maybe test the waters of professional photography? Get the 60D or get a 7D if you can afford it. Consider a 5D Mk II if you are really, really serious.

-Experienced with digital SLR photography and plan to be a top notch amateur/ semi-pro or work towards being a pro? Carry your camera everywhere and want a sturdy tool that serves you and the way you work? Already have been paid to shoot some photos, portraits, or events? Have stopped trying to read the model number of other people’s cameras because you know your photos are better than theirs even if they have a nicer camera? Get a 7D, or a 5D Mk II if you can afford it, or wait for the 5D Mk III.

-Highly experienced with digital SLR photography and are dedicating yourself to being a part-time or full time pro? Already know and understand 99.6% of what you read in this other post? Just looking for reassurance that spending $2,500 is the right decision? Get a 5D Mk II, wait for the 5D Mk III, or get a 7D if you really can’t afford the 5D yet.

Cambridge City Hall
Cambridge City Hall – Cambridge, MA

You may have been convinced by forums, reviews, or online comments to question and compare image quality, auto-focus speed, high ISO performance and noise, dynamic range, etc., but those factors are all nearly completely irrelevant. All of these cameras have more than enough quality in each of those areas. Your choice should instead be based on your experience level and expected needs as a photographer, and on which camera best serves the way you work. Remember, you don’t need a top of the line camera to take professional quality photos. Instead you need mastery of the camera you have, combined with good knowledge of composition and lighting. I encourage you to have a look at some Flickr users’ photos taken with an “old,” 8MP Rebel XT to confirm this. When you are done selecting a digital SLR body, you canread some of my other posts to learn more about the Best Lenses for Travel Photography or Why You Shouldn’t Buy the Kit Lens.

Canon 5D vs. 550D / T2i – I get an unusually high number of hits from people searching for a comparison of the 5D Mk II vs. 550D / T2i. As you can see above, there isn’t a scenario where those two cameras are together as options, as they are on opposite ends of the spectrum. It is a strange comparison between an entry level dSLR and a full frame professional dSLR that, quite frankly, confuses me. If the 5D fits your expanding needs as a photographer, you would already pretty much know that you needed a 5D after your extensive time using a Rebel or a 20D, 40D, etc. Otherwise, getting a 5D means most likely you’d be investing in far more camera than you will actually need or use. Read more about why I say that here and in the Other Important Custom Functions section here (this post is about the 7D, but it will give you a feel for how a 5D / 7D differs from a 550D in terms of features that you may need but probably don’t).

AF Microadjustment 550D / T2i, 60D – A lot of people also search for AF Micro-adjustment or focus calibration for the Canon 550D / T2i for back focus or front focus issues. Due to quality control issues, acceptable tolerances, or more rarely but not unheard of bad cameras, your camera and/or lens may focus a few notches in front of or behind the subject you focused on. If your camera happens to be 2 notches on the plus side and your lens 2 notches on the minus side, well, you are going to have some issues. While the AF Microadjustment feature is not built into the menus of the Canon 550D or new Canon 60D, here is how you micro adjust for front or back focus: send the camera and/ or lens to Canon while it is under warranty, with instructions to calibrate them. You have to pay for one way shipping and insurance (+/- $30 for one item depending on weight and coverage). Ask them to include a detailed report of what the issue was and what service they actually performed (otherwise they just repeat what you wrote and say “lens was front focusing – electrical adjustment of AF mechanism” and you don’t know if it was the camera, the lens, or your mind that was off). Then send a letter to Canon asking them why a brand new expensive Canon camera paired with a brand new expensive Canon lens that you just bought does not focus properly, and why you have to pay $30 to send it immediately back to them to fix it. This process also applies to the AF Microadjustment of the 7D, 5D, and 50D and soon the 60D. It is best to first determine if the camera or the lens is the culprit, by testing the lens on another body or the body with another lens, but it may well be a combination of both since each lens and camera is uniquely faulty. See this great post, “This Lens is Soft and Other Myths” on LensRentals.com for more info on this.

If you are pretty new to digital SLR photography and you decided on the 7D, check out this really great book I recently came across while browsing the photo section at a bookstore: Canon 7D: From Snapshots to Great Shots by Nicole Young. I think you’ll learn more from it than most other how-to photo books and expanded manual type books. Even if you have another Canon and not a 7D, you’ll still find it helpful for learning how to really use a digital SLR to take better photos. She is currently working on a version of the book for the 60D, Canon 60D: From Snapshots to Great Shots.
canon 60D great shots

And I, myself, have written eBook user guides for the Canon 7D, Canon 60D and for the Canon Rebel T2i / EOS 550D. You can learn all about them here:  Canon 7D Experience, Your World 60D, plus the mini-guide to the 60D Menus and Custom Functions (excerpted from the full version of Your World 60D), and T2i Experience.

Need a lens to go with your new camera? Read about choosing a lens other than the kit lens in this post Why You Shouldn’t Buy the Kit Lens, and learn about the Best Lenses for Travel Photography here.

Please leave a comment, ask a question. Let me know what has been helpful, and what you’d like to read more about.

If you plan to purchase any of this equipment or books, I encourage you to do so through the site I’ve set up with Amazon, Doug’s Picturing Change Digital Photography Equipment and Books or through this direct link to Amazon.com. Purchasing through any of these links to Amazon.com, or the ones below, will help support my blog and my work. Thanks! And for those of you across the pond, click here for my referral link to Amazon UK. If you are in another country, click on one of my Amazon links, scroll to the bottom of the page, and click on your country for your local Amazon.
See the T2i on Amazon.
See the 60D on Amazon.
See the 7D on Amazon.
See the Canon 5D MkII on Amazon.

Canon 50D to be Discontinued? 60D Coming?

A lot of you come across my site searching for comparisons of the 550D, 50D, 7D, and 5D (see this post for a thorough comparison of them) so you should know that the production life of the 50D appears to be coming to an end (and word that it is discontinued here).  What that means is you should possibly wait a month or so to see if 50D prices drop or if rebates are offered, or wait for the new improved model to replace it – the 60D or whatever they may call it – although it will be difficult to create a worthwhile improvement of the 50D that isn’t just a 7D.  If there is one, it will mostly serve to fill in the price point between the 7D and th T2i.  I’m speculating that it will cost $1,100 to $1,300 – a little more than the 50D, more than the T2i , but less than the 7D.  It will probably have 18MP, and have the 63 zone metering system of the 7D and 550D.  It is likely that its insides will be closer to a 550D with the exterior body and controls of a 50D/ 7D. Will it have the 19 point autofocus system, 8 frames per second high speed shooting rate, HD video, and remote flash control of the 7D?  If so, it would just be a 7D.  It seems that it will sit at a new position that will no longer be a bridge between pro and consumer cameras (pro-sumer) as the 7D now fills that role (as the 50D once did), but will now be considered a very advanced consumer level camera.

I’m going to join in on the pointless but fun 60D speculation:

  • cost: $1,100-$1,300
  • 18MP 1.6x sensor
  • 63 zone metering
  • 9 or so point autofocus system, less advanced than 7D
  • 6 or so FPS at high speed
  • HD video
  • 3″ 3:2 LCD – articulating
  • 98%+ viewfinder
  • single Digic processor
  • all other features of 50D (construction, custom functions, AF microadjustment, live view, etc.)

Exploring Metering Modes

It is one thing to know that your cool new Canon or Nikon digital SLR provides you with 3 or 4 different metering modes. It’s another thing to know how and when to actually use them in the field or in different real life situations. The Canon 5D, 7D, 60D, 50D and T3i all offer four different metering modes – Evaluative, Center-Weighted, Partial, and Spot – as I’m sure you have thoroughly read about in your manual, right? Nikons, like the D7000, D51000, and D3100 generally have three different modes: Matrix, Center-Weighted, and Spot. I’ll try to cut to the chase and simplify the explanations and their uses.  Note that there are some important differences between how they work for Canon and Nikon cameras, particularly the Spot mode.

Canon T3i T2i 60D metering mode partial spot viewfinder
The viewfinder of the Canon T3i (T2i and 60D similar) showing the areas evaluated for Partial Metering (superimposed grey area) and Spot Metering (black circle in center).

Evaluative (Canon) or Matrix (Nikon): This is the default mode for your camera, and it can be used for almost every situation you shoot. Yes, maybe 90% of the time, maybe more. The camera evaluates the entire scene, as divided into several zones, and chooses the best exposure based on its knowledge of thousands of potential image situations. The current metering systems are so good, they can even be relied on for backlit or other challenging lighting situations. An important feature of this mode is that advanced cameras such as the Canon 7D, Canon 60D or Nikon D7000, D5100 take into account the selected focus point in its determination of exposure settings. It is assuming your focus point is on your most important subject, so under challenging and critical situations, it is wise to confirm that the camera has chosen the focus point you want (well, this is always wise). Even better, you should typically manually choose the focus point or cluster of focus points, as the camera has no idea what your intended image is. So in special situations, such as dramatically back-lit scenes or a situation with bright light plus deep shadows, make sure you are not using the center point to focus and meter, and then recomposing to take the shot – because some of the zones that the camera evaluated are now no longer in your shot after recomposing, and other new areas are, so the camera has set exposure for an image other than the one you are taking.


San Miguel Duenas, Guatemala

Partial (Canon only): This mode meters a smaller area, about 9.4%, in the center of the scene on the 7D and 6.5% with the 60D. Nikons do not have this mode, though some Nikons such as the D7000 offer the ability to change the size of the Center-Weighted Metering circle (see Center-Weighted Metering below), so it makes up for this.  The area is approximately a circle that reaches to the top and bottom focus points, and the metering system ignores the rest of the frame. This mode is useful where there is a dramatic difference in lighting between the foreground or subject and the background. For example, when your subject is backlit – maybe standing in front of a bright window or the sun – and consequently their face is in shadow. I know I said evaluative mode can often handle this type of situation, but if you want the face or subject to be properly exposed and not risk blowing the shot, it is worth it to quickly switch to Partial metering mode. Again, another time to use this is when there is a wide range of light in your scene, from bright sunlight to deep shadows. Remember, this mode is not linked to your focus point. The partial area that is metered is always in the center, so meter on the part of the scene that is most critical and that you want properly exposed, using the central area of the viewfinder, lock in that exposure, then recompose and take the shot.


Campo Nuevo, Guatemala

Important Note about Locking In the Metered Exposure: The metered exposure setting is sometimes locked in by pressing the shutter button half-way down or sometimes not “locked” until the image is taken (depending on your camera, or current shooting mode, or how you set it up – read your manual!).  The shutter button also typically locks focus (unless you have changed that setting).  If you wish to lock in focus and exposure separately, which you often will need to do, on a Canon use the AF-Lock (for focus) button and/ or the AE-Lock (for exposure) button – which looks like this: * – to lock in one of them before locking in the other with the half-press or full press of the shutter button. On the Nikons, you have to set one of your buttons to be the exposure lock button, either the AE-L/AF-L Button or the Fn Button on some cameras like the D7000. I suggest first metering on the subject and locking in that exposure by pressing the appropriate button, then recomposing and locking in focus right before or as you take the photo. Or else learning the advanced methods of back button focusing. Get in the habit of knowing how to do this instinctively, and if you need to hold or just press the particular button, so that it comes naturally during critical situations. On the 7D and D7000 and other cameras you can also customize how these buttons perform or set other buttons to do these tasks. You can see in the viewfinder that you have locked focus when the focus dot is lit. You can see that exposure is locked with the AE-L indication in the Nikon viewfinder or the * symbol in the Canon viewfinder.

Locking exposure and focus, independently, each in the brief seconds before you take a shot? Confusing? A little, but not impossible to figure out with some experimentation and practice. Remember, this is why you bought the fancy dSLR, so that you could make use of all these advanced features and take your photos to another level!

Center-Weighted Average: This metering mode is sort of a cross between Evaluative and Partial metering. It acknowledges that the subject is in the center and requires special metering attention, but it also takes into account all the other zones. Again, this is not linked to the focus point, but always to the center, so if your subject is off center – which it typically should be for a more dynamic image – you need to lock in exposure on your subject and then recompose. I have found that with the Canon 50D, this mode is actually more consistent than Evaluative metering, which often over exposes by 1/3 or 1/2 a stop.  Note that you can use the Custom Settings of the D7000 to change the size of the center area being weighted.

This mode can be used when you want to ensure that the subject is properly exposed, but you also want the camera to consider the background. However, if the background is much darker or lighter than the subject, and you want the camera to expose only for the subject and ignore the background, use Spot Metering…


San Miguel Duenas, Guatemala

Spot: This mode meters a small center area, 2.3% of the frame with the 7D, 2.8% with the 60D, and 2.5% with the D5100 and D7000. This area is indicated by the small circle in the center of the viewfinder of the 7D and 60D. There is no center circle in the Nikon viewfinder and you will soon find out why.  So when do you want to use Spot metering? This, again, is useful for scenes with great variation in light and shadow, or in very critical situations. One of the most common ways to use it is when metering for proper exposure on a dramatically lit face or subject, but the exposure of the rest of the scene is unimportant. Or perhaps your subject is set against a plain but consistent background, like a bird against a large blue sky. It is also used to determine proper exposure of a subject before switching the camera to manual for a controlled studio shot, or a critical shot or series of shots where the lighting is not going to change. If your background is completely dark or extremely bright, and you don’t want the exposure system to consider it at all when determining the exposure of you subject, use Spot rather than Center-Weighted or Partial. With Canon cameras, the Spot that is used to evaluate the exposure is in the center of the frame, and is often indicated by a small circle. However, with Nikon cameras like the D5100 and D7000, the Spot surrounds the active focus point and is not necessarily in the center of the frame unless you are using the center AF point. So it is wise to become familiar with how your camera operates.

A fifth metering mode is Manual metering, which isn’t actually a mode in your camera, but is a method of metering. This is where you use a light meter or use your camera as a light meter (such as described at the end in the Spot section above) and then manually set your exposure based on the meter readings. This is used when you want ultimate control of the metering and exposure.

You can learn much more about the Exposure modes of specific cameras, including the 60D, T3i, D7000 and D5100, in my e-book users guide. See my e-book website, Full Stop to learn more about them or click the banner below! The guides also go into much more detail about setting up the related metering mode Custom Functions/Custom Settings and camera controls.

full stop dslr photo photography camera manual guide for dummies canon nikon

I recently ran across an interesting article which takes this discussion to another level by addressing the use of different metering modes in the very specific situation of a wedding. Since one of the main subjects in typically all in white, and the other in black, the metering mode you select and where you meter can make a dramatic difference in the exposure. While that article is specific to weddings, it is useful and helpful to read to further understand how the different modes work, and how special situations might call for some extra thought.

Equipment for Travel (and Everyday) Photography

My recent trip to Guatemala to photograph for an NGO gave me an opportunity to field test a bunch of new gear under real working conditions – jumping on and off chicken buses, crammed into the seat of a van for hours with all of it on my lap, roaming around the streets of Antigua trying to be discreet as possible carrying a 70-200mm lens and a backpack full of equipment, and photographing for long hours at a time. I had done a bunch of Internet research to choose the best and the most appropriate gear, made a couple trips to B+H to look at it all, and it all worked out as good, or often better than expected. I’m not sponsored or compensated by any of these companies (but wouldn’t be opposed to it if they happen to be reading…), but I do recommend all of this gear without reservation. (Update: I’ve now been using all of this equipment constantly for the past 11 months, and still recommend it all!) I discuss the camera I used on the trip, the Canon 7D, in this previous post.

Most all of this equipment will be equally essential for day-to-day photography, culture and travel photography, humanitarian photography, and photojournalism. And the equipment will be useful with any dSLR, Canon or Nikon.

If you plan to purchase any of this equipment, I encourage you to do so through the links I’ve created below which will take you directly to Amazon.com. Your price will be the same as always, and I will get a small referral fee. Or you can go directly to Amazon.com here. I appreciate your support! If you are in the UK, or wish to purchase from B+H Photo, see the end of this post for information on those links.


Antigua, Guatemala

Camera Backpack: I use the Lowepro Compu Trekker AW as both my carry-on and my working bag during the day. The current version of this is the Lowepro Pro Runner 350 AW. The size works perfectly for both needs. It easily fits the airline carry-on size, including smaller international requirements in some regions, yet fits more that it would first appear. With careful configuration of the interior dividers, I can fit 2 Canon bodies (a Rebel XT and a Canon 7D or 50D), a 70-200mm f/4L IS, a 16-35mm f/2.8L II wide angle zoom, a 28-105mm standard zoom (an older lens, here is a link to the better 24-105mm f/4L), all lenses stored with their hoods turned backwards, a 580EX II flash, its diffuser, 2 external hard drives in cases, a couple memory card cases, and some filters. In the outside pocket, I have a couple battery chargers, extra batteries, medium Rocket Blower, miscellaneous cords, caps, and accessories. In the rear pocket designed for a laptop, I easily fit a 32″ 5 in 1 reflector. Once I am in the field, I play around with the dividers until I have a set-up that best fits my flexible daily needs, and allows quick preparations or lens changes. The pack is extremely comfortable, has tons of padding on the straps and the back so that its weight never bothers me and I don’t feel the reflector in my back. I often wear it for hours a day while working, and it is never a problem. In fact, on my final night in Guatemala when I went out to dinner in Antigua without it on my back for the first time in 2 weeks, I commented that I felt a bit naked. The top handle is strong enough to grab and carry with, as is often necessary while jumping in and out of cars or putting it down and picking it up. There is also a waist belt that I use when I have it fully loaded, like going to the airport, to relieve my shoulders of some of the weight. And it comes with a built in rain cover that stows away at the base of the bag that has done its job on a couple occasions. The Compu Trekker Plus (now the Pro Runner 450 AW) might be a better carry on size so that you could carry more gear on the plane with you (if it fits the airline’s requirements) but it would be too big for daily use. There are also rolling versions of these, with an “x” in the name, thought the retractable handles and wheels add weight and size to the bags. The Compu Trekker has a tripod strap system that I don’t use, and another outside pocket that is, conveniently, exactly the size of a Lonely Planet guidebook. Here are some photos of the backpack in action at the Chichicastenango Market, taken by my travel companion Elizabeth Jimenez:

If you just need a holster style bag to carry one body and one lens, I highly recommend the M Rock Holster Bags.  I used the Yellowstone model for months while traveling in South America, and I love its durability, pockets, and built-in rain cover, plus it comes with extra back-up straps.  Make sure you get the right bag for your body/ lens combination – you will need a longer bag for a telephoto zoom lens.  As far as a satchel bag to carry a body or two plus two or three lenses and/ or a flash as you set out for the day but don’t want a backpack type bag, have a look at the Think Tank Retrospective line (there are a few sizes, the 10, 20 and 30, etc.) or the Crumpler Million Dollar Homes. Again, there are several sizes to choose from, called the 5 Million, 6 Million, etc. The 7 Million Dollar Home is my satchel of choice for carrying my gear about town while working.  It holds a large dSLR (5D line, 6D, 60D, etc.) with a mid-range telephoto attached (24-105mm), plus a 70-200mm, and another lens or a flash, all in the inside compartments. There is then some extra space and a couple front/ flap pockets to hold chargers, memory cards, batteries, etc. To keep moisture from accumulating in your equipment and bag, throw in a durable desiccant pack like this one.  Just be sure that it isn’t loose in your bag and scratching against your equipment.

Security: A couple great additions to the bag are Eagle Creek combo locks and Eagle Creek Pack It Sacs in the small size to hold batteries, memory cards in cases, LensPen, camera and lens body caps, and various wires and cables. The medium size Pack It Sacs are great for medicines bottles and other loose stuff in your luggage. The backpack’s zippers are rugged enough to handle constant abuse from the combo locks, which although they are weighty, are far better than keyed locks in the field so that you don’t need to go digging for the key when you are in a hurry. You just have to be a little careful when opening and closing the bag – the locks dangle and flip around, and could easily bang into something fragile in the backpack. With the Pack It Sacs, I clipped some rubber bands to the key clip within the outside pocket of the backpack and then attached them to the clips on the Sacs, so that way the Sacs won’t accidentally fall out if I flip the bag open and close while the outer pocket is open. There’s enough play to access them and then shove them back into the bag.

Another great accessory for this backpack is the PacSafe 55 wire mesh security system. It fits perfectly around this size bag, and secures your bag and your gear in a hotel room or wherever. It has a long cable that you loop around something secure and lock in place. It also comes with a small, compact storage case for when not in use.


Chichicastenango, Guatemala

SanDisk Extreme 16GB CF Memory Cards – I talked about these in the previous post. Once again, no particular reason why I use these rather than Lexar or Delkin…maybe a sponsorship would help seal my loyalties… :). Be sure to get the Sandisk Extreme 16 GB SD version if you are using the 60D or Rebel T2i. I use a Sandisk card reader to upload the images to my laptop, rather than from the camera directly, in order to save the camera batteries. This Sandisk Card Reader is for the CF cards, and the 5 in 1 reads SD cards.

Spare Batteries – I always have 3 batteries for each camera body. The Canon 60D, 7D and 5D use the Canon LP-E6 Battery. Stick with the Canon brand batteries rather than the unpredictable third-party brands.

BlackRapid RS-4 Camera Strap – The R-Strap is wonderful, and I highly recommend it. I was hesitant and suspicious at first, but I quickly adored it and will always use it. I had even emailed BlackRapid before purchasing to ask about shortcomings of earlier models, and they addressed my concerns thoroughly and completely. I was very impressed with the time and personal attention they paid to my questions. The strap is comfortable, easy to use, quick, strong, and rugged. I often use it in conjunction with wearing the backpack, and although the straps fight for space against each other on my shoulder, it still works fine. I’m a bit envious of the RS-7 that just came out, since it has a curved, ergonomic shoulder pad that will work better by itself on your shoulder and next to a backpack strap. There is also now a version designed for women, the RS-W1. Watch some of the videos out there as to how to use it, and be sure to moisten the rubber gasket before attaching it to your camera – this will make a firm seal that will never budge. The big pain is that the part attached to your camera body is best left in place, yet that makes it less easy to place the camera down on a table or in your bag, and will have to be removed to use a tripod. Also, the textured tightening screw part of the connector may rub up against your camera body in various situations, so I put some black duct tape on the bottom edges of the camera to protect it.

B+W brand UV Filters – clear, protective filters for the lenses, slim for the wide angle. The slim is probably not needed with a crop sensor camera, but is recommended for a full frame camera. The slim comes with a lens cap that does not stay on well after a little bit of use, as there are no front threads for the Canon cap to fit on. If I had to do it over, I would probably get the regular filter so that I could use the Canon lens cap.

B+W brand Circular Polarizer Filter – a polarizer serves to darken skies, boost contrast, cut through haze and reflections in water and glass, and block out a stop or two of light in bright situations. I keep it on my lens much of the time when doing outside work. Polarizing filters work to their maximum degree when the sun is to your right or left, but not when it is directly in front or behind you. Be sure to turn the moving part of the filter to dial in the degree of polarizing that you desire. They are typically not used on wide angle lenses because the darkening effect would vary across a wide swath of sky, and usually look strange.

Sto-Fen Omni Bounce Diffuser – works great on the Canon 580EX II flash, although very snug and is always difficult to get on and off in a hurry. Squeeze it and stretch it first to help it go on easier. Please don’t use the diffuser outside! Even if you see “pros” doing it. It doesn’t do anything outside but make your flash work harder. You can’t bounce light off the clouds.

Honl Color Correction Filters and Speed Strap – These are essential for using with flash to balance the white balance of the scene – to make the color of the flash the same as the color of the ambient light. This way when you correct the WB of your subject your backgrounds won’t be vivid orange (incandescent ambient lighting) or sickly green (fluorescent). You can’t use them in conjunction with the diffuser – the Omni-Bounce can’t fit over the Speed Strap, but that had not occurred to me when I bought them – so I’m going to have to figure out a solution to that. And I’m going to continue experimenting with the full or 1/2 CTO to add warmth to outside fill flash, as recommended by Nevada Wier (actually she uses a Kodak Wratten 81A gel, but I think they are similar). The kit is very slim and fits perfectly in one of the inside pockets of the backpack.


Antigua, Guatemala

Giottos Medium Rocket Blower – I initially used the small size in order to save a bit of space, but it didn’t have the power I wanted, so I sprung for the medium. Always have it handy for getting dust off lenses in a hurry, because blowing on them – no matter how careful – leads to spittle on the lenses 5% of the time when it doesn’t matter and 95% of the time when you are in the most critical situations. The large size may be a good choice as well.

Pearstone LP-1 Lens Pen – Works great for cleaning off mysterious spots, smudges, and fingerprints that always appear on the lens (this is why I always use UV filters) as well as that a-fore-mentioned spittle. There is a retractable brush on one end and a cleaning head on the other end. Twist the cap to load the cleaning tip with the carbon based cleaning material, then remove the cap and use. Please read the instructions and visit the LensPen website to fully learn how to use it properly.

32″ 5 in 1 Reflector – This size is perfect for travel and fits in the backpack, however I never actually used it during the trip so I don’t know if the size is useful in the field. It is best suited for set-up situations and portraits, which I didn’t have the opportunity to do on this assignment. I could have used it once to block some stray sunlight falling into a very dark room and potentially messing up the exposure, but I didn’t think about it until later. I did, however, carry it around a lot and never noticed because it is lightweight and very durable.

External Hard Drives – I use a Iomega Ego 500GB and a Lacie Rugged USB 500GB when traveling. I’ve used the Iomega on extended trips before, and love it. I’ve never had any problems with it, and it is solid and sturdy. I also decided to try out the Lacie Rugged USB for this trip. It is lighter than the Iomega, and doesn’t feel as solid and sturdy, but it worked just fine. They both fit perfectly in the Case Logic Portable Hard Drive Case made for these types of drives, which I recommend getting in different colors so you can quickly differentiate your different drives. I leave them in the cases at all times, but you have to pull the Ego slightly out to plug in the cord, and place the Lacie upside down in the case for the cord to fit without removing the drive each time. For storage at home, I use the Western Digital My Book 1TB External Hard Drives.

Hakuba Digital Media Storage Wallet – These are great, soft sided, thin memory card cases that hold 6 CF memory cards each. I picked up this recommendation from Karl Grobl’s website. There are a lot of bulky, hard-sided cases out there, which make you feel like your memory cards need excessive protection. I’m sure there has been a situation where an elephant stepped on a memory card case and all photos were miraculously saved by a hard sided case, but as far as my needs, the soft ones work just fine. Get into the habit of inserting blank cards face up and used cards face down into the cases’ pockets. Since this is the size for CF cards, have a look at this one if you use SD cards.

‘da Products Screen Protector – (product no longer available) – This is the second camera I have used this product with, and I am once again very happy with it. It is a very inexpensive yet high quality screen protector for your LCD, made with acrylic. Get ‘da40D Protector for the 7D – it is the perfect size. It is a slow, careful, time consuming process to attach the adhesive strips, get it clean, dust and fingerprint free, and perfectly centered, but once it’s on, its there to stay (unless you want to remove it – in that case, to remove the ‘da screen protector use dental floss to break the seal at the bottom corners, then slowly peel off.) I know that today’s LCD screens are durable, but I feel more comfortable and carefree about constantly wiping off my protector with my fingers or shirt than I would directly on the built in screen. This is also why I use B+W UV filters on the lenses.  However, if you have a camera with a rotating screen such as a 60D, T3i, or D5100, this type of screen protector won’t work.  You will need to use a thin adhesive film protector like this one.

Calumet micro fiber lens cloth – Stores perfectly in another slim inside pocket of the backpack, and always handy to have.


Chichicastenango, Guatemala

Insurance – Although I am a member of NPPA – National Press Photographers Association, I also joined NANPA – North American Nature Photography Association, in order to get their equipment insurance, which is much cheaper and has a much lower deductible than NPPA’s, even including the extra $100 to join NANPA. The insurance is primarily for the equipment only, so you are not paying for liability coverage geared toward a business as you are with every other photo equipment insurance plan I researched. Please note that the NANPA membership fee covers you from June to June or something like that – they don’t pro-rate, so you will not get a full year if you join at any other time. The insurance covers photo and computer equipment at home and while traveling. (If you happen to join NANPA to get their insurance, be sure to mention my name as a referrer, and I get $20 NANPA Bucks and save on my next renewal!)

Skooba Satchel 2.0 Laptop Bag – This is typically my second carry on, in which I carry my laptop, some books, misc. charging cords, some toiletries. This is a wonderful laptop bag, and you won’t believe how much will fit in it! As they say themselves, it is deceptively slim looking and incredibly light. It has these great little air squares for cushion everywhere – like bubble wrap made from durable rubber, and has an extremely comfortable and ergonomic strap.

Lowa Tempest Lo Hiking Shoes – I’ve worn these shoes, this same pair, nearly everyday, for almost 4 years straight now, and they still have a little life left in them. I wore them every single day for a total of 7 months in Peru, walking the cobbled streets of Cusco, and traveling the country. And I wore them nearly every day for 3 years walking the streets of Brooklyn and Manhattan, and now Cambridge. (I don’t have a car, so I actually walk, a lot.) They are so comfortable I never notice them. They are light, durable, and somewhat waterproof if treated regularly. I recently bought a backup pair for the inevitable day that I have to give them up. After 3.5 years one one them developed a tear at the front-side where they crease when crouching to take photos, but they are still fine except in the rain.

Post-Production – Once you get back you are going to need to organize, edit, and work on all your photos. And for that, of course you are going to need
Adobe Photoshop and/ or Adobe Lightroom 3. You can start off with the trial versions that you can download from the Adobe site, but sooner or later you are going to have to get the real versions. Use that student discount while you still can!

Purchasing: If you plan to purchase any of this equipment, accessories, or anything else from Amazon.com I encourage you to do so through the links I set up throughout this post. Just click on the equipment above and you will be taken directly to that Amazon page. Your purchasing price will be the same, and they will give me a little something for referring you, which will help support my blog. Thanks! Or click on the Amazon.com logo below to enter Amazon and start shopping. I appreciate your support!

If you are in the UK or Canada, please use these Amazon links:

UK: my Amazon.co.uk link

Canada: my Amazon.ca link

For those interested in purchasing through B&H Photo I have set up affiliate links with them as well – find it on the left side of this page.