Holiday Gift Ideas for Yourself or your Favorite Photographer

I suppose I should join the photo blogger holiday tradition of putting together a holiday and Christmas gift guide for photographers or those who are shopping for the photographer in their life! If you plan to purchase any of these items through Amazon.com, I you can use the product links I set up throughout this post, which will bring you right to that product’s page on Amazon. (Amazon will then reward me with a small referral reward for my effort, which will help support my blog. Thanks! If you are in the UK or wish to purchase from B+H, see the end of this post for link information.) And now on to the shopping:

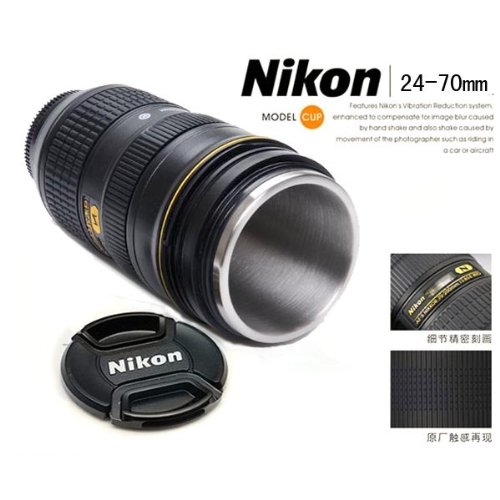
The first thing you are going to need is the Canon 24-105mm f/4 lens Mug or Nikon 24-70mm f/2.8 lens Mug to drink your hot cocoa or hazelnut coffee as you are unwrapping the rest of your gifts. These extremely popular and awesomely realistic mugs, complete with rubber ring grips, have a wide f/4 or f/2.8 opening which enables them to take in copious amounts of liquid just as your lens takes in all that light. The lens caps protects your beverage when not in use – no UV filter needed.
Canon lens mug 24-105mm f/4 Nikon Lens 24-70mm f/2.8 mug

The best gift of the season for most photographers would most likely be a brand new digital dSLR camera to upgrade what they are currently shooting with – one with a few more megapixes, improved autofocus system, faster continuous shooting speeds, and some new bells and whistles.

For many photographers this will be the new Canon EOS 60D body only or the Canon 60D with 18-135mm kit lens. The EOS 60D has continued Canon’s tradition of ease of use, great ergonomics and controls, fantastic image quality and low light performance, plus added a swiveling real LCD screen. And full HD video with more frame rate options than the competitors.
canon eos 60d
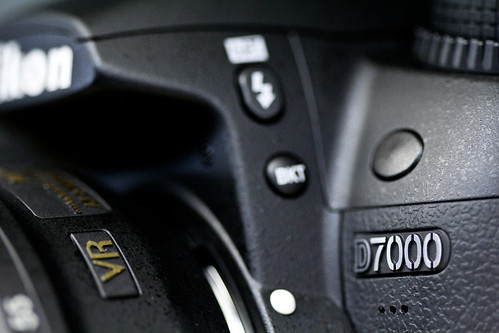
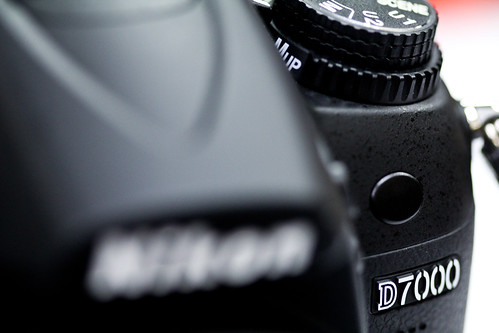
For Nikon shooters the best choice is the brand new, highly sought-after Nikon D7000. The Nikon D7000 body only or D7000 with 18-105mm lens cost a bit more than the 60D, but they provide the additional features to justify the higher cost: faster continuous shooting rate, partial magnesium body, more advanced and customizable autofocus system, and two SD memory card slots to save all those shots and HD movies. Either one makes a excellent camera that is capable of producing high quality images.
Nikon D7000
Of course you are going to want some new lenses to go with these cameras. Why not step up to the professional quality lenses to see that immediate improvement in image quality, color, contrast, as well as lens and autofocus performance? For Canon this means the L series of lenses. Expand your focal range or fill in some gaps with a high quality wide angle zoom, standard zoom, or telephoto zoom.

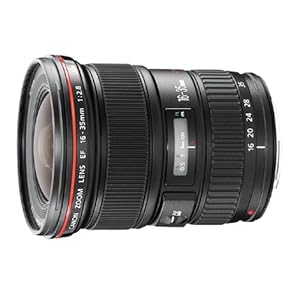
For wide angle zooms, look at either the Canon EF 16-35mm f/2.8L II USM or the EF 17-40mm f/4L USM

For standard zooms, which make for a great “walk-around” lens, consider the Canon EF 24-70 f/2.8L USM or EF 24-105 f/4L IS USM


And in the telephoto zoom range, look at the EF 70-200, f/2.8L II IS USM or the much less expensive and lighter EF 70-200, f/4L IS USM

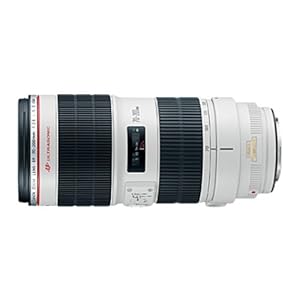
One of these lenses in each pair will be both more expensive AND heavier, so be sure and handle them first before you decide on one.

This may also be a good time to start experimenting with prime lenses. Their extra wide maximum apertures will allow you to use them in much lower light, and will create great, smooth background blurring for awesome portraits. Depending on how closely you like to work to your subject, a few to consider are the Canon 35mm f/2, Canon 50mm f/1.8 II for about $100, Canon 50mm f/1.4 (a little more costly 50mm), or the Canon 85mm f/1.8.

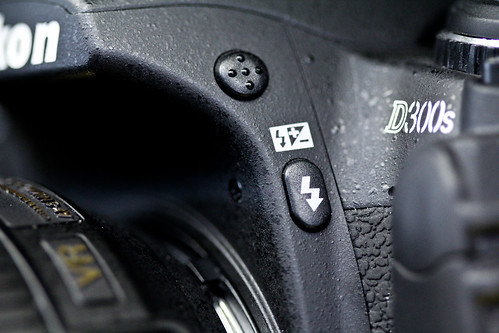
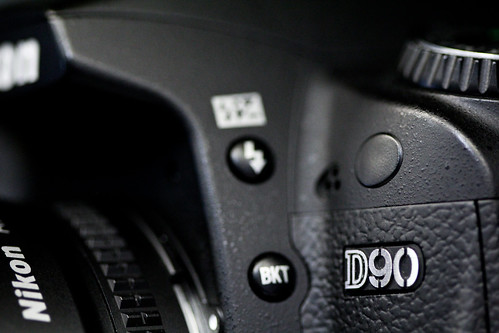
An extremely fun lens to work with is the Canon EF 100mm f.2.8 Macro USM. It is incredibly sharp, has dramatically narrow depth of field at f/2.8, and works as a great portrait lens too. If you have never used a macro, go try one out and experience what makes them so cool. The 60D and D7000 images just above were taken with this lens, as well as the cool close up shots of the following post comparing the Nikon D7000 vs D90 vs D300s.

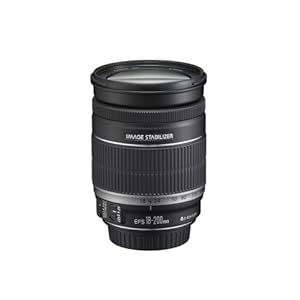
If you need just one versatile lens for everyday use or for travel, the three lenses to consider are the EF 24-105 f/4L IS USM in the L series lenses, or else the EF-S 18-135mm f/3.5-5.6 IS or EF-S 18-200mm f/3.5-5.6 IS.

Of course with any of these lenses, be sure to protect them with a clear or UV filter, preferably a high quality, coated B+W brand UV filter. You can read a lot more about these lenses and how to choose between them in my earlier post, Best Lenses for Everyday and Travel Photography.

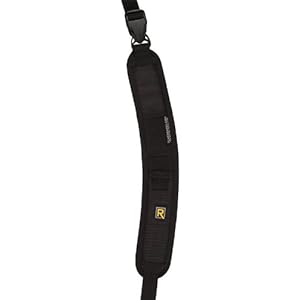
Possibly the most comfortable way to carry your camera around all day, especially when using a larger, heavier lens, is the BlackRapid RS-7 Camera Strap. I highly recommended this strap, and I use the older RS-4 version daily. They have made some steady, welcomed improvements on them, including the curved shoulder pad of the RS-7, the quick release strap, and the improved connecting hardware. The base that screws into your camera is a lower profile, stronger single piece, and the securing screw surface on the clasp ring is smooth rather than knurled so that it will no longer scratch up your camera bottom. The strap is comfortable, easy to use, quick, strong, and rugged. I often use it in conjunction with wearing a backpack, and although the straps fight for space against each other on my shoulder, it still works fine. There is also now a version designed for women, the RS-W1 plus a new woman’s version in just black. They are also introducing 2 different pieces of hardware which will allow you to attach your camera to a tripod without removing the R-Strap’s base that is already attached to your camera.

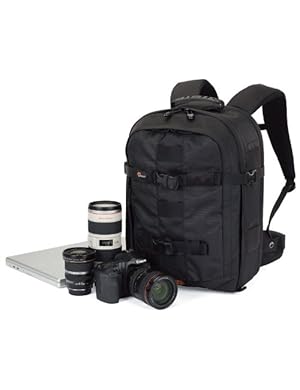
You are going to need something to carry all this equipment around in. My current favorite is the Lowepro Compu Trekker AW backpack, which is now called the Lowepro ProRunner 350 AW. I use this as both my airline carry-on and my working bag during the day. The size works perfectly for both needs. It easily fits the airline carry-on size, including smaller international requirements in some regions, yet fits more that it would first appear. With careful configuration of the interior dividers, I can fit 2 Canon bodies, three lenses, a 580EX II flash, its diffuser, 2 external hard drives in cases, a couple memory card cases, and some filters. In the outside pocket, I have a couple battery chargers, extra batteries, medium Rocket Blower, miscellaneous cords, caps, and accessories. In the rear pocket designed for a laptop, I easily fit a 32″ 5 in 1 reflector. The pack is extremely comfortable, has tons of padding on the straps and the back so that its weight never bothers me and I don’t feel the reflector in my back. I often wear it for hours a day while working, and it is never a problem. The Pro Runner 450 AW might be a better carry on size so that you could carry more gear on the plane with you (if it fits the airline’s requirements) but it would be too big for daily use. There are also rolling versions of these, with an “x” in the name, thought the retractable handles and wheels add weight and size to the bags.


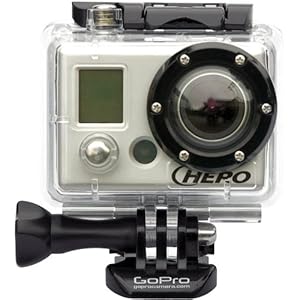
For adventure videographers, the item of the year is the GoPro HD HERO Cam, which you attach to your helmet, head, mountain bike, snowboard, skateboard, motorcycle, or whatever to shoot professional quality, point of view video. It comes in a variety of packages with different mounts. Film and share your adventures in full HD video! Click the image to see it on Amazon or click here to learn more and but direct at the GoPro website.


And to save all those images you are taking, memory cards will make great stocking stuffers. I like Sandisk Extreme 16 GB SD cards. If you still use CF cards, be sure to get the SanDisk Extreme 16GB CF cards. Use a Sandisk card reader to upload the images to your computer, rather than from the camera directly, in order to save the camera batteries. This Sandisk Card Reader is for the CF cards, and the 5 in 1 reads SD cards.

And for some basic stocking stuffers, here are a few simple but essential items for keeping your camera and lenses clean:

Giottos Medium Rocket Blower in the medium or large size. Always have it handy for getting dust off lenses in a hurry, because blowing on them – no matter how careful – leads to spittle on the lenses 5% of the time when it doesn’t matter and 95% of the time when you are in the most critical situations.

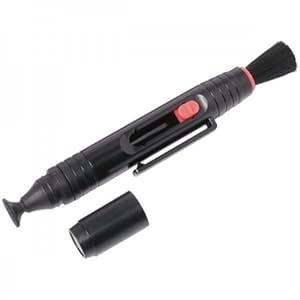
Pearstone LP-1 Lens Pen – Works great for cleaning off mysterious spots, smudges, and fingerprints that always appear on the lens (this is why I always use UV filters) as well as that a-fore-mentioned spittle. There is a retractable brush on one end and a cleaning head on the other end. Twist the cap to load the cleaning tip with the carbon based cleaning material, then remove the cap and use. Please read the instructions and visit the LensPen website to fully learn how to use it properly.

For more photography equipment and accessories like those above, be sure to see this previous post Equipment for Travel (and Everyday) Photography.

To edit and save all your photos, you are going to need some hard drive space and some software:

External Hard Drives – The Iomega Ego 1TB and a Lacie Rugged USB 1TB work great both at home and when traveling. There is a FireWire version of the Lacie Rugged 500GB also. Both are built solid and sturdy, and each fit perfectly in the Case Logic Portable Hard Drive Case made for these types of drives. Get the cases in different colors so you can quickly differentiate your different drives. For storage at home, consider a couple Western Digital My Book 1TB External Hard Drives.

Post-Production – After taking all these wonderful images with your new equipment, you are going to need to organize, edit, and work on all your photos. And for that, of course you are going to needAdobe Photoshop and/ or Adobe Lightroom 3. You can start off with the trial versions that you can download from the Adobe site, but sooner or later you are going to have to get the real versions. Use that student discount if you can!

Also be sure to consider all the great photo books to help you learn to use your equipment, improve you images and compositions, and be inspired. I’ve put together a post of several of my favorites that you can read here. The most recent addition to the bookshelf is:

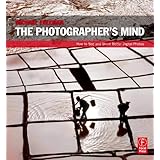
The Photographer’s Mind: How to See and Shoot Better Digital Photos by Michael Freeman
Every time I read Freeman’s The Photographer’s Eye, I lament, usually aloud, “why doesn’t he have more books like this?” Well, my wishes appear to have been answered. His next book The Photographer’s Mind has just come out.

And don’t forget the eBooks I put together for setting up and learning to use you Canon dSLR:

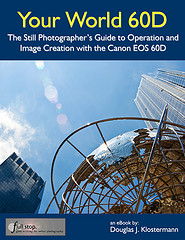
Your World 60D – The Still Photographer’s Guide to Operation and Image Creation with the Canon 60D – an eBook user’s guide and tutorial I wrote to help get you up and running with the 60D, quickly and competently. You can learn more about it at this post here. In addition to the PDF version, which also looks great on the iPad, it is also available in a Kindle edition on Amazon.com here and a Nook verion on BarnesandNoble.com Plus, for the Rebel T2i / EOS 550D, I have written T2i Experience – a similar guide for Canon T2i / 550D users.

Purchasing: If you plan to purchase cameras, photo equipment, books, or anything else from Amazon.com I encourage you to do so through any of the Amazon referral links I’ve set up. Just click on the equipment name or book title within this post and you will be taken to that Amazon page. Or click here to go directly to Amazon or click on the Amazon.com logo below, and start shopping. Thanks, I appreciate your support!

If you are in the UK, you can click here for the UK Amazon referral link.

For those interested in purchasing through B&H Photo, Adorama, or directly from Canon, I have set up affiliate links with them as well – find them on the left side of this page.

Happy Holidays, and I hope you get everything on your list!

Nikon D90 vs. D7000 vs. D300s

Comparing the Nikon D300s vs. D7000 vs. D90:

Since the Nikon D5100 was recently announced, I have updated this post to include all the current Nikon dSLR offerings. Read the updated post Nikon D5100 vs D7000 vs D90 vs D3100 here.

Just as Canon has made the decision between its consumer and pro-sumer dSLR cameras difficult due to the fact that they all share so many features, now so has Nikon with the release of the extremely admired new Nikon D7000. Although the D7000 sits above the Nikon D5100 and between the Nikon D90 and the Nikon D300s in price and features, its impressive new sensor, increase in megapixels and resolution, improved autofocus (AF) system, and construction and controls have made it a viable upgrade not only to the D90, but it some aspects it even challenges the more expensive, semi-professional D300s. Have its impressive specs created a lame duck of the D300s?

Nikon D7000 vs D300s vs D90 macro lens
photo by the author

As I always like to point out, when you are trying to determine which camera to purchase or upgrade to, you need to first consider and determine your needs, and then see which camera fills those needs. Not the other way around where you look at the new features and speculate if you really need or will use them. The latest cameras almost always have more impressive features and specifications than the preceding models, but if your needs and shooting style don’t required those upgrades then it is possible that you can save some money and be completely happy with a less expensive or earlier model.

Sensor and Image Quality: The sensor of the D7000 is greatly improved over both the D90 and the D300s in a couple of ways. The D7000 has 16.2 megapixels, where the D90 and D300s each have 12.3 megapixels. This increase in resolution allows for more intrusive editing of the files in Photoshop, the ability to crop a picture and still obtain an image with high enough resolution for printing or display, and allows for larger prints. In addition, the improved sensor, manufactured by Sony, results in better performance at high ISO settings and in low light, better dynamic range, tonal range, and color sensitivity. Have a look at dxomark.com to compare the sensors – run your mouse along the red-to-green color bar to the right of the graphs to see how these differences affect images.

Exposure Metering: The 2016 pixel RGB metering sensor of the D7000 is also improved compared to the D90 and D300s, and will result in better TTL metering performance of straightforward and complex lighting scenes and situations. All three cameras offer matrix metering, center-weighted, and spot metering. With center-weighted metering, the D90 can make use of your choice of a 6, 8, or 10mm center circle for its weighting, while the D7000 and D300s add a 13mm circle option to that.

Autofocus: The autofocus system of the D90 has 11 autofocus (AF) points with the center one being the more accurate cross type. The D7000 boasts a significantly improved AF system of 39 AF points with 9 of them being cross type. The D300s offers 51 AF points with 15 being cross type. The AF systems of the D7000 and D300s allow for you to use these points in various ways including automatic AF point selection, single point AF, and dynamic area AF using your choice of 9 points, 21 points, all points, or all points with 3D-tracking. With the D7000 you can also use a custom function to limit the AF system to 11 points, which may be more manageable for someone who wishes to manually select their AF points.

Nikon D7000 vs D300s vs D90 macro lens
photo by the author

Body, Construction and Size/ Weight: The D90 and D7000 appear very similar at first glance, but the plastic body of the D90 has been upgraded to the partially magnesium alloy body (top and rear) of the D7000. This adds slightly to the weight: 1.5 lbs for the D90 vs. 1.7 lbs for the D7000. The D300s is slightly larger than the other 2 bodies, and weighs in at 2.2 lbs, with full magnesium construction. The sturdier construction of the D7000 vs. the D90, including its nicer rubber gripping surfaces, creates the impression and feel of a more professional body. The D7000 and D300s have weather sealing at the memory card and battery doors. All 3 cameras have a 3″ rear LCD screen as well as a top LCD panel. It is worth noting that the magnesium alloy body of the D7000 does not fully extend around the front, and thus the area surrounding the lens mount, which plays an important role in supporting a heavy lens, is plastic. See this image of a D7000 skeleton next to one of a 7D for details.

ISO: As mentioned in the Sensor/IQ section above, the high ISO performance of the D7000 is greatly improved over both the D90 and the D300s. The tests at dxomark.com tell this story, along with the fact that the native ISO range of the D7000 is 100-6400 expandable up to 25,600. The other two cameras have a native ISO range of 200-3200 expandable to 6400. This means that with the D7000 you can use higher ISO settings when required, such as in low light situations, and not have as much difficulty with digital noise, particularly in the shadow areas of images. Early reports indicate that the high ISO performance is excellent.

Controls: The controls of the D7000 are similar to the D90 with some changes including the addition of the shooting mode ring under the mode dial (to change from single shot to high speed continuous to self timer, etc.), and the live-view switch with movie record button inside it. The top AF button of the D90 is incorporated into the AF switch and button at the base of the lens on the D7000. The D300s has entirely different switches, dials, and buttons than the other two cameras, however this allows for quicker and easier access to more features on the D300s since the D300s has more controls and settings directly available on the body. The D7000 also offers more white balance options than the other two cameras, plus 2 customizable user settings (U1, U2) on the mode dial, and you can assign functions of your choice to buttons such as the Fn Button.

Wireless Flash: All three cameras allow for advanced wireless lighting using the built in flash with Nikon Speedlights.

Brief commercial interruption: I would like to mention that I have written an eBook user’s guide for the Nikon D7000. After spending so much time studying, experimenting, writing about, comparing, and discussing the camera, I decided to put some that knowledge into eBook form! The guide covers all the Shooting, Setup, and Playback Menu settings and Custom Setting options – with recommended settings – plus discussions of how, when, and why to use the cameras’ settings and features, (metering modes, aperture and shutter priority modes, advanced autofocus use, focus lock, exposure lock, and more) for everyday and travel use, to help you take better photos. Click HERE to learn more about it – Nikon D7000 Experience – and to view a preview, or purchase it!

Viewfinder: The D90 has a viewfinder with 96% coverage of the actual resulting image, while the D7000 and D300s have improved large, bright 100% viewfinder coverage.

Nikon D7000 vs. D90 vs. D300s macro lens
photo by the author

Processor: The D90 and D300s have the Nikon Expeed Processor, while the D7000 has the improved Expeed II processor. This allows for more video options including full 1080p HD at 24fps, and overall faster processing of stills and video files.

Continuous Shooting Speed: The D90 can shoot 4.5 frames per second (fps) up to 100 images, the D7000 shoots 6 fps up to 100 shots, and the D300s shoots 7 fps – or 8fps with the battery grip. If you often capture action and really need the higher frame rate, such as for sports or wildlife shooting, you are going to have to seriously consider the D300s over the D7000. Otherwise, 7 or 8 fps is often complete overkill in typical real-life use.

Memory Card: The D90 uses a single SD memory card. The D7000 accepts 2 SD cards, where the second card can be used in a variety of ways: overflow, JPEG on one / RAW on the other, or mirrored backup of the first card. The D300s uses 1 CF card and 1 SD card, which also can be configured in a variety of ways. The second card can come in handy as well if one is shooting a lot of video files.

Battery: The D7000 uses the new, higher capacity EN-EL15 battery, which will last for over 1000 shots, and accepts the optional MB-D11 battery pack/ vertical grip which is constructed of magnesium alloy. The D300s uses the EN-EL3e battery and the optional MB-D10 battery pack/ vertical grip. The D90 also uses the EN-EL3e battery and its optional battery pack/ vertical grip is the MB-D80.

Full HD video: The D90 and D300s offer 720p video at 24 fps, with a 5 minute shooting time. The D7000 improves this tremendously with full 1080p HD video at 24 fps for up to 20 minutes with full-time continuous autofocus. Plus it offers 720p at 30, 24, and 25 fps.

Price: See below

Shooting Experience: The D7000 feels and performs great. After spending some time with the D7000, and getting over all its quirky differences vs. Canons – as far as menus, custom functions, and buttons/ controls – I’m really beginning to become attached to it. I actually prefer some of the controls it provides vs. the Canons plus some of the options it provides, such as the optional grid in the viewfinder, the ability to limit the AF points to 11 including the 9 cross type points – for quicker manual selection, the ability to change the continuous low shooting speed between 1 to 5 shots (I complained over a year ago that the 7D should have had that feature as its 8 fps is usually overkill for me), and the versatility to change the size of the central spot size for center weighted metering. Also, thank goodness the D7000 includes the ability to reverse the + and – directions of exposure compensation, because the Nikon default is just plain wrong!

So as you can see, the D7000 truly is an improvement over the D90 in every way, and an improvement over the D300s in many ways. Unless you have a couple very specific needs that only the D300s can accommodate – such as faster continuous shooting speeds, direct access to certain controls and settings, and a full magnesium alloy body – then it may be difficult to justify the older D300s over the new D7000.

Purchasing these cameras: If you plan to buy any of these cameras, accessories, or anything else through Amazon.com or Amazon.com UK, I would appreciate it if you use my referral links. Your price will be the same, and they will give me a little something for referring you, which will help support my blog. Thanks! In the USA, use the links throughout this post or use this referral link to Amazon. And for those of you across the pond, click here for my referral link to Amazon UK. If you are in another country, click on one of my Amazon links, scroll to the bottom of the page, and click on your country for your local Amazon. Thank you for supporting my efforts!

See and buy the Nikon D7000 – Body Only on Amazon $1199

See and buy the Nikon D7000 and 18-105mm Lens on Amazon $1499

See and buy the D90 on Amazon $739 body only or $1049 with 18-105mm lens

See and buy the D300s on Amazon $1449 body only

Purchasing from the UK? Use my Amazon UK referral link here. If you are in another country, click on an Amazon link, scroll to the bottom of the page, and click on your country for your local Amazon. If you wish to purchase from B+H Photo please click the link below. Thanks!

Accessories and Books: Now that you are on your way to deciding on a camera, you should also start looking into photography gear, accessories, and books. Check out these links, dSLR Photography Gear, Accessories, and Books, which discusses essential gear plus accessories specific to Nikon cameras; Equipment for Travel Photography, which discusses useful and practical photo accessories and equipment for both everyday and travel photography.

DPReview has excellent, very thorough reviews of all of these cameras, including one just published for the D7000.

Nikon D7000 vs. Canon 60D

(Sorry for the wrong link to the Essential Digital Photo Books – you can find that list HERE:
http://blog.dojoklo.com/2010/10/06/essential-digital-photography-books/)

Just when you thought it was difficult to choose between the latest offerings from Canon – the 7D vs 60D vs. T3i / 600D – Nikon comes out with the D7000! The Nikon D7000 is a competitor to both the Canon 60D and some say to the 7D, and I guess it is up to the forums and early users to really figure out where it stands. (See the comparison of the Canon dSLR line-up – 7D, 60D, T2i here and the comparison of the Nikon dSLR line-up – D7000, D90, D300s – in this post.)

I spent a couple months writing eBook user’s guides to both the Canon 60D (Your World 60D) and the Nikon D7000 (Nikon D7000 Experience), so I’ve spent considerable time with each of these cameras and know their features and controls inside and out. Check out these ebook guides to learn more about using and photographing with these cameras including all of their Menu settings and Custom Function settings (with recommended settings) plus discussions of how, when, and why to use the cameras’ settings and features, (metering modes, aperture and shutter priority modes, advanced autofocus use, focus lock, exposure lock, and more) for everyday and travel use, to help you take better photos.

Canon 60D vs Nikon D7000
Image of a Canon 60D taken with a Nikon D7000 and Nikkor 24-70mm f/2.8 – by the author

Comparing their features on paper, the Canon 60D and the Nikon D7000 are incredibly similar. One model is slightly better in one area, and the other model wins out in another area. With both models, it appears that you pretty much get what you pay for. Pay a couple hundred dollars more for the D7000, and you get a camera that rewards you for that extra cost.

Here is how the Canon 60D and the Nikon D7000 compare:

Canon 60D: (see it on Amazon)
18 megapixels
ISO 100-6400 expanded to 12800
HD Video with more fps options
3″ Articulating rear LCD screen
9 point autofocus system – all cross type
5.3 frames per second maximum burst rate
construction: aluminum chassis with polycarbonate body
single SD card
wireless flash triggering
96% viewfinder
size – slightly bigger but lighter
$1099

Nikon D7000: (see it on Amazon)
16.2 megapixels
ISO 100-6400 expanded to 25600
HD Video with full time autofocus
3″ fixed rear LCD screen
39 point autofocus system – with 9 cross type
6 frames per second maximum burst rate
construction: magnesium chassis with partial magnesium alloy body
dual SD cards
wireless flash triggering
100% viewfinder
size – slightly smaller but heavier
$1199

Here is a more in-depth exploration of these features:

Megapixels: Canon’s 18MP is more than the Nikon’s 16MP, which gives you slightly more cropping and enlarging ability with the 60D. To see how this affects images quality, you are going to have to look at the tests at dxomark.com. ISO performance is very similar, with the D7000 having a slight edge. And as far as color sensitivity, dynamic range, and tonal range, the sensor of the D7000 performs noticeable better. But, be aware that dxomark tests the sensors, but not in conjunction with the camera’s processor, so it is not a complete indication on the final image. A camera processes the images captured by the sensor, even when shooting in RAW, to produce optimal image quality – such as applying a bit of noise reduction, maybe tweeking the color. So it is likely that any “shortcomings” of a particular model’s sensor are addressed by that camera’s processor.

Nikon D7000 vs Canon 60D
Image of a Nikon D7000 taken with a Canon 60D and EF 100m f/2.8 Macro lens – by the author

ISO: You typically shouldn’t be shooting over 1600, maybe 3200 if absolutely necessary, so this is no big deal to most users. But since the megapixel race is over, ISO has become the current benchmark for comparison. It gives the pixel peepers and forum folks something to argue about. Again, check out the tests at dxomark.com to see that they show pretty similar ISO performance, with the D7000 slightly better. DPReview says the D7000 is arguably the best performing sensor for high ISO/ low noise in the consumer class (along with the Sony A55 since they have the same sensor. Did you know that little nugget? Sony manufactures sensors used by numerous other camera ).

HD Video: Canon offers 60fps which I understand is very important to videographers, and Nikon doesn’t shoot 30fps or 25fps at 1080p as Canon does. Nikon offers full time autofocus which may be slow and cumbersome and thus isn’t a big deal to videographers. We will have to see how well that works – early reports say not so great.

LCD screen: the articulating screen of the 60D could come in handy for several types of shooters. There are many times I could have benefited from a rotating screen such as when I was on my belly in wet grass trying to crane my neck to see through my viewfinder and capture a subject and her active dogs from grass level.

Auto focus system: This is a difficult comparison. The 39 AF point system of the Nikon offers both many more AF points plus customization capabilities for how it operates and tracks moving objects that rival the 7D (see Custom Functions/Custom Settings section below). However, only 9 of those points are the more accurate cross type, while all 9 points of the 60D are cross type. The 39 point system of the Nikon might be better for situations where you let the camera choose the AF points to track motion, such as sports, action, and wildlife. But you should often otherwise be choosing the AF point yourself. So with the Nikon, you may want to limit selection to 11 points (Custom Setting a6). If you want a Canon body with a more advanced AF system than the 9 points and basic tracking of the 60D, and overall more accurate than the D7000, have a look at the incredibly advanced and customizable AF system of the 7D with 19 AF points, all cross type.

Maximum burst rate: Close, but Nikon wins this one by a hair. Either rate should be fast enough for most photographer’s needs. The Nikon has the nice feature of being able to change the low speed continuous rate from between 1 to 5 fps. I had previously complained that the 7D should have had this feature since its 8 fps is often overkill. The 5.3 fps of the 60D is great, so it doesn’t really require the ability to change the fps beyond the available 3 or 5.3. Also note that the Canon will allow a continuous burst rate of 58 continuous photos in highest quality JPEG and 16 in highest quality RAW, while the Nikon is limited to a much lower 31 JPEG and 10 RAW before its buffer fills.

Construction: Nikon wins this one, but Canon saves weight with its construction. And I assure you both are more than strong enough for everyday, even abusive use. That being said, the partial metal body (magnesium allow on top and rear) and rubber grip material of the Nikon has a nicer feel and is a great detail that the 60D should have had. I think it is one of the main reasons for the increased price of the D7000 over the 60D. It is worth noting that the magnesium alloy body of the D7000 does not fully extend around the front, and thus the area surrounding the lens mount, which plays quite an important role in supporting a large, heavy lens, is plastic. See this image of a D7000 skeleton next to one of a 7D for details. Kind of an ugly sight for those trying to compare the D7000 to the 7D. Important details like this demonstrate why, in the end, the D7000 just ain’t no 7D competitor. Sorry, the name of this post will just have to remain Canon 60D vs. Nikon D7000!

SD Memory cards: I’m not sure the appeal of 2 memory cards in the Nikon, and why that might be better than just using one larger capacity card? Is it really useful or just a bell/ whistle? You can use the two cards of the D7000 in four ways: overflow, JPEG / RAW, backup, or stills / movies, so maybe that is kind of cool, but I actually prefer to be dealing with just one card at a time at this point.

Wireless, remote flash triggering: A super-cool feature available on both cameras using the built in flash to trigger off camera flashes.

Viewfinder: Nikon wins this one with slightly bigger size, though I don’t know how the actual brightness and view compares. It is a shame the 60D viewfinder view is not 99% or 100% of the actual resulting image like the Nikon. In reality, you won’t notice any shortcomings with either the 60D or the D7000 viewfinder once you start using it. The D7000 includes the option of displaying the grid in the viewfinder, which the 7D also has, and I wish the 60D did as well.

Size and Weight: Not a major difference, you will have to see how they feel in your hands.

Metering: They each have different metering systems, so it is difficult to compare. I’m sure they will both perform quite well. In addition to Evaluative/Matrix and Spot in both of them, the Canon has Center-Weighted and Partial, while the Nikon doesn’t have Partial but has the ability to change the size of the center area in Center-Weighted mode, which sounds pretty cool but may be more of a “set it once to your preference and forget it” thing. Depends on how quick and easy it is to access it in the menus, on the fly.

Processor: This is a pretty important component in the comparison and can really help resolve if the D7000 sits closer to the 7D or the 60D. I don’t yet know enough about the performance of Canon’s Digic IV vs. Nikon’s Expeed II to comment on this. The larger maximum burst buffer of the 60D may point to a more powerful processor. However the dual Digic IV processors of the 7D are able to handle much longer bursts of many more images than the single processor of the D7000 (and the 60D) – again, another very important reason the D7000 is not actually head to head with the 7D.

Custom Functions/ Custom Settings: Despite what I say below in the Controls and Menu section, the Custom Settings of the D7000 are far more sophisticated than those of the 60D, and in that respect make it much more of a contender with the Canon 7D. With the D7000, you can change the size of the center area metered in Center Weighted Metering Mode (not possible on 60D or 7D), you can change the frame rate of Continuous Low Speed between 1 and 5 frames per second (not possible on 60D or 7D), you can give buttons a “hold” feature or not, where you press and release instead of having to hold it down when turning another dial to dial-in a setting (“hold” means the camera does the holding, not you). With the D7000 you can set the autofocus tracking to be nearly as sophisticated as the 7D in terms of how to react to objects that come between you and your intended subject, and also in setting focus priority or release priority (take the picture only when focus is attained or take it immediately even without necessarily attaining focus). You can limit the number of AF points to 11 if you don’t wish to deal will all 39, you can fine-tune focus adjustment for different lenses like the 7D AF microadjustment (not possible on the 60D), plus you can fine-tune exposure adjustment for each individual exposure mode (to set a baseline compensation behind the scenes and not have to use exposure compensation every time, if you feel one of those modes is consistently over- or under-exposing). You can fine-tune the white balance for many more standard fluorescent options without having to have a Kelvin cheat sheet, as you might need to set the same temperature settings on a Canon. All very impressive, and all features that the 60D and certainly the 7D should have but don’t. Also, while I like the two rear thumb buttons of the 60D 7D for exposure and focus lock, you can set the AE-L/AF-L and Fn buttons (and preview button) of the D7000 to take on similar operations.

Controls and Menus: As a Canon user, I find the controls and menus of the Canons to be incredibly practical and intuitive. As a photography instructor, I try to be open-minded about the Nikon controls, notations, and menus, but continue to find them incredibly irritating, nonsensical, and not nearly as intuitive and user-friendly as Canons. I also think that the consistency of the controls and menus across the Canon line, from the 550D to the 5D MkII points to intelligent and thoughtful design. You can pick up any model and go to work, then quickly and intuitively change the ISO setting or metering mode. On the Canons, the controls are not scatted about in seemingly random places that change dramatically from model to model. Please don’t think I’m just a Canon guy on a rant here. Have a look at the controls on the top, back, and front of the D300s vs. the D7000 – essential controls are completely different. Why is that? Functions that are switches at the rear of one are a button at the top of the other, or marked dial switches on the rear become an unlabeled button on the front. The standard dSLR mode dial completely disappears and becomes a trio of buttons on one Nikon but not the other? I challenge you to pick up a D7000 and change the AF area mode to single point AF. The first time I picked it up I searched the camera’s buttons, switches, and menus for 15 minutes and never found it.  I handed it to my camera store co-worker and he failed as well! (Spoiler alert! It is done with the unmarked button located inside the Auto/ Manual focus switch near the lens mount in conjunction with a command dial.) Wait, so a switch that is C/S/M (continuous/ single/ manual) on one Nikon becomes AF/M (autofocus/ manual) on the other? So the same switch now partially controls a different function? Where are AF-C and AF-S (auto-focus continuous/ single modes) found now? Oh, who knows! (Actually, the same place as above, with the unmarked button and the other command dial.) As you can see, this is maddening to a photography instructor or salesperson who must deal with a number of different models and who is attempting to quickly demonstrate these very functions. I’m not even going to start on my feeling for Nikon menus!

Keep in mind, this all doesn’t really matter if you buy and use one of these cameras- you get that one and learn its controls. But I feel it does point to an intelligent consistency on Canon’s part, and as an architect in an earlier life, I highly appreciate good design and intuitive wayfinding. And also many photographers work with two bodies which are often different models of the same brand, and the ability to switch between a Canon 50D and a 5D Mk II without skipping a beat is how it should be. You can actually forget which one you have in your hands and it doesn’t matter. But once you do learn all the controls on the body of the D7000, you have an incredible amount of control at your fingertips.

edit:  After much more experience with various Nikon cameras, I no longer have any issues with their menus – once you get used to the Canon or the Nikon menu system it really is no big deal.  I still do think that the ability to seamlessly go from a 60D or 7D to a 5D Mk II with all the controls being the much the same is awesome (with the exception of the thumb multi-controller now becoming a pad on the 60D) and many photographers working with two bodies do this often – as opposed to going from a D90 or D7000 to a D300s, where there are some dramatic differences (which I do understand make sense in relation to the capability of the bodies, yet must aggravate those photographers working with two of these different bodies…).

Price: The Nikon is $100 to $200 more than the 60D (depending on current specials), and people are saying it is a cheaper competitor to the 7D. But if you study them closely, you can see that it does actually sit between the two. While the D7000 has an advanced AF system and tremendous customizing capabilities, details like the partial vs. full magnesium body construction and the single vs. dual processors of the D7000 vs 7D demonstrate why they are not exactly head to head competitors. The D7000 definitely offers at least $200 of improvements over the 60D, if not more, and is being very well received among photo enthusiasts just as the Canon 7D was last year – you pay a bit more and you get more features. Oddly, DPReview has suggested that the pro-sumer D7000 is a viable upgrade to the Nikon D300s, a higher end, more expensive semi-pro camera. So this makes the decision a bit more complicated for the Nikon D7000 vs. D300s comparison.

Quality Control: There have been numerous reports on the Internet of faulty D7000 bodies. The issues are mainly the bad pixel problem and the front/ back focusing issue. While this type of reaction seems to occur every time any new camera model comes out, there seems to be legitimacy to these complaints. My local camera store (where I worked for a time) reports that they continue to experience these issues with their customers. For the pixel peepers who insist on a clean sensor, nearly every D7000 body tested was found to have bad pixels out of the box. The firmware upgrade fixed some of cameras with bad pixels but not all of them. (What is the fix exactly? Pixel mapping?). Several pixel peeping customers also had front or back focus issues, and went through 2 or 3 bodies to find one they could accept. (see This Lens is Soft and Other Myths for an article about front/ back focus and quality control.)  Also, some of the official Nikon EN-EL15 batteries are larger than others – yes physically larger – and do not properly fit or get stuck in the D7000 body. As far as Canon 60D QC issues or exchanges: none. Zero. (But perhaps Canon customers aren’t so picky…!  Who knows.)  And for their report on repairs and customer service for Canon and Nikon in general: Repairs with Nikon cameras is a daily, ongoing issue. They see Nikons come back, both new and older models, and it sometimes takes sending the camera / lens / flash 3 or 4 times to Nikon to resolve the problem or the customer gives up by then. A few Canon models come in for repair, typically 4-6 year old heavily used Rebels that stop functioning properly. Canon repair is reported as excellent, customer service incredibly helpful, and turnaround is quick. Pile of brand new, defective Nikons returned over two month period: 15. Number of defective Canons: 0. Please note, this is the store’s report, not my opinion or bias, but I think it is worth taking this into account when choosing a dSLR system.

edit 2011-09-29: When any new camera comes out, there is an outcry of “this problem” and “that problem.” Some are exaggerated because you only read about the few bad ones and not the tens of thousands of good ones. Some are possibly over-reactions by people not fully understanding the new or advanced features or nuances of the latest model.  But I wanted to speak from personal experience while working at a camera store and comment on the issues that were being discussed in forums which proved to be real. The scope of the issues in the overall picture (of tens or hundreds of thousands of bodies made), however, should be taken into account, as well as the fact that the returns and exchanges may have been prompted in whole or in part by the internet reports, thus creating a circular chain of whatnot (I’m sure there is a term for this!).

Just keep in perspective, while your camera is a precious object to you, there are literally hundreds of thousands of the same body manufactured. It is a consumer electronics item, just a (precision) hunk of metal, plastic, and 100’s of tiny screws. It is a tool to be used towards an end goal of great photos, not an end unto itself.  (If you wish to learn to take control of your camera and capture great photos, please have a look at my dSLR camera guides such as Nikon D7000 Experience.)

Know that C and N are reputable companies and will make right any genuine issue you may encounter (within your warranty period!).  And while it is frustrating if you encounter a bad pixel, I think it is a marvel of technology that any sensor can be manufactured with 16 million pixels that all work!

Conclusion: Hey look! They are incredibly similar! (other than quality control issues) Both are capable of taking high quality digital images. They are both leaps and bounds better – and cheaper – than the same level dSLRs of just a few years ago. I do like the specifications of the expanded autofocus system, the slightly better sensor performance, the larger viewfinder, the custom setting options, and the partial magnesium alloy body construction of the D7000. Yet the 60D has the additional HD video frame rates, 9 out of 9 cross type AF points, and the articulating screen. You pay a few hundred dollars more for the Nikon, and you get a camera with body construction and features that are a bit better than the 60D. However, if you don’t actually need, understand, or wish to learn how to use all these additional features of the D7000, there is no point in paying for them. (If you are going to leave the camera in Auto or Program mode and let the camera choose the autofocus points, you definitely don’t need a D7000!) In the end, it totally comes down to which one you are more comfortable with – which one feels better, which one’s buttons and controls work best for the way you work, which one’s menus make better sense to you, which one’s custom functions allow you to make the customizations you want to make, and how much money you want to spend. Or which system you want to invest in for the long-term, as far as all the lenses, flash, and accessories you are going to accumulate. Or which camera brand your friends use so that you can go to them for help. Just choose one, learn to use it well, and get out and take photos! That’s what digital SLRs are all about.

Canon didn’t drop the ball with the xxD line, as some have said. It’s just that they reconfigured their price points and naming conventions. The 7D replaced the 50D months ago, and it was widely agreed to be a dramatic, spectacular, and successful improvement. That was very much like the Nikon D90 to D7000 improvement we see now. Canon definitely took the 50D to the next level with the 7D. But then they needed a high-end consumer model to offer between the entry level Rebel line and the semi-pro 7D. Hence the highly capable 60D. So who wins? The consumer. The digital photographer. Cheesy, but true.

If you wish to compare the Nikon D7000 vs the Nikon D90 vs the D300s, have a look at this post.

Purchasing? If you are planning to buy either of these cameras from Amazon.com (or other equipment, accessories, or simply anything else), please use the links below and I will get a little something for referring you, which will help support my blog. Thanks!

see and buy the Canon EOS 60D – Body Only

see and buy the Canon EOS 60D with 18-135mm lens

see and buy the Nikon D7000 – Body Only

see and buy the Nikon D7000 with 18-105mm lens

Link for any other Amazon.com purchases

Purchasing from the UK? Use my Amazon UK referral link here.

If you wish to purchase from B&H Photo, Adorama, or direct from Canon, please click on their logos on the Gear page. Thanks!

Was this post helpful?  Please let others know about it by clicking the Facebook or Twitter sharing buttons below, linking to it from your blog or website, or mentioning it on a forum.  Thanks!

How to Choose a New dSLR Camera

When selecting a new dSLR camera, many people seem to look at the latest offerings, attempt to compare their many features, and determine which one, in or near their price range, is “better.” But this is the backwards way to approach it. Of course a continuous burst rate of of 126 JPEGs at 8 frames per second is “better” than 58 frames at 5.3 frames per second. But do you need the ability to take 126 consecutive images in 15.75 continuous seconds? Ever? Certainly the ability to to control both the method and the sensitivity of AI Servo Tracking is impressive and powerful, but do you even understand it, wish to learn about it, need it, and will you ever use it? If a camera’s features don’t fit your needs as a photographer, it is not a better camera for you. In fact, it may be a worse camera for you because its complexities and options may serve to work against you and your image making.

Douglas J. Klostermann Photography
Iquitos, Peru

When you are trying to determine which new dSLR camera to purchase or upgrade to, you need to first consider and determine your needs, and then see which camera fills those needs. Not the other way around where you look at the new features and determine if you really need or will use them.

For example, I began shooting with a Rebel XT and took it on an extended trip where I shot lots of outdoor dance and festivals (see the Peru and Dance galleries here for the results – those are all shot with a Rebel XT.) I soon discovered this camera wasn’t fulfilling my growing needs and I made a mental list of what my next camera needed:

  • more focus points which are more strategically positioned (the Rebel XT only has 7 focus points in a simple cross pattern which did not suit the way I focus and compose)
  • faster frame rate in continuous shooting mode (it only has 3 fps which wasn’t good enough for catching a good burst at the peak of action)
  • better sealed body (I ended up in several very dusty or wet situations)
  • integrated sensor cleaning (see “dusty or wet situations” above)
  • more megapixels (the 8 MP of the XT just weren’t sufficient when it came to cropping and post-processing)
  • battery with longer capacity (I used it on weekend trips to the middle of nowhere with no electricity, but didn’t want to have to buy and take more than 3 batteries)
  • larger LCD screen to better review photos (the XT has a tiny screen)
  • grid in the viewfinder (I just can’t keep it straight sometimes)

Amazonia Shipibo Vendor
Iquitos, Peru

These are the features I looked for in my next camera. I didn’t work backwards and wonder, “Do I need or will I ever need auto lighting optimizer and highlight tone priority?” If I had exposure issues on my list, I would have looked for these kinds of features, but I didn’t. I didn’t wonder, “Do I need multiple flash remote firing? Should I worry about that?” That wasn’t on my list because it wasn’t a need I ran into, ever, in months of shooting. I don’t even own multiple flashes and wish to minimize using the one. I didn’t ask myself, “Do I need an extensively redesigned focus system with AF Point Expansion and Zone focusing?” I nearly always choose my own focus point – I don’t want the camera choosing the closest point which is bound to be a dancer’s flying hand and not their face, so I don’t need that. No matter how awesome and advanced it is, even if the subjects are moving. I’m pretty quick with the focus point selection, I just need more and better placed focus points. If you haven’t run into a need for certain features in your months or years of extensive shooting, you aren’t going to suddenly need it just because it is now offered on a camera. Sit down and make your list, then look at the cameras’ offerings.

And please be aware, no new camera will help you instantly create better photos. Or better yet, all of the latest cameras will help you take better photos, but equally so, none any better than the others. If you wish to take better photos, just chose one of the cameras and get out and shoot. Learn how to use the basic settings (aperture, shutter speed, ISO, focusing modes and focus points, exposure metering modes, histograms) and then concentrate on composition and telling a story through your images. Get a book like Bryan Peterson’s newly updated Understanding Exposure to get a handle on the essential functions and relationships of aperture, shutter speed, and ISO.  Or have a look at my Full Stop e-book camera guides for various Canon and Nikon dSLR cameras!  And see the following posts to help you on your way:

How Pros Photograph

Deconstructing the Shot

Pucallpa kids and boat
Pucallpa, Peru

Need a lens to go with your new camera? Read about choosing a lens other than the kit lens in this post Why You Shouldn’t Buy the Kit Lens, and learn about the Best Lenses for Travel Photography here.

If you are interested in researching or purchasing the equipment or books I use, discuss, or recommend, I would appreciate it if you use this referral link to Amazon. Your price will be the same, and it will help support my blog and my work. Thanks!  And for those of you across the pond, click here for my referral link to Amazon UK. If you are in another country, click on one of my Amazon links, scroll to the bottom of the page, and click on your country for your local Amazon.

Exploring Metering Modes

It is one thing to know that your cool new Canon or Nikon digital SLR provides you with 3 or 4 different metering modes. It’s another thing to know how and when to actually use them in the field or in different real life situations. The Canon 5D, 7D, 60D, 50D and T3i all offer four different metering modes – Evaluative, Center-Weighted, Partial, and Spot – as I’m sure you have thoroughly read about in your manual, right? Nikons, like the D7000, D51000, and D3100 generally have three different modes: Matrix, Center-Weighted, and Spot. I’ll try to cut to the chase and simplify the explanations and their uses.  Note that there are some important differences between how they work for Canon and Nikon cameras, particularly the Spot mode.

Canon T3i T2i 60D metering mode partial spot viewfinder
The viewfinder of the Canon T3i (T2i and 60D similar) showing the areas evaluated for Partial Metering (superimposed grey area) and Spot Metering (black circle in center).

Evaluative (Canon) or Matrix (Nikon): This is the default mode for your camera, and it can be used for almost every situation you shoot. Yes, maybe 90% of the time, maybe more. The camera evaluates the entire scene, as divided into several zones, and chooses the best exposure based on its knowledge of thousands of potential image situations. The current metering systems are so good, they can even be relied on for backlit or other challenging lighting situations. An important feature of this mode is that advanced cameras such as the Canon 7D, Canon 60D or Nikon D7000, D5100 take into account the selected focus point in its determination of exposure settings. It is assuming your focus point is on your most important subject, so under challenging and critical situations, it is wise to confirm that the camera has chosen the focus point you want (well, this is always wise). Even better, you should typically manually choose the focus point or cluster of focus points, as the camera has no idea what your intended image is. So in special situations, such as dramatically back-lit scenes or a situation with bright light plus deep shadows, make sure you are not using the center point to focus and meter, and then recomposing to take the shot – because some of the zones that the camera evaluated are now no longer in your shot after recomposing, and other new areas are, so the camera has set exposure for an image other than the one you are taking.


San Miguel Duenas, Guatemala

Partial (Canon only): This mode meters a smaller area, about 9.4%, in the center of the scene on the 7D and 6.5% with the 60D. Nikons do not have this mode, though some Nikons such as the D7000 offer the ability to change the size of the Center-Weighted Metering circle (see Center-Weighted Metering below), so it makes up for this.  The area is approximately a circle that reaches to the top and bottom focus points, and the metering system ignores the rest of the frame. This mode is useful where there is a dramatic difference in lighting between the foreground or subject and the background. For example, when your subject is backlit – maybe standing in front of a bright window or the sun – and consequently their face is in shadow. I know I said evaluative mode can often handle this type of situation, but if you want the face or subject to be properly exposed and not risk blowing the shot, it is worth it to quickly switch to Partial metering mode. Again, another time to use this is when there is a wide range of light in your scene, from bright sunlight to deep shadows. Remember, this mode is not linked to your focus point. The partial area that is metered is always in the center, so meter on the part of the scene that is most critical and that you want properly exposed, using the central area of the viewfinder, lock in that exposure, then recompose and take the shot.


Campo Nuevo, Guatemala

Important Note about Locking In the Metered Exposure: The metered exposure setting is sometimes locked in by pressing the shutter button half-way down or sometimes not “locked” until the image is taken (depending on your camera, or current shooting mode, or how you set it up – read your manual!).  The shutter button also typically locks focus (unless you have changed that setting).  If you wish to lock in focus and exposure separately, which you often will need to do, on a Canon use the AF-Lock (for focus) button and/ or the AE-Lock (for exposure) button – which looks like this: * – to lock in one of them before locking in the other with the half-press or full press of the shutter button. On the Nikons, you have to set one of your buttons to be the exposure lock button, either the AE-L/AF-L Button or the Fn Button on some cameras like the D7000. I suggest first metering on the subject and locking in that exposure by pressing the appropriate button, then recomposing and locking in focus right before or as you take the photo. Or else learning the advanced methods of back button focusing. Get in the habit of knowing how to do this instinctively, and if you need to hold or just press the particular button, so that it comes naturally during critical situations. On the 7D and D7000 and other cameras you can also customize how these buttons perform or set other buttons to do these tasks. You can see in the viewfinder that you have locked focus when the focus dot is lit. You can see that exposure is locked with the AE-L indication in the Nikon viewfinder or the * symbol in the Canon viewfinder.

Locking exposure and focus, independently, each in the brief seconds before you take a shot? Confusing? A little, but not impossible to figure out with some experimentation and practice. Remember, this is why you bought the fancy dSLR, so that you could make use of all these advanced features and take your photos to another level!

Center-Weighted Average: This metering mode is sort of a cross between Evaluative and Partial metering. It acknowledges that the subject is in the center and requires special metering attention, but it also takes into account all the other zones. Again, this is not linked to the focus point, but always to the center, so if your subject is off center – which it typically should be for a more dynamic image – you need to lock in exposure on your subject and then recompose. I have found that with the Canon 50D, this mode is actually more consistent than Evaluative metering, which often over exposes by 1/3 or 1/2 a stop.  Note that you can use the Custom Settings of the D7000 to change the size of the center area being weighted.

This mode can be used when you want to ensure that the subject is properly exposed, but you also want the camera to consider the background. However, if the background is much darker or lighter than the subject, and you want the camera to expose only for the subject and ignore the background, use Spot Metering…


San Miguel Duenas, Guatemala

Spot: This mode meters a small center area, 2.3% of the frame with the 7D, 2.8% with the 60D, and 2.5% with the D5100 and D7000. This area is indicated by the small circle in the center of the viewfinder of the 7D and 60D. There is no center circle in the Nikon viewfinder and you will soon find out why.  So when do you want to use Spot metering? This, again, is useful for scenes with great variation in light and shadow, or in very critical situations. One of the most common ways to use it is when metering for proper exposure on a dramatically lit face or subject, but the exposure of the rest of the scene is unimportant. Or perhaps your subject is set against a plain but consistent background, like a bird against a large blue sky. It is also used to determine proper exposure of a subject before switching the camera to manual for a controlled studio shot, or a critical shot or series of shots where the lighting is not going to change. If your background is completely dark or extremely bright, and you don’t want the exposure system to consider it at all when determining the exposure of you subject, use Spot rather than Center-Weighted or Partial. With Canon cameras, the Spot that is used to evaluate the exposure is in the center of the frame, and is often indicated by a small circle. However, with Nikon cameras like the D5100 and D7000, the Spot surrounds the active focus point and is not necessarily in the center of the frame unless you are using the center AF point. So it is wise to become familiar with how your camera operates.

A fifth metering mode is Manual metering, which isn’t actually a mode in your camera, but is a method of metering. This is where you use a light meter or use your camera as a light meter (such as described at the end in the Spot section above) and then manually set your exposure based on the meter readings. This is used when you want ultimate control of the metering and exposure.

You can learn much more about the Exposure modes of specific cameras, including the 60D, T3i, D7000 and D5100, in my e-book users guide. See my e-book website, Full Stop to learn more about them or click the banner below! The guides also go into much more detail about setting up the related metering mode Custom Functions/Custom Settings and camera controls.

full stop dslr photo photography camera manual guide for dummies canon nikon

I recently ran across an interesting article which takes this discussion to another level by addressing the use of different metering modes in the very specific situation of a wedding. Since one of the main subjects in typically all in white, and the other in black, the metering mode you select and where you meter can make a dramatic difference in the exposure. While that article is specific to weddings, it is useful and helpful to read to further understand how the different modes work, and how special situations might call for some extra thought.