Deconstructing the Shot – Photo 2

This post is the second in an occasional series in which I describe the making of a photograph, from both a technical and artistic standpoint.  I’ll go through the camera settings and why they were chosen, as well as the thought processes going through my head regarding composition and the creation of the image.  These types of posts will be concrete examples of a previous post of mine called How Pros Photograph, which describes the various decisions that may be going through a photographer’s head as they work a scene and make photos.  The first post in this series can be read here.

This one can be called the Shutter Speed Edition, as you will learn below.  For those looking to learn about Depth of Field, please also view Deconstructing the Shot post 3, the Aperture Edition.

Douglas J. Klostermann Photography
Canon Rebel XT, 28-105mm f/3.5-4.5 II at 50mm, ISO 100, f/14, 1/20s

The Photo: The photo I’ve selected for this example (seen above) is one I took in Pucallpa, Peru in July 2008.  Pucallpa is a town located along the Ucayali River, a tributary of the Amazon.  Though it is a relatively small town, it has a bustling (though undeveloped) port which receives food and goods from deeper in the Amazon region.  The streets of Pucallpa buzz with the constant traffic of moto-taxis, the motorcycle rickshaws found in much of Peru and the developing world.  I had a few days before hopping on a slow boat to Iquitos, so I roamed the town looking for photo opportunities.  I’ve created some strips of photos to show a selection of images as I worked this particular scene:

Pucallpa Series 1

The Process: I wanted to capture the ubiquitous motion and activity of the traffic in the streets of Pucallpa, which is dominated by the moto-taxis.  The best way to do this, I decided, was to capture the blur of motion as the traffic sped by.  I was using a Canon Rebel XT with a 28-105mm f/3.5-4.5 II lens.  I selected a busy and interesting intersection and set the camera to Shutter Priority mode (Tv on Canon, S on Nikon).  This is so I could control the shutter speed and set it to a slow shutter speed so that fast motion would become a blur.  I initially chose a shutter speed of 1/50, but that wasn’t resulting in enough blur, so through quick experimentation, I settled on 1/20.  This shutter speed, 1/20 of a second, is very slow for hand-holding.  While the motion will blur, it is difficult at this shutter speed to hold it still enough (without a tripod) so that the background will remain sharp and not cause unwanted blur due to camera shake in the in-focus areas.  I now actually recommend using 1/30 as a starting point for creating motion blur.  But even with 1/30, you have to pay attention to holding the camera very still.  I selected ISO 100 since it was a very bright, sunny afternoon, and because I atypically needed to work in a slow shutter speed range.

I initially took some images of the traffic crossing the intersection, trying to capture many vehicles at once to accentuate my idea of the busy traffic.  However, I soon decided to face directly across the street and capture the moto-taxis as they crossed my field of view.  I set the Drive Mode to continuous so that I could fire off a series of photos each time the light turned green and the traffic crossed my view.  The Rebel XT has a slow maximum rate of 3 frames per second (fps) but many current cameras will allow a more useful and faster frame rate of 5 or 6, or even 8 fps.  White Balance was set on Auto, though Sunny setting would have worked well too.  Metering was set on Evaluative.  However, since the lighting and the scene remained relatively consistent, it would not have been a mistake to determine the best exposure then switch the camera to Manual mode, M, and set that exposure for all the photos.

In Shutter Priority mode, you choose the shutter speed and the camera will choose the aperture, based on the ISO setting.  The aperture setting for this photo wasn’t too important to me.  Since the foreground was going to be a blur of motion, it was best that the background was relatively in focus.  So a narrow aperture providing relatively deep depth of field, such as f/11 or f/16 would be fine.  Based on the ISO and the amount of light, the camera was selecting apertures ranging from f/8 to f/22 for various images, with most of them somewhere in the middle of that range.  Also, since the subject was going to be a blur of motion, there was no point in trying to focus on it.  The motion would most likely confuse the auto-focus system anyway, so I switched the lens to MF, Manual Focus, and focused on the sign post directly across the street from me.  Though I may have zoomed slightly in or out with the lens at first, I settled on a focal length of 50mm and left it there.

Pucallpa series 2

While the subject of this composition is the blur of the vehicles, the background also comes into play, and as with every image, can not be ignored.  The street and trees beyond created a nice background, both showing the urban context of the scene and blocking out what could have been a large area of dull, light sky.  The yellow sign post, where I focused, added a nice element of color.  You can see that the yellow post and the curb of the far side of the street lie near the “rule of thirds” lines.  This isn’t an accident, and they were consciously placed there to help create an interesting composition.  This was done through squatting or kneeling in order to place myself at the desired point of view and still capture most of the vehicles from top to bottom.

I took a series of 59 images over a period of nearly 8 minutes, with 48 of the images being the straight-on images in a period of just 2 minutes.  I used a horizontal composition since that worked best with the blur of motion of the traffic.  I typically just held down the shutter button as the traffic started to go by, just after the stoplight changed.  By doing that I captured a variety of interesting images, with the moto-taxis blurring by in all types of configurations.  In a situation like this, luck and chance play a big part.  The photographer must control all the elements they can through composition, framing, and camera settings, and then allow the scene to play out in front of them.  So I would actually call this controlled chance.  There were a few very nice results, and I settled on an frame from the middle of the series, IMG_3306, as my chosen image.  In addition to showing the blur of the moto-taxi, it also captured some pedestrians across the street and fully showed the one-way sign, which I thought were nice additions to the image.  With these added elements, it becomes more of an overall “portrait” of the city streets of Pucallpa rather than just an image about motion.

The Post Process: To create the final image, I adjusted the color and contrast in Adobe Camera Raw (ACR) and in Photoshop (PS).  As you can see by the unprocessed images, the color and contrast is quite dull and lifeless straight out of the camera.  The original file was a JPEG file, and the Picture Style was Standard (I hadn’t started using RAW yet).  In ACR, the Blacks were increased to 10 to give it the nice deep blacks, which helps to make the bright colors pop even more.  A Fill setting of 10 was used to lighten up the foreground moto-taxi a bit, and Clarity +15 and Vibrance +10 were used to give it some, well, clarity and vibrance.  In Photoshop, the contrast was increased with Curves using a setting probably close to Medium Contrast.  I typically don’t make the blacks so black and purposefully lose detail in the shadows, but I was experimenting with this look and it seemed to work well here.  The image was sharpened using Unsharpen Mask, probably at Amount: 85 or 100, Radius: 1, and Threshold: 4.  Now I would try being more aggressive with the Amount and Radius, but I am not sure the 8MP JPEG file from the Rebel XT would withstand much more without starting to degrade.  Somewhere along the way, either in ACR or PS, the color temperature was also changed to warm it up a little, which is more in keeping with the afternoon sun of the Amazon region.  I didn’t crop the image at all, as you can see.  It is best to try to get the framing you want when you capture the photo, but I am somewhat surprised myself that I did it so well.  I once had a photo teacher in college who complimented me on my ability to capture the frame and not need to crop.  I just thought that was the way one was supposed to take a photo!  Thankfully I still sometimes demonstrate that ability.

The Final Image:

Douglas J. Klostermann Photography
Canon Rebel XT, 28-105mm f/3.5-4.5 II at 50mm, ISO 100, f/14, 1/20s

The Lesson: We should always learn from our photos, so that next time we are in a similar situation, we can create an even better image.  Some improvements I could have made to this image include using a neutral density (ND) filter or a polarizing filter.  This would have given me more control over the range of aperture settings that the camera selected and allowed for a wider-open aperture so that the far distance became more of a blur.  A polarizing filter would have also helped to darken the bits of sky that appear.  And as I mentioned above, a shutter speed of 1/30 would have still created the blur, but would have been slightly easier to hand-hold without creating unwanted blur in the background due to camera shake.

This image was chosen to be used on the cover of the programs for the Brooklyn Philharmonic’s Nuevo Latino Festival in 2009.  Incredibly, the near square crop of the image works really well too:

Douglas J. Klostermann Photography

So hopefully you can see from this explanation and from my previous posts that photographs don’t necessarily just happen.  They are created through a combination of thought processes, a series of decisions, and the application of camera settings based on these decisions and on the situation at hand – plus some controlled chance!

See the Related Posts section just below for links to parts 1 and 3 in this series.  And learn more about how to take control of your camera and the images you create with my Full Stop e-book camera and photography guides.

Full Stop photography e book camera user guide Nikon Canon dSLR

Your World 60D eBook Now Available!

My eBook user’s guide and tutorial on using the new Canon 60D, Your World 60D – The Still Photographer’s Guide to Operation and Image Creation is now available! Learn how to use the 60D, quickly and competently, to create the types of images you want to capture. The Canon 60D is an advanced tool, and this guide explains how to begin to use it to its full potential.

Click here to learn more about the eBook

You can preview it at the following link. The preview shows the Table of Contents and Introduction, a sample Menu Settings page, a sample Custom Functions Settings page, and a sample text page.

http://www.dojoklo.com/writing/Your_World_60D-Preview.pdf

Purchase information is below.

Canon EOS 60D book guide manual tutorial how to instruction Your World 60D

Purchase Your World 60D through PayPal here!
This version is in PDF format, 8.5″x11″, which can be read on your computer screen, printed on your printer, and can also be read on the iPad.
Price: $9.99
(plus 6.25% sales tax for residents of Massachusetts)
Secure payment with PayPal or Credit card

Buy Now with PayPal! or Buy Now
_____________________

The Kindle Edition is available at Amazon.com here and the Nook Version is available at BarnesandNoble.com.

Begin to master your Canon 60D and learn to use it to its full capabilities!

(Since my subsequent guides have been called Canon T3i Experience and Canon 7D Experience, this one should perhaps be called Canon 60D Experience.)

Humane Society’s All Animals Magazine

If you happen to receive the Humane Society’s All Animals magazine, be sure to check out the section on young animal activists.  Last month I was fortunate to meet and photograph an amazing and motivated young animal activist, Ayna Agarwal (and her dogs).  One of my portraits of her and Muffy illustrates her profile in the Sept./Oct. 2010 edition of All Animals, and another image was used in the table of contents.
Douglas J. Klostermann Photography

You can read her story here, or read the entire article on the HSUS website here.

Nikon D7000 vs. Canon 60D

(Sorry for the wrong link to the Essential Digital Photo Books – you can find that list HERE:
http://blog.dojoklo.com/2010/10/06/essential-digital-photography-books/)

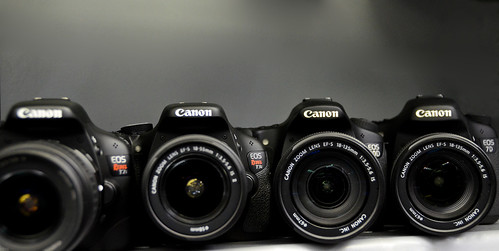
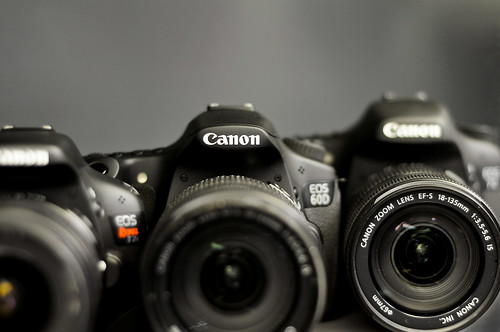
Just when you thought it was difficult to choose between the latest offerings from Canon – the 7D vs 60D vs. T3i / 600D – Nikon comes out with the D7000! The Nikon D7000 is a competitor to both the Canon 60D and some say to the 7D, and I guess it is up to the forums and early users to really figure out where it stands. (See the comparison of the Canon dSLR line-up – 7D, 60D, T2i here and the comparison of the Nikon dSLR line-up – D7000, D90, D300s – in this post.)

I spent a couple months writing eBook user’s guides to both the Canon 60D (Your World 60D) and the Nikon D7000 (Nikon D7000 Experience), so I’ve spent considerable time with each of these cameras and know their features and controls inside and out. Check out these ebook guides to learn more about using and photographing with these cameras including all of their Menu settings and Custom Function settings (with recommended settings) plus discussions of how, when, and why to use the cameras’ settings and features, (metering modes, aperture and shutter priority modes, advanced autofocus use, focus lock, exposure lock, and more) for everyday and travel use, to help you take better photos.

Canon 60D vs Nikon D7000
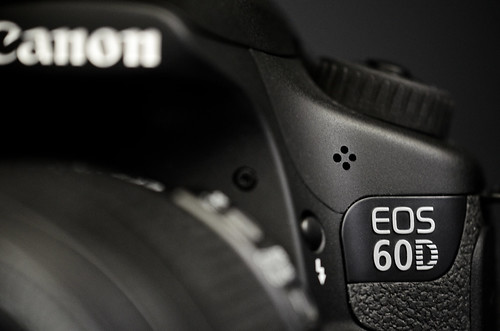
Image of a Canon 60D taken with a Nikon D7000 and Nikkor 24-70mm f/2.8 – by the author

Comparing their features on paper, the Canon 60D and the Nikon D7000 are incredibly similar. One model is slightly better in one area, and the other model wins out in another area. With both models, it appears that you pretty much get what you pay for. Pay a couple hundred dollars more for the D7000, and you get a camera that rewards you for that extra cost.

Here is how the Canon 60D and the Nikon D7000 compare:

Canon 60D: (see it on Amazon)
18 megapixels
ISO 100-6400 expanded to 12800
HD Video with more fps options
3″ Articulating rear LCD screen
9 point autofocus system – all cross type
5.3 frames per second maximum burst rate
construction: aluminum chassis with polycarbonate body
single SD card
wireless flash triggering
96% viewfinder
size – slightly bigger but lighter
$1099

Nikon D7000: (see it on Amazon)
16.2 megapixels
ISO 100-6400 expanded to 25600
HD Video with full time autofocus
3″ fixed rear LCD screen
39 point autofocus system – with 9 cross type
6 frames per second maximum burst rate
construction: magnesium chassis with partial magnesium alloy body
dual SD cards
wireless flash triggering
100% viewfinder
size – slightly smaller but heavier
$1199

Here is a more in-depth exploration of these features:

Megapixels: Canon’s 18MP is more than the Nikon’s 16MP, which gives you slightly more cropping and enlarging ability with the 60D. To see how this affects images quality, you are going to have to look at the tests at dxomark.com. ISO performance is very similar, with the D7000 having a slight edge. And as far as color sensitivity, dynamic range, and tonal range, the sensor of the D7000 performs noticeable better. But, be aware that dxomark tests the sensors, but not in conjunction with the camera’s processor, so it is not a complete indication on the final image. A camera processes the images captured by the sensor, even when shooting in RAW, to produce optimal image quality – such as applying a bit of noise reduction, maybe tweeking the color. So it is likely that any “shortcomings” of a particular model’s sensor are addressed by that camera’s processor.

Nikon D7000 vs Canon 60D
Image of a Nikon D7000 taken with a Canon 60D and EF 100m f/2.8 Macro lens – by the author

ISO: You typically shouldn’t be shooting over 1600, maybe 3200 if absolutely necessary, so this is no big deal to most users. But since the megapixel race is over, ISO has become the current benchmark for comparison. It gives the pixel peepers and forum folks something to argue about. Again, check out the tests at dxomark.com to see that they show pretty similar ISO performance, with the D7000 slightly better. DPReview says the D7000 is arguably the best performing sensor for high ISO/ low noise in the consumer class (along with the Sony A55 since they have the same sensor. Did you know that little nugget? Sony manufactures sensors used by numerous other camera ).

HD Video: Canon offers 60fps which I understand is very important to videographers, and Nikon doesn’t shoot 30fps or 25fps at 1080p as Canon does. Nikon offers full time autofocus which may be slow and cumbersome and thus isn’t a big deal to videographers. We will have to see how well that works – early reports say not so great.

LCD screen: the articulating screen of the 60D could come in handy for several types of shooters. There are many times I could have benefited from a rotating screen such as when I was on my belly in wet grass trying to crane my neck to see through my viewfinder and capture a subject and her active dogs from grass level.

Auto focus system: This is a difficult comparison. The 39 AF point system of the Nikon offers both many more AF points plus customization capabilities for how it operates and tracks moving objects that rival the 7D (see Custom Functions/Custom Settings section below). However, only 9 of those points are the more accurate cross type, while all 9 points of the 60D are cross type. The 39 point system of the Nikon might be better for situations where you let the camera choose the AF points to track motion, such as sports, action, and wildlife. But you should often otherwise be choosing the AF point yourself. So with the Nikon, you may want to limit selection to 11 points (Custom Setting a6). If you want a Canon body with a more advanced AF system than the 9 points and basic tracking of the 60D, and overall more accurate than the D7000, have a look at the incredibly advanced and customizable AF system of the 7D with 19 AF points, all cross type.

Maximum burst rate: Close, but Nikon wins this one by a hair. Either rate should be fast enough for most photographer’s needs. The Nikon has the nice feature of being able to change the low speed continuous rate from between 1 to 5 fps. I had previously complained that the 7D should have had this feature since its 8 fps is often overkill. The 5.3 fps of the 60D is great, so it doesn’t really require the ability to change the fps beyond the available 3 or 5.3. Also note that the Canon will allow a continuous burst rate of 58 continuous photos in highest quality JPEG and 16 in highest quality RAW, while the Nikon is limited to a much lower 31 JPEG and 10 RAW before its buffer fills.

Construction: Nikon wins this one, but Canon saves weight with its construction. And I assure you both are more than strong enough for everyday, even abusive use. That being said, the partial metal body (magnesium allow on top and rear) and rubber grip material of the Nikon has a nicer feel and is a great detail that the 60D should have had. I think it is one of the main reasons for the increased price of the D7000 over the 60D. It is worth noting that the magnesium alloy body of the D7000 does not fully extend around the front, and thus the area surrounding the lens mount, which plays quite an important role in supporting a large, heavy lens, is plastic. See this image of a D7000 skeleton next to one of a 7D for details. Kind of an ugly sight for those trying to compare the D7000 to the 7D. Important details like this demonstrate why, in the end, the D7000 just ain’t no 7D competitor. Sorry, the name of this post will just have to remain Canon 60D vs. Nikon D7000!

SD Memory cards: I’m not sure the appeal of 2 memory cards in the Nikon, and why that might be better than just using one larger capacity card? Is it really useful or just a bell/ whistle? You can use the two cards of the D7000 in four ways: overflow, JPEG / RAW, backup, or stills / movies, so maybe that is kind of cool, but I actually prefer to be dealing with just one card at a time at this point.

Wireless, remote flash triggering: A super-cool feature available on both cameras using the built in flash to trigger off camera flashes.

Viewfinder: Nikon wins this one with slightly bigger size, though I don’t know how the actual brightness and view compares. It is a shame the 60D viewfinder view is not 99% or 100% of the actual resulting image like the Nikon. In reality, you won’t notice any shortcomings with either the 60D or the D7000 viewfinder once you start using it. The D7000 includes the option of displaying the grid in the viewfinder, which the 7D also has, and I wish the 60D did as well.

Size and Weight: Not a major difference, you will have to see how they feel in your hands.

Metering: They each have different metering systems, so it is difficult to compare. I’m sure they will both perform quite well. In addition to Evaluative/Matrix and Spot in both of them, the Canon has Center-Weighted and Partial, while the Nikon doesn’t have Partial but has the ability to change the size of the center area in Center-Weighted mode, which sounds pretty cool but may be more of a “set it once to your preference and forget it” thing. Depends on how quick and easy it is to access it in the menus, on the fly.

Processor: This is a pretty important component in the comparison and can really help resolve if the D7000 sits closer to the 7D or the 60D. I don’t yet know enough about the performance of Canon’s Digic IV vs. Nikon’s Expeed II to comment on this. The larger maximum burst buffer of the 60D may point to a more powerful processor. However the dual Digic IV processors of the 7D are able to handle much longer bursts of many more images than the single processor of the D7000 (and the 60D) – again, another very important reason the D7000 is not actually head to head with the 7D.

Custom Functions/ Custom Settings: Despite what I say below in the Controls and Menu section, the Custom Settings of the D7000 are far more sophisticated than those of the 60D, and in that respect make it much more of a contender with the Canon 7D. With the D7000, you can change the size of the center area metered in Center Weighted Metering Mode (not possible on 60D or 7D), you can change the frame rate of Continuous Low Speed between 1 and 5 frames per second (not possible on 60D or 7D), you can give buttons a “hold” feature or not, where you press and release instead of having to hold it down when turning another dial to dial-in a setting (“hold” means the camera does the holding, not you). With the D7000 you can set the autofocus tracking to be nearly as sophisticated as the 7D in terms of how to react to objects that come between you and your intended subject, and also in setting focus priority or release priority (take the picture only when focus is attained or take it immediately even without necessarily attaining focus). You can limit the number of AF points to 11 if you don’t wish to deal will all 39, you can fine-tune focus adjustment for different lenses like the 7D AF microadjustment (not possible on the 60D), plus you can fine-tune exposure adjustment for each individual exposure mode (to set a baseline compensation behind the scenes and not have to use exposure compensation every time, if you feel one of those modes is consistently over- or under-exposing). You can fine-tune the white balance for many more standard fluorescent options without having to have a Kelvin cheat sheet, as you might need to set the same temperature settings on a Canon. All very impressive, and all features that the 60D and certainly the 7D should have but don’t. Also, while I like the two rear thumb buttons of the 60D 7D for exposure and focus lock, you can set the AE-L/AF-L and Fn buttons (and preview button) of the D7000 to take on similar operations.

Controls and Menus: As a Canon user, I find the controls and menus of the Canons to be incredibly practical and intuitive. As a photography instructor, I try to be open-minded about the Nikon controls, notations, and menus, but continue to find them incredibly irritating, nonsensical, and not nearly as intuitive and user-friendly as Canons. I also think that the consistency of the controls and menus across the Canon line, from the 550D to the 5D MkII points to intelligent and thoughtful design. You can pick up any model and go to work, then quickly and intuitively change the ISO setting or metering mode. On the Canons, the controls are not scatted about in seemingly random places that change dramatically from model to model. Please don’t think I’m just a Canon guy on a rant here. Have a look at the controls on the top, back, and front of the D300s vs. the D7000 – essential controls are completely different. Why is that? Functions that are switches at the rear of one are a button at the top of the other, or marked dial switches on the rear become an unlabeled button on the front. The standard dSLR mode dial completely disappears and becomes a trio of buttons on one Nikon but not the other? I challenge you to pick up a D7000 and change the AF area mode to single point AF. The first time I picked it up I searched the camera’s buttons, switches, and menus for 15 minutes and never found it.  I handed it to my camera store co-worker and he failed as well! (Spoiler alert! It is done with the unmarked button located inside the Auto/ Manual focus switch near the lens mount in conjunction with a command dial.) Wait, so a switch that is C/S/M (continuous/ single/ manual) on one Nikon becomes AF/M (autofocus/ manual) on the other? So the same switch now partially controls a different function? Where are AF-C and AF-S (auto-focus continuous/ single modes) found now? Oh, who knows! (Actually, the same place as above, with the unmarked button and the other command dial.) As you can see, this is maddening to a photography instructor or salesperson who must deal with a number of different models and who is attempting to quickly demonstrate these very functions. I’m not even going to start on my feeling for Nikon menus!

Keep in mind, this all doesn’t really matter if you buy and use one of these cameras- you get that one and learn its controls. But I feel it does point to an intelligent consistency on Canon’s part, and as an architect in an earlier life, I highly appreciate good design and intuitive wayfinding. And also many photographers work with two bodies which are often different models of the same brand, and the ability to switch between a Canon 50D and a 5D Mk II without skipping a beat is how it should be. You can actually forget which one you have in your hands and it doesn’t matter. But once you do learn all the controls on the body of the D7000, you have an incredible amount of control at your fingertips.

edit:  After much more experience with various Nikon cameras, I no longer have any issues with their menus – once you get used to the Canon or the Nikon menu system it really is no big deal.  I still do think that the ability to seamlessly go from a 60D or 7D to a 5D Mk II with all the controls being the much the same is awesome (with the exception of the thumb multi-controller now becoming a pad on the 60D) and many photographers working with two bodies do this often – as opposed to going from a D90 or D7000 to a D300s, where there are some dramatic differences (which I do understand make sense in relation to the capability of the bodies, yet must aggravate those photographers working with two of these different bodies…).

Price: The Nikon is $100 to $200 more than the 60D (depending on current specials), and people are saying it is a cheaper competitor to the 7D. But if you study them closely, you can see that it does actually sit between the two. While the D7000 has an advanced AF system and tremendous customizing capabilities, details like the partial vs. full magnesium body construction and the single vs. dual processors of the D7000 vs 7D demonstrate why they are not exactly head to head competitors. The D7000 definitely offers at least $200 of improvements over the 60D, if not more, and is being very well received among photo enthusiasts just as the Canon 7D was last year – you pay a bit more and you get more features. Oddly, DPReview has suggested that the pro-sumer D7000 is a viable upgrade to the Nikon D300s, a higher end, more expensive semi-pro camera. So this makes the decision a bit more complicated for the Nikon D7000 vs. D300s comparison.

Quality Control: There have been numerous reports on the Internet of faulty D7000 bodies. The issues are mainly the bad pixel problem and the front/ back focusing issue. While this type of reaction seems to occur every time any new camera model comes out, there seems to be legitimacy to these complaints. My local camera store (where I worked for a time) reports that they continue to experience these issues with their customers. For the pixel peepers who insist on a clean sensor, nearly every D7000 body tested was found to have bad pixels out of the box. The firmware upgrade fixed some of cameras with bad pixels but not all of them. (What is the fix exactly? Pixel mapping?). Several pixel peeping customers also had front or back focus issues, and went through 2 or 3 bodies to find one they could accept. (see This Lens is Soft and Other Myths for an article about front/ back focus and quality control.)  Also, some of the official Nikon EN-EL15 batteries are larger than others – yes physically larger – and do not properly fit or get stuck in the D7000 body. As far as Canon 60D QC issues or exchanges: none. Zero. (But perhaps Canon customers aren’t so picky…!  Who knows.)  And for their report on repairs and customer service for Canon and Nikon in general: Repairs with Nikon cameras is a daily, ongoing issue. They see Nikons come back, both new and older models, and it sometimes takes sending the camera / lens / flash 3 or 4 times to Nikon to resolve the problem or the customer gives up by then. A few Canon models come in for repair, typically 4-6 year old heavily used Rebels that stop functioning properly. Canon repair is reported as excellent, customer service incredibly helpful, and turnaround is quick. Pile of brand new, defective Nikons returned over two month period: 15. Number of defective Canons: 0. Please note, this is the store’s report, not my opinion or bias, but I think it is worth taking this into account when choosing a dSLR system.

edit 2011-09-29: When any new camera comes out, there is an outcry of “this problem” and “that problem.” Some are exaggerated because you only read about the few bad ones and not the tens of thousands of good ones. Some are possibly over-reactions by people not fully understanding the new or advanced features or nuances of the latest model.  But I wanted to speak from personal experience while working at a camera store and comment on the issues that were being discussed in forums which proved to be real. The scope of the issues in the overall picture (of tens or hundreds of thousands of bodies made), however, should be taken into account, as well as the fact that the returns and exchanges may have been prompted in whole or in part by the internet reports, thus creating a circular chain of whatnot (I’m sure there is a term for this!).

Just keep in perspective, while your camera is a precious object to you, there are literally hundreds of thousands of the same body manufactured. It is a consumer electronics item, just a (precision) hunk of metal, plastic, and 100’s of tiny screws. It is a tool to be used towards an end goal of great photos, not an end unto itself.  (If you wish to learn to take control of your camera and capture great photos, please have a look at my dSLR camera guides such as Nikon D7000 Experience.)

Know that C and N are reputable companies and will make right any genuine issue you may encounter (within your warranty period!).  And while it is frustrating if you encounter a bad pixel, I think it is a marvel of technology that any sensor can be manufactured with 16 million pixels that all work!

Conclusion: Hey look! They are incredibly similar! (other than quality control issues) Both are capable of taking high quality digital images. They are both leaps and bounds better – and cheaper – than the same level dSLRs of just a few years ago. I do like the specifications of the expanded autofocus system, the slightly better sensor performance, the larger viewfinder, the custom setting options, and the partial magnesium alloy body construction of the D7000. Yet the 60D has the additional HD video frame rates, 9 out of 9 cross type AF points, and the articulating screen. You pay a few hundred dollars more for the Nikon, and you get a camera with body construction and features that are a bit better than the 60D. However, if you don’t actually need, understand, or wish to learn how to use all these additional features of the D7000, there is no point in paying for them. (If you are going to leave the camera in Auto or Program mode and let the camera choose the autofocus points, you definitely don’t need a D7000!) In the end, it totally comes down to which one you are more comfortable with – which one feels better, which one’s buttons and controls work best for the way you work, which one’s menus make better sense to you, which one’s custom functions allow you to make the customizations you want to make, and how much money you want to spend. Or which system you want to invest in for the long-term, as far as all the lenses, flash, and accessories you are going to accumulate. Or which camera brand your friends use so that you can go to them for help. Just choose one, learn to use it well, and get out and take photos! That’s what digital SLRs are all about.

Canon didn’t drop the ball with the xxD line, as some have said. It’s just that they reconfigured their price points and naming conventions. The 7D replaced the 50D months ago, and it was widely agreed to be a dramatic, spectacular, and successful improvement. That was very much like the Nikon D90 to D7000 improvement we see now. Canon definitely took the 50D to the next level with the 7D. But then they needed a high-end consumer model to offer between the entry level Rebel line and the semi-pro 7D. Hence the highly capable 60D. So who wins? The consumer. The digital photographer. Cheesy, but true.

If you wish to compare the Nikon D7000 vs the Nikon D90 vs the D300s, have a look at this post.

Purchasing? If you are planning to buy either of these cameras from Amazon.com (or other equipment, accessories, or simply anything else), please use the links below and I will get a little something for referring you, which will help support my blog. Thanks!

see and buy the Canon EOS 60D – Body Only

see and buy the Canon EOS 60D with 18-135mm lens

see and buy the Nikon D7000 – Body Only

see and buy the Nikon D7000 with 18-105mm lens

Link for any other Amazon.com purchases

Purchasing from the UK? Use my Amazon UK referral link here.

If you wish to purchase from B&H Photo, Adorama, or direct from Canon, please click on their logos on the Gear page. Thanks!

Was this post helpful?  Please let others know about it by clicking the Facebook or Twitter sharing buttons below, linking to it from your blog or website, or mentioning it on a forum.  Thanks!

Your World 60D – Canon 60D User’s Guide and Tutorial

Looking for a Canon EOS 60D book or tutorial to help you learn and begin to master your new dSLR? I’ve written an eBook user’s guide for the Canon 60D, called Your World 60D – The Still Photographer’s Guide to Operation and Image Creation. Learn to use the Canon 60D quickly and competently, and improve your photography and capture better images. The 60D is an advanced tool, and this guide explains how to start to use it to its full potential. Begin to take control of your camera, the image taking process, and the photos you create.

Canon EOS 60D book manual download for dummies user guide instruction tutorial Your World 60D

This instant download eBook guide is for those who wish to get more out of their 60D, and go beyond Auto or Program mode and shoot in Aperture Priority (Av) mode and Shutter Priority (Tv) mode. It covers basic dSLR camera functions and exposure concepts for those new to digital SLR photography, plus it also explains more advanced camera controls and operation, such as using the various metering modes and exposure compensation for correct exposure of every image, controlling autofocus modes and focus points for sharp focus of still or moving subjects, and creating dramatic depth of field for professional looking photographs. Learning to get the most out of a dSLR can involve a steep learning curve, and I believe my book can help you speed up that process.

See below for how to purchase.  You can preview Your World 60D at the following link. The preview shows the Table of Contents, Introduction, a sample Menu Settings page, a sample Custom Functions Settings page, and a sample text page.

Preview: http://www.dojoklo.com/writing/Your_World_60D-Preview.pdf

Your World 60D is a text-only PDF guide that builds upon the information offered by the camera’s manual and focuses on the essential functions and settings for real world 60D use. In addition to covering the various settings, functions and controls of the Canon 60D, its lessons explain when and why to use them. It also describes every Menu setting and Custom Function setting, with recommended settings, including Movie Mode menus. Note that it focuses on still photography and not video except for a brief introduction to menus and important video settings to get you started.

Sections include:

  • Setting Up Your 60D All of the Menu settings and Custom Function (C.Fn) settings, including movie mode menus, with brief descriptions and recommended settings for practical, everyday use. Set up and customize the advanced features of the 60D to work best for the way you photograph.
  • Aperture Priority Mode (Av) and Shutter Priority Mode (Tv) – How and when to use them to create dramatic depth of field or to freeze or express motion.
  • Auto Focusing Modes and Drive Modes – How they differ, how and when to use them to capture sharp images of both still and moving subjects. Also how and when to use focus lock and back-button focusing.
  • Exposure Metering Modes – How they differ, how and when to use them for correct exposures in every situation. Also how to make use of exposure lock.
  • Histograms, Exposure Compensation, Bracketing, and White Balance – Understanding and using these features for adjusting to the proper exposure in challenging lighting situations.
  • Composition – Brief tips, techniques, and explanations, including the creative use of depth of field.
  • The Image Taking Process – A descriptive tutorial for using the settings and controls you just learned to take photos.
  • Photography Accessories – The most useful accessories for day-to-day and travel photography
  • Introduction to Video Settings – Some basic settings to get you started

This digital field guide to the Canon EOS 60D is a 40 page, PDF format text-only document, full of helpful information applicable to the new and intermediate dSLR photographer – to turn you into an advanced digital photographer!  Begin to master your Canon 60D and start to use it to its full capabilities.

Purchase Your World 60D through PayPal here! (or click the PayPal or Credit card check-out button below)
This version is in PDF format, text-only, 8.5″x11″, which can be read on your computer screen, printed on your printer, taken with you on your laptop, and can also be read on the iPad.

Format: PDF – Instant Download
Page Count:
45
Price:  $9.99

(plus 6.25% sales tax for residents of Massachusetts)
Secure payment with PayPal or Credit card

Buy Now with PayPal! or Buy Now


Other versions of Your World 60D e-book:

The Kindle edition is available on Amazon.com
The Nook edition is available online at Barnes and Noble
The iPad and iPhone version is available through Apple’s iTunes or through the iBooks App.

What Readers are Saying about Doug Klostermann’s dSLR User’s Guides:

This book, together with the manual that came with your camera, is all you need to start discovering all the potential of this camera.
-Max M.

It’s the first guide I’ve read which has taken me through all the settings in an understandable way. I now feel that I have control over the camera.
-Peter S.

I would recommend this to anyone who wants to get a quick start to using their camera. Manuals are nice, but this eBook highlights the important information and gives a quick easy to understand explanation of most all of the functions and controls.
-Ray M.

I found the (camera’s) manual good for understanding how to set things up but not much on the why – this book really focuses on the “why.” Prior to reading the book I was setting up my metering on Spot Metering thinking it was much better than Matrix (Evaluative) – the guide helped me understand why to use specific settings for specific needs. The Custom Settings sections helps to make firm decisions on how to apply settings by understanding the usage of each in addition to knowing how to set them up. I would like to thank you for saving me time – now I’m confident that my camera is well tuned!
-Benoit A.

This manual is a clearly written, concise and useful explanation of the rationale for the seemingly infinite and often confusing settings options. Used in conjunction with the (camera’s) manual I feel a bit more confident in understanding how to at last proceed in getting better photographs.
WLS

Your World 60D was originally, briefly titled Real World 60D. It is the same eBook. If you use the Canon Rebel T2i/EOS 550D, or Canon Rebel T3i/EOS 600D have a look at my eBooks for those camera, T2i Experience and Canon T3i Experience.

Search Terms, Questions and Answers Part 2

This is part two of an ongoing series. Over the last several months I’ve collected some of the search terms that led people to read my blog. I’m presenting several of them here, along with brief but informative answers. This is part 2 of this series. The next ones in the series include questions on the Canon 7D specifically, and then on lenses. Here was part one.

What is humanitarian photography?
Humanitarian photography can be defined as the photography of international NGOs (non-governmental organizations), humanitarian aid, and non-profit organizations. These include organizations that focus on diverse issues including from health, development, indigenous rights, and children. Photographers make images of these organizations’ work in the field, projects, staff, and clients or the populations that are served. These images can be for documentation, to tell a story, for printed and web use such as marketing, fundraising, reports, or training publications, for presentations, or many other uses.

A humanitarian photographer, however, can also be a photographer who wishes to tell the story of the human condition through their photography, and this does not need to necessarily involve the work of an NGO. They can be a photojournalist, such as Ami Vitale, or a travel, world, and culture photographer who depicts the world through the people who inhabit it.

Humanitarian photographer / photography
That’s me! Welcome to my site. Also be sure to check out Heber Vega’s website where he has the 10Q interview series with a number of humanitarian photographers. And be sure to check out Karl Grobl, who is an inspiration to all of us humanitarian photographers.

How to become a humanitarian photographer / Getting into humanitarian photography
First, work at becoming a skilled photographer. Then begin to learn about humanitarian issues and what humanitarian aid organizations do. I address that in this post:
http://blog.dojoklo.com/2010/01/26/becoming-a-humanitarian-photographer-part-ii/

Then, have a look at these posts:
http://blog.dojoklo.com/2009/12/10/how-to-start-out-as-a-humanitarian-photographer/

http://blog.dojoklo.com/2010/08/16/after-the-self-assignment/

How much do humanitarian photographers make? / Salary for humanitarian photographer / How can I make a lot of money being a humanitarian photographer?
While there are some humanitarian photographers who work on staff with NGOs, these types of jobs are few and far between. So there really is no such thing as a salary for humanitarian photographers. In fact, at this time, there really isn’t a salary for most types of photographer except for the few that still work on staff at newspapers or a few other places, and this number is dwindling every day. For the most part, humanitarian photographers are freelance photographers who must seek out their own assignments. What they earn depends on how hard they work at this. As with any type of vocational photographer, working as a humanitarian photographer involves something like 10% photography and 90% business and seeking out work. Sounds dreadful, right, but just read about any other photographer discussing business and you will see the same thing. How to make a lot of money as any type of photographer? I haven’t figured that one out yet. Maybe work as a dentist by day.

Humanitarian photography career / jobs / opportunities
As I said above, this doesn’t really exist except in the way you create it yourself. Really. It is 100% up to you to make it a reality. There is no one path to follow, no correct course to take (although there are countless incorrect moves one could make). It is all pretty much up to you to determine through the amount of effort and dedication you put into it. One place to start is to read David DuChemin’s Visionmongers. This is one of the few guides out there for becoming a vocational photographer, and luckily for you, he began as a humanitarian photographer himself. However, it is far from containing all the answers. He leaves much unsaid that you have to learn the hard way.

Humanitarian photography ethics / Guidelines for NGO photojournalists
One good place to start is to read the NPPA Code of Ethics. I address that and discuss it a little further in this post:
http://blog.dojoklo.com/2010/01/28/working-as-a-humanitarian-photographer-ethics-and-images/

You can also look at the countless writings about journalism ethics, photojournalism ethics, and media ethics. Much of those subjects will directly apply to humanitarian photography.

How to shoot humanitarian pictures
However you want! Create your own style, tell your own story! However, if you really don’t know where to start, have a look a photojournalism and how to work and shoot as a photojournalist. You can learn this through reading books, and just as importantly through looking at images. A good place to start is The Big Picture at Boston.com:

Also, learn to tell a story through images, whether it is a single image or a photo essay. How you shoot depends on your goals as well. If you are working for an NGO, they may want photos in a certain style or which serve a certain need. If you are shooting a documentary series for yourself, you may choose your subjects, compositions, and style very differently.

David DuChemin on being a humanitarian photographer
I get this search every day! Perhaps he has set up an automatic tracking search to see where he is mentioned each day.

Cambridge Carnival 2010

Cambridge Carnival 2010 in Cambridge, MA:  the music, dancing, and vibrant colors of the Caribbean, conveniently found down the street from me today.

All of these images were shot using a Canon 50D (60D is current version) with the 70-200mm f/4L IS lens.

Douglas J. Klostermann Photography

Douglas J. Klostermann Photography

There is a very recent and timely post on PhotoFocus about photographing parades.  It has some useful advice.  I would add to that a few more:

-Arrive early and work your way into the assembly area, where there is often a sense of tension and pent-up excitement.  Capture photos of participants getting ready and chatting, musicians practicing, and posed portraits of individuals or groups who are eager to have their photo taken in their outfits or costumes.

-During the parade, always be aware of your image backgrounds.  Position yourself so that you have light or dark backgrounds as appropriate, or crowds of faces.  Be sure you have clean, or at least not distracting backgrounds.  Use wide open apertures to make the backgrounds blurry and less distracting.  Some distracting backgrounds I had to avoid at this event included a bright yellow rental truck with the name across it and porta-potties.  Keep your eyes open for these types of things.  Changing your position and point of view can make the street, some trees, or the sky become your background.

-Be very aware of the light and where it is coming from.  Position yourself on the best side of the street so that you can capture the light on the participants’ faces.  Or backlight them if you want photos with sun-flare.  Position yourself near intersecting side streets where the sunlight is unobstructed by buildings and trees to avoid shadows across the parade route.  Look for mirrored, glass, or light colored buildings to act as natural reflectors which throw back and diffuse the light nicely onto all the participants.  Of find areas with light and dark shadow areas and try to highlight a participant as they step into the light.

-Bring ear plugs so you can concentrate of taking images even when the giant sound truck is stationed right in front of you.

-Experiment with slow shutter speeds to create blurs of motion and color.  Put your camera on shutter priority mode (Canon=Tv or Nikon=S).  Try starting with a shutter speed of 1/30 and adjust from there as necessary.

-If you are using a flash outdoors, do not use your flash diffuser (like a Sto-Fen Omni-Bounce) except for very close portraits.  All you are doing is reducing the light coming from your flash and causing your flash to work harder and take longer to recycle.  It does not change the “softness” or the “warmness” of the light from your flash.  A flash diffuser works by bouncing light and diffusing shadows because the light is then coming from various directions.  It does not magically “soften” light.  You can not bounce light off the sky.  It just doesn’t work.  Use your flash straight on, dial it down minus 1 or 2 so that it doesn’t blow out highlights, and use an orange or straw gel if you want more warmth.  It is much more efficient to reduce the light from your flash by dialing it to -1 and having it use less of its power than it is to put something in front of it and cause it to use more of its power, all for the same look.  If you wish to spread its light, use the built-in, flip-down wide angle screen.  I don’t care if you see the “pros” or the guys with the big cameras using one – they haven’t bothered to read the instructions.  They aren’t able to bounce light off clouds just because they have big cameras.

Canon 5D vs 7D vs 60D vs 50D vs 550D / T2i

I previously wrote a post to compare these cameras, the Canon 5D vs.7D vs. 50D vs. 550D / Rebel T2i – with the exception of the Canon 60D – which you can read here:

http://blog.dojoklo.com/2010/05/03/canon-7d-vs-5d-vs-50d-part-ii/

It still applies to helping you make the decision between these cameras, including the 60D, but it doesn’t yet address its specific new features. Those can be read about in this post. So I hope those two posts together can start to answer your questions. And until I rewrite it to include the 60D, here is some additional input.

canon t2i 550D vs 50d vs 60d
photo by author, courtesy of Newtonville Camera, Newton, Mass.

When you are trying to determine which camera to purchase or upgrade to, you need to first consider and determine your needs, and then see which camera fills those needs. Not the other way around where you look at the new features and determine if you really need or will use them. I will discuss how to go about this in more detail below.

Canon 60D vs. 50D: Since the Canon 60D basically replaces the Canon 50D (well, replacement isn’t exactly the right word because the 60D doesn’t really follow the 20D to 50D progression of improvements…), the 60D or 50D decision is an easy one. The 50D shouldn’t really be considered anymore. While the Canon 50D does hold a couple interesting advantages over the 60D (faster FPS in continuous mode, stronger construction, more comprehensive buttons and controls, complete lack of fun filters like “grainy black and white”), the sensor and exposure metering system have been greatly improved in all the newer cameras (7D or 60D or 500D/ T2i) and I feel these features, along with the increase in mega pixels, outweigh any other 50D advantages. I would definitely choose a 60D instead of a 50D. Or a 7D instead of a 50D if your needs require it and budget allows it. (Find out below if your needs require it!)

So the decision now comes down to the Canon 7D or 60D or 550D / Rebel T2i. (What about the 60D vs. 5D Mk II? Just wait, I’m getting to that!) This decision has become infinitely more difficult (or perhaps infinitely simpler?), as all three of these cameras now share so many specifications and features. And because they share an image sensor that is very similar, and all with 18 MP, the image quality of these three cameras will be nearly identical. The Canon consumer/ pro-sumer lineup has never been so alike as it is now. So as I like to profess, you need to choose which camera is best for you based on your needs and experience as a photographer and based on how the advanced features, controls, and customization options fit those needs and serve the way you work.

Here is a brief, mostly serious summary to help you make this decision:

Get a Canon 550D / Rebel T2i if you are new to photography or to digital SLR photography, or want to upgrade from an older Rebel because you want higher image quality and more mega-pixels (or HD video). If you have been happy with the features and controls of your previous dSLR camera and have not discovered the need, in your use of it, for any specific additional features, there is no need to look beyond the 550D.

Canon EOS 60D

Get a Canon 60D if you have outgrown the capabilities of an older Rebel like an XTi or T1i due to your greater experience and more demanding shooting needs which require more direct or sophisticated controls and customization options. Or you have been pretty pleased with your 20D or 40D and its features but wish to upgrade for the increased image quality and mega pixels (or HD video). And/ or you need a more rugged camera for your frequent and demanding shooting and off-the-beaten-path traveling needs. Or you really like swiveling LCD screens. If you typically shoot on Auto or Program mode, you do not need a 60D. If you do not manually select your own focus point and have never used exposure compensation you do not need a 60D. If you have never used the AE-Lock [*] button to lock exposure you do not need a 60D. Please save the money or use it towards a better lens.

Get a Canon 7D if you have extensive experience with a Rebel (xxxD series like 350D, 400D) or with an older xxD series (20D, 40D) camera, and you know and understand most of the 7D’s controls and advanced custom features, and you specifically need some of them for your demanding shooting needs. If you have never used Av aperture priority mode or M manual mode, you do not need a 7D. If you have never used autofocus tracking settings to track a moving subject across your frame and worried how an interfering object would affect your focus you do not need a 7D. If you have never used spot metering to determine a critical exposure level or experimented with back-button focusing you do not need a 7D. Please save the money or use it towards a better lens. However, if you often need to take 126 consecutive photos at the rate of 8 frames per second, you do need the 7D. Immediately. Even if you just sometimes need that. Totally worth it. That’s 15.75 seconds of continuous shooting. Who doesn’t need that? You’d make Eadweard Muybridge proud.

(Please note, the 550D, 60D and 7D all have these features I just listed: manually selected focus points, exposure compensation, AE-Lock, auto-focus tracking, spot metering, and back-button focusing. I’m just using them as a determination of your experience level and needs)

Canon EOS 5D Mk II mark 2

The Canon 5D Mark II is in a separate league than the other cameras, being a full frame professional camera, and thus I’m not going to compare it to the others in this context. As I said in a previous post,

If the 5D Mk II fits your expanding and demanding needs as a photographer, you would already pretty much know that you needed a 5D after your extensive time using a Rebel or a 20D, 40D, etc. Otherwise, getting a 5D means most likely you’d be investing in far more camera than you will actually need or use.

If you don’t already know that you need a 5D, you probably don’t need a 5D. Plus, as is often the case, those who could really take full advantage of a 5D are those who can’t afford a 5D. (I’m thinking about the talented photographers I come across on Flickr, etc. who are making amazing images with entry-level Rebels.) Feel free to spend $2,500 on a 5D Mk II if you want, but unless you have extensive experience with photography and with a digital SLR, using a 5D is completely unnecessary and is unlikely to help you take “better” pictures than you will be able to with a 550D. And besides, it is becoming old technology. You should wait for the 5D Mark III.

As I said above, when you are trying to determine which camera to purchase or upgrade to, you need to first consider and determine your needs, and then see which camera fills those needs. Not the other way around.

For example, I began shooting with a Rebel XT and took it on an extended trip where I shot lots of travel photos, plus outdoor festivals and dance (see the Peru and Dance galleries here for the results – those are all shot with a Rebel XT.) I soon discovered this camera wasn’t fulfilling my growing needs and I made a mental list of what my next camera needed to serve me better in the specific ways that I work and take photos:

  • more focus points which are more strategically positioned (the Rebel XT only has 7 focus points in a simple cross pattern which did not suit the way I focus and compose)
  • faster frame rate in continuous shooting mode (it only has 3 fps which wasn’t good enough for catching a good burst at the peak of action)
  • better sealed body (I ended up in several very dusty or wet situations)
  • integrated sensor cleaning (see “dusty” above)
  • more megapixels (the 8 MP of the XT just weren’t sufficient when it came to cropping and post-processing)
  • battery with longer capacity (I used it on weekend trips to the middle of nowhere but didn’t want to have to buy and take more than 3 batteries)
  • larger LCD screen to better review photos (the XT has a tiny screen)
  • grid in the viewfinder (I just can’t keep it straight sometimes)

These are the features I looked for in my next camera. I didn’t work backwards and wonder, “Do I need or will I ever need auto lighting optimizer and highlight tone priority?” If I had exposure issues on my list, I would have looked for these kinds of features, but I didn’t. I didn’t wonder, “Do I need multiple flash remote firing? Should I worry about that?” That wasn’t on my list because it wasn’t a need I ran into, ever, in months of daily shooting. I don’t even own multiple flashes and wish to minimize using the one. I didn’t ask myself, “Do I need an extensively redesigned focus system with AF Point Expansion and Zone focusing?” I nearly always choose my own focus point – I don’t want the camera choosing the closest point which is bound to be a dancer’s flying hand and not their face, so I don’t need that. No matter how awesome and advanced it is. Even if the subjects are moving. I’m pretty quick with the focus point selection. I just need more and better placed focus points. If you haven’t run into a need for certain features in your months or years of extensive shooting, you aren’t going to suddenly need it just because it is now offered on a camera. Sit down and make your list, then look at the cameras’ offerings.

And please be aware, none of these cameras will help you instantly create better photos. Or better yet, all of these cameras will help you take better photos, but equally so, none any better than the others. If you wish to take better photos, just chose one of the cameras and get out and shoot. Learn how to use the basic settings (aperture, shutter speed, ISO, focusing modes and focus points, exposure metering modes, histograms) and then concentrate on composition and telling a story through your images. See the posts listed below to help you on your way.

How Pros Photograph

Deconstructing the Shot

Need a lens to go with your new camera? Read about choosing a lens other than the kit lens in this post Why You Shouldn’t Buy the Kit Lens, and learn about the Best Lenses for Travel Photography here.

If you do choose the 60D, it is always wise not to buy a Canon dSLR or lens in the first several months after it is introduced. They have a solid history of quality control and design flaws in early models, including, most notoriously, their top of the line offerings (autofocus issues with cameras, flare issues with lenses). I myself took this risk with the 7D, brought it on a trip, and suffered the consequences (see the bottom of this previous post).


Photographing in Natural Light

Some recent portrait sessions (see them here) have led me to the realization that it is finally time to get my flash off-camera and to expand my knowledge of lighting for portraits.  Since I’m currently working with a camera that doesn’t have built in remote flash triggering, this means I either need a cable or remote triggers.  But which one?  Expensive TTL or radio triggers?  Cheap eBay triggers?  A basic sync cord or a more costly TTL cord?  How long?  A 3′ cord for hand holding, or a longer cord for putting the flash on a stand?  Or both?  What situations am I going to be using them in at home and while traveling?

3268 LSS on beach
Jan. 2010 – Plum Island, Newburyport, MA – Canon Rebel XT, 105mm (28-105mm lens), 1/500s, f/4.5, ISO 200 – natural light at 4pm on beach

The more thought and research I put into it, the more the possibly necessary equipment began to add up:  a stand for the flash, plus maybe a Justin Clamp.  A stand and special arm for the reflector.  Perhaps then a softbox or an umbrella.  Then what else…?

I’m not a strobist.  While I admire the cool things one can do with lighting and I sometimes desire to overpower the sun, it’s just not the kind of thing that gets me excited about photography.  I have more of a photojournalist instinct.  I’d prefer to simply work without a flash most of the time, to make the most of natural light, and to capture the reality of situations in front of me.  But my experience has shown me this isn’t always possible so I decided to seek out a viable alternative for situations I assumed required flash, and to learn how to maximize my use of natural light without sacrificing lighting quality.  Thankfully I quickly discovered a book that demonstrated this was possible – Available Light: Photographic Techniques for Using Existing Light Sources by Don Marr.

Unlike countless photography books that stress the importance of looking at, understanding, and making use of natural light but then leave it to the photographer to figure out, this one leads you directly there.  It is short, simple, and intuitive – so much so that I didn’t write down a single note during my first reading.  It shares knowledge and techniques that can easily and immediately be put to use, such as with this photo I took soon after reading it – look at that glow!  100% natural light:

8772 LSS portrait
Sept. 2010 – Cambridge, MA – Canon 50D, 75mm (28-105mm lens), 1/125s, f/4.0, ISO 200 – natural light at 3pm just inside the shadow-line under a concrete overpass

While we all know to photograph in the shade on a sunny day or how an overcast day is supposed to create nice, soft lighting, with this book it suddenly all clicked and I really understood why these things are so.  When walking around outside, I’m typically always aware of the intensity, direction, color and quality of natural light.  I now realize that in itself was not nearly enough.  Now I have gained the knowledge to work with the natural light and modify it to create the softness/ hardness, direction, color, and intensity I want, whether I am working on an overcast day, at high noon, inside, outdoors, or any other type of situation.  The book also makes one very aware of the existence and potential use of natural reflectors everywhere which will help give you the lighting you want: a wall, the ground, a pole. And it explains the important concept and effective practice of subtractive lighting, used to even-out or create the desired lighting instead of turning to flash to artificially add to existing lighting. The author does not just guide you to finding and creating good light in any situation, but to light that fits your subject and the way in which you wish to portray them, whether that includes soft light or hard light, even light or deep shadows, hair light or flare – or whatever.  I would love to summarize the whole book in this post, but I think it’s better that you just go to your library or Amazon.com and get it!

Douglas J. Klostermann Photography
Nov. 2009 – San Miguel Dueñas, Guatemala – Canon 7D, 135mm (70-200mm lens), 1/200s, f/4.0, ISO 1600 – natural light at 3pm diffused by the fiberglass panel ceiling/ roof of her home

I feel that this book has set me on the right path, away from what I thought was inevitable membership in the Strobist club.  While the author is not against the use of flash, and certainly not against reflectors, this book offers a refreshing and viable alternative to that never-ending accumulation of equipment and techniques, and I encourage off-camera-flash fans to read it as well so they can learn to look for beautiful natural lighting alternatives that will give them as-good or even better images, before instinctively setting up their lighting equipment and knocking down the natural light in order to rebuild it artificially.

In the process of my strobist research, I came back around to the photos of Joey Lawrence (Joey L), and in particular his images of the Mentawai.  They are wonderful images and beautiful portraits, but something about this project has always rubbed me the wrong way.  My recent research into artificial vs. natural light has helped me to think this through and start to figure it out.  I’m always disturbed when people or crews invade, er, I mean visit a culture or community like the Mentawai with a bunch of equipment and ask them or pay them to pose for photographs or footage.  There’s nothing inherently wrong with it and his subjects obviously enjoyed cooperating in his project, but I simply have a different philosophical and stylistic approach – more documentary and photojournalistic.  Plus I feel that there should be more of a unity of subject and technique.  In other words when celebrating (or is it romanticizing?) people’s close relationship with their natural environment, one should perhaps not light them with giant, unnatural, high power artificial lights!  The disharmony certainly creates stunning photos, and that kind of lighting is part of Joey L’s established style.  Possibly the contrast between the natural surroundings and the artificial light helps to emphasize the dichotomy of indigenous people living in a modern world.  But I just feel it would have been more interesting and authentic to make use of the unique natural light of that place when romanticizing, er, I mean portraying the people and their relationship with their environment.  That being said, I am very much looking forward to Joey L’s Faces of a Vanishing World TV series (starting on September 27th on Ovation TV) in order to get a glimpse into how he works in the field and see how he creates his dramatic and undeniably stunning images.

Douglas J. Klostermann Photography
June 2008 – Sillustani, Peru – Canon Rebel XT, 90mm (28-105mm lens), 1/800s, f/5.0, ISO 100 – natural light at 4pm on the altiplano near Lake Titicaca (that is a different lake in the background)

One of the unique aspects of different places in the world is their unique light:  the light at high altitude, in a desert, equatorial light, sunset in the Cinque Terre or Santorini, and of course the diffused light of a rainforest.  Why not try to capture that light as part of your images of a place?  At least, for the strobists out there, I encourage you to first look at and possibly incorporate the natural light before instinctively and blindly setting up the strobes.  In reality, I think it is probably a much greater challenge to find and shape the natural light, but it is a challenge I intend to take on for the long term.

0212 LSS Roosevelt Island portrait
March 2010 – Roosevelt Island, NYC – Canon 50D, 70mm (70-200mm lens), 1/125s, f/4.0, ISO 200 – natural light at 5pm in open area

Search Terms, Questions and Answers Part 1

Over the last several months I’ve collected some of the search terms that led people to read my blog (it is easy with WordPress to check your daily/ weekly/ monthly stats such as this). I’m presenting several of them here, along with brief but informative answers. Whenever I say Canon xxD, please substitute 5D, 7D, 50D, 60D, 550D, etc. as you see fit. They are in no particular order except for the first one, which is the most common search. This is part 1 of 4 of this series. The next ones in the series include questions on humanitarian photography, the Canon 7D specifically, and finally lenses.

0925 music ahll marquee

Compare Canon 5D vs 7D vs 60D vs 50D vs 550D – (or any variation there-of: 60D vs 50D, 7D vs 60D, 60D vs 550D, etc.)
I’ve discussed these various comparisons in depth in several previous posts. Please check out these posts:
Post 1
Post 2
Post 3

Should I wait for Canon xxD or buy Canon xxD?
If a new camera has been announced and will be coming out soon, or a current camera is reaching the end of its typical life cycle, I would wait for the new camera. (You can see if a camera is reaching the end of its typical life by looking at the Canon EOS Digital SLR Timeline at the bottom of this Wikipedia page.) Otherwise you are buying a model that is possibly 12-24 months old already and has been improved upon by the newer models. And then you will be using it for another 2, 3, or more years. This is particularly applicable since the new 63 zone metering system is now being used in the latest Canon cameras instead of the older 35 zone system, plus some other nice features. From experience, I can tell you the new metering system makes a difference. That being said, there will always be improvements in the newest models, so it is a never ending process. Also, unfortunately, you should wait several months after a new Canon camera or lens is released because they have a solid history of real problems and quality control issues on early models.

0975 BBGarden white flowers

How much better is a Canon 7D than a 550D?
A Canon 7D costs $1534
A Canon 550d / T2i costs $799
The difference of the two cameras:
1534 – 799 = 735
735 = m% x 799
m = 735/799
m = .92
Move the decimal point over 2 places
The 7D is 92% better than the 550D.
Or perhaps the 550D is 92% as capable as the 7D? This is actually much closer to the truth, at least when it comes to features like image quality. I guess it’s all in how you do the math.

Canon 5D Mk2 vs. 550D / Why Canon 5D instead of 550D?
As I have said many times before, these two cameras are on opposite ends of the spectrum. It is a strange comparison between a full frame professional dSLR and an entry level dSLR that, quite frankly, confuses me. If the 5D fits your expanding needs as a photographer, you would already pretty much know that you needed a 5D after your extensive time using a Rebel or a 20D, 40D, etc. Otherwise, getting a 5D means most likely you’d be investing in far more camera than you will actually need or use. Please note, there is no such thing as a Mark II camera. “Mark II” means it is the second version of a particular camera or lens. There is a 1D Mark II, a 5D Mark II, a 70-200mm f/2.8L IS Mark II, etc.

Canon 50D vs. 7D for football stadium picture
It would depend on what teams are playing, what color jerseys they are wearing, which quarter it is and/ or the score, and the light temperature of the stadium lights mixed with the natural ambient light. The (very) slightly lower dynamic range of the 50D along with its tendency to overexpose by 1/3 a stop in evaluative metering mode would indicate that you would only want to use a 50D in the later quarters, when the ambient light is decreasing and the score is probably higher. Also, the digital sensors of both the 50D and the 7D have the tendency to overexpose and lose detail in areas of the color red. So if, say, Alabama was playing at home, you would want to consider using a film camera. The final consideration would be that the 7D has a built in level that can be used in Live View. If you wish to keep the playing field level, you might want to utilize this option. However, it will be hard to follow the action and keep your eye on the level at the same time. If you shoot in a more dynamic photo-journalistic style that includes tilted frames and dynamic perspectives, either camera will do.

0182 LSS silhouette

Canon 7D vs 5D autofocus speed
They are both more than fast enough for your needs. I promise.

How to set deep depth of field
Depth of field is determined by the aperture you select (plus, your focal length and distance-to-subject play a role too). First, put your camera in Av mode. Then turn the main dial (the one up top near the shutter button) counter-clockwise until you have the widest aperture your lens allows, possibly 2.8, 3.5, or 4.0. Then read this post:
http://blog.dojoklo.com/2010/02/01/depth-of-field-simplified/

Photography, Creativity, and Angst

It seems that a lot of photography blogs that aren’t caught up in discussing the latest equipment and technology (as I find myself doing lately) are often addressing the struggles of photography, art, and creativity. Most every photographer seems to relate to the frustrations of not being able to create the images that they wish they could – images like the ones of the photographers they admire or images like the ones they envision in their own mind.

This isn’t a bad thing, and in fact this dissatisfaction with one’s current work is one of the most important components in inspiring and pushing oneself to improve. But there is a huge problem if this struggle becomes angst and doesn’t serve a positive purpose. It is an easy path to fall into with photography, especially when just starting out or soon after technical and equipment mastery is attained. There is so much to learn and everyone else seems to have picked up important and secret knowledge which you don’t know where to find. And there are so many great photographers out there who you like and no matter how hard you try your images don’t look anything like theirs.

Rome Casa Blanca and Statue piazza del quirinale black and white italy
Rome – Statue in front of Palazzo del Quirinale

I fell into this trap when I first became serious about photography. I saw images in galleries, museums, and magazines (there was no internet yet…) that I wished I could create, but had no idea how. What kind of camera were they using? What kind of chemicals and darkroom techniques did they use? Where did they come up with their ideas and inspiration? I had no idea, but tried to learn what I could from books and experimentation. But the learning curve was so steep, my interests and ambitions were too broad and scattered, and the dedication was not yet there. The angst and frustration built and slowly I stopped even taking photos. I had wanted to create great images at will but knew I couldn’t. My results rarely matched my vision, so I stopped making any images at all.

Rome Bernini Fountain piazza navona italy
Rome – Fontana dei Quattro Fiumi by Bernini facing Sant’Agnese in Agone by Borromini and Rainaldi

I thought the angst was part of being an artist, a photographer, and that holding onto it would lead somewhere. But the angst didn’t get me anywhere. In fact all it led me to was abandoning photography. Years later, when I became frustrated with the limitations of my digital compact and dSLRs became affordable, I decided to give it another try. I went out on my first self-assignment, not really knowing what I was doing, relearning how to use a camera and compose photos. But this time I had a different attitude, a new mindset. The photos on my LCD screen still didn’t look like the ones in my head, but I didn’t care, and I continued to happily work away. I knew I was learning with each photo, I didn’t expect instant masterpieces. I knew I would improve over time when I studied the results and identified the differences between where I was and where I wanted to be.

Rome Piazza Navona woman walking italy
Rome – Piazza Navona

Most importantly I had finally given up on trying to take Ansel Adams’ photos and started to take my photos. If they weren’t any good, I would keep taking my photos, and figure out how to make them better versions of my photos. For the first time I was truly happy with my images because I stopped comparing them with some real or imagined perfect images that I would never take. It doesn’t mean I still don’t have the angst. Every time I look at Ami Vitale’s photos I want to take Ami Vitale’s photos. But I let it go, I don’t let it become a negative, limiting frustration. I study them and learn from them, but I continue to take my photos. Because those are really the only ones I can take, and those I the ones I am happiest with anyway.

So it is true – as everyone concludes their “photographer’s struggle” blog posts: just get out and shoot. That is virtually all there is to it. But there is another important component. Let go of the angst. Art and creativity does not equal angst. Change your mindset. Stop dwelling on creativity, thinking about creativity, reading about creativity…and just go create. Shoot your photos, improve on your photos, and be happy knowing that with each frame you are learning and progressing. Besides, you shouldn’t want to be imitating anyone else because you don’t want to be called “The next Henri Cartier Bresson.” You want some future budding photographer to be called “The next (your name here).”

Rome Sant'Ivo Sant Ivo alla Sapienza Borromini Italy
Rome – Street with view of Sant’Ivo alla Sapienza by Borromini

(These photos were taken the first time I ever used a “real” camera, an SLR – a Canon AE-1 I borrowed for an afternoon. Taken in Rome, Italy in 1990 or 1991 while studying with the University of Notre Dame Architecture Rome Studies Program. Not a bad start, huh?!)

Canon 60D Tutorial

I have completed an eBook tutorial and user’s guide for the new Canon 60D, called Your World 60D – The Still Photographer’s Guide to Operation and Image Creation. Learn to use your 60D, quickly and competently, to create the types of images you want to capture. You can learn more about the Your World 60D eBook and how to purchase it here.

(The eBook was originally, briefly called Real World 60D – it is the same book.)

How to Choose a New dSLR Camera

When selecting a new dSLR camera, many people seem to look at the latest offerings, attempt to compare their many features, and determine which one, in or near their price range, is “better.” But this is the backwards way to approach it. Of course a continuous burst rate of of 126 JPEGs at 8 frames per second is “better” than 58 frames at 5.3 frames per second. But do you need the ability to take 126 consecutive images in 15.75 continuous seconds? Ever? Certainly the ability to to control both the method and the sensitivity of AI Servo Tracking is impressive and powerful, but do you even understand it, wish to learn about it, need it, and will you ever use it? If a camera’s features don’t fit your needs as a photographer, it is not a better camera for you. In fact, it may be a worse camera for you because its complexities and options may serve to work against you and your image making.

Douglas J. Klostermann Photography
Iquitos, Peru

When you are trying to determine which new dSLR camera to purchase or upgrade to, you need to first consider and determine your needs, and then see which camera fills those needs. Not the other way around where you look at the new features and determine if you really need or will use them.

For example, I began shooting with a Rebel XT and took it on an extended trip where I shot lots of outdoor dance and festivals (see the Peru and Dance galleries here for the results – those are all shot with a Rebel XT.) I soon discovered this camera wasn’t fulfilling my growing needs and I made a mental list of what my next camera needed:

  • more focus points which are more strategically positioned (the Rebel XT only has 7 focus points in a simple cross pattern which did not suit the way I focus and compose)
  • faster frame rate in continuous shooting mode (it only has 3 fps which wasn’t good enough for catching a good burst at the peak of action)
  • better sealed body (I ended up in several very dusty or wet situations)
  • integrated sensor cleaning (see “dusty or wet situations” above)
  • more megapixels (the 8 MP of the XT just weren’t sufficient when it came to cropping and post-processing)
  • battery with longer capacity (I used it on weekend trips to the middle of nowhere with no electricity, but didn’t want to have to buy and take more than 3 batteries)
  • larger LCD screen to better review photos (the XT has a tiny screen)
  • grid in the viewfinder (I just can’t keep it straight sometimes)

Amazonia Shipibo Vendor
Iquitos, Peru

These are the features I looked for in my next camera. I didn’t work backwards and wonder, “Do I need or will I ever need auto lighting optimizer and highlight tone priority?” If I had exposure issues on my list, I would have looked for these kinds of features, but I didn’t. I didn’t wonder, “Do I need multiple flash remote firing? Should I worry about that?” That wasn’t on my list because it wasn’t a need I ran into, ever, in months of shooting. I don’t even own multiple flashes and wish to minimize using the one. I didn’t ask myself, “Do I need an extensively redesigned focus system with AF Point Expansion and Zone focusing?” I nearly always choose my own focus point – I don’t want the camera choosing the closest point which is bound to be a dancer’s flying hand and not their face, so I don’t need that. No matter how awesome and advanced it is, even if the subjects are moving. I’m pretty quick with the focus point selection, I just need more and better placed focus points. If you haven’t run into a need for certain features in your months or years of extensive shooting, you aren’t going to suddenly need it just because it is now offered on a camera. Sit down and make your list, then look at the cameras’ offerings.

And please be aware, no new camera will help you instantly create better photos. Or better yet, all of the latest cameras will help you take better photos, but equally so, none any better than the others. If you wish to take better photos, just chose one of the cameras and get out and shoot. Learn how to use the basic settings (aperture, shutter speed, ISO, focusing modes and focus points, exposure metering modes, histograms) and then concentrate on composition and telling a story through your images. Get a book like Bryan Peterson’s newly updated Understanding Exposure to get a handle on the essential functions and relationships of aperture, shutter speed, and ISO.  Or have a look at my Full Stop e-book camera guides for various Canon and Nikon dSLR cameras!  And see the following posts to help you on your way:

How Pros Photograph

Deconstructing the Shot

Pucallpa kids and boat
Pucallpa, Peru

Need a lens to go with your new camera? Read about choosing a lens other than the kit lens in this post Why You Shouldn’t Buy the Kit Lens, and learn about the Best Lenses for Travel Photography here.

If you are interested in researching or purchasing the equipment or books I use, discuss, or recommend, I would appreciate it if you use this referral link to Amazon. Your price will be the same, and it will help support my blog and my work. Thanks!  And for those of you across the pond, click here for my referral link to Amazon UK. If you are in another country, click on one of my Amazon links, scroll to the bottom of the page, and click on your country for your local Amazon.

Canon 5D vs 7D vs 60D vs 50D vs 550D / T2i

This post has been revised and updated to include the new Canon Rebel T3i / EOS 600D. Please proceed over to this post to read the most current information:

Canon T3i/600D vs T2i/550D vs. 60D vs. 7D, etc.

Like many others out there, you are asking yourself, “should I buy the Canon 7D or 60D or 50D or 550D / T2i?” It’s a difficult question because at this point the three dSLRs in the current Canon consumer line-up (EOS 60D, EOS 7D, Rebel T2i/ EOS 550D) all share a number of specifications and features, a similar exposure metering system, as well as an image sensor that is nearly the same, and all with 18 megapixels. So how do you choose between the Canon 60D, the T2i (550D) or the 7D? This decision has become infinitely more difficult (or perhaps infinitely simpler?) because the image quality and ISO performance of these three cameras will be nearly identical, and all are capable of taking high quality images. So as I like to profess, you need to choose which camera is best for you based on your needs and experience as a photographer and based on how the advanced features, controls, and customization options fit those needs and serve the way you work.

Canon T2i vs 60D vs 7D
photo by author

When you are trying to determine which camera to purchase or upgrade to, you need to first consider and determine your needs, and then see which camera fills those needs. Not the other way around where you look at the new features and speculate if you really need or will use them. I will discuss how to go about this in more detail below.

Review of Canon EOS 60D vs. 50D: Since the Canon EOS 60D basically replaces the Canon 50D (well, replacement isn’t exactly the right word because the 60D doesn’t really follow the 20D to 50D progression of improvements…), the 60D or 50D decision is an easy one. The 50D shouldn’t really be considered anymore. While the Canon 50D does hold a couple interesting advantages over the 60D (faster frame per second (fps) burst rate in continuous mode, stronger construction, more comprehensive buttons and controls, complete lack of fun filters like “grainy black and white”), the sensor and exposure metering system have been greatly improved in all the newer cameras (7D or 60D or 500D/ T2i) and I feel these features, along with the increase in mega pixels, outweigh any other 50D advantages. I would definitely choose a 60D instead of a 50D. This is coming from experience, as I use a 50D professionally and on a daily basis. Or choose a 7D instead of a 50D if your needs require it and budget allows it. (Find out below if your needs require it!) Digital cameras are somewhat disposable. Yes, even $1000 digital cameras. Within 5 years, your new camera will have become old, outdated equipment. The 50D is already two year old technology, so if you start with one now, in 4 more years it will be absolutely archaic! (Actually, since the 50D was just the 40D with a couple more megapixels, it is even older technology than that.) With digital SLRs, I advise buying a recent model, at whatever price range you can currently afford. Of course as with everything in digital photography, this is relative. The 50D is still an excellent camera. And camera companies have to keep coming out with new models every 12-18 months because that is what they do. The trouble comes in 2-3 years when your 50D is still perfectly good and still pretty new to you, but it can no longer compete with the latest offerings in terms of megapixels, ISO performance, and autofocus systems. If this hasn’t convinced you and you still want to consider the 50D for cost or other reasons, I write in more detail about the 50D vs. 60D comparison here from a camera features and operation point of view.

Before I get more into it, I want to mention that I have written eBook user’s guides for the Canon Rebel T3i/ EOS 600D, the Canon Rebel T2i/EOS 550D, and the Canon EOS 60D. After spending so much time studying, experimenting, writing about, comparing, and discussing these cameras, I decided to put all that knowledge into eBook form! Each of these user’s guides cover all the Menu settings, Movie Mode menus, and Custom Function settings – with recommended settings – plus discussions of how, when, and why to use the cameras’ settings and features, (metering modes, aperture and shutter priority modes, advanced autofocus use, and more) for everyday and travel use, to help you take better photos – Your World 60D, Canon T3i Experience, and T2i Experience. Learn more about the eBooks by clicking on their titles.

Back to the Comparison:

Review of Canon EOS 7D vs. 60D vs. 550D / Rebel T2i: So the decision now comes down to the Canon 7D or 60D or 550D / Rebel T2i. (What about the 5D Mk II? Just wait, I’m getting to that! And if you haven’t yet committed to Canon and are interested in comparing the Canon 60D vs. Nikon D7000, have a look at this post.) Below are comparisons of some of the similarities and differences of these three cameras. Remember that all of these comparisons and features are relative. Of course the fact that the 7D can take 126 consecutive photos at the rate of 8 frames per second makes it “better.” Advanced features like that differentiate it from the other models and are also why it costs more. But do you ever need to take 15.75 seconds of continuous photos? Ever? (Look at your watch for 15.75 seconds right now and act like you are taking continuous photos. Now what are you going to do with all those imaginary photos?!)

Sensor and Image Quality: As I said above, all three cameras share a very similar sensor and 18 megapixels, and so their image quality will be virtually the same. All are capable of taking professional quality images.

Exposure Metering: The three cameras all share the latest 63-zone exposure metering system and 4 metering modes. That means they will all determine the exposure virtually identically and enable you to take properly exposed photos in most every situation, including difficult back-lit scenes. The size of the areas metered for Partial and Spot metering vary slightly between the cameras, but that isn’t anything critical.

Autofocus: The 60D shares a similar autofocus system to the T2i and the previous 50D, with 9 focus points and three auto focusing modes. However the 9 AF points of the 60D are more sensitive than those of the T2i: all are cross-type in the 60D, only the center is cross-type in the T2i. The 60D autofocus system is much less complex than the sophisticated AF system of the 7D with its 19 AF point system and its additional Zone, Spot, and Expansion focus modes. These various modes address how you want to deal with and group these numerous AF points. Plus the custom settings of the 7D allow one to customize how the AF system works – how it tracks subjects, how it deals with objects that come between you and your initial subject, how quickly it responds to these changes of possible subjects that are at different distances from you, etc. However, if you are not an avid sports photographer, a wildlife shooter, or someone who understands, needs, and will use the elaborate features of the 7D AF system, then this shouldn’t dissuade you from the 60D.

Construction: As you can probably figure out from the prices, each camera is not built the same. The 60D has relatively strong construction of aluminum and polycarbonate. It is better built than the 550D but not as strong as the 7D’s magnesium alloy frame. The 60D also has some amount of weather sealing – more than the 550D/T2i, less than the 7D. But for most users, including even those using the camera daily or in travel situations, the construction of any of these cameras is far more than good enough, strong enough, and durable enough.

ISO: Since they all share a very similar sensor, the ISO sensitivity and performance at high ISO settings is virtually the same for these three cameras. But don’t take my word for it, don’t be swayed by pixel peepers on forums, instead check out the camera sensor tests at dxomark to verify this. As you can see, they all share the exact same overall score, and show very similar performance.

Controls:
As with construction, the buttons and controls vary with these cameras. Unlike the T2i, the 60D and 7D have nearly every control an advanced photographer needs on the exterior of the camera and they also have the top LCD panel and rear Quick Control Dial that are not on the 550D/T2i. With all the cameras, any controls can also be easily accessed with the Q button and menu or in the other menus on the rear LCD monitor. The top buttons of the 60D set only one setting each, so this is less complicated than the multiple-setting buttons of the 7D. Canon has removed the white balance (WB) button on the 60D that the 7D and 50D have, but that isn’t a big deal – use the Q Menu. Another change on the 60D is that the Multi-controller has been moved from the thumb joystick like the 7D and 50D and placed in the middle of the rear Quick-control dial. This doesn’t change how it functions, and should just be a matter of getting used to the difference. (Unfortunately, I still really do prefer the old design and location.) If you plan on using your camera on Auto or Program most of the time, then the controls of the T2i are more than sufficient for your needs.

Menus and Custom Functions: These allow for greater control over customizing how the camera functions. The 60D has many more Menu and Custom Function settings than the 550D/T2i and nearly as many as the 7D. These settings enable you to customize the operation, function, and controls to work how you want them to, including things like exposure increments, peripheral illuminations correction for lenses (fixes dark corners) and customizing which button does what. Since many of the Menu and Custom Function settings can be complicated and confusing, my eBooks on the 60D and on the T2i/550D cover all of these options along with my recommended settings to get you up and running quickly!

Wireless Flash: Like the 7D, the 60D incorporates wireless flash triggering. It allows you to trigger multiple off camera flashes at different output levels. The 550D/T2i does not have this feature.

Articulating LCD Screen: The big new feature that the 60D has that the other two cameras do not is the articulating rear LCD screen. This may prove useful for videographers, as well as for setting up compositions while the camera is on a tripod, for macro use, or for using it from unusually low or high vantage points. Some users will be able to avoid buying an expensive angle finder because of this feature. There is also an electronic level in the 7D and 60D, visible in the viewfinder, rear LCD, or top LCD.

Viewfinder: The 60D has a large, bright viewfinder with 96% coverage of the actual resulting image, a tiny bit better than the 95% of the 550D/T2i but not quite as nice as the nearly 100% view of the 7D.

Processor:
The 60D shares the same Digic 4 processor as the 550D/T2i. The 7D has dual Digic 4 processors. However, if you don’t need to shoot dozens of continuous images, you probably won’t notice any processing speed issues.

Continuous Shooting Speed: The 7D can shoot a blazing 8 frames per second, in which the photos barely change from frame to frame. The 60D can shoot a respectable 5.3 fps which is actually a more useful rate, and is a higher rate than the 550D/T2i rate of 3.7 fps. If you need the extremely high fps for sports, wildlife, or other action shooting, get the 7D. If not, don’t be swayed by this excessive feature.

Memory Card: The 60D uses the SD memory card like the 550D/T2i, not the CF card of the 7D and 50D.

Battery: The 60D uses the LP-E6 battery like the 7D and 5D, which is a nice feature as this battery can often last through a full day of shooting. The T2i uses a smaller battery with less capacity.

Size and Weight:
The 60D is larger and heavier than the 550D/T2i, smaller and lighter than the 7D. Go to the store and hold them to get a better feel for their size, weight, and feel.

AF Microadjustment:
The 7D has this feature, the 60D and T2i do not. Many are disappointed that the 60D does not include the ability to micro-adjust the focus so that each lens is completely accurate. However, if you have a focus issue, send your camera and/ or lenses to Canon while under warranty and ask them to calibrate them. Doing AF microadjustment yourself is often a maddening, never ending undertaking. You may make a good calibration under controlled conditions, but this really doesn’t replicate real life shooting.

Locking Mode Dial: This is a new feature for a Canon dSLR, only on the 60D, that keeps the Mode dial from accidentally rotating. A nice touch, and not at all difficult to change quickly with one hand, as some people have claimed: just push the center button with your left index finger, rotate dial with thumb and middle finger.

Full HD video: Of course they all offer this capability. Note that this is not video for your kids’ parties and soccer games. It does not have continuous autofocus while shooting, as a camcorder does. It is not designed for that kind of use, but rather for serious videographers who typically manually focus. You can adjust autofocus while shooting by pressing the shutter button or the AF button, but it may have a less than desired looking result.

Flash Sync: A Note to Strobists -the 60D and T2i do not have a PC sync flash socket to plug in PC sync cords. The 7D has this.

Ease of operation: While beginners may find all the buttons, controls, and menus of any dSLR difficult and confusing at first, the additional controls and menus of the 7D and 60D are all quite intelligently designed, intuitive, and straightforward for the more advanced user.

*****

Purchasing: If you plan to buy any of these cameras through Amazon.com, (or just wish to purchase anything from Amazon) I would appreciate it if you use this referral link to Amazon or one of the camera links just below. Your price will be the same, and they will give me a little something for referring you, which will help support this blog. Thanks!  And due to popular request, if you are in the UK, here is my new referral link to Amazon UK. If you are in another country, click on one of my Amazon links, scroll to the bottom of the page, and click on your country for your local Amazon. And for those wishing to purchase from B+H Photo, just click here for my referral link to B+H. Thanks for supporting my blog!

See and buy the T2i on Amazon.
See and buy the 60D on Amazon.
See and buy the 7D on Amazon.
See and buy the Canon 5D MkII on Amazon.

I wrote a previous post that also goes in-depth into comparing and choosing between these cameras, but was written before the introduction of the EOS 60D. It does however have some additional info that may prove useful: Canon 7D vs. 5D vs. 50D (Plus 550D/T2i) Part II

Lenses, Accessories and Books: Now that you are on your way to deciding on a camera, you should also start looking into lenses, photography gear, accessories, and books. Check out this link, Best Lenses for Travel Photography, which also applies to general photography, Equipment for Travel Photography, which discusses useful and practical photo accessories and equipment for both everyday and travel photography. This post lists and describes Essential Books for Digital Photography, including the best user’s guides for each of these cameras.

And to sum it all up, here is a brief, mostly serious synopsis to help you make the camera decision:

Get a Canon 550D / Rebel T2i if you are new to photography or to digital SLR photography, or want to upgrade from an older Rebel because you want higher image quality and more mega-pixels (or HD video). If you have been happy with the features and controls of your previous dSLR camera and have not discovered the need, in your use of it, for any specific additional features, there is no need to look beyond the 550D. See the T2i on Amazon.

Get a Canon 60D if you have outgrown the capabilities of an older Rebel like an XTi or T1i due to your greater experience and more demanding shooting needs which require more direct or sophisticated controls and customization options. Or you have been pretty pleased with your 20D or 40D and its features but wish to upgrade for the increased image quality and mega pixels (or HD video). And/ or you need a more rugged camera for your frequent and demanding shooting and off-the-beaten-path traveling needs. Or if you need the increased 5.3 frames per second continuous rate to shoot sports or action. Or you really like swiveling LCD screens. If you typically shoot on Auto or Program mode, you do not need a 60D. If you do not manually select your own focus point and have never used exposure compensation you do not need a 60D. If you have never used the AE-Lock [*] button to lock exposure you do not need a 60D. If you don’t understand the relationship between aperture, shutter speed and ISO you don’t need a 60D. Or unless you plan to dedicate yourself to learning this camera and the principles of SLR photography and grow into this more advanced camera, please save the money or use it towards a better lens. See the 60D on Amazon.

Get a Canon 7D if you have extensive experience with a Rebel (xxxD series like 350D, 400D) or with an older xxD series (20D, 40D) camera, and you know and understand most of the 7D’s controls and advanced custom features, and you specifically need some of them for your demanding shooting needs. If you haven’t passed the above “criteria” for a 60D, you definitely don’t need a 7D. If you have never used Av aperture priority mode or M manual mode, you do not need a 7D. If you have never used autofocus tracking settings to track a moving subject across your frame and worried how an interfering object would affect your focus you do not need a 7D. If you have never used spot metering to determine a critical exposure level or experimented with back-button focusing you do not need a 7D. Or unless you plan to dedicate yourself to learning this camera and the principles of SLR photography and grow into this very advanced camera, please save the money or use it towards a better lens. However, if you often need to take 126 consecutive photos at the rate of 8 frames per second, you do need the 7D. Immediately. Even if you just sometimes need that. Totally worth it. That’s 15.75 seconds of continuous shooting. Who doesn’t need that? You’d make Eadweard Muybridge proud. See the 7D on Amazon.

(Please note, the T2i/550D, 60D and 7D all have these features I just listed: manually selected focus points, exposure compensation, AE-Lock, auto-focus tracking, spot metering, and back-button focusing. I’m just using them as a determination of your experience level and needs)

The Canon 5D Mark II is in a separate league than the other cameras, being a full frame professional camera, and thus I’m not going to compare it to the others in this context. As I said in a previous post,

If the 5D Mk II fits your expanding and demanding needs as a photographer, you would already pretty much know that you needed a 5D after your extensive time using a Rebel or a 20D, 40D, etc. Otherwise, getting a 5D means most likely you’d be investing in far more camera than you will actually need or use.

If you don’t already know that you need a 5D, you probably don’t need a 5D. Plus, as is often the case, those who could really take full advantage of a 5D are those who can’t afford a 5D. (I’m thinking about the talented photographers I come across on Flickr, etc. who are making amazing images with entry-level Rebels.) Feel free to spend $2,500 on a 5D Mk II if you want, but unless you have extensive experience with photography and with a digital SLR, using a 5D is completely unnecessary and is unlikely to help you take “better” pictures than you will be able to with a 550D. In fact, until you figure out the controls, features, menus, and custom functions of a 5D or 7D, you may be taking worse pictures! And besides, the 5D MkII becoming old technology. You should wait for the 5D Mark III :) See the Canon 5D MkII on Amazon.

*****
Lenses: Lenses for Travel Photography
Accessories and Equipment: Equipment for Digital Photography
Books: Essential Books for Digital Photography

As I said above, when you are trying to determine which camera to purchase or upgrade to, you need to first consider and determine your needs, and then see which camera fills those needs. Not the other way around. Here is a post I wrote which discusses this, titled How to Choose a New dSLR Camera.

Canon 60D Introduced

The Canon 60D was just introduced!

Canon 60D

image of 60D from Canon website

As it had been widely rumored, the 60D has the articulating LCD screen. Although it doesn’t exactly replace the 50D in the sense that it doesn’t add upon the advancement of the 20D, 30D, 40D, 50D progression, it now takes that position between the 550D and the 7D. If you thought it was difficult to choose between a Canon 550D, 50D, and 7D, the choice just became infinitely more difficult, as all three of these cameras now share so many features. And because they share an image sensor that is very similar, and all with 18 MP, the image quality of these three cameras will be nearly identical. The Canon consumer/ pro-sumer lineup has never been so similar as it now becomes. So as I like to profess, you need to choose which camera is best for you based on the advanced features and customization options that are important to you and the way you work. See this post for what I mean.

Before I get into it, I want to mention that I will be selling a Canon 60D eBook tutorial, which covers ALL the Menu settings and Custom Function settings of the 60D (except movie menus), with recommended settings, PLUS in-depth descriptions of how and and why to use its settings and features in everyday use – Your World 60D – The Still Photographer’s Guide to Operation and Image Creation. Learn more about it here: http://blog.dojoklo.com/2010/09/16/canon-60d-users-guide-and-tutorial/

Strangely, the 60D takes a step back from the 50D in continuous shooting speed, in construction, and in use of an SD memory card, and lack of AF Microadjustment capability. They must have determined the smaller size and weight was an important consideration for the target consumer. But basically it is a Canon 550D/ T2i with a larger, more rugged body, advanced buttons and controls, and more advanced menu and customization options (or is it a stripped down 7D?!) One of the only functional differences between the 60D and the 550D is the faster continuous shooting speed. The elimination of the 50D’s thumb joystick and moving that control to inside the large control dial on the back is an interesting decision. While I think I prefer the location of the 50D thumb button, the new controller on the 60D may be easier to control on the diagonals, which I still struggle with on the 50D. In reality, it may just be a matter of getting used to the new control (although dpreview isn’t very pleased with it in actual use). The new 60D uses the same battery as the 7D and 5D, the LP-E6 – an unusual choice considering it is bigger than the 50D battery, but a good choice. Another great feature that Canon incorporated is the locking Mode dial, so that the top mode dial doesn’t accidentally move from, for example, Av mode to Landscape mode, which happens occasionally with my cameras as I take them in and out of their bags or as they lay against my leg hanging from the R-Strap.

Canon has added a lot of in-camera processing abilities which may prove to be useful and time saving to those who shoot a lot of photos and need fast turn-around. Most importantly, this includes the in-camera RAW processing, turning your RAW files into JPGS with the settings you desire, without opening them up and making the changes in Adobe Camera Raw and Photoshop or Lightroom. This also includes in-camera image resizing, while maintaining the original file. According to Canon,

“In-camera RAW image processing features include Picture Style, White Balance (WB), Color Space, High-ISO Noise Reduction, Peripheral Illumination Correction, linear distortion correction and chromatic aberration correction. These powerful in-camera editing tools will allow photographers in the field to produce optimized images on the spot and generate JPEG files at various resolution and compression settings for immediate sharing, without affecting the original RAW data.”

“Another great new feature for photographers-on-the-go is Canon’s new image resizing function. After capturing full resolution or smaller JPEG images, the camera can generate lower-resolution copies using menu commands. New lower-resolution settings include 1920×1280 for optimal display on HD televisions, or 720×480, ideal for immediate uploading to social networking and other photo sharing web sites. The original high resolution files remain unaffected by the image resizing function.”

And also, they’ve included some new fun filters, including the unexpected “toy camera” and tilt-shift-like “miniature” filters:

  • The Soft Focus effect filter helps dramatize an image and smooth over shiny reflections.
  • The Grainy Black and White filter can give a different nostalgic perspective to any shot.
  • Canon’s “Toy Camera” filter deliberately adds vignetting and color shift for a creative option when shooting a colorful scene.
  • Users can also make a scene appear like a small-scale model, simulating the look from a tilt-shift lens, with Canon’s Miniature Effect filter, great when shooting any scene from a high vantage point.

These kinds of inclusions, along with the size and weight reduction, indicate that the 60D is moving down the pro/pro-sumer/consumer scale towards the consumer end, with the Canon 7D now being the pro-sumer camera. (However, I still profess that any of these cameras, from the 550D on up, can give you professional quality images). Unfortunately the new 60D is a camera designed with product positioning (to fill a spot and a price point between the 7D and 550D and its position in relation to Nikon) and marketing (to appeal to a certain target of customers) as a priority more than with technology, innovation, and advancement in mind, which is disappointing to Canon photographers accustomed to the xxD progression of improvements.

Is it more accurately the 60D vs. 7D? Or the 60D vs. 550D / T2i? Here was my analysis and speculation from this previous post, three months ago (I know it is silly and pointless to make these predictions, but I’m pretty proud of my earlier assessment):

“It seems that it [the 60D] will sit at a new position that will no longer be a bridge between pro and consumer cameras (pro-sumer) as the 7D now fills that role (as the 50D once did), but will now be considered a very advanced consumer level camera.”

As dpreview now states,

“With the 60D Canon has unashamedly moved the X0D range out of the ‘semi pro’ bracket and instead focused on the enthusiast photographer looking to upgrade from their Rebel. As a result, it’s not the obvious continuation of the 30D – 40D – 50D pattern that its naming might suggest. Rather than being a direct upgrade replacement for the 50D, it’s perhaps better understood as a ‘Super Rebel.”

And later they call it,

“…essentially a new tier of EOS SLR, perhaps best described as a ‘high end Rebel.”

Let’s see how the actual 60D specs line up with my predictions!

Canon 60D

  • 18 MP APS-C CMOS sensor
  • Vari-angle 7.7cm (3.0”) 3:2 ratio LCD
  • Full HD movies with manual control
  • DIGIC 4
  • 5.3fps shooting for up to 58 JPEGs
  • 9-point cross type AF System
  • iFCL metering with 63-zone Dual-layer Sensor
  • Integrated Speedlite transmitter
  • Estimate Retail Price $1,099
  • 96% Viewfinder
  • ISO 100-6400, H:12800
  • SD memory cards

My Predictions from this previous post

  • 18MP 1.6x sensor – same!
  • 3″ 3:2 LCD – articulating – same!
  • HD video – same!
  • single Digic processor- same!
  • 6 or so FPS at high speedclose but the 60D is a little slower than expected
  • 9 or so point autofocus system, less advanced than 7D – same!
  • 63 zone metering – same!
  • (I didn’t know what to predict for the wireless flash – glad to see they included it!)
  • cost: $1,100-$1,300 – same! B+H is listing it for $1,100. The kit is with the EF-S 18-135mm f/3.5-5.6 IS Lens for $1,399.
  • 98%+ viewfinder – I was off with this one. It is disappointing the 60D doesn’t have a viewfinder quite as big and bright as the 7D, but it is close. It also uses interchangeable focusing screens but it looks like it doesn’t have the nice light up grid option as in the 7D.
  • all other features of 50D (construction, custom functions, AF microadjustment, live view, etc.)- same for the most part. Slightly smaller and lighter. This is due in part to the unfortunate use of a “polycarbonate resin with glass fibre on aluminum chassis” body rather than the more rugged magnesium allow of the 50D and 7D. The 60D also eliminates the thumb joystick for choosing focus points and locates it within the large control dial on back. Again, a strange choice. The 60D does not have AF Microadjustment capability, so again this makes it closer to the 550D than the 7D. The 60D also does not have a PC terminal for connecting external flashes via a cable.
  • Doesn’t use CF memory cards – strange. Seems like a backwards step, but I suppose it contributes to the slightly smaller size.

Lack of AF Microadjustment: Since the Canon 60D does not have Auto Focus Calibration, AF Microadjustment, see the bottom of this previous post for how to deal with that. Canon is hearing from those disappointed that the 60D does not have AF Microadjustment and they may decide to update the firmware and include it in the 60D when it actually goes on sale. However, I still don’t understand why many are so adamant about AF Microadjustment. Have you ever tried to calibrate a zoom lens? Not just with the center point at one focal length, but rather to calibrate it for real life circumstances? At various focal lengths and with different focus points? It is an infuriating, possibly impossible task. AF Microadjustment is a built in admission of lack of quality control of cameras and lenses, and not a positive, much less deal-breaking, feature. I would love to hear from people who disagree because they have had positive and beneficial experiences with calibrating their lenses.

So, who is the Canon 60D for? Canon says,

“For the hobbyist looking for their first “professional-style” camera, or the enthusiast aiming to take their photography to the next level, the EOS 60D makes a sensible choice…For travelling photographers, the high resolution APS-C sensor will capture all the details while at the same time keeping the body and lenses small and light enough to avoid weighing you down.”

Fair enough, I would have to agree with that. See this other post to help you decide between a Canon 7D vs. 60D vs. 550D.

Here is a great quote from Photo.net to sum it all up:

“You can look at the EOS 60D as a Rebel T2i but with a better viewfinder, better AF, higher frame rate, a tilt and swivel LCD, an electronic level, a rear QCD, a larger capacity battery and overall better ergonomics. Alternative you can look at the 60D as an EOS 7D, but with a less advanced AF system, less weather sealing, a slower frame rate, no vertical electronic level, a smaller JPEG buffer and using an SD(HC) card rather than CF. The unique feature of the EOS 60D is the tilt and swivel LCD screen.”

See their hands-on preview here.

more info here:

http://www.dpreview.com/news/1008/10082620canoneos60d.asp

If you are interested in researching or purchasing the equipment I use, discuss, or recommend, please have a look at the site I’ve set up on Amazon.com.

Please leave a comment and let me know if my posts have been helpful, and what you’d like to learn more about.

Deconstructing the Shot – Photo 1

This post is the first in an occasional series in which I will describe the making of a photograph, from both a technical and artistic standpoint. I’ll go through the camera settings and why they were chosen, as well as the thought processes going through my head regarding composition and the creation of the image. These types of posts will be concrete examples of a previous post of mine called How Pros Photograph, which describes the various decisions that may be going through a photographer’s head as they work a scene and make photos.

Douglas J. Klostermann Photography
Ventanas Abiertas – San Miguel Dueñas, Guatemala – Canon 7D, 16-35mm f.2.8L II at 35mm, ISO 200, f/5, 1/100s

The Photo: As the first example photo, I’ve chosen the full, original version of the current header image of this blog (also seen just above), a line of kids reading in the courtyard of Ventanas Abiertas, an after-school learning center in San Miguel Dueñas, Guatemala. I traveled to this NGO near Antigua in November of 2009 to photograph the center, its founder, teachers and students, and its work in the community. I created this strip of images showing select photos from the series as I worked towards finding and making this image:

The Process: As I roamed the center taking photos, I spotted the kids all lined up on a curb in the courtyard, reading. The linear composition and the striking yellow wall made for a pretty obvious opportunity. I had a Canon 16-35mm f/2.8L II lens on a Canon 7D, with a protective UV filter on the lens. I first took a shot from a standing position, composing the image with the kids across the center of the frame. The focal length of the lens was at 23mm, a wide shot to capture the whole scene. That shot has a bit of a snapshot look, and didn’t take full advantage of the yellow wall, had far too much of the grey concrete patio, and created too static of a composition which did not make use of the opportunity to apply the rule of thirds for a more dynamic composition. I re-framed to move the line of kids to the bottom third of the frame, and still had the lens wide and was standing. To better fill the frame with just the kids and to create a better point of view, more on the level of the kids, I crouched down and zoomed in to 35mm. Although the 35mm focal length is a wide angle and thus prone to distortion, due to my camera to subject distance there is only a slight amount of distortion in the image. If I had moved closer to the subjects, more distortion would have been obvious. At this point I checked my settings and saw I was at ISO 400 from the previous shots in the shade, so I lowered it to ISO 200 since the late afternoon light was still pretty bright. The lowest ISO possible for the given situation will typically create a higher quality image file. For all the shots I was using Aperture Priority mode. I almost always use Av mode unless i am dealing with motion or blur that needs to be controlled (then I use Tv mode), or am using the flash in a controlled situation (and then I often use Manual, M mode). The aperture was set at f/5.0 to give me a relatively shallow depth of field, but enough so that the kids and the wall behind them were all in focus, but anything inside the doorway and window would be a bit blurry and thus less distracting. Unlike most of my images, the aperture setting wasn’t critical here, as the depth of the entire image is mostly all within a couple feet, from the kids’ toes to the wall behind them. So f/4.0 or f/8 would have given me virtually the same image. At ISO 200, the shutter speed was at 1/80 or 1/100, which was fast enough for handholding. A little faster would have been better to ensure there was no blurring if a child moved their head or hands during a shot, so leaving the camera set on ISO 400 would not have been a mistake.

As you can see in the first several photos, many of the kids were aware of me taking their photo, and were posing, goofing, or self conscious. I continued to take a few shots and waited for them to begin to ignore me. I liked the composition, and the window and the doorway to anchor the sides of the frame, so I continued to take the same shot, attempting to get the best moment of poses and facial expressions. I attempted to keep the image straight, aided by the lines visible in the viewfinder of the 7D. For all of the shots, I manually selected an auto-focus point, using a point below the central focus point which would line up on or near the face of one of the central kids. This would take advantage of the nice contrast between the dark hair and the lighter face to ensure proper auto-focus. By selecting an AF point exactly where I wanted to focus, I didn’t have to worry about focusing or have to re-frame each subsequent shot. The exposure metering was set on evaluative. The bright yellow wall could have easily messed with the metering, and I’m sure another camera like my 50D would have miscalculated the exposure based on the wall, but the 7D performed nicely on this mode. I checked my histogram a couple times to make sure I wasn’t blowing out any highlights and thus needing to use exposure compensation to adjust for that.

Douglas J. Klostermann Photography
The Final Image: Canon 7D, 16-35mm f.2.8L II at 35mm, ISO 200, f/5, 1/100s

I took a series of 19 images of this same scene, over 1 minute and 12 seconds. As you can see, it didn’t take long for the kids to begin to ignore my presence. My chosen shot was from the middle of this series, IMG_3068. It stood out among all the others in the poses, positions, groupings, and facial expressions of all the kids. Throughout the time of the series, a head appeared in the window, and people moved around inside the doorway. Luckily with my chosen shot, the head was in the window, as I like this subtle, almost hidden detail. I liked the bit of green from the plant on the left, but my chosen shot unfortunately doesn’t show much of it.

The Post-Process: To create the final image, I adjusted the color and contrast in Adobe Camera RAW (ACR). I had shot the image in RAW for maximum quality and processing latitude. Due to the available light of the scene and the proper exposure, it required little processing. I set the Temperature at 4600 and the Tint to 8. I adjusted Recovery to 5 to bring back some of the detail of the yellow wall which was very slightly blown out, Fill to 15 to lighten up the children’s clothes, Brightness stayed at the standard 50, I set Contrast to 20 with plans to increase it a bit more in Photoshop. Clarity 20, Vibrance 15, and Saturation 0. I like a bit of color saturation, vibrance, and contrast in my images, but I prefer not to overprocess or to make the adjustments obvious. While the yellow of these images is definitely vibrant, especially compared to the dull, neutral RAW images, it is a realistic representation of the actual color. Typically I straighten and maybe crop a bit in ACR, but miraculously this shot was very level, and also left no room for cropping. In Photoshop I used Curves to adjust the contrast somewhere between the Linear and Medium presets, and used Unsharpen Mask to sharpen. I don’t know what my exact settings were, but I had to use aggressive sharpening because the Canon 7D I used had a severe front-focusing problem. The settings were probably Amount: 175 or 200, Radius: 1.8, and Threshold: 4.

The Lesson: We should always learn from our photos, so that next time we are in a similar situation, we can create an even better image. Some improvements I could have made to this image include possibly crouching or sitting even lower to be more on level with the kids faces (although this would have caused keystoning of the vertical lines), eliminating the doorway at right by either re-framing or moving slightly to the left (which would cut out a child or two on the right) or moving to my right and shooting back towards them at a slight angle, but this would have affected the straight-on view which I feel is important to this composition. I would not have minded a little more of the green plant on the left in the frame. The image demonstrates the importance of keeping the camera level and the sensor parallel to the subject to avoid unwanted distortion. The best way to keep the horizontal and verticals straight while taking the photo is to make sure the camera is not tilted up or down and that the sensor is parallel to the wall. This involves moving yourself and the camera up or down to get the framing you desire. Also, in post-processing, I could have used the lens correction menus in ACR or Photoshop to perfectly straighten all the verticals and horizontals. Finally, although the color looks good, now I would have paid more attention to adjusting the Temperture and Tint, or adjusting the white balance using Curves in Photoshop because I have experimented and learned a bit more about these settings since then. Also, now that I see IMG_3074 again, (the last one in the strip above) I like it a lot, and should probably process that one and add it to my collection of final images.

So hopefully you can see from this explanation and from my previous post that photographs don’t necessarily just happen. They are created through a combination of thought processes, a series of decisions, and the application of camera settings based on these decisions and on the situation at hand.

See the Related Posts section just below for links to parts 2 and 3 in this series.

And learn more about how to take control of your camera and the images you create with my Full Stop e-book camera and photography guides.

Full Stop photography e book camera user guide Nikon Canon dSLR

Steve McCurry and the Last Roll of Kodachrome

Here’s an article about what renowned photographer Steve McCurry did with the last roll of Kodachrome ever produced, along with the final frames.  I’m eagerly looking forward to the National Geographic special that follows him around the world as he uses the final roll.

Check out this site, Shorpy.com, for some wonderful historic photos on Kodachrome from the 1940’s.

It looks like Alien Skin Software has a nice Kodachrome preset in their Exposure 3 product.

Becoming a Humanitarian Photograper – After the Self-Assignment

I wrote a popular previous post about How to Start Out as a Humanitarian Photographer. It discusses one of the important initial steps of this endeavor: the Self-Assignment. The self-assignment – a volunteer trip to work with and photograph an NGO or non-profit – should help you determine if humanitarian or travel photography is something you really wish to pursue. And if so, it helps you to gain experience working in the field, collaborating with NGOs, and preparing for future assignments. Once you’ve completed and returned from that trip, there is much more to be done!

8421

Editing: Your first task is to select the best images out of the hundreds or thousands of digital images you took, and then to edit and optimize those images. If you are not already adept at working with Photoshop and/ or Lightroom you need to learn the programs and begin to gain proficiency. There are numerous books for this, so try to find the ones that work best with your learning style. Some of the ones I’ve found most helpful are the books by Scott Kelby and by Chris Orwig:

The Adobe Photoshop CS5 Book for Digital Photographers by Scott Kelby

The Adobe Photoshop Lightroom 3 Book for Digital Photographers by Scott Kelby

Adobe Photoshop CS4 How-Tos: 100 Essential Techniques by Chris Orwig

Adobe Photoshop Lightroom 2 How-Tos: 100 Essential Techniques by Chris Orwig

These and other helpful photography related books can be found in my post on Essential Digital Photography Books. Don’t worry about learning every feature of the programs but concentrate on the basic color, contrast, and sharpening features, as well as layers and adjustment layers. As you gain proficiency, move into masking, retouching, advanced sharpening and black and white conversions. Develop good editing, metadata, storage, and workflow habits from the start because it becomes hard to undo bad habits later on. Begin to learn how to use actions and batch processing to more quickly process numerous images.

Contests: When you’ve finished selecting and editing your best images, begin to enter them in contests. The reason for entering contests is not to gain sudden fame, riches, and an instant professional career. Few, if any contest will lead to this, no matter what they promise. Instead, the purpose of contests is to start to develop credentials. Being selected as a finalist or winner of a photo contest will enable you to add that accomplishment to your CV, and winning will allow you to add that coveted phrase in front of your name: “Award winning photographer.” Many contests lure you with the promise of exposure to those in the photo industry or the greater public, but in reality there is very little chance that this will lead anywhere, even if you win. Photographers who are regularly published in magazines and whose name is often in front of industry insiders still struggle to obtain their next gig, so don’t expect your single photo to bring you much. Also, participating in contests will help you to see what others think of your photos. Of course you think they are great, and your friends and family rave over them, but what about others out there? It also helps to see your photos side by side with countless others to see if your images truly stand out among the masses. However, it comes back to you to be the best judge of this. The images that are chosen will often confuse and annoy you and the other entrants, and it is often difficult to understand why the judges chose particular images. It helps somewhat to look at the winners of the previous years to see what types of images catch the judges’ eyes, but it is impossible to second-guess what they are looking for year to year. Stick to entering the images you like best, but detach yourself emotionally from your photos’ subjects and the experience of taking them, and view them as an impartial observer. If contests ask for captions, descriptions or short essays to go with the photos, take time to carefully write them. Look into guidelines and recommendations for writing newspaper captions, and please, avoid saying amateurish phrases like, “I took this photo while standing…”

8387

There are a few contests (and grants) that cater to humanitarian photography, such as those run by Photoshare, Focus for Humanity, and PhotoPhilanthropy. There are countless other photography contests so search on the Internet to find some current ones. Many of your photos will likely fit well in travel photography contests or the travel category of a contest. Also be sure to look at other categories that might apply such as people or portraits. It is best to stick to the well know, reputable contests, like those run by National Geographic, Smithsonian magazine, airline magazines, travel magazines like Conde Nast Traveler, travel guidebooks like Rough Guides and Viva Travel Guides, travel websites like Peterman’s Eye, contest sites like Travel Photographer of the Year, and newspapers. Be wary of contests that charge entry fees. You can quickly spend a lot of money entering multiple photos to multiple contests in the hope of gaining notoriety. But remember that the likelihood of you winning the grand prize is small, no matter how amazing your images are, and even if you did win, it will not lead to sudden fame and an instant professional career. While some of the contests you have to pay for are well respected and legitimate, such at the International Photography Awards, and it may be worth it to enter a couple, keep in mind that the most you can expect is to be able to use this credential in your bio and descriptions. Also note that some of the prestigious contests with entry fees attract professional and commercial photographers or very highly talented amateurs, and the quality of the entries exceptional. Determine if it is worth your time and money to enter, or better to wait a few years until your skills and images improve. But also remember that, despite thousands of entrants, it is possible to win photo contests. I’ve been recognized in several contests, have won a dSLR, and had my photo selected for a travel guidebook cover.

Be sure to carefully read the fine print of a contest’s rules and guidelines, especially to determine if you are signing away the rights to your photos. Contests are often tools for a company to gather a large pool of free photos to use in their books or website, and you may be surrendering lifetime, or even exclusive rights to them just by entering. You never want to surrender your copyright or give them exclusive rights and just give away your photos for free for them to use however they wish. Recent examples of this which greatly upset many photographers including well respected professionals were a National Trust contest in the UK and a Frommer’s cover contest. If you are still determined to enter and feel that the potential benefit outweighs the cost, consider entering a photo that is similar to your best photo, but not the exact same one that you may wish to use, exhibit, and sell later.

Grants and Fellowships: In addition to contests, you should also consider applying for grants and fellowships. There are very few of these, but if you were to win, they would allow you to travel and pursue an in-depth project. I’m sure you’ve begun to think about personal projects and places you would like to travel to and photograph, so turn your idea into a compelling story. Most grant and fellowship applications require both a sample photo essay or story and an essay or proposal. Hopefully on your self-assignment you documented your project in a manner that tells a story of a place, organization, or person. If not, careful editing and captions might create a good photo essay. Some grants or fellowships require a project already in process, so keep this in mind as your travel and work. Writing the proposal is very time consuming and takes a lot of careful thought, so start working on yours well in advance of the deadline, and follow their requirements precisely.

Many of the contests, grants, and fellowships occur annually, so be sure to add them to your calendar, giving yourself a few weeks to prepare for each of them. Some online sites which list many of them are:

http://www.lightstalkers.org/
http://photographygrants.blogspot.com/
http://photojournalismlinks.com/awardsgrantsandcompetitions/

8378

Website: This is pretty self-explanatory – build a website to share your work with others. There are countless sites which are designed to host photo portfolio websites, such a PhotoShelter and Fluid Galleries, or templates you can incorporate into your own website. Try to strike the best balance you can between do-it-yourself, cost, functionality, and professionalism. Domains and hosting are very cheap through places like GoDaddy, but portfolio templates and hosting can start to add up to hundreds of dollars a year. Try to keep the costs to a minimum until you start making money from your photography. Just make sure your site looks clean and professional, functions quickly and intuitively, and that your images are large and easy to navigate. Here is a list that can get you started.

Exhibitions: Print and frame your photographs and exhibit them so that you can share them with a wider audience. Look for unique opportunities of places and events that might be eager to incorporate your photos, such as travel agency offices, local festivals, performances, and movie screenings that relate to the culture or country where your images are from, local stores, and restaurants (although I am wary of this last one as I would prefer to sell my images to them and am afraid of damages to the prints from exposure to constant cooking air).

Read: Continue to read and learn about the humanitarian issues and the countries that most interest you. A good place to start is any of the books listed in the Humanitarian Books section of the Amazon.com site I put together. Get them from your library, or purchase them through that site and help support my work! This post also has information about books, and this post talks about other resources for learning about humanitarian issues.

The next step in the process is to learn the business aspects of becoming a professional photographer. I’ll save that lesson for another time!

For related posts, be sure to check out the other entries in the Humanitarian Photography category.