Ten Tips and Tricks for the Nikon D610 / D600

I spent a considerable amount of time with both the Nikon D610 and the Nikon D600 as I researched and wrote my guides to the camera, Nikon D610 Experience and Nikon D600 Experience, and it has proven to be one of my favorite dSLR bodies.  It is well designed, fully featured, and the image quality and low light performance has proved to be excellent. It is indeed a very powerful and versatile dSLR camera, and much of that is due to its autofocus system, its controls, and its custom settings.  In fact, if you go through the Menus and Custom Settings of the D610 / D600, you will find that a “Top 25 Tips and Tricks” post could easily be put together from just these options alone.

Below is an explanation or introduction to several of these features and options for the D610 / D600.  I go into much more detail about using all of these particular functions and settings, as well as everything else about the camera, in my e-book user guides Nikon D610 Experience and Nikon D600 ExperienceAnd in fact, some of the content from these books is excerpted or summarized throughout this post.
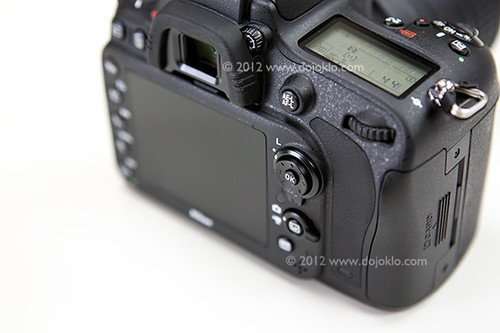
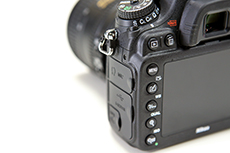
Nikon D600 body buttons controls manual use learn how to book guide dummies customize
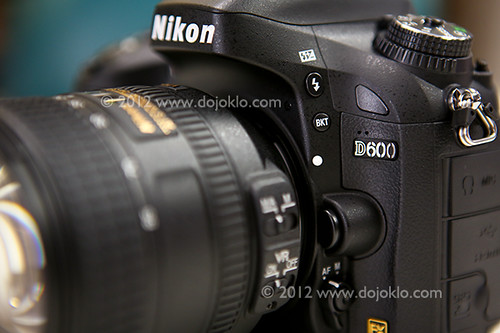
Detail of the controls of the Nikon D600 dSLR camera.

Despite the title of this post, I’m sure you realize there generally really aren’t “tricks” to improving your photography and camera use, but rather there are functions, features, settings, techniques, and controls that you should learn and be familiar with if you wish to take full advantage of your powerful camera. That being said, “tips and tricks” makes for a shorter, more intriguing article title and format, and so I have put together this list of ten helpful … tips for taking control and full advantage of your D610 / D600:

1. Take Control of your Autofocus System:

When capturing an image, it is essential that the image is sharp and that the camera focuses exactly where you want it to. So in order to focus on your desired subject, or precisely on – for example – your subject’s eye, you need to take full control of the AF system. The 39 AF points of the D610 / D600 will allow you to tell the camera exactly where you wish to focus, but the various configurations of Autofocus Modes and Autofocus AF-Area Modes may make it more of a challenge to learn initially. So I have written an entire post about making use of this AF system, which you can read here. It involves first learning the AF related controls and then setting up the applicable Custom Settings so that the AF system works as you want it to. (Some of these settings are especially important when using AF-C mode to track moving subjects.) You will then choose an Autofocus Mode (such as AF-S or AF-C) typically based on if the subject is still or moving, and an Autofocus AF-Area Mode (such as Single-Point or Dynamic-Area) typically based on how you wish for the camera to make use of surrounding AF Points such as to help focus on a subject or track a moving subject.
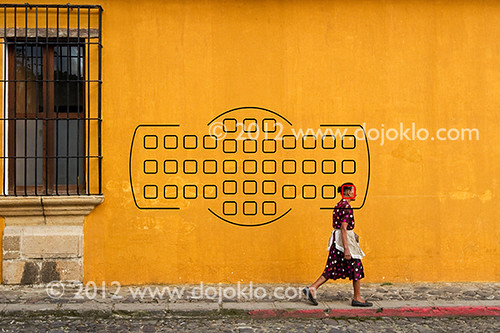
Nikon D600 autofocus system af viewfinder learn use control book manual guide dummies how to
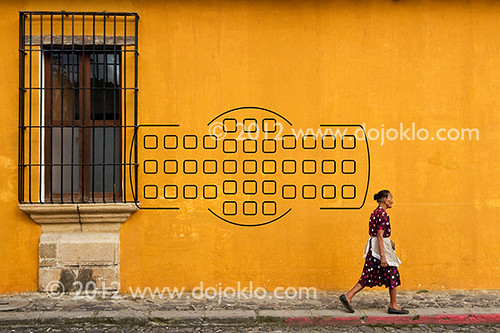
Simulated view of the Nikon D610 / D600 Viewfinder, showing the locations of the 39 AF Points (all of the AF Points will not be visible in the viewfinder at the same time as seen here).

The Menus and Custom Settings will also allow you to do things such as limit the number of available AF Points to just 11 if you find the 39 points excessive for your needs or overwhelming at first when learning to use them (a6: Number of focus points).  And you can make use of another setting to dictate whether or not the focus point selection “wraps around” to the other side of the screen when you reach, say, the far right AF Point (a5: Focus point wrap-around).

2. Make Full Use of and Customize the Buttons and Controls:

In order to work quickly or more efficiently, you should not only learn all the buttons and controls on the camera, but the D610 / D600 will allow you to customize them to fit your shooting needs and personal shooting style. Buttons like the Exposure Compensation and Metering Mode buttons on the top of the camera will obviously enable you to quickly change these settings. The AF Mode Button button, located inside the Focus Mode Selector switch near the base of the lens, may be confusing at first to those who have not previously seen or used it on the Nikon D7000, though you should quickly find that it is a convenient design. It is used to select the Autofocus Mode as well as the Autofocus AF-Area Mode. Press this button and turn the rear Main Command Dial to select the Focus Mode, such as AF-A or AF-C, while viewing the setting on the top Control Panel or in the Viewfinder. Press this button and turn the front Sub-Command Dial to set the AF-Area Mode, such as Single-Point AF or 39-Point Dynamic-Area AF, which you can also view on the top Control Panel or in the Viewfinder.

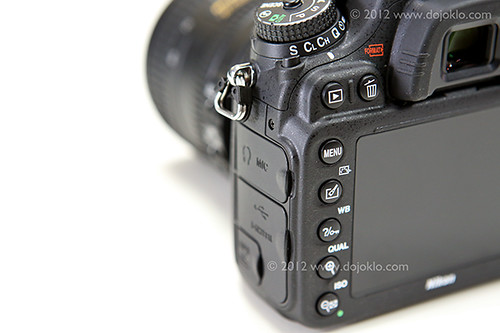
Nikon D600 buttons controls book manual guide how to use learn autofocus tutorial
View of the rear controls of the Nikon D600.

The AE-L/AF-L Button can be customized to lock the exposure setting and/ or focus distance independently of the Shutter Button, or configured to perform back-button focusing duties. And buttons like the Fn Button and Preview Button can be set up to access one of numerous other settings that there is not a specific dedicated button for, such as quickly changing to Spot Metering or temporarily capturing RAW files while shooting in JPEG format. The Flash Button on the front of the camera will not only raise the flash, but it is also used in conjunction with the rear Main-Command Dial to set the Flash Mode (as viewed on the top LCD Control Panel), and with the front Sub-Command Dial to change the Flash Compensation amount.
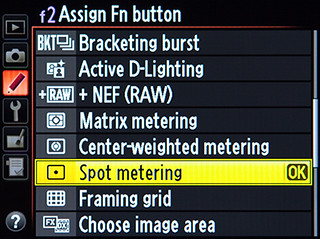
Nikon D600 function button customize use learn book manual how to dummies field guide
Some of the options for Custom Setting f2, to assign your desired function to the Fn Button.

3. Learn the Difference Between Interval Timer Shooting and Time-Lapse Photography:

Unlike some other Nikon dSLR cameras, the D610 / D600 has separate settings for Interval Timer Shooting and Time-Lapse Photography Shooting. Although they are closely related – and are both methods of setting up the camera to automatically take photographs at regular, preset intervals – there are important differences.

Interval Timer Shooting can be used to take a series of images at each interval (for example, four images in a row every 1 hour for 3 hours). It can be used to take these multiple series of shots over several minutes or hours. Time-Lapse Photography is used to take a series of individual photos at each interval over an extended period, which are then automatically combined into a time-lapse movie (for example, one photo every 30 seconds for 6 hours, which are then turned into a movie). The resulting movie will use the video frame rate you have set in the camera, and the menu will calculate and display how long the final movie will be based on your settings.

4. Make Use of and Customize Picture Controls for those Shooting in JPEG Format:

If you are capturing images as JPEG files, you will want to set and/ or customize the Picture Controls so that your images have your desired level of sharpening, contrast, brightness, saturation, and hue. In other words, so that they look exactly how you want them to when they come out of the camera. These Picture Control settings are permanently applied to JPEG image files as they are processed and saved in the camera (but do not permanently affect RAW-NEF files). You can choose one of the presets such as Standard, Vivid, Landscape, and even black and white Monochrome. Or modify one of the presets to your desired settings or create your own custom Picture Control. You can even find custom Picture Controls online, such as ones that mimic certain types of film.

Nikon D600 Picture Control menu option manual guide book how to instruction tutorial dummies
Nikon D600 Picture Control menus to choose and modify a Picture Control, which determines the final look of JPEG images.

Picture Control settings are not necessarily needed if you shoot in RAW. The Picture Control settings will be associated with the RAW file as metadata and may be “applied” as you view the image in processing software such as Nikon Capture or View NX 2, but the settings will not permanently affect the RAW file and they can be changed during processing without affecting the quality of the image. Although please note that the Picture Control you set applies to the images and their Histograms that you see on the rear LCD Monitor even if you are shooting in only RAW. So, for example, if you were to set a Picture Control with high contrast, the images shown on the LCD Monitor will incorporate this setting (and the Histogram will reflect this setting) and thus will not look the same as the “unprocessed” exposure captured in the RAW files that you will later view on your computer. Therefore you may want to have this set at Standard or Neutral if you shoot RAW so that the images and their histograms you view on the camera’s LCD Monitor closely resemble the actual unprocessed RAW images. Or you can take a different approach and customize the Picture Controls to closely resemble how you typically process your RAW files. That way you can preview on the rear LCD how your final, processed image will appear. This approach should be taken only after you have gained experience with post processing and have developed your own typical processing settings.

5. Configure Your Camera for Easy Exposure Compensation:

Pressing the Exposure Compensation Button, indicated by (+/-), and turning the rear Main Command Dial will adjust Exposure Compensation, so that the exposure of a subsequent image is lighter or darker. If you wish to “cancel” exposure compensation, you will need to remember to change this setting back to zero after you take the shot.

If you often make use of Exposure Compensation (EC), you may wish to sometimes apply EC to just the next shot but sometimes use it for all of your following shots.  Custom Setting b3: Easy exposure compensation can give you very precise control over how you use the camera controls to set exposure compensation. You can set it up so that you must press the Exposure Compensation button as you turn the Main Command Dial in order to adjust exposure compensation. Or you can select to just directly turn the Command Dial of your choice, without pressing the Exposure Compensation Button first (by choosing setting On). This is a quicker way to adjust exposure compensation but introduces the possibility of changing it accidentally. With either of these above settings, exposure compensation will not be reset to 0 when you turn the camera off or when the metering standby timer period ends, so you must be sure to check your settings often to ensure you are not using exposure compensation when you don’t wish to.
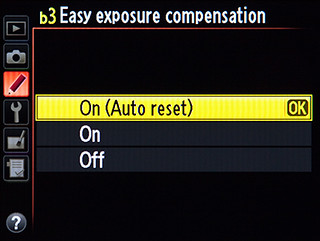
Nikon D600 easy exposure compensation menu custom setting screenshot
Custom Setting b3 to set up Easy Exposure Compensation.

Alternately, you can set up the camera so that you turn one of the Command Dials (of your choice in Custom Setting f5) to directly adjust exposure compensation (EC), but your EC setting will be reset when the camera or exposure meter (Standby Timer) turns off. This option is the most sophisticated and most flexible, and may be the best one to learn and use. This is because you can still continue to use the Exposure Compensation Button with a Command Dial to set EC, but by setting it for On (Auto reset) EC will not be reset when the camera or Standby Timer turns off. Exposure compensation will only be automatically reset if you set it directly using the Command Dial without the button. So if you wish to use exposure compensation for just one shot, you can adjust EC with just the dial and then let it cancel after than single shot. But if you wish to take a series of shots with the same adjusted EC, you can use the button / dial combination to set it more “permanently.” Once you learn more about exposure compensation and how and when to use it, this will all start to make more sense, and you will begin to understand why this is such a powerful and useful Custom Setting.

6. Take Advantage of the Two SD Card Slots:

If you insert SD memory cards in both of the available slots, you can configure the second card to function in a variety of ways, by using the Role Played by Card in Slot 2 menu setting.  Overflow will save your images onto the second card after the first card is full. Backup will simultaneously record copies of all images onto both card 1 and card 2. Raw Slot 1 – JPEG Slot 2 will store NEF (RAW) images on card 1 and JPEG images on card 2, for example when you are shooting NEF (RAW)+JPEG in order to capture both file formats at the same time. When the second or third option is selected, the camera will use the card with the least amount of remaining memory to determine the displayed amount of exposures remaining. In the Movie Settings Menu you can also select to save movies on a specific card.

Nikon D600 dual two card slot memory SD body detail learn use book manual guide

You can also use the Copy Image(s) menu item to copy images from one memory card to another when two cards are inserted in the camera. This can be used to back up specific images or the entire card at once. This could be useful to create back-up copies of your images when you don’t have access to your computer, external hard drive, or CD/DVD burner – but it is best to back them up on one of these more permanent devices as soon as possible.

7. Experiment with HDR Shooting and Multiple Exposure Shooting:

Previously, HDR processing was performed only with software, but with the in-camera HDR (high dynamic range) feature of the D600 you can now capture two images of various exposures (an under-exposed image and an over-exposed image), automatically combine them into a single HDR image, and process them using a variety of options, all in-camera. While this will not result in the distinctive, dramatic types of HDR images you may have seen, it can create an image with a broader range of tones. (To create dramatic HDR images, you will still need to manually bracket three, five, or seven exposures of the same scene and combine and process them using HDR software.)

The in-camera HDR Shooting menu will allow you to select the exposure value (EV) increments of the two images (from 1 EV to 3 EV, or choose Auto), and you can also set the amount of Smoothing used when combining the images. You can set the camera to take just one HDR series, or continue to shoot in HDR Mode until you disable the function.
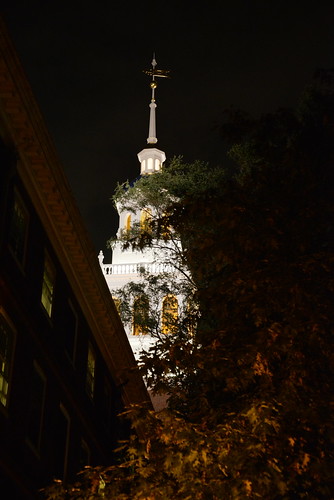
Nikon D600 in camera HDR mode shooting learn use how to
Lowell House, Cambridge, Mass – Making use of in-camera HDR to obtain a better exposure at night, with broader range of light, dark, and shadow details than would be possible with a normal exposure.

The in-camera Multiple Exposure Shooting Mode of the D610 / D600 allows you to create multiple exposure shots, with either two or three exposures superimposed in one image. You can use the Multiple Exposure menu to initiate Multiple Exposure Mode, and as with HDR Shooting you can decide if you wish to take a series of multiple exposure shots, or a single one after which the camera automatically reverts back to regular shooting. You can then select the number of shots to be combined, and set the Auto gain (use On unless you are working with a dark background. When Auto gain is set for On, the exposure of each shot is adjusted so that the final shot has the correct density. For example, if three shots are taken and combined for the final multiple exposure, the gain for each shot will be set at 1/3. If Auto Gain is turned Off, the result will likely be a dark, muddy shot.)

Nikon D600 multiple exposure shooting mode book manual guide dummies how to use learn tutorial
Multiple Exposure image taken with the D600 using Multiple Exposure Shooting mode.

8. Set the Center Weighted Metering Circle Size, and Fine-Tune the Metering:

With the D610 / D600, Custom Setting b4: Center-weighted area gives you the ability to customize the size of the central area that is used in determination proper exposure when working in Center-Weighted Area metering mode. When using Center-Weighted Metering the camera looks at the entire frame to determine exposure, but adds extra “weight” to the exposure values of the central area of the frame.  You can choose the desired diameter of the central circle area: 8mm, 12mm, 15mm, or 20mm. Or you can choose for the camera to determine the Average exposure of the entire frame, with setting Avg.

This option should be set based on how precise you wish your metered area to be or based on the size of the subject that you are metering. Since you can use Spot Metering mode for very precise metering of a 4mm diameter spot when you need that, perhaps it is useful to leave this at the default 12mm (though note that the 4mm Spot Metering circle moves and is centered around the active AF Point, while the Center-Weighted circle does not move). You can also set this to Avg to average the entire scene. This is a far less sophisticated mode of evaluating the entire scene than Matrix Metering (which takes the selected Focus Point and other data into consideration), and is similar to using an old film camera that averages the entire scene to 18% grey to determine proper exposure.
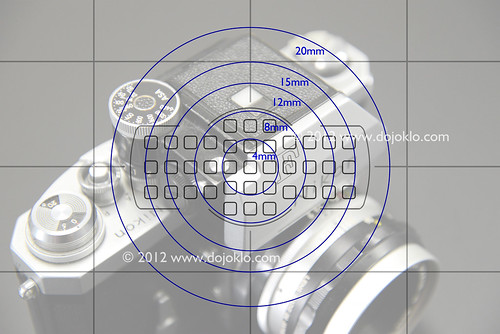
Nikon D600 viewfinder metering mode center weighted spot autofocus system af learn use book manual guide grid
Simulated view of the Nikon D610 / D600 Viewfinder, showing the location of the AF Points, the approximate sizes of the Center-Weighted Metering area size options, and the optional grid. The 4mm circle is the size of the Spot Metering area, which will actually move based on the active AF Point.

You can also take advantage of Custom Setting b5: Fine-tune optimal exposure to fine-tune the exposure value that is selected by the camera in each of its various metering modes. If you find that your images are always typically being slightly underexposed or overexposed when using a specific metering mode, you can adjust this accordingly so that you don’t have to use exposure compensation every time you use that metering mode. For example, you may find that Center-Weighted Metering delivers great exposures, but you would prefer that the images taken with Matrix Metering were 1/3 EV (1/3 step) overexposed all the time. If that is the case, you would adjust Matrix metering to +2/6 using the Custom Setting b5 menu. If you make use of this adjustment, you can still use exposure compensation in any situation in addition to this fine-tune adjustment. The fine-tune adjustment of Custom Setting b5 will happen “behind the scenes” to adjust the baseline exposure prior to any exposure compensation adjustment.

9. Configure the ISO Settings and Take Advantage of the Auto ISO Options:

You can use the menu item for ISO Sensitivity Settings to do much more than simply changing the ISO setting (which is more easily done simply using the ISO Button on the camera). If you plan to use Auto ISO rather than selecting your own ISO setting, this menu is also used to set the optional Auto ISO Sensitivity Control, which will function in P, S, A, and M shooting modes. Making use of Auto ISO can allow you to concentrate more closely on your aperture or shutter speed settings, and of course on your composition and framing. And the D600 has some great options that make the use of Auto ISO more viable and appealing than previous cameras.
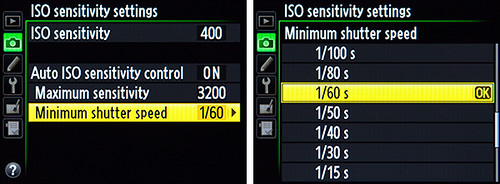
Nikon D600 ISO sensitivity settings menu auto iso screenshot how to use set up learn manual guide book dummies
Nikon D610 / D600 ISO Sensitivity Settings Menu, including Auto ISO.

If you enable Auto ISO then the camera will automatically change your selected ISO, without your expressed permission, in certain situations in order to obtain a proper exposure. For example, if you are working in Aperture-Priority Auto Mode (A) and set the ISO at 1600, but based on your selected aperture and the lighting the camera does not believe there is enough light for the exposure and a realistic shutter speed (that you also set in this menu item – see below), it will automatically raise the ISO so that the shutter speed does not become impossibly slow for hand-holding. This may be good if you are still getting used to the cameras controls and settings and wish for the camera to help you out a bit in certain situations where you may not be paying close enough attention to your settings. Or perhaps in situations such as at a concert where the lighting may change dramatically without you realizing it or responding fast enough. But if you want complete control of your settings and exposures, you will need to turn this Off.

If you do set Auto ISO Sensitivity Control to be On, then you also set the Maximum Sensitivity or maximum ISO that the camera will use in these situations. For example, you may wish to set it no higher than 3200 or perhaps 6400 if you are willing to accept the digital noise of photos at that high an ISO. You also set the Minimum Shutter Speed that you would like the camera to automatically use in these situations. I suggest you set it at the slowest shutter speed you can possibly hand-hold and still potentially get an image without blur, perhaps 1/30 at the slowest if you are careful.

One of the powerful features of Auto ISO with the D600 is that when using it, the camera selects an ISO setting based on the local length of the lens being used. If you find that, when using Auto ISO, the camera is selecting shutter speeds that are slower than you wish (and thus may cause blur due to camera-shake), you can use this menu to adjust these settings and instruct the camera to use a faster shutter speed.

10. Make use of the Playback Display Options and Histogram

You will likely want to enable most or all of the Playback Display Options so that you can better evaluate your images, their settings, and the resulting exposures. That way you will know how to adjust the camera settings for the subsequent images. When these various display options are enabled, you can view the different screens during full-screen image playback (not multiple thumbnail view) by pressing up or down on the Multi Selector.
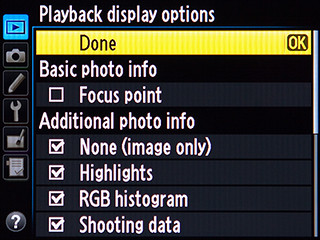
Nikon D600 menu playback display histogram
Playback Display Options menu screen of the D610 / D600.

On the menu screen shown above, None will display a full screen image with no information, which helps you to inspect the image. Highlights will display blinking areas to alert you of where the image has been overexposed, which can help you determine the proper exposure for the subsequent shots. RGB histogram will display histogram graphs of the various color channels to also assist you in determining proper exposure. This one may actually be optional if you do not yet make use of individual color channel histograms. Shooting data displays additional information including the lens and focal length used, flash information, and Picture Controls settings. This screen is not necessarily very informative immediately after taking the shot since you already know most of these settings, but can be handy when later reviewing an image in-camera. Overview displays a thumbnail of the image along with the RGB histogram and shooting information. This is perhaps the most important and useful information screen to use while shooting to help determine that you obtained the proper or desired exposure of an image.

The option for Focus point will show you which Focus Point was used when capturing an image, and will thus verify if you properly focused where you intended (unless you recomposed after locking focus). It is that tiny red square or squares superimposed on your image when you view it on the rear LCD Monitor, but will not be on the actual image. It is most helpful for when you let the camera select the autofocus point, such as in action situations, and/ or when using an AF-Area Mode other than Single Point AF – and then you can see if the camera focused where you wished. But if you manually select your own AF point, as you typically should in many situations, you will already know where the camera focused.
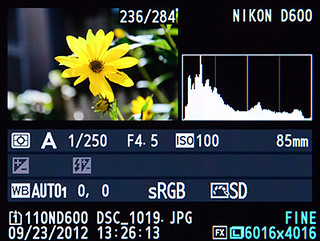
Nikon D600 playback histogram how to use learn manual guide tutorial book
Overview Playback Display option, which shows a thumbnail of the image along with the RGB histogram and shooting information.

The Histogram is used to help you determine if your image was under- or over-exposed, and you generally want to make sure the graph falls down to zero before it reaches the edges of the histogram chart. If the data runs off the right side or spikes against the right edge, it means that you have over-exposed areas of your image, and you will need to adjust your exposure settings or make use of Exposure Compensation for taking the subsequent image.

There are, of course, numerous other settings and features of the D600 that can help you take full advantage of your camera. My guides Nikon D600 Experience and Nikon D610 Experience go beyond the manual to help you learn the features, settings, and controls of these sophisticated and highly customizable cameras.  Most importantly, they explain not only how but also when and why to use the D600/D610 basic and advanced features, settings, and controls in your photography. You can learn more about the guides, preview them, and purchase them by visiting my Full Stop webpage or by clicking on the book covers below:

Nikon D600 book ebook camera guide download manual how to dummies field instruction tutorial   Nikon D610 book manual guide how to autofocus settings menu custom setup dummies learn use tips tricks

Purchasing the Nikon D610: If you are still contemplating the D610 and plan to buy, please consider using my affiliate links to make your purchase, and the retailer will give me a little something for referring you – thanks! You can click on the Amazon, B&H, or Adorama logos on the left of this page, or click here for the Nikon D610 on Amazon.

The First Canon 6D User’s Guide Now Available!

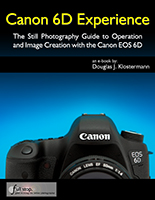
Canon 6D Experience, my newest Full Stop e book and the first EOS 6D user’s guide, is now available! This e book goes beyond the manual to help you learn the features, settings, and controls of the powerful and highly customizable full-frame Canon 6D. Plus most importantly it explains how, when, and why to use the functions, settings, menu options, and controls in your photography – including the autofocus system, exposure and shooting settings, and the in-camera features such as Multiple Exposure, HDR, RAW image processing, and the new Wi-Fi and GPS functions.

Written in the clear, concise, and comprehensive style of all Full Stop guides, Canon 6D Experience will help you learn to use your full-frame 6D quickly and competently, to consistently create the types of images you want to capture. This e-book is available in either PDF or EPUB format for reading on your computer, tablet, iPad, e-reader, etc.

Canon 6D EOS book manual dummies field guide instruction tutorial how to use learn full frame autofocus system

Learn more about it, view a preview, and purchase it here:

http://www.dojoklo.com/Full_Stop/Canon_6D_Experience.htm

As readers have said about Full Stop guides:

“An excellent guide, clear and concise. A great tool for budding photographer as well as the seasoned pro. A sure way to get the most out of your camera.”

and

“I don’t know how I could fully take advantage of all the features the camera has to offer without this publication! It’s well-organized, easy to understand, and succinct enough to keep your attention while still containing a wealth of information to get the most out of your camera.”

Take control of your Canon 6D, the image taking process, and the photos you create!

For Intermediate and Enthusiast Photographers:

This instant download Canon EOS 6D e book is designed for enthusiast dSLR photographers who wish to take fuller advantage of the capabilities of their camera:

  • Go beyond Auto+ and Program modes and shoot competently in Av, Tv, and M modes.
  • Take full control of the versatile autofocus system.
  • Learn how, when, and why to use and customize the various controls, buttons, and features of the 6D.

To get you started, it includes explanations and recommended settings for all Menu settings and Custom Function options of the 6D.  It covers basic dSLR camera functions and exposure concepts for those learning digital SLR photography, and explains more advanced camera controls and operation, such as taking control of the autofocus system for sharp focus of still or moving subjects, using the various metering modes and exposure compensation for correct exposure of every image, and taking advantage of the newer features found in the 6D such as in-camera HDR and Multiple Exposure Modes.

For Experienced Photographers to get up and running with the 6D :
For experienced photographers coming to the EOS 6D from other models, this guide explains the new and advanced features and settings in order to quickly get you up and running and taking advantage of these capabilities.  Plus it explains the camera controls, the in-camera HDR and Multiple Exposures features, in-camera image processing, introduces the HD video capabilities, Wi-Fi and GPS functions, and guides you through all the 6D Menu and Custom Function items in order to help you best set up and customize the camera and its controls for your specific shooting needs.

Canon EOS 6D ISO     Canon EOS 6D af autofocus point

Canon 6D multiple exposure shooting mode     Canon 6D wireless wi-fi wifi control ipad tablet iphone shootin
Example images from Canon 6D Experience:
High ISO sample, Autofocus AF Points in Viewfinder,
Multiple Exposure Shooting Mode, Wi-Fi remote shooting using smart device.

Canon 6D Experience not only covers the various settings, functions and controls of the Canon 6D, but also explains when and why to use them for your photography. The guide focuses on still-photography with an introduction to the movie menus, settings, and options to get you up and running with HD video.  Sections include:

  • Setting Up Your EOS 6D – Explanations of all of the Canon 6D Custom Function settings and Menu options, with recommended settings for practical, everyday use. These settings are a significant part of what makes the 6D such a powerful and versatile camera.  Set up and customize the advanced features to work best for the way you photograph.
  • Camera Controls – Description of all of the camera’s controls, how to customize them for your needs, and when and why to use them.
  • Aperture Priority (Av), Shutter Priority (Tv), and Manual (M) Modes – How and when to use them to create dramatic depth of field, freeze or express motion, or take total control over exposure settings.
  • Auto Focusing Modes and Drive Modes – How they differ, how and when to use them to capture sharp images of both still and moving subjects. Also how and when to use focus lock and back-button focusing.
  • Exposure Metering Modes of the Canon 6D – How they differ, how and when to use them for correct exposures in every situation. Also how to make use of exposure lock.
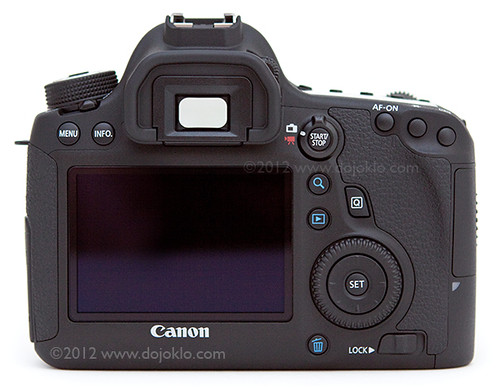
  • Histograms, Exposure Compensation, Bracketing, and White Balance – Understanding and using these features for adjusting to the proper exposure in challenging lighting situations or for capturing a range of exposures to combine into HDR images.
  • Wi-Fi and GPS – Introduction to the set-up and use of the camera’s built-in Wi-Fi and GPS. Wirelessly control the 6D, save, or share images with your smart device or computer, and geotag and map your photos.
  • Introduction to Video Settings – Explanations of the menus, settings, and options to get you started.
  • Composition – Brief tips, techniques, and explanations, including the creative use of depth of field.
  • The Image Taking Process – Descriptive tutorials for using the settings and controls you just learned to take still and action photos.
  • Lenses – Explanation of Canon lenses and choosing your next lens.
  • Photography Accessories – The most useful accessories for day-to-day and travel photography including those specific to the 6D, plus recommended photography books.

This digital guide to the Canon 6D is a 248 page illustrated e-book that goes beyond the 6D manual to explain how, when, and why to use the features, settings, and controls of the 6D to help you get the most from your camera.

Learn more about Canon 6D Experience, view a preview, and purchase it on my Full Stop website here:

http://www.dojoklo.com/Full_Stop/Canon_6D_Experience.htm

Canon 6D Hands On Review

Several weeks ago I wrote a post previewing the Canon EOS 6D, based on its specs and information available at its announcement. I’ve now had some hands-on time and have done significant research on the camera and its functions and features as I work on my latest e-book camera guide Canon 6D Experience. So now I am able to share some more insight into the body, controls, features, and handling of this very nice new full frame dSLR camera. And thanks to Newtonville Camera of Newton, Mass. for getting it into my hands so quickly!

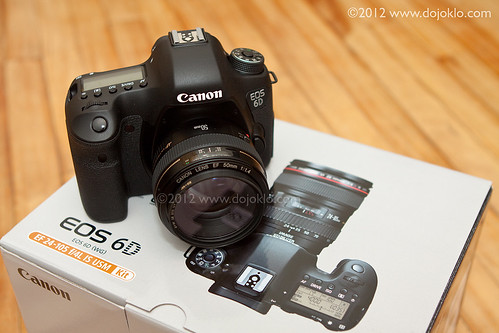
Canon 6D EOS unbox unboxing new full frame dslr review preview hands on test how to use manual guide dummies
The Canon EOS 6D Unboxing – shown here with a Canon 50mm f/1.4 lens attached, not the EF 24-105mm f.4L kit lens.

The EOS 6D is first “affordable” full frame camera from Canon, priced at about $2,100. This means it is a consumer level camera that boasts an image sensor the same size as a frame 35mm film – rather than the smaller APS-C sized sensors that have been the necessary compromise for so many years in order to offer highly capable dSLRs which are still affordable to enthusiast photographers. With the availability of the 6D, many more photographers will now be able to gain the benefits of full frame photography, including the ability to use your lenses at their “intended” focal lengths (no more 1.6x crop factor) as well as obtain great image quality, resolution, and low noise at high ISO settings.

The Canon 6D is aimed at intermediate and dedicated enthusiast photographers (and dSLR beginners willing to learn!), not only with its price and body size, but also with its features and straightforward controls and menus. It is obviously not as fully-featured as the professional-level 5D Mark III, yet it contains nearly every feature that the majority of “non-pro” photographers will need. Besides the much more basic 11 point autofocus system (vs. the 61 AF points of the 5DIII), what the 6D leaves off are often very specific customization options that even some pros never get around to figuring out or using. Plus the 6D adds a couple new features previously not yet seen on a Canon dSLR such as built-in WiFi and GPS.  Most importantly, with its 20.2 megapixel sensor, the image quality of the 6D should prove to be nearly at the level of the 22.3 megapixel 5D MkIII.

As the author of dSLR user guides, my primary interest is more with the controls, features, functions, and “real world” use of any camera – as opposed to the image quality/ sensor issues (resolution, dynamic range, noise, etc.), which I leave up to DP Review, DXOMark, and other sites to examine in depth.  Although I will discuss and give examples of some of these issues in this post, I direct you these other sites to view sample/ comparison images and read detailed discussions of sensor and image quality issues.

Body: Weight and Size: The very first thing I noticed when picking up the camera is how incredibly light it is.  Granted, it was just the body only without a lens attached yet, but I was pleasantly surprised at its light weight. The body only (w/o battery) weighs a mere 1.5 lb. (680g), much lighter (relatively) than the full frame 5D Mark III (1.9 lb./860g) and the APS-C sized 7D (1.8 lb./820g).  The EOS 6D is nearly the same weight – and size – as its closest sibling the (smaller APS-C sensor-sized) EOS 60D, and truly represents an important milestone in dSLR evolution where a full-frame sensor and several advanced features fit into a similar body as an mid/upper-level consumer camera.

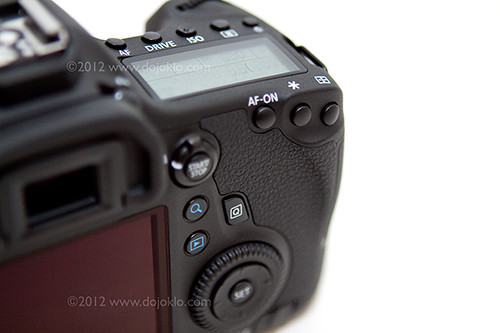
Body: Controls and Feel:  The controls of the 6D are similar to those of the 60D. It shares many of the same buttons (though some are relocated) as well as the thumb-pad Multi-Controller that sits inside the rear Quick Control Dial. This replaces the thumb-joystick version of this controller that was seen on all non-Rebel Canon dSLR cameras up until the 60D. Personally I am still not a fan of this thumb-pad, as the joystick is more comfortably located for autofocus selection, and I also find that I sometimes accidentally hit the thumb-pad while turning the Quick Control Dial when navigating menus, and thus suddenly jump to a different menu option. I also prefer to have the Playback and Delete buttons on the left side, so that I can access them with my left thumb, perhaps due to much more experience and muscle-memory with that set-up. However, these are simply a matter of getting use to the locations and sensitivity of the controls – after some use, muscle memory and habit typically allows one to easily use the controls they are provided with. The top Main Dial (for adjusting aperture and changing various settings) has a great “soft” feel as if made of firm rubber rather than the harder plastic of lower-end models. The rubber of the grip areas also feels great, no complaints regarding the over-all ergonomics of holding and carrying the camera, and the body feels perfectly solid.
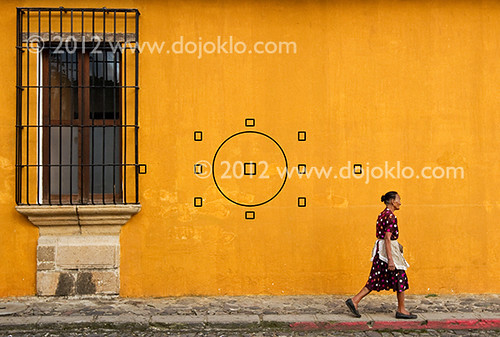
Canon 6D EOS unbox unboxing new full frame dslr review preview controls button autofocus hands on test how to use manual guide dummies
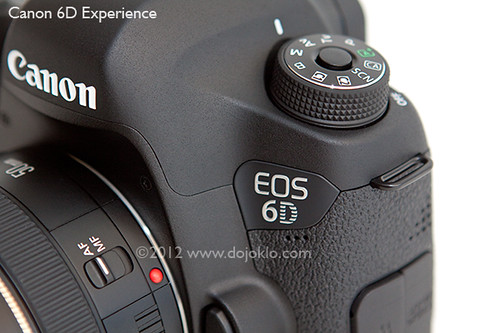
Detail of the Canon 6D, including some of the buttons and controls.

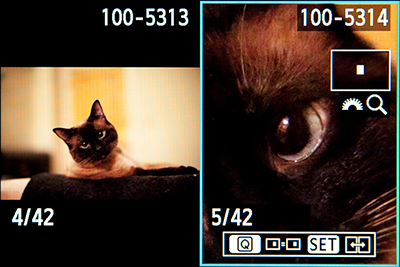
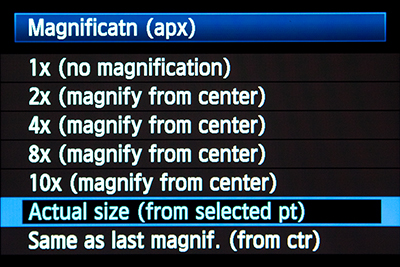
There are several “quirks” to get used to with the 6D if you are accustomed to working with a different Canon body such as a 50D, 7D, or one of the older 5D models. Primarily, the 6D has the new single Magnify Button introduced on the 5DIII, rather than the Zoom-in/ Zoom-out buttons of previous models. Your muscle memory will definitely cause you frustration with this one for awhile until you get used to reaching for this new button rather than using the top-right rear buttons for zooming in and out during image playback. Now during image playback, you press the Magnify Button located just above the Playback Button, and then use the top Main Dial to zoom in and out. One of the advantages of this Magnify Button is that its initial magnification level is customizable from 1x to “zoom-in immediately to pixel level on the area of the image where you focused” (Actual size from selected point). Instead of pressing the Playback Button and then zooming, you can simply press the Magnify Button and immediately view the image at your zoom-level of choice. I found that I actually prefer to set the Magnify Button for 1x zoom. Then after taking an image, I can press the Playback Button to view the thumbnail of the image with the histogram (since I leave this as my default Image Playback view), or press the Magnify Button to immediately see the image full-screen. Using the two buttons, I can easily toggle between these two views.  Others will enjoy immediately zooming in on the area where they focused to ensure that it is indeed in-focus.

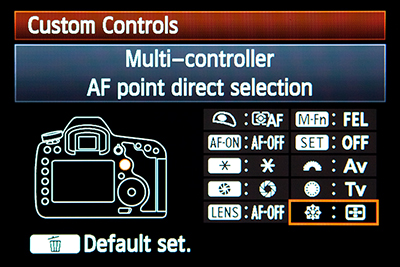
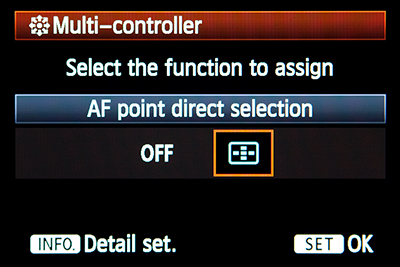
As with the 7D and 5DIII, the 6D has the ability to customize the various buttons and controls of the camera. I recommend that you use these Custom Functions to set the Multi-Controller to AF Point direct selection. That way you can simply use the Multi-Controller to manually select your desired AF Point instead of having to first press the AF Point Selection Button. However, if you do this, the SET Button will not select the center AF Point, as you may be used to from other cameras. Instead it will activate whichever function you set the SET Button for. But if you press the AF Point Selection Button first and then use the Multi-Controller, you can then still use the SET Button to select the center AF Point, which can be very convenient for quickly choosing this point.

The 6D has the Live View/ Movie switch and START/STOP Button which makes it quick and easy to switch between the two, start Live View, or begin Movie recording. However, this may bring you to another “quirk” (ok, it is not really a “quirk,” more a necessity of design and function, but until you realize that you may feel like it is a quirk!).  There are a couple functions that will be greyed-out in your menus if you have a certain conflicting setting option set. For example, some features will not be available (like HDR Mode) if you have the image quality set for RAW or JPEG+RAW.  You will have to switch to JPEG only in order to access these features.  Or you cannot access the Multi Shot Noise Reduction feature if you have Long Exposure Noise Reduction enabled or if you are shooting in RAW. This is bound to aggravate you at first as you try to determine why the function is greyed-out and not accessible in the menus. So, back to the Movie function, you cannot begin movie shooting if you have WiFi enabled. Thankfully with this particular incompatibility, the camera will alert you to this on the rear LCD Monitor. With the other conflicting settings, you are simply going to have to learn and remember the conflicting option.

As with the 60D, the 6D has the top row of buttons that only access one function (such as ISO or Drive Mode) rather than two functions as with previous/ other Canon models. However, this means you can press the button and then use either the top Main Dial or the rear Quick Control Dial to change the function. Or you can always use the [Q] Button and Quick Control Screen to access these functions or other functions that there is not a dedicated button for, such as Image Quality, White Balance, or Flash Exposure Compensation. And Canon has continued the use of the locking Mode Dial, which I prefer as there have been many times my 50D Mode Dial was accidentally turned when pulling the camera out of its bag.

Brief Commercial Interruption: I have completed my e-book guide to the Canon 6D, called Canon 6D Experience. The guide covers all the controls, functions, features, Menus options and Custom Function settings (with recommended settings), autofocus system, exposure, metering, and more. Plus most importantly, it explains how, when, and why to use the various controls, features, and functions of the 6D. Click the link above or the cover to learn more, preview, and purchase the guide.

Canon 6D EOS book manual dummies field guide instruction tutorial how to use learn full frame autofocus system

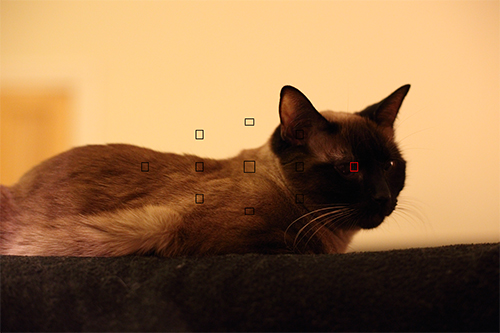
Use and Response: There really isn’t too much I can say about the 6D in action, as it performs as expected.  Not really any complaints, aside from my personal issues with the controls issues I described above.  The autofocus response is quick and accurate in normal use. I realize now that I was paying more attention to my photographic tasks and wasn’t paying particular attention to the AF performance as I was out and about with the camera, and didn’t specifically test the center vs. outer points, so I need to get back out and do that.  But on the other hand I didn’t notice and wasn’t limited by any issues or shortcomings.  In low light, night-time scenes, such as the in-camera Multiple Exposure image below and the in-camera HDR image above, the camera locked right on and focused well with the center and outer points. In extremely low light when using the outer points, it did not seem to react as quick and instantaneous – in my experience so far – as the highly advanced AF system of the 5DIII. For example the 5DIII could immediately find focus on the black face of a cat in very low light, while the 6D needed me to find a slightly stronger area of contrast on the kitty’s face before it locked on. But you can see from the exposure settings and the lack of contrast in the focus area of the image below, it still performed rather admirably for the situation (I focused just above the eye and recomposed slightly).

Canon 6D eos in camera hdr mode autofocus af system low light high iso hand held
Canon 6D – In-camera HDR Mode, with three images automatically combined and processed in-camera. “Adjust Dynamic Range” setting +/-1, “Auto Align” enabled, hand-held. Resulting image 1/40, f/2.8, ISO 6400. This image was also automatically geotagged with the GPS, as can be seen on Flickr.


A closer look at the above image.  I focused at about the center of this image, where the white meets the blue dome, though it may have focused on the closer branches.  Keep in mind this was handheld, for 3 images that were aligned and combined in camera.

The center cross-type AF point of the 6D is said to be even more sensitive (both in specifications and by users in real life use) than that of the 5DIII (according to Canon, the 6D center point is EV -3 while the outer points are EV +0.5; 5DIII is EV -2 all points; 60D is EV 0 all points).  Unfortunately I now realize I did not test the center point in this situation, and I will have to go back and do that.  So, I acknowledge it is premature for me to take away any conclusions about the extreme low light AF performance of center vs. outer points before I re-examine this further. Others are already saying that the center AF Point is stellar in very low light. And I did not test the AF system for tracking moving subjects using AI Servo yet. What does all this EV info mean?  If you are a wedding photographer or a concert photographer and simply need to get the shot and capture a very precise moment with no delay, then you may prefer to work with the 5D Mk III. If you are not working on assignment and perhaps have 1 extra second to re-position an outer AF point on an area of slight contrast, or else use the center AF point and recompose in dark situations, then you will certainly still be able to capture great low light shots with the 6D.

Canon 6d autofocus af low light auto focus system sample image center outer af point
Canon 6D Autofocus in low light – I had to focus just above the eye where dark meets light, and then I slightly recomposed. But as you can see from the settings, it was very low light, and that type of performance is a major accomplishment for any camera: f/2.5 1/60 ISO 6400 (screenshot from DPP in order to show AF points.)


A closer look at the above image. I think due to the high ISO setting some sharpness was lost, but that could be recovered with sharpening.

WiFi: The Canon 6D is the first of their dSLR models to incorporate built-in WiFi and GPS capabilities. Neither of these is something I thought I needed – but I can already see the benefits. With the 6D you can wirelessly connect your camera to your computer, smart phone/ tablet, wireless network, printer, or TV to perform a variety of functions:

Computer: when wirelessly connected to your computer, you can make use of the included EOS Utility software to remotely control the camera (change settings and release the shutter) and save the images directly to your computer.  Previously you could do this only through the use of a USB cable.

Canon 6D wifi wireless tablet ipad iphone smartphone android share connect upload test review preview hands on
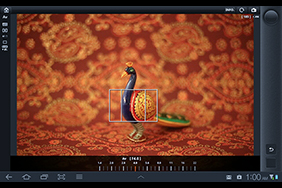
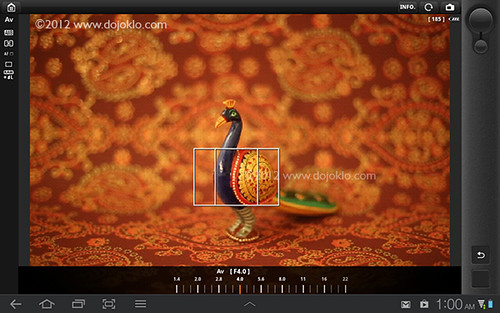
Canon 6D WiFi – Control the camera remotely with an iPhone, iPad, or tablet.  Here the aperture setting is being changed, and the focus area is positioned on the subject.

Smart Phone/ Tablet: You can also control your camera through your smart device (iPad, iPhone, Android phone or tablet) using the free EOS Remote app, and this takes it to a higher level than with EOS Utility. You can actually monitor on your device what the camera is seeing, as if you are seeing the camera’s Live View screen on your device.  You can change some settings (like aperture, shutter speed, ISO), move and resize the focus area to tell the camera where to focus, and release the shutter. You can also view the images that are on the camera’s memory card, and transfer images from your camera to the device, however they will be reduced size JPEGs.

Wireless Network – Internet Services: You can set up your camera with websites including Canon Image Gateway, Facebook, Flickr, Twitter, and YouTube, and directly send images or videos to these sites – straight from the camera! (Some instances like Twitter will merely share a link to the image on Canon Image Gateway, but with Facebook the actual image will appear.)

Canon 6D wifi wireless facebook share connect upload test review preview hands on
Canon 6D WiFi – Send your images directly to Facebook (or links to Twitter, or movies to YouTube) straight from the camera.

TV and Printer: You can wirelessly show a slideshow of the images on your camera with a compatible TV, or print images directly from the camera with a wireless compatible printer.

The great thing about these wireless functions is that they are actually easy to set up and use (at least in my experience). By following the simple instructions in the manuals and the prompts on the camera’s screen and the software and apps, you can just keep clicking OK (and enter your password and name your connections) as the camera finds the network or device and connects them together. The EOS Utility software also automatically installs a “device pairing” function on your computer that finds the camera and easily lets you connect. The biggest challenge was setting up the connections to the Internet sites (Facebook, Twitter)  since the instructions were not straightforward. But once you determine that you need to first connect the camera via USB to the computer then open EOS Utility, the right set-up screen is available on EOS Utility.  Then the Internet sites can be selected and registered with the camera, and it works great. There are lots of intimidating wireless set-up option screens on the camera that may have to be used if the connections to your wireless network or devices are not so straightforward.

GPS: The built-in GPS function can be enabled so that your images are automatically geotagged with data such as location and elevation. You can even log your camera’s journey – even when the camera is turned off (as long as it can “see” the satellites) – and then view the route on a Google map (with the included Map Utility software). You can set the camera to communicate with the satellites at anywhere from every 1 second to every 5 minutes, though note that this will drain the battery to some extent.

Functions and Features: The 6D has all of the features of the other current Canon dSLRs, such as in-camera HDR Mode, Multiple Exposure Mode, Handheld Night Scene mode, and various Noise Reduction features. In my standard camera use, I don’t typically have a need for many of these types of features, but they might come in handy or be fun to experiment with for many users. The image rating option is also included and can be quickly accessed during image playback. While initially this seemed unnecessary for me, I have found that it is a great time saver for marking either really good images or likely deletions, both of which require a quick review on a full size monitor once back at my computer – and now can be easily located with their 1 to 5 star rating.

Canon 6D EOS multiple exposure how to manual instruction use review preview hands on tutorial dummies guide book
Canon 6D Multiple Exposure mode used to create a multiple exposure image in-camera, combining three images. Multiple Exposure Control setting: “Average” used here, as it works best for night/ dark scenes. This image was also automatically geotagged with the built-in GPS, as can be seen on Flickr.

The fast Digic 5+ processor of the 6D also allows for some lens correction features – Peripheral Illumination Correction and Chromatic Aberration Correction – to correct for issues introduced with some lenses, several of which are pre-registered in the camera. These types of corrections can also be done with specific lens profiles in Lightroom or Photoshop, so you will need to decide if you want to make these corrections with more control in post processing.  However, if you will be outputting JPEG files, you may want to take advantage of this in-camera.  You can even apply the corrections in-camera after the fact if you have shot in RAW. There are also several other in-camera RAW processing options which will allow you to fully process the image in camera (for brightness, Picture Style, White Balance, JPEG size, etc.) and output a JPEG file for immediate use.

One other nice feature is that not only does the 6D have lens autofocus microadjustment capability to correct for minor autofocusing distance issues, but (as with the 5D Mk III) you can adjust separately for the wide end and tele end of a zoom lens! Of course this means a lot more work in your AF microadjustment process. Also, through the Custom Functions you can choose the number of shots to take during bracketing, either 3, 2, 5, or 7. This is extremely desired by HDR shooters who were previously frustrated with the 3 shot limit.

On the down-side, the 6D has a relatively slow continuous shooting speed of 4.5 frames per second, and no Low-speed and High-speed Continuous settings – unless of course you use Silent Continuous Shooting at 3fps (though be aware that use of the Silent Drive Modes can result in slight shutter lag). This slower maximum rate, along with the less sophisticated 11 point AF system may limit the camera’s appeal to sports and action shooters who need to track moving subjects. (“Less sophisticated” = not as many AF Points as the 7D or 5DIII, only 1 cross-type AF Point, not as many options to customize how it tracks and responds to moving subjects.) Action photographers should look instead at the Canon 7D or 5D Mark III.) On an unrelated note, I should also mention that the 6D has a slower 1/180 flash sync speed.

Menus and Custom Functions: The 6D has the standard menu interface and options as the other current models. You can adjust and customize a few more settings than with the 60D, but the menus are reduced and simplified a bit from the 5DIII.  For an enthusiast photographer this is generally a good thing, as the 6D contains most all of the customization options that you will need, without overwhelming you with extremely specific or advanced items that are found on the 5D Mk III. After becoming familiar with the 5DIII however, it is interesting to note what options were left off, such as additional Multiple Exposure and in-camera HDR Mode processing options, no Auto level for LCD Brightness, and the elimination of some of the extremely precise, nearly “hidden” Custom Controls sub-sub-menus and options.

But the 6D does contain the additional ISO settings used to specify the minimum and maximum ISO available for you – or the camera in Auto ISO – to select, plus the minimum shutter speed for the camera to use in Auto ISO.  If you choose to use Auto Lighting Optimizer, you can tell the camera to turn it off when shooting in M (since you will want full control of your exposures and don’t want the camera to over-ride your careful settings).  A nice feature is the Safety Shift options, where instead of merely enabling the camera to over-ride your settings if it needs to in order to obtain the proper exposure, you can specifically tell it shift either the shutter speed/ aperture setting, or the ISO setting.  Generally, I believe, it will be better to shift the ISO setting in order to obtain the exposure, as you probably intentionally selected your aperture or shutter speed. The Custom Setting for autofocus Tracking Sensitivity now helpfully lists the options as “Locked On” and “Responsive” rather than the previous vague and confusing notations, so you can tell the camera to remain locked-on to your subject or to be more responsive and begin focusing on a new subject that enters the field of view of your active AF Point.

The Orientation Linked AF Point feature is much simplified from the 7D and 5DIII in that you do not need to pre-register the desired points, but rather the camera makes use of the current, manually selected AF points for each specific camera orientation, and then returns to them when you hold the camera in that orientation.

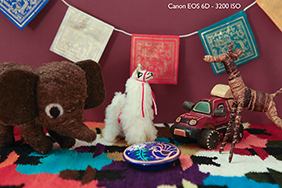
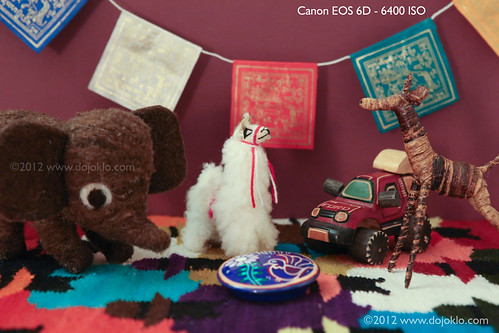
Image Quality: I am not a pixel peeper, I am more of the “just get out there and shoot” variety, and I believe that most all the current consumer cameras – including the 6D – offer more than enough in terms of image quality and low noise for most every photography from enthusiast to semi-pro. So I will leave it up to DP Review and other sites to evaluate the image quality and sensor performance. I have shot some informal ISO tests, which can be viewed on Flickr. For pixel peepers, here is a 6400 ISO, 100% crop detail of the scene below, with no in-camera Noise Reduction or White Balance correction.

Canon 6D high iso noise full frame test review preview hands on
Canon 6D full frame sensor – high ISO noise performance. Click image to see larger version with notes of all the settings.

Video: Oops, I just realized that I forgot to discuss this in the review!  I will come back to this, but it is interesting to note that while the 6D has manual audio input level control, the Wind Filter and Attenuator, it lacks a headphone jack for monitoring audio.

Manuals: Canon has unfortunately followed the trend of not including the full printed manuals with the camera.  While the camera comes with the printed version of the basic instruction manual and “pocket guide” for the camera, plus the basic WiFi/ GPS manual, you have to access the PDF files on the included disc for the full camera manual, the full detailed manual for WiFi, plus the instruction manuals for the software including Map Utility and EOS Utility. Of course you need the full manual to properly set up and learn all the features of the camera, plus you will need to look at some of the the other manuals in order to learn how to get your camera connected to Internet services.  It is a bit frustrating not to have these at hand to quickly refer to.  Fortunately if you have an iPad or tablet, you can download the PDF version of all the manuals from the Canon website and easily read and search through them and take them with you.

However, to quickly learn all the essential and important features of the camera, how to set up the menus and Custom Functions, and learn how, when, and why to use the various controls, features, and functions of the Canon 6D, have a look at my e-book guide Canon 6D Experience.

Canon 6D EOS book manual dummies field guide instruction tutorial how to use learn full frame autofocus system

Conclusion: Overall I think the Canon 6D is an excellent dSLR camera, a very good value for the price, and should easily meet or exceed the needs of most enthusiast and dedicated photographers. It provides the wonderful possibility for a non-pro or aspiring-pro to finally shoot with an affordable full-frame camera. Landscape photographers should enjoy this, as their wide angle lenses will once again act as true wide angle lenses, and be able to capture sweeping vistas.  It should provide general, portrait, and travel photographers with the controls, features, durability, and image quality they desire. Sports, wildlife, and action photographers may not find what they need, however, due to the limited 4.5 frames per second continuous shooting speed and the less sophisticated 11 point autofocus system with only one cross-type point. edit 12/13/12DXOMark summarized it well when they concluded that the 6D “is a high-end, full-frame camera ideal for enthusiast and advanced photographers, or professional photographers looking for a second camera body. Its resolution and AF system mark it out as a camera that is aimed at those shooting portraits or landscapes, where good resolution and a full-frame sensor are key, but where the fastest AF is not as important.”

Designed as a consumer-level camera, a few features (or lack of features) – such as those mentioned – obviously prevent it from being a full-fledged professional level body for highly demanding users (at least not the primary body), but its sensor, image quality, and capabilities will certainly provide anyone with the potential to take professional quality images – and in most situations capture exactly the image you intend. And that, in the end, is the number one goal of photography!

If you enjoyed this post, please be sure to share it, mention it, or link to it!

If you are going to be ordering your Canon 6D online, please consider using my affiliate links below or on the left side of the page (Amazon, B and H, Adorama). Your camera (or other gear) will be the same price, but they will give me a small referral bonus – thanks!

Canon 6D on Amazon (body only or 24-105mm f/4L kit)

Canon 6D at B and H Photo – body only

Canon 6D at B and H Photo – with the 24-105mm f/4L IS kit lens

Nikon D600 E-Book User’s Guide Now Available!

Nikon D600 Experience – The Still Photography Guide to Operation and Image Creation With the Nikon D600 is an e book user’s guide that goes beyond the manual to help you learn the features, settings, and controls of this sophisticated and highly customizable camera.  Most importantly, it explains not only how but also when and why to use the camera’s basic and advanced features, settings, and controls in your photography.

Nikon D600 book ebook camera guide download manual how to dummies field instruction tutorial

Written in the clear, concise, and comprehensive manner of all Full Stop dSLR camera guides, Nikon D600 Experience will help you learn to use your D600 quickly and competently, to consistently create the types of images you want to capture. As one reader has said about Full Stop guides:

“I don’t know how I could fully take advantage of all the features the camera has to offer without this publication!  It’s well-organized, easy to understand, and succinct enough to keep your attention while still containing a wealth of information to get the most out of your camera.”

For dSLR users from Experienced to Enthusiast:

For experienced photographers coming to the D600 from the D90, D7000, D5100, etc., this guide explains the new and advanced features in order to quickly get you up and running and taking advantage of these capabilities, including the sophisticated 39 Point Autofocus System and all its AF Modes, AF Area Modes, and Custom Settings.  Plus it explains the camera controls, the in-camera HDR, Multiple Exposure, and Time Lapse features, introduces the video capabilities, and guides you through all the Playback, Shooting, and Setup Menus, Custom Settings, and Movie Mode Menu settings of the D600 in order to help you best set up the camera and its controls for your specific shooting needs.

For intermediate and enthusiast photographers this instant download Nikon D600 e book will help you learn to take fuller advantage of the capabilities of your camera:

  • Go beyond Auto and Program modes and shoot competently in A, S, and M shooting modes.
  • Take full advantage of the sophisticated 39 point autofocus system.
  • Learn how, when, and why to use and customize the various controls, buttons, and features of the D600.

To get you started, it includes explanations and recommended settings for all Menu options and Custom Settings of the D600.  It covers basic dSLR camera functions and exposure concepts for those learning digital SLR photography, and explains more advanced camera controls and operation, such as taking control of the powerful autofocus system for sharp focus of still or moving subjects, using the various metering modes and exposure compensation for correct exposure of every image, and taking advantage of other features of the D600 such as in-camera HDR and Multiple Exposure Mode.

Nikon D600 book ebook download manual guide instruction tutorial how to dummies   Nikon D600 book ebook download manual guide instruction tutorial how to dummies

Nikon D600 book ebook download manual guide instruction tutorial how to dummies   Nikon D600 book ebook download manual guide instruction tutorial how to dummies
Example images from the text of Nikon D600 Experience

You can preview Nikon D600 Experience at the Full Stop webpage:

Nikon D600 Experience not only covers the various settings, functions and controls of the Nikon D600, but it also explains when and why to use them for your photography. The guide focuses on still-photography with an introduction to the movie menus and settings to get you up and running with video. Sections include:

  • Setting Up Your D600 – All of the D600 Custom Settings and Playback, Shooting, and Setup Menus, including Movie Mode Menus, with explanations and recommended settings for practical, everyday use. Set up and customize the advanced features of your dSLR to work best for the way you photograph.
  • Aperture Priority (A), Shutter Priority (S), and Manual (M) Modes – How and when to use them to create dramatic depth of field, freeze or express motion, or take total control over exposure settings.
  • Auto Focusing Modes and Area Modes and Release (Drive) Modes – The 39 point D600 autofocus system is a is a powerful tool, and taking control of it will enable you to successfully capture more sharp images, especially in action situations.  Learn the AF Modes, AF Area Modes, and AF Custom Settings, how they differ, how and when to take advantage of them to capture both still and moving subjects. Plus how and when to use focus lock.
  • Exposure Metering Modes of the Nikon D600 – How they differ, how and when to use them for correct exposures in every situation, and how to customize them for your needs. Also how to make use of exposure lock.
  • Histograms, Exposure Compensation, Bracketing, and White Balance – Understanding and using these features for adjusting to the proper exposure in challenging lighting situations, and setting custom white balance.
  • Composition – Brief tips, techniques, and explanations, including the creative use of depth of field.
  • The Image Taking Process – Descriptive tutorials for using the settings and controls you just learned to take photos of both still and moving subjects.
  • Photography Accessories – The most useful accessories for day-to-day and travel photography including accessories specific to the D600.
  • Introduction to Video Settings – Settings and explanations to get you started.

This digital guide to the Nikon D600 is an illustrated e-book that goes beyond the D600 manual to explain how, when, and why to use the features, settings, and controls of the D600 to help you get out there shooting in the real world.  It is available in instant download PDF and EPUB formats.

Title:  Nikon D600 Experience
Author:  Douglas Klostermann
Page Count:  217, illustrated
ISBN #: 978-1-3017-2999-9
Price: $14.99

What Readers are Saying about Doug’s previous guide Nikon D7000 Experience:

This book, together with the manual that came with your camera, is all you need to start discovering the full potential of the D7000.
-Max M.

It’s the first guide I’ve read which has taken me through all the settings in an understandable way. I now feel that I have control over the camera.
-Peter S.

Really practical and tremendously helpful. Readers of this e-book can expect to benefit from a more rewarding photographic experience using this superb camera, and be better able to exploit its potential to match their personal objectives and photographic style. Highly recommended.
-M.M.

I would recommend this to anyone who wants to get a quick start to using the D7000.  Manuals are nice, but this eBook highlights the important information and gives a quick easy to understand explanation of most all of the functions and controls.
-Ray M.

I found the Nikon manual good for understanding how to set things up but not much on the why – this book really focuses on the WHY.  The guide helped me understand why to use specific settings for specific needs.  The Custom Settings sections helps to make firm decisions on how to apply settings by understanding the usage of each in addition to knowing how to set them up.
-Benoit A.

This manual is a clearly written, concise and useful explanation of the rationale for the seemingly infinite and often confusing settings options for the D7000. Used in conjunction with the Nikon manual I feel a bit more confident in understanding how to at last proceed in getting better photographs.
-W.L.S.

It’s clear, concise and gets to the heart of the camera’s multiple and often confusing options. Very highly recommended – for experienced user and beginner alike. As previous reviewers have remarked, the official manual is very good on what to do, but not so clear on why.
-G.S.A.

A well written, professional helpful guide – Brilliant, just what I was looking for! A manual for the D7000 that was exciting, clear to follow, had examples and was used by a professional who gave just the right amount of technical with explanations of why you use those settings, when to use those settings and so on, all properly explained. The book is a revelation, a joy to follow, well thought through and well written. Nikon should be employing Doug to write every one of their cameras manuals.
-R.D.C.

Nikon D600 vs. D7000 vs. D300s

Comparing the Nikon D600 vs. D7000 vs. D300s:

I’ve written a previous post comparing the Nikon D7000 vs D90 vs D300s, as well as one comparing the current Nikon dSLR line-up of the Nikon D7000 vs. D5100 vs. D90 vs. D3100.   Now that the full frame Nikon D600 has been introduced (and almost immediately made available for sale), I need to revisit these comparisons to include this latest Nikon dSLR.  I am going to focus on the D600 vs D7000 vs D300s here, with some D90 specs thrown in, but leaving out the D5100 plus the more expensive D800 full frame (FX) model for now until I get the chance to incorporate them into the discussion.

Nikon D600 vs D700 vs D300s compare choose which one decide review full frame fx dx size body weight
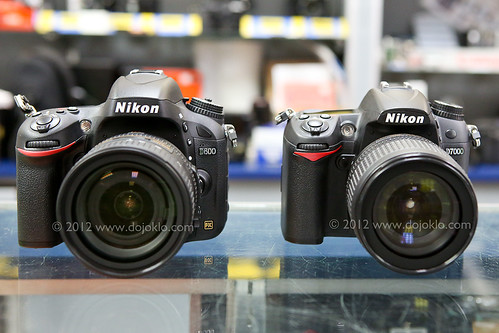
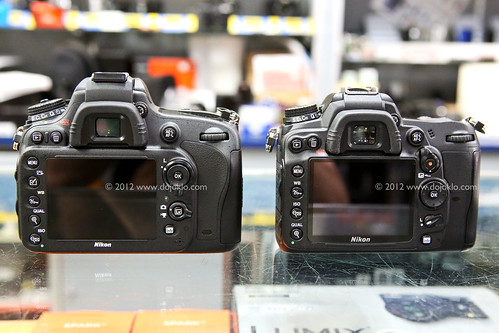
Nikon D600 vs Nikon D7000 – comparison of body size and controls of the full frame FX vs the APS-C sized DX format dSLR cameras – image by author, courtesy of Newtonville camera of Newton, Mass.

The introduction of the full frame (a.k.a. FX format) sensor sized Nikon D600 has expanded the Nikon dSLR line-up, and perhaps made it even more challenging to determine which camera is right for you.  To get a sense of where the D600 sits, it is designed to be the first full frame dSLR aimed at the photography “enthusiast” – in both features and price (about $2100).  (Full frame or FX format means that the sensor is the same size as a frame of 35mm film.) It does not have quite all the features, continuous frame rate speed, larger and more rugged body, external controls, and customization options as a professional level dSLR like the Nikon D800, yet it still offers more than enough in terms of image quality, features, controls, and durable construction for most any serious enthusiast.  I would even contend that it is plenty capable as a semi-pro’s full frame body or second body, or even a smaller, lighter weight option for sometime-use by a pro.

Sitting Between the D7000 and D800: The D600 has been described by Nikon as sitting between the APS-C sensor sized (DX) D7000 and the full frame (FX) D800.  What that means is that, first, it has the approximate size, weight, and “feel” of the pro-sumer D7000.  This “FX camera in a DX body” is a desirable feature for a lot of photographers, especially those carrying and using their camera all day such as when traveling.  Plus it incorporates the sophisticated and customizable 39 point autofocus system of the D7000, along with that camera’s “user-friendly” interface and controls (the autofocus system has actually even been improved over the D7000 in terms of greater sensitivity).  This makes it an easy transition for D7000 users wanting to go full frame, or wanting to simultaneously work with both bodies.  Yet is also boasts some technology borrowed from the higher end D800 like the HDMI output, uncompressed video recording, and improved exposure metering.

Nikon D600 vs D700 vs D300s compare choose which one decide review full frame fx dx
Detail of the Nikon D600 full frame dSLR camera – image by author

The Second Highest Rated Sensor:  Previously, in order to offer a high-quality, fully featured yet affordable camera for enthusiasts and semi-pros, the compromise was a smaller sensor – the APS-C sized sensor (or what Nikon calls the DX format) which is about two-thirds of the size of a full frame sensor.  Larger sensors have always been desired for several reasons:  they typically deliver better performance in terms of improved resolution, increased dynamic range, and improved low light / high ISO performance.  In other words, the images have much better detail and can withstand serious cropping, display a fuller range of colors and tones, and are cleaner with less digital noise, especially in low light situations.  And indeed the sensor of the D600 lives up to these expectations – in fact it is the second highest rated sensor on DXOmark, behind only the Nikon D800E and D800 (the D800E is the D800 without the anti-aliasing filter in front of the sensor). So in terms of image quality for the price, the D600 really can’t be beat at this point.

The full frame sensor will also affect the field of view of your lenses. For those moving from an APS-C sized (DX) sensor camera to a full frame body, a 50mm lens will now act as a true 50mm lens – no more 1.5x crop factor to consider. This means that your wide angle lenses will now act as true wide angle lenses, but your telephoto lenses will no longer have quite as much reach as you may be used to.  But in the interest of lens compatibility, Nikon DX lenses can be used with the D600 and the camera will automatically crop the images as if using a DX sized sensor (so the sensor is reduced to 10.5 MP).

I first introduced the Nikon D600 in my post The First Affordable Full Frame dSLR, and there you can learn about a lot of the camera’s specifications and what they mean as far as real-life photographic use.  Here I will try to spell out the difference in specs and how that might affect your choice.  As I always like to point out, when you are trying to determine which camera to purchase or upgrade to, you need to first consider and determine your needs, and then see which camera fills those needs. Not the other way around where you look at the new features and speculate if you really need or will use them. The latest cameras almost always have more impressive features and specifications than the preceding models, but if your needs and shooting style don’t required those upgrades then it is possible that you can save some money and be completely happy with a less expensive or earlier model (and spend your money on better lenses!)

Nikon D600 vs D700 vs D300s compare choose which one decide review full frame fx dx size body weight
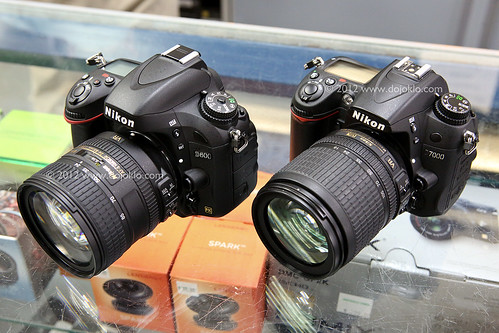
Nikon D600 vs Nikon D7000 – comparison of body size and controls of the full frame FX vs the APS-C sized DX format dSLR cameras – Click on this image to have a closer look.  Image by author, courtesy of Newtonville camera of Newton, Mass.

Sensor and Image Quality: The image sensor of the D7000 was greatly improved over both the D90 and the D300s, and now the sensor of the D600 is an even greater leap.  The D7000 has 16.2 megapixels, where the D90 and D300s each have 12.3 megapixels.  The D600 boasts 24.3 megapixels.  In addition to its dramatic improvement in resolution, I noted above the other image quality advantages of a full frame sensor, as well as how that will affect your lenses’ field of view.  This increase in resolution will also allow for more intrusive editing of the files in Photoshop, the ability to crop a picture and still obtain an image with high enough resolution for printing or display, and allow for larger prints.  You can have a look at dxomark.com to compare the sensors – run your mouse along the red-to-green color bar to the right of the Measurement graphs (such as Dynamic Range) to see how these differences affect images.  You can see from the charts that there are some significant improvements over the sensor of the D7000.

Exposure Metering: As with the D7000, the D600 has a 2016 pixel RGB metering sensor – although Nikon has stated that this latest version is improved over the D7000.  Both of these are certainly improved compared to the D90 and D300s, and will result in better TTL metering performance of straightforward and complex lighting scenes, such as back-lit situations.  All of these Nikon cameras offer Matrix metering, Center-weighted average metering, and Spot metering. With center-weighted metering, the D600 offers the option of an 8, 12, 15, or 20mm center circle for its weighting, or simply an old-fashioned Average reading.  The D90 makes use of your choice of a 6, 8, or 10mm center circle for its weighting, while the D7000 and D300s add a 13mm circle option to that.  A nice feature of Nikon dSLR cameras is that the Spot Metering is linked to the active AF Point, so in the image below, the AF Point was placed on the subject’s face, and the camera determined metering there (rather than requiring me to first meter where I wanted and then lock the exposure as Canon Spot Metering requires).

Nikon D600 full frame FX sensor backlit backlighting active d lighting exposure metering spot
Nikon D600 – Use of Spot Metering and Active-D Lighting in severe backlit situation.  As you can see, you still need to know how to make use of the metering modes and determine a proper exposure, as the camera can’t perform magic.  Use of fill flash in this situation resulted in better exposure and contrast on the subject.

Autofocus: The autofocus system of the D600 is similar to the D7000 AF system, with its 39 AF points and 9 more sensitive cross-type points (clustered in the center).  However, you can see that the AF points are spread much more widely across the viewfinder with the DX sized D7000:

Nikon D7000 vs D600 viewfinder DX FX compare choose vs which one af autofocus point 39
Simulated view of Nikon D7000 viewfinder, showing the location of all the autofocus AF points (and the viewfinder grid that can be turned on or off)- image by author.

Nikon D7000 vs D600 viewfinder DX FX compare choose vs which one af autofocus point 39
Simulated view of Nikon D600 viewfinder, showing the location of all the autofocus AF points (viewfinder grid not show but is available to view)- image by author.

Each of these above images show the full simulated framing as seen in the viewfinder, and you can clearly see how the 39 AF Points of the D600 are limited more to the central area of the frame.  This means that you are likely going to have to do some significant “focus-lock and recomposing” as you create interesting compositions where the subject is off-center.  This will also impact the use of the AF Points when using AF-C Continuous Autofocus Mode to track moving subjects.  The moving subject will have to remain within the area of the AF Points in order for the camera to continue tracking it, so you will have to move the camera around to follow the subject more closely.  This again is going to seriously limit your compositions when using AF-C and tracking a subject, as the subject is always going to have to be located in the central part of the frame.  If you are a serious action, sports, bird, or wildlife photographer, you are going to have to seriously consider if this AF Point arrangement of the D600 is going to work for you.  Or else consider using the camera in DX Crop “mode,” where you use just a DX-sized portion of the sensor to capture the image.  Although you will only be making use of 10 megapixels, the AF Points will in effect be spread out over more of the frame, more similar to what you see in the D7000 viewfinder.

As mentioned above, the 39 AF Points of the D600 are more sensitive than those of the D7000, with 33 of them sensitive down to f/8.  This means when you use a teleconverter (such as with a long lens in order to turn a 200mm lens into a 400mm lens) which reduces the effective maximum aperture of your lens by a stop or 2 or 3, you can sill make full use of most of the AF Points.  As with the D7000, you can limit the number of selectable AF Points to 11 if you prefer to manually select your AF Point (as you typically should) and you find 39 too many to contend with.  Since the AF system of the D600 as well as its controls and autofocus Custom Settings are so similar to the D7000, you can have a look at this post Taking Control of your D7000 Autofocus System to begin to learn how to get the most out of it.  The AF systems of the D600 and D7000 (and D300s) allow for you to use the numerous autofocus points in various ways to best capture still subjects (typically using AF-S autofocus mode) or track and capture moving subjects (using AF-C autofocus mode), including Automatic AF point selection, Single Point AF, and Dynamic Area AF using your choice of 9 points, 21 points, all points, or all points with 3D-Tracking.

Regarding the D90 and D300s, the autofocus system of the D90 has 11 autofocus (AF) points with only the center one being the more accurate cross type. The D300s offers 51 AF points with 15 being cross type, and thus is ideal for sports, action, and wildlife – although it has begun to become outdated and superseded by many of the other features of the D7000.

Nikon D600 book ebook guide manual tutorial how to dummies instruction fieldBrief commercial interruption: I would like to mention that I have written an e-book user’s guide for the D7000 called Nikon D7000 Experience, and will be offering an e-book guide for the D600Nikon D600 Experience. The guides discuss not only how to use the features, controls, autofocus systems, and various settings of the cameras, but more importantly when and why to make use of them in your photography.  They also explain the metering modes, aperture and shutter priority modes and manual shooting, focus lock, exposure lock, and more.  Plus they describe all of the Menu options and Custom Settings, with recommended settings.  Learn more about my Full Stop dSLR camera guides here!

Body, Construction and Size/ Weight: The D600 and D7000 (and even the older D90) appear very similar at first glance, and both have a rugged partial magnesium alloy body (top and rear) with a polycarbonate front.  However, the D600 is actually slightly lighter than the D7000: 1.68 lbs. vs 1.7 lbs.  The D300s is slightly larger than the other 2 bodies, and weighs in at 2.2 lbs, with full magnesium construction. The sturdier construction of the D600 and the D7000, including their nice rubber gripping surfaces, creates the feel of a more professional body. The D600, D7000, and D300s all have weather sealing at the memory card and battery doors.  The D600 has a slightly larger rear LCD Monitor at 3.2″ vs. the 3″ rear LCD screen of the D7000 and D300s.

ISO: As mentioned in the Sensor/ Image Quality section above, the high ISO performance of the D600 is improved over the D7000, which was already improved over both the D90 and the D300s. The tests at dxomark.com tell this story.  The native ISO range of the D600 and D7000 is 100-6400 expandable up to 25,600.  The D300s and D90 have a native ISO range of 200-3200 expandable to 6400. This means that with the D600 you can use high ISO settings when required, such as in low light situations, and not have any difficulty with digital noise, particularly in the shadow areas of images. You can view my informal ISO test images on this post of Nikon D600 ISO Test Sample Images to see the excellent high ISO performance when shooting JPEG images.

Controls: The controls of the D600 are very similar to the D7000, with some minor changes such as the locking Mode Dial switch (a nice touch), the different Live View / Movie switch and relocated Record Button, and in the “why did they do that?” category the reversing of the zoom in and zoom out buttons.  The Multi-Selector thumb pad size has also been reduced on the D600, which I find to be less comfortable than the larger D7000 Multi-Selector.  Overall, all of the controls are easily accessible, user friendly, and quick and easy to access and use for changing settings on the fly.  Many controls make use of a button press and then either of the Command Dials to change the setting.  For example, press the AF-Mode Button at the base of the lens and then turn the Main Command Dial to change the AF Mode or the Sub-Command Dial to change the AF Area Mode, as you look on the top LCD Control Panel to see your choices.  I found myself always intuitively turning the wrong dial in conjunction with the ISO Button, but that will just take some practice (one dial enables Auto ISO while the other changes the ISO setting).

Nikon D600 vs D7000 controls buttons size compare side by side
Nikon D600 vs Nikon D7000 – comparison of body size and controls of the full frame FX vs the APS-C sized DX format dSLR cameras – image by author, courtesy of Newtonville camera of Newton, Mass.

The D300s has entirely different switches, dials, and buttons than the D600 and D7000, however this allows for quicker and easier direct access to a few more features and settings on the D300s.  As with the D7000, the D600 offers two customizable user settings (U1, U2) on the mode dial for pre-setting a combination of camera settings and Custom Settings.  For example, you can set up your camera for landscape photography with all the settings you use for that and assign these settings to U1, and then configure your camera for studio/ portrait use and assign that combination of settings to the U2 mode.  You can also assign numerous functions of your choice to certain buttons such as the Fn Button, such as quickly and temporarily changing to Spot Metering Mode or turning on the built-in level display.

Wireless Flash: All of these Nikon cameras allow for advanced wireless lighting using the built in flash as a remote Commander for Nikon Speedlights, allowing you to make use of and remotely control simple or complex off-camera lighting set-ups.

Viewfinder: As with the D7000 and D300s, the D600 has a large, bright 100% optical viewfinder coverage.

Processor: The D90 and D300s have the Nikon Expeed Processor, the D7000 has the improved Expeed II processor, and the D600 boasts the speedier Expeed 3 processor. This allows for more video options including full 1080p HD at all the frame rates and overall faster processing of stills and video files especially when using in-camera processing features while shooting such as Vignetting Control or High ISO Noise Reduction.  The fast processor also allows for quick results when taking in-camera HDR or Multiple Exposure images.

Continuous Shooting Speed: The D600 can shoot at a maximum continuous frame rare of 5.5 frames per second (fps) up to 100 images when shooting JPEG or up to 16 images when shooting at the best RAW setting.  This allows you to capture exactly the right moment of an action situation, or a rapidly changing expression on a subject.  The D90 can shoot 4.5 frames per second (fps) up to 100 images, the D7000 shoots 6 fps up to 100 shots, and the D300s shoots 7 fps – or 8fps with the battery grip. If you often capture action and really need the highest frame rate, such as for sports or wildlife shooting, you are going to have to seriously consider the D300s or D800 over the D600.  Otherwise, 7 or 8 fps is often complete overkill in typical real-life use.

Memory Card: Like the D7000, the D600 accepts 2 SD cards, where the second card can be used in a variety of ways: overflow, JPEG on one / RAW on the other, or mirrored backup of the first card. The D300s uses 1 CF card and 1 SD card, which also can be configured in a variety of ways. The second card can definitely come in handy if one is shooting a lot of still and video files or wants instant back-up of all images.  There is a “trick” for choosing which memory card slot is viewed during image playback:  Press and hold the BKT Button and then press Up on the Multi-Selector and follow the prompts to make your choice.

Battery: The D600 and D7000 both use the high capacity EN-EL15 battery, which will last for over 1000 shots.  TheD600 accepts the optional, new MB-D14 battery grip for the use of two batteries – and to perhaps make the camera more comfortable for some users particularly when using larger lenses or working often in portrait orientation.  Similarly, the D7000 accepts the optional MB-D11 battery pack/ vertical grip,  and the D300s uses the EN-EL3e battery and the optional MB-D10 battery pack/ vertical grip. The D90 also uses the EN-EL3e battery and its optional battery pack/ vertical grip is the MB-D80.

Full HD video: The D600 offers full HD video with manual control and all the usual frame rates (1080p at 30/25/24 fps and 720p at 60/50/30 fps), for up to 20 minutes of recording at the highest settings. As with stills, you can switch to DX (as if you were using a smaller DX sized sensor) for a “telephoto boost,” and it is capable of full time autofocus, though most dedicated videographers still prefer manually focusing. The camera records mono audio but is compatible with optional stereo mics, and has a headphone jack for audio monitoring.  The D90 and D300s offer 720p video at 24 fps, with a 5 minute shooting time. The D7000 improved upon that with full 1080p HD video at 24 fps for up to 20 minutes with full-time continuous autofocus. Plus it offers 720p at 30, 24, and 25 fps.

Price: Just under $2100 – may vary slightly at different retailers.

Shooting Experience: The D600 feels and performs absolutely wonderfully. Its body and controls are comfortable and responsive in the hands, with the exception of what I think is a too-small Multi-Selector pad.   All controls are easily accessible for quickly changing all the essential settings such as autofocusing modes, ISO, white balance, metering modes, bracketing, etc. The Shutter Button is thankfully less sensitive than that of the D7000, thus allowing focus lock or exposure lock using a half-press, without accidentally taking the shot.  The Matrix Metering works great to properly determine exposure in a wide variety of situations, and the Auto White Balance even captures sunset colors nicely rather than turning them into less warm daylight colors as many previous cameras might have done.  The D600 has carried over all of the nice touches from the D7000 such as the optional grid in the viewfinder, the ability to limit the AF points to 11 – for quicker manual selection, the ability to change the continuous low shooting speed between 1 to 5 shots (which Canon has yet to do on their non-pro cameras), and the versatility to change the size of the central spot size for center weighted metering.

Choosing a Camera:  So which camera is best for your needs? At this point I would be hesitant to recommend to D300s to most users, simply due to the fact that it is an “older” model.  While it is still a highly capable camera, the image resolution and many of the features have been improved upon by the current models.  So if you plan to use your dSLR for several more years, just consider how “outdated” it will be in 4 more years.

The D600 and D7000 are similar in so many ways that a big part of the decision comes down to the full frame sensor vs. the APS-C sized sensor.  Of course the D600 has improved resolution, dynamic range, etc, but remember that all that is relative. You can still capture excellent, professional quality images on the D7000, or even the D90.  Pixel peepers will certainly find a difference, but it may not be significant enough for many users.  The full frame will also allow you to capture wider more sweeping views with your wide angle lenses, and indirectly more dramatically shallow depth of field.

This is because depth of field is affected by not only your aperture setting but also by the camera-to-subject distance.  So say that you were to use the full frame D600 to frame a shot with a 50mm focal length and f/2.0 aperture, from 10 feet away.  To “recreate” this same shot with the APS-C sensor-sized D7000 and a 50mm focal length, you would have to back up several feet to have the same field of view.  The full frame sensor will capture a wider field of view, while the APS-C “crops” the scene due to its smaller size.  Even though you use the same f/2.0 aperture setting, the depth of field does not appear as dramatically shallow because the camera-to-subject distance has increased.  So…indirectly…a full frame camera can contribute to more dramatic depth of field. (However, this all gets a bit more complicated and a lot of photographers, including myself until recently, misunderstand the role of the focal length in this – namely that it does not affect this issue: http://www.bluesky-web.com/dofmyth.htm)

However, since the autofocus points of the D600 are grouped more closely to the center of the frame, they are not as useful as the more widely spread AF points of the D7000 for tracking and capturing moving subjects when working in AF-C autofocus mode.  If you intend to shoot lots of sports, action, birds or other wildlife, the D7000 may work better.  The faster continuous frame rate of the D7000 will greatly assist with action photography as well.  Plus the D7000’s DX sensor will “extend” the reach of your telephoto lenses in these situations.  You can always use the D600 in DX Mode to “widen” you AF point spread and “extend” your telephoto reach, but the tradeoff is that you will only be using 10 megapixels of your sensor.

Purchasing these cameras: If you plan to buy any of these cameras, accessories, or anything else through Amazon.com or B and H Photo, I would appreciate it if you use my referral links. Your price will be the same, and they will give me a little commission for referring you, which will help support my blog.  Thank you for supporting my efforts!

Order your D600 today on Amazon or B and H – it is already available and shipping!

Nikon D600 on Amazon (body only or kit)

Nikon D600 at B and H Photo – body only

Nikon D600 at B and H Photo – with the 24-85mm f/3.5-4.5G ED VR Lens

Purchasing from the UK? Use my Amazon UK referral link here.


Nikon D600 book ebook guide manual tutorial how to dummies instruction fieldBrief commercial interruption: And don’t forget, I will be offering an e-book guide for the D600Nikon D600 Experience. The guide discusses not only how to use the features, controls, autofocus systems, and various settings of the cameras, but more importantly when and why to make use of them in your photography.  It also explains the metering modes, aperture and shutter priority modes and manual shooting, focus lock, exposure lock, and more.  Plus it goes over all of the Menu options and Custom Settings, with recommended settings.  Learn more about my Full Stop dSLR camera guides here!

Canon 6D – The Second Affordable Full-Frame dSLR

Introducing the Canon 6D Full Frame dSLR Camera

First, I have been corrected – the Sony a850 was the first “affordable” full frame (meaning ~$2000 price at introduction), followed by the Nikon D600, then the Canon 6D. But as I unfortunately only have time in my work day to mostly follow, research, and write about Canon and Nikon news and dSLR cameras, this one slipped by me.

Just as I have been digesting the specs and features of the new Nikon D600 full frame dSLR, Canon quickly follows on their heels with their version of a “pro-sumer” full frame camera, the Canon EOS 6D.  The big deal about these two cameras – and indeed they are a big deal – is that they are the first full frame cameras priced at around $2000 at first release.  In fact they are each priced at just under $2100.  dSLR cameras with full frame sized sensors (sensors about the size of a frame of 35mm film – remember film?) have typically cost several hundred, if not $1000 more than this when first introduced. The Canon 5D, though also referred to as “affordable” at the time, was around $3300 when introduced as a professional camera. The Canon 5D Mark II was about $2700 at introduction, and the Nikon D700 and D800 were each about $3000.  The latest Canon full frame, the 5D Mark III is around $3400, but Canon knew they would be coming out with the 6D to fill in the price point vacated by the 5D Mark II.

Canon EOS 6D full frame dslr review
Canon EOS 6D

Previously, the compromise in order to put a high-quality, fully featured camera into enthusiasts’ and semi-pros’ hands was a smaller sensor – the APS-C sized sensor which is about 64% of the size of a full frame sensor.  Nikon calls the smaller size the DX and the full frame the FX format, while Canon really doesn’t have a special name for either that I can recall. But larger sensors have always been prized for several reasons.  They typically deliver better performance in terms of improved resolution, increased dynamic range, and improved low light / high ISO performance.  In other words, the images have much better detail and can withstand serious cropping, display a fuller range of colors and tones, and are cleaner with less digital noise, especially in low light situations.  The full frame sensor will also affect the field of view of your lenses. For those moving from an APS-C sized sensor camera to a full frame body, a 50mm lens will now act as a true 50mm lens – no more 1.6x crop factor to consider. This means that your wide angle lenses will now act as true wide angle lenses, but your telephoto lenses will no longer have quite as much reach as you may be used to.

I have long warned that Canon users should carefully consider buying EF-S lenses that are only compatible with APS-C Canon dSLRs, and my reasoning was that one day you would either want to upgrade to a full frame 5D that does not accept AF-S lenses, and/ or eventually full frame bodies would become more affordable.  Well, that day is today!  The 6D is the “affordable” full frame camera, and indeed it does not accept EF-S lenses, only EF lenses.

For those who can’t or don’t wish to spend $3400 on the 5D Mark III yet still want the full frame experience, the 6D is now a reasonable option.  The 5D Mk II of course is currently under $2000, but it really isn’t very desirable anymore with its relatively slow and outdated 9 point autofocus system and relatively slow 3.9 frames per second continuous shooting speed.  Not to mention the wide variety of feature, HD video improvements, and in-camera processing features that have been added to more recent models.  However, based on its controls, autofocus system, and other features (whether included or left out), the 6D can be considered a full frame version of the 60D, and thus sits firmly in the enthusiast range rather than the professional range. Again, some compromises were made in order to offer a well-featured full-frame camera at an enthusiast photographer price point.  But its full frame coupled with its smaller, lighter body (more like an APS-C camera body) will make it a great option for everyday and travel use.

Canon 6D EOS book manual dummies field guide instruction tutorial how to use learn full frame autofocus system

Brief Commercial Interruption: I have written an e-book camera guide to the Canon 6D, Canon 6D Experience, now available. Click the link or book cover to learn more, preview, or purchase this guide (as well as all my other e-book camera guides for Nikon and Canon dSLR cameras).


Canon EOS 6D full frame dslr review
Canon EOS 6D

Here are some of the specs of the Canon 6D, and more importantly what they mean. After reading about what the camera offers, be sure to also read my Canon 6D Hands On Reveiw:

Sensor: The 6D sits between the 7D and the 5DIII in terms of resolution, with 20.2MP compared to the 18MP of the 7D, 21MP of the 5DII, and 22.3MP of the 5DIII. As mentioned above, a full-frame size sensor promises not only improved image quality but also increased dynamic range and improved low light / high ISO performance (100-25,600 max. ISO expandable up to 102,400). Have a look just below and at my images here to see some example images of the performance of the 5DIII at various ISO settings.  The 6D may not be quite as excellent, but it should be very close (edit: my informal ISO tests of the 6D can now be seen below and here.  And as noted above, the full-frame sensor will also affect the field of view of your lenses. Your wide angle lenses will now act as true wide angle lenses, but your telephoto lenses will no longer have quite as much reach as you may be used to.

Canon 6D high iso noise digital camera slr pixel test compare preview
Example image of the Canon 6D ISO performance and digital noise. Image by the Author – click on the image to view larger.

A full frame sensor also affects your depth of field…indirectly.  This is because depth of field is affected by not only your aperture setting but also the camera-to-subject distance.  So say that you were to use the full frame 6D to frame a shot with a 50mm focal length and f/2.0 aperture, from 10 feet away.  To “recreate” this same shot with the APS-C sensor-sized 7D and a 50mm focal length, you would have to back up several feet (6 more feet I believe?) to have the same field of view.  (The full frame sensor will capture a wider field of view, while the APS-C “crops” the scene due to its smaller size.)  Even though you use the same f/2.0 aperture setting, the depth of field is not as dramatically shallow because the camera-to-subject distance has increased.  The depth of field in this case changes from less than a foot to over 2 feet.  (I may be wrong about backing up from 10 feet to 16 feet for this example, which means my final numbers are off, but none-the-less, the dof increases as you move back.)  So…indirectly…a full frame camera can contribute to more dramatic depth of field.

Processor: The 6D incorporates a single speedy Digic 5+ processor – the latest processor that is also included in the 5DIII (there as one of two processors). This allows you to take more continuous photos at the maximum frame rate, as well as to keep up a fast rate as the camera applies optional in-camera processing to the images, such as lens aberration corrections.  The speedy processor also allows for the in-camera HDR and Multiple Exposure features.

Viewfinder: The 6D also has a nice big and bright 97% view viewfinder, not as awesome as a 100% viewfinder would have been to be able to frame the entire scene to be captured, but excellent none-the-less.  Unfortunately, there is not an electronic grid included in the viewfinder view as there is with the 7D.  In order to get a grid, you will have to make use of the optional Eg-D matte focusing screen.  You can see a simulated view of the viewfinder below the Autofocus section.

Autofocus (AF) System / FPS: The Canon 6D has a new 11 point autofocus system with only the center point as a more accurate cross-type point.  Not quite the 19 AF point system of the 7D as one might have expected, and also significantly lower than the 61 AF point system of the 5DIII.  In terms of number of focus points, it is a minor improvement to the 5DII.  However, I am sure that it is a system that will react and perform significantly faster (even despite only one cross-type point) as well as offer numerous customization options. This AF system, along with its 4.5 frame per second (fps) continuous shooting speed, indicates that the 6D is not intended to be a sports and action camera, but rather a camera geared towards standard photography, weddings, portraits, travel, etc.

Canon 6D EOS autofocus AF viewfinder 11 points compare choose dummies guide book digital dslr
Simulated view of the Canon 6D viewfinder, showing the Spot Metering circle and the 11 autofocus AF Points

Body, Size, Battery, Memory Cards:  Regarding size and weight, the 6D is nearly the same size and weight as the 7D – in fact it is not quite as wide and as deep as the 7D, stands at the same height, and weights a little less.  Overall it is 145 x 111 x 71 mm, weighing 770g (with the battery) compared to the 860g of the 7D.  The 6D accepts the same excellent LP-E6 battery as the 7D and 5DIII, as well as SD memory cards (single card slot).  The body is constructed primarily of magnesium alloy, is weather sealed against dust and moisture, and should prove to be quite durable for any everyday-type use plus more rugged situations.  It boasts a 3″ LCD screen – fixed not articulating – with 102,400 pixels, making it large, clear, and sharp – but not a touch screen as originally speculated.

Interface and Controls: The controls on the body of the 6D closely resemble those of the EOS 60D, with a few changes.  The Multi-Controller pad is used for autofocus AF point control rather than the thumb joystick of the 5D cameras, the top row of buttons control one function only, and the Mode Dial has the handy center locking button.  The power switch has been moved to the typical current location for Canon dSLRs – at the Mode Dial.  The row of buttons on the rear left side, common on most Canon dSLRs without a rotating screen, has been pared down and moved to the right of the screen.  Rather than the zoom-in and zoom-out buttons, there is a single Magnify button that was first found on the 5DIII and initially drove users crazy due to the muscle memory of their thumbs that had to be retrained.  The exposure lock and focus lock buttons remain, thus allowing for back-button focusing and easily separating focus and exposure functions.

Canon EOS 6D full frame dslr review
Canon EOS 6D

New Features: The 6D is the first Canon camera to offer built-in wireless and built-in GPS capability.  The Wi-Fi feature will allow photographers to do some great wireless stuff, including cable-free “tethered” shooting and camera control using EOS Utility and a computer, easily sharing images on Facebook and other social networks straight from the camera, controlling the camera (in Live View) from a smartphone or tablet – including focusing and changing some settings, using the smart device to view and transfer images that are on the camera’s memory card, and Wi-Fi connection to a TV or printer.  And the GPS will allow geotagging of images with the coordinates, altitude, and orientation, and mapping the route of the camera.

Accessories: Of course there will be a battery grip for the 6D, the BG-E13, for the use of two LP-E6 batteries for longer shooting.  The larger body size created by the grip is also more comfortable for some, especially when shooting often in the portrait orientation and/ or when using larger, heavier lenses.  There are also a couple optional focusing screens that are compatible, the Eg-D and Eg-S matte focusing screens which make manual focusing eaiser.  The Eg-D offers a grid as well for assistance with compositions and keeping the framing straight.  This means that there is no electronic grid built into the viewfinder, as with the 7D.

The typical remote shutter releases are certain to be compatible, such as the Canon Remote Switch RS-80N3 or Canon Wireless Remote Control RC-1 or RC-5 or RC-6.  These remotes will allow either self-portraits or the ability to release the shutter without pressing the Shutter Button thus preventing possible camera shake. There is also the Timer Remote Controller TC-80N3 for time-lapse or long exposure photography.

Flash: Similar to the 5D line of cameras, the 6D does not include a built-in flash, though it is fully compatible with all the Canon Speedlite flashes such as the new Canon 600EX-RT as well as the older but still highly capable 580EX II.  It will certainly be compatible with the Speedlite Transmitter ST-E3-RT radio wave wireless transmitter, which can control and trigger up to 5 groups of 15 flashes, up to 30 meters, with no line-of-site required. (Currently only compatible with the Canon 600EX-RT Speedlite.)

HD Video: And of course the 6D offers full HD video with manual control and all the usual frame rates (1080p at 30/25/24 fps and 720p at 60/50 fps plus 480p at 25/30 fps. The new sensor is not capable of full time autofocus, though most dedicated videographers still prefer manually focusing anyway. The camera records mono audio but is compatible with optional stereo mics, and unfortunately lacks a headphone jack for audio monitoring.

Bracketing: The offers 3, 2, 5, or 7 frame Auto Exposure Bracketing, which will please HDR shooter. There is also a built-in “HDR mode” which combines and processes three automatically bracketed images in-camera, and a Multiple Exposure mode that can “overlay” and process up to 9 images in-camera. And there are a couple more multi-shop options where the camera takes a few shots in a row and then combines them for a better final result, such as the multi-shot noise reduction option, and the hand-held night scene.

Of course the 6D offers the usual 63-Zone dual layer exposure metering system for consistent, accurate exposures in all types of situations including challenging scenes like back-lit ones.  It has the usual Canon Metering Modes and Drive Modes as well as the familiar Picture Style settings and in-camera image processing and filter/ art effects as found in the 7D, 60D, and 5D Mk III.

Conclusions:  Just as with the new Nikon D600 full frame camera, I expect the Canon EOS 6D to be an extremely popular camera, offering an affordable full-frame dSLR for dedicated enthusiasts, aspiring pros/ semi-pros, or a highly competent second body for semi-pros and pros on a budget. There is nothing lacking in this camera that would prevent any photographer from capturing the highest quality, professional level images in most every shooting situation, be it general photography, portraits, street photography, studio work, wedding photography or travel use.  Its pairing with the professional 24-105mm f/4L lens is an indication of its exceptional image quality capabilities.  Plus it offers the ability, although somewhat limited by its autofocus system and maximum continuous frame rate, to capture sports, wildlife, and other action type situations.

The 6D may not be the “fully featured budget pro-sumer full frame dSLR” that many had hoped for, however.  Its 11 point AF system with only one cross-type point is clearly on the consumer/ enthusiast level, as are its external controls such as the thumb pad Multi-Controller and the single function top buttons.  Its inclusion of the Scene Modes on the Mode Dial also indicates that it is targeted to enthusiasts, as well as its single SD memory card slot.  But these are the types of compromises that had to be made to keep the price within reach of more enthusiast photographers while still offering full frame image quality.  As Canon says in their 6D press release, “the EOS 6D bridges the gap for budget-minded photographers, videographers and cinematographers who are eager to step up into the world of full-frame imaging.”

Be sure to also read my subsequent Canon 6D Hands On Reveiw, written after the camera became available.

As I work on a comparison post of the current Canon dSLR line-up, have a look at these other Canon related posts, including how to take full advantage of your autofocus system.

The camera will be offered as a body-only or with the 24-105mm f/4L IS (image stabilized) lens, and is expected to be available in December 2012.

Canon 6D EOS book manual dummies field guide instruction tutorial how to use learn full frame autofocus system

And as I mentioned, I have written the first guide to the Canon 6D, my Full Stop e-book user’s guide for the Canon 6D – Canon 6D Experience, now available.

Order your 6D today on Amazon or B and H:

Canon 6D on Amazon (body only or 24-105mm f/4L kit)

Canon 6D at B and H Photo – body only

Canon 6D at B and H Photo – with the 24-105mm f/4L IS kit lens

Nikon D600 – The First Affordable Full-Frame dSLR (and the updated Nikon D610)

Introducing the Nikon D600 Full Frame dSLR Camera and the updated Nikon D610:

(With additions made at the end of this article to explain the features added to the updated Nikon D610)

(First, I have been corrected on the title of this post – the Sony a850 was the first “affordable” full frame (meaning ~$2000 price at introduction). But as I unfortunately only have time in my work day to mostly follow, research, and write about Canon and Nikon news and dSLR cameras, this one slipped by me!)

The day has finally arrived!  For a couple years I have been suggesting to my readers that when choosing lenses they anticipate the time that, someday soon, full-frame cameras will be more affordable.  This was both to address the possibility that certain DX lenses could not be used on an FX body, plus how a lens’ field of view will be affected by a full frame vs. a cropped APS-C sensor.  Well that day has now arrived with the introduction of the Nikon D600.  Initially priced at $2100 (body only), it can certainly be considered the first enthusiast full-frame (or in Nikon terminology, FX Format) camera – and which should also be more than rugged enough and capable enough for a semi-pro or a second body.  And as icing on the cake, DX lenses are indeed compatible with this new FX camera (although the resulting image will be a 10MP DX crop).

(Of course the full-frame Canon 5D Mark II is under $2000 at this time, but that is due to it recently being replaced by the 5D Mark III.  When the 5D Mark II was new, it was priced at around $2700, and didn’t go below $2400 for most of its active life.  And you don’t want the 5D Mk II anymore – its continuous frame rate is slow and its AF system isn’t so hot, especially compared to current models.)

Nikon D600 unbox unboxing full frame FX dSLR camera 35mm new kit lens
Nikon D600 full frame dSLR camera, shown with kit lens Nikkor 24-85mm f/3.5-4.5G ED VR – Image by author.  Special thanks to Newtonville Camera of Newton, Mass.

Sensor, Viewfinder: The D600 sits between the D7000 and the recent D800, being closer – I would say – to a full-frame version of the D7000 (with a few more megapixels).  It boasts a 24.3 megapixel image sensor (over the 16.2 MP of the D7000) and the same 39 point autofocus system with 9 cross type points and similar custom settings options as the D7000. This full-frame size sensor delivers not only improved resolution but also increased dynamic range and improved low light / high ISO performance (6400 max. ISO expandable up to 25,600).  As noted above, the full-frame sensor will also affect the field of view of your lenses.  For those coming from an APS-C sized sensor camera, a 50mm lens will now act as a true 50mm lens – no more 1.5x  crop factor to consider.  This means that your wide angle lenses will now act as true wide angle lenses, but your telephoto lenses will no longer have quite as much reach as you may be used to.  However, the D600 offers a DX setting so that you can act as if you have a DX sized sensor.  This camera also has a nice big and bright 100% view viewfinder so that one can easily see their subject, make use of the AF Points, and frame their images.

Interface and Controls: Much of the user interface (menus, displays) as well as the controls are also similar to the D7000, with a few changes such as the addition of the Live View/ Movie switch, a locking Mode Dial switch, and the addition of a Picture Control button.  The newly locking Mode Dial contains the customizable user modes U1 and U2 so that you can set up the camera to quickly switch to your desired mode and settings, including your desired Custom Settings parameters.  In the“why did they do that?” category, Nikon has swapped the position of the Image Zoom [+] and [-] buttons used during image review.  So overall, any D7000 user will be immediately comfortable and familiar with this D600 body.  Changing the AF Mode and AF Area Mode of the D600 is done with the “hidden” button inside the AF/M switch at the base of the lens, in conjunction with the Command Dials (as with the D7000).  The D600 offers two customizable Function Buttons on the front of the camera to set for whichever functions you desire.

Nikon D610 book manual guide how to autofocus settings menu custom setup dummies learn use tips tricks     Nikon D600 book ebook camera guide download manual how to dummies field instruction tutorial

Brief Commercial Interruption: Of course I offer a Full Stop e-book user’s guide for the Nikon D610Nikon D610 Experience, and one for the D600, Nikon D600 Experience.  This first book is currently the highest rated D600 guide on the market, with nearly 50 five star reviews!  Click the links to learn more about the guides and all my other e-book camera guides for Nikon and Canon dSLR cameras.

Nikon D610 D600 autofocus af system full frame use choose decide book guide manual how to dummies
Simulated view of the Nikon D610 / D600 viewfinder showing the location of all 39 autofocus AF Points

Autofocus (AF) System / FPS: As mentioned, the D600 makes use of the 39 point autofocus system with 9 cross-type points of the D7000.  For those not familiar with this system, it is somewhat sophisticated in that it offers several combinations of autofocus modes (for still subjects or a variety of situations with moving subjects), autofocus area modes (how many of the AF points are active and how they track), AF related Custom Settings (to tweak the performance of the system to your subject and needs), and customizable controls (to set which buttons do what).  There is a bit of a learning curve in order to take full advantage and full control of it, but once mastered it enables a photographer to consistently and successfully capture sharp images of still subjects and to track and capture moving subjects in a variety of ways.  You can start to learn about this system in my post explaining how to Take Advantage of the Nikon D7000 Autofocus System.  You can put the AF subject tracking to good use as you shoot up to 5.5 frames per second with the D600.  This is a great frame rate for most action, sports, or wildlife photography – any slower misses important moments and any faster starts to give you nearly identical multiple shots which become a time and memory space drain when backing up and editing. (Of course if you shoot something like motorsports or professional sports, you likely need the faster frame rate of a full-fledged pro camera!)

Body, Size, Battery, Memory Cards: Regarding size and weight, the D600 is slightly larger than than the D7000, but surprisingly 20g lighter (with the battery.)  It shares the same EN-EL 15 battery as the D7000, and offers a new MB-D14 battery grip for the use of two batteries – and to perhaps make the camera more comfortable for some users particularly when using larger lenses or working often in portrait orientation.  The top and rear of the camera body are constructed of strong and light magnesium alloy, and the body is weather sealed against dust and moisture (including the battery and memory card doors).  Although the entire body isn’t magnesium like the Canon 7D or 5D Mk III, it should prove to be more than rugged and durable enough for most any photographer’s needs.  The D600 has two SD memory card slots which can be configured in a variety of ways including overflow (when one card fills images are automatically then saved to the 2nd card), simultaneous back-up (each image is saved on both cards), or stills on one card and movies on the other. The LCD monitor on the rear of the camera is now a slightly larger 3.2 inches (compared to the 3″LCD of the D7000) with 921K pixels, and is optimized for minimum glare and good contrast in sunlight.

Nikon D600 unbox unboxing full frame FX dSLR camera 35mm new kit lens
Unboxing of the Nikon D600 full frame dSLR camera, shown with kit lens Nikkor 24-85mm f/3.5-4.5G ED VR – Image by author.  Special thanks to Newtonville Camera of Newton, Mass.

Accessories: Nikon is offering a Wireless Adapter, the WU-1b, which will allow you to immediately share your images through mobile devices, remotely save images, or remotely fire the shutter through a smartphone.  It is also compatible with the Nikon GP-1 GPS unit for geo-tagging your images.

Flash: Unlike the full-frame Canon 5D series that forgo the built-in flash, the D600 (like the D800) has a built-in flash that also acts as a wireless Speedlight Commander to control remote flashes (up to two groups).  The camera of course has a hotshoe for optional external Speedlights like the Nikon SB-900, SB-800, SB-700, or SB-600.

HD Video: And of course the D600 offers full HD video with manual control and all the usual frame rates (1080p at 30/25/24 fps and 720p at 60/50/30 fps). As with stills, you can switch to DX (as if you were using a smaller DX sized sensor) for a “telephoto boost,” and it is capable of full time autofocus, though most dedicated videographers still prefer manually focusing. The camera records mono audio but is compatible with optional stereo mics, and has a headphone jack for audio monitoring.

Bracketing: The D600 unfortunately only offers the choice of 2 or 3 frame Auto Exposure Bracketing (up to +/- 6 EV), which doesn’t help the HDR shooters who would prefer 5 or 7 bracketed shots.  There is a dedicated BKT Bracketing Button on the camera body to initiate this process.  There is also a built-in “HDR mode” which combines and processes two images in-camera.

Nikon D600 book guide ebook instruction manual how to dummies field guide
Image of a gorgeous Nikon F taken with the Nikon D600 and kit lens (24-85mm f/3.5-4.5G ED VR)  Unprocessed JPEG straight from camera (with watermarks added), ISO 2500.  Image by author – click to see larger.  Special thanks to Newtonville Camera of Newton, Mass. 

Of course the D600 offers the usual Metering Modes, Drive Modes, and White Balance options, as well as the familiar Scene Modes, Picture Style settings, Multiple Exposure mode, Interval Timer for time-lapse photography, and in-camera image processing and filter/ art effects.

I expect the Nikon D600 to be an extremely popular camera, offering an affordable full-frame camera for dedicated enthusiasts, aspiring pros, and semi-pros, or a highly competent second body for semi-pros and pros.  There is nothing lacking in this camera that would prevent any photographer from capturing the highest quality, professional level images in most every shooting situation, be it general photography, portraits, street photography, studio work, wedding photography, or travel use.  Plus it offers the ability, although somewhat limited by its frame rate and centrally clustered AF Points, to capture non-professional sports, wildlife, and other action type situations.  (See the image at the bottom of the page for the AF Points locations.)

As I work on a comparison post of the current Nikon dSLR line-up, have a look at these other Nikon related posts, including how to take full advantage of your autofocus system.

The camera is offered as a body-only or with the 24-85mm f/3.5-4.5G ED VR Lens (image stabilized).

And as I mentioned, I will be coming out with a Full Stop e-book user’s guide for the Nikon D600 – Nikon D600 Experience, possibly as soon as November 2012.

Order your D600 today on Amazon or B and H – it is already available and shipping!

Nikon D600 on Amazon (body only or kit)

Nikon D600 at B and H Photo – body only

Nikon D600 at B and H Photo – with the 24-85mm f/3.5-4.5G ED VR Lens

Nikon D600 full frame FX dSLR camera unbox unboxing 35mm new kit lens 24-85mm f/3.5-4.5
Nikon D600 full frame dSLR camera, shown with kit lens Nikkor 24-85mm f/3.5-4.5G ED VR – Image by author.  Special thanks to Newtonville Camera of Newton, Mass.

The Nikon D610 was introduced in October of 2013, and has added a couple minor, but important features to the camera. The D610 incorporates a new shutter mechanism which enables a faster six frames per second (fps) continuous shooting speed and a new Quiet Continuous shutter-release mode for taking a burst of images up to three frames per second and with decreased shutter noise. In addition, the D610 has an improved Auto White Balance setting which promises more natural color reproduction both indoors under artificial lighting and outdoors. As mentioned above, the previous D600 model marked an important moment in the evolution of digital SLR cameras as the first dSLR with a full-frame sized image sensor to also be priced at about $2000 at release, thus putting it within the reach of far more photography enthusiasts. With the D610, Nikon has retained a similar price. And although a number of D600 users reportedly experienced issues with dust or oil spots on the camera’s sensor, it is expected that the new shutter mechanism of the D610 will eliminate this concern.

Nikon D610 D600 autofocus af system points full frame viewfinder
Another simulated view of the Nikon D610 / D600 viewfinder, showing the location of all 39 autofocus AF Points.  Image of Nikon F SLR by author, taken with Nikon D600 with kit lens – 24-85mm f/3.5-4.5G ED VR, ISO 2500.  Special thanks to Newtonville Camera of Newton, Mass. 

The First User’s Guide to the Canon Rebel T4i / EOS 650D Now Available!

Canon T4i / 650D Experience, my most recent Full Stop dSLR e-book and the first available user’s guide to the T4i / 650D, goes beyond the manual to help you learn the features, settings, and controls of the advanced and versatile T4i / 650D, plus most importantly how, when, and why to use the functions, settings, and controls in your photography.

Written in the clear, concise, and comprehensive style of all Full Stop guides, Canon T4i / 650D Experience will help you learn to use your Canon T4i / 650D quickly and competently, to consistently create the types of images you want to capture. The e-book is available in PDF format for reading on your computer, e-reader, or tablet.

Learn more about it, preview it, and purchase it here:
http://www.dojoklo.com/Full_Stop/Canon_T4i_Experience.htm

As one reader has said about the previous Canon T3i Experience e-book:A Must-Have Accessory – What a great addition to my bag. This is a well written, full body of work that explains, in plain English, how to get the most out of my new camera.  Doug provides the knowledge and experience to bring you to the next level.  I look forward to learning more every time I open the book.”

Take control of your Rebel T4i / EOS 650D, the image taking process, and the photos you create!

Canon Rebel T4i 650D book ebook manual guide tutorial instruction bible how to dummies field EOS

For beginner, intermediate and enthusiast photographers:  This Canon T4i / 650D e-book is for those who wish to get more out of their camera and to go beyond Auto+ and Program modes and shoot in Aperture Priority (Av), Shutter Priority (Tv), and Manual (M) modes. To get your camera set up, it begins with explanations and recommended settings for all Menu settings, Custom Function options, and Movie Mode Menu settings of the T4i / 650D.  It covers basic dSLR camera functions and exposure concepts for those new to digital SLR photography, and explains more advanced camera controls and operation, such as using the various metering modes and exposure compensation for correct exposure of every image, controlling autofocus modes and focus points for sharp focus of still or moving subjects, and making use of the camera’s new multi-shot exposure modes.

Canon T4i / 650D Experience focuses on still-photography with an introduction to the movie menus and settings to get you up and running with video. Sections include:

  • Setting Up Your Camera – All of the Menu settings and Custom Function settings for the T4i / 650D, including movie mode menus, with brief descriptions and recommended settings for practical, everyday use. Set up and customize the advanced features of this dSLR to work best for the way you photograph.
  • Camera Controls – Description of all of the camera’s controls, plus when and why to use them, including how to take advantage of the new Touch Screen and Quick Control settings screens.
  • Aperture Priority (Av), Shutter Priority (Tv), and Manual (M) Modes – How and when to use them to create dramatic depth of field, freeze or express motion, or take total control over exposure settings.
  • Auto Focusing Modes and Drive Modes – How they differ, how and when to use them to capture sharp images of both still and moving subjects. Also how and when to use focus lock and back-button focusing.
  • Exposure Metering Modes of the Canon T4i / 650D – How they differ, how and when to use them for correct exposures in every situation. Also how to make use of exposure lock.
  • Histograms, Exposure Compensation, Bracketing, and White Balance – Understanding and using these features for adjusting to the proper exposure in challenging lighting situations.
  • Lenses – Explanation of Canon lenses and choosing your next lens.
  • Composition – Brief tips, techniques, and explanations, including the creative use of depth of field.
  • The Image Taking Process – A descriptive tutorial for using the settings and controls you just learned to take still and action photos.
  • Photography Accessories – The most useful accessories for day-to-day and travel photography including those specific to this camera, plus recommended photography books.
  • Introduction to Video Settings – Some basic settings to get you started.

This digital guide to the Canon Rebel T4i / EOS 650D is a 165 page illustrated e-book that goes beyond the manual to explain how, when, and why to use the features, settings, and controls of the T4i / 650D to help you get the most from your camera.

Learn more about Canon T4i / 650D Experience e book manual for the Rebel T4i / EOS 650D on my Full Stop website here:

http://www.dojoklo.com/Full_Stop/Canon_T4i_Experience.htm


Canon Rebel T4i / 650D vs. EOS 60D

Canon Rebel T4i vs. EOS 60D

I first introduced and discussed the new Canon Rebel T4i in this recent post, Introduction the the Canon Rebel T4i.  I encourage you to read that first to learn about all the features of the T4i. Then you may be wondering about how to choose between the T4i vs. the Canon EOS 60D, so I go into more detail about that here:

The predecessor to the T4i, the T3i, shared several important features with the 60D including the same 18 MP image sensor and the 63 zone exposure metering mode, both allowing you to get great, high-quality, well exposed images even in challenging lighting situations.  However, the T3i lacked a couple critical features that dedicated enthusiast photographers might eventually find that they would need, even if they weren’t ready or knowledgeable enough to use them right away.  They might have found that the less accurate autofocus system was eventually not up to their needs and that the slower continuous shooting speed limited the moments they could capture.

Canon Rebel T4i EOS 650D unbox unboxing compare vs T3i 60D choose decide

As I discussed above, the new Canon Rebel T4i / 600D demonstrates a significant leap in the “trickle-down” trend by borrowing several additional important features from the 60D, including the more accurate all-cross-type 9 point autofocus system and 5 frames per second, faster continuous shooting speed.  The fact that both of these cameras, the T4i and 60D, now share numerous key features, it is obviously a challenge to decide between them.

There are still a few features, however, that may help you decide one way or the other. The T4i has added continuous autofocusing while shooting video and a couple new Movie autofocus modes to best make use of this.  If you intend to shoot lots of video with your camera, this could be an important deciding factor. The T4i also adds a Touch Screen, allowing you to change settings, navigate menus, and browse through images with iPhone-like multi-touch gestures.  This isn’t a vital feature for taking better images, but it may be a convenience issue that makes a difference.

But the 60D still holds some important advantages for those who intend to be serious and dedicated to their photography, and who wish to use their camera as a versatile tool to fit with how they shoot. The 60D still offers a bigger and brighter viewfinder, additional external buttons and controls which makes changing camera settings on the fly much quicker and easier.  For example it has the metering mode, autofocus mode, etc. buttons right on top for easy access, plus the large Quick Control Dial on the rear of the camera to quickly change exposure compensation or to help with changing settings and rapidly moving through menus, and the all-important AF-ON button allowing more control over autofocus operation.

The 60D also has a slightly more rugged build than the T4i and some amount of weatherproofing seals, where the T4i basically has none.  Even more importantly, the 60D boasts additional Custom Function options, which will allow you to customize the camera and its functions to operate  exactly how you want them to: Safety Shift, Bracketing Sequence, ISO increments at 1/2 or 1/3 rather than full stops, dial direction reversal.  While some of these options may not seem important to the casual user, the heavy-duty user will find them indispensable in increasing their efficiency and deceasing their aggravation. And due to some of the additional features/ controls and stronger build, the body of the 60D is larger, feels sturdier, and is better balanced with the larger heavier lenses that a more dedicated photographer will likely be using sooner or later.

Top Tips and Tricks for the Canon 5D Mark III

OK, I admit, I’m being a bit deceptive.  While this post will include “tips” for taking full advantage of the Canon EOS 5D Mk III, it won’t really contain any “tricks.”  That is because with digital photography, especially a camera as powerful and complex as the 5D3, there really aren’t any tricksTricks implies shortcuts, and to paraphrase Euclid, there is no royal road to dSLR photography.  Instead there are techniques and camera controls that can and should be learned.  These will then allow you to adapt not just to a specific situation or emulate a certain image or style, but will give you the tools and knowledge to adapt to any situation and create the images you desire.

I spent several intimate weeks with the Canon 5D Mk III as I researched and wrote my dSLR camera guide, Canon 5D Mark III Experience, the first (and hopefully best!) book available for the 5D Mk III.  In the process I learned and discovered a few obvious and not so obvious things about the 5D3 that will help you get the most from your camera.

Canon 5D mark III mk 3 Experience e book tips tricks how to learn manual guide instruction
Detail of the Canon 5D Mark III

Learn and Take Advantage of the Autofocus System

First and foremost is to learn, understand, and make full use of the new 61 Point autofocus system.  This powerful and highly customizable AF system will allow you to capture more sharp images of a variety of moving subjects which was not previously possible with the 5DII, or even the 7D.  But to do this you will need to take control of it in order to focus on, or begin tracking, your intended subject.  This involves making use of the AF Modes as well as the AF Area Selection Modes and AF Points.

For moving subjects you can then employ the AF Cases and their settings to let the camera know what to expect as far as subject movement.  AF subject tracking works in part by predicting where the subject will be when the Shutter is pressed, so if the camera knows the subject is going to be moving erratically about the frame and changing its rate of speed, then it can take measures to better follow this than if it is set for a subject that is expected to move smoothly at a steady rate.  Ten tips could easily be written about the autofocus system alone, but I will limit it to a few (my e-book guide Canon 5D Mark III Experience contains extensive explanation of the AF system and all its elements, if you wish to learn it inside and out.)

Canon 5d mark iii mk 3 auto focus autofocus 61 af point select
Simulated image of the Canon 5D Mark III viewfinder showing the 61 autofocus points, with the desired AF Point shown as the larger black square.

One of the essential steps in taking a successful and sharp photo is controlling where the camera autofocuses.  If you allow the camera to autofocus by automatically choosing its own focus point(s) (such as in Auto+ Shooting Mode or with One-Shot AF Mode and Auto Selection – 61 Point AF Area Selection Mode) it typically focuses on the closest object.  This may or may not be what you want to focus on, so you should select or at least narrow down where the camera focuses using the autofocus AF Points or Zones.  By doing so you are telling the camera exactly where to autofocus or to look to find a moving subject to track.  For example, you often want to focus on a subject’s eyes, but if you allow the camera to choose the autofocus point itself, it may select another part of the face, or somewhere else on the body, or even a raised hand that is nearer to the camera than the face to focus most sharply on.  If you are capturing an image of a bird in a tree, the camera has no idea you want the autofocus system to zero in on the bird so that it is in sharp focus and not the branches or leaves near it or the perhaps even the leaves closer to you.

You will select an AF Mode based on whether the subject is still or moving, and select an AF Area Selection Mode based on how large of an area you want the camera to look at to find your intended subject – ranging from a small spot to a wider Zone to all the available 61 AF Points.  You can set the AF Modes and AF Area Selection Modes in a variety of combinations based on what and how you are shooting.

Activate all the Available AF Area Selection Modes at first and experiment with them all.  Then if you decide that you will never or rarely use one or more of them, de-activate those modes so that you don’t have to “click” through them every time to select your desired mode.

canon 5d mark III mk 3 autofocus auto focus af point zone 61 af area selection mode
Available AF Area Selection Modes of the Canon 5D Mark III

Spot AF is Not Necessarily More Accurate than Single-Point AF.  You may be inclined to use Spot AF all the time, assuming it will be more accurate than Single-Point AF, but this is not advised.  Spot AF is designed for specific situations and autofocusing challenges, where you need to focus on a very precise area and avoid any surrounding or foreground objects that the AF system may otherwise lock onto.  This can include making sure you zero-in on a bird that is sitting among leaves and branches, or perhaps shooting through a fence to a subject beyond.  In those situations you may find that Single-Point AF searches back and forth between the near leaves/ fence and the further subject, because the area it is looking at to find the subject encompasses both potential subjects.  Spot AF will allow you to target in on a more precise area.  Although Spot AF is indicated in the Viewfinder by the tiny square within the larger selected AF Point square, Spot AF will actually pinpoint the focus to an area about the size of the larger square.

So while Spot AF will be more accurate in certain situations as described, it should not be used for general use.  Because it is so precise, the area it looks at to find contrast or a detail on which to focus may be an area of solid color.  For example if you used Spot AF to quickly focus on the general cheek and eye area of a face, it may be aimed at an area of skin without contrast, whereas the Single-Point AF area might encompass the cheek and the eye and thus find enough contrast to be able to properly and quickly focus.

Decide How Many Selectable AF Points you wish to Choose From.  If you are coming from a Canon 5D Mark II, the 60D, or any number of other previous Canon dSLR cameras, you may be used to only having 9 AF Point to choose from.  If you still wish to manually select a specific point or zone, you may find that 61 points are a bit overwhelming at first.  Even if you are used to the 19 AF Points of the Canon 7D, you may not wish to suddenly jump up to 61 AF Points.  So you can limit the number of AF Points you wish to choose from to either 15 or 9, or to just the more accurate cross-type points.  Unfortunately, the 9 points are not in the nice diamond pattern of previous EOS cameras, but you may find them to be more manageable.

canon 5d mark III mk 3 auto foucs autofocus af mode point area selection 61 11
Limit your Selectable AF Points if 61 are too many to deal with.

Choose Your Priority when Working in AI Servo – Focus or Release.  You will need to tell the camera what your priority is when shooting in AI Servo AF mode – is it to ensure that the subject is in focus, or that the shutter is release immediately, whether or not the subject is in focus?  There are two menu items to set the priority for the first image and the second and subsequent images if shooting in Continuous Shooting Mode.

For AI Servo 1st Image Priority, Release priority will prioritize shutter release, or immediately capturing the initial shot at the possible expense of exact focus.  Generally when taking a photo, you are supposed to half-press the Shutter Button, allow the camera to focus, then continue the full-press of the Shutter Button to take the image.  If you simply “mash” down the Shutter Button, this setting will cause the camera to take the photo without bothering to focus first.  Sometimes when photographing sports, news, or events, capturing the “decisive moment” may take priority over exact focus.

Setting for Focus priority will prioritize focus for the first shot, ensuring that the subject is in focus before the picture is taken.  So when you fully press the Shutter Button, this setting may cause a brief, perhaps micro-seconds delay while the camera confirms focus before actually releasing the shutter.

Equal priority is a slight compromise between Release and Focus priorities.  It allows a brief (perhaps micro-seconds) pause for the camera to possibly find focus before releasing the shutter.  It does not guarantee that the image will be in focus, but merely gives it more of a chance to find focus.  It generally seems to make more sense to choose Release or Focus based on your priority.

Canon 5D mark III mk 3 custom setting function control multi controller direct autofocus point
AI Servo 1st Image Priority menu to determine if capturing the shot or getting the subject in-focus is the priority.

AI Servo 2nd Image Priority is similar except that it applies to the second and subsequent images in the burst.  Setting for Speed (Shooting speed priority) will prioritize shutter release, or continuing the high speed burst at the possible expense of exact focus.

Setting for Focus will prioritize focus tracking for the following shot(s), ensuring that the subject is in focus as you continue to take the burst of images.  Again, this may cause a brief, perhaps micro-seconds delay while the camera confirms focus before releasing the shutter for each image.

Equal priority again allows a slight pause before each of the subsequent shots to perhaps give the camera time to find focus before releasing the shutter.  This pause may be slightly more pronounced when shooting in low light or low contrast situations.

These 1st Image Priority and 2nd Image Priority settings should be set in conjunction with each other, based on the type of situation you are photographing and thus your priorities.  Generally, it sharp images are your goal, you will want to set both for  Focus Priority.  You may sacrifice the maximum 6 frames per second (fps) continuous shooting speed (if you have the Drive Mode set for High Speed Continuous) as there might be a  couple micro-seconds or more delays as the camera ensures that the subject is in focus before taking the subsequent shots.  If you are capturing a “decisive moment” such as a runner at the finish line or a goal being scored, you will want to set one or both of the settings to Release Priority/ Speed Priority, but ensure somehow that you have pre-focused on the subject distance so the result is not wildly out of focus.  Again, I go into much more detail about the various combinations and when to make use of them in my e-book.

Set the Custom Controls for Multi-Controller Direct.  This will allow you to manually select your AF Point or Zone more quickly by simply toggling the Multi-Controller thumb joystick, without having to first press the AF Point Selection Button.  You have probably noticed, to the dismay of your muscle memory, that the AF Point Selection Button no longer controls image zoom.  This is because there are many more image review options that are now made possible by Comparative Playback (side by side image review), discussed just below.

canon 5d mark iii mk 3 multi controller direct af auto focus autofocus point select

canon 5d mark iii mk 3 auto focus autofocus multi controller direct af point select zone control custom function setting
Set the Multi-Controller for AF Point Direct Selection for ease and speed.

Take Advantage of Comparative Playback (Side by Side Image Review).  Of course you can instantly review the image you just captured on the rear LCD Monitor, but the 5D Mk III now also offers Comparative Image Playback Mode (Two-Image Display) which gives you the ability to simultaneously compare two images or two different sections of the same image.  Whereas before, one would have to “flip” back and forth between two images and navigate around the images, this feature allows for some extremely helpful and flexible image analysis that was previously only possible once you were back at your computer.

To enter Comparative Playback Mode during image playback or review, press the Creative Photo / Comparative Playback Button (at the top of the row on the left of the camera back), which is also indicated by the side-by-side blue squares icon for side-by-side image playback.  Use the SET Button to highlight which of the two image windows you wish to navigate, then use the Quick Control Dial or Main Dial to scroll or jump to the desired image, the Magnify Button followed by the top Main Dial to zoom in or out of the selected image, and the Multi-Controller to navigate around the selected image frame.  You can press the INFO Button repeatedly to change the Shooting Information Display in order to view shooting information and/ or the Histograms.  If you zoom in on a specific area of one image and wish to zoom in on the other image to the same magnification and same area of the image, press the SET Button to switch to the other image window, then press the [Q] Button.  Also, press and hold the Playback Button to view the highlighted image as a single, full-screen image.

canon 5d mark iii mk 3 view image lcd side by side comparative playback review rear screen
Comparative Playback Mode view of two different images, also showing the images’ Histograms.

There are several different viewing options and potential uses for Comparative Playback, whether you are simultaneously viewing two separate images or two areas of the same image.

-Display the active AF point(s).
-Preview alternate cropping guides.
-View the thumbnail plus the Luminance Histogram.
-View the thumbnail plus the RGB Histograms.
-View the thumbnail plus basic exposure information.

For two different images:
-Compare the compositions of two images simultaneously.
-Zoom in and simultaneously compare a specific area for focus or exposure.
-View the thumbnails along with histograms or basic exposure information of both images.

For the same image:
-Zoom in and simultaneously compare two separate areas of the same image to have a closer look at focus or exposure.
-View the entire image for overall composition while also zooming in to view an area of detail for focus or exposure (see Figure 61).

Set the Default Magnification for Image Review.  In order to immediately review your images according to your preferences, you should set the initial magnification and position that you will view an image during image review (Playback) when you press the Magnify Button.  You can set for no magnification (1x) and then use the top Main Dial to zoom in and out.  This can be handy if you have the image review set to initially show the Shooting Information Display with the Histogram.  Since the image in that view is a thumbnail, you can then press the Magnify Button to show the full size image.  After this initial zoom, you can then use the Main Dial to zoom in or out.

Or set for 2x, 4x, 8x, or 10x magnification and it will instantly zoom to that magnification when the Magnify Button is pressed.  Again, after this initial zoom, you can then use the Main Dial to zoom in or out.  Each of these magnifications will zoom from the center of the image.  Or you can set it to quickly zoom in to full size, 100% view of the pixels, zoomed into the AF Point where focus was achieved, using setting Actual size (from selected pt).  This can be useful to quickly check for precise focus, though note that if you focused with a selected AF Point and recomposed, it will zoom into the final position of that AF Point in the composition, not the actual position where you used it to focus on your subject.  But if you only recomposed slightly, it will often be easy to quickly navigate to the actual area of focus.  The setting Same as last magnif. (from ctr) will zoom in at the same magnification that you last viewed an image at, centered at the image center.

canon 5D mark III mk 3 magnify button lcd view zoom
Magnification menu to set how images are initially viewed during Playback when the Magnify Button is pressed.


I’m still putting this post together but wanted to share what I had already written.  Next week I will go into more detail about the tips below:

Turn on the Viewfinder Warnings

canon 5D mark III mk 3 viewfinder warning custom function setting


Auto Rotate Images in the Camera and on Your Computer

canon 5D mark III mk 3 auto rotate image view lcd


Use the Q Button for Quick Access to a Variety of Features for Still Images

canon 5d mark iii mk 3 q button control edit image view lcd


Make Use of the Silent Control Touch Pad and Q Button for Movie Shooting

canon 5d mark iii mk 3 movie video silent control touch pad q button menu


canon 5d mark iii mk 3 movie video silent control touch pad q button menu


All of the above information – and much, much more – can be found in Canon 5D Mark III Experience, my latest Full Stop dSLR user’s guide e book, which goes beyond the manual to help you learn the features, settings, and controls of the powerful and highly customizable EOS 5D Mk III, plus most importantly how, when, and why to use the functions, settings, and controls in your photography.

Written in the clear, concise, and comprehensive style of all Full Stop guides, Canon 5D Mark III Experience will help you learn to use your Canon 5D Mk 3 quickly and competently, to consistently create the types of images you want to capture. The e-book is available in either PDF, EPUB, or MOBI format for reading on any device.

Learn more about it, preview it, and purchase it here:
http://www.dojoklo.com/Full_Stop/Canon_5DMkIII_Experience.htm

As one Canon user has said about Full Stop guides, “I don’t know how I could fully take advantage of all the features the camera has to offer without this publication! It’s well-organized, easy to understand, and succinct enough to keep your attention while still containing a wealth of information to get the most out of your camera.”

Take control of your 5D Mk III, the image taking process, and the photos you create!

Canon 5D Mark III mk 3 book ebook manual guide tutorial instruction bible how to dummies field EOS


Taking Advantage of the Canon 5D Mark III / IV Autofocus System

The autofocus systems of the Canon 5D Mark III and Canon 5D Mark IV are incredibly powerful and versatile, with their 61 AF Points, various pre-set AF “Cases,” and its Custom Function settings and redesigned menus to help photographers take advantage of its features.  The AF systems are designed to better enable you to lock onto and track moving subjects, so that when you take the shot the subject is ideally in focus, even when using Continuous Shooting to capture multiple shots.

For the basics of the Canon AF system, including the AF Modes, please see this other post first: Taking Control of Your Canon Autofocus System.  This post here will then address the additional features and options of the 5D3 and 5D4 AF system.  Most of the text below is excerpted from my e-book guides Canon 5D Mark III Experience and Canon 5D Mark IV Experience, where I write extensively about the 5D3  and 5D4 autofocus systems, including the numerous and important Auto Area Selection Modes.

Please note that some of the menu numbers, names, and options may vary slightly between the two cameras.

Canon 5D Mark III mk 3 autofocus auto-focus auto focus manual guide book
Antigua, Guatemala – simulated view of Canon 5D Mark III viewfinder and AF Points

All of these settings will apply when working in AI Servo Autofocus Mode.

First you will need to set the Autofocus (AF) Menu AF2: AI Servo settings to match your priorities:

AI Servo 1st Image Priority and AI Servo 1st Image Priority:  

Setting for Release priority will prioritize shutter release, or immediately capturing the initial shot and subsequent shots at the possible expense of exact focus.  Generally when taking a photo, you are supposed to half-press the Shutter Button, allow the camera to focus, then continue the full-press of the Shutter Button to take the image.  If you simply “mash” down the Shutter Button, this setting will cause the camera to take the photo without bothering to focus first.  Sometimes when photographing sports, news, or events, capturing the “decisive moment” may take priority over exact focus.

Setting for Focus priority will prioritize focus for the first shot and subsequent shots, ensuring that the subject is in focus before the picture is taken.  So when you fully press (or hold) the Shutter Button, this setting may cause a brief, perhaps micro-seconds delay while the camera confirms focus before actually releasing the shutter.

Equal priority is a slight compromise between Release and Focus priorities.  It allows a brief (perhaps micro-seconds) pause for the camera to possibly find focus before releasing the shutter.  It does not guarantee that the image will be in focus, but merely gives it more of a chance to find focus.  It generally seems to make more sense to choose Release or Focus based on your priority.

Then choose the AF Area Selection Mode that will best enable you to keep track of your subject.  Choose the some that is most accurate yet allows for the proper amount of lee-way if you are unable to keep the subject under your selected initial point at all times.  These settings include Single Point AF, AF Point Expansion 4 or 8 surrounding points, etc.  I will not go into detail about them here, but they are fully discussed in my guide.

Then find a “Case” setting which closely matches your needs

Case 1 – Versatile multi purpose setting

Tracking sensitivity:  0
Acceleration/deceleration tracking:  0
AF point auto switching:  0

Case 2 – Continue to track subjects, ignoring possible obstacles

Tracking sensitivity:  -1
Acceleration/deceleration tracking:  0
AF point auto switching:  0

Case 3 – Instantly focus on subjects suddenly entering AF points

Tracking sensitivity:  +1
Acceleration/deceleration tracking:  1
AF point auto switching:  0

Case 4 – For subjects that accelerate or decelerate quickly

Tracking sensitivity:  0
Acceleration/deceleration tracking:  1
AF point auto switching:  0

Case 5 – For erratic subjects moving quickly in any direction

Tracking sensitivity:  0
Acceleration/deceleration tracking:  0
AF point auto switching:  1

Case 6 – For subjects that change speed and move erratically

Tracking sensitivity:  0
Acceleration/deceleration tracking:  1
AF point auto switching:  1

These are the various options of these Cases which you can tweak for your specific needs:

Tracking sensitivity – This is the speed at which the AF system will switch from the initial subject to another subject when a new subject enters the focusing field of view or passes in front of the initial subject, or if you momentarily lose the subject that you are trying to keep positioned under a selected AF point. If you wish for it to quickly lock onto a new subject that enters the area you are focusing on, or rapidly switch intentionally between subjects at various distances, set for +2. If you wish to retain focus tracking on the same subject and ignore new or obstructing subjects set for -2. If your objective is somewhere in between, set accordingly at +1, 0, or -1.

Acceleration/deceleration tracking – AI Servo Autofocus Mode works in part by predicting the potential location of a subject based on the subject’s current speed and direction. In order to make these predictions more accurate, use this setting to tell the camera if the subject is accelerating/ decelerating at a steady pace, or if it is changing its speed more erratically. For subjects that move smoothly set for 0. If the subject moves erratically and may very suddenly speed up, slow down, start, or stop set for 2. Or set for 1 if the subject’s movements are somewhere in between these other options.

AF point auto switching – When you are using Auto Selection – 61 AF Point, Zone AF, or AF Point Expansion Autofocus Area Selection Modes this setting will adjust the speed at which the AF Points change to track a moving subject as it travels across the frame. Setting 0 is for a slow, gradual speed at which the surrounding AF Points will pick up and start tracking the subject if it moves away from the initially selected AF Point. Setting 1 will somewhat rapidly switch to a different AF Point, and setting 2 will most rapidly switch to a different AF Point. So for example, if you began tracking a subject with a selected point and the subject was quickly moving between it and the surrounding eight points, setting 0 would retain focus at the initial point expecting the subject to soon return to that primary point. Setting 2 would mean the surrounding points would immediately activate, pick up the moving subject as it entered their area of focus, and be used to focus on it.

Again, there is much more to the AF System and its Autofocus Modes, Autofocus Area Selection Modes, and Menu and Custom Function settings.  Please have a look at my e-book guides Canon 5D Mark III Experience and Canon 5D Mark IV Experience to learn more!