Top Ten Accessories for the Canon T5i / EOS 700D

Now that you’ve decided on the Canon Rebel T5i / EOS 700D (or Canon Rebel T4i / EOS 650DCanon Rebel T3i / EOS 600D) you’ll want to get the basic, essential accessories. Don’t get carried away yet with elaborate flash modifiers and color balance correction tools before you gain some experience and determine which advanced accessories you will really need and use. But you can’t go wrong with these initial 10 additions to your camera bag. Click on the links or the images to view and purchase them on Amazon.com or from the manufacturer (and help support my blog by doing so – thanks!)

1. SanDisk Extreme 8GB or 16GB Memory Card – You are going to need a high quality, high speed memory card to save all those images and capture those videos. Go with the best and don’t risk corruption and errors – a SanDisk Extreme. Perhaps a couple 8GB, 16GB, or even 32GB capacity Secure Digital (SD) cards to capture and store your photos – more if traveling. Use at least class 6 cards, or better yet class 10 if you will be shooting video.  Be sure to check the Sandisk site for current rebates.

2. Canon LP-E8 Battery – You will probably want a spare battery, especially if you are traveling, or just for those times you forgot to charge the battery before going to an important event. Go with the official Canon brand and avoid battery communication and charging issues. If you are a fan of the optional battery back / vertical grip, the one for the T3i and T4i is the Canon BG-E8. The battery grip allows you to use 2 LP-E8 batteries for extended shooting, or six AA batteries, and also increases the size of the camera body, which some users find more ergonomically comfortable, especially when shooting in the portrait orientation.

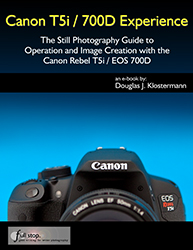
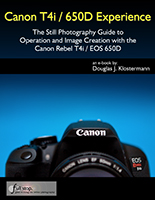
3. Canon T5i/700D Experience e-book (or Canon T4i Experience E Book or Canon T3i Experience E Book) – You will want to go beyond Auto and learn to use the advanced functions and settings of your sophisticated camera, so be sure to check out my e books, Canon T5i/700D Experience, Canon T4i Experience and Canon T3i Experience. They will help you to take control of your camera so that you can consistently take better images – the images you wish to capture. You’ve invested the money in an advanced camera, now invest the time to learn how to use it to its full potential! (There is also a Canon T2i Experience book available.)

Canon Rebel T5i 700D EOS book manual guide dummies how to tutorial tips tricks learn use setup     Canon T4i EOS 650D book ebook how to manual dummies field guide    

4. Black Rapid RS7 Strap – This sling-style camera strap provides a more comfortable and practical – and somewhat more discreet – way to carry around your camera, especially if you have a larger lens on it. They also make a couple of slightly different versions of the sling-strap, such as one designed for women, and a active “sport” version.

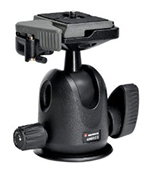
5. Manfrotto 055XPROB Tripod Legs and Manfrotto 496RC2 Ball Head:  This is an excellent “starter” combination of tripod legs and head for the enthusiast.  They are sturdy and durable yet affordable.  If you know you will be doing a lot of tripod work, such as for studio, landscape, or travel photography, it is best to invest in more advanced (expensive) versions, including lighter carbon fiber legs, four section legs that close to a shorter length, and a head with additional or specialized features.


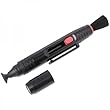
6. Giottos Large Rocket Blower – Blow the dust off your lens, camera body, interior, and sensor safely with the Rocket Blower. Get the large size for maximum “whoosh!” Use with the LensPEN Lens Cleaning System to clean those fingerprints, smudges, and mysterious spots off your camera lens (filter) safely and quickly with the LensPEN. Brush off the loose spots with the brush end, “charge” the tip with a twist of the cap, then clean by “drawing” in a circular motion. Read the manufacturer’s instruction for complete details.


7. Canon 430EX II Speedlite Flash – Upgrade to the Canon Speedlite Flash to obtain more flash power and control for your low light pictures. Take advantage of the T3i’s wireless remote flash capabilities. Rotate and bounce your flash for more flattering indirect light, diffuse it and scatter it for less harsh shadows. Consider the Canon 580EX II Speedlite for more advanced needs.

7a. Stofen Omni Bounce Diffuser – Diffuse and scatter the light from your Speedlite flash with the Omni Bounce Diffuser to eliminate harsh shadows. Use it with your flash head at a 45 degree angle up, or to the side or behind you, as it is designed to be used. Don’t aim it straight on, and don’t use it outside. I don’t care if you see others doing that, even if they have a 5D and a big lens – they don’t know that all they are doing is wasting flash power and not affecting the results.

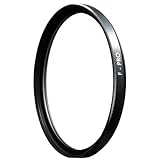
8. B+W Brand UV Filter – Protect your lens from scratches, dust, and impact damage with a high-quality, multi-coated B+W brand UV filter. It generally shouldn’t affect your image quality due to its high quality glass and coatings, and it just may save you from a $200 repair. Leave one on each of your lenses at all times, unless you are using another filter like the circular polarizer. Be sure to get the right size filter for your lens.

8a. B+W Brand Circular Polarizer Filter – Use this high-quality, multi-coated filter to dramatically darken skies, increase contrast, and cut through reflections. Turn the rotating lens to adjust the amount of darkening or reflection.

9. Canon EF-S 18-200mm f/3.5-5.6 IS Lens – After you’ve realized the limitations of the kit lens in both quality and focal range, pair your T3i with this high quality all-purpose “walk-around” lens, great for everyday and travel use. It provides the full focal range from wide angle to telephoto, and delivers excellent image quality, color, and contrast, as well as Image Stabilization to prevent blur from camera movement.

9a. EW 78D Lens Hood – And you will want the lens hood for the 18-200mm lens, to shade the lens from unwanted glare and flare and protect it from bumps and bangs.

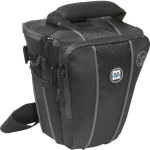
10. M Rock Holster Bag – Carry and protect your camera and walk-around lens in a holster style bag from M Rock. I used the Yellowstone style extensively in my travels throughout South America, and I love its durability and extra little features like a built-in rain cover, micro-fiber cleaning cloth, zippered interior pocket, adjustable interior, and extra strap. Be sure to get the model that fits your camera body and lens-length.
Bonus. Understanding Exposure by Bryan Peterson – If you don’t yet understand the relationship between aperture, shutter speed, and ISO, read this book immediately. This knowledge is essential to understanding and using your powerful dSLR to its full potential.

For additional photography gear, accessories, and books, be sure to check out my dSLR Photography Gear, Accessories, and Books post!

What the Canon 7D Firmware 2 Upgrade Will Do For You

Soon after the release of the long awaited 5D Mark III professional full-frame dSLR, Canon announced that it would update the firmware of the EOS 7D to expand its functions and to add several new menu items that had been introduced on the 5D Mk III (as well as some additional features). And now, this Canon 7D Firmware 2 update is here! You can download it from Canon on the 7D product page:

Canon 7D Firmware 2 2.0 EOS upgrade update

With this update, Canon has increased the versatility and boosted the capabilities of the popular and powerful 7D. These improvements now give you more control over Auto ISO settings and over audio recording during Movie shooting, quick access to new and existing editing features during playback, and in-camera RAW processing. The 7D is also now compatible with the optional Canon GP-E2 GPS Receiver. Perhaps most dramatically, the maximum continuous burst capability has been increased so that the 7D is now able to shoot more continuous frames before pausing: up to 25 RAW or 130 JPEG images when using a 128GB UDMA card, or 23 RAW and 110 JPEG images when using a standard (8GB minimum) CompactFlash card. When saving both RAW+JPEG image files, the camera has improved from 6 consecutive shots to 17.

Here are all of the Canon EOS 7D Firmware 2 improvements:

  • Option to set the time zone and daylight saving time along with the date. Now when you travel, you merely have to adjust the time zone setting for your destination and not reset the time.
  • Increased maximum burst during continuous shooting. This is a fantastic update for those shooting long continuous bursts, allowing you to shoot 23 RAW or 110 consecutive JPEG images when using a typical memory card, or even 17 RAW+JPEG images over the previous 6. Invest in a 128GB UDMA card and shoot 25 RAW or 130 JPEG consecutively.
  • Ability to set the desired maximum ISO Auto setting. Now when using Auto ISO you can select the maximum ISO setting, between 400 and 6400, that the camera will choose – to avoid creeping into unwanted noisy ISO settings.
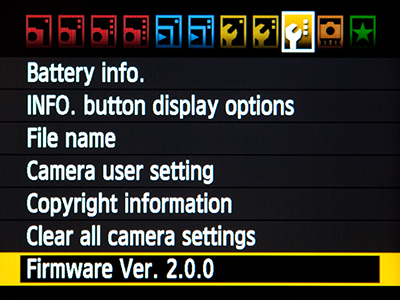
  • Registering or changing the file name prefix of JPEG and RAW files. If you have the need to customize the file name prefix of your images, due to using more than one camera or any other reason, the camera now offers you a few different ways to do this.
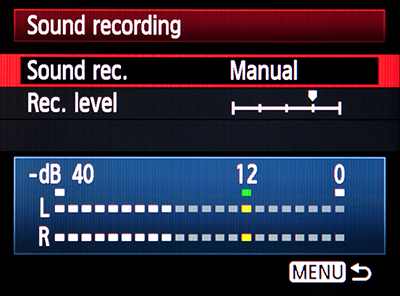
  • Manual adjustment of audio recording levels for Movie shooting (64 levels). Like the 5DIII, you can now adjust the audio level while shooting video. While the in-camera microphone is mono, an optional external mic can record in stereo.

Canon 7D eos firmware 2 2.0 update video movie sound audio recording level manual adjust

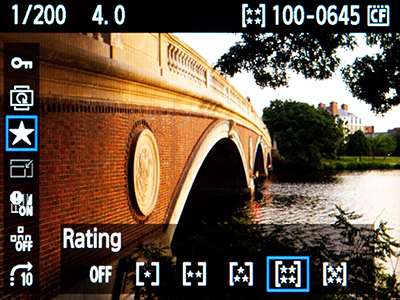
  • Option to rate images (1 to 5 stars). You can now rate your images in-camera, which can help you to get a head start on editing.
  • Added option to Jump through images by Rating. The rating can also be used in conjunction with Image Jump or when putting together a slide show.
  • Quicker scrolling of magnified image view during playback. This is an unexpected but welcomed update to help make in-camera image review a bit easier.
  • Quick Control screen during playback to easily access various image options. The various Quick Control screens can often be the quickest and easiest way to access and change a variety of settings and features. The camera has now added a convenient Quick Control Screen for image playback. When reviewing an image, or when in Live View or Movie Shooting Modes, pressing the [Q] Button will bring up Quick Control screens specific to those operations. The Playback Quick Control Screen allows you to easily access image functions including Protect, Rotate, Rating, RAW image processing, Resize JPEG, Highlight Alert, AF Point Display, and Image Jump. During Live View shooting, you can quickly access Auto Lighting Optimizer and the image recording quality by pressing the [Q] Button. During Movie shooting, pressing the [Q] Button will allow you to quickly access similar functions as with Live View plus the movie recording size setting.

Canon 7D eos firmware 2 2.0 update quick control rating q screen

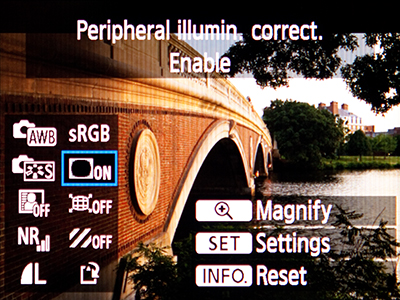
  • RAW image processing in-camera. Now you can process RAW images in-camera and then save them as JPEG images. This is useful if you need to quickly output a processed file, and you can apply a White Balance, Picture Style (and adjust its variables), Auto Lighting Optimizer, High ISO Speed Noise Reduction, choose the JPEG Image Quality output, select the Color Space (sRGB, AdobeRGB), and utilize Peripheral Illumination, Distortion, and Lens Aberration corrections.

Canon 7D eos firmware 2 2.0 update raw processing in camera

  • Ability to resize JPEG images in-camera. This new menu item can be used to resize (reduce only) a JPEG image in-camera, which could be useful if you need to quickly output a smaller JPEG file (with lower pixel count). You can also use the [Q] Button during image playback to quickly access Resize.
  • GPS settings menu and added compatibility with optional Canon GPS device. The 7D is now compatible with the optional Canon GPS Receiver GP-E2, which will allow you to record location information as part of the EXIF data of your image including elevation, direction, longitude, and latitude.

My e-book camera guide Canon 7D Experience is being updated to incorporate all the EOS 7D Firmware 2 updates. If you have already bought the guide from my Full Stop website or from Amazon you will be contacted about how to obtain the revised guide. This updated guide, perhaps the only Canon 7D guide incorporating Firmware 2 additions, should be available by mid-August.

Canon EOS 7d manual guide book firmware 2 update 2.0

Canon Rebel T4i / EOS 650D Hands-On

I’ve had a chance to get some hands-on time with the new Canon Rebel T4i / EOS 650 as I’ve been working on my e-book user’s guide for the camera, Canon T4i / 650D Experience.  While the T4i shares the outward appearance and many of the features of its predecessor the T3i (and the T2i as well), if definitely has something new to offer.  Its improved autofocusing system for viewfinder shooting, its revamped AF modes for continuous movie shooting, its faster maximum continuous shooting rate, and its touch-screen all contribute to the T4i being a dramatic leap over the prior uninspired T2i/ T3i improvements.

I wrote about all the new features of the T4i and what they will mean for real life camera use in a recent post, Introduction to the Canon Rebel T4i / EOS 650D, so please have a look at that.  I will speak a little bit here about my thoughts on actually using these features.

Trickle-Down Features: The new Canon Rebel T4i / 600D demonstrates a significant leap in this “trickle-down” trend by taking the all-cross-type 9 point autofocus system and faster continuous shooting speed from the 60D and introducing these to the Rebel line. Although these previous omissions were seemingly necessary to differentiate the Rebels from the mid-level 50D/ 60D line, they resulted in two of the few but important “shortcomings” of the Rebels: they always had a less precise autofocus system with only one cross-type AF point (the center one), and a slower frames-per-second maximum continuous shooting speed. (Learn more about why cross-type points are so great just below.) Now with these improved features, the differences between the T4i and the mid-level 60D have been significantly reduced. (The 60D still offers additional external buttons and controls, slightly more rugged build and weatherproofing, and additional Custom Function options.)

All New LCD and Movie Focus: In addition, the T4i adds a first for a Canon dSLR: a touch-screen LCD that can be used for settings selection, image review, menu navigation, and even autofocusing or shutter release in Live View. Plus it offers a totally revamped hybrid autofocus system for Live View and Movie shooting that makes use of phase detection and contrast detect, allowing for another Canon dSLR first: continuous autofocus during Live View and Movie shooting. The phase detection aspect of the new AF system allows the camera to determine both the out-of-focus distance and the direction in which to correct, finally eliminating the slow and awkward focus hunting of previous models. Add one of the new “step motor” STM lenses such as the 18-135mm kit lens or the 40mm “pancake” and the lens will now silently focus during movie shooting, thus eliminating the autofocus motor noise previously picked up by the camera’s microphone. (Did I mention the built-in mic is now a stereo mic! And there is a stereo mic input jack.) Plus the image stabilization of the 18-35mm EF-S IS STM lens is designed to counteract camera shake caused by walking while shooting video.

All Cross-Type AF Points:  Cross-type autofocus points are more accurate and more desired because they can grab focus on a wider range of subjects. If your non-cross-type point is oriented only in the vertical direction, and you aim it at a subject displaying a strong line also also in the vertical direction (such as the side of a door frame) it will not be able to detect the line or a change in contrast, and will not be able to focus. Aim it at the strong horizontal line of the top of the door, and it will lock right on. (learn more about autofocus concepts here.)

So the fact that the T4i uses cross-type AF sensors for all 9 AF points means that the autofocus system is significantly more accurate, and you can confidently use not just the center AF point but all the outer points as well to focus on or track a subject. Not to mention that the center AF point is now also an even more accurate diagonal cross-type sensor when using an f/2.8 lens.

Faster Frame Rate: The T4i now boasts a more rapid 5 frames per second maximum continuous shooting speed, and incorporates the speedy Digic 5 processor, narrowing another major difference with the mid-level 60D. These features will allow you to capture quicker shots in a burst thus giving you the greater possibility of capturing just the right moment of action or the best facial expression or pose.

As mentioned, the Canon T4i also finally brings us great quality touch-sensitive (not old-fashioned pressure-sensitive) touch-screen capabilities on a Canon dSLR (with smear-resistance!). You can select and change your settings on the Quick Control Screen (Q Screen) simply by touching your choice, or use it to tell the camera where to focus during Live View shooting. It can also be used to navigate the menus, and during image playback you can easily swipe and zoom with iPhone-like multi-touch motions and response. Early reports indicate that the screen responds incredibly well, and the graphic layout of icons and options make it easy to use. This 1 million pixel LCD screen is fully articulating, as with the T3i and 60D.

New Live View/ Movie AF Modes: So in addition to the upgraded AF system during stills shooting, Canon has modified the Live View and Movie Shooting autofocus system, which now offers Face Detection+Tracking, FlexiZone-Multi, and FlexiZone-Single AF modes rather than the previous Quick, Live, and Face AF Modes. Quick Mode AF is still also available for Live View shooting. (With Quick Mode you use the 9 auto focus points, similar to the viewfinder AF Points, as displayed on the LCD Monitor. But since the camera is using the autofocus sensor to focus, it momentarily interrupts the Live View on the LCD Monitor when it flips the mirror back down to access the AF sensor.)

All of these features contribute to the T4i / 650D being quite an amazing consumer level camera. In most ways it is a higher-quality, more capable camera that the pro-sumer 50D of just a few years ago, and it will definitely fulfill the needs and expectations of most any enthusiast shooter. The only reasons one would need to step up to the 60D would be if you need more direct access to controls, buttons, and settings on the body of the camera in order to change and adjust settings on the fly, if you needed a slightly more rugged and dust/water-proof body, and wanted greater ability to customize the controls and functions of the camera with its additional Custom Functions.

Borrowing from the 5D MkIII:  The specs also note that due to the faster Digic 5 processor, the T4i has Lens Aberration Correction and Chromatic Aberration Correction features as first seen on the 5D3, as well as a new Ambient Light Correction.

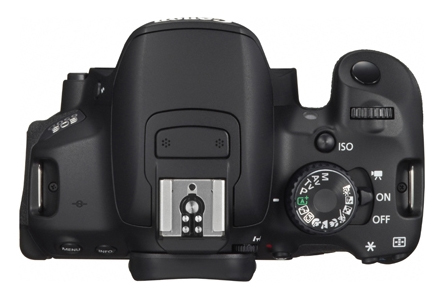
Canon Rebel T4i EOS 650D mode dial
Note the additional Mode Dial options and Power Switch change (Movie Shooting Mode) to the Canon T4i (image courtesy of Canon USA)

Some Extras: And in addition to the standard Creative Zone shooting modes (Av, Tv, P, M) and the Basic Zone modes (Flash Off, Creative Auto, Portrait, Landscape, Close-Up, Sports, Night Portrait) the T4i eliminates the Automatic Depth of Field mode on the dial and adds Night shooting without a tripod and HDR backlight compensation. Movie Shooting mode is removed from the Shooting Mode dial and is added to the On-Off switch. The T4i includes the Auto+ Shooting Mode (Scene Intelligent Auto) introduced on the T3i and even used on the 5D Mark III, where the camera analyzes the specific scene in order to automatically determine the best and most appropriate exposure, white balance, Picture Style, focus, and other settings.

The T4i shares the same battery (the LP-E8) and the same battery grip (the BG-E8) as the T3i and T2i. The fun filter (Creative Filters) effects introduced in the previous models (including Grainy Black and White, Soft Focus, Fish-eye Effect, Toy Camera Effect, Miniature Effect) are all still available, plus a couple new ones such as Water Painting and Art Bold.

Canon Rebel T4i / 650D vs. EOS 60D

Canon Rebel T4i vs. EOS 60D

I first introduced and discussed the new Canon Rebel T4i in this recent post, Introduction the the Canon Rebel T4i.  I encourage you to read that first to learn about all the features of the T4i. Then you may be wondering about how to choose between the T4i vs. the Canon EOS 60D, so I go into more detail about that here:

The predecessor to the T4i, the T3i, shared several important features with the 60D including the same 18 MP image sensor and the 63 zone exposure metering mode, both allowing you to get great, high-quality, well exposed images even in challenging lighting situations.  However, the T3i lacked a couple critical features that dedicated enthusiast photographers might eventually find that they would need, even if they weren’t ready or knowledgeable enough to use them right away.  They might have found that the less accurate autofocus system was eventually not up to their needs and that the slower continuous shooting speed limited the moments they could capture.

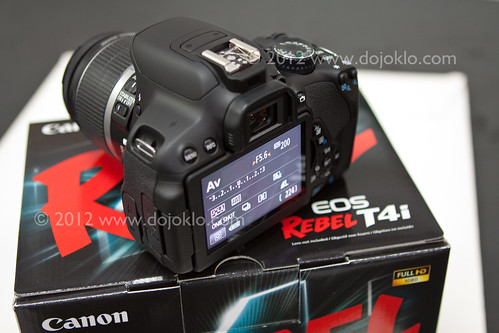
Canon Rebel T4i EOS 650D unbox unboxing compare vs T3i 60D choose decide

As I discussed above, the new Canon Rebel T4i / 600D demonstrates a significant leap in the “trickle-down” trend by borrowing several additional important features from the 60D, including the more accurate all-cross-type 9 point autofocus system and 5 frames per second, faster continuous shooting speed.  The fact that both of these cameras, the T4i and 60D, now share numerous key features, it is obviously a challenge to decide between them.

There are still a few features, however, that may help you decide one way or the other. The T4i has added continuous autofocusing while shooting video and a couple new Movie autofocus modes to best make use of this.  If you intend to shoot lots of video with your camera, this could be an important deciding factor. The T4i also adds a Touch Screen, allowing you to change settings, navigate menus, and browse through images with iPhone-like multi-touch gestures.  This isn’t a vital feature for taking better images, but it may be a convenience issue that makes a difference.

But the 60D still holds some important advantages for those who intend to be serious and dedicated to their photography, and who wish to use their camera as a versatile tool to fit with how they shoot. The 60D still offers a bigger and brighter viewfinder, additional external buttons and controls which makes changing camera settings on the fly much quicker and easier.  For example it has the metering mode, autofocus mode, etc. buttons right on top for easy access, plus the large Quick Control Dial on the rear of the camera to quickly change exposure compensation or to help with changing settings and rapidly moving through menus, and the all-important AF-ON button allowing more control over autofocus operation.

The 60D also has a slightly more rugged build than the T4i and some amount of weatherproofing seals, where the T4i basically has none.  Even more importantly, the 60D boasts additional Custom Function options, which will allow you to customize the camera and its functions to operate  exactly how you want them to: Safety Shift, Bracketing Sequence, ISO increments at 1/2 or 1/3 rather than full stops, dial direction reversal.  While some of these options may not seem important to the casual user, the heavy-duty user will find them indispensable in increasing their efficiency and deceasing their aggravation. And due to some of the additional features/ controls and stronger build, the body of the 60D is larger, feels sturdier, and is better balanced with the larger heavier lenses that a more dedicated photographer will likely be using sooner or later.

Important Firmware Update to the Canon 7D

It has been reported that Canon will soon be releasing an important firmware update for the Canon EOS 7D.  Unlike most firmware updates that correct a little bug and a typo in one of the foreign language menus, this update will add a considerable amount of features that were recently included in the Canon 5D Mark III.  These include:

IMPROVED RAW MAXIMUM BURST
Increasing the maximum burst when shooting RAW images from 15 fps to 26 RAW frames in a singlecontinuous burst.

IN-CAMERA RAW CONVERSION
Post-processing of RAW images in-camera, including adjusting or setting the white balance, Picture Style, High ISO Noise Reduction, Color Space (AdobeRGB/sRGB) and lens corrections (Peripheral Illumination Correction, Chromatic Aberration Correction, and distortion correction).

The file can then be saved as a JPEG for immediate output and use.

IMAGE RATING CAPABILITIES
Rate your images in-camera, from 1 to 5 stars.  This feature speeds up the process of sorting and organizing images when you return to your computer and begin to work in Adobe Bridge, Apple Aperture, etc.

AUTO ISO MAXIMUM SETTING
Set the maximum ISO that the camera will use while working in Auto ISO, between 400-6400 (inclusive).

MANUAL ADJUSTMENT FOR AUDIO RECORDING LEVELS
Manually adjust the audio recording level while shooting video, as well as the volume during playback.

JPEG RESIZING
Resize (downsize) a JPEG image in-camera and save it as a separate image, for easy immediate output and use.

SUPPORT FOR THE GP-E2 GPS UNIT
Use the new Canon GP-E2 GPS unit to geo-tag your images.

QUICK CONTROL DURING PLAYBACK
Press the Q Button during image playback to quickly access several options including Protect Image, Rotate, Rate, Resize, Highlight Alert, AF Point Display, and Image Jump.

FILE NAME SETTING
This adds the ability to change the naming convention of file name prefixes, so that instead of an image file being named IMG_xxxx, it can now be anything you wish such as DJK1xxxx or 7D12xxxx.  The second option of this feature allows you to change just the first three letters of the name, and the third letter will reflect the file size setting, such as IMGL0025.JPG for Large JPEG files or IMGL0025.CR2 for large RAW files.

TIME ZONE SETTING
Set your time zone with the option to adjust for daylight savings time.

FASTER SCROLLING OF MAGNIFIED IMAGES
When reviewing an image during playback, this will allow you to scan around a magnified image quicker.

~ ~ ~

Be sure to check the Canon 7D page under Drivers and Software to see when this update has been released.

~ ~ ~

Canon 7D Experience e-book guide to the 7D – If you are looking to take full control of your Canon EOS 7D and the images you create, be sure to have a looks at my e-book guide Canon 7D Experience.  Since I publish only in e-book form, this may be the only book that will be able to quickly incorporate these major changes to the menus and features of the camera!  I will send out an update supplement to all those who have purchased the PDF version of Canon 7D Experience, and I will incorporate all the changes in an updated version of the guide, so that all new readers will obtain the latest information.

Canon EOS 7d manual guide book firmware 2 update 2.0

Introduction to the Canon Rebel T4i / 650D

Canon Rebel T4i / EOS 650D:

(After learning about the features of the new T4i here, see this other post for a comparison of the Canon Rebel T4i vs. EOS 60D)

Each year as Canon updates its high end Rebel (or xxxD) model, they borrow additional features from their more advanced (and more expensive) dSLR cameras, resulting in higher and higher quality consumer models that incorporate previous “pro” and “pro-sumer” features. The T2i then T3i added the improved 63 zone exposure metering system, 18 megapixel sensor, wireless controlled external flash, and full HD video of the pro-sumer models, plus threw in some additional menu items, custom function options, and in-camera processing features that were lacking in previous Rebels.

Canon Rebel T4i EOS 650D features compare
The Canon Rebel T4i / EOS 650D (image by the author)

Trickle-Down Features: The new Canon Rebel T4i / 650D demonstrates a significant leap in this “trickle-down” trend by taking the all-cross-type 9 point autofocus system and faster continuous shooting speed from the 60D and introducing these to the Rebel line. Although these previous omissions were seemingly necessary to differentiate the Rebels from the mid-level 50D/ 60D line, they resulted in two of the few but important “shortcomings” of the Rebels: they always had a less precise autofocus system with only one cross-type AF point (the center one), and a slower frames-per-second maximum continuous shooting speed. (Learn more about why cross-type points are so great just below.) Now with these improved features, the differences between the T4i and the mid-level 60D have been significantly reduced. (The 60D still offers additional external buttons and controls, slightly more rugged build and weatherproofing, and additional Custom Function options.)

All New LCD and Movie Focus: In addition, the T4i adds a first for a Canon dSLR: a touch-screen LCD that can be used for settings selection, image review, menu navigation, and even autofocusing or shutter release in Live View. Plus it offers a totally revamped hybrid autofocus system for Live View and Movie shooting that makes use of phase detection and contrast detect, allowing for another Canon dSLR first: continuous autofocus during Live View and Movie shooting. The phase detection aspect of the new AF system allows the camera to determine both the out-of-focus distance and the direction in which to correct, finally eliminating the slow and awkward focus hunting of previous models. Add one of the new “step motor” STM lenses such as the 18-135mm kit lens or the 40mm “pancake” and the lens will now silently focus during movie shooting, thus eliminating the autofocus motor noise previously picked up by the camera’s microphone. (Did I mention the built-in mic is now a stereo mic! And there is a stereo mic input jack.) Plus the image stabilization of the 18-135mm EF-S IS STM lens is designed to counteract camera shake caused by walking while shooting video.

Canon T4i EOS 650D Rebel T3i autofocus viewfinder 9 point cross type
Simulated view of the Canon T3i/ T4i viewfinder with 9 autofocus (AF) points. (Image by author)

All Cross-Type AF Points:  Cross-type autofocus points are more accurate and more desired because they can grab focus on a wider range of subjects. If your non-cross-type point is oriented only in the vertical direction, and you aim it at a subject displaying a strong line also also in the vertical direction (such as the side of a door frame) it will not be able to detect the line or a change in contrast, and will not be able to focus. Aim it at the strong horizontal line of the top of the door, and it will lock right on. (learn more about autofocus concepts here.)

So the fact that the T4i uses cross-type AF sensors for all 9 AF points means that the autofocus system is significantly more accurate, and you can confidently use not just the center AF point but all the outer points as well to focus on or track a subject. Not to mention that the center AF point is now also an even more accurate diagonal cross-type sensor when using an f/2.8 lens.

Faster Frame Rate: The T4i now boasts a more rapid 5 frames per second maximum continuous shooting speed, and incorporates the speedy Digic 5 processor, narrowing another major difference with the mid-level 60D. These features will allow you to capture quicker shots in a burst thus giving you the greater possibility of capturing just the right moment of action or the best facial expression or pose.

As mentioned, the Canon T4i also finally brings us great quality touch-sensitive (not old-fashioned pressure-sensitive) touch-screen capabilities on a Canon dSLR (with smear-resistance!). You can select and change your settings on the Quick Control Screen (Q Screen) simply by touching your choice, or use it to tell the camera where to focus during Live View shooting. It can also be used to navigate the menus, and during image playback you can easily swipe and zoom with iPhone-like multi-touch motions and response. Early reports indicate that the screen responds incredibly well, and the graphic layout of icons and options make it easy to use. This 1 million pixel LCD screen is fully articulating, as with the T3i and 60D.

New Live View/ Movie AF Modes: So in addition to the upgraded AF system during stills shooting, Canon has modified the Live View and Movie Shooting autofocus system, which now offers Face Detection+Tracking, FlexiZone-Multi, and FlexiZone-Single AF modes rather than the previous Quick, Live, and Face AF Modes. Quick Mode AF is still also available for Live View shooting. (With Quick Mode you use the 9 auto focus points, similar to the viewfinder AF Points, as displayed on the LCD Monitor. But since the camera is using the autofocus sensor to focus, it momentarily interrupts the Live View on the LCD Monitor when it flips the mirror back down to access the AF sensor.)

All of these features contribute to the T4i / 650D being quite an amazing consumer level camera. In most ways it is a higher-quality, more capable camera that the pro-sumer 50D of just a few years ago, and it will definitely fulfill the needs and expectations of most any enthusiast shooter. The only reasons one would need to step up to the 60D would be if you need more direct access to controls, buttons, and settings on the body of the camera in order to change and adjust settings on the fly, if you needed a slightly more rugged and dust/water-proof body, and wanted greater ability to customize the controls and functions of the camera with its additional Custom Functions.

Borrowing from the 5D MkIII:  The specs also note that due to the faster Digic 5 processor, the T4i has Lens Aberration Correction and Chromatic Aberration Correction features as first seen on the 5D3, as well as a new Ambient Light Correction.

Canon Rebel T4i EOS 650D mode dial
Note the additional Mode Dial options and Power Switch change (Movie Shooting Mode) to the Canon T4i (image courtesy of Canon USA)

Some Extras: And in addition to the standard Creative Zone shooting modes (Av, Tv, P, M) and the Basic Zone modes (Flash Off, Creative Auto, Portrait, Landscape, Close-Up, Sports, Night Portrait) the T4i eliminates the Automatic Depth of Field mode on the dial and adds Night shooting without a tripod and HDR backlight compensation. Movie Shooting mode is removed from the Shooting Mode dial and is added to the On-Off switch. The T4i includes the Auto+ Shooting Mode (Scene Intelligent Auto) introduced on the T3i and even used on the 5D Mark III, where the camera analyzes the specific scene in order to automatically determine the best and most appropriate exposure, white balance, Picture Style, focus, and other settings.

The T4i shares the same battery (the LP-E8) and the same battery grip (the BG-E8) as the T3i and T2i. The fun filter (Creative Filters) effects introduced in the previous models (including Grainy Black and White, Soft Focus, Fish-eye Effect, Toy Camera Effect, Miniature Effect) are all still available, plus a couple new ones such as Water Painting and Art Bold.

Order your T4i from Amazon or B and H Photo today:

(If you plan to purchase the T4i, or any photo equipment or books etc., I encourage you to do so through these referral links. While your price will be the same, they will give me a little something for the referral, which helps to support my blog and my work – thanks!  I appreciate your support!)

Canon T4i from Amazon – body only, 18-55mm kit, or new 18-135mm STM kit

Canon T4i from B&H Photo – body only, 18-55mm kit, or new 18-135mm STM kit


Remember to check out this other post for a comparison of the Canon Rebel T4i vs. EOS 60D.

For a full list of Rebel T4i / EOS 650D specifications and features, have a look here:

http://www.usa.canon.com/cusa/consumer/products/cameras/slr_cameras/eos_rebel_t4i_18_135mm_is_stm_lens_kit#Specifications


A Response to Ken Rockwell’s Review of the Canon 5D Mark III

I just came across a certain review of the new Canon 5D Mark III and am compelled to respond.  It is one thing to write a critical review, but a whole other thing to list various perceived shortcomings and deficiencies that simply don’t actually exist in the camera.  After having spent several intimate weeks with the 5D Mk III (as I wrote the Canon 5D Mark III Experience camera guide), it is disappointing to then read about alleged issues and faults which actually don’t exist but were merely assumed by a reviewer because effort wasn’t put into reading the manual and properly learning the camera.

Canon 5D Mark III mk 3 eos manual book ebook instruction how to guide dummies
Detail of the Canon 5D Mark III by dojoklo

I have put together a list of some of my responses.  KR quotes are in italics and blue, and my replies below them.

Slower Autofocus – With so much more to set, learn and get in the way, the new AF system will slow you down until you master it.  The 5D Mark III’s AF system is that is about ten times more complicated than earlier cameras. Now it will take you forever to learn how to use it, and if you do, you’ll discover that the Auto AF Area Select mode takes much longer to select which of the 61 points it feels like using, while the original 5D and the 5D Mark II instantly selected among their 9 points..

Yes, the sophisticated and highly customizable autofocus system of this professional camera needs to be fully learned and understood in order to take full advantage of it and to gain proficiency at using it.  But the AF system and menus are designed to be powerful yet easy to get the most from, and this proves to be true once the user puts some effort into learning and setting it up.  Then you will find that there are numerous solutions to quickly accessing it, changing it, and making full use of the Canon 5D Mk 3 autofocus system, including:

  • Limiting the number of selectable AF points in the AF4 menu to just 15, 9, or 41 cross-type (while all of the 61 AF Points will still be available for use by the camera to find, track, and capture subjects).
  • Setting up all the AF menu and Custom Function items initially to best suit your style of shooting and then not dealing with them anymore.
  • Or better yet, tweaking any of the Autofocus Case presets to your liking, then quickly choosing among the Cases based on your shooting situation.
  • Setting up your favorite combination of AF settings, modes, tracking settings, etc, which can then all be registered and called up with the press of the DOF button.
  • Adding any of the AF menu items to My Menu, setting My Menu to come up with one button push, then quickly accessing the AF menu items you need to change.

A different response to the Canon 5D Mk III autofocus system would be to marvel at the incredible, never-before-possible opportunities to customize and use a state-of-the-art AF system to track, retain focus, and capture shots that could not have previously been captured, through pre-setting the camera to be aware of the rates of speed and amount of erratic movement to expect from the subject, as well as take into account the user’s desire to either retain focus on a subject/ distance or to quickly be able to change to another subject/ distance.  Not to mention the various configurations of AF points and Zones which can be chosen to most accurately focus on and track a variety of subjects and situations.

AF is much more complicated, not necessary better than the original 5D and 5D Mark II.

Anyone who has used the 5D and 5DII autofocus system for more than 6 minutes and then used the 5DIII AF system will tell you that:

1. there were some major shortcomings with the 5D and 5DII autofocus, particularly in lower light, and

2. the AF speed, accuracy, and low light focusing abilities of the 5DIII are on a whole new performance level than those previous models.

It’s not any different from other AF cameras as far as low-light is concerned.

As indicated above, I found quite the opposite to be the case as, for example, I quickly and easily grabbed focus on a black furry face in incredibly dim lighting, which could never have been accomplished so easily with the 5D II or 50D:

Canon 5D Mark III mk 3 low light high iso 25600
Canon 5D Mark III – 25,600 ISO, JPEG straight from camera.  25,600 ISO plus 1/640 plus f/1.4 will help indicate the light level.

The finder’s AF display is inferior. Instead of discrete LEDs that only blinked as needed, the Mark III’s new screen uses solid black LCD boxes that get in the way of seeing your subject’s subtleties — like when they smile.

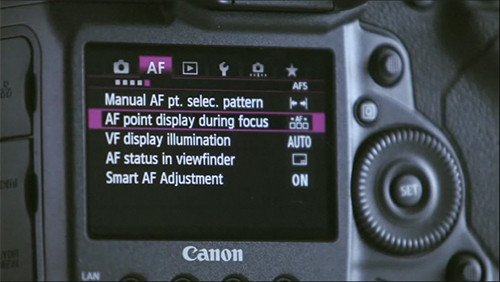
The big, bright, glorious viewfinder of the 5D3 offers several options for how and when to display and/ or illuminate the AF points as they are seen in the viewfinder, including different options to have them visible and/ or blink just when used or needed, as listed below.  See the AF5 Menu, AF Point Display During Focus item as well as other menu items to set up exactly how and when they illuminate such as VF Display Illumination.

Selected (constant) – The selected AF Point (or points) is always visible, but not all of the other 61 AF Points.

All (constant) – All of the 61 AF Points are always visible.  Recommended:  this will make it easier to always know where the other points are for when you quickly need to select a different point.  These AF Points are typically too important to hide!

Selected (pre-AF, Focused) – The selected AF Point(s) is visible when the camera is ready to shoot even before you have started any AF operations, when you are selecting an AF Point or zone, and when focused is achieved by the camera (except when working in AI Servo AF mode).

Selected (focused) – The selected AF Point(s) is visible only when you are selecting an AF Point or zone, and when focus is achieved (except when working in AI Servo AF mode).

Disable display – The selected AF point(s) will only be displayed when selecting an AF Point or zone.

Plus you can turn the grid display off or on.  I myself find seeing all the AF points as well as the grid indispensable to taking full advantage of the AF system while keeping my framing straight and level.

The AF points are now poorly lit. An LED lights up the entire screen and sort of helps you see the dark LCD AF point boxes in the dark. The older cameras were much better.

Again, I did not find this to be the case, and had no problem making use of the AF points in the dark as I took these images.  In fact I rather enjoyed using the AF system in the dark as I shot these images, and marveled at how pleasant it made night shooting.  However, other 5D3 users have shared KR’s complaint regarding the black AF Points in dark situations, and it sounds like Canon is going to address this with a future firmware update.

Canon 5D Mark III mk 3 multiple exposure low light high iso
Canon 5D Mark III – In-Camera Multiple Exposure feature

Canon 5D Mark III mk 3 in camera HDR shooting mode low light
Canon 5D Mark III – In-camera HDR Shooting Mode – Art Embossed setting, +/-3 EV

No Highlight AND Shadow optimization – While all Nikons and the 5D Mark II can optimize both highlights and shadows at the same time, the 5D Mark III no longer can do this.

Auto Lighting Optimizer is designed to automatically adjust contrast and brightness and helps to maintain detail in both the shadow and highlight areas.  The new HDR shooting mode, when set to Natural, can also capture a wider range of shadows to highlights.  ALO and Highlight Tone Priority were never designed to be used simultaneously.

A huge defect in the 5D Mark III’s AF system is that no longer can I switch among the AF modes I use with one click, without stopping or taking my eye from my subject.

The DOF Button can be set to instantly switch between One-Shot and AI-Servo AF Modes on the 5D Mk III.  I’m not sure how one did this “one-click switch” with the Mk II in a way that can’t also be done with the Mk III.

No Zoomed-in Histogram – When you zoom, the histogram goes away.

With the new side-by-side Comparative Playback, you can view the entire image with histogram on one side of the screen, and a zoomed in detail from that image in the other window.

Not to mention that the incredibly versatile side-by-side image playback feature offers numerous other review and comparison opportunities never before available.

Impossible-to-set custom manual white balances – It still takes about ten steps to set a custom manual white balance.

Add Custom White Balance to My Menu and access it much faster.  Then take your WB photo, access Custom WB through My Menu, select that photo you just took, and set the camera WB setting to Custom with the quick press of a button and turn of a dial.  I count 4 steps to access an advanced feature that very few photographers employ on a regular basis.  Not really that hard.

No Custom White Balance Memories

True, but you could register the custom WB as part of one of the C1, C2, or C3 Custom Shooting Modes.

The Ratings button is a waste of a button, unless you really like to edit in-camera.

That may be true if you find you don’t use it.  I have unexpectedly grown fond of the Rating feature, and use it to save much time later when back at my computer.  In addition, the 5D Mk III offers an incredible amount of options for customizing the buttons and controls of the camera, as demonstrated by the grid of choices on pages 322-323 of the manual, plus several additional options discussed with the functions they control.

As I’m learning to use the AF system, I’ve realized that it will never make sense because the AF-Area settings were removed from the Quick Control screen. Now we always will have to look in two different places to set the AF Mode (AI SERVO, AI FOCUS or ONE SHOT), and someplace else to select the manner in which the various AF areas are used.

If you first press the INFO Button and access the Shooting Settings screen and then press any of the three setting-selection buttons on the top of camera (including AF Mode), you can view and change their settings on the rear LCD Monitor, also using either the Main Dial or the Quick Control Dial as you would when changing the function while viewing the top LCD Panel.  In other words, an amazingly awesome and handy Quick Control Screen specifically for each of the top button’s paired functions.  This will also work with the AF Point Selection Button after pressing the INFO Button and accessing the Shooting Settings screen, and then you can view and select an AF Area Selection Mode on its very own Quick Control Screen.  BUT, the reason that the 5D Mark III has buttons that the T3i does not have is so that a knowledgeable user can quickly and easily access these functions on the fly (such as AF Mode and AF Area Mode) without using a Quick Control Screen.  Sigh.

To learn much more about how to use and take advantage of all of the features, controls, and capabilities of the Canon 5D Mark III, have a look at my guide Canon 5D Mark III Experience.

Canon 5D Mark III Experience – The Still Photography Guide to Operation and Image Creation is an e-book user’s guide that goes beyond the manual to help you learn the features, settings, and controls of this sophisticated, powerful, and highly customizable camera.  Most importantly, it explains not only how but also when and why to use the features, settings, and controls in your photography.

Canon 5D Mark III mk 3 manual guide book dummies how to beginner intermediate advanceWritten in the clear, concise, and comprehensive manner of all Full Stop guides, Canon 5D Mark III Experience will help you learn to use your EOS 5D Mk III quickly and competently, to consistently create the types of images you want to capture.

As one Canon user has said about Full Stop guides:
“I don’t know how I could fully take advantage of all the features the camera has to offer without this publication!  It’s well-organized, easy to understand, and succinct enough to keep your attention while still containing a wealth of information to get the most out of your camera.”

Take control of your Canon 5D Mk III, and the images you create!

Canon 5D Mark III is Here!

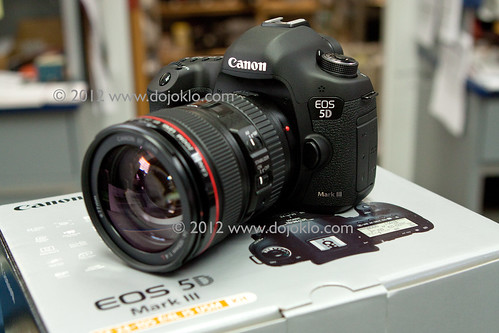
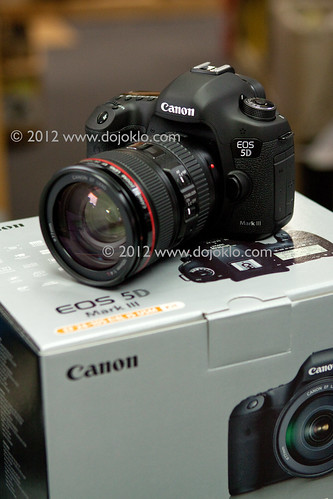
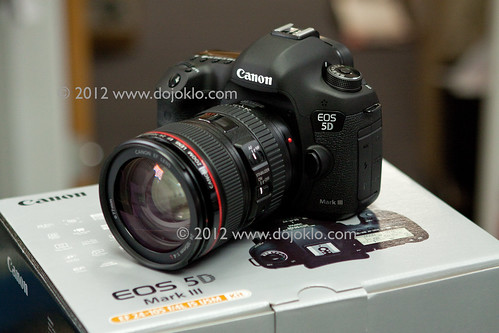
Here are my first quick shots of the Canon EOS 5D Mark III, during the ceremonial unboxing at Newtonville Camera, Newton Mass.  (Thanks guys!)

Canon 5D Mark III mk 3 EOS unbox unboxing package box
Images copyright by author, taken at Newtonville Camera, Newton, Mass.  Please do not use without permission.

Canon 5D Mk III mark 3 unboxing unbox box package new EOS
Images copyright by author, taken at Newtonville Camera, Newton, Mass.  Please do not use without permission.

I am in the process of working on the first and best (hopefully on both counts) e-book guide for the Canon 5D Mk III called Canon 5D Mark III Experience – The Still Photography Guide to Operation and Image Creation with the Canon EOS 5D Mk III.  You can learn more about it by clicking on the title or here:

http://www.dojoklo.com/Full_Stop/Canon_5DMkIII_Experience.htm

I wrote an initial post about the 5D Mk III Specs and What They Mean for real world use, so you can begin to learn about its new and/ or improved features.  I’ve also spent a lot of time with the manual, and a little bit of time with the camera itself, and I am thoroughly impressed!  I love the new autofocus system and the new menu systems that are far better organized than ever before.  The new menus include the new AF Autofocus Menu tab and sub-menus with the pre-set autofocus Cases to make it far easier to configure your camera for your specific subject tracking needs than was previously possible with the Canon 7D menus and Custom Functions.  The side-by-side Comparative Image Review is great for comparing two images at once on the nice, wide rear LCD Monitor, or for comparing a full image with a detailed view of part of it.

Canon 5D Mark III Mk 3 111 eos detail image quality
Quick shot with the 5D MkIII, with a detail of the dew drop I noticed during post-processing.  Captured in JPEG – looks even better full size!.  Images copyright by author, taken at Newtonville Camera, Newton, Mass.  Please do not use without permission.

The feel of the body is great too, more 7D than 5D Mk II, and the sound of the shutter is much more appealing than the “ka-chunk” of the 5D Mk II.  The silent Touch Pad control for movie shooting works great, and the in-camera HDR and Multiple Exposures are fun to play with.  I will write more about the camera and its features as I get a chance.

Canon EOS 5D Mark III Mk 3 unbox unboxing box package
Images copyright by author, taken at Newtonville Camera, Newton, Mass.  Please do not use without permission.  (Sorry for the copyright watermarks, but I had my previous unboxing image widely stolen by unsavory websites.)

Here are some in-camera HDR Mode and in-camera Multiple Exposure Mode experiments:

Canon 5D Mark III mk 3 111 sample image photo in camera HDR mode art embossed lowell house harvard square cambridge ma mass
Lowell House, Harvard Square, Cambridge, Mass.  Canon 5D Mark III – in-camera HDR Mode, Art Embossed

Canon 5D mark III mk 3 111 in camera hdr mode sample image art vivid
Lowell House, Harvard Square, Cambridge, Mass.  Canon 5D Mark III – in-camera HDR Mode, Art Vivid

Example images of all of the other HDR processing options can be seen here.

Canon 5D Mark III mk 3 111 multiple exposure mode test shot image sample
Neon Sign, Cambridge, Mass. – Canon 5D Mark III Multiple Exposure Mode.  Multiple-exposure control: Bright, 3 exposures

Canon 5D Mk III Specs and What They Mean

It is here!

Canon 5D Mark III pre-orders available at Amazon.com and at B and H Photo (my affiliate links – thanks for supporting this blog by using them!):

pre-order your Canon 5D Mk III from Amazon

pre-order your Canon 5D Mk III from B and H Photo


It is expected to be available and start shipping on March 22, 2012.

THE INTRODUCTION of the CANON EOS 5D Mk III

The long awaited and highly anticipated Canon EOS 5D Mark III has finally been announced!  There has been wide speculation of what the camera will include (including predictions at one time that it would be split into two camera lines for still vs. video).  It seems that the most current leaked specs were accurate, and the new 5D boasts such features as a whopping 61 point autofocus system, improved exposure metering system, fast DIGIC 5+ processor, and dual card slots for CF and SD.

I myself made some educated guesses back on August 5, 2011 as to what the camera was likely to offer.  I have included my predictions below in red, and my reactions and comments are in blue:

Canon EOS 5D Mk III specs:

  • 22.3 MP Full Frame Sensor. (26 to 28 MP Full Frame sensor.)  This is a surprise that they didn’t increase the sensor resolution very much, but as anyone who has used a 5D Mk II is aware, it already has amazing resolution and great high ISO/ low noise performance.  It appears from early test samples that this new sensor is going to show significant improvement in the high ISO/ low noise area, with perfectly acceptable, low noise, usable images all the way up to 12,800.  Yes, 12,800 ISO.
  • DIGIC 5+ Processor. (Single or Dual DIGIC 5 processors).  A nice, fast processor to keep up with the 6 fps frame rate, HD video, and all the image info coming from the high resolution sensor either in RAW or JPEGs that are being processed in-camera to include various settings such as Auto Lighting Optimization, Picture Controls, and other user-set adjustments such as the newly included Lens Aberration Correction.  This higher processing speed will also allow long continuous bursts even with the in-camera processing settings being used on JPEG images as they are being captured.
  • Full HD Movie – ISO 100-12800 H:25600.  (Full HD video at all the frame rates, perhaps with RAW video, perhaps with full time autofocus).  With two different compression formats to choose from, time codes with multiple options, and audio control plus a new headphone jack.
  • 6.0 frames per second high speed continuous shooting.  (7 frames per second high speed continuous shooting.)  Not quite as fast as I expected, but this is actually a much more useful rate for most situations.  This higher fps rate combined with the new 61 point AF system is going to allow the 5D to be used a bit more as a sports and action camera.  It does not appear the this desired feature that I hoped for is included:  Ability to customize Continuous Low and High settings so that you can choose your own rates.
  • ISO 100-25600, expandable to L: 50 H1: 51,200, H2: 102,400.  (ISO 100 to 12,800 or more, and then expandable.)  The new sensor, as mentioned, is likely to have tremendous performance in low light, high ISO situations with minimal noise, and preliminary samples and tests indicate this is indeed the case.
  • 3.2″ 1.04 million pixel Clear View II LCD screen.  Not articulating.  (3” very-high resolution LCD screen – Non-articulating?  Articulating?  Touch screen?)  A nice, high-resolution rear LCD screen, with a wider ratio to match the sensor and great for video shooting.
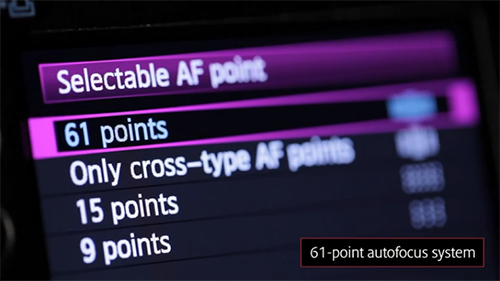
  • 61 point autofocus system with up to 41 cross type sensors.  (19 point (or more) autofocus system, all cross-type, with numerous configurations and customization options, as taken from the 7D.  Plus the new Autofocus menu system of the new 1D X to make configuring and taking full advantage of the AF system much easier.)  This is the biggest surprise for me.  I expected something like the19 point AF system of the Canon 7D, maybe with 20-30 AF points – but the 61 points is a shock.  While this will be awesome for tracking moving subjects and action, it is also customizable to reduce the number of choosable AF points and make it reasonable workable for “still” photography, as demonstrated in this still grabbed from a Canon video.
      Canon 5D Mk III mark III autofocus points 61 41 15 9
    Still from Canon video on the 5D Mk III

What this is showing is that if you wish to manually select a single AF point – which you should typically do in non-action-tracking situations to ensure that the camera autofocuses exactly where you want – you can limit the number of selectable AF points so that you don’t have to  manually click across dozens of points to quickly get to the one you want.  You can limit it to 9 points (as with the 5D Mk II or 60D), 15 points (similar to the 19 points of the 7D and likely the one I will most often use), just the cross-type points (which will number up to 41 depending on which lens you are using), or all 61 of them.

  • When using Center AF Point with an f/2.8 lens, the 5D Mark III is able to focus in EV -2, which according to Canon, “is the equivalent of shooting by the light of a full moon.”  This is an incredible improvement over the autofocusing abilities of the 5D Mk II, which struggles in low light.
  • 63-zone dual layer metering sensor.  (Improved 63 zone+ exposure metering system)  This is a similar metering system as in many of the current Canon cameras, such as the 7D and 60D, which has proved to be excellent as determining the proper exposure even in challenging lighting situations.  This metering system takes into account color, luminance, as well as information provided by the active AF point(s) to best determine the exposure.
  • Magnesium alloy body with improved durability, water, and dust resistance.  (Magnesium alloy body with weather sealing – already has this, not much improvement required.)  A durable, go-anywhere camera is now even more durable and resistant!

Additional features of the new 5D Mk III:

  • “Intelligent viewfinder” which means it includes the 7D type viewfinder with the LCD grid that can be turned on or off, sensitivity to light and dark to automatically illuminate the AF points when needed, if desired.
  • Silent and Low Vibration Modes.  These are likely designed to enable one to use the camera more stealthily – not just surreptitiously, but in situations such as dance and theater performances where you need the shutter and mirror to be quieter.  Low vibration is handy for optimal sharpness in certain hand-held and tripod shooting situations.
  • Dual memory card slots – CF and SD.  This is a new feature for the 5D line.  (It will likely and hopefully retain the CF card)
  • LP-E6 battery – thankfully they have retained the same battery as the 5D Mk II and 7D.  (It will likely retain the LP-E6 battery)
  • HDR Mode – This is an in-camera feature that will take and combine 3 images, either at auto-levels of exposure or user-selected EV increments.  You can then choose from various options of how you wish the camera to process the final image.  The original 3 images will also be saved for your own use.  The camera also offers an improved 7 stop EV latitude of exposures for auto bracketing, for those who wish to do more with HDR using other software and post-processing themselves.
  • Multiple Exposures – Nikon has had this feature for a while, so it is nice to see it on a Canon.

The 5D Mk III has also incorporated many of the menu and Custom Function features of the 7D, such as the ability to customize many of the buttons and controls of the camera, as well as the new, easier to use and comprehend Autofocus Menu system as the one seen in the Canon 1D X.  By putting all the AF options in one menu, it makes it considerably easier to take advantage of the powerful AF system options without having to access and understand various menus items and Custom Function options (as you do with the 7D).  There are also AF “presets” so you don’t have to remember and set the variables such as “Tracking Sensitivity” and “AF Point Auto Switching.”  The Custom Functions of the 5D Mk III have also been grouped into 3 categories now for ease of use.

There is also an image comparison feature where you can compare two images side by side on the rear LCD to see the effects of your adjustments – double chimping!

Hopefully there will be the options to customize the size of the Center-Weighted, Spot, or Partial Metering circles, and to adjust the Hi Speed and Low Speed Continuous shooting rates, and perhaps some additional WB options such as more Fluorescent option.

Built-in GPS, wireless flash, or wi-fi?  No, they all still require optional, external devices.  But we will see these in-camera features eventually.

I will soon be starting to write an e-book user guide for the Canon 5D Mk III to join my current Full Stop camera guide line-up which includes Canon 7D Experience and Your World 60D. You can check out my Full Stop bookstore website to learn more:

full stop dslr photo photography camera manual guide for dummies canon nikon

If you are interested in pre-ordering your Canon 5D Mk III, please use my referral links to the 5D Mk III on Amazon.com or B&H Photo. Using these links will help support my blog and my work.  Thanks, I appreciate your support!

If you are in the UK, please click here for the UK Amazon referral link.

And if you are in Canada, please click here to use my Canada Amazon.ca referral link.

BandH Photo

Direct Link to Canon 5D Mark III pre-order at B and H Photo.

These are retailers that I have purchased equipment from (excluding Amazon UK/ CA), and I recommend them based on my good experiences, their extensive selection, competitive prices, great customer service and responsiveness, and fair return policies.

Canon 24-70mm f/2.8L II vs. 24-70mm f/2.8L

Canon has just announced an updated, improved version of it’s high-quality EF 24-70mm f/2.8L standard zoom, called the EF 24-70mm f/2.8L II USM.  (To understand what all the notions mean, please see my Canon Lens Notations post.)

Some would call this the full frame standard zoom, though as an EF lens it can also be used on non-full-frame cameras such as the 7D, 60D, and T3i/600D.  The difference is that on non-full-frame bodies, it will act more like a 38-112mm focal length lens due to the crop factor of the smaller sensors.

Canon 24-700mm f/2.8L II lens new updated improved
New Canon 24-70mm f/2.8L II USM – (image from Canon USA)

Many, including myself, had hoped for – or even expected – this update to incorporate image stabilization, but this was not included.  The image stabilization would have made it an even tougher decision between the new 24-70 f/2.8L II and the 24-105mm f/4L IS, which offers a similar focal length plus image stabilization, but has a minimum aperture of “only” f/4.0.

Canon states that the lens has been completely redesigned, and in addition to still offering great weather sealing like the original, the same .38m / 1.25 ft. minimum focus distance, and improved durability, it also now “features completely redesigned optics to provide outstanding clarity, image quality and durability. A compact design makes it ideal for carrying on every shoot, and a range of optical enhancements provide improved performance – capturing greater detail across the frame while reducing distortion throughout the entire zoom range, particularly at the maximum 70mm focal length.

With a redesigned optical system that includes two Ultra-low Dispersion (UD) and one Super UD aspheric elements to minimise chromatic aberration and colour blurring, the lens delivers consistently sharp, high-contrast images. Each lens element also features Canon’s optimised Super Spectra coatings to reduce ghosting and flare and ensure excellent colour balance. Additionally, a fluorine coating minimises the amount of dust, dirt and fingerprints that adhere to the front and rear of the lens, helping to maintain superior image quality.”

The original 24-70mm f/2.8L lens included “the use of two different types of aspherical lens elements and a UD (Ultra-low Dispersion) glass element for obtaining sharper image quality.”  (quotes from Canon press releases)

Canon 24-70mm f/2.8L original lens
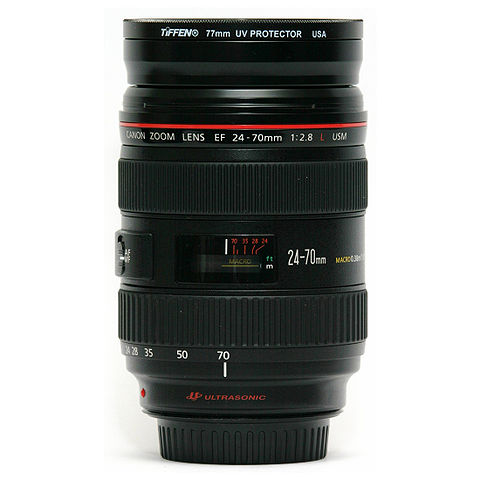
Original Canon 24-70mm f/2.8L USM – (image from Cburnett, Wikipedia, GFDL license)
PLEASE do not put a cheap Tiffen filter on an L lens – use a high quality multi-coated B+W MRC filter

There are some significant differences in the design of the new lens vs. the older version.  They both have ultrasonic motors for autofocus and full time autofocus (you can override the AF by turning the focus ring without switching to manual focus).  And they both use an external zoom mechanism, meaning the lens extends as you zoom in and out.  However, the original lens extended as you zoomed toward the 24mm wide end, which is “backwards” from a typical zoom lens.  The new version acts as a more typical zoom, extending as you zoom towards the 70mm telephoto end.  They both include a lens hood, though the older hood attached to the main section of the lens and the lens extends inside of the hood, thus working more effectively as a hood throughout the entire focal range from wide to tele.  The hood of the new version attaches to the extending section, and thus is a smaller tulip style lens hood typical of most lenses.  Perhaps the new coatings and lens elements make up for any internal reflections that might have resulted from this less effective hood.  The new lens offers a lock switch for when it is retracted, though L lenses typically zoom so smoothly and tightly that they don’t tend to creep.

The sizes of the lenses are similar, though the new version is slightly shorter and lighter but wider.  Due to the changed design, the new lens boasts a larger 82mm filter size.  And the prices at this point are dramatically different.  As far as the image quality, it is certain that the new 24-70mm is going to demonstrate dramatically improved image quality, especially when paired with the new Canon 5D MkIII (Canon 5D X?) when it comes out, as it is rumored to boast 30+ MP, which is going to require excellent glass to fully take advantage of.

24-70mm f/2.8L
3.3″ x 4.9″
2.1 lbs (950 g)
77mm filter size
$1,269 at B&H
$1,299 on Amazon

24-70mm f/2.8L II
3.5″ x 4.4″
1.77 lbs (805 g)
82mm filter size
$2,299 at B&H available for pre-order, expected in mid-April

Canon Powershot G1 X vs. G12

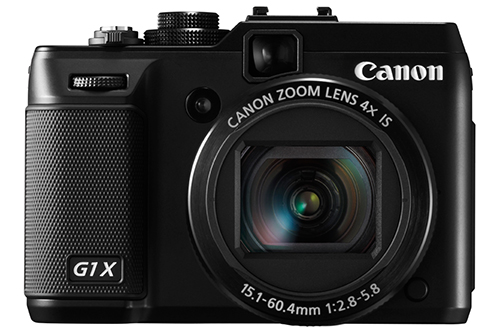
The latest in the Canon Powershot G series, the Powershot G1 X was recently announced, and should be available in February 2012. I wrote a bit about what new features it offers compared to the G12, namely a much larger CMOS sensor and a different lens to go with it. The G1 X is not a replacement to the G12, but rather is a new, even higher-end compact with manual controls, designed for dSLR users who want a very high quality point and shoot for various situations, as well as for dedicated enthusiasts who want the quality and manual control of a dSLR but don’t want the size, weight, and bulk of a dSLR body and lenses. The G1 X should prove to be a very popular camera for many demanding photographers for both everyday and travel use.

Canon g1 x g1x gx1 gx 1 compact asp-c large sensor high end g12
image courtesy of Canon USA

If you are trying to decide between the new G1 X and the older G12, the most important consideration (besides the price difference) is the sensor/ lens/ Digic V processor combo. While not quite as large as the ASP-C sensor of a dSLR like the T3i or 60D, the 18.7mm x 14mm, 14 megapixel sensor of the G1X is six times larger than that of the G12, and thus promises to offer not only higher image quality, but also much improved low light performance. Its f/2.8 maximum aperture at the wide end coupled with the larger sensor will also allow a larger degree of background blurring for portraits, etc. While you shouldn’t expect the degree of out of focus areas (bokeh) as a dSLR due to the minimum aperture becoming f/5.8 at the telephoto end, it will be somewhat improved over what the G12 or other compacts can offer. The 4X zoom lens of the G1 X also does not have quite the reach of the 5X zoom lens of the G12.

Other possibly important differences between the two are the camera size and weight and the battery life. While the G1 X is larger and heavier than the G12, it uses a smaller batter with a shorter shot life (see below for details). The G1 X also offers a high speed burst of continuous shooting, 4.5 fps for up to 6 shots at full quality, or 1.9fps for unlimited continuous shots.

The controls of both cameras are very similar, with some minor tweaks made to the G1 X. The G series is prized by demanding photographers because it offers quick and easy access to many manual controls, similar to a dSLR, as well as a viewfinder. Both cameras have a mode dial to quickly change shooting modes, an exposure compensation dial for quick EC adjustments, and button access to autofocus modes, metering modes, flash, as well as exposure lock. The G1 X looses the ISO dial of the G12, but places it on the rear control dial for relatively easy access. The G1 X however adds a movie record button for rapid start of movie recording in any shooting mode. As a result of these changes, the AE-L button is moved lower, and the self-timer and manual focus functions no longer have dedicated buttons, but can be accessed in the menus.

Below is a further comparison of some of the key specs of each camera:

Canon G1 X

sensor: 14 MP, 18.7mm x 14mm sensor
lens: 28-112mm equivalent, 4X zoom lens
aperture: f/2.8-5.8 maximum aperture
rear LCD: 3″ articulating rear LCD with 920,000 dots
size: 116.7 x 80.5 x 64.7mm
weight: 534 g
processor: Digic V
RAW image file format: yes, 14 bit RAW
ISO: 100-12,800
exposure compensation: +/- 3 EV at 1/3 stops
continuous shooting: 4.5 fps for 6 shots
metering: Evaluative, Center-weighted, Spot
flash: internal pop-up plus hot-shoe for EX Speedlites
battery: NB 10L – 250 shots
video: up to 1920 x 1080 @ 24fps full HD
price: $799

Canon G12

sensor: 10 MP, 7.44 x 5.58mm sensor
lens: 28-140mm equivalent, 5X zoom lens
aperture: f/2.8-4.5 maximum aperture
rear LCD: 2.8″ articulating rear LCD with 460,000 dots
size: 112 x 76 x 48mm
weight: 351 g
processor: Digic IV
RAW image file format: yes
ISO: 80-3,200
exposure compensation: +/- 2 EV at 1/3 stops
continuous shooting: 2 fps
metering: Evaluative, Center-weighted, Spot
flash: internal plus hot-shoe for EX Speedlites
battery: NB 7L – 370 shots
video: up to 1280 x 720 @ 24fps HD
price: $395

So as you can see, the cameras are quite similar in many ways, with the exception of the sensor, lens, and processor, which is going to make a very large difference in terms of improved image quality, higher dynamic range, better low light performance, reduced noise at high ISO settings, longer flash reach, larger image size allowing for more aggressive cropping, and will allow the ability to achieve more dramatic depth of field. According to Canon:

The powerful DIGIC 5 processor in the PowerShot G1 X is able to process six times the amount of information compared to the DIGIC 4 processor used in the PowerShot G12 compact. With this vastly increased processing power advanced noise reduction is possible to provide even better image quality than the DIGIC 4-powered HS System.

The DIGIC 5 processor uses approximately four times as much information as before to resolve one pixel, with the aforementioned six times faster processing speed. For the total performance of noise and image clarity this has an effect of two stops at high ISOs compared to the PowerShot G12 compact at ISO 3200, and three stops at lower ISO.

The 14 bit RAW allows for those who shoot in RAW file format for later post-processing to capture images with more dynamic range, better noise reduction, and more shadow detail.

Most of the other features such as the viewfinder, scene modes, autofocusing systems, creative filters, movie modes, and white balance options are nearly identical on both models. The G1 X also adds improved, 4-stop image stabilization, a built in 3-stop neutral density (ND) filter, and an intelligent face detection system which will give focus and exposure priority to faces it recognizes. It also offers multi-area white balance correction so that different light sources are equally neutralized or balanced – such as the flash lit subject with the fluorescent lit background.

So, how do you decide between the two? Who is the G1 X for vs. the G12? Well, if the price difference doesn’t make up your mind for you, the G12 is for those who want a very high quality point, rugged point and shoot with manual controls and great image quality. If you are going to be viewing and sharing your photos online or on a computer screen primarily, the images from the G12 should suffice. You can still do post-processing and make small or medium size prints for the special images. It is great for everyday use and for travel.

But if you need to take it to the next level – if you need or want near dSLR quality images for more invasive post-processing, larger prints, cropping, or even publication, you will want the G1 X. If you want the ability to more easily create background blurring, and the occasional high speed burst for action shots, you will want the new model. If you want to get as close to a dSLR without the size, weight, and lenses, the G1 X (or Sony NEX-7) is the answer.

Pre-order your G1 X from B and H Photo here! – $799 – expected Feb. 2012?

Pre-order your G1 X from Amazon – $799 – expected March 31, 2010

See the Powershot G12 on Amazon – $395

The official Canon press release for the G1 X can be read on their site here.

Canon G1 X – the Compact Approaching Near-dSLR Capabilities

Canon has announced their latest model in the G series of high-end compacts, the PowerShot G1 X, and its specifications indicate that it may finally have brought the G series to the place where most have always wished it would be.  While the G12 and previous models worked well as the compact camera with manual control, for dSLR users who didn’t want to carry their dSLR with them, they never quite fully lived up to the task because the sensor and lens sizes simply did not allow for dramatic shallow depth of field and good background blurring in many situations.

Canon g1 x g1x gx1 gx 1 compact asp-c large sensor high end g12
image courtesy of Canon USA

The G1 X takes the model-line a giant step forward in fulfilling this promise, as it includes a larger 18.7mm x 14mm sensor – not quite as big as an ASP-C sensor in a dSLR, but six times larger than the G12 sensor and larger than the sensors of any of its competitors including the Four-Thirds cameras and the Nikon 1.  Combined with its 4x zoom (28-112mm) lens, f/2.8 to f/16 aperture range, low light capabilities, Digic 5 processor allowing for 1.9fps or up to 4.5fps for 6 shots in high speed mode at full image quality, 14-bit RAW file support, and full HD video, this should prove to be a very popular compact for pros and dedicated enthusiasts, as well as to ideal primary camera for enthusiasts and travelers who simply don’t want or need the size, weight, and bulk of a dSLR system.  High end digital cameras are rapidly making the move back to smaller and lighter bodies, and the G1 X is going to serve to push this trend along.

The body of the the G1 X is slightly larger than the G12, sitting taller and wider with a larger lens protrusion, but is none-the-less still incredibly compact for the size of the sensor and all else it offers inside its metal body.  The camera boasts 14 megapixels, the HS system for excellent low light performance, fast response due to the Digic 5, a 9 point autofocus system plus child-priority face detection, +/-3 EV exposure compensation, built-in neutral density filters, an articulating screen, and even an HDR mode.

However, despite all that it offers, the G1 X is not capable of completely replacing a dSLR.  Its shutter response time is likely not instantaneous, its maximum aperture at the telephoto end is only f/5.8 thus limiting the amount of background blurring, its high speed shooting 4.5fps at full image quality is only for 6 shots before the camera needs to stop and process, and its built-in lens does not give the range, focusing speed, and zoom speed and control of an interchangeable lens.  But for those willing to work with these compromises, the image quality will likely meet or exceed your needs.

I would like to go into more detail about this promising model, and compare it to the G12, as soon as I learn more about it and have a chance to study the differences.  But as it looks now, this just might be the G model that starts to approach the depth of field flexibility and the increased performance that many have longed for with the already-well-regarded high-end compact G series.

Pre-order yours from B and H Photo here! – $799 – expected Feb. 2012

The official Canon press release for the G1 X can be read on their site here.


Canon 5D MkII at Lowest Price Ever

B and Photo Photo is selling the Canon 5D MkII body at the lowest price it has ever been: $1999.95.  Plus they include a great memory card and a shoulder bag for free!  Click on the image to head to B&H and learn more:

Canon 5D mark mk II low lowest price sale

Many are speculating, and I concur, that the replacement of the 5D Mk II (probably to be called the 5D Mark III) may be arriving in February 2012.  This doesn’t mean the 5D Mk II is outdated.  It is still an incredible camera with 21 megapixels, great low light/ high ISO performance, and of course the full frame sensor so that your wide angle lenses really go wide.  And 1080p video with all the frame rates, for the videographers.  Any aspiring pro or wedding photographer that won’t be able to afford the newest 5D Mk III when that arrives should consider taking advantage of this deal.

Ten Top Accessories for the Nikon D5100

Now that you’ve finally decided on a dSLR and chosen the Nikon D5100 you will want to get some basic, essential accessories. While there are countless accessories available that may look appealing or seem necessary, I suggest you first gain some experience with your basic equipment, and then discover through use which additional items you truly want or really need.  No add-on, whether an elaborate flash modifier or color balance correction tool, will instantly improve your images so concentrate instead on your image making!

nikon d5100 dslr camera unbox unboxing kit lens choose decide vs
photo by author – copyright 2011 – please do not use without permission!

But you can’t go wrong with these initial 10 additions to your camera bag. Click on the links or the images to view and purchase them on Amazon.com (and help support my blog by doing so – thanks!)

1. SanDisk Extreme 8GB Memory Card – You are going to need a high quality, high speed memory card to save all those images and capture those videos. Go with the best and don’t risk corruption and errors – a SanDisk Extreme. Perhaps a couple 8GB cards or 16GB cards.

2. Nikon EN-EL14 Rechargable Battery: It is always good to have an extra battery or two, especially when traveling or when photographing an event all day.  Go with the official Nikon brand and avoid battery communication and charging issues. If you are a fan of the optional battery back / vertical grip, there is a third-party offering for the D5100, the Neewer Pro Battery Grip for Nikon D5100.  Though Nikon did not design their own D5100 battery grip, this third-party option fills the gap, and accepts 2 EN-EL 14 batteries. The grip may make the camera easier to handle for those with larger hands, when working with a large lens, or if often working in portrait orientation.

Nikon d5100 battery en-el14

3. Nikon D5100 Experience e-book – You will want to begin to learn to use your camera, go beyond Auto, and start to use the advanced functions and settings of your sophisticated D5100, so be sure to check out my e book, Nikon D5100 Experience.  This guide will help you to take control of your camera so that you can consistently take better images – the images you wish to capture. You’ve invested in an advanced camera, now invest the time to learn how to use it to its full potential! There are also Kindle, Nook, and iPad versions of the e-book available here.

4. Black Rapid RS7 Strap – This sling-style camera strap provides a more comfortable and practical – and somewhat more discreet – way to carry around your camera, especially if you have a larger lens on it.  The RS-7 version has a nice curved shoulder strap, the RS-4 is not curved at the shoulder but does have a handy little pocket for memory cards, and the RS-W1 R-Strap is designed for women.

5. Giottos Large Rocket Blower – Blow the dust off your lens, camera body, interior, and sensor safely with the Rocket Blower. Get the large size for maximum “whoosh!”

6. LensPEN Lens Cleaning System – Clean those fingerprints, smudges, and mysterious spots off your camera lens (filter) safely and quickly with the LensPEN. Brush off the loose spots with the brush end, “charge” the tip with a twist of the cap, then clean by “drawing” in a circular motion. Read the manufacturer’s instruction for complete details.

7.  Nikon SB-900, SB-800, SB-700, or SB-600 Speedlight Flashes: Use one of these external flashes for greatly increased flash power and control compared to the built-in flash. They also have adjustable and rotating heads so that you can use indirect and bounce flash, and all of them can be used as remote flashes controlled by the built-in flash.  With the exception of the SB-600 all can be used as commanders to trigger remote flashes. The SB-900 Speedlight or the new SB-910 Speedlight is recommended if you need maximum flash power for events and weddings, etc. Otherwise the smaller SB-700 Speedlight is best for general use.

8. B+W Brand UV Filter – Protect your lenses from dust, scratches, and impact damage with a high-quality, multi-coated B+W brand UV filter. It typically shouldn’t affect your image quality due to its high quality glass and coatings, and it just might save you from a $200 repair. Leave one on each of your lenses at all times, unless you are using another filter like the circular polarizer. Be sure to get the right size filter for your lens.

8a. B+W Brand Circular Polarizer Filter – Use this high-quality, multi-coated filter to dramatically darken skies, increase contrast, and cut through reflections. Turn the rotating lens to adjust the amount of darkening or reflection as you place the sun to your left or right.

9. Nikon 18-200mm f/3.5-5.6G AF-S ED VR II Lens – After you’ve realized the limitations of the kit lens, especially in that area of focal range, pair your D5100 with this high quality all-purpose “walk-around” lens, great for everyday and travel use. It provides the full focal range from wide angle (for capturing the entire scene) to telephoto (for zooming in on details and faces), and delivers excellent image quality, color, and contrast, as well as Vibration Reduction (image stabilization) to prevent blur from camera movement.

9a. HB-35 Lens Hood – And you will want the optional bayonet lens hood for the 18-200mm lens, to shade the lens from unwanted glare and flare and protect it from bumps and bangs.

10. M Rock Holster Bag – Carry and protect your camera and walk-around lens in a holster style bag from M Rock. I used the Yellowstone style extensively in my travels throughout South America, and I love its durability and extra little features like a built-in rain cover, micro-fiber cleaning cloth, zippered interior pocket, adjustable interior, and extra strap. Be sure to get the model that fits your body and lens.


Bonus items:

Understanding Exposure by Bryan Peterson – If you don’t yet understand the relationship between aperture, shutter speed, and ISO, read this book immediately. This knowledge is essential to understanding and using your powerful dSLR to its full potential.

Nikon ML-L3 Wireless Remote or MC-DC2 Remote Release Cord: These remotes will allow you to trigger the shutter of the camera remotely, thus allowing either self-portraits or the ability to release the shutter without pressing the Shutter-Release Button thus preventing possible camera shake.

Nikon Capture NX2: If you are not using Photoshop, this software will enable you to process and retouch your JPEG or RAW files, and correct things such color, contrast, and sharpening.

For additional photography gear, accessories, and books, be sure to check out my dSLR Photography Gear, Accessories, and Books post!
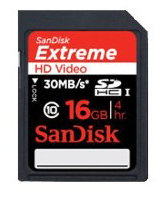
Black Friday Deals on Canon dSLR Cameras

B&H is having some great Black Friday deals on dSLR cameras and accessories, including some Double Instant Rebates on Canon bodies and lenses including the EOS 60D, 7D, and 5D MkII.  If you are looking to pair a new body with a great lens or Speedlite, such as one of the 70-200mm telephoto zooms, one of the high-quality wide angle lenses like the 17-55mm f/2.8, the 580 EXII flash, or a number of macro and specialty lenses like a tilt-shift, this is the time to do it!

Note that B&H will be closed and not be taking orders between Friday evening and Saturday evening.  Below is a sample of the savings you can get with the 60D. Click here for the B&H Canon Savings or on the image to go to B&H and see the entire offer.  They also have a number of other Black Friday and holiday specials.

Amazon also of course has many Black Friday deals in everything including cameras and accessories, including several Canon point and shoot cameras such as the very high quality Canon Powershot SX230HSClick here to view Amazon Black Friday camera specials.

B&H Black Friday and Holiday Specials

Black Friday Canon dslr camera 60D 7D 5D speedlite flash lens rebate sale

black friday camera dslr canon deal sale bargain

Choosing Your First dSLR for the Future Pro on a Budget

I spend a lot of time on photography forums, trying to stay on top of the latest news and equipment as well as to better learn about the concerns and difficulties of those trying to choose or to learn to use their new dSLR.  This always helps me in writing my dSLR camera guides, such as learning which functions and concepts users have trouble with, and figuring out how to best explain them.

tips tricks photography dslr learn use manual instruction tutorial for dummies guide

Unfortunately one begins to see the same posts again and again:

“I want to get my first dSLR.  Which one should I get?”

often supplemented with

“I hear/ read/ am told that Canon is better at XX but Nikon is better at XX.  Which one should I choose?”

and then

“I want to start taking wedding and portrait photos.”

typically qualified with

“I only want to spend $500.”

So to be honest, it is pretty simple:

If you are truly on a budget and don’t want to spend a lot on a dSLR, then get the entry level Canon T3 or Nikon D3100.

But, if you really intend to grow and learn and develop as a photographer, and don’t want to quickly reach the limits of your camera and have to spend more money and buy another one, start out with the advanced-entry-level Canon T3i (also called the 600D) or the Nikon D5100.  These cameras will give you a bit more room to grow with their additional features, capabilities, and image quality.

If you plan to be really dedicated to photography, to pursue it as a serious hobby or even as a semi-pro, and intend to read every book you can find about your equipment, photography, exposure, composition, and Photoshop, and be out there using your camera all the time, then it may be worth your while to start off with a mid-level or pro-sumer camera such as the Canon 60D, Canon 7D, or Nikon D7000.  That way you won’t find yourself reaching the limits of your first camera within a year and having to upgrade so soon.

But know that starting out with a 7D or D7000 is jumping in near the deep end of the pool.  You will have a steep learning curve in order to get to the point where you can take control of your camera and take full advantage of all those features and capabilities you paid for.  As can be witnessed on the forum posts where the new user says

“I just got my ($1500 camera), set it on Auto and took some photos, and they don’t look anything like (pro photographer’s) photos.  What is wrong with my camera?  I guess I should start reading the manual, but what settings should I use to take better photos?”

…spending a lot of money on a “better” camera does not automatically, instantly lead to great images.

If you wish to become serious about photography, you need to understand that “photography” and “budget” do not belong in the same sentence!  If you want to do wedding and portrait/ child/ pet photography eventually, and want to be paid for it, then you need to change your mindset about the cost of the equipment required by a professional photographer.  The camera is a tool required to do the job right, and a professional needs professional equipment.  Not just because it is expected or is the price of admission, but because professional tools are needed to do professional work.  While one can get away with using a mid-level or pro-sumer camera for weddings or when starting out as a portrait or pet photographer, you will find that you really need the quality and capabilities of a pro camera to properly do the job. You need equipment that can perform in all situations (in conjunction with your skills).

I’ve written some much more detailed posts about comparing a choosing a dSLR camera, including:

Choosing Between the Canon 7D vs 60D vs T3i (600D)

Choosing Between the Nikon D7000 vs D5100 vs D3100

These posts go into detail about their features and differences, and why you may or may not need to additional features of the advanced cameras for your photography.

New Firmware for the Nikon D7000 and D5100

New firmware has been released for the Nikon D7000, version 1.03.  Be sure to update your camera, as it will fix several minor bugs including some settings and displays that have mysteriously changed on their own previously.

Update information on the Nikon site here:

http://downloadcenter.nikonimglib.com/en/download/fw/22.html

The Nikon D5100 firmware has also been updated for the first time, v 1.01, with fixes including:

  • An error recognizing some memory cards has been addressed.
  • When Selective color from the retouch menu is performed on a picture taken with the image quality set to NEF (RAW)+JPEG and an image size of M or S, the edges of the image may not have changed color. This issue has been resolved.
  • When Metering was set to Matrix metering, the exposure mode set to M (Manual), and the HDR exposure differential set to Auto, the exposure differential was fixed at a value equivalent to 2 EV. This has been changed to enable automatic adjustment of exposure differential so that it is appropriate for the scene.

D5100 firmware upgrade available here:

https://www.nikonusa.com/en/index.page

Nikon D7000 D5100 firmware update upgrade

New Canon Autofocus System

I wrote about the introduction of the new Canon flagship EOS 1D X digital SLR a couple weeks ago.  As I mentioned, I don’t typically discuss $6,000 professional cameras on this site – if someone is trying to decide if they need a 1D, well, they probably don’t need a 1D!  If you need one, you already know that you need one…

Anyway, I think it is well worth looking at the new autofocus system that the 1D X introduces as it will eventually find its way, in some form, into the pr0-sumer cameras such as the Canon 7D Mark II and hopefully the 5D Mk III.  While those cameras won’t offer the 61 AF points and huge variety of customization options, they may incorporated the increased precision, low light sensitivity, better tracking speed, and the new algorithms that coordinate with the exposure system to detect and better track a subject by brightness, color, and even facial recognition (yes, even pros can use face-detection now!).

canon autofocus af system
Screenshot from Canon 1D X video (link below) explaining new autofocus system – image by Canon Europe

What will will certainly see in the newer cameras is the redesign of the menus, incorporating an Autofocus tab and AF tracking presets!  These are highly desirable features, as anyone who has attempted to fully take advantage of the 7D AF system knows how challenging it is to go between the AF menus and the Custom Functions to change to the desired settings while trying to decipher the cryptic C.Fn option names.

The EOS 1D X has a single AF tab in the menu, containing 5 AF sub-menus.  One of the most helpful sub-menus is going to be the AF Config Tool menu that contains the “Case Study” AF presets.  Instead of trying to recall how to set each Custom Function such as AI Servo Tracking Sensitivity and AI Servo AF Tracking Method to best track a subject and respond to loss of the subject or interference of an object between the camera and subject, one can now choose from preset options with helpful descriptions such as “Continuous shooting, ignore obstructions,” “Subjects that accelerate or decelerate quickly,” and “Instantly refocus suddenly with obstructions.”

The 1D X offers six AF “Case studies” presets, and there is no reason not to include all of these with the 7D replacement, since it too is a camera designed for sports and motion.

If you intend to purchase the 7D Mk II or whatever it will be called, it is worth your time to have a look at this page and video from Canon and begin to become familiar with what you will want to learn and take advantage of in the near future with the likely-to-be-improved 7D AF system and menus:

Nov. Canon Rebate on Lenses, 60D, Flashes

Canon is running more Instant Savings Rebates on the EOS 60D, body only or with a variety of different lenses or lens combinations.  There are also rebates on several desirable lenses – including great wide angle, telephoto, and macro lenses, the nifty 50, and even tilt-shift lenses.  Plus Speedlite flashes.

It’s a great time to get a pre-holiday gift for yourself or those on your list!
Have a look at the options below, and head over to Amazon, B&H, or Adorama to start shopping – click these store links, or the logos at the left of the page, to shop at these stores and help support this blog!. Thanks!

Have a look at the Canon rebate site to see the details of the offer.

Rare Leica Auction

Those who appreciate old, rare cameras, especially those with Leica fetishes, should have a look at this catalog for an upcoming Leica auction by Tamarkin Photographica.  The auction takes place October 29 and 30, 2011 in Woodbridge, CT.  There are even a couple Nikon rangefinders available, with gorgeous brassing.


Photo from Tamarkin Photographica Fall 2011 Auction Catalog – Nikon SP with Nikkor 50mm f/1.4 – estimate of $4,000-$6,000


Photo from Tamarkin Photographica Fall 2011 Auction Catalog – Nikon SP with Nikkor 50mm f/1.4 – estimate of $4,000-$6,000