The rebates are back! Well, not as great as some previous ones. This time you need to buy a Canon 1D, 5D, or 7D PLUS a lens or Speedlite in order to qualify. See here for details:
or go to the Canon promotions page for updates.

The rebates are back! Well, not as great as some previous ones. This time you need to buy a Canon 1D, 5D, or 7D PLUS a lens or Speedlite in order to qualify. See here for details:
or go to the Canon promotions page for updates.
I previously wrote a post to compare these cameras, the Canon 5D vs.7D vs. 50D vs. 550D / Rebel T2i – with the exception of the Canon 60D – which you can read here:
http://blog.dojoklo.com/2010/05/03/canon-7d-vs-5d-vs-50d-part-ii/
It still applies to helping you make the decision between these cameras, including the 60D, but it doesn’t yet address its specific new features. Those can be read about in this post. So I hope those two posts together can start to answer your questions. And until I rewrite it to include the 60D, here is some additional input.
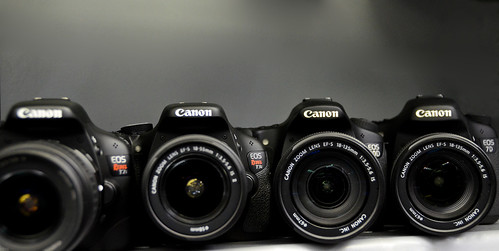
photo by author, courtesy of Newtonville Camera, Newton, Mass.
When you are trying to determine which camera to purchase or upgrade to, you need to first consider and determine your needs, and then see which camera fills those needs. Not the other way around where you look at the new features and determine if you really need or will use them. I will discuss how to go about this in more detail below.
Canon 60D vs. 50D: Since the Canon 60D basically replaces the Canon 50D (well, replacement isn’t exactly the right word because the 60D doesn’t really follow the 20D to 50D progression of improvements…), the 60D or 50D decision is an easy one. The 50D shouldn’t really be considered anymore. While the Canon 50D does hold a couple interesting advantages over the 60D (faster FPS in continuous mode, stronger construction, more comprehensive buttons and controls, complete lack of fun filters like “grainy black and white”), the sensor and exposure metering system have been greatly improved in all the newer cameras (7D or 60D or 500D/ T2i) and I feel these features, along with the increase in mega pixels, outweigh any other 50D advantages. I would definitely choose a 60D instead of a 50D. Or a 7D instead of a 50D if your needs require it and budget allows it. (Find out below if your needs require it!)
So the decision now comes down to the Canon 7D or 60D or 550D / Rebel T2i. (What about the 60D vs. 5D Mk II? Just wait, I’m getting to that!) This decision has become infinitely more difficult (or perhaps infinitely simpler?), as all three of these cameras now share so many specifications and features. And because they share an image sensor that is very similar, and all with 18 MP, the image quality of these three cameras will be nearly identical. The Canon consumer/ pro-sumer lineup has never been so alike as it is now. So as I like to profess, you need to choose which camera is best for you based on your needs and experience as a photographer and based on how the advanced features, controls, and customization options fit those needs and serve the way you work.
Here is a brief, mostly serious summary to help you make this decision:
Get a Canon 550D / Rebel T2i if you are new to photography or to digital SLR photography, or want to upgrade from an older Rebel because you want higher image quality and more mega-pixels (or HD video). If you have been happy with the features and controls of your previous dSLR camera and have not discovered the need, in your use of it, for any specific additional features, there is no need to look beyond the 550D.
Get a Canon 60D if you have outgrown the capabilities of an older Rebel like an XTi or T1i due to your greater experience and more demanding shooting needs which require more direct or sophisticated controls and customization options. Or you have been pretty pleased with your 20D or 40D and its features but wish to upgrade for the increased image quality and mega pixels (or HD video). And/ or you need a more rugged camera for your frequent and demanding shooting and off-the-beaten-path traveling needs. Or you really like swiveling LCD screens. If you typically shoot on Auto or Program mode, you do not need a 60D. If you do not manually select your own focus point and have never used exposure compensation you do not need a 60D. If you have never used the AE-Lock [*] button to lock exposure you do not need a 60D. Please save the money or use it towards a better lens.
Get a Canon 7D if you have extensive experience with a Rebel (xxxD series like 350D, 400D) or with an older xxD series (20D, 40D) camera, and you know and understand most of the 7D’s controls and advanced custom features, and you specifically need some of them for your demanding shooting needs. If you have never used Av aperture priority mode or M manual mode, you do not need a 7D. If you have never used autofocus tracking settings to track a moving subject across your frame and worried how an interfering object would affect your focus you do not need a 7D. If you have never used spot metering to determine a critical exposure level or experimented with back-button focusing you do not need a 7D. Please save the money or use it towards a better lens. However, if you often need to take 126 consecutive photos at the rate of 8 frames per second, you do need the 7D. Immediately. Even if you just sometimes need that. Totally worth it. That’s 15.75 seconds of continuous shooting. Who doesn’t need that? You’d make Eadweard Muybridge proud.
(Please note, the 550D, 60D and 7D all have these features I just listed: manually selected focus points, exposure compensation, AE-Lock, auto-focus tracking, spot metering, and back-button focusing. I’m just using them as a determination of your experience level and needs)

The Canon 5D Mark II is in a separate league than the other cameras, being a full frame professional camera, and thus I’m not going to compare it to the others in this context. As I said in a previous post,
If the 5D Mk II fits your expanding and demanding needs as a photographer, you would already pretty much know that you needed a 5D after your extensive time using a Rebel or a 20D, 40D, etc. Otherwise, getting a 5D means most likely you’d be investing in far more camera than you will actually need or use.
If you don’t already know that you need a 5D, you probably don’t need a 5D. Plus, as is often the case, those who could really take full advantage of a 5D are those who can’t afford a 5D. (I’m thinking about the talented photographers I come across on Flickr, etc. who are making amazing images with entry-level Rebels.) Feel free to spend $2,500 on a 5D Mk II if you want, but unless you have extensive experience with photography and with a digital SLR, using a 5D is completely unnecessary and is unlikely to help you take “better” pictures than you will be able to with a 550D. And besides, it is becoming old technology. You should wait for the 5D Mark III.
As I said above, when you are trying to determine which camera to purchase or upgrade to, you need to first consider and determine your needs, and then see which camera fills those needs. Not the other way around.
For example, I began shooting with a Rebel XT and took it on an extended trip where I shot lots of travel photos, plus outdoor festivals and dance (see the Peru and Dance galleries here for the results – those are all shot with a Rebel XT.) I soon discovered this camera wasn’t fulfilling my growing needs and I made a mental list of what my next camera needed to serve me better in the specific ways that I work and take photos:
These are the features I looked for in my next camera. I didn’t work backwards and wonder, “Do I need or will I ever need auto lighting optimizer and highlight tone priority?” If I had exposure issues on my list, I would have looked for these kinds of features, but I didn’t. I didn’t wonder, “Do I need multiple flash remote firing? Should I worry about that?” That wasn’t on my list because it wasn’t a need I ran into, ever, in months of daily shooting. I don’t even own multiple flashes and wish to minimize using the one. I didn’t ask myself, “Do I need an extensively redesigned focus system with AF Point Expansion and Zone focusing?” I nearly always choose my own focus point – I don’t want the camera choosing the closest point which is bound to be a dancer’s flying hand and not their face, so I don’t need that. No matter how awesome and advanced it is. Even if the subjects are moving. I’m pretty quick with the focus point selection. I just need more and better placed focus points. If you haven’t run into a need for certain features in your months or years of extensive shooting, you aren’t going to suddenly need it just because it is now offered on a camera. Sit down and make your list, then look at the cameras’ offerings.
And please be aware, none of these cameras will help you instantly create better photos. Or better yet, all of these cameras will help you take better photos, but equally so, none any better than the others. If you wish to take better photos, just chose one of the cameras and get out and shoot. Learn how to use the basic settings (aperture, shutter speed, ISO, focusing modes and focus points, exposure metering modes, histograms) and then concentrate on composition and telling a story through your images. See the posts listed below to help you on your way.
Need a lens to go with your new camera? Read about choosing a lens other than the kit lens in this post Why You Shouldn’t Buy the Kit Lens, and learn about the Best Lenses for Travel Photography here.
If you do choose the 60D, it is always wise not to buy a Canon dSLR or lens in the first several months after it is introduced. They have a solid history of quality control and design flaws in early models, including, most notoriously, their top of the line offerings (autofocus issues with cameras, flare issues with lenses). I myself took this risk with the 7D, brought it on a trip, and suffered the consequences (see the bottom of this previous post).
Some recent portrait sessions (see them here) have led me to the realization that it is finally time to get my flash off-camera and to expand my knowledge of lighting for portraits. Since I’m currently working with a camera that doesn’t have built in remote flash triggering, this means I either need a cable or remote triggers. But which one? Expensive TTL or radio triggers? Cheap eBay triggers? A basic sync cord or a more costly TTL cord? How long? A 3′ cord for hand holding, or a longer cord for putting the flash on a stand? Or both? What situations am I going to be using them in at home and while traveling?

Jan. 2010 – Plum Island, Newburyport, MA – Canon Rebel XT, 105mm (28-105mm lens), 1/500s, f/4.5, ISO 200 – natural light at 4pm on beach
The more thought and research I put into it, the more the possibly necessary equipment began to add up: a stand for the flash, plus maybe a Justin Clamp. A stand and special arm for the reflector. Perhaps then a softbox or an umbrella. Then what else…?
I’m not a strobist. While I admire the cool things one can do with lighting and I sometimes desire to overpower the sun, it’s just not the kind of thing that gets me excited about photography. I have more of a photojournalist instinct. I’d prefer to simply work without a flash most of the time, to make the most of natural light, and to capture the reality of situations in front of me. But my experience has shown me this isn’t always possible so I decided to seek out a viable alternative for situations I assumed required flash, and to learn how to maximize my use of natural light without sacrificing lighting quality. Thankfully I quickly discovered a book that demonstrated this was possible – Available Light: Photographic Techniques for Using Existing Light Sources by Don Marr.

Unlike countless photography books that stress the importance of looking at, understanding, and making use of natural light but then leave it to the photographer to figure out, this one leads you directly there. It is short, simple, and intuitive – so much so that I didn’t write down a single note during my first reading. It shares knowledge and techniques that can easily and immediately be put to use, such as with this photo I took soon after reading it – look at that glow! 100% natural light:

Sept. 2010 – Cambridge, MA – Canon 50D, 75mm (28-105mm lens), 1/125s, f/4.0, ISO 200 – natural light at 3pm just inside the shadow-line under a concrete overpass
While we all know to photograph in the shade on a sunny day or how an overcast day is supposed to create nice, soft lighting, with this book it suddenly all clicked and I really understood why these things are so. When walking around outside, I’m typically always aware of the intensity, direction, color and quality of natural light. I now realize that in itself was not nearly enough. Now I have gained the knowledge to work with the natural light and modify it to create the softness/ hardness, direction, color, and intensity I want, whether I am working on an overcast day, at high noon, inside, outdoors, or any other type of situation. The book also makes one very aware of the existence and potential use of natural reflectors everywhere which will help give you the lighting you want: a wall, the ground, a pole. And it explains the important concept and effective practice of subtractive lighting, used to even-out or create the desired lighting instead of turning to flash to artificially add to existing lighting. The author does not just guide you to finding and creating good light in any situation, but to light that fits your subject and the way in which you wish to portray them, whether that includes soft light or hard light, even light or deep shadows, hair light or flare – or whatever. I would love to summarize the whole book in this post, but I think it’s better that you just go to your library or Amazon.com and get it!

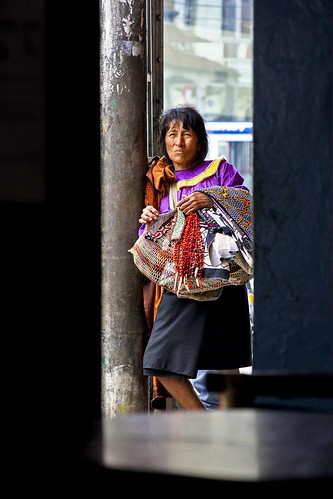
Nov. 2009 – San Miguel Dueñas, Guatemala – Canon 7D, 135mm (70-200mm lens), 1/200s, f/4.0, ISO 1600 – natural light at 3pm diffused by the fiberglass panel ceiling/ roof of her home
I feel that this book has set me on the right path, away from what I thought was inevitable membership in the Strobist club. While the author is not against the use of flash, and certainly not against reflectors, this book offers a refreshing and viable alternative to that never-ending accumulation of equipment and techniques, and I encourage off-camera-flash fans to read it as well so they can learn to look for beautiful natural lighting alternatives that will give them as-good or even better images, before instinctively setting up their lighting equipment and knocking down the natural light in order to rebuild it artificially.
In the process of my strobist research, I came back around to the photos of Joey Lawrence (Joey L), and in particular his images of the Mentawai. They are wonderful images and beautiful portraits, but something about this project has always rubbed me the wrong way. My recent research into artificial vs. natural light has helped me to think this through and start to figure it out. I’m always disturbed when people or crews invade, er, I mean visit a culture or community like the Mentawai with a bunch of equipment and ask them or pay them to pose for photographs or footage. There’s nothing inherently wrong with it and his subjects obviously enjoyed cooperating in his project, but I simply have a different philosophical and stylistic approach – more documentary and photojournalistic. Plus I feel that there should be more of a unity of subject and technique. In other words when celebrating (or is it romanticizing?) people’s close relationship with their natural environment, one should perhaps not light them with giant, unnatural, high power artificial lights! The disharmony certainly creates stunning photos, and that kind of lighting is part of Joey L’s established style. Possibly the contrast between the natural surroundings and the artificial light helps to emphasize the dichotomy of indigenous people living in a modern world. But I just feel it would have been more interesting and authentic to make use of the unique natural light of that place when romanticizing, er, I mean portraying the people and their relationship with their environment. That being said, I am very much looking forward to Joey L’s Faces of a Vanishing World TV series (starting on September 27th on Ovation TV) in order to get a glimpse into how he works in the field and see how he creates his dramatic and undeniably stunning images.

June 2008 – Sillustani, Peru – Canon Rebel XT, 90mm (28-105mm lens), 1/800s, f/5.0, ISO 100 – natural light at 4pm on the altiplano near Lake Titicaca (that is a different lake in the background)
One of the unique aspects of different places in the world is their unique light: the light at high altitude, in a desert, equatorial light, sunset in the Cinque Terre or Santorini, and of course the diffused light of a rainforest. Why not try to capture that light as part of your images of a place? At least, for the strobists out there, I encourage you to first look at and possibly incorporate the natural light before instinctively and blindly setting up the strobes. In reality, I think it is probably a much greater challenge to find and shape the natural light, but it is a challenge I intend to take on for the long term.

March 2010 – Roosevelt Island, NYC – Canon 50D, 70mm (70-200mm lens), 1/125s, f/4.0, ISO 200 – natural light at 5pm in open area
Over the last several months I’ve collected some of the search terms that led people to read my blog (it is easy with WordPress to check your daily/ weekly/ monthly stats such as this). I’m presenting several of them here, along with brief but informative answers. Whenever I say Canon xxD, please substitute 5D, 7D, 50D, 60D, 550D, etc. as you see fit. They are in no particular order except for the first one, which is the most common search. This is part 1 of 4 of this series. The next ones in the series include questions on humanitarian photography, the Canon 7D specifically, and finally lenses.

Compare Canon 5D vs 7D vs 60D vs 50D vs 550D – (or any variation there-of: 60D vs 50D, 7D vs 60D, 60D vs 550D, etc.)
I’ve discussed these various comparisons in depth in several previous posts. Please check out these posts:
Post 1
Post 2
Post 3
Should I wait for Canon xxD or buy Canon xxD?
If a new camera has been announced and will be coming out soon, or a current camera is reaching the end of its typical life cycle, I would wait for the new camera. (You can see if a camera is reaching the end of its typical life by looking at the Canon EOS Digital SLR Timeline at the bottom of this Wikipedia page.) Otherwise you are buying a model that is possibly 12-24 months old already and has been improved upon by the newer models. And then you will be using it for another 2, 3, or more years. This is particularly applicable since the new 63 zone metering system is now being used in the latest Canon cameras instead of the older 35 zone system, plus some other nice features. From experience, I can tell you the new metering system makes a difference. That being said, there will always be improvements in the newest models, so it is a never ending process. Also, unfortunately, you should wait several months after a new Canon camera or lens is released because they have a solid history of real problems and quality control issues on early models.

How much better is a Canon 7D than a 550D?
A Canon 7D costs $1534
A Canon 550d / T2i costs $799
The difference of the two cameras:
1534 – 799 = 735
735 = m% x 799
m = 735/799
m = .92
Move the decimal point over 2 places
The 7D is 92% better than the 550D.
Or perhaps the 550D is 92% as capable as the 7D? This is actually much closer to the truth, at least when it comes to features like image quality. I guess it’s all in how you do the math.
Canon 5D Mk2 vs. 550D / Why Canon 5D instead of 550D?
As I have said many times before, these two cameras are on opposite ends of the spectrum. It is a strange comparison between a full frame professional dSLR and an entry level dSLR that, quite frankly, confuses me. If the 5D fits your expanding needs as a photographer, you would already pretty much know that you needed a 5D after your extensive time using a Rebel or a 20D, 40D, etc. Otherwise, getting a 5D means most likely you’d be investing in far more camera than you will actually need or use. Please note, there is no such thing as a Mark II camera. “Mark II” means it is the second version of a particular camera or lens. There is a 1D Mark II, a 5D Mark II, a 70-200mm f/2.8L IS Mark II, etc.
Canon 50D vs. 7D for football stadium picture
It would depend on what teams are playing, what color jerseys they are wearing, which quarter it is and/ or the score, and the light temperature of the stadium lights mixed with the natural ambient light. The (very) slightly lower dynamic range of the 50D along with its tendency to overexpose by 1/3 a stop in evaluative metering mode would indicate that you would only want to use a 50D in the later quarters, when the ambient light is decreasing and the score is probably higher. Also, the digital sensors of both the 50D and the 7D have the tendency to overexpose and lose detail in areas of the color red. So if, say, Alabama was playing at home, you would want to consider using a film camera. The final consideration would be that the 7D has a built in level that can be used in Live View. If you wish to keep the playing field level, you might want to utilize this option. However, it will be hard to follow the action and keep your eye on the level at the same time. If you shoot in a more dynamic photo-journalistic style that includes tilted frames and dynamic perspectives, either camera will do.

Canon 7D vs 5D autofocus speed
They are both more than fast enough for your needs. I promise.
How to set deep depth of field
Depth of field is determined by the aperture you select (plus, your focal length and distance-to-subject play a role too). First, put your camera in Av mode. Then turn the main dial (the one up top near the shutter button) counter-clockwise until you have the widest aperture your lens allows, possibly 2.8, 3.5, or 4.0. Then read this post:
http://blog.dojoklo.com/2010/02/01/depth-of-field-simplified/
I have completed an eBook tutorial and user’s guide for the new Canon 60D, called Your World 60D – The Still Photographer’s Guide to Operation and Image Creation. Learn to use your 60D, quickly and competently, to create the types of images you want to capture. You can learn more about the Your World 60D eBook and how to purchase it here.

(The eBook was originally, briefly called Real World 60D – it is the same book.)
When selecting a new dSLR camera, many people seem to look at the latest offerings, attempt to compare their many features, and determine which one, in or near their price range, is “better.” But this is the backwards way to approach it. Of course a continuous burst rate of of 126 JPEGs at 8 frames per second is “better” than 58 frames at 5.3 frames per second. But do you need the ability to take 126 consecutive images in 15.75 continuous seconds? Ever? Certainly the ability to to control both the method and the sensitivity of AI Servo Tracking is impressive and powerful, but do you even understand it, wish to learn about it, need it, and will you ever use it? If a camera’s features don’t fit your needs as a photographer, it is not a better camera for you. In fact, it may be a worse camera for you because its complexities and options may serve to work against you and your image making.

Iquitos, Peru
When you are trying to determine which new dSLR camera to purchase or upgrade to, you need to first consider and determine your needs, and then see which camera fills those needs. Not the other way around where you look at the new features and determine if you really need or will use them.
For example, I began shooting with a Rebel XT and took it on an extended trip where I shot lots of outdoor dance and festivals (see the Peru and Dance galleries here for the results – those are all shot with a Rebel XT.) I soon discovered this camera wasn’t fulfilling my growing needs and I made a mental list of what my next camera needed:
Iquitos, Peru
These are the features I looked for in my next camera. I didn’t work backwards and wonder, “Do I need or will I ever need auto lighting optimizer and highlight tone priority?” If I had exposure issues on my list, I would have looked for these kinds of features, but I didn’t. I didn’t wonder, “Do I need multiple flash remote firing? Should I worry about that?” That wasn’t on my list because it wasn’t a need I ran into, ever, in months of shooting. I don’t even own multiple flashes and wish to minimize using the one. I didn’t ask myself, “Do I need an extensively redesigned focus system with AF Point Expansion and Zone focusing?” I nearly always choose my own focus point – I don’t want the camera choosing the closest point which is bound to be a dancer’s flying hand and not their face, so I don’t need that. No matter how awesome and advanced it is, even if the subjects are moving. I’m pretty quick with the focus point selection, I just need more and better placed focus points. If you haven’t run into a need for certain features in your months or years of extensive shooting, you aren’t going to suddenly need it just because it is now offered on a camera. Sit down and make your list, then look at the cameras’ offerings.
And please be aware, no new camera will help you instantly create better photos. Or better yet, all of the latest cameras will help you take better photos, but equally so, none any better than the others. If you wish to take better photos, just chose one of the cameras and get out and shoot. Learn how to use the basic settings (aperture, shutter speed, ISO, focusing modes and focus points, exposure metering modes, histograms) and then concentrate on composition and telling a story through your images. Get a book like Bryan Peterson’s newly updated Understanding Exposure to get a handle on the essential functions and relationships of aperture, shutter speed, and ISO. Or have a look at my Full Stop e-book camera guides for various Canon and Nikon dSLR cameras! And see the following posts to help you on your way:

Pucallpa, Peru
Need a lens to go with your new camera? Read about choosing a lens other than the kit lens in this post Why You Shouldn’t Buy the Kit Lens, and learn about the Best Lenses for Travel Photography here.
If you are interested in researching or purchasing the equipment or books I use, discuss, or recommend, I would appreciate it if you use this referral link to Amazon. Your price will be the same, and it will help support my blog and my work. Thanks! And for those of you across the pond, click here for my referral link to Amazon UK. If you are in another country, click on one of my Amazon links, scroll to the bottom of the page, and click on your country for your local Amazon.
This post has been revised and updated to include the new Canon Rebel T3i / EOS 600D. Please proceed over to this post to read the most current information:
Canon T3i/600D vs T2i/550D vs. 60D vs. 7D, etc.
Like many others out there, you are asking yourself, “should I buy the Canon 7D or 60D or 50D or 550D / T2i?” It’s a difficult question because at this point the three dSLRs in the current Canon consumer line-up (EOS 60D, EOS 7D, Rebel T2i/ EOS 550D) all share a number of specifications and features, a similar exposure metering system, as well as an image sensor that is nearly the same, and all with 18 megapixels. So how do you choose between the Canon 60D, the T2i (550D) or the 7D? This decision has become infinitely more difficult (or perhaps infinitely simpler?) because the image quality and ISO performance of these three cameras will be nearly identical, and all are capable of taking high quality images. So as I like to profess, you need to choose which camera is best for you based on your needs and experience as a photographer and based on how the advanced features, controls, and customization options fit those needs and serve the way you work.
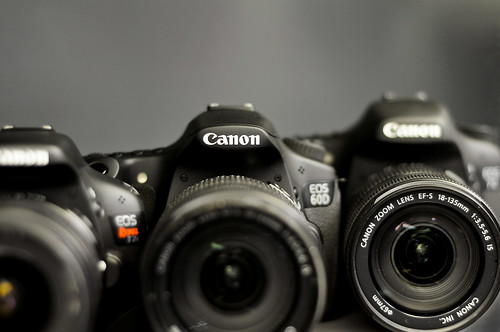
photo by author
When you are trying to determine which camera to purchase or upgrade to, you need to first consider and determine your needs, and then see which camera fills those needs. Not the other way around where you look at the new features and speculate if you really need or will use them. I will discuss how to go about this in more detail below.
Review of Canon EOS 60D vs. 50D: Since the Canon EOS 60D basically replaces the Canon 50D (well, replacement isn’t exactly the right word because the 60D doesn’t really follow the 20D to 50D progression of improvements…), the 60D or 50D decision is an easy one. The 50D shouldn’t really be considered anymore. While the Canon 50D does hold a couple interesting advantages over the 60D (faster frame per second (fps) burst rate in continuous mode, stronger construction, more comprehensive buttons and controls, complete lack of fun filters like “grainy black and white”), the sensor and exposure metering system have been greatly improved in all the newer cameras (7D or 60D or 500D/ T2i) and I feel these features, along with the increase in mega pixels, outweigh any other 50D advantages. I would definitely choose a 60D instead of a 50D. This is coming from experience, as I use a 50D professionally and on a daily basis. Or choose a 7D instead of a 50D if your needs require it and budget allows it. (Find out below if your needs require it!) Digital cameras are somewhat disposable. Yes, even $1000 digital cameras. Within 5 years, your new camera will have become old, outdated equipment. The 50D is already two year old technology, so if you start with one now, in 4 more years it will be absolutely archaic! (Actually, since the 50D was just the 40D with a couple more megapixels, it is even older technology than that.) With digital SLRs, I advise buying a recent model, at whatever price range you can currently afford. Of course as with everything in digital photography, this is relative. The 50D is still an excellent camera. And camera companies have to keep coming out with new models every 12-18 months because that is what they do. The trouble comes in 2-3 years when your 50D is still perfectly good and still pretty new to you, but it can no longer compete with the latest offerings in terms of megapixels, ISO performance, and autofocus systems. If this hasn’t convinced you and you still want to consider the 50D for cost or other reasons, I write in more detail about the 50D vs. 60D comparison here from a camera features and operation point of view.
Before I get more into it, I want to mention that I have written eBook user’s guides for the Canon Rebel T3i/ EOS 600D, the Canon Rebel T2i/EOS 550D, and the Canon EOS 60D. After spending so much time studying, experimenting, writing about, comparing, and discussing these cameras, I decided to put all that knowledge into eBook form! Each of these user’s guides cover all the Menu settings, Movie Mode menus, and Custom Function settings – with recommended settings – plus discussions of how, when, and why to use the cameras’ settings and features, (metering modes, aperture and shutter priority modes, advanced autofocus use, and more) for everyday and travel use, to help you take better photos – Your World 60D, Canon T3i Experience, and T2i Experience. Learn more about the eBooks by clicking on their titles.
Back to the Comparison:
Review of Canon EOS 7D vs. 60D vs. 550D / Rebel T2i: So the decision now comes down to the Canon 7D or 60D or 550D / Rebel T2i. (What about the 5D Mk II? Just wait, I’m getting to that! And if you haven’t yet committed to Canon and are interested in comparing the Canon 60D vs. Nikon D7000, have a look at this post.) Below are comparisons of some of the similarities and differences of these three cameras. Remember that all of these comparisons and features are relative. Of course the fact that the 7D can take 126 consecutive photos at the rate of 8 frames per second makes it “better.” Advanced features like that differentiate it from the other models and are also why it costs more. But do you ever need to take 15.75 seconds of continuous photos? Ever? (Look at your watch for 15.75 seconds right now and act like you are taking continuous photos. Now what are you going to do with all those imaginary photos?!)
Sensor and Image Quality: As I said above, all three cameras share a very similar sensor and 18 megapixels, and so their image quality will be virtually the same. All are capable of taking professional quality images.
Exposure Metering: The three cameras all share the latest 63-zone exposure metering system and 4 metering modes. That means they will all determine the exposure virtually identically and enable you to take properly exposed photos in most every situation, including difficult back-lit scenes. The size of the areas metered for Partial and Spot metering vary slightly between the cameras, but that isn’t anything critical.
Autofocus: The 60D shares a similar autofocus system to the T2i and the previous 50D, with 9 focus points and three auto focusing modes. However the 9 AF points of the 60D are more sensitive than those of the T2i: all are cross-type in the 60D, only the center is cross-type in the T2i. The 60D autofocus system is much less complex than the sophisticated AF system of the 7D with its 19 AF point system and its additional Zone, Spot, and Expansion focus modes. These various modes address how you want to deal with and group these numerous AF points. Plus the custom settings of the 7D allow one to customize how the AF system works – how it tracks subjects, how it deals with objects that come between you and your initial subject, how quickly it responds to these changes of possible subjects that are at different distances from you, etc. However, if you are not an avid sports photographer, a wildlife shooter, or someone who understands, needs, and will use the elaborate features of the 7D AF system, then this shouldn’t dissuade you from the 60D.
Construction: As you can probably figure out from the prices, each camera is not built the same. The 60D has relatively strong construction of aluminum and polycarbonate. It is better built than the 550D but not as strong as the 7D’s magnesium alloy frame. The 60D also has some amount of weather sealing – more than the 550D/T2i, less than the 7D. But for most users, including even those using the camera daily or in travel situations, the construction of any of these cameras is far more than good enough, strong enough, and durable enough.
ISO: Since they all share a very similar sensor, the ISO sensitivity and performance at high ISO settings is virtually the same for these three cameras. But don’t take my word for it, don’t be swayed by pixel peepers on forums, instead check out the camera sensor tests at dxomark to verify this. As you can see, they all share the exact same overall score, and show very similar performance.
Controls: As with construction, the buttons and controls vary with these cameras. Unlike the T2i, the 60D and 7D have nearly every control an advanced photographer needs on the exterior of the camera and they also have the top LCD panel and rear Quick Control Dial that are not on the 550D/T2i. With all the cameras, any controls can also be easily accessed with the Q button and menu or in the other menus on the rear LCD monitor. The top buttons of the 60D set only one setting each, so this is less complicated than the multiple-setting buttons of the 7D. Canon has removed the white balance (WB) button on the 60D that the 7D and 50D have, but that isn’t a big deal – use the Q Menu. Another change on the 60D is that the Multi-controller has been moved from the thumb joystick like the 7D and 50D and placed in the middle of the rear Quick-control dial. This doesn’t change how it functions, and should just be a matter of getting used to the difference. (Unfortunately, I still really do prefer the old design and location.) If you plan on using your camera on Auto or Program most of the time, then the controls of the T2i are more than sufficient for your needs.
Menus and Custom Functions: These allow for greater control over customizing how the camera functions. The 60D has many more Menu and Custom Function settings than the 550D/T2i and nearly as many as the 7D. These settings enable you to customize the operation, function, and controls to work how you want them to, including things like exposure increments, peripheral illuminations correction for lenses (fixes dark corners) and customizing which button does what. Since many of the Menu and Custom Function settings can be complicated and confusing, my eBooks on the 60D and on the T2i/550D cover all of these options along with my recommended settings to get you up and running quickly!
Wireless Flash: Like the 7D, the 60D incorporates wireless flash triggering. It allows you to trigger multiple off camera flashes at different output levels. The 550D/T2i does not have this feature.
Articulating LCD Screen: The big new feature that the 60D has that the other two cameras do not is the articulating rear LCD screen. This may prove useful for videographers, as well as for setting up compositions while the camera is on a tripod, for macro use, or for using it from unusually low or high vantage points. Some users will be able to avoid buying an expensive angle finder because of this feature. There is also an electronic level in the 7D and 60D, visible in the viewfinder, rear LCD, or top LCD.
Viewfinder: The 60D has a large, bright viewfinder with 96% coverage of the actual resulting image, a tiny bit better than the 95% of the 550D/T2i but not quite as nice as the nearly 100% view of the 7D.
Processor: The 60D shares the same Digic 4 processor as the 550D/T2i. The 7D has dual Digic 4 processors. However, if you don’t need to shoot dozens of continuous images, you probably won’t notice any processing speed issues.
Continuous Shooting Speed: The 7D can shoot a blazing 8 frames per second, in which the photos barely change from frame to frame. The 60D can shoot a respectable 5.3 fps which is actually a more useful rate, and is a higher rate than the 550D/T2i rate of 3.7 fps. If you need the extremely high fps for sports, wildlife, or other action shooting, get the 7D. If not, don’t be swayed by this excessive feature.
Memory Card: The 60D uses the SD memory card like the 550D/T2i, not the CF card of the 7D and 50D.
Battery: The 60D uses the LP-E6 battery like the 7D and 5D, which is a nice feature as this battery can often last through a full day of shooting. The T2i uses a smaller battery with less capacity.
Size and Weight: The 60D is larger and heavier than the 550D/T2i, smaller and lighter than the 7D. Go to the store and hold them to get a better feel for their size, weight, and feel.
AF Microadjustment: The 7D has this feature, the 60D and T2i do not. Many are disappointed that the 60D does not include the ability to micro-adjust the focus so that each lens is completely accurate. However, if you have a focus issue, send your camera and/ or lenses to Canon while under warranty and ask them to calibrate them. Doing AF microadjustment yourself is often a maddening, never ending undertaking. You may make a good calibration under controlled conditions, but this really doesn’t replicate real life shooting.
Locking Mode Dial: This is a new feature for a Canon dSLR, only on the 60D, that keeps the Mode dial from accidentally rotating. A nice touch, and not at all difficult to change quickly with one hand, as some people have claimed: just push the center button with your left index finger, rotate dial with thumb and middle finger.
Full HD video: Of course they all offer this capability. Note that this is not video for your kids’ parties and soccer games. It does not have continuous autofocus while shooting, as a camcorder does. It is not designed for that kind of use, but rather for serious videographers who typically manually focus. You can adjust autofocus while shooting by pressing the shutter button or the AF button, but it may have a less than desired looking result.
Flash Sync: A Note to Strobists -the 60D and T2i do not have a PC sync flash socket to plug in PC sync cords. The 7D has this.
Ease of operation: While beginners may find all the buttons, controls, and menus of any dSLR difficult and confusing at first, the additional controls and menus of the 7D and 60D are all quite intelligently designed, intuitive, and straightforward for the more advanced user.
*****
Purchasing: If you plan to buy any of these cameras through Amazon.com, (or just wish to purchase anything from Amazon) I would appreciate it if you use this referral link to Amazon or one of the camera links just below. Your price will be the same, and they will give me a little something for referring you, which will help support this blog. Thanks! And due to popular request, if you are in the UK, here is my new referral link to Amazon UK. If you are in another country, click on one of my Amazon links, scroll to the bottom of the page, and click on your country for your local Amazon. And for those wishing to purchase from B+H Photo, just click here for my referral link to B+H. Thanks for supporting my blog!
See and buy the T2i on Amazon.
See and buy the 60D on Amazon.
See and buy the 7D on Amazon.
See and buy the Canon 5D MkII on Amazon.
I wrote a previous post that also goes in-depth into comparing and choosing between these cameras, but was written before the introduction of the EOS 60D. It does however have some additional info that may prove useful: Canon 7D vs. 5D vs. 50D (Plus 550D/T2i) Part II
Lenses, Accessories and Books: Now that you are on your way to deciding on a camera, you should also start looking into lenses, photography gear, accessories, and books. Check out this link, Best Lenses for Travel Photography, which also applies to general photography, Equipment for Travel Photography, which discusses useful and practical photo accessories and equipment for both everyday and travel photography. This post lists and describes Essential Books for Digital Photography, including the best user’s guides for each of these cameras.
And to sum it all up, here is a brief, mostly serious synopsis to help you make the camera decision:
Get a Canon 550D / Rebel T2i if you are new to photography or to digital SLR photography, or want to upgrade from an older Rebel because you want higher image quality and more mega-pixels (or HD video). If you have been happy with the features and controls of your previous dSLR camera and have not discovered the need, in your use of it, for any specific additional features, there is no need to look beyond the 550D. See the T2i on Amazon.
Get a Canon 60D if you have outgrown the capabilities of an older Rebel like an XTi or T1i due to your greater experience and more demanding shooting needs which require more direct or sophisticated controls and customization options. Or you have been pretty pleased with your 20D or 40D and its features but wish to upgrade for the increased image quality and mega pixels (or HD video). And/ or you need a more rugged camera for your frequent and demanding shooting and off-the-beaten-path traveling needs. Or if you need the increased 5.3 frames per second continuous rate to shoot sports or action. Or you really like swiveling LCD screens. If you typically shoot on Auto or Program mode, you do not need a 60D. If you do not manually select your own focus point and have never used exposure compensation you do not need a 60D. If you have never used the AE-Lock [*] button to lock exposure you do not need a 60D. If you don’t understand the relationship between aperture, shutter speed and ISO you don’t need a 60D. Or unless you plan to dedicate yourself to learning this camera and the principles of SLR photography and grow into this more advanced camera, please save the money or use it towards a better lens. See the 60D on Amazon.
Get a Canon 7D if you have extensive experience with a Rebel (xxxD series like 350D, 400D) or with an older xxD series (20D, 40D) camera, and you know and understand most of the 7D’s controls and advanced custom features, and you specifically need some of them for your demanding shooting needs. If you haven’t passed the above “criteria” for a 60D, you definitely don’t need a 7D. If you have never used Av aperture priority mode or M manual mode, you do not need a 7D. If you have never used autofocus tracking settings to track a moving subject across your frame and worried how an interfering object would affect your focus you do not need a 7D. If you have never used spot metering to determine a critical exposure level or experimented with back-button focusing you do not need a 7D. Or unless you plan to dedicate yourself to learning this camera and the principles of SLR photography and grow into this very advanced camera, please save the money or use it towards a better lens. However, if you often need to take 126 consecutive photos at the rate of 8 frames per second, you do need the 7D. Immediately. Even if you just sometimes need that. Totally worth it. That’s 15.75 seconds of continuous shooting. Who doesn’t need that? You’d make Eadweard Muybridge proud. See the 7D on Amazon.
(Please note, the T2i/550D, 60D and 7D all have these features I just listed: manually selected focus points, exposure compensation, AE-Lock, auto-focus tracking, spot metering, and back-button focusing. I’m just using them as a determination of your experience level and needs)
The Canon 5D Mark II is in a separate league than the other cameras, being a full frame professional camera, and thus I’m not going to compare it to the others in this context. As I said in a previous post,
If the 5D Mk II fits your expanding and demanding needs as a photographer, you would already pretty much know that you needed a 5D after your extensive time using a Rebel or a 20D, 40D, etc. Otherwise, getting a 5D means most likely you’d be investing in far more camera than you will actually need or use.
If you don’t already know that you need a 5D, you probably don’t need a 5D. Plus, as is often the case, those who could really take full advantage of a 5D are those who can’t afford a 5D. (I’m thinking about the talented photographers I come across on Flickr, etc. who are making amazing images with entry-level Rebels.) Feel free to spend $2,500 on a 5D Mk II if you want, but unless you have extensive experience with photography and with a digital SLR, using a 5D is completely unnecessary and is unlikely to help you take “better” pictures than you will be able to with a 550D. In fact, until you figure out the controls, features, menus, and custom functions of a 5D or 7D, you may be taking worse pictures! And besides, the 5D MkII becoming old technology. You should wait for the 5D Mark III :) See the Canon 5D MkII on Amazon.
*****
Lenses: Lenses for Travel Photography
Accessories and Equipment: Equipment for Digital Photography
Books: Essential Books for Digital Photography
As I said above, when you are trying to determine which camera to purchase or upgrade to, you need to first consider and determine your needs, and then see which camera fills those needs. Not the other way around. Here is a post I wrote which discusses this, titled How to Choose a New dSLR Camera.
The Canon 60D was just introduced!

image of 60D from Canon website
As it had been widely rumored, the 60D has the articulating LCD screen. Although it doesn’t exactly replace the 50D in the sense that it doesn’t add upon the advancement of the 20D, 30D, 40D, 50D progression, it now takes that position between the 550D and the 7D. If you thought it was difficult to choose between a Canon 550D, 50D, and 7D, the choice just became infinitely more difficult, as all three of these cameras now share so many features. And because they share an image sensor that is very similar, and all with 18 MP, the image quality of these three cameras will be nearly identical. The Canon consumer/ pro-sumer lineup has never been so similar as it now becomes. So as I like to profess, you need to choose which camera is best for you based on the advanced features and customization options that are important to you and the way you work. See this post for what I mean.
Before I get into it, I want to mention that I will be selling a Canon 60D eBook tutorial, which covers ALL the Menu settings and Custom Function settings of the 60D (except movie menus), with recommended settings, PLUS in-depth descriptions of how and and why to use its settings and features in everyday use – Your World 60D – The Still Photographer’s Guide to Operation and Image Creation. Learn more about it here: http://blog.dojoklo.com/2010/09/16/canon-60d-users-guide-and-tutorial/
Strangely, the 60D takes a step back from the 50D in continuous shooting speed, in construction, and in use of an SD memory card, and lack of AF Microadjustment capability. They must have determined the smaller size and weight was an important consideration for the target consumer. But basically it is a Canon 550D/ T2i with a larger, more rugged body, advanced buttons and controls, and more advanced menu and customization options (or is it a stripped down 7D?!) One of the only functional differences between the 60D and the 550D is the faster continuous shooting speed. The elimination of the 50D’s thumb joystick and moving that control to inside the large control dial on the back is an interesting decision. While I think I prefer the location of the 50D thumb button, the new controller on the 60D may be easier to control on the diagonals, which I still struggle with on the 50D. In reality, it may just be a matter of getting used to the new control (although dpreview isn’t very pleased with it in actual use). The new 60D uses the same battery as the 7D and 5D, the LP-E6 – an unusual choice considering it is bigger than the 50D battery, but a good choice. Another great feature that Canon incorporated is the locking Mode dial, so that the top mode dial doesn’t accidentally move from, for example, Av mode to Landscape mode, which happens occasionally with my cameras as I take them in and out of their bags or as they lay against my leg hanging from the R-Strap.
Canon has added a lot of in-camera processing abilities which may prove to be useful and time saving to those who shoot a lot of photos and need fast turn-around. Most importantly, this includes the in-camera RAW processing, turning your RAW files into JPGS with the settings you desire, without opening them up and making the changes in Adobe Camera Raw and Photoshop or Lightroom. This also includes in-camera image resizing, while maintaining the original file. According to Canon,
“In-camera RAW image processing features include Picture Style, White Balance (WB), Color Space, High-ISO Noise Reduction, Peripheral Illumination Correction, linear distortion correction and chromatic aberration correction. These powerful in-camera editing tools will allow photographers in the field to produce optimized images on the spot and generate JPEG files at various resolution and compression settings for immediate sharing, without affecting the original RAW data.”
“Another great new feature for photographers-on-the-go is Canon’s new image resizing function. After capturing full resolution or smaller JPEG images, the camera can generate lower-resolution copies using menu commands. New lower-resolution settings include 1920×1280 for optimal display on HD televisions, or 720×480, ideal for immediate uploading to social networking and other photo sharing web sites. The original high resolution files remain unaffected by the image resizing function.”
And also, they’ve included some new fun filters, including the unexpected “toy camera” and tilt-shift-like “miniature” filters:
These kinds of inclusions, along with the size and weight reduction, indicate that the 60D is moving down the pro/pro-sumer/consumer scale towards the consumer end, with the Canon 7D now being the pro-sumer camera. (However, I still profess that any of these cameras, from the 550D on up, can give you professional quality images). Unfortunately the new 60D is a camera designed with product positioning (to fill a spot and a price point between the 7D and 550D and its position in relation to Nikon) and marketing (to appeal to a certain target of customers) as a priority more than with technology, innovation, and advancement in mind, which is disappointing to Canon photographers accustomed to the xxD progression of improvements.
Is it more accurately the 60D vs. 7D? Or the 60D vs. 550D / T2i? Here was my analysis and speculation from this previous post, three months ago (I know it is silly and pointless to make these predictions, but I’m pretty proud of my earlier assessment):
“It seems that it [the 60D] will sit at a new position that will no longer be a bridge between pro and consumer cameras (pro-sumer) as the 7D now fills that role (as the 50D once did), but will now be considered a very advanced consumer level camera.”
As dpreview now states,
“With the 60D Canon has unashamedly moved the X0D range out of the ‘semi pro’ bracket and instead focused on the enthusiast photographer looking to upgrade from their Rebel. As a result, it’s not the obvious continuation of the 30D – 40D – 50D pattern that its naming might suggest. Rather than being a direct upgrade replacement for the 50D, it’s perhaps better understood as a ‘Super Rebel.”
And later they call it,
“…essentially a new tier of EOS SLR, perhaps best described as a ‘high end Rebel.”
Let’s see how the actual 60D specs line up with my predictions!
Canon 60D
My Predictions from this previous post
Lack of AF Microadjustment: Since the Canon 60D does not have Auto Focus Calibration, AF Microadjustment, see the bottom of this previous post for how to deal with that. Canon is hearing from those disappointed that the 60D does not have AF Microadjustment and they may decide to update the firmware and include it in the 60D when it actually goes on sale. However, I still don’t understand why many are so adamant about AF Microadjustment. Have you ever tried to calibrate a zoom lens? Not just with the center point at one focal length, but rather to calibrate it for real life circumstances? At various focal lengths and with different focus points? It is an infuriating, possibly impossible task. AF Microadjustment is a built in admission of lack of quality control of cameras and lenses, and not a positive, much less deal-breaking, feature. I would love to hear from people who disagree because they have had positive and beneficial experiences with calibrating their lenses.
So, who is the Canon 60D for? Canon says,
“For the hobbyist looking for their first “professional-style” camera, or the enthusiast aiming to take their photography to the next level, the EOS 60D makes a sensible choice…For travelling photographers, the high resolution APS-C sensor will capture all the details while at the same time keeping the body and lenses small and light enough to avoid weighing you down.”
Fair enough, I would have to agree with that. See this other post to help you decide between a Canon 7D vs. 60D vs. 550D.
Here is a great quote from Photo.net to sum it all up:
“You can look at the EOS 60D as a Rebel T2i but with a better viewfinder, better AF, higher frame rate, a tilt and swivel LCD, an electronic level, a rear QCD, a larger capacity battery and overall better ergonomics. Alternative you can look at the 60D as an EOS 7D, but with a less advanced AF system, less weather sealing, a slower frame rate, no vertical electronic level, a smaller JPEG buffer and using an SD(HC) card rather than CF. The unique feature of the EOS 60D is the tilt and swivel LCD screen.”
See their hands-on preview here.
more info here:
http://www.dpreview.com/news/1008/10082620canoneos60d.asp
If you are interested in researching or purchasing the equipment I use, discuss, or recommend, please have a look at the site I’ve set up on Amazon.com.
Please leave a comment and let me know if my posts have been helpful, and what you’d like to learn more about.
Digital SLR Camera Lessons
I am offering one-on-one, individual instruction (or small group workshops) in all aspects of digital photography in the Boston and Cambridge, MA area. I will create a unique lesson with you that can include topics such as choosing a new digital SLR or advanced compact camera and related equipment, learning how to use the various settings and features of your digital camera, photographic composition and taking stronger images, processing and editing your images in Photoshop, and preparing for photographing while traveling. The lesson plan is up to you and is customized to your interests, needs, level of experience, and specific equipment. Subjects will be explained, demonstrated, and practiced in ways you will understand, remember, and use.
Please view the Lessons page here, or under Lessons in the blog menu above, to learn more details.

Central Square – Cambridge, MA – “Crosswinds” mural by Daniel Galvez
Learn to use your camera with confidence, get the most out of your digital SLR photography equipment, and learn to take better images. Get in touch with me at doug (at) dojoklo (dot) com or at 347-272-Seven Thousand.
I continue to get a large number of visits from people who are comparing the current line of Canon digital SLR cameras – the 5D Mk. II vs. 7D vs. 50D vs. 550D / T2i. I go into detail about comparing the features of these cameras in this post, including the 60D and T3i, so that is probably the post you want to read first. However, it is a long, in-depth post. If you would like to read a summary of how to make this decision and find out which camera is right for you, here it is (however, I still encourage you to read that in-depth post which is a bit more educational than this post).
Before I start I want to mention:
I have written eBook tutorials for the Canon 60D and for the Canon T2i, which cover ALL the Menu settings and Custom Function settings, with recommended settings, plus in-depth descriptions of how and and why to use the cameras’ settings and features in everyday use – Canon 7D Experience, Your World 60D, Canon T3i Experience, and T2i Experience. Learn more about the eBooks by clicking on their titles.

Longfellow House – Cambridge, MA
-New to digital SLR photography and want a really nice camera for casual home and travel use? Not really sure what all those buttons and symbols are and not really interested in knowing? Get a 550D/ T2i or a Rebel XSi.
-New to digital SLR photography and want to take really great, high quality photos, but don’t ever really plan to totally get into it? Don’t really want to spend months reading about f-stops and metering modes? Plan to use Auto or Program mode most of the time? Fall asleep 3 minutes into reading the manual? Get a 550D/ T2i or a Rebel XSi.
-New to digital SLR photography and want to learn the basics of exposure: aperture, shutter speed, and ISO? Want to learn to take the camera off Auto or Program mode, and experiment with partial or spot metering and manually selected focus points? Eager to read and understand the often confusing explanations of the manual? Get a 550D/ T2i, or a 60D.
-New to digital SLR photography and want to learn everything noted above plus want to take pictures of fast moving action: kids at play, sports, dance? Consider a 60D because it can shoot 5.3 frames per second vs. 3.7 fps of the 550D. This doesn’t mean you can’t focus on and capture fast moving action with the 550D, but it means with the 60D you can fire off a faster rapid series of shots, and thus hope to capture the exact right moment.
-New to digital SLR photography but super ambitious and know you are going to be committed and dedicated enough to learn about exposure compensation and back-button focusing? Ready for Av mode now, and plan to really take your photography to the next level over the next year or two? Already read the manual online? Want to consider the possibility of professional photography in the future? Get a 60D or get a 7D if you are super-serious and if you can afford it.
-Experienced with digital SLR photography and have outgrown the limited speed and menu/ custom options of the entry level cameras? Annoyed with digital SLR users you see on the street whose cameras are nicer than yours but are left on Auto or P mode? Want to take it to the next level and maybe test the waters of professional photography? Get the 60D or get a 7D if you can afford it. Consider a 5D Mk II if you are really, really serious.
-Experienced with digital SLR photography and plan to be a top notch amateur/ semi-pro or work towards being a pro? Carry your camera everywhere and want a sturdy tool that serves you and the way you work? Already have been paid to shoot some photos, portraits, or events? Have stopped trying to read the model number of other people’s cameras because you know your photos are better than theirs even if they have a nicer camera? Get a 7D, or a 5D Mk II if you can afford it, or wait for the 5D Mk III.
-Highly experienced with digital SLR photography and are dedicating yourself to being a part-time or full time pro? Already know and understand 99.6% of what you read in this other post? Just looking for reassurance that spending $2,500 is the right decision? Get a 5D Mk II, wait for the 5D Mk III, or get a 7D if you really can’t afford the 5D yet.

Cambridge City Hall – Cambridge, MA
You may have been convinced by forums, reviews, or online comments to question and compare image quality, auto-focus speed, high ISO performance and noise, dynamic range, etc., but those factors are all nearly completely irrelevant. All of these cameras have more than enough quality in each of those areas. Your choice should instead be based on your experience level and expected needs as a photographer, and on which camera best serves the way you work. Remember, you don’t need a top of the line camera to take professional quality photos. Instead you need mastery of the camera you have, combined with good knowledge of composition and lighting. I encourage you to have a look at some Flickr users’ photos taken with an “old,” 8MP Rebel XT to confirm this. When you are done selecting a digital SLR body, you canread some of my other posts to learn more about the Best Lenses for Travel Photography or Why You Shouldn’t Buy the Kit Lens.
Canon 5D vs. 550D / T2i – I get an unusually high number of hits from people searching for a comparison of the 5D Mk II vs. 550D / T2i. As you can see above, there isn’t a scenario where those two cameras are together as options, as they are on opposite ends of the spectrum. It is a strange comparison between an entry level dSLR and a full frame professional dSLR that, quite frankly, confuses me. If the 5D fits your expanding needs as a photographer, you would already pretty much know that you needed a 5D after your extensive time using a Rebel or a 20D, 40D, etc. Otherwise, getting a 5D means most likely you’d be investing in far more camera than you will actually need or use. Read more about why I say that here and in the Other Important Custom Functions section here (this post is about the 7D, but it will give you a feel for how a 5D / 7D differs from a 550D in terms of features that you may need but probably don’t).
AF Microadjustment 550D / T2i, 60D – A lot of people also search for AF Micro-adjustment or focus calibration for the Canon 550D / T2i for back focus or front focus issues. Due to quality control issues, acceptable tolerances, or more rarely but not unheard of bad cameras, your camera and/or lens may focus a few notches in front of or behind the subject you focused on. If your camera happens to be 2 notches on the plus side and your lens 2 notches on the minus side, well, you are going to have some issues. While the AF Microadjustment feature is not built into the menus of the Canon 550D or new Canon 60D, here is how you micro adjust for front or back focus: send the camera and/ or lens to Canon while it is under warranty, with instructions to calibrate them. You have to pay for one way shipping and insurance (+/- $30 for one item depending on weight and coverage). Ask them to include a detailed report of what the issue was and what service they actually performed (otherwise they just repeat what you wrote and say “lens was front focusing – electrical adjustment of AF mechanism” and you don’t know if it was the camera, the lens, or your mind that was off). Then send a letter to Canon asking them why a brand new expensive Canon camera paired with a brand new expensive Canon lens that you just bought does not focus properly, and why you have to pay $30 to send it immediately back to them to fix it. This process also applies to the AF Microadjustment of the 7D, 5D, and 50D and soon the 60D. It is best to first determine if the camera or the lens is the culprit, by testing the lens on another body or the body with another lens, but it may well be a combination of both since each lens and camera is uniquely faulty. See this great post, “This Lens is Soft and Other Myths” on LensRentals.com for more info on this.
If you are pretty new to digital SLR photography and you decided on the 7D, check out this really great book I recently came across while browsing the photo section at a bookstore: Canon 7D: From Snapshots to Great Shots by Nicole Young. I think you’ll learn more from it than most other how-to photo books and expanded manual type books. Even if you have another Canon and not a 7D, you’ll still find it helpful for learning how to really use a digital SLR to take better photos. She is currently working on a version of the book for the 60D, Canon 60D: From Snapshots to Great Shots.

And I, myself, have written eBook user guides for the Canon 7D, Canon 60D and for the Canon Rebel T2i / EOS 550D. You can learn all about them here: Canon 7D Experience, Your World 60D, plus the mini-guide to the 60D Menus and Custom Functions (excerpted from the full version of Your World 60D), and T2i Experience.

Need a lens to go with your new camera? Read about choosing a lens other than the kit lens in this post Why You Shouldn’t Buy the Kit Lens, and learn about the Best Lenses for Travel Photography here.
Please leave a comment, ask a question. Let me know what has been helpful, and what you’d like to read more about.
If you plan to purchase any of this equipment or books, I encourage you to do so through the site I’ve set up with Amazon, Doug’s Picturing Change Digital Photography Equipment and Books or through this direct link to Amazon.com. Purchasing through any of these links to Amazon.com, or the ones below, will help support my blog and my work. Thanks! And for those of you across the pond, click here for my referral link to Amazon UK. If you are in another country, click on one of my Amazon links, scroll to the bottom of the page, and click on your country for your local Amazon.
See the T2i on Amazon.
See the 60D on Amazon.
See the 7D on Amazon.
See the Canon 5D MkII on Amazon.
I responded to a comment on one of my posts, and my response ended up being the size of a blog post, so I’m just going to turn it into one! Please note that the title of this post should actually, technically be “Fixed Maximum Aperture vs. Variable Maximum Aperture,” as I will explain in a second.
If you are getting into dSLR cameras and lenses, you may have noticed that some lenses have a fixed maximum aperture, while others have a variable maximum aperture. This is spelled out in the name of the lens. For example, the Canon EF-S 17-55mm f/2.8 IS USM lens has a fixed maximum aperture of f/2.8 at all focal lengths, while the Canon EF 28-135mm f/3.5-5.6 IS USM has a variable maximum aperture which ranges from f/3.5 to f/5.6, depending on which focal length you are using. (the EF vs. EF-S means that EF lenses can be used on any Canon dSLR, while EF-S lenses are designed for, and can only be used on Canon dSLRs with 1.6x cropped sensors, including all Rebels, 50D, 60D, 7D, T2i/550D, but not the full frame 5D. IS means image stabilization. USM means ultrasonic motor, and means the lens has a high quality, rapid, and quiet motor for auto focusing.) The term fixed aperture usually does not mean that the lens only has one aperture setting you can use, but rather that is a common way of saying it has a fixed maximum aperture. So you can change the aperture of a “fixed aperture” lens and set it anywhere from its maximum aperture, possibly f/2.8, to its minimum aperture, perhaps f/32.

Barbes, Brooklyn, NY
With variable aperture lenses, the largest, maximum aperture you can choose when you zoom to the telephoto end will not be as wide open as the largest aperture you can choose at the wide angle end. For example with the 28-135mm f/3.5-5.6, with the lens set at the focal length of 28mm (the wide end), you can use the f/3.5 aperture setting. But with the lens zoomed to 135mm, the widest aperture you can use is f/5.6. This will slightly affect the amount of background blurring – or foreground blurring in the image above, and will decrease the amount of light entering the lens. Wider, larger apertures like f/2.8 or f/3.5 blur the background the most, which helps to create dramatic images. The reason not all lenses have fixed apertures is that they require more sophisticated internal parts and mechanisms, such as more lens elements, which thus makes them very expensive (and heavy), so variable aperture is a compromise in order to offer more reasonably priced lenses.

Barbes, Brooklyn, NY
Also, the wider apertures (f/2.8, f/4) are best for low light situations because they allow more light to enter the camera and thus allow you to select a fast shutter speed that won’t blur the image while hand-holding the camera. If you are typically working outside, this shouldn’t be too much of a concern, but if you work indoors or in low light, lenses with wide apertures like f/2.8 or f/1.4 are desirable.
Now, why is f/2.8 called a large aperture and f/22 a small aperture? 2.8 seems like a smaller number than 22, right? No, f/2.8 and f/22 are fractions. So if f were to equal 1, a slice of pie that is 1/2.8 of the pie is a bigger piece that a slice that is 1/22 of the pie, right?! So f/2.8 is a large aperture, which means a large opening, which lets in lots of light all at once, but which then causes objects not in the plane of focus, such as the background, to be blurry. f/22 is a small aperture, a small opening which lets in just a little light. But everything from near to far is in focus, like when you squint to see a street sign clearer! (The letter f in the fraction stands for the focal length of the lens.)
Please leave a comment, ask a question. Let me know what has been helpful, and what you’d like to read more about.
For additional posts about lenses see Best Lenses for Travel and Humanitarian Photography and Why You Shouldn’t Buy the Kit Lens.
Purchasing: If you plan to purchase any of this equipment, I encourage you to do so by clicking on the links of the lenses listed above, which will take you to that page on Amazon.com. Or go directly to Amazon using this link or click on the Amazon logo below. If you purchase through these links, Amazon will give me a little something for the referral, which will help support my blog. Thanks, I appreciate your support!
![]()
If you are in the UK, you can click here for the UK Amazon referral link.
For those interested in purchasing through B&H Photo, Adorama, or directly from Canon, I have set up affiliate links with them as well – find them on the left site of this page.
A lot of you come across my site searching for comparisons of the 550D, 50D, 7D, and 5D (see this post for a thorough comparison of them) so you should know that the production life of the 50D appears to be coming to an end (and word that it is discontinued here). What that means is you should possibly wait a month or so to see if 50D prices drop or if rebates are offered, or wait for the new improved model to replace it – the 60D or whatever they may call it – although it will be difficult to create a worthwhile improvement of the 50D that isn’t just a 7D. If there is one, it will mostly serve to fill in the price point between the 7D and th T2i. I’m speculating that it will cost $1,100 to $1,300 – a little more than the 50D, more than the T2i , but less than the 7D. It will probably have 18MP, and have the 63 zone metering system of the 7D and 550D. It is likely that its insides will be closer to a 550D with the exterior body and controls of a 50D/ 7D. Will it have the 19 point autofocus system, 8 frames per second high speed shooting rate, HD video, and remote flash control of the 7D? If so, it would just be a 7D. It seems that it will sit at a new position that will no longer be a bridge between pro and consumer cameras (pro-sumer) as the 7D now fills that role (as the 50D once did), but will now be considered a very advanced consumer level camera.
I’m going to join in on the pointless but fun 60D speculation:
Lots of rebates going on over at Canon, including on the 7D, 5D Mark II, some of the Rebels, and several lenses.

Plum Island – Newburyport, MA
NOTE: Some of the information in this post has been updated to include the current Canon dSLR models, the 60D and the Rebel T3i / 600D. Please check out my blog post at the following link to read the most current information:
http://blog.dojoklo.com/2011/02/20/canon-t3i-600d-vs-t2i-550d-vs-60d-vs-7d-etc/
Original Post: I’ve had a lot of visits to my previous post comparing these cameras – the Canon 7D, Canon 5D Mark II, and the Canon 50D – and since that really wasn’t much of a comparison post, but rather just a link to an impartial, technically based testing site, I’ll try to give a little more insight into helping you make this decision. Please note, this is aimed towards still photographers and not videographers. I know that videographers have different priorities when making this selection, and I am not knowledgeable enough to address them. I have written some updated comparison posts which also address the Canon 60D here and here.
I’ve used the 50D and the 7D pretty extensively, so I can speak with a bit of confidence about them. I’m very familiar with the features of the 5D Mk II and how they compare to the other cameras, so I will discuss them too. I’ll address the 550D (Rebel T2i) at the end of this post. Also, all the precise specifications of these cameras can be researched online and compared, so I will discuss them on a user-experience level, but I encourage you to decide which factors are most important to you for further research. I know it is a long post with a lot to read, but if you are investing several hundred or thousands of dollars in a dSLR and lenses, you should be thorough! On a final note before I begin, you may have been convinced by forums, reviews, or online comments to question and compare image quality, auto-focus speed, ISO and noise, etc., but those factors are all nearly completely irrelevant. Each of these cameras has more than enough quality in all of those areas. Your choice should instead be based on your level and needs as a photographer, and on which camera best serves the way you work. If you wish to see this complicated choice summarized in an easy to read format, view this post (it is a bit tongue-in-cheek, but mostly accurate). And when you are done selecting a camera body, you can learn more about lenses here.
While I have your attention, I want to mention that I have written eBook tutorials for the Canon 60D and for the Canon T2i, which cover ALL the Menu settings and Custom Function settings, with recommended settings, plus in-depth descriptions of how and and why to use the cameras’ settings and features in everyday use – Your World 60D and T2i Experience. Learn more about the eBooks by clicking on their titles.
Also, please let me know about broken links in my posts, as they seem to mysteriously happen from time to time.

Hudson River – Cold Spring, NY (this image is entirely in color – look at the plants!)
Sensor Size: If you are, or plan to be a professional photographer, and you’ve limited your selection down to two or three of these cameras, you are going to want to seriously consider the 5D MkII. This is due primarily to the fact that it has a full frame sensor (a sensor approximately the size of a frame of 35mm film), which is pretty much expected for you to have as a professional. (Note that whenever I say 5D in this post, I am referring to the 5D Mark II). The 7D and the 50D have smaller sensors, with a 1.6 crop factor. This means that their sensors are a bit smaller than a frame of traditional 35mm film. A wide angle lens will not produce as wide of a field of view on a cropped sensor as on the 5D: a 16mm will give the field of view of a 16 x 1.6 = 25mm lens, but a telephoto on a cropped sensor will appear to zoom closer, thus making a 200mm lens appear to be a 200 x 1.6 = 320mm lens. You can begin down the professional path with a 50D or 7D, but you are eventually going to experience the limitations of the smaller sensors and start to understand the need for full frame. BUT…there are a few problems with this choice…
Price and Obsolescence: First, you probably haven’t run out to get a 5D MkII because of its cost. As of 5/2010, the price is $2,500. AND, the 5D MkII dates from 9/2008, and is due for an upgrade, likely in 2012, maybe as soon as later in 2011. In some respects, the 7D – being newer – has better features than the 5D, such as the advanced auto focus and metering systems and faster frame rate. Not to mention the fact that if you wait around long enough, a 7D type camera WITH a full frame sensor but a lower price than the 5D is bound to come out! But you need a camera now, so let’s continue. The 7D is $1,600 or $1,700 depending on current promotions, and the 50D is about $1,000. The 50D however, is also the closest one to being replaced (by the 60D or whatever it may be called). This doesn’t mean that it isn’t still a very capable and feasible camera – people are still happily using 20D and 30D cameras, just that it is reaching the end of its production life. So as far as the newest model, that is the 7D (and the 550d/ T2i).
Megapixels / Image Quality: Regarding megapixels, it really isn’t much of an issue unless you plan on printing out billboard size prints. All of these cameras have more than enough megapixels and image quality for most photographers’ needs. The 7D is at 18mp, the 5D Mk II at 21mp, and the 50D at 15mp. I have found that more megapixels give you more lee-way to push and pull the image around in Photoshop before it starts to fall apart and look over manipulated. In this respect there is a significant difference between 8 megapixels of a Rebel XT and 15 or 18 mp. The 8mp barely allow you to do a regular amount of exposure, contrast, and color correction before it starts to really show, but there is little to be concerned about between the 15mp of the 50D and 18mp of the 7D (unless you are a hard-core pixel peeper, in which case you will be deeply offended by these kinds of statements). Be aware that sensors with more megapixels more readily show the shortcomings of cheaper lenses, and thus demand higher quality lenses, like the Canon L series, for the sharpest, most detailed image across the entire frame. From experience, I can tell you there is a huge improvement in clarity, color, and overall image quality when using an L lens with a 50D or 7D.

Marquee – Tarrytown, NY
HD Video: If you are concerned about HD video, then you choice is narrowed down to the 7D and the 5D Mk II. With firmware updates and 3rd party Magic Lantern firmware, they are about on par as far as frame rates etc., so cost and sensor size is again the differing factor here. If you are not going to need or use video, it is definitely worth considering the 50D, which will give you 85-90% of the still photography features and performance of the 7D at a much lower price.
ISO, Frame Rate, File Size: For ISO performance, you can look at the testing site mentioned above to see that they are incredibly similar. Being a professional camera, the 5D has a broader ISO range on both ends, lower noise at higher ISOs, and a better dynamic/ tonal range. This is a large factor in why you pay $2400 for this camera. But for the non-pro, in general you hardly ever want to go above ISO 1,600, so unless you have a specific reason for needing really high ISO and photos with the lowest possible noise at high ISOs (for example shooting lots of indoor or dark events like concerts, weddings and receptions), then this isn’t much of a deciding factor. And if you are concerned about dynamic range, well, don’t be. Anyone who actually needs to be concerned about dynamic range is a commercial photographer who is not reading this post because they are busy choosing between a $7,000 camera and a $10,000 camera. The frame rate performance, however, may be an important factor depending on how you work and what you take photos of. The 7D has a continuous rate of 3fps and a high speed continuous rate of 8fps. Personally, I’m unhappy with this choice of rates. The 3fps is too slow for action situation, and the 8fps is ridiculously high, giving me far too many unwanted photos that quickly fill up the memory card. I wish for a rate closer to 5 or 6 fps. The 5D has one rate of 3.9fps, which again seems a bit too slow for action situations, and limits its use for capturing sports action. The 50D offers 3fps and 6.3fps, which I find ideal. Oh, also, the file size of the 7D images are much larger than the files of the 50D and somewhat larger than the files of the 5D. While this indicates that the files contain more information and detail, this affects size and number of memory cards you will need, plus size and expense of storage on your hard drive and external hard drives, PLUS the time it takes to download, transfer, copy, open, save, and upload files. It is a significant hidden cost in storage dollars and time of the 7D that should not be ignored. (Is this apparent difference of the 7D and 50D images visible to the naked eye of anyone other than pixel peepers and people making jumbo prints? Not necessarily. The image quality you need is available from any of these cameras, so it is more productive as a photographer to focus on image content!)

St. Patrick’s Day Parade – Brooklyn, NY
Features, Customization: Being the newest camera, the 7D has the most advanced features. As I mentioned above, it has an advanced auto focus system, providing more focus points, more focus modes (single point, spot, zone, expansion, etc.) and numerous options for how the focus points perform and select and track a subject. I’ve written a bit more about these features here, along with links to additional resources. There are advanced custom functions for auto focusing and tracking, flash control (the 7D is the only one which offers remote flash capabilities, which will save you a couple hundred dollars on Pocket Wizards if you are going to use this), and customization of buttons and displays. Again, I’ve explained a lot of these features in this post. Read through them. Do you understand them? Are you going to learn them? Are you going to need and use them? Probably not. They are nice to have, make you feel like you have a really powerful camera you are in control of if you learn how to choose, set and use them, but in everyday shooting I rarely, if ever, make use of them. The live view (which the 50D has as well) and the built in level are cool, but will you ever use them? I don’t. (The built in level will be most useful to landscape photographers). Of all the features and customizations of the 7D that are not on the older 50D, the only ones I miss are the remote flash capability, the grid overlay in the viewfinder, the larger more inclusive viewfinder, the spring loaded doors of the 7D, and the ability to switch functions of the top dial and back dial in Manual mode. (It is such a nice feature on the 7D – since I use Av mode most of the time, the top dial controls aperture. But when I switch to M mode, the top dial now controls shutter speed. So with the 50D I have to overcome muscle memory and use the back dial for aperture. But with the 7D, one can switch the dials’ functions.) Unless you are an intense sports or animal shooter who needs to customize how the camera selects and auto focuses on a moving object, how it addresses an object that moves in front of your subject, and how fast it responds to this new object before it addresses or ignores it, then you don’t need these features. And when you compare the features of the 7D to the 5D or 50D, you find that the older cameras are not outdated dinosaurs as forums will lead you to believe – but rather they also have many of these features and customizations as well. As far as all the new auto focus features of the 7D, it turns out they barely mattered to me because I manually select my auto focus point 99% of the time. I don’t want the camera necessarily focusing on the closest object, and it certainly does not know what I wish to focus on, so I don’t leave it up to chance, and I select the point myself. Therefore I rarely use any of these advanced auto-focus modes. In addition, it is much easier and quicker to manually select an auto focus point on the 5D and the 50D when you are selecting from 9 focus points rather than the 19 focus points of the 7D! However, if you photograph fast moving objects that you would prefer the camera to locate, track, and properly focus on, most of the time, all by itself, then the 7D is the camera for you. Also, note that due to the fact that the 5D is a professional body and not a consumer level camera, it does not have a built in pop-up flash. If you plan to use a flash with it, you will need to buy the Canon 580EX II flash (which you should do with any of these camera anyway).

San Miguel Dueñas, Guatemala
It is expected that the 5D Mk III and possibly the 60D (or whatever it may be called) will also incorporate this new 7D type focusing system when they come out. The 5D, 7D, and 50D all have AF microadjustment capability, which means that you can adjust the auto-focusing of each lens individually, in the camera, if they happen to front- or back-focus a little bit. The problem is that it is a maddening procedure, and you can never get it quite right because the focusing typically varies slightly for each focus point, as well as for different distances and apertures. (You may get it exactly sharp for the center focus point at 15 feet at f/4, yet find that it is still off for the upper left focus point when you shoot under real life conditions that vary from those settings.) I feel that if you need an excessive amount of AF microadjustment, you should probably send the camera or lens back for repair, calibration, or replacement. Personally, if I were using a non-L-series lens, I wouldn’t worry about a few mm of front- or back-focusing. And if I were using an L-series lens that didn’t focus dead on, I would send it back to Canon for recalibration – which in fact is something I have done. (I don’t understand people’s celebration of AF microadjustment – isn’t it a built in admission of poor manufacturing quality control, especially when pairing a Canon lens with a Canon body?) Finally, be aware that the mode dials of the 7D and 5D do not have most of the “basic zone” mode settings such as sports, portrait, and landscape. As the user of such an advanced camera, you are expected to know how to change the camera’s settings (aperture, shutter speed, ISO, etc.) yourself for these types of situations. If you don’t, and/ or if you plan on keeping your camera set on Auto (so called “green box mode”) or Program (P) mode, you probably shouldn’t be considering a 5D, 7D or 50D anyway, because you’ll be paying for far more camera than you will be using! Start with the 550D or one of the other Rebels for now and upgrade later if you feel you have outgrown its capabilities. If you are concerned about the best image quality, your image quality difference between a 7D on Auto and a 550D on Auto will be negligible. (Note that these cameras also have a Creative Auto mode, which is a weird “transitional” mode between Auto and actually learning how to make use of aperture settings and exposure compensation in Av, Tv or M mode. Since using aperture settings to dictate desired depth of field is essential to photographic composition, it is best you actually learn it directly.)
Metering: The 7D has an advanced metering system compared to the 5D Mk II and the 50D, and this is actually one very important advantage. The 7D has a more precise 63 zone metering system vs. the 35 zone system of the 5D and 50D. With the 7D, I can confidently leave it on evaluative metering 97% of the time, and it meters the subject exceptionally well 98% of those times. Canon claims that it will meter properly for a wide variety of subjects, including back lit and extreme contrast subjects. I have found this to be true. Compared to the 50D, this is significant. I have found that the 50D regularly overexposes by about 1/3 or 1/2 a stop, and I have exposure compensation on -1/3 all the time to avoid blown out highlights (except in dark situations, where it tends to under-expose). Also, the 50D just does not always correctly expose in unusual or difficult lighting situations. And for dramatic and powerful photos, you want unusual or difficult lighting situations, so I have found that I am using exposure compensation, or having to change to center weighted, partial, or spot metering often. While this is sharpening my metering eye and skills, it is a pain and it leads to the risk of lost shots. I would prefer that it just got the exposure right the majority of the time, as the 7D does. (I have subsequently found that using center-weighted averaging mode on the 50D all the time results in more consistent exposures than evaluative metering mode). You can learn more about the various metering modes, and when to use them, in this post.

Vinnie – Brooklyn, NY
550D / Rebel T2i: The Canon 550D or Rebel T2i has some impressive specs, and shares many features of the 50D and the 7D, and it is actually the newest model of all of them. It has 18mp and HD video like the 7D, but only 3.7fps continuous shooting mode frame rate. And it has 9 AF points and less complex auto focus options, like the 50D. It is fully capable of taking photos that are virtually the same quality as the 7D and the 50D, and if you don’t have intensive shooting and ego demands (ie, wanting the biggest, most expensive body whether or not you actually understand, need, or use its advanced features), it is worth seriously considering. But the 550D can’t have every feature and custom function of the higher level cameras, otherwise it would just be a 7D! If you are concerned about comparing image quality, ISO performance, auto-focusing speed, etc, all of these cameras have more than enough of what you need. You should instead be comparing the features and advanced options of the cameras which are most important to how you work. The top of the line camera won’t help you take better photos. But mastery of the tool that best fits your need just might (when combined with good knowledge of composition and lighting). I encourage you look at Flickr users’ photos taken with an “old,” 8MP Rebel XT to confirm this. Also, don’t rule out the Canon Rebel XSi if you are just starting out with digital SLRs.
If you are comparing a 5D Mk II vs. 550D (5D vs. T2i) you are looking at a professional full frame camera vs. a consumer, entry level dSLR, and skipping 2 pro-sumer cameras in between. So while the features of the 550D are nearly on par with the 7D in many ways, the 550D vs. 5D MkII is an odd comparison that quite frankly confuses me. Are you new to digital SLRs? Get a 550D (or a 50D/ 60D if you wish to spend more money or need the higher frame rate for sports or photojournalism). Have you outgrown all the features, capabilities, or limitations after extensive use of a 20D, 40D or 50D? Get a 5D MkII. (Note that whenever I say 5D, I am referring to the 5D Mark II, the current model at this time). Are the images you’ve been taking with your Rebel or 40D no longer living up to your professional level needs in terms of dynamic range and noise at high ISOs? Get a 5D. Want to spend $2,400 on a camera body? Get a 5D. Want to spend $800 and still have a tool that is fully capable of taking professional quality images? Get the 550D.
There are a few reasons why you would need a 7D or a 50D over a 550D / T2i. A major one is the advanced controls over camera settings. The more expensive models have additional buttons, controls, and displays on the exterior of the camera to enable quicker changes of important settings and easier viewing of what the current settings are. The 550D is capable of changing all these settings too, it is just done in a different way. For example, the 7D and 50D have the big dial on the back for quickly scrolling through menus, images, and for quick exposure compensation changes and changes of other settings. They also have the little toggle joystick on the back, primarily for quickly changing focus points. These 2 cameras also have the additional display screen and buttons on the top to easily view and change a number of settings such as ISO, drive mode, white balance, and metering mode – among others. These cameras are designed for a professional or advanced user who makes use of all these settings and needs to quickly change them while working. However, with a little practice, these settings can also be quickly changed using the buttons and big screen on the back of the 550D. The 7D and 50D also have advanced menus which give the user more customization options, like those discussed above (27 custom functions on the 7D vs. 12 on the 550D), and additional features desired by advanced users or pros, such as 1/3 ISO increments where the 550D has full increments (100-200-400 etc.).
What you are also paying for with the 7D and the 50D are stronger, better constructed metal bodies to handle daily use and abuse as well as some weatherproofing of the buttons and doors. (However, Canon cameras have fallen from elephants and airplanes and have survived, so they are all generally pretty rugged. At pitcher of water was thrown on the back of my Rebel XT and it was fine.) All these features give the 7D and 50D a bigger and heavier body than the smaller, lighter 550D, which may be an important consideration for some users. Also, the 7D, and 50D have AF microadjustment capability, but the 550D does not. AF Microadjustment means that you can adjust the auto-focusing for each lens, in the camera menu, if they happen to front- or back-focus a little bit. I don’t think this is a very important feature, as I discuss above in Features. (The problem is that it is a maddening procedure, and you may get the focus exactly sharp for the center focus point at 15 feet at f/4, yet find that it is still off for the upper left focus point when you shoot under real life conditions that vary from those settings.) As I said above, if you need an excessive amount of AF microadjustment, you should probably send the camera or lens back for repair, calibration, or replacement. Or if you are that obsessed about pixels, you should be looking at a pro-sumer or pro camera and L series lenses. Finally, the 550D also uses SD type memory cards, while the other cameras all use CF, and the smaller battery of the 550D will not last for as many shots as the other cameras.
Also, as I discussed above, be aware that the mode dials of the 7D and 5D MkII do not have most of the “basic zone” mode settings such as sports, portrait, and landscape. If you are starting to learn dSLR photography, these modes are helpful for seeing the results from different camera settings, and are good shortcuts until you have learned more about apertures and shutter speeds. Or if you never intend to use or learn more about the advance settings, the basic modes are good for helping you get better looking results than Auto or Program modes. So if you plan on keeping your camera set on Auto, Program, or the basic modes (sports, landscape, etc.), start with the 550D or one of the other Rebels for now and upgrade later if you feel you have outgrown its capabilities. Your image quality difference between a 7D on Auto and a 550D on Auto will be negligible.
So there you have it. You can read great, in depth reviews of each of these cameras on DPreview.com. There are probably numerous features and points that I forgot to mention, but hopefully this will give you a starting point in determining which features are important to you, and what warrants further research to help you in making your decision. The important thing is to choose one that fits your needs and budget, then stop comparing and get out and shoot! As I said above, your camera choice should be based on your level and needs as a photographer, and on which camera best serves the way you work. Whichever one you choose, I highly encourage you to get the the applicable Canon Guide to Digital SLR Photography from David Busch, or a similar book like the Magic Lantern Guides. They are much more user friendly versions of the camera’s manual, and will get you up and running quickly and assist you in fully understanding the settings, controls, and functions of your dSLR.
Need a lens to go with your new camera? Read about choosing a lens other than the kit lens in this post Why You Shouldn’t Buy the Kit Lens, and learn about the Best Lenses for Travel Photography here.
Please leave a comment, ask a question. Let me know what has been helpful, and what you’d like to read more about.
If you plan to purchase any of this equipment or books, I encourage you to do so through the site I’ve set up with Amazon, Doug’s Picturing Change Digital Photography Equipment and Books. Purchasing through this site or one of the direct-to-Amazon.com links below will help support my blog and my work. Thanks! And for those of you across the pond, click here for my referral link to Amazon UK. If you are in another country, click on one of my Amazon links, scroll to the bottom of the page, and click on your country for your local Amazon.
See the T2i on Amazon.
See the 60D on Amazon.
See the 7D on Amazon.
See the Canon 5D MkII on Amazon.
When I began my work in travel, culture, and humanitarian photography I spent a great deal of time scouring websites, reading forums, checking reviews, making lists, and agonizing before I finally settled on which lenses were best for my needs and my work. So hopefully all my effort can help you save some time and assist you in your research in selecting which lenses are best for you. In addition to travel, humanitarian, and photojournalism work, much of this advice will apply to general photography as well. After you’ve learned all about lenses here, you can have a look at this other post to see what other camera gear and accessories you might want.

Open Windows, San Miguel Duenas, Guatemala
The easy answer to the question of which lens is best for travel photography, right up front, is: an all purpose zoom that goes all the way from wide to telephoto, like an 18-200mm, or a standard zoom like a 24-105mm. See the Standard Zoom section and the One Lens For Travel sections of this post for more information about these. The more difficult answer to that question is addressed in detail by this post. The most difficult answer to this question is: it depends. It depends on you. It depends on your level, interests, and goals as a photographer. It depends on what you most enjoy taking photos of and what type of images you aim to capture. Hopefully this post will help you figure that out, and I’ll address this most complicated answer more at the end of the post.
The primary sources for me in determining which lenses to choose were looking at the websites and blogs of other photographers who do similar work, since they often list and discuss the equipment they use. The initial and most helpful source for me was Karl Grobl, since his work as a humanitarian photojournalist is closest to what I do and what I aspire to do. But some of the other ones I can recall looking at include David duChemin – (who is a travel, art, and humanitarian photographer – he seems to have moved or deleted his “Gear” page), plus Nevada Wier and Bob Krist – both dedicated travel and cultural photographers. Oh, and the books and advice of the ever-enthusiastic Rick Sammon helped out along the way. I then applied what I learned from them to my specific photographic interests, preferences, and tendencies (which can be summed up with the fact that I typically like to zoom in close). In other words, if one of them favors a 50mm prime lens but you know you prefer the versatility of zooms, then adapt what they say to your needs.
For me and many others the ideal combination is a wide angle zoom, a standard (or middle range) zoom, and a telephoto zoom. (If you are interested in just one lens for travel, have a look at the Standard Zoom section, and then also jump down to the bottom of this article for the One Lens for Travel section.) I’m going to stick to the professional level lenses and compare the Canon L lenses first, and discuss other Canon lenses in the One Lens for Travel section below. I’ll try to keep it short and simple, and let you conduct further research on the countless sites dedicated to equipment and reviews.
Click on each lens below to link to its page on Amazon.com. If you plan to purchase any of this equipment from Amazon (or other equipment, accessories, or anything else), I encourage you go to Amazon.com by clicking on the links found throughout this post, and then Amazon will give me a little something for the referral, which will help support my blog. Thanks!
If you wish to first try out a lens before buying it, click on this link to go to BorrowedLenses.com, where you can get great prices on short-term rentals of any lens as well as the latest Canon and Nikon dSLR bodies (as well as video, audio, and lighting equipment).
If you are in the UK or wish to purchase from B&H, Adorama, or direct from Canon see the information at the end of this post for those links. The lenses I chose, which work best for my needs, are indicated by (Y). I apologize to the Nikonistas out there, since all of these lenses are the Canon variety. However, Nikon typically has an equivalent lens for each of these. Just search for the same focal length and have a look at the aperture and price to determine the comparable Nikon (Nikkor) lens. For example here are some equivalents:
Canon 16-35 f/2.8L to Nikkor 14-24mm f/2.8
Canon 24-70 f/2.8L to Nikkor 24-70 f/2.8
Canon 70-200 f/2.8L IS to Nikkor 70-200 f/2.8 VR
Check out this post to better Understand Canon Lens Notations – the significance of all the various numbers and letters in a lens name.
Wide Angle Zoom
As humanitarian photojournalist Karl Grobl says, this is the “bread and butter lens” of the photojournalist. This is used for up-close-and-personal shots, for environmental portraits or photos, and for “story-telling” images which include multiple subjects or a larger context.

Open Windows, San Miguel Duenas, Guatemala
EF 16-35mm f/2.8L II USM (Y)
pros: slightly wider on the wide end which is good for cropped sensors (7D, 60D, Rebels), larger maximum aperture (“faster”) for use in low light situations or for more dramatic depth of field
cons: high price, heavier in weight
notes: get the slim UV filter to avoid vignetting, especially if using a full frame camera like the 5D
filter: 82mm slim filter fits this lens.
notes: The above two images of this post were with this lens. This is the wide angle zoom I chose because I wanted the “faster” f/2.8 aperture to be able to use it effectively in low light situations.
EF 17-40mm f/4L USM
pros: more zoom on the far end, lighter in weight, much lower price
cons: f/4 maximum aperture not as “fast” and slightly less dramatic for shallow depth of field, not quite as wide on the wide end
filter: 77mm slim filter fits this lens.
Standard Zoom
This is a great “walk-around” all purpose lens, especially for travel or everyday photography. If you want to head out on the streets with just one lens, this is the one to take which will serve you well in most situations you encounter.

Panajachel, Guatemala
EF 24-70 f/2.8L USM (Y)
pros: larger maximum aperture (“faster”) for use in low light situations and more dramatic depth of field
cons: heavier in weight, higher price, less zoom range, no image stabilization
filter: 77mm multi-coated filter or 77mm coated filter fits this lens.
notes: a great all-purpose walk-around lens, though relatively big and heavy. I discuss using this lens, with several photo examples, in this post here.
There is a new EF 24-70 f/2.8L II USM lens plus the new EF 24-70 f/4L IS USM lens, both with the same focal length as above. The first one just listed is an improved, lighter version of the 24-70 f/2.8L, and the second one listed adds Image Stabilization but has an f/4 maximum aperture rather than the f/2.8 maximum aperture of the other 24-70mm lenses. Adding these two new lenses into the mix makes this an even more challenging decision in the Standard Zoom category!
EF 24-105 f/4L IS USM
pros: lighter in weight, image stabilization which will help you gain 2 or 3 stops in speed vs. hand-held non IS (*see below), more zoom range, lower price
cons: f/4 maximum aperture not as “fast” and slightly less dramatic for shallow depth of field
filter: 77mm multi-coated filter or 77mm coated filter fits this lens.
* this means for example, if the proper exposure of a scene is 1/60 at f/5.6, and you want to hold on to that f/5.6 aperture for compositional reasons and not have to sacrifice your chosen depth of field for a faster shutter speed, you could capture it without blur, whereas without the image stabilization (IS) the hand held image may have been blurry.
Telephoto Zoom
This is a great lens for portraits, close ups, details, ability to zoom in and capture something far away, sports and action shots, and ability to create dramatic depth of field or blurry backgrounds. There are four versions of the Canon 70-200mm lens – either f/2.8 or f/4, each with or without image stabilization (IS). Oh wait, there are now five versions, with the recent Mark II version of the f/2.8 IS. I think with a lens this long and heavy, you need image stabilization if you are going to be hand holding it, so I will ignore the non-IS versions.

Solola Market, Guatemala
EF 70-200, f/2.8L IS USM
pros: larger maximum aperture (“faster”) for use in low light situations and more dramatic depth of field. The Mark II version of this has a closer minimum focus distance and improved optics
cons: very heavy, very large, higher price, especially the new Mark II version
filter: 77mm multi-coated filter or 77mm coated filter fits this lens.
EF 70-200, f/4L IS USM (Y)
pros: lighter weight, smaller, lower price
cons: f/4 maximum aperture not as “fast” and less dramatic for shallow depth of field
filter: 67mm multi-coated filter or 67mm coated filter fits this lens.
notes: This is the telephoto zoom I chose. I sacrificed the one-stop of aperture for the much more manageable size and weight of the f/4. And since I primarily use it outdoors, and because it has image stabilization, the f/4 aperture only really affects the extent of background blurring. There are several example photos of this lens in action in this post here and also more nice example photos in this post here.
I haven’t used each of these lenses in the field, though I have briefly tested most of them, so my decisions and my pros and cons are sometimes based on my research and from what I’ve learned from others who use them. Consider them starting points for issues you want to consider in your selections. And while there are endless discussions and comparisons regarding image quality, sharpness, sweet spots, etc. for each pair above, I will stay out of that discussion and tell you there are highly regarded professionals who use each of these, that any Canon L series lens is professional quality, that price and/ or largest maximum aperture will often indicate the one that is generally considered “better,” and that you will never regret your choice based on these concerns. Note that many L-series lenses are sealed against and dust, water and weather. Sometimes a front filter is required to complete the weather sealing, such as with the wide angle lenses. I suggest always using a clear, protective UV filter with any lens, preferably a high quality, multi-coated B+W brand filter. If you don’t want to spend that much, at least get a high quality single-coated B+W filter rather than a cheaper Tiffen filter.
When making your choices, I highly recommend going to a store with your camera and actively testing and comparing each pair. The difference in size and weight, and even feel of the lens in your hands, is often dramatic and may help you make your decision. If you are still undecided, rent one for the weekend and work with it. And don’t think that you have to immediately get three lenses in order to do your work. Karl Grobl uses just two of them in his work, and that hasn’t limited him in either humanitarian or travel work. Consider your primary needs, and buy one or two based on that, and combine them with less expensive non-L lenses for now.
If your budget or needs don’t call for L-series lenses, see the One Lens for Travel section below, or look for the closest equivalents of the above lenses in other Canon or Sigma or Tamron, etc. lenses (or in the Nikon lenses if you are over in that camp).
Prime Lenses
Many photographers rave about prime lenses (lenses of a single focal length, that don’t zoom) for many reasons, including image quality, the purity and simplicity of working with them, and their large maximum apertures (as wide as f/1.2) for very dramatic compositions through use of shallow depth of field. The focal lengths I see used most often are (these are obviously Canon examples):
Canon 35mm f/2
Canon 50mm f/1.8 II (high image quality for about $100!)
Canon 50mm f/1.4 (Y) (a little more costly, but higher quality 50mm)
Canon 85mm f/1.8
Take into consideration if you have a full frame or a cropped sensor, since with a cropped sensor 7D , 60D, or 550D the field of view of the 50mm lens will be closer to an 80mm lens on a full frame 5D camera (or a 35mm film camera), so the field of view of a 35mm will be closer to a 50mm on a full frame or 35mm film camera.

San Miguel Dueñas, Guatemala
One Lens for Travel
I know a lot of people are interested in finding just one lens that is good for travel photography. As I mentioned above the best option is typically the standard, mid-range zoom. Look above for info on the Canon L-series lenses. My choice would be the EF 24-105 f/4L IS USM. For something less expensive Canon offers a couple other great options. For each of these lenses, I would highly recommend getting the optional lens hood (the hood comes with L-series lenses). It helps shade the lens to prevent unwanted lens flare (although lens flare can sometimes be used for a great effect when desired), helps protect the lens from bumps and drops, and makes you look cooler and more professional! And of course always get a good quality, coated B+W brand UV filter for protection – or at least a cheaper Tiffen filter. However, there is a significant difference in the clarity and lack of reflectiveness of a coated B+W filter vs. a standard Tiffen filter, which you can see if you look through them side by side, so those who are concerned about image quality should go with a coated, or better yet multi-coated B+W filter (designated MRC). Also, note that non-L-series lenses are not nearly as well sealed against dust, water and weather as most all of the L-series lenses are.
EF-S 18-135mm f/3.5-5.6 IS
pros: less expensive, lighter weight, image stabilization
cons: less zoom range on the telephoto end than the 18-200mm, not a constant minimum aperture like the L-series lenses (the f/3.5-5.6 means your largest aperture at the 18mm wide end will be f/3.5, while the largest aperture at the 135mm telephoto end will be a less dramatic f/5.6), not higher quality USM focusing motor, EF-S means this lens can only be used on cameras with the APS-C sensor, or non-full-frame sensors, so it can be used on all Digital Rebels, 20D-50D, and 7D, but cannot be used on a Canon 5D. However, that means it is optimized for those cameras, especially for the wide end.
Lens hood EW-73B fits this lens, and a 67mm coated filter or 67mm filter.
This is currently one option for the kit lens for the Canon EOS 60D, and is a good choice if you are debating between the kit lens or not.
EF-S 18-200mm f/3.5-5.6 IS
pros: more zoom range on the telephoto end, image stabilization, better image quality than the 18-135mm lens.
cons: more expensive, heavier weight, not a constant minimum aperture like the L-series lenses (see above lens), not higher quality USM focusing motor, EF-S for APS-C sensor cameras only (see above lens).
Lens hood EW-78D fits this lens and a 72mm coated filter or 72mm filter.
This is currently another option for the kit lens for the Canon EOS 60D, and is an excellent choice if you are debating between the kit lens or not.
EF 28-135mm f/3.5-5.6 IS USM
This is an older lens that seems to have been replaced for the most part by the two lenses above.
pros: less expensive, image stabilization, USM means a faster, quieter auto-focusing motor and full time manual focus (which means you can override the auto-focus by turning the focus ring without having to switch the lens to MF manual focus), EF so can be used with both APS-C and full frame cameras too if you have or wish to upgrade to a 5D.
cons: not a constant minimum aperture like the L-series lenses (see above), less range on both the wide and telephoto ends.
Lens hood EW-78BII fits this lens and a 72mm coated filter or 72mm filter.
It Depends
The actual answer to the question of which lens is best for travel photography is: it depends. As I said above, it depends on you – on your level, interests, and goals as a photographer. It depends on what you most enjoy taking photos of and what type of images you aim to capture. If you are a photography novice, or just want to be able to capture all or most situations, the all purpose zoom or standard zoom might serve you best. But if you wish to capture more of a certain type of photo that you like, photos that match your specific visual ideas and preferences, you need to reconsider. Do you like sweeping vistas and all encompassing environmental portraits? Do you typically want to capture the entire scene in your shots? Then perhaps a wide angle zoom will work better for you than a standard zoom. Certainly, you will be limited and not able to frame certain shots the way you might want, but you will capture more of the types of images you like, and might simply have to move in closer than usual to get some the other images. Do you like extreme close-ups of people’s faces with dramatically blurry backgrounds, architectural details on buildings, the look of compressed perspective? Then a telephoto zoom rather than a standard zoom will help you capture more of those images you like. Sure, you will not be able to get the wide angle view of spaces, but you might succeed in capturing many more of the dramatic photos you like. Or perhaps you best work like a classic photojournalist and want to capture scenes and portraits more closely to how you see them. Then a single prime lens like a 50mm or 85mm might be the one lens that is perfect for you.
The Best Lens for the Canon 60D
A lot of people ask, “Which is the best lens for the Canon 60D, (or the 7D, or the 550D/T2i or the 5D)?” There isn’t a specific lens that is best for a specific camera. I hope you’ve already learned that from reading this post! A lens will perform exactly the same on each of those cameras or any other camera with an APS-C size sensor. The effective focal lengths will be different with a full frame sensor dSLR, such as the Canon 5D, but they will still be wide angle zooms, medium zooms, etc. The best lens for your camera is the one that is best for you, your work, and the types of photos you take. That being said, the kit lens that Canon has paired up with the 60D, the EF-S 18-200mm f/3.5-5.6 IS is an excellent choice for an all-purpose everyday and travel lens. See the EOS 60D with the kit lens on Amazon here.
For related posts, check out other entries in the Lenses Category, the Humanitarian Photography category, and my posts about Fixed vs. Variable Aperture Lenses and Choosing a Lens beyond the Kit Lens, as well as my discussion and recommendations for gear for travel photography.
Purchasing: As I mentioned above, if you plan to purchase any of this equipment, I encourage you to do so by clicking on the links of each of the lenses listed above, which will take you to that page on Amazon.com. Or go directly to Amazon using this link or click on the Amazon logo below. If you purchase through these links, Amazon will give me a little something for the referral, which will help support my blog. Thanks, I appreciate your support!
![]()
If you are in the UK, you can click here for the UK Amazon referral link. If you are in another country, click on one of my Amazon links, scroll to the bottom of the page, and click on your country for your local Amazon.
For those interested in purchasing from B&H Photo, Adorama, or direct from Canon, please click on their logos on the Gear page. Thanks!
Renting Lenses: If you wish to first try out a lens before buying it, click on this link to go to BorrowedLenses.com, where you can get great prices on short-term rentals of any lens as well as the latest Canon and Nikon dSLR bodies (as well as video, audio, and lighting equipment).
Was this post helpful? Please let others know about it by clicking the Facebook or Twitter sharing buttons below, linking to it from your blog or website, or mentioning it on a forum. Thanks!
Canon has some new rebates that are perfectly made for any aspiring photojournalist needing to buy equipment. Several lenses have rebates, including the 16-35 f/2.8L II – the current version of the “bread and butter” lens for any photojournalist, the popular 24-70mm f/2.8L midrange zoom, as well as 85mmL, 50mmL and 100mm primes. Speedlites included too. If you buy a 5D body at the same time, the rebates double! There are other rebates with the 7D, either alone or in combination with various lenses.
If you are a reader of Scott Kelby’s blog, then you are well aware of the Photoshop 20th Anniversary event that took place last week. If not, check it out here, with a video of the entire presentation. The various presenters demonstrate important features added to each new version, and it is interesting to see the advanced capabilities that even the earliest versions contained. Though they run through them too fast to actually learn, it was also worth watching to see the possibilities of features I still haven’t explored, like smart objects and channels. They conclude with some upcoming features, notably content aware healing and filling, which is also demonstrated in some videos on YouTube like this one.
It is one thing to know that your cool new Canon or Nikon digital SLR provides you with 3 or 4 different metering modes. It’s another thing to know how and when to actually use them in the field or in different real life situations. The Canon 5D, 7D, 60D, 50D and T3i all offer four different metering modes – Evaluative, Center-Weighted, Partial, and Spot – as I’m sure you have thoroughly read about in your manual, right? Nikons, like the D7000, D51000, and D3100 generally have three different modes: Matrix, Center-Weighted, and Spot. I’ll try to cut to the chase and simplify the explanations and their uses. Note that there are some important differences between how they work for Canon and Nikon cameras, particularly the Spot mode.
The viewfinder of the Canon T3i (T2i and 60D similar) showing the areas evaluated for Partial Metering (superimposed grey area) and Spot Metering (black circle in center).
Evaluative (Canon) or Matrix (Nikon): This is the default mode for your camera, and it can be used for almost every situation you shoot. Yes, maybe 90% of the time, maybe more. The camera evaluates the entire scene, as divided into several zones, and chooses the best exposure based on its knowledge of thousands of potential image situations. The current metering systems are so good, they can even be relied on for backlit or other challenging lighting situations. An important feature of this mode is that advanced cameras such as the Canon 7D, Canon 60D or Nikon D7000, D5100 take into account the selected focus point in its determination of exposure settings. It is assuming your focus point is on your most important subject, so under challenging and critical situations, it is wise to confirm that the camera has chosen the focus point you want (well, this is always wise). Even better, you should typically manually choose the focus point or cluster of focus points, as the camera has no idea what your intended image is. So in special situations, such as dramatically back-lit scenes or a situation with bright light plus deep shadows, make sure you are not using the center point to focus and meter, and then recomposing to take the shot – because some of the zones that the camera evaluated are now no longer in your shot after recomposing, and other new areas are, so the camera has set exposure for an image other than the one you are taking.

San Miguel Duenas, Guatemala
Partial (Canon only): This mode meters a smaller area, about 9.4%, in the center of the scene on the 7D and 6.5% with the 60D. Nikons do not have this mode, though some Nikons such as the D7000 offer the ability to change the size of the Center-Weighted Metering circle (see Center-Weighted Metering below), so it makes up for this. The area is approximately a circle that reaches to the top and bottom focus points, and the metering system ignores the rest of the frame. This mode is useful where there is a dramatic difference in lighting between the foreground or subject and the background. For example, when your subject is backlit – maybe standing in front of a bright window or the sun – and consequently their face is in shadow. I know I said evaluative mode can often handle this type of situation, but if you want the face or subject to be properly exposed and not risk blowing the shot, it is worth it to quickly switch to Partial metering mode. Again, another time to use this is when there is a wide range of light in your scene, from bright sunlight to deep shadows. Remember, this mode is not linked to your focus point. The partial area that is metered is always in the center, so meter on the part of the scene that is most critical and that you want properly exposed, using the central area of the viewfinder, lock in that exposure, then recompose and take the shot.

Campo Nuevo, Guatemala
Important Note about Locking In the Metered Exposure: The metered exposure setting is sometimes locked in by pressing the shutter button half-way down or sometimes not “locked” until the image is taken (depending on your camera, or current shooting mode, or how you set it up – read your manual!). The shutter button also typically locks focus (unless you have changed that setting). If you wish to lock in focus and exposure separately, which you often will need to do, on a Canon use the AF-Lock (for focus) button and/ or the AE-Lock (for exposure) button – which looks like this: * – to lock in one of them before locking in the other with the half-press or full press of the shutter button. On the Nikons, you have to set one of your buttons to be the exposure lock button, either the AE-L/AF-L Button or the Fn Button on some cameras like the D7000. I suggest first metering on the subject and locking in that exposure by pressing the appropriate button, then recomposing and locking in focus right before or as you take the photo. Or else learning the advanced methods of back button focusing. Get in the habit of knowing how to do this instinctively, and if you need to hold or just press the particular button, so that it comes naturally during critical situations. On the 7D and D7000 and other cameras you can also customize how these buttons perform or set other buttons to do these tasks. You can see in the viewfinder that you have locked focus when the focus dot is lit. You can see that exposure is locked with the AE-L indication in the Nikon viewfinder or the * symbol in the Canon viewfinder.
Locking exposure and focus, independently, each in the brief seconds before you take a shot? Confusing? A little, but not impossible to figure out with some experimentation and practice. Remember, this is why you bought the fancy dSLR, so that you could make use of all these advanced features and take your photos to another level!
Center-Weighted Average: This metering mode is sort of a cross between Evaluative and Partial metering. It acknowledges that the subject is in the center and requires special metering attention, but it also takes into account all the other zones. Again, this is not linked to the focus point, but always to the center, so if your subject is off center – which it typically should be for a more dynamic image – you need to lock in exposure on your subject and then recompose. I have found that with the Canon 50D, this mode is actually more consistent than Evaluative metering, which often over exposes by 1/3 or 1/2 a stop. Note that you can use the Custom Settings of the D7000 to change the size of the center area being weighted.
This mode can be used when you want to ensure that the subject is properly exposed, but you also want the camera to consider the background. However, if the background is much darker or lighter than the subject, and you want the camera to expose only for the subject and ignore the background, use Spot Metering…

San Miguel Duenas, Guatemala
Spot: This mode meters a small center area, 2.3% of the frame with the 7D, 2.8% with the 60D, and 2.5% with the D5100 and D7000. This area is indicated by the small circle in the center of the viewfinder of the 7D and 60D. There is no center circle in the Nikon viewfinder and you will soon find out why. So when do you want to use Spot metering? This, again, is useful for scenes with great variation in light and shadow, or in very critical situations. One of the most common ways to use it is when metering for proper exposure on a dramatically lit face or subject, but the exposure of the rest of the scene is unimportant. Or perhaps your subject is set against a plain but consistent background, like a bird against a large blue sky. It is also used to determine proper exposure of a subject before switching the camera to manual for a controlled studio shot, or a critical shot or series of shots where the lighting is not going to change. If your background is completely dark or extremely bright, and you don’t want the exposure system to consider it at all when determining the exposure of you subject, use Spot rather than Center-Weighted or Partial. With Canon cameras, the Spot that is used to evaluate the exposure is in the center of the frame, and is often indicated by a small circle. However, with Nikon cameras like the D5100 and D7000, the Spot surrounds the active focus point and is not necessarily in the center of the frame unless you are using the center AF point. So it is wise to become familiar with how your camera operates.
A fifth metering mode is Manual metering, which isn’t actually a mode in your camera, but is a method of metering. This is where you use a light meter or use your camera as a light meter (such as described at the end in the Spot section above) and then manually set your exposure based on the meter readings. This is used when you want ultimate control of the metering and exposure.
You can learn much more about the Exposure modes of specific cameras, including the 60D, T3i, D7000 and D5100, in my e-book users guide. See my e-book website, Full Stop to learn more about them or click the banner below! The guides also go into much more detail about setting up the related metering mode Custom Functions/Custom Settings and camera controls.

I recently ran across an interesting article which takes this discussion to another level by addressing the use of different metering modes in the very specific situation of a wedding. Since one of the main subjects in typically all in white, and the other in black, the metering mode you select and where you meter can make a dramatic difference in the exposure. While that article is specific to weddings, it is useful and helpful to read to further understand how the different modes work, and how special situations might call for some extra thought.
There are a number of blogs and sites I check out most every day in order to stay current with the latest photo equipment, news, and discussions. One of my favorites is Canon Rumors, which – as the name would imply – is all about the latest rumors regarding new Canon cameras, lenses, and firmware updates. It is particularly useful if you are thinking of purchasing a new body or lens because you can find out if the particular model you are interested in is rumored to be updated soon, thus possibly affecting your purchasing decision. If you follow it regularly for just a couple weeks, you can get good feel for all the expected new releases. For example right now, the Canon 550D/ Rebel T2i came out just about when it was predicted, and the Canon 60D is rumored to be coming out any day now.
It also has a great Price Watch section where you can compare the current prices of numerous cameras and lenses at a variety of retailers such as B+H, Adorama, and Amazon.

San Miguel Duenas, Guatemala
Canon has just announced a new model in their Rebel lineup of digital SLRs, the T2i or 550D. I encourage anyone who is just entering into digital SLR photography to have a look at my previous post Why You Shouldn’t Buy the Kit Lens before you simply buy the T2i kit without considering another lens that may be a better choice for you and your photography. Also, have a look at my post comparing several of the Canon dSLR cameras, including information about the 550D / T2i.

Antigua, Guatemala photo by dojoklo