How to Start Out as a Humanitarian Photographer: The Self-Assignment

(For related posts, check out other entries in the Humanitarian Photography category which includes post such as choosing your camera and lenses, as well as the follow up to this post, After the Self-Assignment.)

How to Become a Humanitarian Photographer

As with many other photography specialties, there is no set course to becoming a humanitarian photographer. You must make your own path by determining your goals, piecing together the advice and experiences of others, and following your intuition. You can go to school and study photojournalism, you can create your own self-designed curriculum of classes, workshops, and experience, you can intern with an experienced photographer, or you can just strike out into the real world and learn it on your own. Starting out as a humanitarian photographer, or any type of photographer for that matter, involves learning about so many diverse areas beyond the art of making images and the skills of using a camera, a flash, and Photoshop (all of which are full time undertakings in themselves). There is also much to learn about business, copyright, marketing, branding, finances, insurance, client relations…the list goes on and on. But I’d like to go into detail about one important and practical aspect of starting out: the self-assignment.


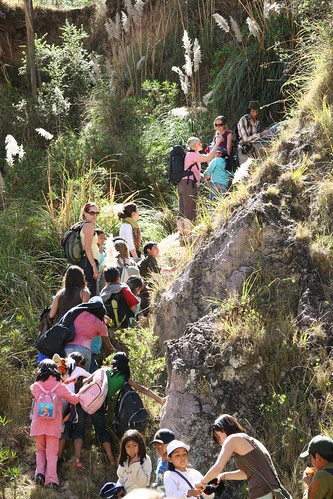
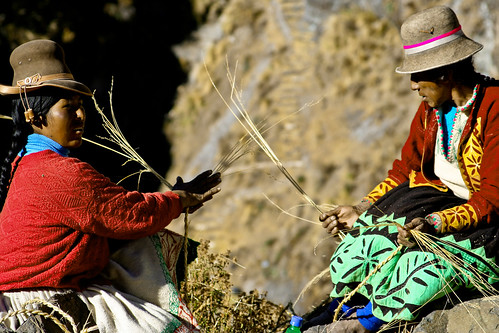
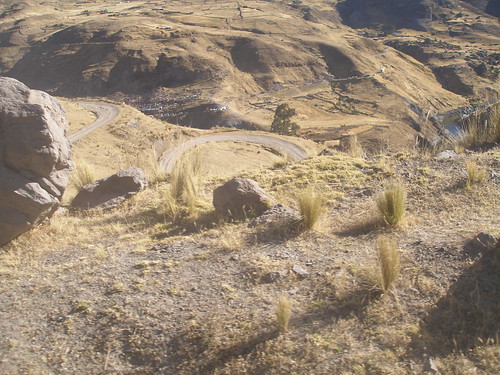
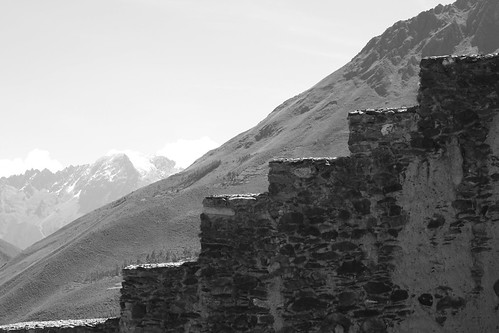
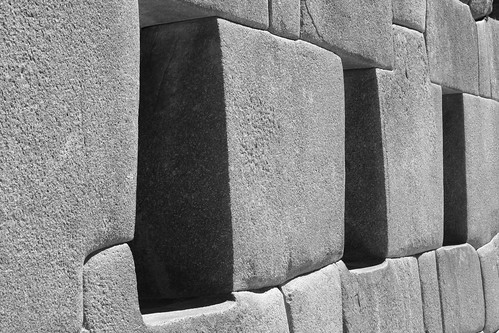
San Francisco, Peru

In order to discover if travel or humanitarian photography is what you really want to dedicate yourself to, it is vital to get out there and really try it out. Travel to a foreign country, get out in the field, and spend days working at it, as if you were on a real assignment. One can think about it from the comfort of home, drooling over the beautiful photos of those you admire, and imagining the excitement of traveling in exotic places. But you may find that working in the field, spending weeks away from friends, family and soft toilet paper, and suffering days of intestinal distress is not all you hoped for. As any working photographer will tell you, it’s hard. Immensely gratifying and often fun, but none the less hard. I encourage anyone not to invest too much time, thought, and money into this dream until they have undertaken this important test.

Planning and executing a self assignment is challenging, but entirely do-able and realistic for anyone who is dedicated to the idea. Even if you have a full time job and aren’t making that much money, it can be done. Don’t quit your job yet to dive head first into self-employment, but use your vacation time to test the waters.


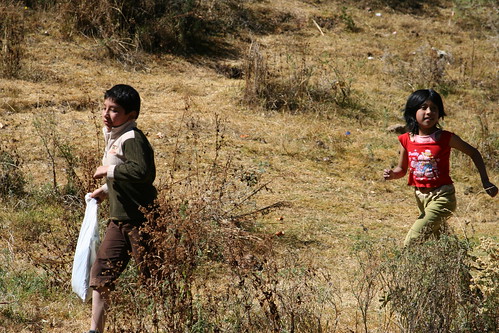
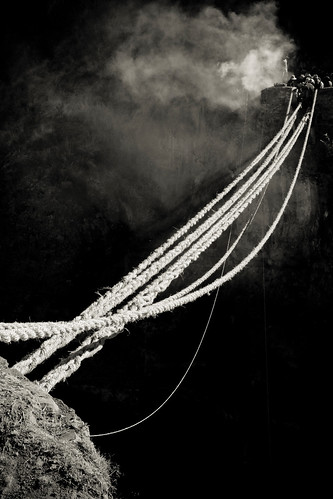
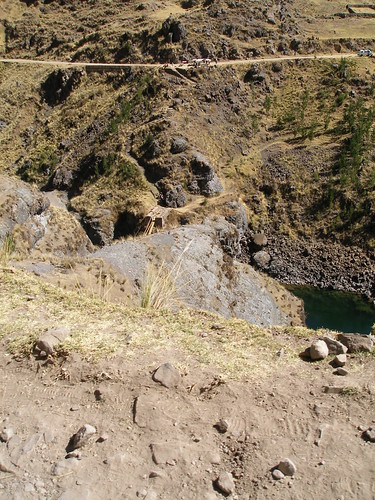
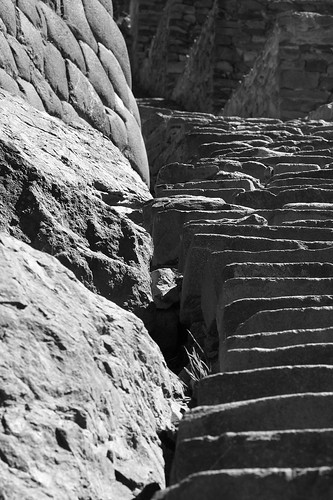
Cusco, Peru

Money: The first challenge is always money. You have to save up money for the gear, for the time away from work, and for the trip. This is done the old-fashioned way – by scrimping and saving. You’ve read it many times before, and it sometimes seems unrealistic, but it works. Save money anywhere you can – stop eating out, bring your lunch to work, cancel cable, cancel Netflix, get your books and movies from the library, stop buying stuff, use the right ATM and stop paying fees, scour the Internet for the best price on the gear you need. It may take longer than you want, it may even take a year or two, but it works. Remember, each restaurant meal you skip here equals three equivalent restaurant meals in a developing country – or better yet, it equals a week’s worth of groceries when you travel. The recession has already given everyone a head-start into living and thinking more economically, you just have to be dedicated to it a bit more and a lot longer. Also, once you begin traveling to developing countries and seeing how people find great joy in life yet live with so few possessions, your new economic lifestyle will seem that much more appropriate. I’m not just saying all these things because I’ve read them or because they sound like they will work. I’ve done them, all. Also look to Ami Vitale for inspiration. She worked long and hard and saved, then headed off and launched her career exactly this way (see the How You Finance Your Stories video at the bottom of this page: http://digitaljournalist.org/issue0301/av_intro.html). Look into counties that aren’t very expensive to fly to. For someone in the USA, that means look to South and Central America. Depending on the time of year, there are incredibly cheap deals. For example, I recently saw $84 tickets to Guatemala on a major airline. Yes, $84 each way! That’s cheaper than flying home for Christmas. Granted, it is a redeye with a long layover, but it gets you there. Be flexible and use Kayak.com to find the best prices.


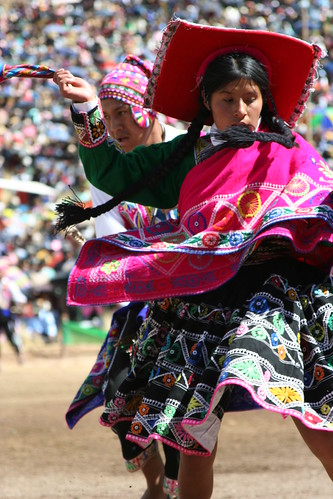
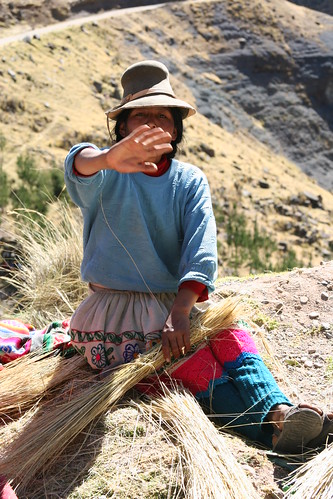
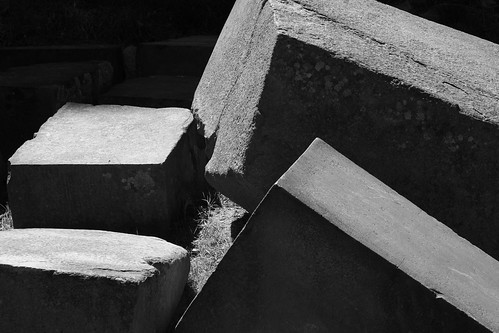
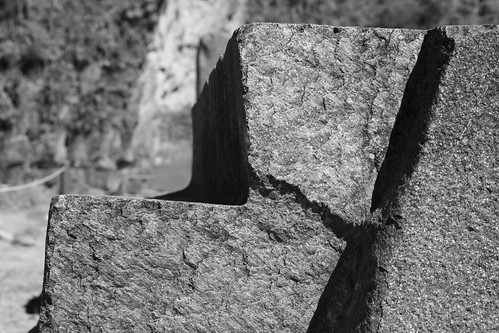
Taquile Island on Lake Titicaca, Peru

Gear: You might not yet be able to afford the latest and greatest professional gear. In fact, until you are sure you really want to do this, you probably don’t want to invest in a 5D Mark III and 2 or 3 L-series lenses. Every photo forum you follow, pixel peeper you talk to, and gear review you read is going to convince you that you need the most current, top of the line gear. But you don’t. I do recommend using a dSLR and not just a point and shoot, so something like a Canon Rebel T5i / 700D and a versatile zoom lens like the Canon 18-200mm (or the Nikon equivalent) offers more than enough quality and range to start off with if you can’t afford more. On my first self-assignment all I had was an outdated, 8 megapixel Rebel XT and a single, 28-105mm lens. It didn’t prevent me from getting the shots I wanted, they’ve been exhibited, won awards, been honored by the United Nations, been used on travel guide and textbook covers, and no one has ever told me that the quality of the photos is unacceptable. (And remember that no one, outside the photo world, will ever even think to ask you what camera you used or which lens you chose.) Sometimes, with that early gear, I wasn’t able to zoom as much as I wanted for travel shots, or get wide enough for the close-ups of humanitarian work, so that is why the 18-200mm or 18-135mm (which weren’t available until more recently) would be a pretty ideal single lens solution now. (The secret fact is, I even have a couple great photos in my portfolio, a photo on a travel guidebook cover, and won a dSLR camera using an Olympus SP-320, 7 megapixel point and shoot.) Don’t go overboard with bags and accessories. Get a simple holster bag, like an M-Rock Yellowstone or whichever one fits your body and lens, or a LowePro or Tamrac bag or backpack, a couple filters (UV and polarizing), a lens pen and cloth, a rocket blower, extra batteries and memory cards, and then stop looking. You don’t need anything else. I promise. (Well, also your laptop computer, external hard drive, and some type of insurance coverage for it all. And maybe a Pac Safe 55 to secure it. And perhaps an external flash if you will be working inside. Hey, no one said this was cheap!) For insurance, look into your home-owner’s or renter’s insurance to see if it will cover it, or look at NANPA’s coverage or the discussion here. (If you happen to join NANPA to get their insurance, be sure to mention my name as a referrer, and I get $20 NANPA Bucks and save on my next renewal!) To sum it up, as culture photographer Craig Ferguson stated in a recent interview, “You don’t need to have the most expensive gear or even the newest. A plane ticket and enough money for 3 months living coupled with an entry level body and a 50mm lens will get you further than the latest pro-level body and no time or money to use it.” I discuss additional photography gear and accessories that are useful for working in the field in this post.


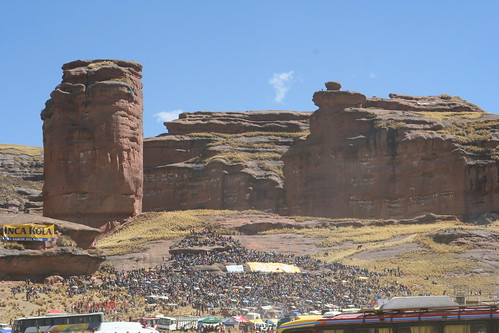
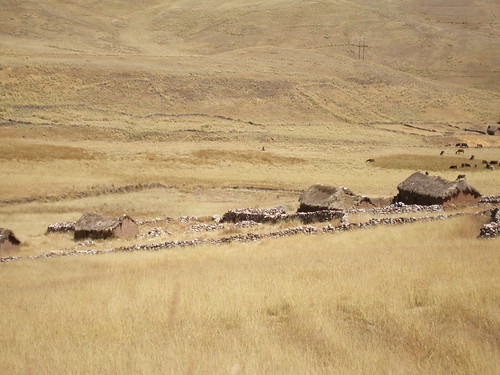
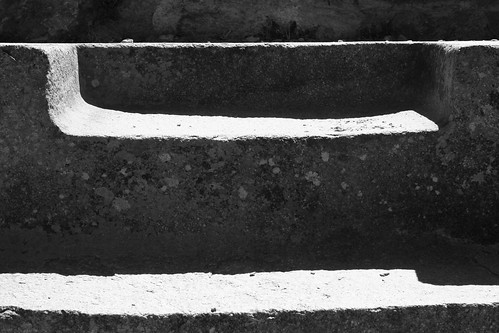
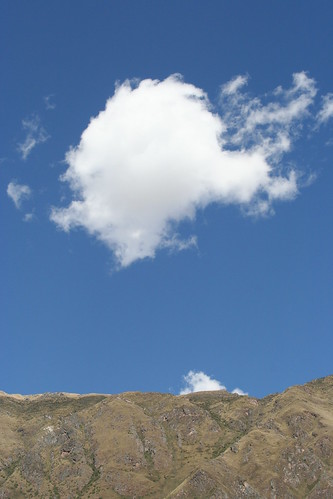
Altos de los Mores, Peru

Researching the NGO: Figure out what type of NGO (non-governmental organization) or non-profit organization you’d like to photograph, and which countries interest you, and start doing research. Which subjects most inspire your passion for this work? Disabled children, gender equality, health, faith-based work, community development? In every developing country there are countless NGOs doing each of these types of work and more. As a professional, you might not be able to be this specific in your choices, so take advantage of your self-assignment. Do searches on the Internet, and look on idealist.org. It is hard to imagine that any small, typically struggling organization does not want free, semi-professional quality photos for their website and newsletters, so most all will be welcoming to your offer to volunteer. But it is very important that you are quite clear that your interest and intent is to photograph their work. If you sign up to be a general volunteer, you will be expected and obligated to be doing whatever work they ask of you. Do not think you can be a volunteer and also take photos on the side. You will not do a good job of either that way. Be perfectly clear with them that you are interested in primarily photographing the work they do. That doesn’t mean you can’t spend a few days as a volunteer, and by all means you should (see below), but they should not be expecting you to be a typical volunteer.
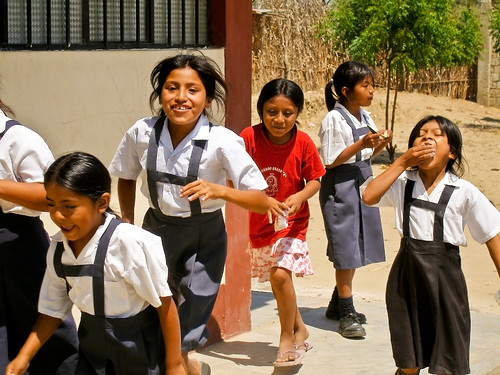

Altos de los Mores, Peru

Ask questions and find out as much as you can about the actual work they do. Don’t just trust what you read on their website, but find out exactly what they do and where they work. They may say they work in 4 different communities, but really they might only visit 3 of them once a year for a medical visit or to bring donations. They might say they have a number of different programs, but really they may only be currently focusing on one of them based on financial reasons or staff and volunteers skills. Make sure that your area of interest is really what they are doing now. Explain to them your interests, and see if meeting your goals will be possible with them. NGOs are often run by incredibly generous, helpful, kind, friendly, flexible people, and they will want to help you at your project. But they are also incredibly busy and strapped for resources, so learn to communicate and work with them on their terms. Many organizations require that you pay to be a volunteer. This may sound strange, but you have to understand that they need money in order to keep doing the work they do. Just the fact that you are working for free does not pay the salary for the NGO’s staff. But be wary, there are many placement services that make money by being a middle-man, so make arrangements directly with the NGO. If your volunteer fee includes lodging, or even food, it is often quite reasonable to pay them. However, there are also many excellent organizations which will not charge you anything. If this is the case, be sure and support them by bringing donations (books, toys, art supplies). See my Resources Page for more information on volunteering. Some organizations run restaurants and hostels, so support them by eating and staying with them. Also, if you are thinking of joining a mission type trip, like a medical mission, find one that is being organized from your area so that you can document the planning and the departure of the group at the airport.

**Update 2010-01-28** Here is a website I just discovered which attempts to link up volunteer photographers with humanitarian projects world-wide: http://photophilanthropy.org/
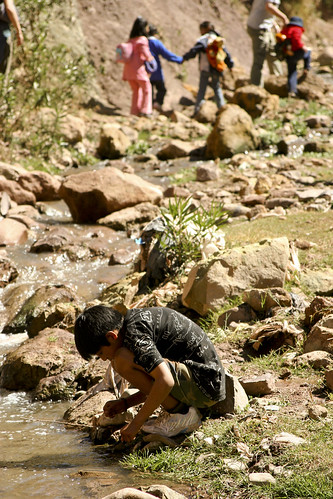

Cusco, Peru

Working in the Field: It seems every photographer I admire always discusses the importance of talking to and getting to know the people you are photographing. Sometimes that means just chatting with them and buying some of their wares before you start to photograph them, other times that means living among them for several days, weeks, or months. As a photographer working with an NGO, this means you should consider being a volunteer for a day, without your camera, without photographing. Yes, that is a painful experience, to see potentially great shots slip by left and right. But this sacrifice will quickly pay off when you start to work. This gives you an opportunity to learn what the organization does and how they work. It also allows you to start to get to know the people they serve, and for them to become comfortable around you. It is obvious that this approach, rather than barging in with your face behind a camera, is going to result in much more genuine photos. Also, stay out of the way of the director and the staff when they are working. Make your arrangements and ask questions before or after the workday. Be flexible to ever-changing, never scheduled situations, but also, always remind the director of what you want to be doing. She might go running off to visit one of the client’s homes or villages, and you want her to know to always grab you and take you along on those types of trips. Take advantage of your time there to do, see, and photograph as many different types of places and situations as you can. Talk to everyone you meet – other volunteers, people at restaurants and hotels. Many other people are doing volunteer work, and they may point you in the direction of a great photographic situation.


Huinchiri, Peru

Develop, learn, and practice a good workflow for saving and backing up your images every day. It is time consuming and easy to want to put off, but if you get behind there will be no catching up. I recommend using David duChemin’s global workflow as a starting point (alternate link here). Always have your camera with you, even if you think you are just being taken to the bakery for some bread and are told you’ll be back in 5 minutes. You will inevitably be taken on a two hour detour through a part of town off the beaten path, with amazing photo opportunities, during the magic hour (best evening light). Always carefully prepare and assemble your gear before you start each day, and have new batteries and memory cards accessible while you shoot. I highly recommend you always remember to “make haste slowly.” What this means is that you will often be in a hurry, but don’t rush and act in a panic during critical moments, in preparation or in shooting. Change lenses carefully and slowly, then rush back to the action. Clean the mysterious glob off your lens carefully and delicately, then get back to shooting. There are countless opportunities to damage your gear, and while it is durable, somewhat waterproof, and stray marks and dings on your tools are not something to fret over, a dropped or scratched lens is. After this, well, I don’t know what to tell you – you’re going to learn a lot. You are going to learn your camera and its settings inside and out, you are going to learn to work under pressure, always being ready, always trying to capture the fleeting shot and changing light. You are going to start to learn what works and what doesn’t as far as compositions, camera settings, perspectives, etc. You are going to begin to learn about life in a developing country. And you are going to very quickly learn if this work is truly your passion and your calling.

Please leave a comment, ask a question. Let me know what has been helpful, and what you’d like to read more about. Let me know if you have planned or undertaken a self-assignment on your way to becoming a humanitarian photographer, and how you are addressing the challenges of this endeavor.

See my follow-up post, Becoming a Humanitarian Photographer-After the Self-Assignment for the next stage of the process.

For related posts, check out other entries in the Humanitarian Photography category.

Even More Canon Rebates

In addition to the instant rebates Canon USA has on numerous lenses and Speedlites, there is a new rebate on select camera-lens kits.  I also just discovered (through an ad on Amazon) there is also a loyalty program rebate offer.  If you bought and registered a Canon camera in the past, and then bought a new one recently, you may be eligible for a $20 mail-in rebate on PowerShot cameras and $50 mail-in rebate on EOS cameras.

Click here for all the info:

Equipment for Travel (and Everyday) Photography

My recent trip to Guatemala to photograph for an NGO gave me an opportunity to field test a bunch of new gear under real working conditions – jumping on and off chicken buses, crammed into the seat of a van for hours with all of it on my lap, roaming around the streets of Antigua trying to be discreet as possible carrying a 70-200mm lens and a backpack full of equipment, and photographing for long hours at a time. I had done a bunch of Internet research to choose the best and the most appropriate gear, made a couple trips to B+H to look at it all, and it all worked out as good, or often better than expected. I’m not sponsored or compensated by any of these companies (but wouldn’t be opposed to it if they happen to be reading…), but I do recommend all of this gear without reservation. (Update: I’ve now been using all of this equipment constantly for the past 11 months, and still recommend it all!) I discuss the camera I used on the trip, the Canon 7D, in this previous post.

Most all of this equipment will be equally essential for day-to-day photography, culture and travel photography, humanitarian photography, and photojournalism. And the equipment will be useful with any dSLR, Canon or Nikon.

If you plan to purchase any of this equipment, I encourage you to do so through the links I’ve created below which will take you directly to Amazon.com. Your price will be the same as always, and I will get a small referral fee. Or you can go directly to Amazon.com here. I appreciate your support! If you are in the UK, or wish to purchase from B+H Photo, see the end of this post for information on those links.


Antigua, Guatemala

Camera Backpack: I use the Lowepro Compu Trekker AW as both my carry-on and my working bag during the day. The current version of this is the Lowepro Pro Runner 350 AW. The size works perfectly for both needs. It easily fits the airline carry-on size, including smaller international requirements in some regions, yet fits more that it would first appear. With careful configuration of the interior dividers, I can fit 2 Canon bodies (a Rebel XT and a Canon 7D or 50D), a 70-200mm f/4L IS, a 16-35mm f/2.8L II wide angle zoom, a 28-105mm standard zoom (an older lens, here is a link to the better 24-105mm f/4L), all lenses stored with their hoods turned backwards, a 580EX II flash, its diffuser, 2 external hard drives in cases, a couple memory card cases, and some filters. In the outside pocket, I have a couple battery chargers, extra batteries, medium Rocket Blower, miscellaneous cords, caps, and accessories. In the rear pocket designed for a laptop, I easily fit a 32″ 5 in 1 reflector. Once I am in the field, I play around with the dividers until I have a set-up that best fits my flexible daily needs, and allows quick preparations or lens changes. The pack is extremely comfortable, has tons of padding on the straps and the back so that its weight never bothers me and I don’t feel the reflector in my back. I often wear it for hours a day while working, and it is never a problem. In fact, on my final night in Guatemala when I went out to dinner in Antigua without it on my back for the first time in 2 weeks, I commented that I felt a bit naked. The top handle is strong enough to grab and carry with, as is often necessary while jumping in and out of cars or putting it down and picking it up. There is also a waist belt that I use when I have it fully loaded, like going to the airport, to relieve my shoulders of some of the weight. And it comes with a built in rain cover that stows away at the base of the bag that has done its job on a couple occasions. The Compu Trekker Plus (now the Pro Runner 450 AW) might be a better carry on size so that you could carry more gear on the plane with you (if it fits the airline’s requirements) but it would be too big for daily use. There are also rolling versions of these, with an “x” in the name, thought the retractable handles and wheels add weight and size to the bags. The Compu Trekker has a tripod strap system that I don’t use, and another outside pocket that is, conveniently, exactly the size of a Lonely Planet guidebook. Here are some photos of the backpack in action at the Chichicastenango Market, taken by my travel companion Elizabeth Jimenez:

If you just need a holster style bag to carry one body and one lens, I highly recommend the M Rock Holster Bags.  I used the Yellowstone model for months while traveling in South America, and I love its durability, pockets, and built-in rain cover, plus it comes with extra back-up straps.  Make sure you get the right bag for your body/ lens combination – you will need a longer bag for a telephoto zoom lens.  As far as a satchel bag to carry a body or two plus two or three lenses and/ or a flash as you set out for the day but don’t want a backpack type bag, have a look at the Think Tank Retrospective line (there are a few sizes, the 10, 20 and 30, etc.) or the Crumpler Million Dollar Homes. Again, there are several sizes to choose from, called the 5 Million, 6 Million, etc. The 7 Million Dollar Home is my satchel of choice for carrying my gear about town while working.  It holds a large dSLR (5D line, 6D, 60D, etc.) with a mid-range telephoto attached (24-105mm), plus a 70-200mm, and another lens or a flash, all in the inside compartments. There is then some extra space and a couple front/ flap pockets to hold chargers, memory cards, batteries, etc. To keep moisture from accumulating in your equipment and bag, throw in a durable desiccant pack like this one.  Just be sure that it isn’t loose in your bag and scratching against your equipment.

Security: A couple great additions to the bag are Eagle Creek combo locks and Eagle Creek Pack It Sacs in the small size to hold batteries, memory cards in cases, LensPen, camera and lens body caps, and various wires and cables. The medium size Pack It Sacs are great for medicines bottles and other loose stuff in your luggage. The backpack’s zippers are rugged enough to handle constant abuse from the combo locks, which although they are weighty, are far better than keyed locks in the field so that you don’t need to go digging for the key when you are in a hurry. You just have to be a little careful when opening and closing the bag – the locks dangle and flip around, and could easily bang into something fragile in the backpack. With the Pack It Sacs, I clipped some rubber bands to the key clip within the outside pocket of the backpack and then attached them to the clips on the Sacs, so that way the Sacs won’t accidentally fall out if I flip the bag open and close while the outer pocket is open. There’s enough play to access them and then shove them back into the bag.

Another great accessory for this backpack is the PacSafe 55 wire mesh security system. It fits perfectly around this size bag, and secures your bag and your gear in a hotel room or wherever. It has a long cable that you loop around something secure and lock in place. It also comes with a small, compact storage case for when not in use.


Chichicastenango, Guatemala

SanDisk Extreme 16GB CF Memory Cards – I talked about these in the previous post. Once again, no particular reason why I use these rather than Lexar or Delkin…maybe a sponsorship would help seal my loyalties… :). Be sure to get the Sandisk Extreme 16 GB SD version if you are using the 60D or Rebel T2i. I use a Sandisk card reader to upload the images to my laptop, rather than from the camera directly, in order to save the camera batteries. This Sandisk Card Reader is for the CF cards, and the 5 in 1 reads SD cards.

Spare Batteries – I always have 3 batteries for each camera body. The Canon 60D, 7D and 5D use the Canon LP-E6 Battery. Stick with the Canon brand batteries rather than the unpredictable third-party brands.

BlackRapid RS-4 Camera Strap – The R-Strap is wonderful, and I highly recommend it. I was hesitant and suspicious at first, but I quickly adored it and will always use it. I had even emailed BlackRapid before purchasing to ask about shortcomings of earlier models, and they addressed my concerns thoroughly and completely. I was very impressed with the time and personal attention they paid to my questions. The strap is comfortable, easy to use, quick, strong, and rugged. I often use it in conjunction with wearing the backpack, and although the straps fight for space against each other on my shoulder, it still works fine. I’m a bit envious of the RS-7 that just came out, since it has a curved, ergonomic shoulder pad that will work better by itself on your shoulder and next to a backpack strap. There is also now a version designed for women, the RS-W1. Watch some of the videos out there as to how to use it, and be sure to moisten the rubber gasket before attaching it to your camera – this will make a firm seal that will never budge. The big pain is that the part attached to your camera body is best left in place, yet that makes it less easy to place the camera down on a table or in your bag, and will have to be removed to use a tripod. Also, the textured tightening screw part of the connector may rub up against your camera body in various situations, so I put some black duct tape on the bottom edges of the camera to protect it.

B+W brand UV Filters – clear, protective filters for the lenses, slim for the wide angle. The slim is probably not needed with a crop sensor camera, but is recommended for a full frame camera. The slim comes with a lens cap that does not stay on well after a little bit of use, as there are no front threads for the Canon cap to fit on. If I had to do it over, I would probably get the regular filter so that I could use the Canon lens cap.

B+W brand Circular Polarizer Filter – a polarizer serves to darken skies, boost contrast, cut through haze and reflections in water and glass, and block out a stop or two of light in bright situations. I keep it on my lens much of the time when doing outside work. Polarizing filters work to their maximum degree when the sun is to your right or left, but not when it is directly in front or behind you. Be sure to turn the moving part of the filter to dial in the degree of polarizing that you desire. They are typically not used on wide angle lenses because the darkening effect would vary across a wide swath of sky, and usually look strange.

Sto-Fen Omni Bounce Diffuser – works great on the Canon 580EX II flash, although very snug and is always difficult to get on and off in a hurry. Squeeze it and stretch it first to help it go on easier. Please don’t use the diffuser outside! Even if you see “pros” doing it. It doesn’t do anything outside but make your flash work harder. You can’t bounce light off the clouds.

Honl Color Correction Filters and Speed Strap – These are essential for using with flash to balance the white balance of the scene – to make the color of the flash the same as the color of the ambient light. This way when you correct the WB of your subject your backgrounds won’t be vivid orange (incandescent ambient lighting) or sickly green (fluorescent). You can’t use them in conjunction with the diffuser – the Omni-Bounce can’t fit over the Speed Strap, but that had not occurred to me when I bought them – so I’m going to have to figure out a solution to that. And I’m going to continue experimenting with the full or 1/2 CTO to add warmth to outside fill flash, as recommended by Nevada Wier (actually she uses a Kodak Wratten 81A gel, but I think they are similar). The kit is very slim and fits perfectly in one of the inside pockets of the backpack.


Antigua, Guatemala

Giottos Medium Rocket Blower – I initially used the small size in order to save a bit of space, but it didn’t have the power I wanted, so I sprung for the medium. Always have it handy for getting dust off lenses in a hurry, because blowing on them – no matter how careful – leads to spittle on the lenses 5% of the time when it doesn’t matter and 95% of the time when you are in the most critical situations. The large size may be a good choice as well.

Pearstone LP-1 Lens Pen – Works great for cleaning off mysterious spots, smudges, and fingerprints that always appear on the lens (this is why I always use UV filters) as well as that a-fore-mentioned spittle. There is a retractable brush on one end and a cleaning head on the other end. Twist the cap to load the cleaning tip with the carbon based cleaning material, then remove the cap and use. Please read the instructions and visit the LensPen website to fully learn how to use it properly.

32″ 5 in 1 Reflector – This size is perfect for travel and fits in the backpack, however I never actually used it during the trip so I don’t know if the size is useful in the field. It is best suited for set-up situations and portraits, which I didn’t have the opportunity to do on this assignment. I could have used it once to block some stray sunlight falling into a very dark room and potentially messing up the exposure, but I didn’t think about it until later. I did, however, carry it around a lot and never noticed because it is lightweight and very durable.

External Hard Drives – I use a Iomega Ego 500GB and a Lacie Rugged USB 500GB when traveling. I’ve used the Iomega on extended trips before, and love it. I’ve never had any problems with it, and it is solid and sturdy. I also decided to try out the Lacie Rugged USB for this trip. It is lighter than the Iomega, and doesn’t feel as solid and sturdy, but it worked just fine. They both fit perfectly in the Case Logic Portable Hard Drive Case made for these types of drives, which I recommend getting in different colors so you can quickly differentiate your different drives. I leave them in the cases at all times, but you have to pull the Ego slightly out to plug in the cord, and place the Lacie upside down in the case for the cord to fit without removing the drive each time. For storage at home, I use the Western Digital My Book 1TB External Hard Drives.

Hakuba Digital Media Storage Wallet – These are great, soft sided, thin memory card cases that hold 6 CF memory cards each. I picked up this recommendation from Karl Grobl’s website. There are a lot of bulky, hard-sided cases out there, which make you feel like your memory cards need excessive protection. I’m sure there has been a situation where an elephant stepped on a memory card case and all photos were miraculously saved by a hard sided case, but as far as my needs, the soft ones work just fine. Get into the habit of inserting blank cards face up and used cards face down into the cases’ pockets. Since this is the size for CF cards, have a look at this one if you use SD cards.

‘da Products Screen Protector – (product no longer available) – This is the second camera I have used this product with, and I am once again very happy with it. It is a very inexpensive yet high quality screen protector for your LCD, made with acrylic. Get ‘da40D Protector for the 7D – it is the perfect size. It is a slow, careful, time consuming process to attach the adhesive strips, get it clean, dust and fingerprint free, and perfectly centered, but once it’s on, its there to stay (unless you want to remove it – in that case, to remove the ‘da screen protector use dental floss to break the seal at the bottom corners, then slowly peel off.) I know that today’s LCD screens are durable, but I feel more comfortable and carefree about constantly wiping off my protector with my fingers or shirt than I would directly on the built in screen. This is also why I use B+W UV filters on the lenses.  However, if you have a camera with a rotating screen such as a 60D, T3i, or D5100, this type of screen protector won’t work.  You will need to use a thin adhesive film protector like this one.

Calumet micro fiber lens cloth – Stores perfectly in another slim inside pocket of the backpack, and always handy to have.


Chichicastenango, Guatemala

Insurance – Although I am a member of NPPA – National Press Photographers Association, I also joined NANPA – North American Nature Photography Association, in order to get their equipment insurance, which is much cheaper and has a much lower deductible than NPPA’s, even including the extra $100 to join NANPA. The insurance is primarily for the equipment only, so you are not paying for liability coverage geared toward a business as you are with every other photo equipment insurance plan I researched. Please note that the NANPA membership fee covers you from June to June or something like that – they don’t pro-rate, so you will not get a full year if you join at any other time. The insurance covers photo and computer equipment at home and while traveling. (If you happen to join NANPA to get their insurance, be sure to mention my name as a referrer, and I get $20 NANPA Bucks and save on my next renewal!)

Skooba Satchel 2.0 Laptop Bag – This is typically my second carry on, in which I carry my laptop, some books, misc. charging cords, some toiletries. This is a wonderful laptop bag, and you won’t believe how much will fit in it! As they say themselves, it is deceptively slim looking and incredibly light. It has these great little air squares for cushion everywhere – like bubble wrap made from durable rubber, and has an extremely comfortable and ergonomic strap.

Lowa Tempest Lo Hiking Shoes – I’ve worn these shoes, this same pair, nearly everyday, for almost 4 years straight now, and they still have a little life left in them. I wore them every single day for a total of 7 months in Peru, walking the cobbled streets of Cusco, and traveling the country. And I wore them nearly every day for 3 years walking the streets of Brooklyn and Manhattan, and now Cambridge. (I don’t have a car, so I actually walk, a lot.) They are so comfortable I never notice them. They are light, durable, and somewhat waterproof if treated regularly. I recently bought a backup pair for the inevitable day that I have to give them up. After 3.5 years one one them developed a tear at the front-side where they crease when crouching to take photos, but they are still fine except in the rain.

Post-Production – Once you get back you are going to need to organize, edit, and work on all your photos. And for that, of course you are going to need
Adobe Photoshop and/ or Adobe Lightroom 3. You can start off with the trial versions that you can download from the Adobe site, but sooner or later you are going to have to get the real versions. Use that student discount while you still can!

Purchasing: If you plan to purchase any of this equipment, accessories, or anything else from Amazon.com I encourage you to do so through the links I set up throughout this post. Just click on the equipment above and you will be taken directly to that Amazon page. Your purchasing price will be the same, and they will give me a little something for referring you, which will help support my blog. Thanks! Or click on the Amazon.com logo below to enter Amazon and start shopping. I appreciate your support!

If you are in the UK or Canada, please use these Amazon links:

UK: my Amazon.co.uk link

Canada: my Amazon.ca link

For those interested in purchasing through B&H Photo I have set up affiliate links with them as well – find it on the left side of this page.

Assignment: Guatemala – Canon 7D Tutorial and Review

I recently returned from a trip to Guatemala, where I was taking photos for an NGO that works with children, literacy, and education. It gave me the perfect opportunity to try out a bunch of new equipment and really put it to the test in the field.


San Miguel Duenas, Guatemala – Canon 7D, 70-200mm f/4L IS lens at 78mm, 1600 ISO, 1/100, f/5.6

Jump to the Custom Function section

First and foremost, it was the first time I really had the opportunity to use the Canon 7D body (I discuss the additional gear in this related post). The camera performed wonderfully in many ways, however, I did have autofocus related problems – namely a serious front focus issue. With both wide angle and telephoto L-series lenses, the camera was consistently focusing several inches or more in front of the subjects. I played around briefly with the AF Microadjustments, with the intention of taking a closer look at the situation when I returned home.  (Body was later exchanged for another that focuses properly.)

I had another, odd and unexpected complaint in the field, and that is with the high speed shooting modes. One has the choice of 3fps or 8fps, yet I needed something more like 5fps! I’ve included some images throughout the post that are straight from the camera (I merely converted from RAW to JPEG). Anyway, on to the review and instructions for many of the camera’s settings, and how and when to use them in real world situations. And at the end there is some info about video tutorials available for downloading and watching.

If any of the digital photography terms you come across in this post are unfamiliar, be sure to refer to this great glossary for assistance.

Design – The camera is extremely comfortable to hold and use, especially due to the size, shape, and material of the grip, and it felt to be designed perfectly for my hands. It is nicely weighted with both a 16-35 f/2.8L II and a 70-200 f/4, and carries well with an R-Strap attached to the camera body (the 70-200 f/4 doesn’t come with a collar). Due to its similar design and button placement as previous Canon models, it was easy to get used to changing various settings on the fly – everything from ISO right up on top to Flash Control in the menus. There are a few settings that I quickly fell into, but that I would like to experiment with a little more with before I settle permanently into. Here are a few notes, in no particular order of importance:

Av Mode – I set the camera to Av mode for 99% of the time, as that is how I typically work (because I always want to control the depth of field). About the only time I took it out was when I was experimenting in an HDR type situation where I was in Manual and bracketing, trying to properly expose both a dark colonnade I was under and the cathedral in bright sunlight beyond. I haven’t yet worked on combining the exposures, but here is a nice shot that came from that situation:


Antigua, Guatemala – Canon 7D, 16-35 f/2.8L lens at 16mm, 1600 ISO, 1/500, f/16

(edit – I added the camera and lens information to these images.  Please note that the camera settings used for these various images may not necessarily be the “best” or “ideal” settings to use in the specific situations, but camera settings are always the result of changing situations and lighting, coming from another scene, going back and forth between action and still subjects, adapting, experimenting, and sometime just plain not paying attention!)

ISO – I had high hopes for Auto ISO, thinking I would finally be given the freedom to stop worrying where I left it set, but I quickly found that in Av, I didn’t like the slow shutter speeds that were resulting when I selected the aperture and the camera selected the ISO. So I ended up never using it. I would like to experiment with it some more, and figure out if there is something I can do to keep the shutter speeds in a better range. It is wonderful to have the versatility to change ISO on the fly, but one often gets caught up in shooting, and forgets to change it to an appropriate setting, and thus sometimes the shutter speed isn’t the most ideal. So, I just have to stay in the habit of paying attention to where all three settings are as I go from indoor to out or change lenses, etc. This is aided by these settings being visible in the 7D viewfinder.

High Speed Continuous Shooting – many people marvel at the 7D’s ability to shoot 8fps in High Speed Continuous Mode. However, for my purposes on this trip, that proved far too excessive. I often shoot a burst of photos when someone or something is in motion and I want to capture the peak of action or a flattering pose, or when a gesture or facial expression might change rapidly. Unfortunately, 8fps results in a lot of unwanted files, and as I will soon address, these files are HUGE and rapidly fill up a hard drive. But sadly, the Low Speed Continuous drive setting is only 3fps, which is too slow to capture the rapid changes in a scene. The 3fps speed was one of the main drawbacks of my previous body, and a major reason for upgrading. What I need is something in between, maybe 5fps! Perhaps Canon or someone will tweek the firmware to allow this…


San Miguel Duenas, GuatemalaCanon 7D, 16-35 f/2.8L lens at 35mm, 800 ISO, 1/500, f/3.5

Custom Functions – In order for you to get the most out of the 7D, and to set it to function best how you work, you need to dig into the Custom Functions. One of the settings I use is customizing My Menu, and then having My Menu always appear first when I hit the Menu button. (My Menu Settings / Display from My Menu=enable) I played around with different items on My Menu, but have settled for now on the ones that I use most often or that I may quickly need and want to access without digging into the menus. They are:

Flash Control
– you can quickly adjust all the settings for the built in flash, external flash, wireless flash. You can even control all the setting of the 580EX II remotely – when it is not attached to your camera. Very cool.
Exposure Compensation/ AEB – exposure compensation is easy to change at any time with the big dial, so this shortcut is for using when I want to bracket (AEB).
Review Time – I found that I was often shooting away without chimping (looking at the LCD), so I often just turn off the LCD review altogether. Other times, however, I want to review.
ISO Expansion – I haven’t used this yet, but I wanted it handy in case I want to use the high ISO. I typically have this turned off because I didn’t want the camera to default to High ISO during any situations. But considering I wasn’t using Auto ISO, this all seems unnecessary, and now that I realize this, I will have to replace this with something else on the menu! I never went above 1600 ISO, which I did have to use sometimes in very dark classroom settings along with the flash. Upon quick review of those images, the lack of noise in these files is really good.
Format – this is to format the memory card in preparation for use the next day. Always reformat the card, never simply erase them or use the Erase All option if your camera had that (the 7D does not). However, after formatting, turn the dial to select another menu item so that next time you hit Menu, Format isn’t still selected and you quickly make a grave mistake of pressing it.
Highlight Tone Priority (II-3) – this is a great setting to use in a high key situation, or with a bright subject or scene. It helps to retain detail in the highlights so they don’t get blown out, such as a white wedding dress, or a snow or beach scene. I never did use it, but I keep it in this menu to remind me it is there for the day when I do need it!


Chichicastenango, Guatemala – Canon 7D, 70-200mm f/4L IS lens at 155mm, 200 ISO, 1/80, f/4

Other important Custom Function Settings

(please note, this post was initially written to explain how I used these settings in a specific travel situation.  I go into more detail about each of the Custom Function settings, with clear explanations of what they are and when and why to use them, in my e-book Canon 7D Experience, which is discussed below.)

Safety Shift (I-6) – I sometimes enable this setting. It allows the camera to shift the shutter speed or aperture automatically, without your expressed permission, in order to get the shot. This is great for situations where the light suddenly and dramatically changes, such as at a concert.  However if you are carefully choosing your settings, or working with a flash, you will want to disable this so that the camera isn’t overriding your careful settings.

AI Servo Tracking Sensitivity (III-1) – This dictates how quickly focus tracking switches to another subject when it momentarily loses the initial subject, such as when another subject passes in front of it. You can choose to have it stay focused on the initial subject (Slow), or focus quickly on a new subject that moves in front of your initial subject (Fast). Typically I want to stay focused on my selected subject, and ignore someone or something that momentarily passes between us. If you want to quickly focus on different subjects at different distances, put it on fast.

AI Servo 1st/2nd (III-2) – Is your priority focusing on the subject, tracking the subject, firing off rapid shots? Look at the manual to see which situation works best for how you shoot.Personally I think 0 or 1, with the autofocus (AF) Priority, is best. (The camera makes sure it focuses first before taking the shot. It may cost you a microsecond of time however.) Regarding tracking vs. drive, I keep it at 0. Setting 0 continues to prioritize focusing possibly at the expense of speed, while setting 1 will prioritize the speed of subsequent shutter releases at the expense of focus.

AI Servo AF Tracking Method (III-3) – This works with autofocus modes where more than one AF point is active. The names of the choices are a little confusing but what they do is Setting 0 will focus on a closer subject that enters into your view, not necessarily in front of your subject. while setting 1 will remain focused on the initial subject. I keep mine on 1, since I want to stay focused on my initial subject.


San Juan del Obisbo, GuatemalaCanon 7D, 70-200mm f/4L IS lens at 200mm, 100 ISO, 1/1000, f/4

AF Focus Mode (III-6) – I enabled all the AF modes in the Custom Functions – by default, several of them are not available to you unless you change that setting. I started out using Single Point, but sometimes changed to Spot for more precision. The cost of using Spot is that it may not focus as quickly or as well when hand held or with a moving subject, and is generally not necessary unless you are trying to focus on a very small, precise area, such as through a fence to a subject beyond.  I occasionally used AF Point Expansion when photographing rapidly moving children. I don’t know how other photographers work (according to a Canon rep who gave a 7D presentation at B+H, there are big name professionals who still just focus with the center point and recompose), but I always choose the focus point I want manually, using the Multi-Controller button. This takes a little longer, now that I am dealing with 19 focus points, but that enables me to quickly get the composition I want, makes sure the camera focuses on what I want it to, and to get subsequent shots without too much reframing. There is an important menu setting so that you can use the Multi-Controller directly to change the AF point without having to press the AF thumb button first – I believe it is on the screen where you can customize all the camera’s buttons. Oh, and I changed the custom settings so that all the focus points always show, and that they light up upon achieving focus, even in bright sunlight (which they would not do if you had this setting on Auto or Disable). That way I always know when it has focused.  And I set Custom Function III-7 to stop focus point selection when I reach the edge and not loop around to the other side. I’m also thrilled that the 7D has a grid display that you can turn on in the viewfinder, which helps me keep my horizons and compositions straight. The viewfinder looks pretty busy, filled up with AF points and the grid, but when you are shooting away and focusing on your subject, you don’t even notice they are there.

Single Point Focus vs. Spot Focus Size – This controls the size of the area being looked at for focusing purposes on the 7D.  With Single Point AF Area Mode, the camera is actually looking at a cross shape area (all focus points are cross type, center point is dual diagonal as well at certain apertures) that extends about 2x as big as the actual square you see in the viewfinder. With Spot AF Area Mode, the size of the cross is about the size of the square you see, I think perhaps slightly larger.  Now you might think that using Spot AF will be more accurate all the time and sounds like a great idea and will get you sharper pictures, but this is not necessarily the case.  Since Spot AF is so precise, and since autofocus works by looking for an area of contrast, Spot AF may not focus as well or as quickly in many general situations (because it may be looking at such a precise area that is all one color or  tone).

Spot AF is for when you need a really precise “focus beam” to pinpoint, for example a bird in a tree, and not the branches and leaves surrounding it and all around it, which may be closer to you and the camera.  Or if, say, you are shooting through a chain link fence and you want the camera to focus on the animal beyond and not on the fence.  If you were to use Spot AF all the time, you would have to continue to act in a slower and more precise manner, so that you ensure you are focusing on an area of contrast or a nice line.  For example, if you capture a shot of a person, you want to focus on the eye typically.  If you do this quickly with Single Point AF, you can aim at the general area of the eye and you will likely include it in the area being looked at by the camera.  However if you grab a quick shot with Spot AF, you may  be a little off and the camera is looking at an area of cheek to focus on, which will be difficult since there isn’t much contrast there.

Orientation Linked AF Point – This setting allows you to choose your favorite AF points, and when you are hold the camera horizontally or vertically, those points are automatically selected. However, it is very complicated to set, so much so that is would seem Canon doesn’t even understand it. The Canon rep did not fully explain it properly at the B+H presentation, the instructions in the manual do not work, and after 3 different instructions by email from Canon, I may finally have the correct way. I still have to try their latest directions. (note- nope, latest instructions still don’t work properly) **12/17/2009** AHA!! Here it is, finally explained in its entirety.

I also changed the button/ dial function settings so that in Manual mode, the big dial controls shutter speed and the top dial controls aperture. The default is the opposite. I changed this because I almost always shoot in Av mode, where the top dial controls aperture, so when I switch to Manual mode, I want that to remain the same.

Additional edit – August 2011:
I have written a popular e-book user’s guide for the Canon 7D
called Canon 7D Experience. It not only explains all of the features, functions, and controls of this powerful, sophisticated, and highly customizable camera, but also when and why to use them in your photography – including EVERY Menu item and Custom Function setting, with explanations and recommended settings for real-life use.  You can learn more about the guide, preview it, and purchase it here.


AF Microadjustments – This is a setting on the 7D which enables you to tweak the auto-focusing to your different lenses. A site about AF micro adjustments that look to be helpful is below:

http://www.northlight-images.co.uk/article_pages/cameras/1ds3_af_micoadjustment.html#Anchor-Canon-49575

Here is a micro-adjustment focus test chart you can use.

Viewfinder – The viewfinder on the 7D is big and bright and wonderful. It is nearly 100% view of the image you will capture. The aperture and shutter speed info is of course displayed below, along with the current ISO setting, which one should get in the habit of glancing at often. See the AF Focus Mode category above for more info on what you can view in the viewfinder to assist with focusing and composition.

Picture Style – I had this on Standard, since I shoot in RAW and intend to post-process, however, I would like to do a comparison of the styles to see which one best matches my visual preferences – although the Picture Styles will only affect JPEGs and, it is important to know, the image you see on your rear LCD screen when shooting RAW.


Jalapa, GuatemalaCanon 7D, 16-35 f/2.8L lens at 35mm, 800 ISO, 1/2000, f/8

File Size – I shot RAW for almost the entire trip, and quickly discovered that these files are HUGE. The files range from about 21MB to around 31MB each. I used SanDisk Extreme III 16GB cards, which worked great, and one card often lasted much of the day. I have no good reason for using SanDisk over Lexar, other than the fact that the Lexar people haven’t approached me about sponsorship… :) The Extreme III cards have been replaced by the new Extreme and Extreme Pro cards, and are thus the old ones are much cheaper at the moment, especially with current rebates. At 30MB/s, they were fast enough for the types of shooting and short bursts I was doing. However, downloading them to my computer and external HD were pretty slow using the SanDisk ImageMate CF card reader. Eventually I’m going to have to spring for a card reader that goes right into the PC slot. I used Adobe Bridge to simultaneously save the day’s files to 2 external hard drives. The 160GB Iomega Ego filled up before the trip was over, but fortunately I also had a Lacie 500GB. I am dreading the number of external hard drives I am going to have to buy for travel and for home storage, but once you go RAW, it’s hard to go back to shooting just JPEG. I’m going to have to look into the Drobo system that many rave about.

Battery Life – The battery life of the 7D is excellent. When you get new batteries, first charge them all the way. Do not recharge until they are completely drained. Do this one or two cycles. I know they say you no longer have to do this, but some claim that seasoning the batteries like this will maximize their charge life. Anyway, one battery lasted well into 2 days of shooting, maybe longer, I didn’t keep track. They just keep going, even with heavy use, chimping (LCD reviewing), frequent use of an external Speedlite flash, and use of image stabilization (IS) on the 70-200 lens. I carried 3 batteries, but probably could have gotten away with 2. The spring-loaded battery door that pops right open for quick battery changes is a nice touch.


Antigua, Guatemala – Canon 7D, 70-200mm f/4L IS lens at 78mm, 100 ISO, 1/250, f/4

Automatic Sensor Cleaning – Like most good dSLRs these days, the 7D automatically cleans the sensor at start up and shut down. Since the dust that is shaken off is collected on a tiny sticky strip at the base of the sensor, it seems to me that you should hold the camera straight as this happens. I’m not sure if this is actually true, but I think I read in the manual that it even says to place the camera flat on a table as you use this, so I have gotten in the habit of holding it straight and still as I turn it off and on. Yeah! No more having to clean the sensor manually with a Rocket Blower!

Video – I did not have a chance to even experiment with the HD video on the 7D yet…so much to learn, so little time…

The next post will review all the other gear I used on the trip – the camera backpack, R-strap, accessories, etc. – and perhaps some of the other lessons learned. Read it here.

Purchasing: If you plan to buy the Canon 7D or any other camera or equipment from Amazon.com, I would appreciate it if you use my referral link by clicking on the text or logo below. Your price will be the same, and they will give me a little something for referring you, which will help support this blog. Thanks!


See and buy the Canon 7D on Amazon

And due to popular request, if you are in the UK, here is my referral link to Amazon UK.

And for those wishing to purchase from B&H Photo, Adorama, or directly from Canon just click their logos on the left side of the page.


Jalapa, GuatemalaCanon 7D, 70-200mm f/4L IS lens at 200mm, 200 ISO, 1/1600, f/4

Again, be sure to check out my e-book user’s guide for the Canon 7D called Canon 7D Experience. It not only explains all the features, functions, and controls of this powerful, sophisticated, and highly customizable camera, but also when and why to use them in your photography. You can learn more about the guide, preview it, and purchase it here.

I’ve run across a nice set of video tutorials (link below) for using the Canon 7D. You can watch them online, or even download them to your camera for viewing. The one on AF Custom Fuctions is especially helpful at clarifying those setting. Be sure to look around on the Canon Digital Learning Center to find all kinds of other cool stuff about using your camera plus useful tips and instructions from pros who use them.

link to Canon 7D Video Tutorials

The distinctive voice you hear in the 7D tutorial videos is Canon guru Rudy Winston, and the photo samples are his images as well. If you are in NYC, you can often find him leading workshops and presentations at places like B+H and Adorama. I went to a wonderfully informative introduction to the 7D that he gave a B+H a month or 2 ago, and these videos are pretty much the same presentation.

Here is additional information from Canon Europe about custom functions of the 7D:

United Nations – Humanizing Development Campaign

My photo Women in the Plaza – Combapata, Peru, was one of 50 selected – from thousands of photos from over 100 countries – to represent the United Nations Development Programme and their Humanizing Development campaign.

The photos will be published in a book sponsored by the Presidency of Brazil, and are currently on exhibit at the headquarters of the United Nation’s International Policy Center for Inclusive Growth (IPC-IG) in Brasilia, Brazil.  The exhibit will tour major international cities throughout 2010, including NYC, Bangkok, London, São Paulo, Rio de Janeiro, Johannesburg and Bonn.

According to the IPC-IG, “The meaning of ‘Humanizing Development’ cannot be expressed in numbers. It shows examples of people winning the battle against poverty, social exclusion and marginalisation. It calls for the humane face of development. It spreads hope, initiative and determination. It transmits inspiration to each of us and feeds our dream of transforming the world we live in into a just place. A world that enables all of us, regardless of our birth place, social and economic status, sex, sexual orientation, race, ethnicity, religion and ideology, opportunities to fulfilling our potential as individuals, human beings and members of our society.”

As a photographer dedicated to documenting the work of  humanitarian organizations throughout the world, I’m extremely thrilled and proud to have been selected for this honor, and can’t wait to see the exhibit in NYC.

The women in the photo are queued in the main plaza of Combapata, Peru to receive monthly Juntos program benefits. The Juntos (Together) program, a conditional cash transfer (CCT) government program, provides cash to the poorest families if they meet certain criteria. Recipients must have children under the age of 14, enroll their children in school and have them vaccinated. Pregnant mothers are required to utilize mandatory pre- and post-natal healthcare programs. Peru’s Juntos program, similar to CCT programs in other Latin American countries, was launched in 2005.  I captured this image on my way to Huinchiri to see the annual reconstruction of the Keshwa Chaca, the last remaining traditional Inca straw bridge.  That journey was detailed in this post.

Pete Souza’s Photos of Obama’s First 200 Days

At this point I find myself seeking out and viewing photo exhibits in terms of “what can I learn from this work to help improve my photography?  What makes these images successful?”  So instead of just contemplating these things in my head and torturing whichever friend happens to find themself across from me in a bar, I’ll start to put my thoughts down here.  I think I’ll mainly focus on “lessons learned” – what I’ve picked up from looking at and thinking about the images.

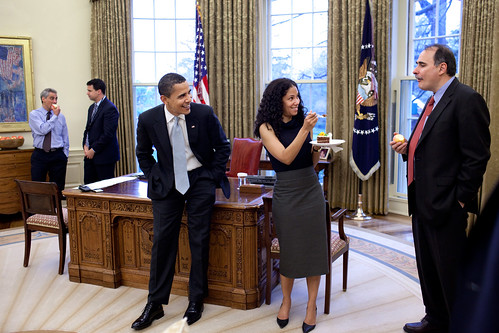
I happened by the Leica Gallery last week, and had the chance to see its Pete Souza – Obama exhibit.    The success of the images on display are a result of a few strong and consistent choices and techniques Souza applies in his photography, including his awareness of the moment, his framing and point of view, use of natural light when available, and his awareness of precedent.

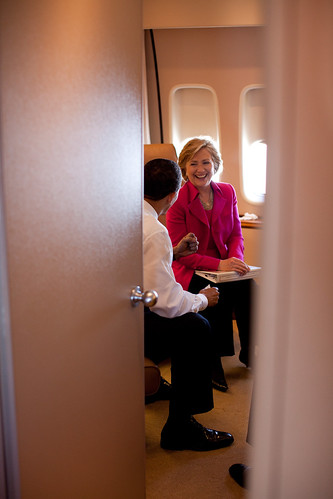
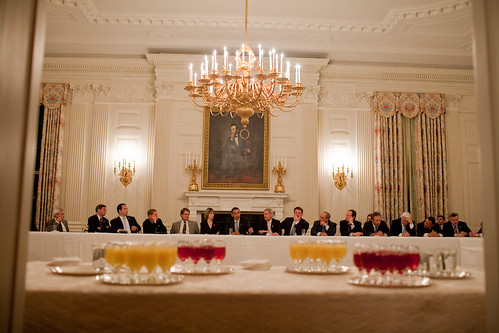
All photos shown in today’s post are by Pete Souza.

Souza is the “Chief Official White House Photographer,” so he obviously has unparalleled access to President Obama’s daily activities.  His ability to capture special moments was obvious from the start or the term, with his two elevator shots from the night of the Inaugural Ball:  an intimate moment with the First Lady, and the final image of the night with the President heading to bed.

This first one of these, which can also be see on Souza’s home page as well as on the White House Flickr site, demonstrates two of his strengths:  his ability to capture both the moment, and the intimacy of the environment it occurred in.  The subject of a majority of the photos in the exhibit is a specific moment, but one that typically speaks to a wider subject or theme.  This photo was just one brief encounter between the President and the First Lady, yet it clearly represents their relationship and personalities.  The same is true for the other photos in the exhibit.  While Souza has undoubtedly captured hundreds or thousands of singular moments between Obama and his staff, the ones he displays all demonstrate more than what was occurring that split second.  They show the relationships, the personalities, the mood.  They do this through the facial expressions, the body language, the framing of the space around them.

The second characteristic of many of these photos is that they capture the intimacy of the moment and of the spaces they occurred in.  Souza often accomplishes this through use of a wide angle lens and by expanding the frame beyond the subject to the space around it to show that the interaction is taking place on a plane, or in a corridor.  He also does this through creative framing, looking in through a doorway or window, or using a lower point of view.

Another tool he uses is making references to previous photos or works of art. By possessing knowledge of the work that has come before him, he has an eye for similar situations and compositions. There seems to be a few particular references to Kennedy era images. For example, this one of Sasha sneaking up on Obama brings to mind the photos of JFK Jr. playing under the his father’s desk – the father hard at work with the playful child on the floor (there are also a couple photos in the exhibit with Caroline Kennedy and Obama discussing that photo and looking at the desk for the hidden door).

And one can’t help but to recognize the tongue-in-cheek reference to DaVinci’s Last Supper here:

Other images make use of light and of details to tell the story of the situation.  While Souza is probably often using flash to light his indoor subjects, he has a keen eye for natural light when the situation presents itself.  There are a few shots of Obama at his desk, or a detail of his hand, that use dramatic natural light to set the mood.  He also focuses in on very specific details as the subject of some of the photos, often times hands.  For example, Obama’s hand on a phone, Michelle’s hands clasped behind her back, or a Ghanean’s hand, gold jewelry, and tribal outfit.

Finally, Souza sometimes turns the camera around, to capture the expressions and reactions of those viewing the President.  Several times I have run across the tip to turn around 180 degrees and see if there is another image behind you that is worth capturing, and Souza clearly demonstrates it is worth looking:

Here’s a brief interview with the photographer:

http://www.cbsnews.com

So, I believe these are some of the elements that make these images successful.  And what makes them powerful, important, and lasting is that in addition to capturing a instant in time, an expression or detail, or an interaction, they also speak to a greater moment, personality, or relationship.  That’s about enough for this lesson.  Look forward to retroactive reviews of Robert Frank’s The Americans, Phil Borges’ Tibetan Portrait, Vermeer’s The Milkmaid, and Cornell Capa’s Concerned Photographer.  Vermeer?  “What?”, you wonder?  Well, stay tuned and see…

Help Along the Way

In my development as a travel, culture, and humanitarian photographer, I’ve spent a lot of time researching other photographers who do this type of work. In addition to simply looking at, contemplating, and studying their photos, I also scour their websites for any and all information and nuggets of knowledge I can find. They are typically very helpful in listing the equipment they use, but also offer everything from packing, traveling, and working advice to post-production tutorials.


Pucallpa, Peru – photo by Douglas J. Klostermann

Again and again, I return to Karl Grobl’s website (http://www.karlgrobl.com/) to mine it for info.  He has dozens of pages with incredibly helpful advice (follow the “Cameras and equipment I use” link to see them all).  I discovered that I share his fondness for Lowa Tempest Lo hiking shoes, which inspired me to order a back up pair for the inevitable time when my soles are too far worn.


Taquile Island on Lake Titicaca, Peru – photo by Douglas J. Klostermann

My latest discovery is David duChemin.  He’ s rapidly become a real standout in this field – with a recent book, Within the Frame, an upcoming book (which will include Karl Grobl in it), a blog, a video blog, e-books, a forum, you name it.  What I’m really loving about him is what a great teacher he is, and how he is shifting the conversation away from equipment obsession and towards more meaningful topics – such, as he says, vision.  I’ve read through most of the current favorite photo books, where I picked up lots of great info and tips for equipment, composition and lighting, post-production workflow, etc.  But I’ve always found something lacking.  They give you everything you need to know to take technically better photos, but they rarely speak to the content and the purpose of the image – as David might say, they give you the how, but not the why.  They don’t offer much in terms of developing one’s style, of strengthening one’s vision.  And that’s what David addresses, so I’m glad I came across him at this time.  Watch a few of his video blogs (free from iTunes under Within the Frame), and I think you will see what I am getting at.  And as I work my way through his blog archives, I’m seeing that his early development in this field shares many similarities with mine, which is encouraging to me as I follow this difficult but determined journey.

Dreaming of a Conde Nast Dream Trip

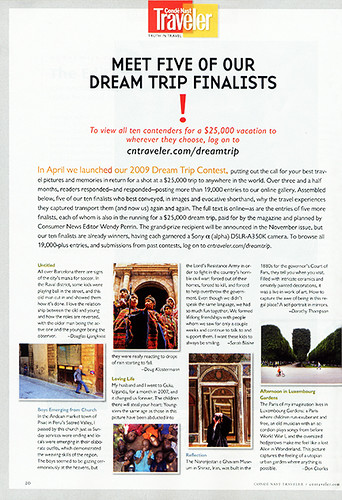
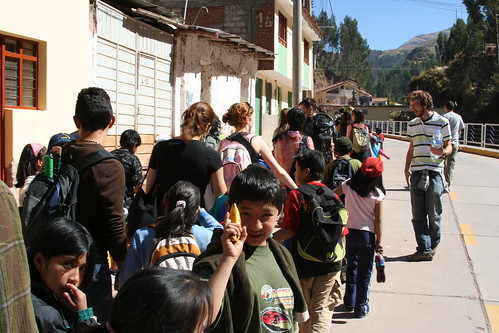
I’ve been selected as one of the Ten Finalists in the Conde Nast $25,000 Dream Trip Contest (out of over 70,000 entries!) with my photo Boys Emerging from Chuch – Pisac. This photo was captured on my visit to Pisac where I ran into some fellow Yanapay volunteers, and then we all got on the bus going the wrong way, as documented in this post.

I was requested to submit an essay detailing my dream trip, in which I described a trip to visit and photograph the indigenous cultures of Laos, Cambodia, and Vietnam.

In addition, I won a Sony a350 digital SLR with an 18-70mm lens, and my photo was published in the October 2009 Conde Nast Traveler magazine.  If you are interested in purchasing this new, never used Sony camera, head over to eBay here. too late!

CondeNastScan

The Heart of Dampness

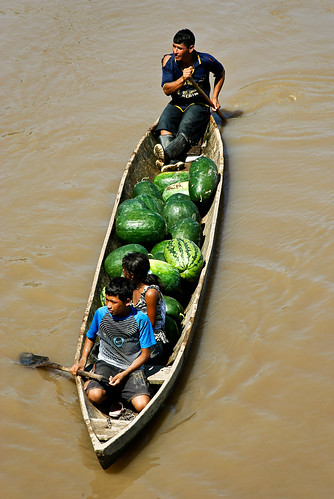
The Ucayali section of the Amazon, somewhere between Pucallpa and Iquitos
The Ucayali River, somewhere between Pucallpa and Iquitos.

I once visited Istanbul, reaching it by ship, and realized that was by far the best way to enter the city.  One slowly floats past the bustling city, with exotic minarets poking up from the skyline, and then disembarks in the manner travelers had for centuries.  The city of Iquitos is accessible by only plane or boat, and so the same romantic notion overtook me.  What better way to enter this one time rubber boom town carved out of the jungle than by boat down the Amazon?  You can’t understand this city without experiencing the river, I figured, so I flew to Pucallpa, and found my way onto a lanca, a passenger and cargo boat heading down the Ucayali section of the Amazon River to Iquitos.

I then spent the next four days on the equivalent of a Peruvian Greyhound bus, albeit in boat form, with hammocks instead of seats (bring your own), a hundred passengers in one big open deck, 2 trucks, 3 moto-taxis, 1000 kilos of salt, several thousand bananas, a few hundred eggs (hey guess what, you really don’t need to refrigerate them!), 8 pigs (they don’t actually squeal, they cry in a manner disturbingly similar to a very loud toddler), 2 cows, and a crate of chickens.  I also discovered, to my shock and disgust, that while the civilized world is trying to save the Amazon, the Peruvian boat passengers are using it as their garbage can, throwing their empty 2 liter Inca Kola bottles right into the water.  One Peruvian man decided that the boat ride was a good time to consolidate his cd collection, so after he emptied the plastic cases, he frisbee’d them, one by one, into the river.  Luckily, after about a dozen, a couple kids begged him to give the cases to them rather than to the river dolphins.  I think they were more entrepreneurs than environmentalists, but hey, same result.

Early into the first day, we were cruising along and hit bottom. Sudden dead stop! One of the moto-taxis on the top deck went sliding 15 feet across the deck towards me. Then there was the night we got stuck for 2 hours in the pitch dark. The procedure for that is to gun the engines for 2 straight hours as you turn the wheel back and forth and shine the spotlight around on the shore – i dunno, maybe looking for a crocodile who can help.

I did discover the greatest Peruvian invention since the potato: bathrooms that are also showers. That way they are always clean!  And then finally, after 4 full days of a 3 day trip, we reached Iquitos. Everyone just stood on the front deck staring. Maybe out of habit, maybe out of shock. Maybe they had all died, in place, out of boredom. There was no mad rush for dry land as I expected. I thought, hmm, is this just a cargo port and we get off somewhere else? But no, it was over! And I lost another 15 minutes of my life until I figured this out.

At some point, I think it was towards the early afternoon of day three, I discovered I’d had enough of Peru and decided to return to the US.  I spent a few days somewhat enjoying the frantic energy of Iquitos, and am now back in Lima for a long week before flying home.

Clara Update

I haven’t written an update on Clara for awhile, so there is a lot to catch up on!

IMG_0568

As previously discussed, my friend Nienke put me in touch with an American special needs teacher here, Celeste, who then arranged for a young deaf Peruvian women, Karen, to work with Clara.  Finally everyone’s schedules coodinated, and they came to Yanapay to visit.  Clara soon figured out that we were discussing her, and she refused to join us, acting unusually shy and hesitant.  Nevertheless, Celeste explained everything to Yuri, and acted as a multi-communication translator, signing to Karen and telling me in English.  Yuri was thrilled with the idea, as was Karen’s mom, whose support was also important for this to work.  I was beaming with happiness, as it seemed Clara was finally going to get consistent help.  In the process, I obtained my name in sign – a “d” next to my glasses.  Finally Clara was forced down to join us, the idea was explained to her as best as possible, and she agreed to work with Karen.

On the first day of class, Karen and I sat down with Clara, and Clara already didn’t seem very happy.  She kicked me under the table in protest, but we carried on with the lesson.  Karen went through the alphabet in sign, and then seeing that she hadn’t brought any materials, I pulled out my flashcards.  She went through each of those, with Clara learning the signs.  She then quizzed Clara, and she remembered nearly all of them.  Not knowing what to do next, I ran to the storeroom to get some drawing materials.  However, when I returned, Clara had run off, and I had no success in coaxing her back.  “Poco a poco” I told Karen, little by little.

The following day, Clara wouldn’t even sit down with us to start the lesson.  We tried and tried to persuade her to join us, but no luck.  Eventually, however, as Karen and I stood around not knowing what to do, Clara invited Karen up to the games room.  Great!  Clara is warming up to her teacher!  I thought.  Karen was hesitant, but luckily she went up and joined Clara.  I left them alone, with the hope that Karen would turn it into a learning opportunity.  After about 10 minutes, they came down and went into the art room.  I tried to spy a bit, but mostly gave them their space.  They weren’t really working with each other, but working next to each other was a start.

By the following day, Clara would no longer greet me.  I assume it was because I was making her work, and perhaps because she comes to Yanapayto play, to have fun, and to be with other kids.  It is entirely possible that she is in her house all day, as she no longer attends school.  She wouldn’t sit down to work with Karen, and I began to think it all might fall apart.  I was away from Yanapay for a few days, and was afraid the lessons be over when I returned. 

Although Clara still wouldn’t greet me when I returned, she was proudly sounding out, “I am Clara!”  One of the volunteers had somehow taught her that.  She was also showing that she could sign her name.  I joyfully discovered that Karen had brought 2 of her friends, and they all worked with Clara that day.  It turns out, in my absence, the teachers at Yanapay had explained to Clara that if she wants to continue to come to Yanapay, she has to work with Karen.    I was extremely curious what they were all doing in the classroom, but I left them alone, and they worked for well over an hour.

A few weeks later, Karen started a job, but she had started to go to Clara’s house on Sundays for the lessons, which are hopefully continuing.  Last week, again after an absence when I went to Puno and Bolivia, I returned and saw Clara signing with Yuri.  It was not longer gestures and pantomimes, but real signing, which she seemed to be doing it with new found confidence and perhaps even a slight bit more maturity than I had seen before!

Aldea Yanapay Day Out

Please view additional Yanapay photo essay at www.dojoklo.com

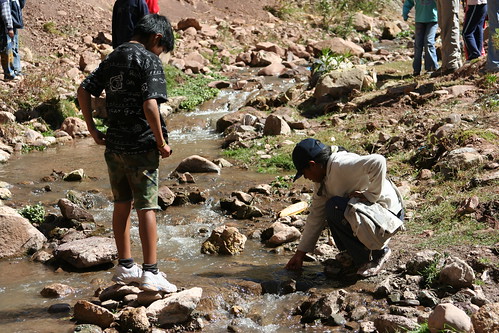
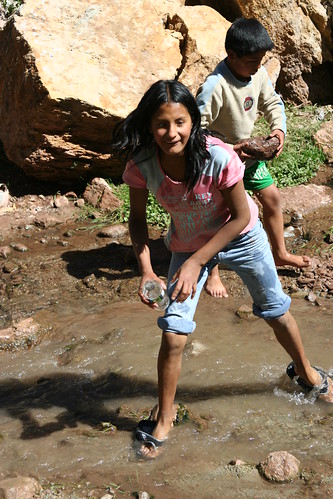
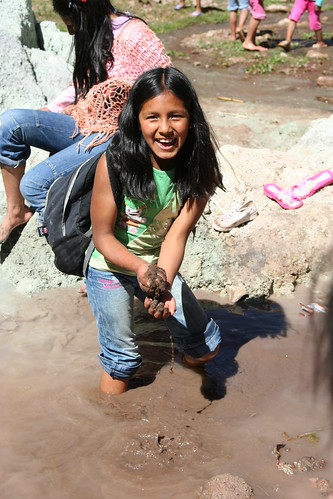
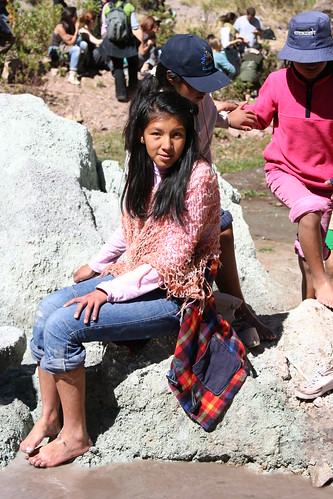
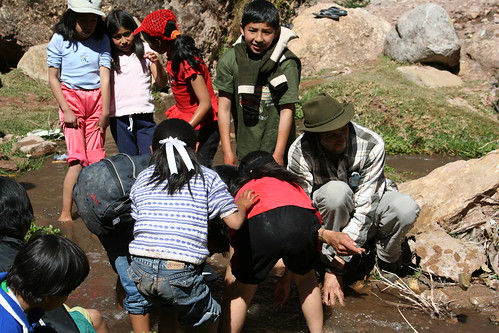
OK, so I’ve been very forgetful.  I forgot to do a special post for Tracie and for Aunt Vickie and Grandma on their donation days.  I will have to make that up to you…  BUT, today is Gail Zimmer’s donation day and birthday!  Her donation was for a doll related art project with the kids.  Since I was supposed to be in the jungle now working in Pilcopata, I was going to do that at this time.  However, since that gig fell through, I am carrying my art materials deep into the jungle to Iquitos next week.  When I hook up with a volunteer organization, hopefully in a secluded indigenous community, I will attempt to do that project.  In the mean time, here are some pictures from an outing with the Aldea Yanapay kids.  We hiked just outside of Cusco, and explored a creek and some woods for the afternoon.  The kids loved playing in the water, and many left quite wet, along with a couple unlucky volunteers.


Heading out


Yuri helping a little one across


Jenni in the water


Marylin


Clara getting ready to cause trouble!


“Mira Profe!” The little ones were amazed by the wonders of nature


Diana playing in the mud


Maria calm and composed as always


Yuri and the kids


Ascending the trecherous hill


Returning from collecting leaves and seeds for future art projects


Descending the trecherous hill


Heading home

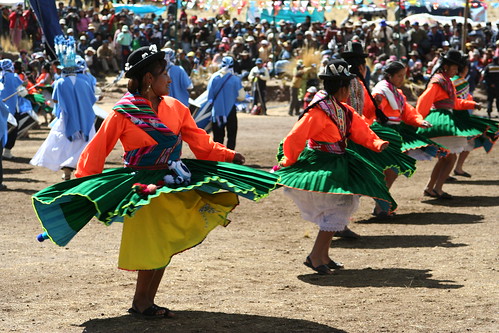
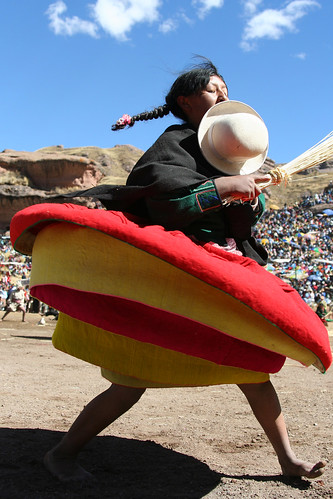
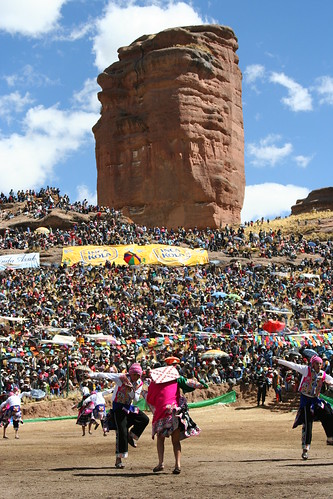
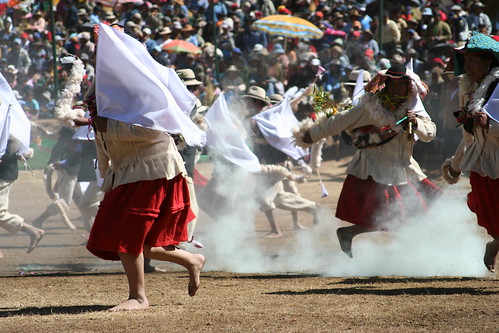
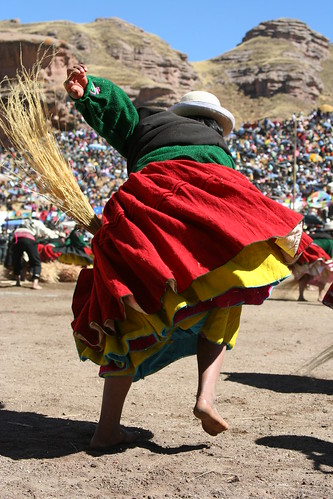
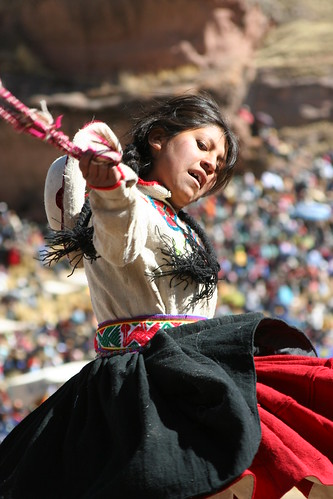
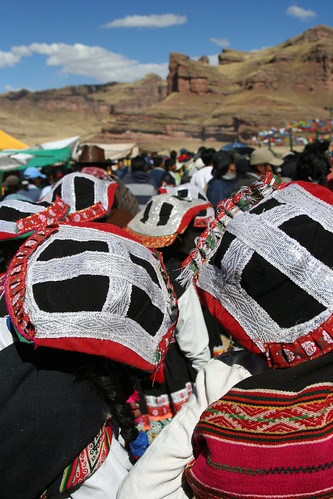
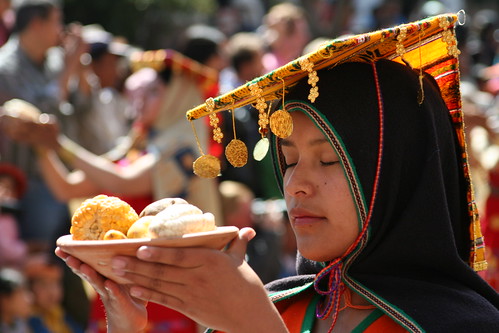
Festival de Tinajani – aka More Skirt Twirling Photos


Traditional dances from various regions of Peru, Bolivia, and Chile

As the bus from Puno approached Juliaca, I turned to the campesina woman next to me and asked how I could continue on to the Festival de Tinajani.  Her face lit up and she told me, “Nosotros vamos a Tinajani tambien!” – “We´re going to Tinajani also!” I asked how we proceed there from Juliaca, and she explained rapidly, so I figured it was best just to follow her.  She was with a group of 3 other adults and 2 children, and after we unloaded their buckets of what I assumed was soup to sell at the festival, we attempted to find a taxi.  Ten minutes passed without luck, only bicycle taxis came by, and so I tried again to ask her where I go to get to the next city near the festival.  She convinced me to wait, and finally we got a taxi, loaded the buckets, and all piled in.  Deposited at a large plaza and market area, we happily discovered there were direct buses to the festival, and wouldn´t have to go to Ayaviri first.  I asked the oldest woman how much my share of the taxi was.  “Dos Soles” she quickly replied.  Based on my knowledge of transportation prices, my experience with Peruvians, and the smug expression on her face, I assume I paid for the entire family…and their soup, which I had helped to load and unload.

We all sat on the bus for several minutes, and the passengers started to get antsy.  “Vamos!” they all began to yell.  We moved a bit, stopped some more, moved a bit.  People started to get off to try their luck with another bus.  The young woman sitting next to me had been attaching yarn braid extensions into her hair, and so I assumed she was a dancer headed to the festival.  As soon as she got up, I knew it was best to follow her.  We got on the next bus, which filled up when a man butted right in front of us (an everyday experience in most any line in this country), and unfortunately we had to stand for the ride.   An hour and a half later, we turned off right before Ayaviri, onto a dirt road heading into the altiplano, the high plains between the two spines of the Andes.  As we followed buses and cattle trucks loaded to capacity with festival-goers, a continuous series of buses and combis, now empty, passed us on their way out.  The festival was nowhere in sight, just desolate, dry grasslands, fields, and pastures with cows, sheep, and llamas.  After twenty minutes, the dramatic rocks which I had seen in pictures came into view, then the parking lot loaded with hundreds of buses, then the crowds, covering the hillsides.  Emerging from the bus, I didn´t know where to turn.  There was color and activity in every direction, so overwhelming I didn´t know where to start.  I didn´t want to miss any photo opportunity, but I just had to begin.  Right next to me was a field with some dance groups practicing.  After a few minutes there, I weaved through the vehicles, and merged with the crowd crossing a precarious plywood bridge to the site.  I moved through the rows of food vendors and people eating lunch, chicharones on grills sputtering grease at every turn.  At the dance site, I tried to determine how to best sneak my way in, but each corner was filled with crowds and police.  I circumnavigated the entire area, since I saw other photographers on the far side.  I waved my camera in front of a guard and he let me pass.

Since I had no idea how I was going to return to Puno, how difficult it might be, and how long it might take, I knew I couldn´t stay long.  So I alternated between taking photos, filming videos, wiping the dust off my camera, and blowing it off my lens.  Group after group of dancers performed, each with their own band of musicians and singers.  The announcer´s voice boomed through the PA system constantly, even over the music and voices of the singers, “TINAJANI RAYMI!”  “La Provincia de MELGAR!”  The crowds continued to grow on the rocks and hillsides surrounding the site.  At 1:30 I forced myself away, knowing I had to be on my way out of there by 2:00.  But on the hillside there was so much more activity:  kids flying kites, groups of dancers waiting, carnival games and foosball tables.  I made my way back through the food area, to the parking lot, and once again found myself in the practice field.  A group of women danced in a circle, surrounded by men parading huge red and white banners.  Another amazing photo opportunity!  I snapped as fast as I could, and then delved back into the parking area looking for the combis heading back to Ayaviri.

I got the last seat on one just about to head out, and encountered a small group of Spaniards, the other other tourists I saw the whole day.  We spent the ride amused by the smiles and laughter of an adorable little girl, just as entertaining as the festival we just came from.


I just got off the bus – dancers practicing in a field


The crowd, visible from the parking lot


One of the market and lunch streets


So much overwhelming color, activity, and so many people, I didn’t know where to start!


I got my way into the photographers’ row, right at the side of the dance area


Skirt-twirling action!


Dust, dust and more dust – not so good for the camera and the sensor.  Luckily I had my Rocket Blower with me.


This dance involved sweeping the dirt right onto me!


Danza Tondero de Piura, surprising to see so far south


Awaiting their turn to dance

transportation costs:

Moto-taxi from hostal to Terminal Terestre Puno – s/. 1.50 – 7 min
Bus from Puno to Juliaca – s/. 2 – 1.5 hr
Taxi with family and food to Plaza – s/. 2 – 5 min
Bus directo from Juliaca to Tinajani – s/. 5 – 2 hr

total: s/. 10.50 – 4 hours

return trip:
Combi Tinajani to Ayaviri plaza – s/. 1.50 – 25 min
Bike taxi to Ayaviri Terminal – s/. 1 – 5 min
Bus from Ayaviri to Juliaca – s/. 3.50 – 1.5 hr
Bike Taxi to paradero – s/. 2 – the slowest 10 minutes of my life, as every other bike taxi passed us
Bus from Juliaca to Puno – s/. 2.50 – 1.5 hr

total: s/. 10.50 again! – 4 hours

Additional photos can be viewed at www.dojoklo.com in the Dance or Peru galleries.

Here Comes the Sun – aka Inti Raymi 2008

**Sorry, the links to most the photos got messed up.  Please view photos in the Peru gallery at www.dojoklo.com or my Inti Raymi set on Flickr here.

Here are some shots from the Inti Raymi morning ceremony to greet the sun, at Coricancha.  I got there bright and early, and hour and a half before, in order to get a good spot on the railing.  But the front row was already full!  What to do?  Wait until someone makes the mistake of leaving their spot, and jump right in!  Then push, nudge, and hold my ground for the next 3 hours.

Keshwa Chaca Inca Bridge 2008 – Photos

You can view this entire photo series, with captions, on my website at www.dojoklo.com in the “Inca Bridge” gallery.

See THIS POST for my videos of the bridge construction.

see THIS POST for the story of getting to the bridge site.


Keshwa Chaca 2008 – part 1: Getting There

Photos of the bridge building can be seen HERE, and also on my website at www.dojoklo.com in the Inca Bridge gallery.

Videos of the bridge can be seen HERE

Rolando stopped the taxi right in front of the group of women weaving straw ropes, sitting by the side of the road.  Their kids immediately ran to the window, “Propina, propina, carameletto?” Oh no, I thought, I haven´t even gotten out of the car yet and they’re asking for handouts.  As soon as I pulled myself out and gathered my backpack and tent, the chorus of women started:  “Propina gringito, propina.  Carameleto para los niños?”  – “Tip, little white boy.  Candy for the kids?” My goodness!  They even sounded a bit angry that the money and sweets hadn’t started to flow from my pockets.  And I haven’t even pulled out my camera yet!  I came here with the hopes of spending three days taking award winning, up-close photos, and the women were already not pleased with my presence.  Is this how the next three days were going to be?


My welcoming committee, as I exited the taxi and immediately began taking photos.

I had headed south from Cusco on Friday morning and took a bus for two and a half hours to Combapata.  From there I switched to a collective taxi, and joined 9 other people as I crammed myself into the back of a tiny hatchback station wagon.  As an unshaven old man slept on my shoulder we slowly wove our way through herds of cows and sheep being led down the road, and forty minutes later, after picking up yet another passenger, everyone got out in Yanaoca.  I had thought we were going all the way to Huinchiri, but now I discovered I was the only one who wanted to go there.  Since the festival wasn’t until Sunday, neither locals nor tourists were heading to the bridge site yet.  So while it cost 2 soles to go the previous forty minutes, it was going to cost me 70 soles for the next hour and a quarter to Huinchiri!  I sat in disbelief in the car, refusing to get out.  I knew there were no other options, but I quizzed the driver.  “Are there any other cars going?  Any trucks, any buses?”  “No, not until Sunday.”  “But 70 soles?!” I responded.  “I haven’t brought enough money.  I’ll never be able to get back!” I tried to bargain with him, and soon started to beg.  “But you only charge 2 soles per person going back and forth all day.  How much do you make in a couple hours?  30, 40 soles?”  “Yes, but the road is very rough, full of rocks,” he replied.  We sat in silence for awhile, and every couple minutes I went up 10 soles.  “50?  60?” But 65 soles was the best I could get out of him  “Sesenta?” I kept trying, just for a personal feeling of accomplishment.  “Mas cinco,” he insisted.  Finally I had to agree:  65 soles.


A view along the way between Yanaoca and Huinchiri.

He was right.  The road was terrible.  We wound our way through dry grassland, with herds of cows and sheep and alpacas feeding on the q’oya grass that was the same material used to construct the bridge.  There were mud huts with thatched roofs, and precariously constructed stone walls meandering across the low hills.  At one point he gestured to a distant hill, “Atras, atras,” telling me the bridge was behind.

Along the way I realized that the bone jarring ride was probably doing at least 65 soles of damage and wear and tear to the taxi.  After an hour we reached a gate across the road, with a couple of locals attending it.  A handwritten sign was posted: Taxis – 5 soles, Camiones – 10 soles, Turistas – 70 soles.  70 soles for tourists!  My heart sunk into my stomach.  I´m never going to have enough money to get back, I thought.  The taxi driver talked to the men for a bit, then turned to me asking for 2 soles.  I quickly fished the money out of my pocket, discreetly hid my camera so I would look less like a tourist – if that was at all possible – and didn´t ask any questions.  While I got in cheaply, it wasn´t until perhaps two days later that I realized “Turista” likely meant 70 soles for an entire tourist bus.


A couple of the “Quince curvas” of the road winding down to the site.

We passed through the gate, climbed over the top of the last hill, and began the descent to the river valley.  “Quince curvas,” he told me – fifteen distinct, precarious turns in the road.  I caught my first glimpse of the bridge far below, but it quickly disappeared.  I saw a few tents in a pasture several hundred yards beyond.  Then he dropped me off in front of the women.


Where I was dropped off.  The bridge is right below, the weaving women just to the left, and the campsite in the distant top-right, to the right of the bus. The abutment of the far side of the bridge can be glimpsed in the center.

to be continued…

Keshwa Chaca – Inca straw bridge near Huinchiri

See THIS POST for photos of the bridge construction.

See THIS POST for the story of getting to the bridge site.

Nearing completion of the Keshwa Chaca – Inca bridge made of q’oya grass – on Saturday afternoon, June 7, 2008

[flickr video=2566110776]

.

The completed Keshwa Chaca – Inca bridge – on Sunday morning, June 8, 2008.  With soundtrack of French tourists, who had instructed the locals to act natural as they cross…you know, so that their photos will look more “authentic” :)

[flickr video=2565020973]

The Real Story

A map uncovered by Paolo Greer demonstrating that Hiram Bingham wasn’t the first outsider to “discover” Machu Picchu (and the farmers living there, who presumably knew it was there as well)

A few months ago I met a real life explorer in the South American Explorer’s Club in Cusco named Paolo Greer.  He told me of his lifetime of searching for lost cities in the mountains of Peru, his studious research in dusty archives in Washington and Peru (I don’t think you’re allowed to say “archive” without first writing “dusty”), his innovative use of satellite maps to locate lost sites, and his technique of countering poisonous snakebites with a modified stun gun.  He even mentioned an NPR show where he was referred to as the real Indiana Jones.  AND, he was on the verge of breaking an amazing story of the true modern discovery of Machu Picchu.

At first I was fascinated and captivated, eager to hear of his adventures and his theories.  But after a few afternoons in the clubhouse, I repeatedly overheard him tell the same stories to any eager audience.  I began to suspect I had already learned all the juicy information.

Then last week, returning on a path back to Ollantaytambo after hiking to the Pumamarca ruins, we were joined by a British paleoecologist who was studying the ancient remains of mites buried in the mud of a lake.  The rise and fall of the mites, it turns out, from Inca times to present, corresponds to the rise and fall of the local populations, due to the fact that the mites lived in the llama poop.  Anyway, at his first mention of modern explorers, we exclaimed, “we know one of them!”  Turns out he has been working with Greer, helping him get his newly gathered information into the news.  And 5 days later…here it is: (sorry, some of these links don’t work anymore).  And here is the tale of our first unsuccessful but unforgettable expedition to the Pumamarca ruins.

Link to Article (no longer available)

Link to 2nd Article (no longer available)

Link to 3rd Article (no longer available…the Internet isn’t as permanent as we think!)

Link to Article with Pictures of the Maps and Documents

edit 2011-07-26:  Paolo Greer is now mentioned in a wonderful book by Mark Adams called Turn Right at Machu Picchu, a story partially inspired by the article that Greer was releasing in South American Explorer magazine at the time of this blog post.  Greer certainly is an “obsessed amateur historian,” as Adams calls him in the book, and their meeting commencing at the Lima SAE clubhouse in Miraflores reminded me so much of my first discussion with Greer at the Cusco SAE clubhouse.  Greer was enthusiastically, single-mindedly determined to share his story.  My companion and I had to begin to avoid him out and about in Cusco so as not to hear his theories again and again!  The paleoecologist mentioned above is also a footnote in the book, footnote 9 page 186.  I put together a blog post called Exploring the Andes to discuss the new book Turn Right at Machu Picchu, to discuss a photography e-book called Andes, and to showcase some of my favorite Peru photographs from other travelers.

The Bus to Sicuani

When asked a question, a Peruvian will never respond that they don’t know the answer.  Instead they will always offer an answer, any answer, its accuracy and veracity: unimportant.  Ask the next passing Peruvian the same question, you will get a wholly contradictory, yet equally passionate response.  Put the two responders together and ask the question, and you will be either greatly amused or infinitely frustrated by the ensuing debate, depending on the importance and urgency of the question.

This becomes an issue when you are asking for the location of, say, the buses to Sicuani.  I first asked a teacher at the Spanish school.  “Avenida Cultura,” she confidently responded, “al lado del grifo” – next to the gas station.

“So there is only one gas station on Cultura?” I asked in Spanish, knowing that there are numerous gas stations on this street, hoping the sarcasm would translate.  “No, of course not!” she smiled, amused by my bilingual wit.  But returning to her serious face, she again insisted, “It is next to the gas station.”  “¿Esta cerca?  ¿Puedo caminar?” I asked – Is it close, can I walk to it.  “Si, si, claro,” – of course.

I asked a few other people over the next week, but never got a similar, or clear response.  A couple days later, I posed the question to the woman at the reception desk at my hostal.  Surprisingly, she confirmed the earlier response.  “Avenida Cultura.  Close.  Yes, you can walk to it.”  “How often do the buses depart?” I asked.  “Cada diez minutos,” – Every ten minutes.  Based on her previously consistent record regarding similar questions, I was now certain of two things:  it wasn’t close, and I’d consider myself lucky if the buses left more often than every ten days.

So I set out on a reconnaissance mission a few days before my journey.  I started walking down Avenida Cultura, past one gas station – no sign of a bus terminal.  Ten minutes later, another gas station.  No sign of a terminal, so I asked a passing woman.  “¿Sicuani?” she repeated as she looked pensively at her girl in tow.  “¿Sicuani?” the little girl echoed.  The woman then recalled, “Keep walking, it’s across from the hospital.  When you get to the hospital, ask someone.”
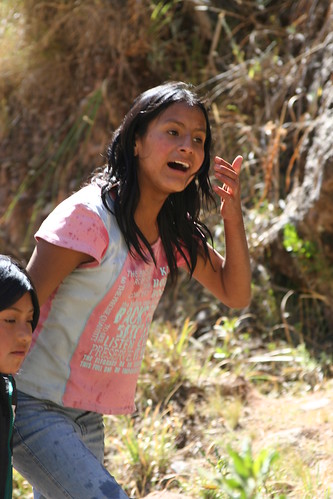
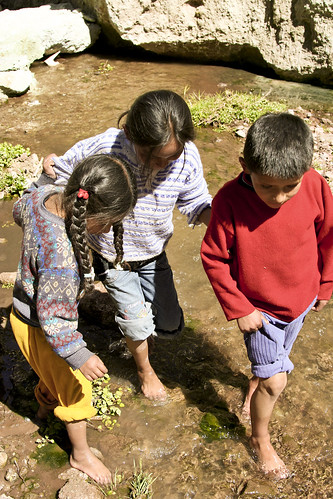
About ten minutes later I stopped in a Radio Shack and happily discovered that blank CDs were 25% cheaper than in the center of town.  After I bought a couple packs, I asked the woman where the paradero for the Sicuani buses is.  “Two blocks, no mas.  Maybe one and a half.”  After three blocks I came across a bus terminal.

“Is this the paradero for the Sicuani buses?” I asked the first knowledgeable looking person I came across.  “No, one block further.”  And so finally, after two more blocks, just past the fourth gas station, I found my stop.  Now, if I am only able to direct the taxi driver there on Friday morning.