The E-Book Handbook – Now Available!

My latest e-book, The E-Book Handbook, is now available!

The E-Book Handbook – A Thoroughly Practical Guide to Formatting, Publishing, Marketing, and Selling Your E-Book is a comprehensive guide that will help you create, publish, and market your own e-book, and sell it online through Amazon, Barnes and Noble, and Apple iTunes and iBooks – all easily and inexpensively.

The E-Book Handbook e book ebook how to create format publish market sell Amazon Kindle Nook iPad for dummies

It explains how to properly format and convert your text for PDF, tablet, and e-reader versions (such as the Kindle and Nook), create interactive bookmarks and table of contents, and include a book cover and images.  It includes step-by-step instructions for easily uploading and selling your e-book on major retail websites including Amazon through Kindle Direct Publishing, Barnes and Noble through PubIt!, and Apple’s iBooks and iTunes through Smashwords, plus setting up the e-book’s descriptions and author pages – all at no cost.  And it describes how to set up and automate sales and digital delivery from your own website and blog using reliable, low-cost services like E-Junkie and PayPal.

This instant download e-book explains multiple ways to market your e-book to increase sales, including detailed instructions for setting up a website and blog, marketing through various channels on the Internet, optimizing search engine results so that your e-book and sites are found, and monetizing your website and blog through advertising and affiliate programs. The E-Book Handbook also explains how to keep track of and evaluate sales, income, and expenses and offers a detailed spreadsheet to record and monitor this information.  Throughout the text, the guide contains links to every website and retailer discussed, as well as comprehensive lists in the Appendixes.

The E-Book Handbook will provide you with the knowledge and tools to successfully create, publish, market, and sell your own e-book. It includes tips and straightforward information from the author’s experiences as a best-selling e-book writer and publisher, in order to make the process as low-cost and efficient as possible.

The E-Book Handbook is a 112 page, illustrated PDF document that can help turn you into an e-book author and publisher.  This PDF e-book can be read on your computer and printed on your printer, or transferred and read on an iPad, Android, or other tablet, Kindle, Nook, or other e-reader.

Author: Douglas Klostermann
Format:
PDF – Instant Download
Page Count:
112 pages, illustrated
ISBN #:  978-1-4524-0474-5
Price: $9.99
secure payment with PayPal or Credit card (via PayPal)
(plus 6.25% sales tax for residents of Massachusetts)

or   Buy Now


Other versions of The E-Book Handbook are available:

The Kindle edition is available on Amazon.com
The Nook edition is available on BarnesandNoble.com
The iPad and iPhone version is available through iTunes or through the iBooks App


Doug Klostermann is a travel, culture, and humanitarian photographer and successful, best-selling e-book author and publisher.  He has sold over 4,000 e-book camera guides which are regularly at or near the top of the Kindle and Amazon bestseller lists for Photography Equipment and Reference.

Doug has photographed for numerous organizations in Latin America and the United States, been recognized by the United Nations Development Programme for his humanitarian photography, and been published in magazines and books including Conde Nast Traveler, Sherman’s Travel, South American Explorer, and Viva Travel Guides. Doug is a member of the National Press Photographers Association. View his images at www.dojoklo.com.  Learn more about e-books and photography equipment and techniques on his blog Picturing Change at http://blog.dojoklo.com/.

Full Manual Exposure Control, Video, Live View, and the D5100

I recently received some interesting questions from two different readers on my posts about the Nikon D5100, Nikon D5100 vs D7000 vs D90 etc. and Nikon D5100 vs. Canon T3i.  Both questions point out interesting issues with the Nikon D5100 that may be important considerations if your shooting needs required these functions, or that might not affect you and your shooting at all if, like me, you never use manual exposure control in video and/ or you don’t use Live View (and M mode) when shooting stills.

Here is the first question and my reply:

Question 1:

I wanted to ask about a major differentiator, if its true and useful for someone trying to learn a bit of manual photography. Below link and video talks about D90 and D5100 not having the ability to do manual control in video. Is it true? Does it really matter. Please advise.

(video is no longer available on YouTube)

I would also like some instructions on how to use manual control – when, why, how.

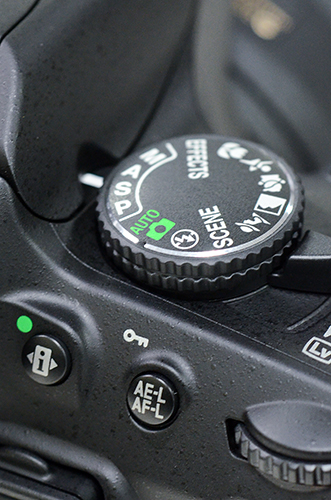
Nikon D5100 mode dial video manual exposure a s m aperture shutter
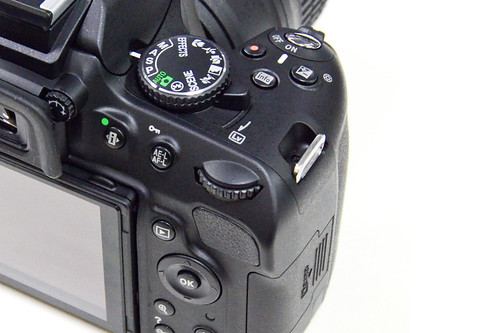
Mode dial of the Nikon D5100

My Answer:
Yes, the lack of full manual control in video mode is a very real deficiency of the of the Nikon D5100, especially for people who wish to seriously use it for video.  To answer your question “does it really matter?”, yes, it really matters if you wish to have straightforward, full manual control while shooting video.  I know that sounds like a smart-ass response to the question, but it is kind of like “if it isn’t an iPhone, it isn’t an iPhone,” blatantly stolen from “if you had invented Facebook, you would have invented Facebook.”

Wait a minute, I just realized that I was ahead of the curve and I wrote this similar smart-ass phrase before that movie even came out:
“If the 5D Mk II fits your expanding and demanding needs as a photographer, you would already pretty much know that you needed a 5D.”
See, look here, I said that earlier than August 26, 2010, and the movie came out Oct 1, 2010, and I didn’t even see it until a couple months ago!

Anyway, if you need full manual control in video, you know that you need full manual control in video based on your experience and needs, and then you need your camera to have full manual control in video.  Simple, right?  But…do you not know yet but wonder are you going to need it in the future if you grow and develop as a photographer/videographer?  That is the big unknown that no one can answer but one needs to figure out on an individual basis!

However, there is a “work-around” for this shortcoming of no full manual exposure control with the Nikon D5100.  To manually set your shutter speed, you must set the camera on Shutter-Priority Auto Mode (S) and set your desired shutter speed before going into Live View mode, use exposure compensation to obtain the aperture setting you want, and use the AE-L/AF-L Button to lock that exposure (set Custom Setting f2 for AE-Lock Hold).  If you wish to first set the aperture setting, you must set the camera on Aperture-Priority Auto Mode (A) and set your desired aperture before going into Live View mode, use exposure compensation to obtain the shutter speed setting you want, and use the AE-L/AF-L Button to lock that exposure (set Custom Setting f2 for AE-Lock Hold).

See this video I came across on YouTube for a demonstration:

As far as instruction in manual control (for still photography), see my Full Stop dSLR camera guide e-books, of course!  I don’t go into a lot of detail of full manual (M) because I don’t feel it is necessary for most beginner or intermediate photographers in most situations.  I don’t believe in M for the sake of old-school, full control, “look, I’m a skilled photographer/ martyr ‘cuz I use full manual.” It just adds an extra step (setting BOTH aperture and shutter speed rather than just one) to each photo that isn’t necessary.  Let the camera do it for you.  Pick your priority:  Aperture or Shutter Speed.  Are you concerned with depth of field (aperture) or with freezing or blurring action (shutter speed)?  Set your aperture in A (Av) mode or else set your shutter speed in S (Tv) mode, and let the camera take care of the other setting.

I know that many photographers like working in M mode, but if you are wondering if you need to use it: if you haven’t encountered a need for it, you don’t have a need for it. The aperture setting is typically my priority, hence I use Aperture Priority Mode.  Here is a detailed explanation of how I use Aperture Priority in the real world:  Deconstructing the Shot.

As my e-books say about possible situations for using M:

“There are times you may wish to use Manual Exposure Mode.  For example, if you are taking several photos to stitch together into a panorama, you want them all to be taken with the same exposure so that the lighting is consistent across the entire scene. Or if you are working in a studio setting and the lighting will remain consistent, you can set the exposure once and then not worry about it. Or in any other situation where the lighting or your desired exposure will remain consistent such as an indoor performance or sunny day portrait session where the lighting does not change.”

And I know that other situations also demand or benefit from M mode, including macro situations, but many of those situations fall under the “any other situation where the lighting or your desired exposure will remain consistent” category.  Readers, please defend M to me and tell me why you use it!

Question 2:

When I used the Nikon D5100 at a nearby camera store in Live View and Manual (M) mode, it never quite seemed to register ANY of the changes I made to shutter:  the image is supposed to go dark as the shutter speed increases right? (I was in a moderately lit room).  The weird part is that the actual image captured was dark (like it should be) but not the preview!  Is there some setting on the Nikon that is wrong on the piece I tested?  If the camera can’t display the changes it is making during Live View – leaving me to approximate the changes I’m making, then that is a deal breaker for me. I am wondering if this is a bug that was only on the piece that I saw at the showroom, or if you saw it too.

My Answer:

That is a really great question! These are the kinds of features one really has to dig into the camera, menus, or manual of a new dSLR model to determine if it is actually going to meet your needs.

It turns out that no, it is not possible to see actual exposure simulation with the Nikon D5100 in Live View while in Manual M shooting mode. However, in the P, A, or S shooting modes, the live view image will lighten or darken to simulate the exposure settings or the exp. compensation that you set. And to add insult to injury, there is no exposure meter displayed on the Live View screen, so to check your exposure you will need to temporarily leave Live View and switch to the control panel view by pressing the [i] Button.

The Canon 60D and Canon Rebel T3i both have Exposure Simulation in all modes during Live View. On the 60D you can turn this feature off and on. On the T3i it is on automatically while in Live View.

Conclusion:

Now, if you are thinking of buying a Nikon D5100 and after reading this you are suddenly concerned that it is lacking important features that you might need…be sure to first determine if you, indeed, really even need these features.  They shouldn’t be anything to worry about if you are never going to use them and never going to encounter these issues.  For example, I would never encounter the first issue, the lack of full manual control in video, because I don’t shoot video.  If you plan to use the camera to shoot production quality, professional video, this is pretty important.  If you plan to switch over to video and shoot a kid’s sporting event, it is unlikely you are going to shoot this in Manual and so it doesn’t matter.

Regarding the second issue, do you plan to use live mode AND manual shooting mode (M) AND need to preview your image exposure at the same time?  I rarely use M mode and I rarely use Live View and I rarely preview my exposure in Live View if I do use it, so for me and my photography, it will be “rare x rare raised to the rare power” (or (rare x rare) rare or is it merely rare x (rare) rare ?) that I need to use Live View AND M mode AND preview what my exposure will be.  If I needed to, I think I could get by with A mode instead, where the Exposure Simulation in Live View functions on the D5100.  But, if you are like the reader who had this question and you have a real need for this, say shooting cool macro shots of flowers and insects, then you will need to consider the Nikon D7000, Canon T3i, or Canon 60D instead.

New Firmware for the Canon 50D

Canon has just released new firmware for the Canon EOS 50D, a camera I still use and love.  Although it is uncommon for firmware to be updated for older cameras, I guess it becomes necessary when memory card technology evolves.

According to Canon, this update:

  1. Improves the writing/reading speeds when using UDMA 7-compatible CF cards.
  2. Fixes incorrect indications in the Simplified Chinese, Traditional Chinese, Arabic, Swedish, Spanish, Portuguese, Thai and Turkish menu screens.

You can find the new firmware here:

New “Deeper Frame” E-Book from David duChemin

As some of you may know, popular travel and culture photographer and blogger David duChemin suffered an accident in Italy a couple months ago, falling from a wall and shattering his ankles.  He spent about 40 days in a hospital, but has recently been released and continues to recover.

As he recovered, he worked on a new e-book, called A Deeper Frame, about achieving visual, physical depth in out photographs.  Here is the press release for this new book, now available from Craft and Vision:

New eBook Available: A Deeper Frame
David duChemin’s first eBook in over 6 months, A Deeper Frame, is an introduction to the discussion about re-introducing the illusion, or perception, of depth that is removed when the camera flattens the three-dimensional world into two. This insightful and inspirational eBook will help you understand principles that artists have understood for centuries, but that seldom get discussed in popular photography with more than a passing mention.

A Deeper Frame outlines seven ways that we can create more engaging images through the re-creation of a sense of depth in the flattened image to create photographs that feel immersive and invite a reader of that photograph to not merely look at the photograph but into or through the photograph.

A Deeper Frame is available now as a downloadable PDF for just $5USD.


Special Offer on PDFs
For the first five days only, if you use the promotional code DEEP4 when you checkout, you can have the PDF version of A Deeper Frame for only $4 OR use the code DEEP20 to get 20% off when you buy 5 or more PDF ebooks from the Craft & Vision collection. These codes expire at 11:59pm PST July 2, 2011.  Click here to go to the Craft and Vision website and make your purchase.

Most Well-Read City in America

Amazon has released a list of the most well-read cities in America, based on the data they have compiled from book, magazine, newspaper, and e-book sales.  And it only seems appropriate that my e-book empire is headquartered in the number one well-read city:  Cambridge, MA!  Here is a preview of the list:

  1. Cambridge, Mass.
  2. Alexandria, Va.
  3. Berkeley, Calif.
  4. Ann Arbor, Mich.
  5. Boulder, Colo.

Here is some of the other data and fun facts that they shared:

  • Not only do they like to read, but they like to know the facts: Cambridge, Mass.–home to the prestigious Harvard University and Massachusetts Institute of Technology–also topped the list of cities that ordered the most nonfiction books.
  • Boulder, Colo., lives up to its reputation as a healthy city by topping the list of cities that order the most books in the Cooking, Food & Wine category.
  • Alexandria, Va., residents must be reading a lot of bedtime stories – they topped the list of the city that orders the most children’s books.
  • Summer reading weather all year long? Florida was the state with the most cities in the Top 20, with Miami, Gainesville and Orlando making the list.


Filter Stacking

If you hang around photography forums for long enough, you will inevitably come across the debate of whether or not to use a UV filter at all times on each of your lenses. I even accidentally initiated this argument once when I offhandedly mentioned filters in a forum post.

Some people claim they degrade image quality and thus passionately detest them.  (However, why is it that when you look at their sample images, you often discover that image quality is the least of their photographic issues?).  Others, like myself, recommend them for protecting lenses and offering a surface that one can quickly clean without worrying about creating a scratch across an actual lens element.  You know what degrades image quality?  A scratch or crack across the front element of your lens!

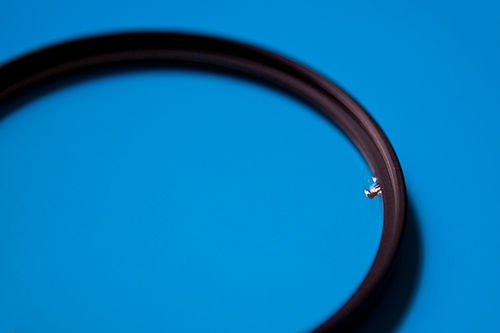
photo photography filter uv broken cracked
Oops.

My opinion is that one should always use a high quality, multi-coated UV filter at all times on each lens, for protection against scratches and impact dents and dings (plus a lens hood to assist with both flare and bumps of the front of your lens against hard objects). No one intends to drop or bang their lens, but it can happen – when traveling, working in a hurry, falling from a not-fully-zipped bag, or an accidental loss of grip at anytime. When I worked in a camera store, people came in weekly with busted filters from dropped lenses, but the lenses themselves were nearly always fine. And in fact, it recently happened to me. As I was picking up my camera with a big heavy lens, the strap got caught on a low table corner and the camera was yanked from my hand. It crashed to the floor with a thud. I quickly inspected it and found the filter glass had broken but the ring was not dented (it was a pretty high quality filter). The filter apparently took the brunt of the impact and thus saved the front of the lens from damage, denting, and glass breakage. It stinks to have to replace an expensive filter, but that is cheaper and quicker than having a lens repaired or replaced.

The higher-quality the lens, the better the filter should be.  A $50-60 coated or multi-coated filter may be sufficient for $300-$400 lens, but the highest quality B+W MRC filter should be used on a professional quality lens, like a Canon L lens.  Some lenses, such as the Canon 16-35 f/2.8L II, even require a filter to complete their weather-proofing.

Anyway, I bring this up because there is a funny article about UV filters, cheap filters, good filters, stacking 50 filters, and the benefits of using high quality UV filters – here at lensrentals.com

Find a high quality B+W UV filter for your lens here.

Caught in a Scott Kelby Sandwich

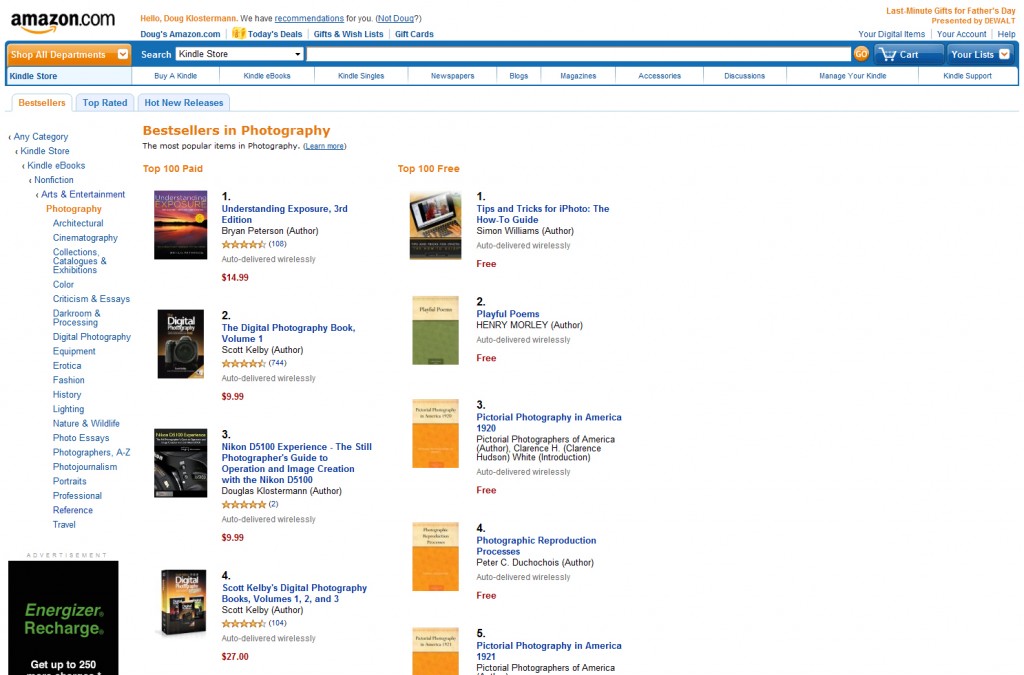
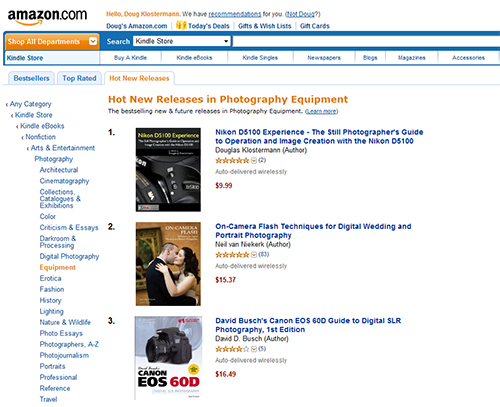
I was checking on the sales of my e-books on Amazon, and discovered my latest book, Nikon D5100 Experience, is caught in a Scott Kelby sandwich in the list of Photography Bestsellers in the Amazon Kindle Store.  Yes, his Digital Photography Book v.1 is at number 2 and his Digital Photography Book box set is at number 4.  And between them, in the number 3 spot, my Nikon D5100 Experience.  (Both of us being behind Bryan Peterson’s Understanding Exposure which never budges from number 1.)

Have a look at all my e-books, including dSLR camera guides for the Nikon D5100, Nikon D7000, Canon 60D and Canon T3i (600D) on my Full Stop e-book website here.


New Craft and Vision E-Book about Selling Micro Stock Photos

This just in from Craft and Vision and Nicole S. Young:

New eBook Available:
(micro)STOCK: From Passion to Paycheck by Nicole S. Young is a jam-packed guide to producing, managing, and marketing your photographs for digital distribution on the micro-stock market.

There is a lot more to stock photography than uploading a bunch of pictures and hoping for the best. Nicole shares her industry experience and knowledge to help you better navigate the rules, procedures, and best practices to creating quality, useful imagery for the micro-stock market. She explains how to build and deliver on a successful portfolio concept, takes the mystery out of the different types of stock, like rights-managed (RM) and royalty-free (RF), and shares the ins/outs of licensing and releases.

And it doesn’t stop there! She interviews four successful stock photographers and illustrates how others are making the big bucks online. If you’re looking to grow your revenue through digital sales then building a successful micro-stock business is a great way to do it!

Nicole S. Young is a full-time photographer and author specializing in commercial stock photography. She’s is an accredited Adobe Certified Expert (ACE) in Photoshop CS5 and is a Help Desk Specialist with the National Association of Photoshop Professionals. She is also the author of two print books Canon 7D: From Snapshots to Great Shots and Canon 60D: From Snapshots to Great Shots.


(micro)STOCK: From Passion to Paycheck is available now as a downloadable PDF for just $5USD here.


Special Offer on PDFs
For the first five days only, if you use the promotional code MICRO4 when you checkout, you can have the PDF version of (micro)STOCK for only $4 OR use the code MICRO20 to get 20% off when you buy 5 or more PDF ebooks from the Craft & Vision collection. These codes expire at 11:59pm PST June 11, 2011.

Ten Tips and Tricks for the Nikon D7000

In addition to delivering great image quality, exceptional low light/high ISO performance, and rugged construction, the Nikon D7000 is an extremely sophisticated camera that can be highly customized to work exactly how you want or need it to.  Its autofocus system and metering system can be set up and tweaked according to your preferences, its buttons and dials can be assigned and customized for your most-used functions, its frame rates can be adjusted, its white balance fine-tuned, and much more.  I’ve spent a lot of time with the Nikon D7000 as I researched and wrote my e-book user’s guide to the D7000 called Nikon D7000 Experience, and here are the some of the top “tips and tricks” I’ve discovered for setting up and using this powerful dSLR (in no particular order):

(Looking for additional tips for the Nikon D7100? New post here.)

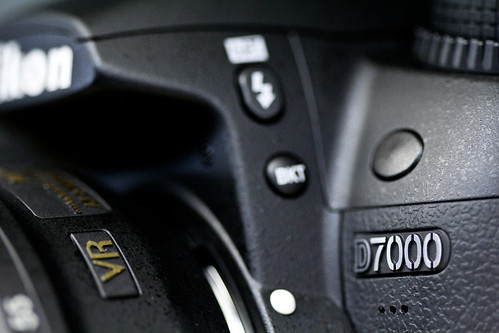
Nikon D7000 tips tricks book guide download how to learn
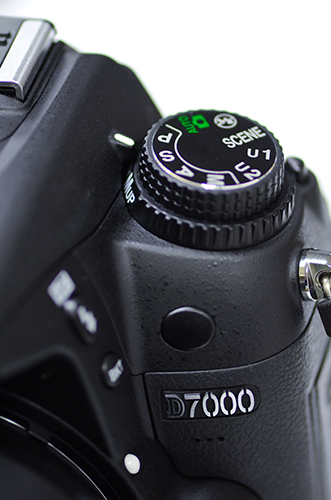
Detail of the Nikon D7000 – photo by author

1. Take Control of your Autofocus System: In order to always ensure that the camera autofocuses where and how you want, you need to take control of your AF system.  Use AF-S Autofocus Mode and Single Point AF Autofocus Area Mode for still subjects, and use AF-C Autofocus Mode and Dynamic Area AF or 3D-Tracking Autofocus Area Mode for tracking moving subjects.  Select your desired AF point so that the camera focuses on, or begins to track, your intended subject.  Press the AF Mode Button and then turn the Command and Sub-Command Dials to change the Autofocus Mode and Autofocus Area Mode as you view the settings on the top LCD screen.  There is so much more you can do with the AF system, including selecting the number of active AF points and determining exactly how it tracks moving subjects.  I wrote an entire previous post that goes into more detail about the settings and capabilities of the D7000 autofocus system.

2. Set up your Dual SD Memory Card Slots: The two memory card slots of the D7000 can function in a couple different ways, including using one for RAW and the other for JPEG files, saving all your images to both cards simultaneously, using the second card as overflow when the first one fills up, or saving stills to one and movies to the other.  You can set this up in the Shooting Menu under “Role played by card in slot 2.” To set how the cards function for saving videos, use the Shooting Menu > Movie Settings > Destination.

3. Set or Create a Picture Control for your JPEG Images and Movies: If you are shooting in RAW (NEF) or JPEG and will be post-processing your images in Photoshop, Lightroom, or using the Nikon software, then you don’t need to worry about Picture Controls.  If that is the case, set the Picture Control for Standard or Neutral and that way the images that you view on the camera’s rear LCD screen will be close to how they will appear in the actual RAW image file.  However if you are not post-processing, you will want the images to come out of the camera looking as you want them to, so you will need to set, customize, or create a Picture Control that best creates your desired look.  Adjust the contrast, saturation, brightness, and sharpening to achieve the look you are after.  Save the Picture Controls you have created to access them later.  You can even create your own styles using the included software, or find them online and download them.  There are styles to be found online that recreate the look of various roll films including Kodachrome and Velvia.

4. Verify that you Haven’t Over-Exposed Your Highlights: View your histogram along with your image during image review or image playback to confirm that you haven’t over- or under-exposed your image.  To see the Overview image-view that shows the histogram, press up or down on the Multi-controller during image playback to flip through the different available views.  The histogram will show you if your highlights or shadows have run off the graph, indicating that those areas of the image contain no detail in the highlights or shadows other than pure white or pure black.  In the RGB Histogram and Highlights view, the over-exposed highlights will also blink in the tiny image, indicating that those areas of the image have been “blown-out” and that there is no detail other than pure white in those parts of the image.  If you have over- or under-exposed your image, then…

5. Make use of Exposure Compensation: Explore the various options in Custom Setting b3 to customize exactly how exposure compensation works.  Set it so that you press the Exposure Compensation Button first before turning a dial to change EC, or have it set so that you can just turn a dial to quickly and directly change EC.  You can even select which dial you use with Custom Setting f6.  And you can set it so that the EC amount that you dialed in stays set for the subsequent shots, or that it is automatically reset to zero, depending on which controls you use to set EC.  This last option is the most sophisticated and most flexible, and may be the best one to learn and use.  Using this option, On (Auto reset), you can choose to turn a dial to directly adjust EC, but your EC setting will be reset when the camera or exposure meter turns off .  This is because you can still continue to use the Exposure Compensation Button with a Command Dial to set EC, but by setting it this way, EC will not be reset when the camera or meter turns off.  EC will only be automatically reset if you set it directly using the dial without the button.  So if you wish to use EC for just one shot, you can adjust EC with just the dial.  But if you wish to take a series of shots with the same adjusted EC, you can use the button/ dial combination to set it more “permanently.”  Pretty powerful stuff!  This is why you got the D7000, right?  So that you can take advantage of these sophisticated controls!

Brief Commercial Interruption: Are you already getting a little confused?  Want to learn more about these and other features of the D7000?   I recently completed an e-book user’s guide for the Nikon D7000 called Nikon D7000 Experience that explains all of this and much more.  The guide covers all the Menus, Custom Settings, functions and controls of the Nikon D7000, focusing modes, exposure modes, shooting modes, white balance, etc., PLUS when and why you may want to use them when shooting.  As one reader has said, “This book, together with the manual, is all you need to start discovering all the camera’s potential.” It will help you to take control of your camera and the images you create!  Learn more about the features and settings discussed in the ” tips and tricks” here and much more.  To read more about the book, preview it, and purchase it, see my Full Stop bookstore website here!
Nikon D7000 tips tricks book download manual
Nikon D7000 Experience by Douglas Klostermann

6. Fine-Tune the Exposure Metering Modes: Using Custom Setting b5, you can fine-tune the exposure for each of the different Exposure Metering Modes (Matrix, Center-Weighted Average, Spot), all independently.  For example, if you find that Center-Weighted metering is slightly under-exposing all the time, fine-tune it for +1/3 or +2/3 using Custom Setting b5.  This tweaks the exposure behind the scenes, independent of exposure compensation.  You can still continue to use EC as always, on top of this fine-tuning.

7. Lock Exposure and Focus Independently: Sometimes you need to lock the focus distance before recomposing, or lock the metered exposure setting for one shot or for several shots in a row.  Or sometimes you need to lock both focus and exposure for the same shot, perhaps independently of each other.  By default, the Shutter Button locks focus when you half-press it and exposure is determined when you fully press the Shutter Button to take the shot.  You can use Custom Setting c1 to have the Shutter Button half-press also lock exposure, or better yet use Custom Setting f3 to use the Fn Button for locking exposure.  You can even set it so that you either press and hold the Fn Button or just press it and release.  Then you can use Custom Setting f5 to set the AE-L/AF-L Button for locking focus.  This is known as back-button focusing and that way you can lock these settings independently.  Learning to use back-button focus and even exposure lock can be awkward at first, and you may not fully understand why it is necessary.  But I highly recommend starting to experiment with them, then hopefully getting in the habit of using them all the time – especially if you shoot a lot of action scenes or situations where you are rapidly taking lots of photos (perhaps a wedding and reception), or if you are recomposing your framing between when you focus and when you take the shot.  You may soon find them both indispensable and wonder how you once managed without them!

Nikon D7000 tips tricks how to instruction book download user guide learn
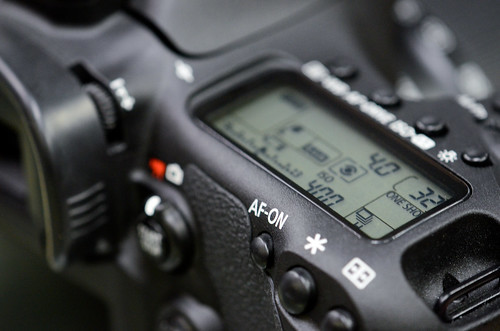
Detail of the Nikon D7000 – photo by author

8. Reverse the Values of the Exposure Indicators: In the viewfinder and on the top LCD screen of the Nikon D7000, the exposure indicator shows the negative values on the right and the positive values on the left.  Perhaps you find this as counter-intuitive as I do.  Ever since grade school, negative values have always been to the left!  Plus with the histogram, the brighter values are shown on the right of the graph, and thus to make use of exposure compensation you would dial to the negative side to correct for over-exposed values, thus moving your histogram to the left.  So why do you have to move the value to the right on the exposure indicator?  It can obviously cause great confusion!  Use Custom Setting f9 to reverse the indicators to the more logical orientation.

9. Put Your Most Used Settings in My Menu: Instead of digging into the menus and Custom Settings all the time to find your most used settings, you can create your own custom menu called My Menu, which is then quickly and easily accessed with the Menu Button.  You can even decide what order to list the items in.  Set up My Menu by selecting Choose Tab in the Recent Settings menu, and select My Menu.  Then Add Items and Rank Items in the order you desire.  You can add items from most all of the Menus and Custom Settings Menus.  Determine what settings you are digging into the menus to look for and change most often, and put them in My Menu, such as maybe Format and White Balance (for more WB options and fine-tuning).  I recommend you include Format since you should re-format your memory card each time you are ready to clear off that card, and not just Erase All.  However, put Format lower down in My Menu so that you don’t have a tragic memory card accident.

10. Make Use of the Other Exposure Modes: While Matrix Metering will do an excellent job of determining the proper exposure of an image the majority of the time, there are some situations where you may wish to use the other exposure modes – Center-Weighted Metering and Spot Metering.  This includes dramatically backlit situations, subjects with a dramatically dark background, scenes that contain a wide range of highlights and shadow areas, or other dramatic lighting situations.  It is best to turn to one of these other modes to ensure you properly meter for the subject and don’t blow the shot.  If the background is not dramatically lighter or darker than the subject, but you still want to ensure that the camera’s metering system concentrates on the subject and not the entire scene, use Center-Weighted.  This is a situation where you may wish to lock in the exposure and recompose if your subject is not going to be in the center in the final framing.  You can even use Custom Setting b4 to change the size of the area being metered with Center-Weighted metering.  If the background is very dark or light and you want the camera to ignore it and just meter on a certain critical area of the scene, use Spot metering.  Again, meter for that critical area, lock the exposure, and recompose.

10a. Quickly Use Spot Metering to Determine a Critical Exposure:  You can use Custom Setting f4 to assign the Depth-of-Field Preview Button to Spot Metering so that you can quickly meter for a precise area without having to take your eye from the viewfinder and change the Metering Mode.  Versatile Custom Settings such as this are a big part of what makes the D7000 such a powerful, customizable camera, and this demonstrates why it is worthwhile to completely understand and take advantage of these advances capabilities.

There are many more great features and settings of the Nikon D7000 to take advantage of.  You have a powerful camera in your hands, so why not learn to take advantage of its advanced features?!  Have a look at my e-book guide Nikon D7000 Experience to learn more about the settings, features, and controls mentioned here, and so much more.  Learn to take control of your camera and the images you create!

Also, please know that there aren’t really any tips or tricks for better photography.  To improve your photography, simply learn your camera inside and out and learn the techniques of dSLR photography (with my e-book!) and then practice, practice, practice taking images, study the results, and look at and learn from the work of talented photographers.

Have a look at that post I mentioned earlier about the autofocus system of the D7000, and another post I’ve written which discusses the Menus and Custom Settings of the D7000.  Some of the same items are addressed, but there is also much additional information to be found in the older posts.

Was this post helpful?  Please let others know about it by clicking the Facebook or Twitter sharing buttons below, linking to it from your blog or website, or mentioning it on a forum.  Thanks!  Want to help support this blog with no cost or effort?  Simply click on the Amazon and B&H Photo logos on the left side of this page to go to those sites and make your purchases.  They will then give me a little referral bonus!

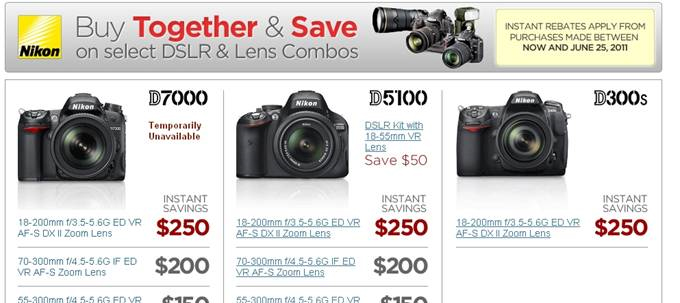
Nikon Instant Savings on Cameras and Lenses

Buy a Nikon dSLR including the D5100, D7000 or D3100, with one of the selected lenses, and save up to $250 on the purchase!  Here is a page on Amazon with the complete instructions.  It involves putting both items in your cart – camera and lens – and then using the proper coupon code:

Instant Savings Amount by Lens
$250 off Nikon 18-200mm f/3.5-5.6G AF-S ED VR II Nikkor Telephoto Zoom Lens. Enter code 33YES67Y at checkout.
$200 off Nikon 70-300mm f/4.5-5.6G ED IF AF-S VR Nikkor Zoom Lens. Enter code JSZW7NC9 at checkout.
$100 off Nikon 85mm f/3.5G AF-S DX ED VR Micro Nikkor Lens. Enter code TG5D8MXL at checkout.
$100 off Nikon 55-300mm f/4.5-5.6G ED VR AF-S DX Nikkor Zoom Lens. Enter code V8DLU4TK at checkout.
$100 off Nikon 55-200mm f/4-5.6G ED IF AF-S DX VR Nikkor Zoom Lens. Enter code ESZBSIIK at checkout.
$100 off Nikon 55-200mm f4-5.6G ED AF-S DX Nikkor Zoom Lens. Enter code ZRB9VW8Y at checkout.

Head over to Amazon by clicking here, and save!


The instant rebate is also going on with other retailers such as B&H.  B&H has an informative page with visually spells it all out nicely (click the link or the image):

Nikon dslr camera sale savings rebate b and h B&H


Exposure Lock, Focus Lock, and Back-Button Focusing

When I got my first dSLR camera, I went through the manual and tried to absorb how and why to use all the buttons, controls, and menu items.  I was about to head off to Peru for three months and I wanted to make sure I was going to be able to use it properly and get the most out of it right from the start.

For some reason it seemed odd to me that when you pressed the shutter button half-way both the focus AND the exposure were locked in.  I had never used an auto-focus SLR before (I went from a Canon AE-1 to a digital point and shoot and missed the whole EOS film SLR era) and always thought of focusing and setting the exposure as two separate acts.  Based on my experience with a digital point and shoot, I knew I often focused on the subject with the static middle square (this was several years ago, before face detection and moving auto-focus areas) and then recomposed to take the final shot.  With a dSLR, I thought to myself, wouldn’t the exposure change between the framing where I locked in the focus and exposure, and the final framing?  Even if using the other focus points of the dSLR and not just the center focus point, I found that my subjects rarely sat right under a focus point and I was often recomposing in order to get the composition I wanted.

I asked a few dSLR users about this, and they looked at me as if I had a Rocket Blower growing out of my head.  They didn’t seen to encounter or consider this problem.  So I dug into the manual and the very helpful David Busch digital SLR guide and discovered I could overcome this issue with exposure lock.  Indeed, this was a real issue that was addressed by dSLR controls, and I wasn’t out of my mind!

Canon 7D 60D T3i exposure lock focus lock back button focus Nikon D5100 D7000 AE-L AF-L
The Exposure Lock (*) Button and AF-ON Button of the Canon 7D

There are typically a few different ways to separate exposure lock and focus lock with current dSLR camera.  As described above, you can use the exposure lock button to first lock exposure, and then deal with focusing.  With a Canon this is done by pressing the button marked “*”.  With a Nikon, you can set the AE-L/AF-L button for auto exposure lock (hence AE-L).  But since Nikons by default don’t typically lock exposure with a half-press of the shutter button, you really don’t have to worry about it for the same reasons that you do with a Canon (such as when you are recomposing a shot, since the Nikon only locks focus and not exposure with a shutter button half-press, and then determines exposure when the shot is taken, exposure should be correct).

For a Canon you can also set it so that the half-press of the shutter button will lock exposure but not focus, and then use the AF-ON button to lock focus (the T3i does not have this button, thus it is done differently).  This is one method of what is called back-button focusing.  This can also be done with a Nikon using the AE-L/AF-L button for auto focus lock (hence AF-L).  You typically have to dig into the custom function settings on any of the cameras to change these settings and button functions.  The terminology can be confusing, so you may want to have a look at any of my e-book user’s guides which all discuss how to accomplish exposure lock and focus lock with the specific cameras.  So far I have guides for the Canon 60D and Rebel T3i, and Nikon D5100 and D7000.  You can learn more about them all here on my Full Stop e-book website.

For example with the Canon 60D, I explain how you can go into the menus and set the Shutter Button to Metering+AF Start and the AF-ON Button to AF Stop.  This setup will allow you to use the camera as you always have, in the default manner of the Shutter Button locking focus and exposure when pressed halfway.  The “*” button functions as before, locking exposure at any time when pressed.  But this also gives you the option of locking focus independent of exposure metering.  It is the best of both worlds.

Learning to use back-button focus and even exposure lock can be awkward at first, and you may not fully understand why it is necessary.  But I highly recommend starting to experiment with it, then hopefully getting in the habit of using it all the time – especially if you shoot a lot of action scenes or situations where you are rapidly taking lots of photos (perhaps a wedding and reception).  You may soon find it indispensable and wonder how you once managed without it!

Canon has an article about back-button focusing which explains all the various options here:

http://www.usa.canon.com/dlc/controller?act=GetArticleAct&articleID=2286

It is not specific to any camera, so you may have to determine how to implement it on your camera.

Best-Selling, Most Popular Guide to the Nikon D5100 Currently Available

My e-book user’s guide for the Nikon D5100, called Nikon D5100 Experience, is the best-selling, most popular guide to the camera currently available!  How did I learn this?  Because it is the only guide to the D5100 currently available!

Nikon D5100 book manual download how to instruction tutorial

Through the flexibility of independent e-publishing, Nikon D5100 Experience is available months before any of the other guides for this dSLR are available.  OK, so maybe one of the other ones is selling more in pre-orders – I have no way of knowing that.  But for all the guides currently available…mine is on top!  And is in the top spot for Kindle Hot New Releases in the Photo Equipment AND Photo Reference categories.  And I’m quite proud of it.

Even if it wasn’t the only one currently available, I still think it is the most helpful guide out there, explaining not only the features, controls, and functions of the camera, but more importantly when and why to use them in your photography.

You can learn a lot more about the guide on my Full Stop bookstore website here:
http://www.dojoklo.com/Full_Stop/Nikon_D5100_Experience.htm

Want to become an affiliate and earn 25% commission for selling the PDF version of this e-book?  See here for complete details on how to sign up as an affiliate and make money referring sales of Full Stop e-books on your blog or website!


Taking Advantage of the Nikon D5100 Autofocus System

Learn How to Use the Nikon D5100 Autofocus System

The autofocus system of the Nikon D5100 may not be quite as complicated as the 39 point AF system of the Nikon D7000, but it does offer many of the same capabilities and options, and can be a little confusing to figure out.  The autofocus system includes not only the three Focus Modes used in various combinations with four Autofocus Area Modes, but also includes a few Custom Settings as well as the optional AF-L or Autofocus Lock Button.

Nikon D5100 autofocus system AF focus mode autofocus area mode
Image by author – copyright 2011 – please do not use without permission!

You will first want to set up the autofocus Custom Settings so that the AF system functions how you desire.

a1: AF-C priority selection – This setting determines if attaining focus is top priority when you are in Continuous-servo AF mode (AF-C autofocus mode), or if you just want the shots to be taken even if exact focus is not attained for each shot.  If exact focus is your priority, set on Focus.  If getting the shots at all costs is the priority, set for Release.

a2: Built-in AF-assist illuminator – This is used to enable or disable the autofocus assist light, to assist you in autofocusing in low light.  Note that the AF-assist lamp only works in AF-S mode or when the camera is in AF-A and choosing single-servo (not always under your control), and when in Auto-area AF area mode or only with the center AF point in other AF area modes.

a3: Rangefinder – This setting is used to help obtain focus when you have turned off autofocus and are using Manual Focus mode (MF) and manually focusing.  (Be sure to also set the autofocus switch on your lens to M)  The exposure indicator in the viewfinder is used to indicate if the subject is correctly in focus.

f2: Assign AE-L/AF-L button – This is to assign the function of the AE-L/AF-L Button., which gives you the option to use this button to lock focus or to initiate focus, and this separate those functions from the Shutter Button.

This should get you started, and I go into more detail about each of these Custom Settings, as well as all the other D5100 Custom Settings in my e-book guide Nikon D5100 Experience.

Using Autofocus
The information below is also excerpted from my e-book user’s guide Nikon D5100 Experience, so I hope you have a look at the guide in order to learn more about the AF system as well as all the other functions and controls of the D5100.

One of the essential steps in taking a successful photo is controlling where the camera focuses.  If you allow the camera to autofocus by choosing its own Focus Point(s), it typically focuses on the closest object or human subject.  This may or may not be what you want to focus on.  So you should choose where the camera focuses using the autofocus Focus Points and selecting a specific AF point.  This does not mean you have to manually focus the camera, it means you tell the camera exactly where to autofocus.  But you also need to select the desired Focus Mode and Autofocus Area Mode, based on your subject and its type of movement (or lack of movement).

Focus Modes

The D5100 has three different Focus Modes to choose from, typically depending if your subject is still or moving.  It also has four different Autofocus Area Modes (see below) to specify how many of the AF points are active and how they track a moving object.  You can set these two functions in various combinations.  First the Focus Modes.

Single-Servo AF (AF-S)
Use this mode when your subject is stationary, or still and not going to move, or if your subject is not going to move very much, or if the distance between you and the subject is not going to change between the time you lock focus, recompose, and take the shot.  Lock focus on the subject and recompose if necessary.  When using AF-S, you can select from two Autofocus Area Modes, either Single-Point AF where you select the AF point, or Auto-Area AF, where the camera selects the AF point(s) for you.  I suggest you nearly always select your own desired AF point so that the camera focuses exactly where you want it to.

Continuous-Servo AF (AF-C)
Use this mode when your subject is moving.  If the subject is moving towards you or away from you, the camera will keep evaluating the focus distance, as long as the Shutter-Release Button is kept half-pressed.  You will need to use this in conjunction with the Autofocus Area Modes to determine if and how the camera tracks the subject laterally to the surrounding AF points, or if it will only track the subject if it remains at the initially selected AF point.  Single-Point AF will only track the subject’s distance as it moves near or far if it remains under the selected point.  It will not track lateral movement if the subject leaves the selected AF point.  If the subject is going to be moving somewhat unpredictably and may leave your selected AF point before you can react, use the Dynamic-Area AF mode so that the surrounding AF points are used to maintain focus while you realign your selected AF point with the subject.  If the subject is going to be moving across your field of view, set the AF-Area Mode to the 3D-Tracking mode so that the camera tracks it in any direction as it moves to the other AF points.

Focus on the moving subject with the selected AF point when using Dynamic Area Mode or 3D-Tracking Mode, or let the camera select the AF point in Auto-Area AF Mode, and then as long as the Shutter-Release Button remains half-pressed the camera will track the subject to the other focus points if it moves to them and as it moves closer or farther in distance.

Auto-Servo AF (AF-A)
This mode is a hybrid of the two other focus modes.  It starts in Single-Servo AF (AF-S) mode then changes to Continuous-Servo AF (AF-C) mode if your subject starts moving.  Why shouldn’t you use this all the time, then?  Well, if you are focusing and then recomposing, as you may often be doing, your movement of the camera may fool it into thinking that the subject is moving and your resulting focus may not be where you want it to be, or may not be as accurate as it might be if you are using Single-Servo AF.

Manual Focus
Sometimes you may be taking several photos of the same subject from the same distance, or for some other reason want to keep the same focus distance and not have to keep re-focusing and re-composing.  Or you may be taking multiple photos for a panorama.  In these situations, turn off the auto-focus with the autofocus switch on the lens itself (set to M) and change your camera’s Focus Mode to MF (Manual Focus).  Just remember to switch them back when you are finished.  You may also wish to do this if you want to precisely manually focus with the focus ring on your lens.  (Note that for lenses with “full time manual focus” you don’t need to switch to M in order to manually override when slightly tweaking the autofocus with the lens focus ring.  These lenses will have M/A and M on the lens focus mode switch instead of A and M.)  Use the Rangefinder feature of the D5100 to assist with manual focus – Custom Setting a3.

Autofocus Area Modes

The Autofocus Area Modes are used to set if just a single AF point is active or else how many AF points surrounding your selected AF point will be used to track a moving subject if you are using AF-C or AF-A Focus Modes.

Nikon d5100 autofocus af auto focus system lock point area mode
Selecting an AF Point using Single-Point AF and locking focus

Single-Point AF
Only one AF point will be active, and surrounding AF points will not become active to track a subject that moves away from the one selected point.  This is typically used along with Single-Servo AF (AF-S) to focus on a stationary or still subject, or in a situation where you will be reframing the shot after you lock focus at a specific distance.  It can also be used with accuracy with AF-S mode for moving subjects if you take the photo quickly or if you recompose and take the shot quickly after locking in focus, especially if the camera-to-subject distance does not change at all or very much in that period between locking focus and taking the photo.  Use the Multi Selector to choose your active AF point as you look through the viewfinder and use the OK Button to quickly select the center AF point.  If you choose Single-Point AF with Continuous-Servo AF (AF-C) or Auto-Servo AF (AF-A) for tracking moving subjects, it will only track the subject as long as it is positioned at the selected AF point, and it will not be tracked laterally to the other, surrounding points.  As noted above, the single AF point you select will track a subject if it moves closer or farther away, but the AF system will not track the subject if it moves left, right, up, or down and away from your selected AF point.  To do this, you use Dynamic-Area AF mode or 3D-Tracking mode.

Dynamic-Area AF
With the Dynamic-Area AF Mode, you select an AF point to tell the camera where to autofocus, and if your subject briefly moves away from that point to a neighboring point or if you lose the subject from your AF point while panning, the camera will use the surrounding AF points to help maintain focus on it.  Select Dynamic-Area AF when you are photographing moving or potentially moving subjects using Continuous-Servo AF (AF-C) or Auto-Servo AF (AF-A).  These modes are ideal for a subject moving closer or further from the camera but which may also move laterally away from the selected AF point faster than you can react in order to keep it located at that point, or for when you are panning and following the subject and attempting to keep it located at the selected AF point, but may have a little or a lot of difficulty doing so.  Remember that you need to keep the Shutter Button half-pressed in order for the continuous focusing at the initial point or the surrounding points to occur.  Note that the camera may pick up and start tracking a new subject that falls under the selected AF point if you lose your initial subject.

The Dynamic-Area AF Mode is not used to track and maintain focus on a subject that is moving across the various AF points in the frame, but rather is used to stay focused on a moving subject that you attempt to keep located at your selected AF Point.  To track a subject that is moving across the frame, intentionally passing from one AF point to the next, use 3D-Tracking.

3D-Tracking
This mode is used for subjects moving across the frame in any direction, or subjects moving erratically from side-to-side in the frame, and they are tracked by areas of color.  This is used when you don’t wish to necessarily pan or follow the subject to keep it located in the same part of the frame, but rather when you wish to keep the camera relatively still as the subject moves across the frame.  You may select this option when you are tracking and photographing moving subjects using Continuous-Servo AF (AF-C) or Auto-Servo AF (AF-A).  Again, you choose the initial AF point to locate the subject and begin the tracking.  If the area of color you wish to track is too small or if it blends into the background, this mode might not be very effective.

Auto-Area AF
The camera uses all 11 AF points to detect what it thinks is the subject and automatically choose the appropriate AF point(s).  Typically, the camera will select the nearest subject or a human in the frame, so it may not focus on exactly what you wish to focus on.  That is why it is best to use one of the other modes and select the AF point yourself.  However in certain situations such as quick sports or action scenes you may have to make use of this.

Locking Focus

The next step is to learn to lock focus independent of locking exposure, typically through the use of the AE-L/AF-L Button as noted in the f2 Custom Setting above.  But for that, and numerous other important functions of the D5100, you are going to have to have a look at my e-book, Nikon D5100 Experience!
Nikon D5100 book user guide manual download ebook

I’ve put together a video introduction to the D5100 autofocus system to compliment this article:

To learn about another important reason why you need to take control of your autofocus system, see the related post:

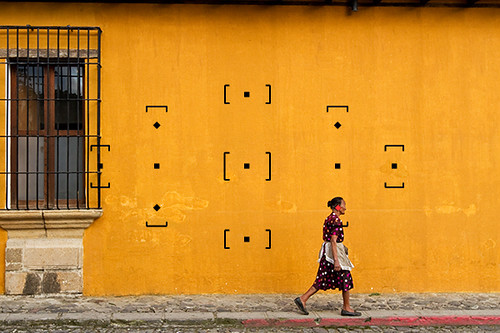
Don’t Let the Locations of the AF Points Dictate Your Composition

What do you do when, with your desired framing, your subject is not located exactly under or near an AF point? Even with all the AF points of an advanced Nikon D5100 or D7000, this will often be an issue.  Have a look at the above post to learn why this is an issue and how to resolve it.

Was this post helpful?  Please let others know about it by clicking the Facebook or Twitter sharing buttons below, linking to it from your blog or website, or mentioning it on a forum.  Thanks! 

Want to help support this blog with no cost or effort?  Simply click on the Amazon, B&H Photo, or Adorama logos on the left side of this page to go to those sites and make your purchases.  They will then give me a little referral bonus!

Taking Advantage of the Nikon D810/ D610 / D7100 / D5300 Autofocus System

This was originally written for the Nikon D7000, but as the Nikon D7100, the Nikon D7000, the Nikon D610 / D600, the Nikon D810 / D800, and the Nikon D5200 / D5300 all share a similar Autofocus system, most of this information will apply to all of them.  And even though some of the models have 51 AF Points instead of the 39 AF Points of the other cameras, all the same settings and actions apply.

The Nikon D7100, the Nikon D7000, the Nikon D610 / D600, the Nikon D810 / D800, and the Nikon D5200 / D5200 dSLRs all share very similar, and quite sophisticated autofocus systems – especially if you are coming from a D90, D5100, or earlier camera.  With their 39 AF points or 51 AF points that can be used independently or together in a variety of ways, its Autofocus Custom Settings that affect many of the functions of the AF system, and the three different Autofocus Modes that are used in various combinations with the four different Autofocus AF-Area Modes, it is no wonder that users are having difficulty figuring it all out. (Plus the D810 offers an additional Group Area AF Area Mode!)
Nikon D600 D7000 autofocus af system 39 point auto focus control learn use how to dummie book guide manual
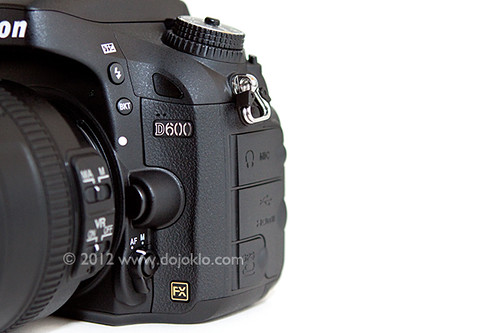
Some of the Autofocus controls of the Nikon D600, located near the base of the lens (to the left of the FX badge and below the Lens Release Button).

First, the Autofocus Controls on the D810/ D800, D610/ D600, D7100, and D7000 are a bit different than previous cameras.  You can change the Autofocus Mode and AF Area Mode by pressing the AF Mode Button (located inside the Focus Mode Selector switch) and then use the Command Dials to adjust the settings as you view them on the top LCD Control Panel or in the Viewfinder.

Focus Mode Selector – This switch is used to turn on or off autofocus. Set to AF for autofocus and M for manual focus. Be sure to set the similar switch on the lens as well. If your camera does not seem to be autofocusing, be sure to check this switch and the one on your lens.

AF Mode Button – This button, located inside the Focus Mode Selector switch, may be confusing at first to those who have not previously seen or used it on the Nikon D7000 or D600, though you should quickly find that it is a convenient design. It is used to select the Focus Mode as well as the autofocus AF-Area Mode. Press this button and turn the rear Main Command Dial to select the Focus Mode, such as AF-A or AF-C, while viewing the setting on the top Control Panel or in the Viewfinder. Press this button and turn the front Sub-Command Dial to set the AF-Area Mode, such as Single-Point AF or 39-Point Dynamic-Area AF. Again, you can view the selected setting on the top Control Panel or in the Viewfinder. The autofocus system including the Focus Modes and AF-Area Modes will be explained below.

Next you will need to set up some of the autofocus Custom Settings to begin to customize how the AF system functions for your needs (Some of these options may not be available with the D5200):

AF-C priority selection – This setting determines if attaining focus is top priority when you are in Continuous-servo AF (Auto-Focus) Mode (AF-C), or if you just want the shots to be taken even if exact focus is not attained for each shot.  If exact focus is your priority, set on Focus.  If getting the shots at all costs is the priority, set for Release.

AF-S priority selection – This is similar to above, except that this setting is for when you are working in Single-servo AF Mode (AF-S), typically used when your subject is not moving.  Since AF-S is typically used with subjects that are not moving, it makes more sense to make sure focus is attained, thus you should typically select Focus for this setting.

Focus tracking with lock-on – This setting determines how the autofocus system reacts to sudden, dramatic changes in the distance of the subject when you are working in AF-C or AF-A modes.  Decide if you wish to have the camera quickly refocus on a new or closer subject (1-Short), wait awhile until it ideally picks up the intended subject again (5-Long), somewhere in between, or immediately refocus on a new subject at a large distance from the initial subject (Off).  Keep this option in mind with the various AF-C and AF Area Mode configurations, as it may change depending on your subject and situation.  Sometimes you don’t want the camera to quickly refocus on a closer or more distant subject, while other times you do.

AF point illumination – This is used to set whether or not the selected autofocus point (AF Point) is illuminated in the viewfinder.  Since you pretty much always want to know where your camera is focusing, this should be set for On.

Focus point wrap-around – This determines if the AF Point selection will “wrap around” to the other side of the screen when you reach an edge.  In other words, if you are selecting your AF Point (as you should be doing at almost all times) and you reach an AF Point on the far right, when you click right again, do you want to “wrap around” to a focus point on the far left, or do you wish to stop at the edge and not continue to the other side?

Number of focus points – This setting determines the number of autofocus points that are available for selection in your viewfinder.  If you are always selecting your AF Point (as you typically should) you may find that it is quicker and easier, at least at first, to limit the number of AF Points to 11 – AF11.  If you prefer to have all the AF Points available for your selection, set this at AF39 (or AF51 with the D7100).  If you set to 11 AF points your selection will be limited to those 11 AF points, but the additional surrounding AF points will still be active to be used by the camera in the AF-Area Modes and in subject tracking, so the camera is still taking advantage of all the AF points of the autofocus system.

Built-in AF-assist illuminator – This is used to enable or disable the autofocus assist light.  Turn this On to assist you in autofocusing in low light, but be sure to turn it Off if you are working in situations where it will be distracting, unwanted, or unnecessary.

and

Assign AE-L/AF-L button (f4 on the D600 and D7100) – This is to assign the function of the AE-L/AF-L Button.  You may want to use this in conjunction with the Function or Fn Button and use one to lock exposure and the other to lock focus.  In that case, you would typically set this to AF lock only to use this button to lock focus.

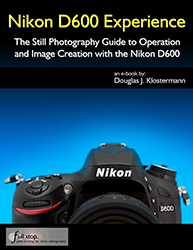
I go into much more detail about each these Custom Settings, how you may wish to set them up, and recommended settings in my e-book guides for all the current and previous cameras including Nikon D600 Experience, Nikon D7100 Experience, and Nikon D5200 Experience – but this should get you started.
Nikon D600 book ebook camera guide download manual how to dummies field instruction tutorial     Nikon D7100 book ebook manual tutorial field guide how to learn use dummies


Using Autofocus
Now on to using the AF system.  (All of the information below is also adapted from my e-book user’s guides, so I hope you will have a look at them to learn more.)

One of the essential steps in taking a successful photo is controlling where the camera focuses.  If you allow the camera to autofocus by choosing its own Focus Point(s), it typically focuses on the closest object or a person in the scene.  This may or may not be what you want to focus on.  So you should choose where the camera focuses using the autofocus Focus Points.  But first you will need to select an appropriate Autofocus Mode and an Autofocus Area Mode, based on your subject and situation.

Autofocus Modes
The D7100, D7000, D600, and D5200 each have three different Autofocus Modes to choose from, typically depending if your subject is still or moving.  They also have four different Autofocus Area Modes (see below) to specify how many of the AF points are active and how they track a moving object.  You can set these two functions in various combinations.  First the Autofocus Modes:

Single-Servo AF (AF-S)
Use this mode when your subject is stationary, or still and not going to move, or if your subject is not going to move very much, or if the distance between you and the subject is not going to change between the time you lock focus, recompose, and take the shot.  Lock focus on the subject and recompose if necessary.  When using AF-S, you can select from two Autofocus Area Modes, either Single-Point AF where you select the AF point, or Auto-Area AF, where the camera selects the AF point(s) for you.  I suggest you nearly always select your own desired AF point.

Continuous-Servo AF (AF-C)
Use this mode when your subject is moving.  If the subject is moving towards you or away from you, the camera will keep evaluating the focus distance, as long as the Shutter Button is kept half-pressed.  You will need to use this in conjunction with the Autofocus Area Modes to determine if and how the camera tracks the subject laterally to the surrounding AF points, or if it will only track the subject if it remains at the initially selected AF point.  If the subject is going to be difficult to follow or is moving across your field of view, set the AF-Area Mode to one of the Dynamic-Area AF modes or to the 3D-Tracking mode.  Focus on the moving subject with the selected point if using Single-Point, one of the Dynamic Area Modes, or 3D-Tracking, or let the camera select the AF point in Auto-Area AF, and then as long as the Shutter Button remains half-pressed the camera will track the subject as it moves closer or farther in distance.  Depending which AF Area Mode you are using, the camera may also maintain focus or track the subject to some or all of the surrounding focus points if it moves away from the initially selected point.  More about this in the Autofocus Area Modes section just below.

Auto-Servo AF (AF-A)
This mode is a hybrid of the two other focus modes.  It starts in Single-Servo AF (AF-S) mode then changes to Continuous-Servo AF (AF-C) mode if your subject starts moving.  Why shouldn’t you use this all the time, then?  Well, if you are focusing and then recomposing, as you may often be doing, your movement of the camera may fool it into thinking that the subject is moving and your resulting focus may not be where you want it to be, or may not be as accurate as it might be if you are using Single-Servo AF.
Nikon D600 autofocus 39 point af system use learn tutorial how to auto focus mode area
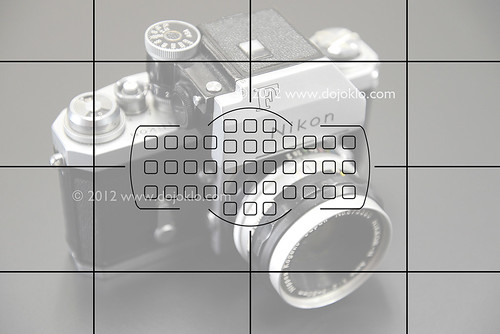
The arrangement and position of the 39 AF points of the Nikon D600, shown with the optional viewfinder grid display.

Manual Focus
Sometimes you may be taking several photos of the same subject from the same distance, or for some other reason want to keep the same focus distance and not have to keep re-focusing and re-composing.  Or you may be taking multiple photos for a panorama.  In these situations, turn off the auto-focus on your lens by switching from AF to M with the camera’s Focus Mode Selector switch and with the A/M switch on the lens itself.  Just remember to switch them back when you are finished.  You may also wish to do this if you want to precisely manually focus with the focus ring on your lens.  For lenses with “full time manual focus” however, you don’t need to switch to M in order to manually override the autofocus with the lens focus ring.  These lenses will have M/A and M on the lens focus mode switch instead of A and M.

Autofocus Area Modes
The Autofocus Area Modes are used to set if just a single AF point is active or else how many AF points surrounding your selected AF point will be used to maintain focus or to track a moving subject if you are using AF-C or AF-A Autofocus Modes.

Single-Point AF
Only one AF point will be active, and surrounding AF points will not become active to maintain focus or to track a subject that moves away from the one selected point.  This is typically used along with Single-Servo AF (AF-S) to focus on a stationary or still subject, or in a situation where you will be reframing the shot after you lock focus at a specific distance.  It can also be used with accuracy with AF-S mode for moving subjects if you take the photo quickly or if you recompose and take the shot quickly after locking in focus, especially if the camera-to-subject distance does not change at all or very much in that period between locking focus and taking the photo.  Use the Multi Selector to choose your active AF point as you look through the viewfinder and use the OK Button to quickly select the center AF point.  Also, remember that Custom Setting a6 allowed you to choose between having all 39 AF points available or to limit the camera to 11 AF points.  If you are just starting out with manually selecting a single Focus Point, you may wish to limit them to 11 now, and when you get the hang of it or when you are using one of the other AF Area Modes described below, increase it to 39 to take full advantage of all the AF points of the D7000 autofocus system.  If you choose Single-Point AF with Continuous-Servo AF (AF-C) or Auto-Servo AF (AF-A) for tracking moving subjects, it will only track the subject as long as it is positioned at the selected AF point, and it will not be tracked laterally to the other, surrounding points.  In other words, the single AF point you select will track a subject if it moves closer or farther away, but the AF system will not follow or track the subject if it moves left, right, up, or down and away from your selected AF point.  To do this, you use Dynamic-Area AF Mode or 3D-Tracking.

Dynamic-Area AF
With the Dynamic-Area AF Modes, you select an AF point to tell the camera where to autofocus, and if your subject briefly moves away from that point to a neighboring point or if you lose the subject from your AF point while panning, the camera will use the surrounding AF points to help maintain focus on it.  Select one of the Dynamic-Area AF options (below) when you are photographing moving or potentially moving subjects using Continuous-Servo AF (AF-C) or Auto-Servo AF (AF-A).  These modes are ideal for a subject moving closer or further from the camera but which may also move laterally away from the selected AF point faster than you can react in order to keep it located at that point, or for when you are panning and following the subject and attempting to keep it located at the selected AF point, but may have a little or a lot of difficulty doing so.  Remember that you need to keep the Shutter Button half-pressed in order for the continuous focusing at the initial point or the surrounding points to occur.  Note that the camera may pick up and start tracking a new subject that falls under the selected AF point if you lose your initial subject, in part determined by your setting for Custom Setting a3.

9-Point Dynamic-Area AF will use the immediate surrounding AF points to help maintain focus on a subject that briefly leaves the selected AF point.  This can be used with predictably moving subjects, like a runner or vehicle moving towards you or one that you can easily follow laterally by panning.

21-Point Dynamic-Area AF will use even more of the surrounding AF Points, more than half the total AF Points, to help maintain focus on a subject that briefly leaves the selected AF point.  This should be used for more unpredictably moving objects, like sports players on a field, which may quickly move further away from your selected AF point before you have a chance to realign that point over the subject.

39-Point Dynamic-Area AF (or 51-Point Dynamic-Area AF with the D7100) will use all of the 39 AF points (or 51 points) to help maintain focus on a subject that briefly leaves the selected AF point.  It can be used for very quick and unpredictably moving subjects, like pets, birds or other wildlife, and all 39 AF points will be used to maintain focus on the subject as you attempt to realign the selected AF point with the subject.

The Dynamic-Area AF Modes are not used to track and maintain focus on a subject that is moving across the various AF points in the frame, but rather are used to stay focused on a moving subject that you attempt to keep located at your selected AF Point.  To track a subject that is moving across the frame, intentionally passing from one AF point to the next, use 3D-Tracking.
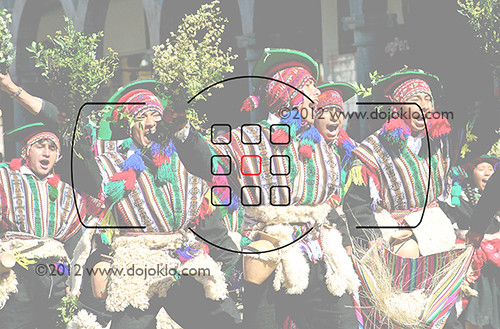
Nikon D5200 autofocus af system viewfinder 39 point how to use learn manual guide book instruction dummies tutorial area mode dynamic
A simulated image of the Nikon D5200 viewfinder, showing the autofocus focus points active with 9-Point Dynamic Area AF area mode, when the center AF point is selected. (Image shown at 50% opacity to better view AF points.)

3D-Tracking
This mode is used for subjects moving across the frame in any direction, or subjects moving erratically from side-to-side in the frame, and they are tracked by areas of color.  This is used when you don’t wish to necessarily pan or follow the subject to keep it located in the same part of the frame, but rather when you wish to keep the camera relatively still as the subject moves across the frame.  You may select this option when you are tracking and photographing moving subjects using Continuous-Servo AF (AF-C) or Auto-Servo AF (AF-A).  Again, you choose the initial AF point to locate the subject and begin the tracking.  If the area of color you wish to track is too small or if it blends into the background, this mode might not be very effective.

Auto-Area AF
The camera uses all 39 AF points to detect what it thinks is the subject and automatically choose the appropriate AF point(s).  Typically, the camera will select the nearest subject or a human in the frame, so it may not focus on exactly what you wish to focus on.  That is why it is best to use one of the other modes and select the AF point yourself.

Group Area AF
The Nikon D810 and D4s include the Group Area AF autofocus area mode, which makes use of a group of 5 AF Points arranged in a cross-shaped pattern. And instead of selecting a primary point with the surrounding points being “helper points,” you will actually be selecting the group of five points, which will all be used to attempt to focus on the subject. Unlike the other AF Area Modes with multiple points, the Viewfinder will actually display the four outer points of the group, but for some reason not the central point – perhaps so that you can better view the subject.

Keep in mind that with the other somewhat similar Dynamic Area AF modes, you choose a primary point and attempt to keep the subject located at that point, and the surrounding points act as “helper” points if the subject happens to move away from the primary point. But with Group Area AF you select the entire group of AF Points, and they all work equally to focus on the subject. This mode can be used similar to Single Point AF but when it might be challenging to locate the subject under an individual point. When working in AF-S Focus Mode and using Group Area AF, the selected AF points will give priority to faces if they are present, otherwise they will focus on the closest subject.


The next step is to learn to lock focus independent of locking exposure, and customize the camera’s controls to perform these functions how you wish.  But you are going to have to have a look at my e-book guides Nikon D7100 Experience, Nikon D7000 Experience, Nikon D600 Experience and Nikon D5200 Experience to learn about this and many other important functions of your sophisticated Nikon D600, D5200, or D7000!

Nikon D600 book ebook camera guide download manual how to dummies field instruction tutorial      Nikon D7100 book ebook manual tutorial field guide how to learn use dummies


To learn about another important reason why you need to take control of your autofocus system, see the related post:

Don’t Let the Locations of the AF Points Dictate Your Composition

What do you do when, with your desired framing, your subject is not located exactly under or near an AF point? Even with all the AF points of an advanced Nikon D7000 and D600, this will often be an issue. Have a look at the above post to learn why this is an issue and how to resolve it.

Still need to purchase your D7100, D7000, D5200 or D600.  Please use my links to have a look at them on Amazon:

Nikon D7100 24.1 megapixel DX format dSLR camera

Nikon D7000 16.2 megapixel DX format dSLR camera

Nikon D600 24.3 megapixel full-frame FX format dSLR camera

Nikon D5200 24.2 megapixel DX format dSLR camera

Was this post helpful?  Please let others know about it by clicking the Facebook or Twitter sharing buttons below, linking to it from your blog or website, or mentioning it on a forum.  Thanks!  Want to help support this blog with no cost or effort?  Simply click on the Amazon, B&H Photo, or Adorama logos on the left side of this page to go to those sites and make your purchases.  They will then give me a little referral bonus!

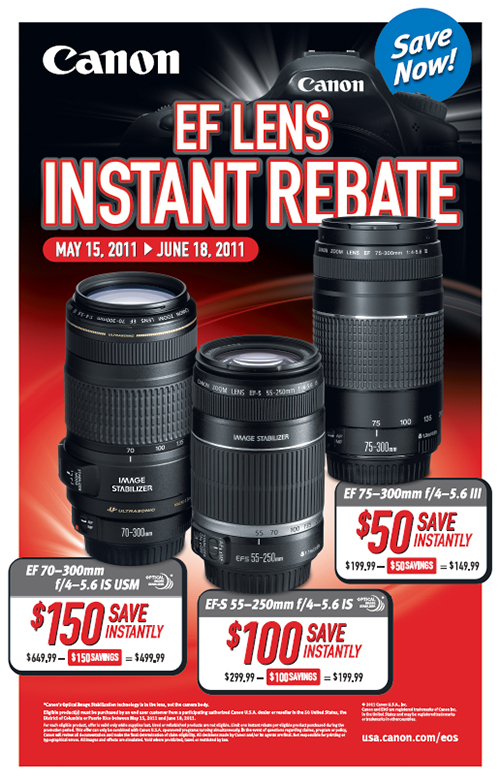
Canon Lens Rebates on Telephoto Zoom Lenses

Just in time for summer vacations, safaris, and baseball there are new instant save rebates for some of the Canon telephoto zoom lenses.  You don’t need to do anything for the rebate or send anything in, it is an instant savings built into the sale price.

Canon lens rebate instant save telephoto zoom

EF 70-300mm f/4-5.6 IS
EF-S 55-250mm f/4-5.6 IS
EF 75-300mm f/4-5.6 III

Click on the lens names above to see and purchase them from Amazon, with the sale price.

All of these are pretty basic quality lenses, but if you are looking for an affordable telephoto zoom to give you more reach for those sports, wildlife, and travel, now is a good time to buy.

If you are going to purchase any of these, I would suggest going with the EF 70-300mm f/4-5.6 IS.  With any lens, you get pretty much exactly what you pay for, so pay a little more for better image quality, color, contrast, and image stabilization.  You can learn much more about lenses in the Lens Category of posts here.

Here is the information on the Canon instant save rebates.

If you are looking for a high quality zoom, consider one of the Canon L lenses such as:

70-200mm f/2.8L IS USM II

70-200mm f/4L IS USM

70-300mm f/4-5.6L IS  USM

Making Sense of Canon and Nikon Lens Notations

Click here to jump down to Nikon (Nikkor) Lens Notations

Canon Lens Notations

You have probably noticed that Canon lens descriptions have numerous notations, and may be wondering what some of those letters and numbers mean.  For example EF-S 18-135mm f/3.5-5.6 IS is the full name of the kit lens that you may have purchased with the camera.  A lens with a somewhat similar focal length, but which is much more expensive, is the EF 24-105mm f/4L IS USM lens.  Each of those notations is significant, and all are important to know and understand when you are researching additional lenses to buy for your camera.  And since I have a hard time remembering them all, I have also added a quick reference to the end for Nikon lenses and a link to a more thorough site.

Canon lens notation letter number mean meaning
Canon EF 16-35mm f/2.8L II

EF and EF-S are two different Canon lens mounts.  EF lenses can be used on any Canon dSLR, while EF-S lenses are designed for, and can only be used on Canon dSLRs with 1.6x cropped sensors, including the 60D, all Rebels such as the T3i, plus the 7D, 50D and others, but not the full frame 5D or 5D Mk II.  The rear of EF-S lenses reaches further into the camera body, and thus will damage the mirror of the 5D cameras if you attempt to attach it.  These lenses are optimized for the 1.6X cropped sensor cameras, and have a shorter back-focus distance which gives them the ability to be more effective as wide-angle lenses on the cameras with smaller sensors.  EF-S lenses are mounted by lining-up the white square on the lens with the white square on the camera.  EF lenses match red dot to red dot.  If you someday plan to upgrade to a full-frame camera, such as a 5D Mk II or its eventual replacement, or if you suspect that in the future full-frame cameras will become much more affordable and replace most cropped frame cameras, you shouldn’t invest in too many EF-S lenses.

18-135mm or 24-105mm is the focal length of the lens.  These are both zoom lenses, which cover a range of focal lengths.  There are wide-angle zooms – typically within the 10-40mm range, standard zooms – typically within the 17-135mm range, and telephoto zooms – typically within the 70-300mm range.  See this page for all of Canon’s lens offerings:

A Prime lens has only a single focal length, such as 50mm or 85mm.  It will not zoom in and out, and thus you have to “zoom with your feet” as they say.  However, without the additional mechanisms required by zooms, you generally get more quality for the price with a prime lens, plus typically very wide apertures for great low light use and blurry backgrounds.

f/3.5-5.6 or f/4 indicates the largest maximum aperture.  See my post Fixed Maximum Aperture vs. Variable Maximum Aperture for more information on what this means and why one lens has a range of numbers and the other lens just has one.

L lenses are Canon’s top of the line lenses, identifiable by the red band around the front end of the lens.  L lenses are generally higher quality lenses than the standard lenses in just about every way possible.  They typically offer:

  • Better sharpness throughout the full range of focal lengths and apertures, as well as better sharpness, color, contrast, and image quality across the image frame from the center to the corners.  They accomplish this in part by precisely and accurately resolving all the light wavelengths (colors) on the sensor plane.  (Think of a cheap printing job you’ve seen where the colors don’t all align and thus the words or images always look out of focus.  This is an exaggerated example of what a lower quality lens might do.)
  • Higher quality and stronger construction, durability, and seals for increased dust, water, and weather resistance.
  • Higher quality glass (or even fluorite crystal) and coatings to prevent flare and internal reflections.
  • Larger maximum apertures and fixed maximum apertures.
  • Image stabilization.
  • Higher quality, quieter, and faster auto focus mechanisms and full time manual focus (ability to override auto-focus for manually tweaking focus while remaining in AF).
  • Internal zoom mechanisms, meaning the lens does not extend when you zoom, which also allows for better weather sealing.
  • Metal lens mounts (the part that attaches onto the camera) for better durability, sealing, and electrical connections (less expensive lenses sometimes have plastic mounts that wear and then the lens wobbles and loses electrical connection).

However, several non-L lenses, including some EF-S lenses, have many of these features and characteristics too, and some approach the L lenses in terms of quality.  One thing to keep in mind with lenses is that you almost always get what you pay for.  More expensive lenses offer higher image quality, construction quality, and features.

IS means image stabilization, and allows you to hand-hold your camera at slower shutter speeds and still obtain an in-focus image.  The IS system in the lens monitors vibration and moves the internal lens elements to counteract camera movement, which might normally cause camera-shake to blur the resulting image.  A lens with IS allows you to use a shutter speed up to 4 stops slower than normally possible when taking an image while hand holding the camera.  Image stabilization isn’t critical to have for wide-angle and standard focal length lenses, but becomes pretty important when working in the 150mm, 200mm or 300mm focal lengths.  This is because those lenses are typically longer and heavier, and because you are often zooming in on something further away and a slight movement of the lens translates to a large movement over that distance (think of trying to hold your view of a distant bird steady while looking through binoculars).  Image stabilization does not correct for subject movement, but rather for camera movement, such as from an unsteady hand.  You need to use a fast shutter speed to freeze subject movement.

USM stands for ultrasonic motor, and means the lens has a high quality, precise, rapid, and quiet motor for auto focusing.

II means it is the second version of that lens.  For example the 70-200mm f/2.8L IS USM lens was recently replaced with a new version which now has a II in its name.  Most often, the second version of a lens boasts improvements in quality and construction.

Have a look that this other post to learn the difference between Fixed Maximum Aperture vs. Variable Maximum Aperture.

And the little “circle with a line through it,” found on the front of the lens, indicates the filter size that will fit on the lens, such as a protective UV filter or a circular polarizing filter.

Purchasing: If you plan to purchase a new lens from Amazon, or any other equipment, I encourage you to do so by clicking on the Amazon logo below (or on the links of the lenses mentioned above). If you purchase through this link, Amazon will give me a little something for the referral, which will help support my blog. Thanks, I appreciate your support!
Amazon.com

If you are in the UK, you can click here for the UK Amazon referral link.

For those interested in purchasing through B&H Photo, Adorama, or directly from Canon, I have set up affiliate links with them as well – find them on the left side of this page.

Renting Lenses: If you wish to first try out a lens before buying it, check out LensProToGo, where you can get great prices on short-term rentals of any lens as well as the latest Canon and Nikon dSLR bodies.


Nikon (Nikkor) Lens Notations

Here are some the most common Nikon (Nikkor) lens notations of current lenses that you will run across, many of which deal with a lens’s ability for metering, aperture control, and autofocus:

F-Mount – This is the Nikon bayonet-type lens mount that was introduced in 1959 and is still in use on Nikon dSLR cameras today.

AF – Auto-focus:   Although these lenses are capable of autofocusing, they do not have a built-in autofocus motor in the lens.  They require a camera body with a built-in autofocus motor in order to fully function, such as a Nikon D7100 or D610.  These lenses will not autofocus with Nikon dSLRs that do not have an internal autofocus motor, such as the D5200, D3200, and D40. You will need to use and AF-S lens with those cameras if you wish to autofocus.

AF-S – Auto-focus with an integrated silent wave motor:  The autofocus motor is in the lens and thus not required to be in the camera body.  You can use these lenses with any Nikon dSLR, but know that you need AF-S lenses in order to autofocus with a camera that lacks an AF motor in the body, such as the D5200 or D3200.

CPU – CPU lenses are autofocus lenses that can communicate information with the camera, such as the aperture setting, via electronic contacts.

AI – These lenses have an Ai coupling system that makes use of a small lever on the camera’s lens mount to communicate the aperture setting between camera and lens.

AI-S

Non-AI (also called A or Pre-AI) –

D – Distance:  The lens communicated the focus distance to the camera, so for example that info will be part of your image metadata and assists, I believe, with the flash metering.

DC – Defocus Control:  Allows the photographer to change the degree of spherical aberration in the out-of-focus areas to provide for better bokeh (background blurring).

DX – Made for non-full-frame (crop sensor) cameras, such as the D7000, D5100, D3100.

ED – Contains extra low dispersion glass elements, which helps to reduce various optical aberrations.

G – No aperture ring on the lens.  Since an aperture ring is no longer required with a dSLR, most common current lenses, with the exception of a 50mm for one, are G lenses.

IF – Internal Focusing:  Focusing movement occurs inside the lens and so no external lens elements are moving during focusing (well, other than the focusing ring of course).

N – Nano coating:  A crystalline coating on the lens elements eliminates internal lens element reflections, helping to reduce ghosting and flare.

PC – Perspective control:  Used to correct perspective (converging horizontals) such as for an architectural photographer.

VR or VR II– Vibration Reduction:  Image stabilization incorporated into the lens, which corrects for camera movement (but not subject movement!).

A more thorough list of notations, including older ones, and detailed explanation can be found here: http://www.bythom.com/