Canon 6D – The Second Affordable Full-Frame dSLR

Introducing the Canon 6D Full Frame dSLR Camera

First, I have been corrected – the Sony a850 was the first “affordable” full frame (meaning ~$2000 price at introduction), followed by the Nikon D600, then the Canon 6D. But as I unfortunately only have time in my work day to mostly follow, research, and write about Canon and Nikon news and dSLR cameras, this one slipped by me.

Just as I have been digesting the specs and features of the new Nikon D600 full frame dSLR, Canon quickly follows on their heels with their version of a “pro-sumer” full frame camera, the Canon EOS 6D.  The big deal about these two cameras – and indeed they are a big deal – is that they are the first full frame cameras priced at around $2000 at first release.  In fact they are each priced at just under $2100.  dSLR cameras with full frame sized sensors (sensors about the size of a frame of 35mm film – remember film?) have typically cost several hundred, if not $1000 more than this when first introduced. The Canon 5D, though also referred to as “affordable” at the time, was around $3300 when introduced as a professional camera. The Canon 5D Mark II was about $2700 at introduction, and the Nikon D700 and D800 were each about $3000.  The latest Canon full frame, the 5D Mark III is around $3400, but Canon knew they would be coming out with the 6D to fill in the price point vacated by the 5D Mark II.
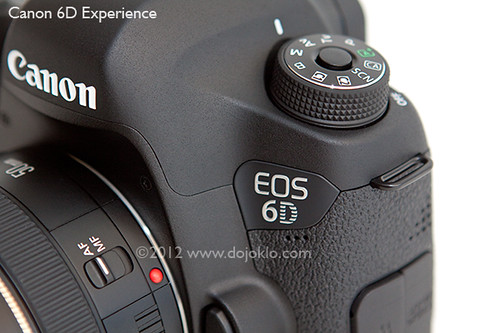
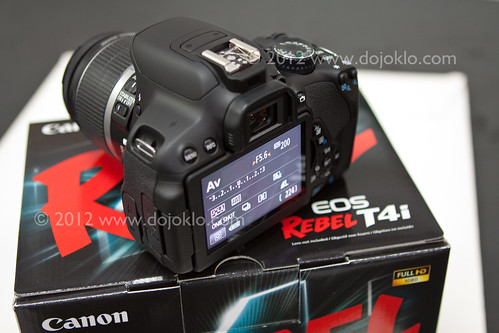
Canon EOS 6D full frame dslr review
Canon EOS 6D

Previously, the compromise in order to put a high-quality, fully featured camera into enthusiasts’ and semi-pros’ hands was a smaller sensor – the APS-C sized sensor which is about 64% of the size of a full frame sensor.  Nikon calls the smaller size the DX and the full frame the FX format, while Canon really doesn’t have a special name for either that I can recall. But larger sensors have always been prized for several reasons.  They typically deliver better performance in terms of improved resolution, increased dynamic range, and improved low light / high ISO performance.  In other words, the images have much better detail and can withstand serious cropping, display a fuller range of colors and tones, and are cleaner with less digital noise, especially in low light situations.  The full frame sensor will also affect the field of view of your lenses. For those moving from an APS-C sized sensor camera to a full frame body, a 50mm lens will now act as a true 50mm lens – no more 1.6x crop factor to consider. This means that your wide angle lenses will now act as true wide angle lenses, but your telephoto lenses will no longer have quite as much reach as you may be used to.

I have long warned that Canon users should carefully consider buying EF-S lenses that are only compatible with APS-C Canon dSLRs, and my reasoning was that one day you would either want to upgrade to a full frame 5D that does not accept AF-S lenses, and/ or eventually full frame bodies would become more affordable.  Well, that day is today!  The 6D is the “affordable” full frame camera, and indeed it does not accept EF-S lenses, only EF lenses.

For those who can’t or don’t wish to spend $3400 on the 5D Mark III yet still want the full frame experience, the 6D is now a reasonable option.  The 5D Mk II of course is currently under $2000, but it really isn’t very desirable anymore with its relatively slow and outdated 9 point autofocus system and relatively slow 3.9 frames per second continuous shooting speed.  Not to mention the wide variety of feature, HD video improvements, and in-camera processing features that have been added to more recent models.  However, based on its controls, autofocus system, and other features (whether included or left out), the 6D can be considered a full frame version of the 60D, and thus sits firmly in the enthusiast range rather than the professional range. Again, some compromises were made in order to offer a well-featured full-frame camera at an enthusiast photographer price point.  But its full frame coupled with its smaller, lighter body (more like an APS-C camera body) will make it a great option for everyday and travel use.

Canon 6D EOS book manual dummies field guide instruction tutorial how to use learn full frame autofocus system

Brief Commercial Interruption: I have written an e-book camera guide to the Canon 6D, Canon 6D Experience, now available. Click the link or book cover to learn more, preview, or purchase this guide (as well as all my other e-book camera guides for Nikon and Canon dSLR cameras).


Canon EOS 6D full frame dslr review
Canon EOS 6D

Here are some of the specs of the Canon 6D, and more importantly what they mean. After reading about what the camera offers, be sure to also read my Canon 6D Hands On Reveiw:

Sensor: The 6D sits between the 7D and the 5DIII in terms of resolution, with 20.2MP compared to the 18MP of the 7D, 21MP of the 5DII, and 22.3MP of the 5DIII. As mentioned above, a full-frame size sensor promises not only improved image quality but also increased dynamic range and improved low light / high ISO performance (100-25,600 max. ISO expandable up to 102,400). Have a look just below and at my images here to see some example images of the performance of the 5DIII at various ISO settings.  The 6D may not be quite as excellent, but it should be very close (edit: my informal ISO tests of the 6D can now be seen below and here.  And as noted above, the full-frame sensor will also affect the field of view of your lenses. Your wide angle lenses will now act as true wide angle lenses, but your telephoto lenses will no longer have quite as much reach as you may be used to.

Canon 6D high iso noise digital camera slr pixel test compare preview
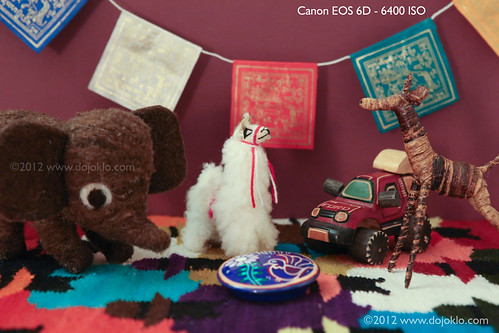
Example image of the Canon 6D ISO performance and digital noise. Image by the Author – click on the image to view larger.

A full frame sensor also affects your depth of field…indirectly.  This is because depth of field is affected by not only your aperture setting but also the camera-to-subject distance.  So say that you were to use the full frame 6D to frame a shot with a 50mm focal length and f/2.0 aperture, from 10 feet away.  To “recreate” this same shot with the APS-C sensor-sized 7D and a 50mm focal length, you would have to back up several feet (6 more feet I believe?) to have the same field of view.  (The full frame sensor will capture a wider field of view, while the APS-C “crops” the scene due to its smaller size.)  Even though you use the same f/2.0 aperture setting, the depth of field is not as dramatically shallow because the camera-to-subject distance has increased.  The depth of field in this case changes from less than a foot to over 2 feet.  (I may be wrong about backing up from 10 feet to 16 feet for this example, which means my final numbers are off, but none-the-less, the dof increases as you move back.)  So…indirectly…a full frame camera can contribute to more dramatic depth of field.

Processor: The 6D incorporates a single speedy Digic 5+ processor – the latest processor that is also included in the 5DIII (there as one of two processors). This allows you to take more continuous photos at the maximum frame rate, as well as to keep up a fast rate as the camera applies optional in-camera processing to the images, such as lens aberration corrections.  The speedy processor also allows for the in-camera HDR and Multiple Exposure features.

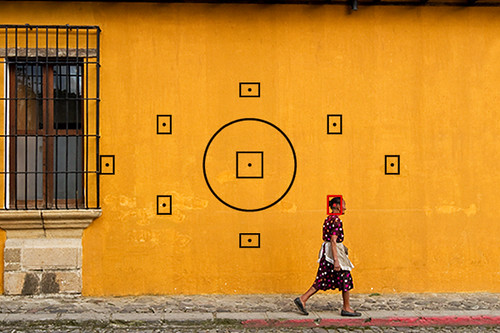
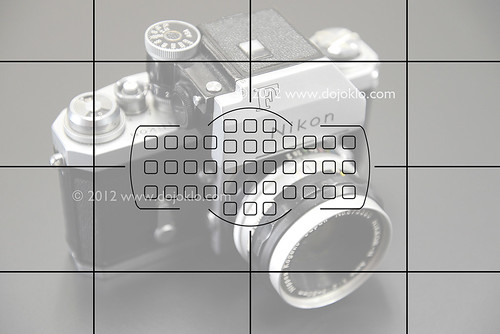
Viewfinder: The 6D also has a nice big and bright 97% view viewfinder, not as awesome as a 100% viewfinder would have been to be able to frame the entire scene to be captured, but excellent none-the-less.  Unfortunately, there is not an electronic grid included in the viewfinder view as there is with the 7D.  In order to get a grid, you will have to make use of the optional Eg-D matte focusing screen.  You can see a simulated view of the viewfinder below the Autofocus section.

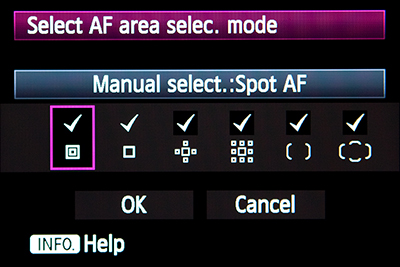
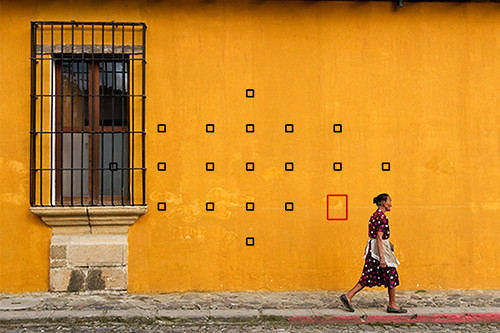
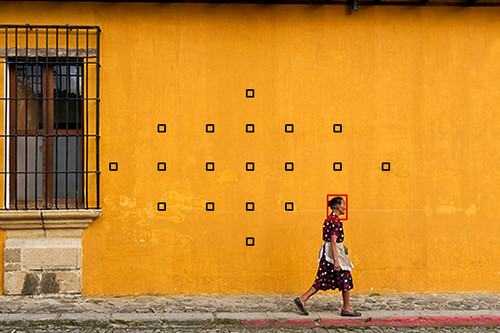
Autofocus (AF) System / FPS: The Canon 6D has a new 11 point autofocus system with only the center point as a more accurate cross-type point.  Not quite the 19 AF point system of the 7D as one might have expected, and also significantly lower than the 61 AF point system of the 5DIII.  In terms of number of focus points, it is a minor improvement to the 5DII.  However, I am sure that it is a system that will react and perform significantly faster (even despite only one cross-type point) as well as offer numerous customization options. This AF system, along with its 4.5 frame per second (fps) continuous shooting speed, indicates that the 6D is not intended to be a sports and action camera, but rather a camera geared towards standard photography, weddings, portraits, travel, etc.

Canon 6D EOS autofocus AF viewfinder 11 points compare choose dummies guide book digital dslr
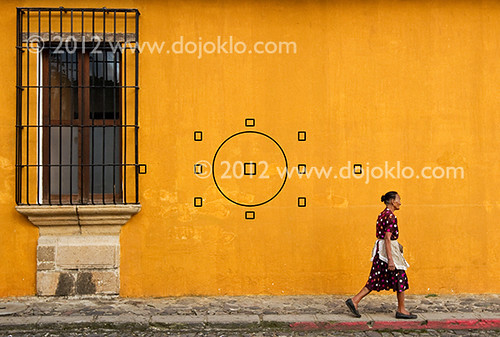
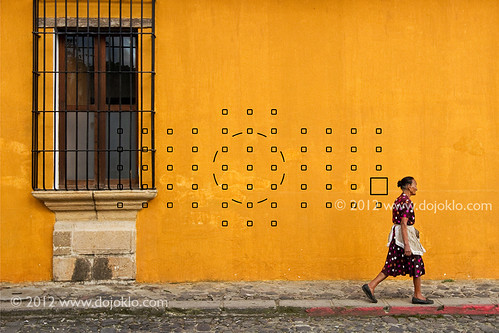
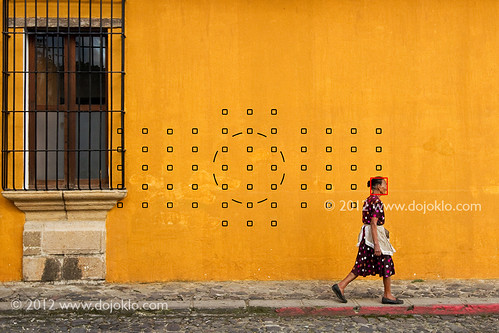
Simulated view of the Canon 6D viewfinder, showing the Spot Metering circle and the 11 autofocus AF Points

Body, Size, Battery, Memory Cards:  Regarding size and weight, the 6D is nearly the same size and weight as the 7D – in fact it is not quite as wide and as deep as the 7D, stands at the same height, and weights a little less.  Overall it is 145 x 111 x 71 mm, weighing 770g (with the battery) compared to the 860g of the 7D.  The 6D accepts the same excellent LP-E6 battery as the 7D and 5DIII, as well as SD memory cards (single card slot).  The body is constructed primarily of magnesium alloy, is weather sealed against dust and moisture, and should prove to be quite durable for any everyday-type use plus more rugged situations.  It boasts a 3″ LCD screen – fixed not articulating – with 102,400 pixels, making it large, clear, and sharp – but not a touch screen as originally speculated.

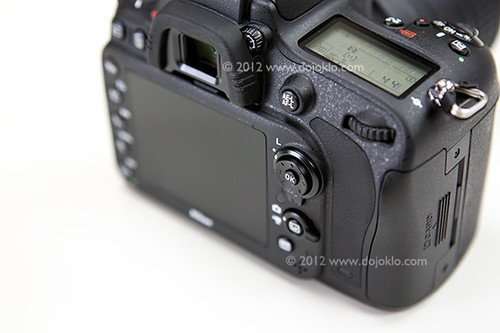
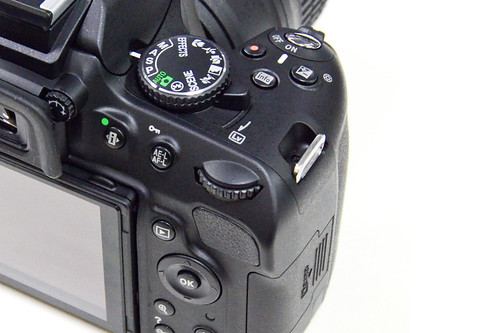
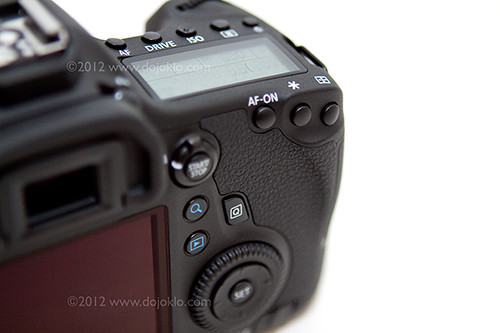
Interface and Controls: The controls on the body of the 6D closely resemble those of the EOS 60D, with a few changes.  The Multi-Controller pad is used for autofocus AF point control rather than the thumb joystick of the 5D cameras, the top row of buttons control one function only, and the Mode Dial has the handy center locking button.  The power switch has been moved to the typical current location for Canon dSLRs – at the Mode Dial.  The row of buttons on the rear left side, common on most Canon dSLRs without a rotating screen, has been pared down and moved to the right of the screen.  Rather than the zoom-in and zoom-out buttons, there is a single Magnify button that was first found on the 5DIII and initially drove users crazy due to the muscle memory of their thumbs that had to be retrained.  The exposure lock and focus lock buttons remain, thus allowing for back-button focusing and easily separating focus and exposure functions.
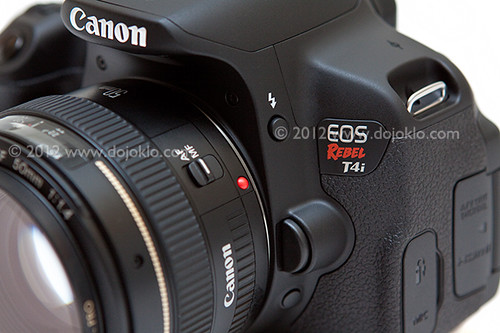
Canon EOS 6D full frame dslr review
Canon EOS 6D

New Features: The 6D is the first Canon camera to offer built-in wireless and built-in GPS capability.  The Wi-Fi feature will allow photographers to do some great wireless stuff, including cable-free “tethered” shooting and camera control using EOS Utility and a computer, easily sharing images on Facebook and other social networks straight from the camera, controlling the camera (in Live View) from a smartphone or tablet – including focusing and changing some settings, using the smart device to view and transfer images that are on the camera’s memory card, and Wi-Fi connection to a TV or printer.  And the GPS will allow geotagging of images with the coordinates, altitude, and orientation, and mapping the route of the camera.

Accessories: Of course there will be a battery grip for the 6D, the BG-E13, for the use of two LP-E6 batteries for longer shooting.  The larger body size created by the grip is also more comfortable for some, especially when shooting often in the portrait orientation and/ or when using larger, heavier lenses.  There are also a couple optional focusing screens that are compatible, the Eg-D and Eg-S matte focusing screens which make manual focusing eaiser.  The Eg-D offers a grid as well for assistance with compositions and keeping the framing straight.  This means that there is no electronic grid built into the viewfinder, as with the 7D.

The typical remote shutter releases are certain to be compatible, such as the Canon Remote Switch RS-80N3 or Canon Wireless Remote Control RC-1 or RC-5 or RC-6.  These remotes will allow either self-portraits or the ability to release the shutter without pressing the Shutter Button thus preventing possible camera shake. There is also the Timer Remote Controller TC-80N3 for time-lapse or long exposure photography.

Flash: Similar to the 5D line of cameras, the 6D does not include a built-in flash, though it is fully compatible with all the Canon Speedlite flashes such as the new Canon 600EX-RT as well as the older but still highly capable 580EX II.  It will certainly be compatible with the Speedlite Transmitter ST-E3-RT radio wave wireless transmitter, which can control and trigger up to 5 groups of 15 flashes, up to 30 meters, with no line-of-site required. (Currently only compatible with the Canon 600EX-RT Speedlite.)

HD Video: And of course the 6D offers full HD video with manual control and all the usual frame rates (1080p at 30/25/24 fps and 720p at 60/50 fps plus 480p at 25/30 fps. The new sensor is not capable of full time autofocus, though most dedicated videographers still prefer manually focusing anyway. The camera records mono audio but is compatible with optional stereo mics, and unfortunately lacks a headphone jack for audio monitoring.

Bracketing: The offers 3, 2, 5, or 7 frame Auto Exposure Bracketing, which will please HDR shooter. There is also a built-in “HDR mode” which combines and processes three automatically bracketed images in-camera, and a Multiple Exposure mode that can “overlay” and process up to 9 images in-camera. And there are a couple more multi-shop options where the camera takes a few shots in a row and then combines them for a better final result, such as the multi-shot noise reduction option, and the hand-held night scene.

Of course the 6D offers the usual 63-Zone dual layer exposure metering system for consistent, accurate exposures in all types of situations including challenging scenes like back-lit ones.  It has the usual Canon Metering Modes and Drive Modes as well as the familiar Picture Style settings and in-camera image processing and filter/ art effects as found in the 7D, 60D, and 5D Mk III.

Conclusions:  Just as with the new Nikon D600 full frame camera, I expect the Canon EOS 6D to be an extremely popular camera, offering an affordable full-frame dSLR for dedicated enthusiasts, aspiring pros/ semi-pros, or a highly competent second body for semi-pros and pros on a budget. There is nothing lacking in this camera that would prevent any photographer from capturing the highest quality, professional level images in most every shooting situation, be it general photography, portraits, street photography, studio work, wedding photography or travel use.  Its pairing with the professional 24-105mm f/4L lens is an indication of its exceptional image quality capabilities.  Plus it offers the ability, although somewhat limited by its autofocus system and maximum continuous frame rate, to capture sports, wildlife, and other action type situations.

The 6D may not be the “fully featured budget pro-sumer full frame dSLR” that many had hoped for, however.  Its 11 point AF system with only one cross-type point is clearly on the consumer/ enthusiast level, as are its external controls such as the thumb pad Multi-Controller and the single function top buttons.  Its inclusion of the Scene Modes on the Mode Dial also indicates that it is targeted to enthusiasts, as well as its single SD memory card slot.  But these are the types of compromises that had to be made to keep the price within reach of more enthusiast photographers while still offering full frame image quality.  As Canon says in their 6D press release, “the EOS 6D bridges the gap for budget-minded photographers, videographers and cinematographers who are eager to step up into the world of full-frame imaging.”

Be sure to also read my subsequent Canon 6D Hands On Reveiw, written after the camera became available.

As I work on a comparison post of the current Canon dSLR line-up, have a look at these other Canon related posts, including how to take full advantage of your autofocus system.

The camera will be offered as a body-only or with the 24-105mm f/4L IS (image stabilized) lens, and is expected to be available in December 2012.

Canon 6D EOS book manual dummies field guide instruction tutorial how to use learn full frame autofocus system

And as I mentioned, I have written the first guide to the Canon 6D, my Full Stop e-book user’s guide for the Canon 6D – Canon 6D Experience, now available.

Order your 6D today on Amazon or B and H:

Canon 6D on Amazon (body only or 24-105mm f/4L kit)

Canon 6D at B and H Photo – body only

Canon 6D at B and H Photo – with the 24-105mm f/4L IS kit lens

Nikon D600 – The First Affordable Full-Frame dSLR (and the updated Nikon D610)

Introducing the Nikon D600 Full Frame dSLR Camera and the updated Nikon D610:

(With additions made at the end of this article to explain the features added to the updated Nikon D610)

(First, I have been corrected on the title of this post – the Sony a850 was the first “affordable” full frame (meaning ~$2000 price at introduction). But as I unfortunately only have time in my work day to mostly follow, research, and write about Canon and Nikon news and dSLR cameras, this one slipped by me!)

The day has finally arrived!  For a couple years I have been suggesting to my readers that when choosing lenses they anticipate the time that, someday soon, full-frame cameras will be more affordable.  This was both to address the possibility that certain DX lenses could not be used on an FX body, plus how a lens’ field of view will be affected by a full frame vs. a cropped APS-C sensor.  Well that day has now arrived with the introduction of the Nikon D600.  Initially priced at $2100 (body only), it can certainly be considered the first enthusiast full-frame (or in Nikon terminology, FX Format) camera – and which should also be more than rugged enough and capable enough for a semi-pro or a second body.  And as icing on the cake, DX lenses are indeed compatible with this new FX camera (although the resulting image will be a 10MP DX crop).

(Of course the full-frame Canon 5D Mark II is under $2000 at this time, but that is due to it recently being replaced by the 5D Mark III.  When the 5D Mark II was new, it was priced at around $2700, and didn’t go below $2400 for most of its active life.  And you don’t want the 5D Mk II anymore – its continuous frame rate is slow and its AF system isn’t so hot, especially compared to current models.)

Nikon D600 unbox unboxing full frame FX dSLR camera 35mm new kit lens
Nikon D600 full frame dSLR camera, shown with kit lens Nikkor 24-85mm f/3.5-4.5G ED VR – Image by author.  Special thanks to Newtonville Camera of Newton, Mass.

Sensor, Viewfinder: The D600 sits between the D7000 and the recent D800, being closer – I would say – to a full-frame version of the D7000 (with a few more megapixels).  It boasts a 24.3 megapixel image sensor (over the 16.2 MP of the D7000) and the same 39 point autofocus system with 9 cross type points and similar custom settings options as the D7000. This full-frame size sensor delivers not only improved resolution but also increased dynamic range and improved low light / high ISO performance (6400 max. ISO expandable up to 25,600).  As noted above, the full-frame sensor will also affect the field of view of your lenses.  For those coming from an APS-C sized sensor camera, a 50mm lens will now act as a true 50mm lens – no more 1.5x  crop factor to consider.  This means that your wide angle lenses will now act as true wide angle lenses, but your telephoto lenses will no longer have quite as much reach as you may be used to.  However, the D600 offers a DX setting so that you can act as if you have a DX sized sensor.  This camera also has a nice big and bright 100% view viewfinder so that one can easily see their subject, make use of the AF Points, and frame their images.

Interface and Controls: Much of the user interface (menus, displays) as well as the controls are also similar to the D7000, with a few changes such as the addition of the Live View/ Movie switch, a locking Mode Dial switch, and the addition of a Picture Control button.  The newly locking Mode Dial contains the customizable user modes U1 and U2 so that you can set up the camera to quickly switch to your desired mode and settings, including your desired Custom Settings parameters.  In the“why did they do that?” category, Nikon has swapped the position of the Image Zoom [+] and [-] buttons used during image review.  So overall, any D7000 user will be immediately comfortable and familiar with this D600 body.  Changing the AF Mode and AF Area Mode of the D600 is done with the “hidden” button inside the AF/M switch at the base of the lens, in conjunction with the Command Dials (as with the D7000).  The D600 offers two customizable Function Buttons on the front of the camera to set for whichever functions you desire.

Nikon D610 book manual guide how to autofocus settings menu custom setup dummies learn use tips tricks     Nikon D600 book ebook camera guide download manual how to dummies field instruction tutorial

Brief Commercial Interruption: Of course I offer a Full Stop e-book user’s guide for the Nikon D610Nikon D610 Experience, and one for the D600, Nikon D600 Experience.  This first book is currently the highest rated D600 guide on the market, with nearly 50 five star reviews!  Click the links to learn more about the guides and all my other e-book camera guides for Nikon and Canon dSLR cameras.

Nikon D610 D600 autofocus af system full frame use choose decide book guide manual how to dummies
Simulated view of the Nikon D610 / D600 viewfinder showing the location of all 39 autofocus AF Points

Autofocus (AF) System / FPS: As mentioned, the D600 makes use of the 39 point autofocus system with 9 cross-type points of the D7000.  For those not familiar with this system, it is somewhat sophisticated in that it offers several combinations of autofocus modes (for still subjects or a variety of situations with moving subjects), autofocus area modes (how many of the AF points are active and how they track), AF related Custom Settings (to tweak the performance of the system to your subject and needs), and customizable controls (to set which buttons do what).  There is a bit of a learning curve in order to take full advantage and full control of it, but once mastered it enables a photographer to consistently and successfully capture sharp images of still subjects and to track and capture moving subjects in a variety of ways.  You can start to learn about this system in my post explaining how to Take Advantage of the Nikon D7000 Autofocus System.  You can put the AF subject tracking to good use as you shoot up to 5.5 frames per second with the D600.  This is a great frame rate for most action, sports, or wildlife photography – any slower misses important moments and any faster starts to give you nearly identical multiple shots which become a time and memory space drain when backing up and editing. (Of course if you shoot something like motorsports or professional sports, you likely need the faster frame rate of a full-fledged pro camera!)

Body, Size, Battery, Memory Cards: Regarding size and weight, the D600 is slightly larger than than the D7000, but surprisingly 20g lighter (with the battery.)  It shares the same EN-EL 15 battery as the D7000, and offers a new MB-D14 battery grip for the use of two batteries – and to perhaps make the camera more comfortable for some users particularly when using larger lenses or working often in portrait orientation.  The top and rear of the camera body are constructed of strong and light magnesium alloy, and the body is weather sealed against dust and moisture (including the battery and memory card doors).  Although the entire body isn’t magnesium like the Canon 7D or 5D Mk III, it should prove to be more than rugged and durable enough for most any photographer’s needs.  The D600 has two SD memory card slots which can be configured in a variety of ways including overflow (when one card fills images are automatically then saved to the 2nd card), simultaneous back-up (each image is saved on both cards), or stills on one card and movies on the other. The LCD monitor on the rear of the camera is now a slightly larger 3.2 inches (compared to the 3″LCD of the D7000) with 921K pixels, and is optimized for minimum glare and good contrast in sunlight.

Nikon D600 unbox unboxing full frame FX dSLR camera 35mm new kit lens
Unboxing of the Nikon D600 full frame dSLR camera, shown with kit lens Nikkor 24-85mm f/3.5-4.5G ED VR – Image by author.  Special thanks to Newtonville Camera of Newton, Mass.

Accessories: Nikon is offering a Wireless Adapter, the WU-1b, which will allow you to immediately share your images through mobile devices, remotely save images, or remotely fire the shutter through a smartphone.  It is also compatible with the Nikon GP-1 GPS unit for geo-tagging your images.

Flash: Unlike the full-frame Canon 5D series that forgo the built-in flash, the D600 (like the D800) has a built-in flash that also acts as a wireless Speedlight Commander to control remote flashes (up to two groups).  The camera of course has a hotshoe for optional external Speedlights like the Nikon SB-900, SB-800, SB-700, or SB-600.

HD Video: And of course the D600 offers full HD video with manual control and all the usual frame rates (1080p at 30/25/24 fps and 720p at 60/50/30 fps). As with stills, you can switch to DX (as if you were using a smaller DX sized sensor) for a “telephoto boost,” and it is capable of full time autofocus, though most dedicated videographers still prefer manually focusing. The camera records mono audio but is compatible with optional stereo mics, and has a headphone jack for audio monitoring.

Bracketing: The D600 unfortunately only offers the choice of 2 or 3 frame Auto Exposure Bracketing (up to +/- 6 EV), which doesn’t help the HDR shooters who would prefer 5 or 7 bracketed shots.  There is a dedicated BKT Bracketing Button on the camera body to initiate this process.  There is also a built-in “HDR mode” which combines and processes two images in-camera.

Nikon D600 book guide ebook instruction manual how to dummies field guide
Image of a gorgeous Nikon F taken with the Nikon D600 and kit lens (24-85mm f/3.5-4.5G ED VR)  Unprocessed JPEG straight from camera (with watermarks added), ISO 2500.  Image by author – click to see larger.  Special thanks to Newtonville Camera of Newton, Mass. 

Of course the D600 offers the usual Metering Modes, Drive Modes, and White Balance options, as well as the familiar Scene Modes, Picture Style settings, Multiple Exposure mode, Interval Timer for time-lapse photography, and in-camera image processing and filter/ art effects.

I expect the Nikon D600 to be an extremely popular camera, offering an affordable full-frame camera for dedicated enthusiasts, aspiring pros, and semi-pros, or a highly competent second body for semi-pros and pros.  There is nothing lacking in this camera that would prevent any photographer from capturing the highest quality, professional level images in most every shooting situation, be it general photography, portraits, street photography, studio work, wedding photography, or travel use.  Plus it offers the ability, although somewhat limited by its frame rate and centrally clustered AF Points, to capture non-professional sports, wildlife, and other action type situations.  (See the image at the bottom of the page for the AF Points locations.)

As I work on a comparison post of the current Nikon dSLR line-up, have a look at these other Nikon related posts, including how to take full advantage of your autofocus system.

The camera is offered as a body-only or with the 24-85mm f/3.5-4.5G ED VR Lens (image stabilized).

And as I mentioned, I will be coming out with a Full Stop e-book user’s guide for the Nikon D600 – Nikon D600 Experience, possibly as soon as November 2012.

Order your D600 today on Amazon or B and H – it is already available and shipping!

Nikon D600 on Amazon (body only or kit)

Nikon D600 at B and H Photo – body only

Nikon D600 at B and H Photo – with the 24-85mm f/3.5-4.5G ED VR Lens

Nikon D600 full frame FX dSLR camera unbox unboxing 35mm new kit lens 24-85mm f/3.5-4.5
Nikon D600 full frame dSLR camera, shown with kit lens Nikkor 24-85mm f/3.5-4.5G ED VR – Image by author.  Special thanks to Newtonville Camera of Newton, Mass.

The Nikon D610 was introduced in October of 2013, and has added a couple minor, but important features to the camera. The D610 incorporates a new shutter mechanism which enables a faster six frames per second (fps) continuous shooting speed and a new Quiet Continuous shutter-release mode for taking a burst of images up to three frames per second and with decreased shutter noise. In addition, the D610 has an improved Auto White Balance setting which promises more natural color reproduction both indoors under artificial lighting and outdoors. As mentioned above, the previous D600 model marked an important moment in the evolution of digital SLR cameras as the first dSLR with a full-frame sized image sensor to also be priced at about $2000 at release, thus putting it within the reach of far more photography enthusiasts. With the D610, Nikon has retained a similar price. And although a number of D600 users reportedly experienced issues with dust or oil spots on the camera’s sensor, it is expected that the new shutter mechanism of the D610 will eliminate this concern.

Nikon D610 D600 autofocus af system points full frame viewfinder
Another simulated view of the Nikon D610 / D600 viewfinder, showing the location of all 39 autofocus AF Points.  Image of Nikon F SLR by author, taken with Nikon D600 with kit lens – 24-85mm f/3.5-4.5G ED VR, ISO 2500.  Special thanks to Newtonville Camera of Newton, Mass. 

The First User’s Guide to the Canon Rebel T4i / EOS 650D Now Available!

Canon T4i / 650D Experience, my most recent Full Stop dSLR e-book and the first available user’s guide to the T4i / 650D, goes beyond the manual to help you learn the features, settings, and controls of the advanced and versatile T4i / 650D, plus most importantly how, when, and why to use the functions, settings, and controls in your photography.

Written in the clear, concise, and comprehensive style of all Full Stop guides, Canon T4i / 650D Experience will help you learn to use your Canon T4i / 650D quickly and competently, to consistently create the types of images you want to capture. The e-book is available in PDF format for reading on your computer, e-reader, or tablet.

Learn more about it, preview it, and purchase it here:
http://www.dojoklo.com/Full_Stop/Canon_T4i_Experience.htm

As one reader has said about the previous Canon T3i Experience e-book:A Must-Have Accessory – What a great addition to my bag. This is a well written, full body of work that explains, in plain English, how to get the most out of my new camera.  Doug provides the knowledge and experience to bring you to the next level.  I look forward to learning more every time I open the book.”

Take control of your Rebel T4i / EOS 650D, the image taking process, and the photos you create!

Canon Rebel T4i 650D book ebook manual guide tutorial instruction bible how to dummies field EOS

For beginner, intermediate and enthusiast photographers:  This Canon T4i / 650D e-book is for those who wish to get more out of their camera and to go beyond Auto+ and Program modes and shoot in Aperture Priority (Av), Shutter Priority (Tv), and Manual (M) modes. To get your camera set up, it begins with explanations and recommended settings for all Menu settings, Custom Function options, and Movie Mode Menu settings of the T4i / 650D.  It covers basic dSLR camera functions and exposure concepts for those new to digital SLR photography, and explains more advanced camera controls and operation, such as using the various metering modes and exposure compensation for correct exposure of every image, controlling autofocus modes and focus points for sharp focus of still or moving subjects, and making use of the camera’s new multi-shot exposure modes.

Canon T4i / 650D Experience focuses on still-photography with an introduction to the movie menus and settings to get you up and running with video. Sections include:

  • Setting Up Your Camera – All of the Menu settings and Custom Function settings for the T4i / 650D, including movie mode menus, with brief descriptions and recommended settings for practical, everyday use. Set up and customize the advanced features of this dSLR to work best for the way you photograph.
  • Camera Controls – Description of all of the camera’s controls, plus when and why to use them, including how to take advantage of the new Touch Screen and Quick Control settings screens.
  • Aperture Priority (Av), Shutter Priority (Tv), and Manual (M) Modes – How and when to use them to create dramatic depth of field, freeze or express motion, or take total control over exposure settings.
  • Auto Focusing Modes and Drive Modes – How they differ, how and when to use them to capture sharp images of both still and moving subjects. Also how and when to use focus lock and back-button focusing.
  • Exposure Metering Modes of the Canon T4i / 650D – How they differ, how and when to use them for correct exposures in every situation. Also how to make use of exposure lock.
  • Histograms, Exposure Compensation, Bracketing, and White Balance – Understanding and using these features for adjusting to the proper exposure in challenging lighting situations.
  • Lenses – Explanation of Canon lenses and choosing your next lens.
  • Composition – Brief tips, techniques, and explanations, including the creative use of depth of field.
  • The Image Taking Process – A descriptive tutorial for using the settings and controls you just learned to take still and action photos.
  • Photography Accessories – The most useful accessories for day-to-day and travel photography including those specific to this camera, plus recommended photography books.
  • Introduction to Video Settings – Some basic settings to get you started.

This digital guide to the Canon Rebel T4i / EOS 650D is a 165 page illustrated e-book that goes beyond the manual to explain how, when, and why to use the features, settings, and controls of the T4i / 650D to help you get the most from your camera.

Learn more about Canon T4i / 650D Experience e book manual for the Rebel T4i / EOS 650D on my Full Stop website here:

http://www.dojoklo.com/Full_Stop/Canon_T4i_Experience.htm


Canon Rebel T4i / 650D vs. EOS 60D

Canon Rebel T4i vs. EOS 60D

I first introduced and discussed the new Canon Rebel T4i in this recent post, Introduction the the Canon Rebel T4i.  I encourage you to read that first to learn about all the features of the T4i. Then you may be wondering about how to choose between the T4i vs. the Canon EOS 60D, so I go into more detail about that here:

The predecessor to the T4i, the T3i, shared several important features with the 60D including the same 18 MP image sensor and the 63 zone exposure metering mode, both allowing you to get great, high-quality, well exposed images even in challenging lighting situations.  However, the T3i lacked a couple critical features that dedicated enthusiast photographers might eventually find that they would need, even if they weren’t ready or knowledgeable enough to use them right away.  They might have found that the less accurate autofocus system was eventually not up to their needs and that the slower continuous shooting speed limited the moments they could capture.

Canon Rebel T4i EOS 650D unbox unboxing compare vs T3i 60D choose decide

As I discussed above, the new Canon Rebel T4i / 600D demonstrates a significant leap in the “trickle-down” trend by borrowing several additional important features from the 60D, including the more accurate all-cross-type 9 point autofocus system and 5 frames per second, faster continuous shooting speed.  The fact that both of these cameras, the T4i and 60D, now share numerous key features, it is obviously a challenge to decide between them.

There are still a few features, however, that may help you decide one way or the other. The T4i has added continuous autofocusing while shooting video and a couple new Movie autofocus modes to best make use of this.  If you intend to shoot lots of video with your camera, this could be an important deciding factor. The T4i also adds a Touch Screen, allowing you to change settings, navigate menus, and browse through images with iPhone-like multi-touch gestures.  This isn’t a vital feature for taking better images, but it may be a convenience issue that makes a difference.

But the 60D still holds some important advantages for those who intend to be serious and dedicated to their photography, and who wish to use their camera as a versatile tool to fit with how they shoot. The 60D still offers a bigger and brighter viewfinder, additional external buttons and controls which makes changing camera settings on the fly much quicker and easier.  For example it has the metering mode, autofocus mode, etc. buttons right on top for easy access, plus the large Quick Control Dial on the rear of the camera to quickly change exposure compensation or to help with changing settings and rapidly moving through menus, and the all-important AF-ON button allowing more control over autofocus operation.

The 60D also has a slightly more rugged build than the T4i and some amount of weatherproofing seals, where the T4i basically has none.  Even more importantly, the 60D boasts additional Custom Function options, which will allow you to customize the camera and its functions to operate  exactly how you want them to: Safety Shift, Bracketing Sequence, ISO increments at 1/2 or 1/3 rather than full stops, dial direction reversal.  While some of these options may not seem important to the casual user, the heavy-duty user will find them indispensable in increasing their efficiency and deceasing their aggravation. And due to some of the additional features/ controls and stronger build, the body of the 60D is larger, feels sturdier, and is better balanced with the larger heavier lenses that a more dedicated photographer will likely be using sooner or later.

Introduction to the Canon Rebel T4i / 650D

Canon Rebel T4i / EOS 650D:

(After learning about the features of the new T4i here, see this other post for a comparison of the Canon Rebel T4i vs. EOS 60D)

Each year as Canon updates its high end Rebel (or xxxD) model, they borrow additional features from their more advanced (and more expensive) dSLR cameras, resulting in higher and higher quality consumer models that incorporate previous “pro” and “pro-sumer” features. The T2i then T3i added the improved 63 zone exposure metering system, 18 megapixel sensor, wireless controlled external flash, and full HD video of the pro-sumer models, plus threw in some additional menu items, custom function options, and in-camera processing features that were lacking in previous Rebels.

Canon Rebel T4i EOS 650D features compare
The Canon Rebel T4i / EOS 650D (image by the author)

Trickle-Down Features: The new Canon Rebel T4i / 650D demonstrates a significant leap in this “trickle-down” trend by taking the all-cross-type 9 point autofocus system and faster continuous shooting speed from the 60D and introducing these to the Rebel line. Although these previous omissions were seemingly necessary to differentiate the Rebels from the mid-level 50D/ 60D line, they resulted in two of the few but important “shortcomings” of the Rebels: they always had a less precise autofocus system with only one cross-type AF point (the center one), and a slower frames-per-second maximum continuous shooting speed. (Learn more about why cross-type points are so great just below.) Now with these improved features, the differences between the T4i and the mid-level 60D have been significantly reduced. (The 60D still offers additional external buttons and controls, slightly more rugged build and weatherproofing, and additional Custom Function options.)

All New LCD and Movie Focus: In addition, the T4i adds a first for a Canon dSLR: a touch-screen LCD that can be used for settings selection, image review, menu navigation, and even autofocusing or shutter release in Live View. Plus it offers a totally revamped hybrid autofocus system for Live View and Movie shooting that makes use of phase detection and contrast detect, allowing for another Canon dSLR first: continuous autofocus during Live View and Movie shooting. The phase detection aspect of the new AF system allows the camera to determine both the out-of-focus distance and the direction in which to correct, finally eliminating the slow and awkward focus hunting of previous models. Add one of the new “step motor” STM lenses such as the 18-135mm kit lens or the 40mm “pancake” and the lens will now silently focus during movie shooting, thus eliminating the autofocus motor noise previously picked up by the camera’s microphone. (Did I mention the built-in mic is now a stereo mic! And there is a stereo mic input jack.) Plus the image stabilization of the 18-135mm EF-S IS STM lens is designed to counteract camera shake caused by walking while shooting video.

Canon T4i EOS 650D Rebel T3i autofocus viewfinder 9 point cross type
Simulated view of the Canon T3i/ T4i viewfinder with 9 autofocus (AF) points. (Image by author)

All Cross-Type AF Points:  Cross-type autofocus points are more accurate and more desired because they can grab focus on a wider range of subjects. If your non-cross-type point is oriented only in the vertical direction, and you aim it at a subject displaying a strong line also also in the vertical direction (such as the side of a door frame) it will not be able to detect the line or a change in contrast, and will not be able to focus. Aim it at the strong horizontal line of the top of the door, and it will lock right on. (learn more about autofocus concepts here.)

So the fact that the T4i uses cross-type AF sensors for all 9 AF points means that the autofocus system is significantly more accurate, and you can confidently use not just the center AF point but all the outer points as well to focus on or track a subject. Not to mention that the center AF point is now also an even more accurate diagonal cross-type sensor when using an f/2.8 lens.

Faster Frame Rate: The T4i now boasts a more rapid 5 frames per second maximum continuous shooting speed, and incorporates the speedy Digic 5 processor, narrowing another major difference with the mid-level 60D. These features will allow you to capture quicker shots in a burst thus giving you the greater possibility of capturing just the right moment of action or the best facial expression or pose.

As mentioned, the Canon T4i also finally brings us great quality touch-sensitive (not old-fashioned pressure-sensitive) touch-screen capabilities on a Canon dSLR (with smear-resistance!). You can select and change your settings on the Quick Control Screen (Q Screen) simply by touching your choice, or use it to tell the camera where to focus during Live View shooting. It can also be used to navigate the menus, and during image playback you can easily swipe and zoom with iPhone-like multi-touch motions and response. Early reports indicate that the screen responds incredibly well, and the graphic layout of icons and options make it easy to use. This 1 million pixel LCD screen is fully articulating, as with the T3i and 60D.

New Live View/ Movie AF Modes: So in addition to the upgraded AF system during stills shooting, Canon has modified the Live View and Movie Shooting autofocus system, which now offers Face Detection+Tracking, FlexiZone-Multi, and FlexiZone-Single AF modes rather than the previous Quick, Live, and Face AF Modes. Quick Mode AF is still also available for Live View shooting. (With Quick Mode you use the 9 auto focus points, similar to the viewfinder AF Points, as displayed on the LCD Monitor. But since the camera is using the autofocus sensor to focus, it momentarily interrupts the Live View on the LCD Monitor when it flips the mirror back down to access the AF sensor.)

All of these features contribute to the T4i / 650D being quite an amazing consumer level camera. In most ways it is a higher-quality, more capable camera that the pro-sumer 50D of just a few years ago, and it will definitely fulfill the needs and expectations of most any enthusiast shooter. The only reasons one would need to step up to the 60D would be if you need more direct access to controls, buttons, and settings on the body of the camera in order to change and adjust settings on the fly, if you needed a slightly more rugged and dust/water-proof body, and wanted greater ability to customize the controls and functions of the camera with its additional Custom Functions.

Borrowing from the 5D MkIII:  The specs also note that due to the faster Digic 5 processor, the T4i has Lens Aberration Correction and Chromatic Aberration Correction features as first seen on the 5D3, as well as a new Ambient Light Correction.

Canon Rebel T4i EOS 650D mode dial
Note the additional Mode Dial options and Power Switch change (Movie Shooting Mode) to the Canon T4i (image courtesy of Canon USA)

Some Extras: And in addition to the standard Creative Zone shooting modes (Av, Tv, P, M) and the Basic Zone modes (Flash Off, Creative Auto, Portrait, Landscape, Close-Up, Sports, Night Portrait) the T4i eliminates the Automatic Depth of Field mode on the dial and adds Night shooting without a tripod and HDR backlight compensation. Movie Shooting mode is removed from the Shooting Mode dial and is added to the On-Off switch. The T4i includes the Auto+ Shooting Mode (Scene Intelligent Auto) introduced on the T3i and even used on the 5D Mark III, where the camera analyzes the specific scene in order to automatically determine the best and most appropriate exposure, white balance, Picture Style, focus, and other settings.

The T4i shares the same battery (the LP-E8) and the same battery grip (the BG-E8) as the T3i and T2i. The fun filter (Creative Filters) effects introduced in the previous models (including Grainy Black and White, Soft Focus, Fish-eye Effect, Toy Camera Effect, Miniature Effect) are all still available, plus a couple new ones such as Water Painting and Art Bold.

Order your T4i from Amazon or B and H Photo today:

(If you plan to purchase the T4i, or any photo equipment or books etc., I encourage you to do so through these referral links. While your price will be the same, they will give me a little something for the referral, which helps to support my blog and my work – thanks!  I appreciate your support!)

Canon T4i from Amazon – body only, 18-55mm kit, or new 18-135mm STM kit

Canon T4i from B&H Photo – body only, 18-55mm kit, or new 18-135mm STM kit


Remember to check out this other post for a comparison of the Canon Rebel T4i vs. EOS 60D.

For a full list of Rebel T4i / EOS 650D specifications and features, have a look here:

http://www.usa.canon.com/cusa/consumer/products/cameras/slr_cameras/eos_rebel_t4i_18_135mm_is_stm_lens_kit#Specifications


Top Tips and Tricks for the Canon 5D Mark III

OK, I admit, I’m being a bit deceptive.  While this post will include “tips” for taking full advantage of the Canon EOS 5D Mk III, it won’t really contain any “tricks.”  That is because with digital photography, especially a camera as powerful and complex as the 5D3, there really aren’t any tricksTricks implies shortcuts, and to paraphrase Euclid, there is no royal road to dSLR photography.  Instead there are techniques and camera controls that can and should be learned.  These will then allow you to adapt not just to a specific situation or emulate a certain image or style, but will give you the tools and knowledge to adapt to any situation and create the images you desire.

I spent several intimate weeks with the Canon 5D Mk III as I researched and wrote my dSLR camera guide, Canon 5D Mark III Experience, the first (and hopefully best!) book available for the 5D Mk III.  In the process I learned and discovered a few obvious and not so obvious things about the 5D3 that will help you get the most from your camera.

Canon 5D mark III mk 3 Experience e book tips tricks how to learn manual guide instruction
Detail of the Canon 5D Mark III

Learn and Take Advantage of the Autofocus System

First and foremost is to learn, understand, and make full use of the new 61 Point autofocus system.  This powerful and highly customizable AF system will allow you to capture more sharp images of a variety of moving subjects which was not previously possible with the 5DII, or even the 7D.  But to do this you will need to take control of it in order to focus on, or begin tracking, your intended subject.  This involves making use of the AF Modes as well as the AF Area Selection Modes and AF Points.

For moving subjects you can then employ the AF Cases and their settings to let the camera know what to expect as far as subject movement.  AF subject tracking works in part by predicting where the subject will be when the Shutter is pressed, so if the camera knows the subject is going to be moving erratically about the frame and changing its rate of speed, then it can take measures to better follow this than if it is set for a subject that is expected to move smoothly at a steady rate.  Ten tips could easily be written about the autofocus system alone, but I will limit it to a few (my e-book guide Canon 5D Mark III Experience contains extensive explanation of the AF system and all its elements, if you wish to learn it inside and out.)

Canon 5d mark iii mk 3 auto focus autofocus 61 af point select
Simulated image of the Canon 5D Mark III viewfinder showing the 61 autofocus points, with the desired AF Point shown as the larger black square.

One of the essential steps in taking a successful and sharp photo is controlling where the camera autofocuses.  If you allow the camera to autofocus by automatically choosing its own focus point(s) (such as in Auto+ Shooting Mode or with One-Shot AF Mode and Auto Selection – 61 Point AF Area Selection Mode) it typically focuses on the closest object.  This may or may not be what you want to focus on, so you should select or at least narrow down where the camera focuses using the autofocus AF Points or Zones.  By doing so you are telling the camera exactly where to autofocus or to look to find a moving subject to track.  For example, you often want to focus on a subject’s eyes, but if you allow the camera to choose the autofocus point itself, it may select another part of the face, or somewhere else on the body, or even a raised hand that is nearer to the camera than the face to focus most sharply on.  If you are capturing an image of a bird in a tree, the camera has no idea you want the autofocus system to zero in on the bird so that it is in sharp focus and not the branches or leaves near it or the perhaps even the leaves closer to you.

You will select an AF Mode based on whether the subject is still or moving, and select an AF Area Selection Mode based on how large of an area you want the camera to look at to find your intended subject – ranging from a small spot to a wider Zone to all the available 61 AF Points.  You can set the AF Modes and AF Area Selection Modes in a variety of combinations based on what and how you are shooting.

Activate all the Available AF Area Selection Modes at first and experiment with them all.  Then if you decide that you will never or rarely use one or more of them, de-activate those modes so that you don’t have to “click” through them every time to select your desired mode.

canon 5d mark III mk 3 autofocus auto focus af point zone 61 af area selection mode
Available AF Area Selection Modes of the Canon 5D Mark III

Spot AF is Not Necessarily More Accurate than Single-Point AF.  You may be inclined to use Spot AF all the time, assuming it will be more accurate than Single-Point AF, but this is not advised.  Spot AF is designed for specific situations and autofocusing challenges, where you need to focus on a very precise area and avoid any surrounding or foreground objects that the AF system may otherwise lock onto.  This can include making sure you zero-in on a bird that is sitting among leaves and branches, or perhaps shooting through a fence to a subject beyond.  In those situations you may find that Single-Point AF searches back and forth between the near leaves/ fence and the further subject, because the area it is looking at to find the subject encompasses both potential subjects.  Spot AF will allow you to target in on a more precise area.  Although Spot AF is indicated in the Viewfinder by the tiny square within the larger selected AF Point square, Spot AF will actually pinpoint the focus to an area about the size of the larger square.

So while Spot AF will be more accurate in certain situations as described, it should not be used for general use.  Because it is so precise, the area it looks at to find contrast or a detail on which to focus may be an area of solid color.  For example if you used Spot AF to quickly focus on the general cheek and eye area of a face, it may be aimed at an area of skin without contrast, whereas the Single-Point AF area might encompass the cheek and the eye and thus find enough contrast to be able to properly and quickly focus.

Decide How Many Selectable AF Points you wish to Choose From.  If you are coming from a Canon 5D Mark II, the 60D, or any number of other previous Canon dSLR cameras, you may be used to only having 9 AF Point to choose from.  If you still wish to manually select a specific point or zone, you may find that 61 points are a bit overwhelming at first.  Even if you are used to the 19 AF Points of the Canon 7D, you may not wish to suddenly jump up to 61 AF Points.  So you can limit the number of AF Points you wish to choose from to either 15 or 9, or to just the more accurate cross-type points.  Unfortunately, the 9 points are not in the nice diamond pattern of previous EOS cameras, but you may find them to be more manageable.

canon 5d mark III mk 3 auto foucs autofocus af mode point area selection 61 11
Limit your Selectable AF Points if 61 are too many to deal with.

Choose Your Priority when Working in AI Servo – Focus or Release.  You will need to tell the camera what your priority is when shooting in AI Servo AF mode – is it to ensure that the subject is in focus, or that the shutter is release immediately, whether or not the subject is in focus?  There are two menu items to set the priority for the first image and the second and subsequent images if shooting in Continuous Shooting Mode.

For AI Servo 1st Image Priority, Release priority will prioritize shutter release, or immediately capturing the initial shot at the possible expense of exact focus.  Generally when taking a photo, you are supposed to half-press the Shutter Button, allow the camera to focus, then continue the full-press of the Shutter Button to take the image.  If you simply “mash” down the Shutter Button, this setting will cause the camera to take the photo without bothering to focus first.  Sometimes when photographing sports, news, or events, capturing the “decisive moment” may take priority over exact focus.

Setting for Focus priority will prioritize focus for the first shot, ensuring that the subject is in focus before the picture is taken.  So when you fully press the Shutter Button, this setting may cause a brief, perhaps micro-seconds delay while the camera confirms focus before actually releasing the shutter.

Equal priority is a slight compromise between Release and Focus priorities.  It allows a brief (perhaps micro-seconds) pause for the camera to possibly find focus before releasing the shutter.  It does not guarantee that the image will be in focus, but merely gives it more of a chance to find focus.  It generally seems to make more sense to choose Release or Focus based on your priority.

Canon 5D mark III mk 3 custom setting function control multi controller direct autofocus point
AI Servo 1st Image Priority menu to determine if capturing the shot or getting the subject in-focus is the priority.

AI Servo 2nd Image Priority is similar except that it applies to the second and subsequent images in the burst.  Setting for Speed (Shooting speed priority) will prioritize shutter release, or continuing the high speed burst at the possible expense of exact focus.

Setting for Focus will prioritize focus tracking for the following shot(s), ensuring that the subject is in focus as you continue to take the burst of images.  Again, this may cause a brief, perhaps micro-seconds delay while the camera confirms focus before releasing the shutter for each image.

Equal priority again allows a slight pause before each of the subsequent shots to perhaps give the camera time to find focus before releasing the shutter.  This pause may be slightly more pronounced when shooting in low light or low contrast situations.

These 1st Image Priority and 2nd Image Priority settings should be set in conjunction with each other, based on the type of situation you are photographing and thus your priorities.  Generally, it sharp images are your goal, you will want to set both for  Focus Priority.  You may sacrifice the maximum 6 frames per second (fps) continuous shooting speed (if you have the Drive Mode set for High Speed Continuous) as there might be a  couple micro-seconds or more delays as the camera ensures that the subject is in focus before taking the subsequent shots.  If you are capturing a “decisive moment” such as a runner at the finish line or a goal being scored, you will want to set one or both of the settings to Release Priority/ Speed Priority, but ensure somehow that you have pre-focused on the subject distance so the result is not wildly out of focus.  Again, I go into much more detail about the various combinations and when to make use of them in my e-book.

Set the Custom Controls for Multi-Controller Direct.  This will allow you to manually select your AF Point or Zone more quickly by simply toggling the Multi-Controller thumb joystick, without having to first press the AF Point Selection Button.  You have probably noticed, to the dismay of your muscle memory, that the AF Point Selection Button no longer controls image zoom.  This is because there are many more image review options that are now made possible by Comparative Playback (side by side image review), discussed just below.

canon 5d mark iii mk 3 multi controller direct af auto focus autofocus point select

canon 5d mark iii mk 3 auto focus autofocus multi controller direct af point select zone control custom function setting
Set the Multi-Controller for AF Point Direct Selection for ease and speed.

Take Advantage of Comparative Playback (Side by Side Image Review).  Of course you can instantly review the image you just captured on the rear LCD Monitor, but the 5D Mk III now also offers Comparative Image Playback Mode (Two-Image Display) which gives you the ability to simultaneously compare two images or two different sections of the same image.  Whereas before, one would have to “flip” back and forth between two images and navigate around the images, this feature allows for some extremely helpful and flexible image analysis that was previously only possible once you were back at your computer.

To enter Comparative Playback Mode during image playback or review, press the Creative Photo / Comparative Playback Button (at the top of the row on the left of the camera back), which is also indicated by the side-by-side blue squares icon for side-by-side image playback.  Use the SET Button to highlight which of the two image windows you wish to navigate, then use the Quick Control Dial or Main Dial to scroll or jump to the desired image, the Magnify Button followed by the top Main Dial to zoom in or out of the selected image, and the Multi-Controller to navigate around the selected image frame.  You can press the INFO Button repeatedly to change the Shooting Information Display in order to view shooting information and/ or the Histograms.  If you zoom in on a specific area of one image and wish to zoom in on the other image to the same magnification and same area of the image, press the SET Button to switch to the other image window, then press the [Q] Button.  Also, press and hold the Playback Button to view the highlighted image as a single, full-screen image.

canon 5d mark iii mk 3 view image lcd side by side comparative playback review rear screen
Comparative Playback Mode view of two different images, also showing the images’ Histograms.

There are several different viewing options and potential uses for Comparative Playback, whether you are simultaneously viewing two separate images or two areas of the same image.

-Display the active AF point(s).
-Preview alternate cropping guides.
-View the thumbnail plus the Luminance Histogram.
-View the thumbnail plus the RGB Histograms.
-View the thumbnail plus basic exposure information.

For two different images:
-Compare the compositions of two images simultaneously.
-Zoom in and simultaneously compare a specific area for focus or exposure.
-View the thumbnails along with histograms or basic exposure information of both images.

For the same image:
-Zoom in and simultaneously compare two separate areas of the same image to have a closer look at focus or exposure.
-View the entire image for overall composition while also zooming in to view an area of detail for focus or exposure (see Figure 61).

Set the Default Magnification for Image Review.  In order to immediately review your images according to your preferences, you should set the initial magnification and position that you will view an image during image review (Playback) when you press the Magnify Button.  You can set for no magnification (1x) and then use the top Main Dial to zoom in and out.  This can be handy if you have the image review set to initially show the Shooting Information Display with the Histogram.  Since the image in that view is a thumbnail, you can then press the Magnify Button to show the full size image.  After this initial zoom, you can then use the Main Dial to zoom in or out.

Or set for 2x, 4x, 8x, or 10x magnification and it will instantly zoom to that magnification when the Magnify Button is pressed.  Again, after this initial zoom, you can then use the Main Dial to zoom in or out.  Each of these magnifications will zoom from the center of the image.  Or you can set it to quickly zoom in to full size, 100% view of the pixels, zoomed into the AF Point where focus was achieved, using setting Actual size (from selected pt).  This can be useful to quickly check for precise focus, though note that if you focused with a selected AF Point and recomposed, it will zoom into the final position of that AF Point in the composition, not the actual position where you used it to focus on your subject.  But if you only recomposed slightly, it will often be easy to quickly navigate to the actual area of focus.  The setting Same as last magnif. (from ctr) will zoom in at the same magnification that you last viewed an image at, centered at the image center.

canon 5D mark III mk 3 magnify button lcd view zoom
Magnification menu to set how images are initially viewed during Playback when the Magnify Button is pressed.


I’m still putting this post together but wanted to share what I had already written.  Next week I will go into more detail about the tips below:

Turn on the Viewfinder Warnings

canon 5D mark III mk 3 viewfinder warning custom function setting


Auto Rotate Images in the Camera and on Your Computer

canon 5D mark III mk 3 auto rotate image view lcd


Use the Q Button for Quick Access to a Variety of Features for Still Images

canon 5d mark iii mk 3 q button control edit image view lcd


Make Use of the Silent Control Touch Pad and Q Button for Movie Shooting

canon 5d mark iii mk 3 movie video silent control touch pad q button menu


canon 5d mark iii mk 3 movie video silent control touch pad q button menu


All of the above information – and much, much more – can be found in Canon 5D Mark III Experience, my latest Full Stop dSLR user’s guide e book, which goes beyond the manual to help you learn the features, settings, and controls of the powerful and highly customizable EOS 5D Mk III, plus most importantly how, when, and why to use the functions, settings, and controls in your photography.

Written in the clear, concise, and comprehensive style of all Full Stop guides, Canon 5D Mark III Experience will help you learn to use your Canon 5D Mk 3 quickly and competently, to consistently create the types of images you want to capture. The e-book is available in either PDF, EPUB, or MOBI format for reading on any device.

Learn more about it, preview it, and purchase it here:
http://www.dojoklo.com/Full_Stop/Canon_5DMkIII_Experience.htm

As one Canon user has said about Full Stop guides, “I don’t know how I could fully take advantage of all the features the camera has to offer without this publication! It’s well-organized, easy to understand, and succinct enough to keep your attention while still containing a wealth of information to get the most out of your camera.”

Take control of your 5D Mk III, the image taking process, and the photos you create!

Canon 5D Mark III mk 3 book ebook manual guide tutorial instruction bible how to dummies field EOS


Taking Advantage of the Canon 5D Mark III / IV Autofocus System

The autofocus systems of the Canon 5D Mark III and Canon 5D Mark IV are incredibly powerful and versatile, with their 61 AF Points, various pre-set AF “Cases,” and its Custom Function settings and redesigned menus to help photographers take advantage of its features.  The AF systems are designed to better enable you to lock onto and track moving subjects, so that when you take the shot the subject is ideally in focus, even when using Continuous Shooting to capture multiple shots.

For the basics of the Canon AF system, including the AF Modes, please see this other post first: Taking Control of Your Canon Autofocus System.  This post here will then address the additional features and options of the 5D3 and 5D4 AF system.  Most of the text below is excerpted from my e-book guides Canon 5D Mark III Experience and Canon 5D Mark IV Experience, where I write extensively about the 5D3  and 5D4 autofocus systems, including the numerous and important Auto Area Selection Modes.

Please note that some of the menu numbers, names, and options may vary slightly between the two cameras.

Canon 5D Mark III mk 3 autofocus auto-focus auto focus manual guide book
Antigua, Guatemala – simulated view of Canon 5D Mark III viewfinder and AF Points

All of these settings will apply when working in AI Servo Autofocus Mode.

First you will need to set the Autofocus (AF) Menu AF2: AI Servo settings to match your priorities:

AI Servo 1st Image Priority and AI Servo 1st Image Priority:  

Setting for Release priority will prioritize shutter release, or immediately capturing the initial shot and subsequent shots at the possible expense of exact focus.  Generally when taking a photo, you are supposed to half-press the Shutter Button, allow the camera to focus, then continue the full-press of the Shutter Button to take the image.  If you simply “mash” down the Shutter Button, this setting will cause the camera to take the photo without bothering to focus first.  Sometimes when photographing sports, news, or events, capturing the “decisive moment” may take priority over exact focus.

Setting for Focus priority will prioritize focus for the first shot and subsequent shots, ensuring that the subject is in focus before the picture is taken.  So when you fully press (or hold) the Shutter Button, this setting may cause a brief, perhaps micro-seconds delay while the camera confirms focus before actually releasing the shutter.

Equal priority is a slight compromise between Release and Focus priorities.  It allows a brief (perhaps micro-seconds) pause for the camera to possibly find focus before releasing the shutter.  It does not guarantee that the image will be in focus, but merely gives it more of a chance to find focus.  It generally seems to make more sense to choose Release or Focus based on your priority.

Then choose the AF Area Selection Mode that will best enable you to keep track of your subject.  Choose the some that is most accurate yet allows for the proper amount of lee-way if you are unable to keep the subject under your selected initial point at all times.  These settings include Single Point AF, AF Point Expansion 4 or 8 surrounding points, etc.  I will not go into detail about them here, but they are fully discussed in my guide.

Then find a “Case” setting which closely matches your needs

Case 1 – Versatile multi purpose setting

Tracking sensitivity:  0
Acceleration/deceleration tracking:  0
AF point auto switching:  0

Case 2 – Continue to track subjects, ignoring possible obstacles

Tracking sensitivity:  -1
Acceleration/deceleration tracking:  0
AF point auto switching:  0

Case 3 – Instantly focus on subjects suddenly entering AF points

Tracking sensitivity:  +1
Acceleration/deceleration tracking:  1
AF point auto switching:  0

Case 4 – For subjects that accelerate or decelerate quickly

Tracking sensitivity:  0
Acceleration/deceleration tracking:  1
AF point auto switching:  0

Case 5 – For erratic subjects moving quickly in any direction

Tracking sensitivity:  0
Acceleration/deceleration tracking:  0
AF point auto switching:  1

Case 6 – For subjects that change speed and move erratically

Tracking sensitivity:  0
Acceleration/deceleration tracking:  1
AF point auto switching:  1

These are the various options of these Cases which you can tweak for your specific needs:

Tracking sensitivity – This is the speed at which the AF system will switch from the initial subject to another subject when a new subject enters the focusing field of view or passes in front of the initial subject, or if you momentarily lose the subject that you are trying to keep positioned under a selected AF point. If you wish for it to quickly lock onto a new subject that enters the area you are focusing on, or rapidly switch intentionally between subjects at various distances, set for +2. If you wish to retain focus tracking on the same subject and ignore new or obstructing subjects set for -2. If your objective is somewhere in between, set accordingly at +1, 0, or -1.

Acceleration/deceleration tracking – AI Servo Autofocus Mode works in part by predicting the potential location of a subject based on the subject’s current speed and direction. In order to make these predictions more accurate, use this setting to tell the camera if the subject is accelerating/ decelerating at a steady pace, or if it is changing its speed more erratically. For subjects that move smoothly set for 0. If the subject moves erratically and may very suddenly speed up, slow down, start, or stop set for 2. Or set for 1 if the subject’s movements are somewhere in between these other options.

AF point auto switching – When you are using Auto Selection – 61 AF Point, Zone AF, or AF Point Expansion Autofocus Area Selection Modes this setting will adjust the speed at which the AF Points change to track a moving subject as it travels across the frame. Setting 0 is for a slow, gradual speed at which the surrounding AF Points will pick up and start tracking the subject if it moves away from the initially selected AF Point. Setting 1 will somewhat rapidly switch to a different AF Point, and setting 2 will most rapidly switch to a different AF Point. So for example, if you began tracking a subject with a selected point and the subject was quickly moving between it and the surrounding eight points, setting 0 would retain focus at the initial point expecting the subject to soon return to that primary point. Setting 2 would mean the surrounding points would immediately activate, pick up the moving subject as it entered their area of focus, and be used to focus on it.

Again, there is much more to the AF System and its Autofocus Modes, Autofocus Area Selection Modes, and Menu and Custom Function settings.  Please have a look at my e-book guides Canon 5D Mark III Experience and Canon 5D Mark IV Experience to learn more!

Take Control of your Canon 5D Mark III with my e-book guide!

I have completed my e-book guide for the new Canon EOS 5D Mark III, called Canon 5D Mark III Experience.  This Still Photography Guide to the EOS 5D Mark III goes beyond the EOS 5D Mk III manual to help you learn when and why to use the various controls, features, and custom settings of this powerful camera, including the advanced and sophisticated 61 point autofocus system, the numerous Menu and Custom Function options, and the new controls and features.  Written in the clear and concise manner of all Full Stop guides, Canon 5D Mark III Experience can help you learn to use your Canon 5DIII quickly and competently, to consistently create the types of images you want to capture.

Take control of your Canon 5D Mk III and the images you create!

Canon EOS 5D Mark III Mk 3 111 manual guide how to dummies instruction autofoucs meter mode experience

As one Canon user has said about on of my previous guides:

I don’t know how I could fully take advantage of all the features the camera has to offer without this publication! It’s well-organized, easy to understand, and succinct enough to keep your attention while still containing a wealth of information to get the most out of your camera.”

This book is now available!  To learn more about it, please click on the cover or the link below to have a look at my Full Stop e-book website:

http://www.dojoklo.com/Full_Stop/Canon_5DMkIII_Experience.htm


What Readers Had to Say about Doug’s Previous dSLR Camera Guides:

Brilliant – just what I was looking for! A manual that was exciting, clear to follow, had examples and was used by a professional who gave just the right amount of technical info with explanations of why you use those settings, when to use those settings and so on…all properly explained. Doug’s book is a joy to follow, well thought through and well written. The camera company should be employing Doug to write their cameras manuals!
-Robert D.

A Must-Have Accessory – What a great addition to my bag. This is a well written, full body of work that explains, in plain English, how to get the most out my new camera. Doug provides the knowledge and experience to bring you to the next level. I look forward to learning more every time I open the book.
-Steven

Definitely reduces the slope of the learning curve to an easy gradient – I found that it was easy to read and understand, full of important hints and suggestions and allowed me to get to grips with the tools available in the camera in a very short time indeed. Excellent value!
-O.B.

It’s the first guide I’ve read which has taken me through all the settings in an understandable way. I now feel that I have control over the camera.
-Peter S.

Nikon D5100 Autofocus System Video

I’ve written a detailed article about Taking Advantage of the Nikon D5100 Autofocus System, but I decided to make a video as well, to introduce and explain the Focus Modes, Autofocus Area Modes, and the AF Custom Settings of the D5100, in order to help one use their camera to its full capabilities:

Change the viewer settings to 720p to watch in HD

To learn more about about the Nikon D5100 autofocus system as well as how to fully take control of your camera in order to consistently capture better images, please have a look at my e-book user’s guide Nikon D5100 Experience.  It not only explains all the features and controls but also when and why to use them in real life photography.

New Canon Autofocus System

I wrote about the introduction of the new Canon flagship EOS 1D X digital SLR a couple weeks ago.  As I mentioned, I don’t typically discuss $6,000 professional cameras on this site – if someone is trying to decide if they need a 1D, well, they probably don’t need a 1D!  If you need one, you already know that you need one…

Anyway, I think it is well worth looking at the new autofocus system that the 1D X introduces as it will eventually find its way, in some form, into the pr0-sumer cameras such as the Canon 7D Mark II and hopefully the 5D Mk III.  While those cameras won’t offer the 61 AF points and huge variety of customization options, they may incorporated the increased precision, low light sensitivity, better tracking speed, and the new algorithms that coordinate with the exposure system to detect and better track a subject by brightness, color, and even facial recognition (yes, even pros can use face-detection now!).

canon autofocus af system
Screenshot from Canon 1D X video (link below) explaining new autofocus system – image by Canon Europe

What will will certainly see in the newer cameras is the redesign of the menus, incorporating an Autofocus tab and AF tracking presets!  These are highly desirable features, as anyone who has attempted to fully take advantage of the 7D AF system knows how challenging it is to go between the AF menus and the Custom Functions to change to the desired settings while trying to decipher the cryptic C.Fn option names.

The EOS 1D X has a single AF tab in the menu, containing 5 AF sub-menus.  One of the most helpful sub-menus is going to be the AF Config Tool menu that contains the “Case Study” AF presets.  Instead of trying to recall how to set each Custom Function such as AI Servo Tracking Sensitivity and AI Servo AF Tracking Method to best track a subject and respond to loss of the subject or interference of an object between the camera and subject, one can now choose from preset options with helpful descriptions such as “Continuous shooting, ignore obstructions,” “Subjects that accelerate or decelerate quickly,” and “Instantly refocus suddenly with obstructions.”

The 1D X offers six AF “Case studies” presets, and there is no reason not to include all of these with the 7D replacement, since it too is a camera designed for sports and motion.

If you intend to purchase the 7D Mk II or whatever it will be called, it is worth your time to have a look at this page and video from Canon and begin to become familiar with what you will want to learn and take advantage of in the near future with the likely-to-be-improved 7D AF system and menus:

Don’t Let the Locations of the AF Points Dictate Your Composition

I began to discuss the autofocus modes of various dSLR cameras in previous posts including Taking Control of Your Canon Autofocus System and Taking Advantage of the Autofocus Systems of the Nikon D5100 and the Nikon D7000

In this post I wish to go into more detail about one of the reasons it is important to take control of your autofocus system, namely not allowing the locations of the AF Points in your viewfinder to dictate your final composition.

As I mentioned in previous autofocus posts, one of the essential steps in taking a successful photo is controlling where the camera focuses.  If you allow the camera to auto focus by choosing its own focus point(s), it typically focuses on the closest object.  This may or may not be what you want to focus on, so you should select where the camera focuses using the Auto Focus Points.  For example, you often want to focus on a subject’s eyes, but if you allow the camera to choose the autofocus point itself, it may select another part of the face, or somewhere else on the body, or even a raised hand that is nearer to the camera than the face to focus most sharply on.

In addition, there are reasons to use the outer focus points and not just focusing with the center AF point and then recomposing.  First, if you are taking several shots of the same subject and framing, you will not have to re-focus with the center point and recompose between each shot.  And by controlling exactly where you focus, you then have greater, more precise control over the use of dramatic depth of field.  Also, if you use the center point and recompose, you have swept the camera in an arc to recompose, and are thus always focusing at a distance behind the subject.  This may not be as noticeable when the subject is further away, but for a close subject – especially when using shallow depth of field – the difference is critical.

One of the additional critical reasons to take control of your autofocus system is so that you don’t let the location of the AF Points dictate your composition. What happens when the subject you want to focus on is not located exactly under one of the AF Points? Even with 9 or 19 or more AF Points to choose from, they will not always be located exactly at or near where you need them to be.  Recomposing or re-framing your shot is often necessary so that you can capture exactly the image you wish to and not one dictated by the locations of the AF Points as you see them in the viewfinder.

Canon 7D 5D mark II 60D T3i 600D autofocus system AF point choose select set setting
Figure 1 – The desired framing and composition of the shot I wish to take, yet no AF Point, including the selected lower right point (the larger point shown in red here) is located exactly at the woman’s head where I wish to focus. (Canon 7D viewfinder shown)

Canon 7D 5D mark II 60D T3i 600D autofocus system AF point choose select set setting
Figure 2 – Image is temporarily framed to place the selected AF Point over the woman’s head, Shutter Button is pressed half-way and held to lock focus at that distance, image is recomposed to the desired framing of previous Figure 1, and Shutter Button is fully pressed to capture the image.

Figure 1 shows the desired framing and composition of the shot I want to take, but the woman is not located under an AF Point. This composition is desired for me because it captures the entire window along with some space around it, as well as some space in front of the woman for her to “walk into” – but not an excessive amount of space. So I manually select the lower right AF Point (using Single-Point AF Mode), temporarily frame the image to place the selected AF Point over her face or head, press and hold the Shutter Button half-way to lock focus at that distance (Figure 2), and see the Focus Confirmation Light illuminate in the viewfinder. I then recompose back to the final framing I want (Figure 1) and press the Shutter Button fully to take the image. Even though the subject is moving, I do not need the sophisticated tracking of AI Servo (Canon) or Continuous Servo (Nikon) Focus Mode to keep her in focus. I can quickly lock focus using One Shot (Canon) or Single Servo (Nikon) Focus Mode, recompose, and take the image without the camera-to-subject focus distance changing significantly.

With the example images above (Figures 1, 2), focusing on the wall would not have been tragic because the distance between the subject and the background is small, and if a medium or narrow aperture such as f/8 or f/16 is used both the wall and the subject may be in acceptable focus. If the background was further away, and/ or a wide aperture such as f/2.8 was used – especially with a telephoto lens, and if the image was enlarged, you would clearly see that the camera focused on the wall and not the woman. Not to mention the fact that the wall is a somewhat consistent area of color and the AF system may have difficulty properly focusing on it. So it is best not to take shortcuts such as focusing on the wall and hoping the subject will also be in focus, because in many other situations you will not have this option. It is best to take the photo properly and to learn and practice the habit of working in the more rigorous manner if you want all your photos to be sharp.

If you would like to learn more about the autofocus systems of your Canon or Nikon dSLR camera, as well as learn to use the other features of your camera including metering modes, Aperture and Shutter priority modes, all the menus and Custom Function settings, and more, have a look at my Full Stop e-book camera guides. In addition to explaining the features and settings, the guides clearly explain when and why to use them in order to capture the images you desire.

Take control of your camera and the images you create!

Learn more about the e-books by clicking on their titles or on the banner below:
Canon 7D Experience
Canon T3i Experience
Your World 60D
T2i Experience.

Nikon D7000 Experience
Nikon D5100 Experience.

full stop dslr photo photography camera manual guide for dummies canon nikon

For those with other cameras, check out my Ten Steps to Better dSLR Photography which also discusses taking advantage of any dSLR camera’s autofocus system.

Was this post helpful?  Please let others know about it by clicking the Facebook or Twitter sharing buttons below, linking to it from your blog or website, or mentioning it on a forum.  Thanks!  Want to help support this blog with no cost or effort?  Simply click on the Amazon, B&H Photo, or Adorama logos on the left side of this page to go to those sites and make your purchases.  They will then give me a little referral bonus!

Taking Control of Your Canon Autofocus System

This article mostly applies to the 9 point autofocus system of the Canon 60D and the Rebels including the T5i / 700D and T4i / EOS 650D (and their predecessors), as well as to the new Canon 6D and its 11 AF points.  The Canon EOS 7D also shares the same Autofocus Modes discussed below, but it adds Autofocus Area Modes to the mix as well as additional Custom Functions affecting the AF system, so I will have to address those additional capabilities in the future (or you can learn all about them now in my Canon 7D Experience e-book).  I have written a separate post that addresses the AF system of the Canon 5D Mark III.

You can learn much more about using these cameras with my Full Stop e-book camera guides for Canon dSLR cameras.

Using Auto Focus
One of the essential steps in taking a successful photo is controlling where the camera focuses.  If you allow the camera to auto focus by choosing its own focus point(s), it typically focuses on the closest object.  This may or may not be what you want to focus on, so you should select where the camera focuses using the Auto Focus Points.  This does not mean you have to manually focus the camera, it means you tell the camera exactly where to autofocus.  For example, you often want to focus on a subject’s eyes, but if you allow the camera to choose the autofocus point itself, it may select another part of the face, or somewhere else on the body, or even a raised hand that is nearer to the camera than the face to focus most sharply on.  If you are capturing an image of a bird in a tree, the camera has no idea you want the autofocus system to zero-in on the bird so that it is in sharp focus and not the branches or leaves near it, or the leaves closest to you.

Autofocus works by looking for contrast, so try to focus (place your AF Point) on a detail with a strong line or strong contrast between light and dark.  It may not be able to focus on a large area of consistent color – such as a white wall or blue sky or even an evenly colored and lit shirt – or on a subject that is too dark.  It can be disrupted by regular patterns or confused when looking through close objects to objects farther away, such as looking through a fence.  And it sometimes fails to work as well in dim light, though the AF-Assist Beam can assist in this situation.  When photographing people, always try to focus somewhere on the face, ideally on the eyes or eyebrows, then recompose the framing of your image if necessary.

Select an Auto Focus Point, or AF Point, using the Multi-Controller or using the AF Point Selection Button and the Cross Keys (depending on your camera).  If you have a model with the Multi-Controller (such as the 60D with the thumb-pad or the 7D or 5DII with the thumb-joystick), be sure to set the Custom Function setting for AF Point Selection Method so that you can directly change the AF Point without pressing the AF Button first.

Canon 60D T3i 600D autofocus system AF point select choose set setting
Figure 1 – The selected AF Point is located over the subject’s eye in order to ensure the camera autofocuses where desired.  (Canon 60D viewfinder shown, T3i/600D viewfinder similar)

To see how autofocus point selection works, make sure the switch on your lens it set to AF and your Autofocus Mode, as seen on the top LCD Panel or rear LCD screen, is set to One Shot, then:

•    Tap the Shutter Button with a half-press to wake up the camera.
•    Looking through the viewfinder, use the Multi-Controller or Cross Keys to select the focus point that is nearest to where you want to focus.
•    Place that point over your intended subject.
•    Press and hold the Shutter Button halfway down and see that point blink red.  The Focus Confirmation Light should light up in your viewfinder.  You have locked the focus.
•    Keeping the Shutter Button pressed halfway, recompose if necessary, and take the shot by fully pressing the Shutter Button.

There are reasons to use the outer focus points and not just the center one all the time.  First, if you are taking several shots of the same subject and framing, you will not have to re-focus with the center point and recompose between each shot.  And by controlling exactly where you focus, you then have greater, more precise control over the use of dramatic depth of field.  Also, if you use the center point and recompose, you have swept the camera in an arc to recompose, and are thus always focusing at a distance behind the subject (think of an arc that is your focus distance, and the tangent line off that arc that is the focus plane which now runs behind the subject after re-composing).  This may not be as noticeable when the subject is further away, but for a close subject – especially when using shallow depth of field – the difference is critical.

It may sound difficult to select the focus point each time, but it is actually very quickly done and should become instinctive.  You may even start to set your focus point as you approach a scene before even bringing your camera to your eye.

Focus Modes
The 60D and T3i (and 5D/ 5DII and 7D) have different focus modes to choose from, typically depending if your subject is still or moving, or if you wish to track its movement.

One-Shot AF
Use this mode when your subject is still and not going to move, or if your subject is not going to move very much, or if the distance between you and the subject is not going to change between the time you lock focus, recompose, and take the shot.  Lock focus on the subject and recompose if necessary.  This mode can even be used for moving people or objects if you quickly take the shot after establishing or locking focus.

Focus on your subject by pressing the Shutter Button halfway.  The active or selected AF Point will be displayed or will illuminate, and the Focus Confirmation Light at the lower right in the Viewfinder will illuminate as well.  Continue to press the Shutter Button all the way to take the shot.  If you half-press the Shutter Button to lock focus on your subject, the camera will remain focused at that distance as long as you keep half-pressing the Shutter Button.  You can recompose the shot as you wish and then full press the Shutter Button to take the photo.

As just noted, if the Focus Confirmation Light does not light up and the camera does not take the photo, the camera may not be finding enough contrast to focus on, you may be too close to your subject for the lens to focus, or the lighting may be too dim for the AF system to work properly.

However, if you are photographing a subject that is approaching or receding from view at a relatively constant rate, or photographing fast or erratic or unpredictably moving subjects, or photographing sports, action, or wildlife you will usually want to use AI Servo Focus Mode.

Canon 7D 5D mark II 60D T3i 600D autofocus system AF point choose select set setting
Figure 2 – Use One-Shot AF mode and select your desired AF Point to capture still or moderately moving subjects.  (Canon T3i viewfinder shown – 60D similar)

AI Servo
AI Servo mode is used for tracking and focusing on moving subjects, and is ideal for capturing sports and wildlife including birds.  If the subject is moving towards you or away from you the camera will keep evaluating the focus distance as long as the subject remains under the focus point that was originally active and the Shutter Button is kept half-pressed, and if the subject is moving from side to side or throughout the frame the camera will track it as it passes from one AF Point or Zone to the other ones (if you started tracking with the center AF point on the 60D and T3i or any selected AF point with the 7D).

If the subject is going to be moving across your field of view, set the camera to automatically select the focus point using all the AF points (this is one of the few times you will not be manually selecting the auto focus point), focus on the moving subject with the center focus point, and then as long as the Shutter Button remains half-pressed the camera will track the subject to the other focus points if it moves to them.  Thus when the image is taken, the subject is in focus.  This will even work in conjunction with continuous shooting.  If you keep the Shutter Button fully pressed and continue to take photos, the camera will keep focusing on the moving subject.  As you can imagine, this is ideal for tracking a player running across a field, a dog running toward you, or a bird moving across the fame.  Note that when shooting with Continuous Shooting Drive Mode not every shot may be in sharp focus as the camera sometimes can’t keep up and accurately predict the subject’s speed or location.  But you should be able to capture many sharp images with this technique.  The more sophisticated Canon 7D will allow you to start tracking moving subjects with any selected AF Point and not just the center AF Point.  These are the types of advanced capabilities you are paying for (and should take advantage of!) with a more expensive dSLR.

As you will see, when using AI Servo mode your compositions will be partially dictated by the positions of the autofocus points in your Viewfinder.  The subject needs to be at one of these AF Points in order for the camera to maintain focus on it.  This is why in some situations becoming skilled at quickly using One-Shot AF – even for action scenes – will give you much more ability to control your compositions.

AI Focus
This mode is a hybrid of the two other focus modes.  It starts in One-Shot AF mode then changes to AI Servo mode if your subject starts moving.  Why shouldn’t you use this all the time, then?  Well, it is typically not the best of both worlds.  If you are focusing and then recomposing, as you may often be doing, your movement of the camera may fool it into thinking that the subject is moving and then activate subject tracking AI Servo Mode, and your resulting focus may not be where you intend it to be or may not be as accurate as it could have been with One-Shot AF.  And in AI Focus Mode it may not be as quick to respond to a moving subject as it would in AI Servo Mode.  Typically you know if your subject is still or moving so it is better to select one of the other two AF Modes.  Plus that way you always know which AF Mode you are working in and can either lock focus where you want it or begin tracking a subject without wondering what mode the camera is in and if it will suddenly change.  But there may be situations that call for this combination mode such as a still bird or animal that may start moving unexpectedly, so keep it in mind.

How do you remember which mode is which since the terms “AI Servo” and “AI Focus” tell you nothing that makes sense?  Although I listed them in a different order above to explain them more easily, on your camera they are listed:

ONE SHOT
AI FOCUS
AI SERVO

Remember that One-Shot AF just focuses once and doesn’t change once you lock it in, and AI Servo AF is the other extreme – continuous focus used for moving objects. And AI Focus AF is listed in the middle, between the two, because it is the hybrid, combination of the two.

Checking Focus
You can review your images on the rear LCD Monitor of your camera to try to determine if they are in focus, especially by zooming in as close as possible.  But be aware that this screen has only about one million dots or pixels, while your actual image has about 18 million pixels.  That means that many images will appear to be in proper focus on your LCD screen, but you might discover that the actual images are not really so sharply in focus.

Before continuing, I want to mention that much of this text is excerpted from my dSLR guides for the Canon EOS 6D, Canon 70D, Rebel T5i / EOS 700D, Rebel T4i / EOS 650D, and the Canon EOS 7D. If you would like to learn more about the autofocus systems as well as all the other features of your camera including metering modes, Aperture and Shutter priority modes (Av and Tv), all the menus and Custom Function settings, and more, have a look at my Full Stop e-book camera guides. In addition to explaining the features and settings, the guides clearly explain when and why to use them in order to capture the images you desire.

Take control of your camera and the images you create!

Learn more about the e-books by clicking on the banner below:

full stop dslr photo photography camera manual guide for dummies canon nikon


To learn about another important reason why you need to take control of your autofocus system, and why the two example photos above actually weren’t my final compositions, see the next post:

Don’t Let the Locations of the AF Points Dictate Your Composition

What do you do when, with your desired framing, your subject is not located exactly under or near an AF point?  Even with the 19 or 39 points of an advanced Canon 7D or Nikon D7000, this will often be an issue.  For example in Figure 2 above, I actually wish to capture the entire window and more space around it within the image frame, but moving the camera and framing for that composition leaves me with no AF Point at the woman where I wish to focus.  Have a look at the above post to learn why this is an issue and how to resolve it.

Focus and Depth of Field

Many functions of dSLR cameras are related to some degree or another, and Focus and Depth of Field are two of these.  The depth of field, based on your aperture setting (and thus related to exposure…) expands forward and back from your point of focus.  Thus, one important aspect of controlling your depth of field begins with focusing exactly where you want to.  To begin learning more about depth of field, have a look at my post Depth of Field Simplified.

Was this post helpful?  Please let others know about it by clicking the Facebook or Twitter sharing buttons below, linking to it from your blog or website, or mentioning it on a forum.  Thanks!  Want to help support this blog with no cost or effort?  Simply click on the Amazon, B&H Photo, or Adorama logos on the left side of this page to go to those sites and make your purchases.  They will then give me a little referral bonus!

Exposure Lock, Focus Lock, and Back-Button Focusing

When I got my first dSLR camera, I went through the manual and tried to absorb how and why to use all the buttons, controls, and menu items.  I was about to head off to Peru for three months and I wanted to make sure I was going to be able to use it properly and get the most out of it right from the start.

For some reason it seemed odd to me that when you pressed the shutter button half-way both the focus AND the exposure were locked in.  I had never used an auto-focus SLR before (I went from a Canon AE-1 to a digital point and shoot and missed the whole EOS film SLR era) and always thought of focusing and setting the exposure as two separate acts.  Based on my experience with a digital point and shoot, I knew I often focused on the subject with the static middle square (this was several years ago, before face detection and moving auto-focus areas) and then recomposed to take the final shot.  With a dSLR, I thought to myself, wouldn’t the exposure change between the framing where I locked in the focus and exposure, and the final framing?  Even if using the other focus points of the dSLR and not just the center focus point, I found that my subjects rarely sat right under a focus point and I was often recomposing in order to get the composition I wanted.

I asked a few dSLR users about this, and they looked at me as if I had a Rocket Blower growing out of my head.  They didn’t seen to encounter or consider this problem.  So I dug into the manual and the very helpful David Busch digital SLR guide and discovered I could overcome this issue with exposure lock.  Indeed, this was a real issue that was addressed by dSLR controls, and I wasn’t out of my mind!

Canon 7D 60D T3i exposure lock focus lock back button focus Nikon D5100 D7000 AE-L AF-L
The Exposure Lock (*) Button and AF-ON Button of the Canon 7D

There are typically a few different ways to separate exposure lock and focus lock with current dSLR camera.  As described above, you can use the exposure lock button to first lock exposure, and then deal with focusing.  With a Canon this is done by pressing the button marked “*”.  With a Nikon, you can set the AE-L/AF-L button for auto exposure lock (hence AE-L).  But since Nikons by default don’t typically lock exposure with a half-press of the shutter button, you really don’t have to worry about it for the same reasons that you do with a Canon (such as when you are recomposing a shot, since the Nikon only locks focus and not exposure with a shutter button half-press, and then determines exposure when the shot is taken, exposure should be correct).

For a Canon you can also set it so that the half-press of the shutter button will lock exposure but not focus, and then use the AF-ON button to lock focus (the T3i does not have this button, thus it is done differently).  This is one method of what is called back-button focusing.  This can also be done with a Nikon using the AE-L/AF-L button for auto focus lock (hence AF-L).  You typically have to dig into the custom function settings on any of the cameras to change these settings and button functions.  The terminology can be confusing, so you may want to have a look at any of my e-book user’s guides which all discuss how to accomplish exposure lock and focus lock with the specific cameras.  So far I have guides for the Canon 60D and Rebel T3i, and Nikon D5100 and D7000.  You can learn more about them all here on my Full Stop e-book website.

For example with the Canon 60D, I explain how you can go into the menus and set the Shutter Button to Metering+AF Start and the AF-ON Button to AF Stop.  This setup will allow you to use the camera as you always have, in the default manner of the Shutter Button locking focus and exposure when pressed halfway.  The “*” button functions as before, locking exposure at any time when pressed.  But this also gives you the option of locking focus independent of exposure metering.  It is the best of both worlds.

Learning to use back-button focus and even exposure lock can be awkward at first, and you may not fully understand why it is necessary.  But I highly recommend starting to experiment with it, then hopefully getting in the habit of using it all the time – especially if you shoot a lot of action scenes or situations where you are rapidly taking lots of photos (perhaps a wedding and reception).  You may soon find it indispensable and wonder how you once managed without it!

Canon has an article about back-button focusing which explains all the various options here:

http://www.usa.canon.com/dlc/controller?act=GetArticleAct&articleID=2286

It is not specific to any camera, so you may have to determine how to implement it on your camera.

Taking Advantage of the Nikon D5100 Autofocus System

Learn How to Use the Nikon D5100 Autofocus System

The autofocus system of the Nikon D5100 may not be quite as complicated as the 39 point AF system of the Nikon D7000, but it does offer many of the same capabilities and options, and can be a little confusing to figure out.  The autofocus system includes not only the three Focus Modes used in various combinations with four Autofocus Area Modes, but also includes a few Custom Settings as well as the optional AF-L or Autofocus Lock Button.

Nikon D5100 autofocus system AF focus mode autofocus area mode
Image by author – copyright 2011 – please do not use without permission!

You will first want to set up the autofocus Custom Settings so that the AF system functions how you desire.

a1: AF-C priority selection – This setting determines if attaining focus is top priority when you are in Continuous-servo AF mode (AF-C autofocus mode), or if you just want the shots to be taken even if exact focus is not attained for each shot.  If exact focus is your priority, set on Focus.  If getting the shots at all costs is the priority, set for Release.

a2: Built-in AF-assist illuminator – This is used to enable or disable the autofocus assist light, to assist you in autofocusing in low light.  Note that the AF-assist lamp only works in AF-S mode or when the camera is in AF-A and choosing single-servo (not always under your control), and when in Auto-area AF area mode or only with the center AF point in other AF area modes.

a3: Rangefinder – This setting is used to help obtain focus when you have turned off autofocus and are using Manual Focus mode (MF) and manually focusing.  (Be sure to also set the autofocus switch on your lens to M)  The exposure indicator in the viewfinder is used to indicate if the subject is correctly in focus.

f2: Assign AE-L/AF-L button – This is to assign the function of the AE-L/AF-L Button., which gives you the option to use this button to lock focus or to initiate focus, and this separate those functions from the Shutter Button.

This should get you started, and I go into more detail about each of these Custom Settings, as well as all the other D5100 Custom Settings in my e-book guide Nikon D5100 Experience.

Using Autofocus
The information below is also excerpted from my e-book user’s guide Nikon D5100 Experience, so I hope you have a look at the guide in order to learn more about the AF system as well as all the other functions and controls of the D5100.

One of the essential steps in taking a successful photo is controlling where the camera focuses.  If you allow the camera to autofocus by choosing its own Focus Point(s), it typically focuses on the closest object or human subject.  This may or may not be what you want to focus on.  So you should choose where the camera focuses using the autofocus Focus Points and selecting a specific AF point.  This does not mean you have to manually focus the camera, it means you tell the camera exactly where to autofocus.  But you also need to select the desired Focus Mode and Autofocus Area Mode, based on your subject and its type of movement (or lack of movement).

Focus Modes

The D5100 has three different Focus Modes to choose from, typically depending if your subject is still or moving.  It also has four different Autofocus Area Modes (see below) to specify how many of the AF points are active and how they track a moving object.  You can set these two functions in various combinations.  First the Focus Modes.

Single-Servo AF (AF-S)
Use this mode when your subject is stationary, or still and not going to move, or if your subject is not going to move very much, or if the distance between you and the subject is not going to change between the time you lock focus, recompose, and take the shot.  Lock focus on the subject and recompose if necessary.  When using AF-S, you can select from two Autofocus Area Modes, either Single-Point AF where you select the AF point, or Auto-Area AF, where the camera selects the AF point(s) for you.  I suggest you nearly always select your own desired AF point so that the camera focuses exactly where you want it to.

Continuous-Servo AF (AF-C)
Use this mode when your subject is moving.  If the subject is moving towards you or away from you, the camera will keep evaluating the focus distance, as long as the Shutter-Release Button is kept half-pressed.  You will need to use this in conjunction with the Autofocus Area Modes to determine if and how the camera tracks the subject laterally to the surrounding AF points, or if it will only track the subject if it remains at the initially selected AF point.  Single-Point AF will only track the subject’s distance as it moves near or far if it remains under the selected point.  It will not track lateral movement if the subject leaves the selected AF point.  If the subject is going to be moving somewhat unpredictably and may leave your selected AF point before you can react, use the Dynamic-Area AF mode so that the surrounding AF points are used to maintain focus while you realign your selected AF point with the subject.  If the subject is going to be moving across your field of view, set the AF-Area Mode to the 3D-Tracking mode so that the camera tracks it in any direction as it moves to the other AF points.

Focus on the moving subject with the selected AF point when using Dynamic Area Mode or 3D-Tracking Mode, or let the camera select the AF point in Auto-Area AF Mode, and then as long as the Shutter-Release Button remains half-pressed the camera will track the subject to the other focus points if it moves to them and as it moves closer or farther in distance.

Auto-Servo AF (AF-A)
This mode is a hybrid of the two other focus modes.  It starts in Single-Servo AF (AF-S) mode then changes to Continuous-Servo AF (AF-C) mode if your subject starts moving.  Why shouldn’t you use this all the time, then?  Well, if you are focusing and then recomposing, as you may often be doing, your movement of the camera may fool it into thinking that the subject is moving and your resulting focus may not be where you want it to be, or may not be as accurate as it might be if you are using Single-Servo AF.

Manual Focus
Sometimes you may be taking several photos of the same subject from the same distance, or for some other reason want to keep the same focus distance and not have to keep re-focusing and re-composing.  Or you may be taking multiple photos for a panorama.  In these situations, turn off the auto-focus with the autofocus switch on the lens itself (set to M) and change your camera’s Focus Mode to MF (Manual Focus).  Just remember to switch them back when you are finished.  You may also wish to do this if you want to precisely manually focus with the focus ring on your lens.  (Note that for lenses with “full time manual focus” you don’t need to switch to M in order to manually override when slightly tweaking the autofocus with the lens focus ring.  These lenses will have M/A and M on the lens focus mode switch instead of A and M.)  Use the Rangefinder feature of the D5100 to assist with manual focus – Custom Setting a3.

Autofocus Area Modes

The Autofocus Area Modes are used to set if just a single AF point is active or else how many AF points surrounding your selected AF point will be used to track a moving subject if you are using AF-C or AF-A Focus Modes.

Nikon d5100 autofocus af auto focus system lock point area mode
Selecting an AF Point using Single-Point AF and locking focus

Single-Point AF
Only one AF point will be active, and surrounding AF points will not become active to track a subject that moves away from the one selected point.  This is typically used along with Single-Servo AF (AF-S) to focus on a stationary or still subject, or in a situation where you will be reframing the shot after you lock focus at a specific distance.  It can also be used with accuracy with AF-S mode for moving subjects if you take the photo quickly or if you recompose and take the shot quickly after locking in focus, especially if the camera-to-subject distance does not change at all or very much in that period between locking focus and taking the photo.  Use the Multi Selector to choose your active AF point as you look through the viewfinder and use the OK Button to quickly select the center AF point.  If you choose Single-Point AF with Continuous-Servo AF (AF-C) or Auto-Servo AF (AF-A) for tracking moving subjects, it will only track the subject as long as it is positioned at the selected AF point, and it will not be tracked laterally to the other, surrounding points.  As noted above, the single AF point you select will track a subject if it moves closer or farther away, but the AF system will not track the subject if it moves left, right, up, or down and away from your selected AF point.  To do this, you use Dynamic-Area AF mode or 3D-Tracking mode.

Dynamic-Area AF
With the Dynamic-Area AF Mode, you select an AF point to tell the camera where to autofocus, and if your subject briefly moves away from that point to a neighboring point or if you lose the subject from your AF point while panning, the camera will use the surrounding AF points to help maintain focus on it.  Select Dynamic-Area AF when you are photographing moving or potentially moving subjects using Continuous-Servo AF (AF-C) or Auto-Servo AF (AF-A).  These modes are ideal for a subject moving closer or further from the camera but which may also move laterally away from the selected AF point faster than you can react in order to keep it located at that point, or for when you are panning and following the subject and attempting to keep it located at the selected AF point, but may have a little or a lot of difficulty doing so.  Remember that you need to keep the Shutter Button half-pressed in order for the continuous focusing at the initial point or the surrounding points to occur.  Note that the camera may pick up and start tracking a new subject that falls under the selected AF point if you lose your initial subject.

The Dynamic-Area AF Mode is not used to track and maintain focus on a subject that is moving across the various AF points in the frame, but rather is used to stay focused on a moving subject that you attempt to keep located at your selected AF Point.  To track a subject that is moving across the frame, intentionally passing from one AF point to the next, use 3D-Tracking.

3D-Tracking
This mode is used for subjects moving across the frame in any direction, or subjects moving erratically from side-to-side in the frame, and they are tracked by areas of color.  This is used when you don’t wish to necessarily pan or follow the subject to keep it located in the same part of the frame, but rather when you wish to keep the camera relatively still as the subject moves across the frame.  You may select this option when you are tracking and photographing moving subjects using Continuous-Servo AF (AF-C) or Auto-Servo AF (AF-A).  Again, you choose the initial AF point to locate the subject and begin the tracking.  If the area of color you wish to track is too small or if it blends into the background, this mode might not be very effective.

Auto-Area AF
The camera uses all 11 AF points to detect what it thinks is the subject and automatically choose the appropriate AF point(s).  Typically, the camera will select the nearest subject or a human in the frame, so it may not focus on exactly what you wish to focus on.  That is why it is best to use one of the other modes and select the AF point yourself.  However in certain situations such as quick sports or action scenes you may have to make use of this.

Locking Focus

The next step is to learn to lock focus independent of locking exposure, typically through the use of the AE-L/AF-L Button as noted in the f2 Custom Setting above.  But for that, and numerous other important functions of the D5100, you are going to have to have a look at my e-book, Nikon D5100 Experience!
Nikon D5100 book user guide manual download ebook

I’ve put together a video introduction to the D5100 autofocus system to compliment this article:

To learn about another important reason why you need to take control of your autofocus system, see the related post:

Don’t Let the Locations of the AF Points Dictate Your Composition

What do you do when, with your desired framing, your subject is not located exactly under or near an AF point? Even with all the AF points of an advanced Nikon D5100 or D7000, this will often be an issue.  Have a look at the above post to learn why this is an issue and how to resolve it.

Was this post helpful?  Please let others know about it by clicking the Facebook or Twitter sharing buttons below, linking to it from your blog or website, or mentioning it on a forum.  Thanks! 

Want to help support this blog with no cost or effort?  Simply click on the Amazon, B&H Photo, or Adorama logos on the left side of this page to go to those sites and make your purchases.  They will then give me a little referral bonus!

Taking Advantage of the Nikon D810/ D610 / D7100 / D5300 Autofocus System

This was originally written for the Nikon D7000, but as the Nikon D7100, the Nikon D7000, the Nikon D610 / D600, the Nikon D810 / D800, and the Nikon D5200 / D5300 all share a similar Autofocus system, most of this information will apply to all of them.  And even though some of the models have 51 AF Points instead of the 39 AF Points of the other cameras, all the same settings and actions apply.

The Nikon D7100, the Nikon D7000, the Nikon D610 / D600, the Nikon D810 / D800, and the Nikon D5200 / D5200 dSLRs all share very similar, and quite sophisticated autofocus systems – especially if you are coming from a D90, D5100, or earlier camera.  With their 39 AF points or 51 AF points that can be used independently or together in a variety of ways, its Autofocus Custom Settings that affect many of the functions of the AF system, and the three different Autofocus Modes that are used in various combinations with the four different Autofocus AF-Area Modes, it is no wonder that users are having difficulty figuring it all out. (Plus the D810 offers an additional Group Area AF Area Mode!)

Nikon D600 D7000 autofocus af system 39 point auto focus control learn use how to dummie book guide manual
Some of the Autofocus controls of the Nikon D600, located near the base of the lens (to the left of the FX badge and below the Lens Release Button).

First, the Autofocus Controls on the D810/ D800, D610/ D600, D7100, and D7000 are a bit different than previous cameras.  You can change the Autofocus Mode and AF Area Mode by pressing the AF Mode Button (located inside the Focus Mode Selector switch) and then use the Command Dials to adjust the settings as you view them on the top LCD Control Panel or in the Viewfinder.

Focus Mode Selector – This switch is used to turn on or off autofocus. Set to AF for autofocus and M for manual focus. Be sure to set the similar switch on the lens as well. If your camera does not seem to be autofocusing, be sure to check this switch and the one on your lens.

AF Mode Button – This button, located inside the Focus Mode Selector switch, may be confusing at first to those who have not previously seen or used it on the Nikon D7000 or D600, though you should quickly find that it is a convenient design. It is used to select the Focus Mode as well as the autofocus AF-Area Mode. Press this button and turn the rear Main Command Dial to select the Focus Mode, such as AF-A or AF-C, while viewing the setting on the top Control Panel or in the Viewfinder. Press this button and turn the front Sub-Command Dial to set the AF-Area Mode, such as Single-Point AF or 39-Point Dynamic-Area AF. Again, you can view the selected setting on the top Control Panel or in the Viewfinder. The autofocus system including the Focus Modes and AF-Area Modes will be explained below.

Next you will need to set up some of the autofocus Custom Settings to begin to customize how the AF system functions for your needs (Some of these options may not be available with the D5200):

AF-C priority selection – This setting determines if attaining focus is top priority when you are in Continuous-servo AF (Auto-Focus) Mode (AF-C), or if you just want the shots to be taken even if exact focus is not attained for each shot.  If exact focus is your priority, set on Focus.  If getting the shots at all costs is the priority, set for Release.

AF-S priority selection – This is similar to above, except that this setting is for when you are working in Single-servo AF Mode (AF-S), typically used when your subject is not moving.  Since AF-S is typically used with subjects that are not moving, it makes more sense to make sure focus is attained, thus you should typically select Focus for this setting.

Focus tracking with lock-on – This setting determines how the autofocus system reacts to sudden, dramatic changes in the distance of the subject when you are working in AF-C or AF-A modes.  Decide if you wish to have the camera quickly refocus on a new or closer subject (1-Short), wait awhile until it ideally picks up the intended subject again (5-Long), somewhere in between, or immediately refocus on a new subject at a large distance from the initial subject (Off).  Keep this option in mind with the various AF-C and AF Area Mode configurations, as it may change depending on your subject and situation.  Sometimes you don’t want the camera to quickly refocus on a closer or more distant subject, while other times you do.

AF point illumination – This is used to set whether or not the selected autofocus point (AF Point) is illuminated in the viewfinder.  Since you pretty much always want to know where your camera is focusing, this should be set for On.

Focus point wrap-around – This determines if the AF Point selection will “wrap around” to the other side of the screen when you reach an edge.  In other words, if you are selecting your AF Point (as you should be doing at almost all times) and you reach an AF Point on the far right, when you click right again, do you want to “wrap around” to a focus point on the far left, or do you wish to stop at the edge and not continue to the other side?

Number of focus points – This setting determines the number of autofocus points that are available for selection in your viewfinder.  If you are always selecting your AF Point (as you typically should) you may find that it is quicker and easier, at least at first, to limit the number of AF Points to 11 – AF11.  If you prefer to have all the AF Points available for your selection, set this at AF39 (or AF51 with the D7100).  If you set to 11 AF points your selection will be limited to those 11 AF points, but the additional surrounding AF points will still be active to be used by the camera in the AF-Area Modes and in subject tracking, so the camera is still taking advantage of all the AF points of the autofocus system.

Built-in AF-assist illuminator – This is used to enable or disable the autofocus assist light.  Turn this On to assist you in autofocusing in low light, but be sure to turn it Off if you are working in situations where it will be distracting, unwanted, or unnecessary.

and

Assign AE-L/AF-L button (f4 on the D600 and D7100) – This is to assign the function of the AE-L/AF-L Button.  You may want to use this in conjunction with the Function or Fn Button and use one to lock exposure and the other to lock focus.  In that case, you would typically set this to AF lock only to use this button to lock focus.

I go into much more detail about each these Custom Settings, how you may wish to set them up, and recommended settings in my e-book guides for all the current and previous cameras including Nikon D600 Experience, Nikon D7100 Experience, and Nikon D5200 Experience – but this should get you started.

Nikon D600 book ebook camera guide download manual how to dummies field instruction tutorial     Nikon D7100 book ebook manual tutorial field guide how to learn use dummies


Using Autofocus
Now on to using the AF system.  (All of the information below is also adapted from my e-book user’s guides, so I hope you will have a look at them to learn more.)

One of the essential steps in taking a successful photo is controlling where the camera focuses.  If you allow the camera to autofocus by choosing its own Focus Point(s), it typically focuses on the closest object or a person in the scene.  This may or may not be what you want to focus on.  So you should choose where the camera focuses using the autofocus Focus Points.  But first you will need to select an appropriate Autofocus Mode and an Autofocus Area Mode, based on your subject and situation.

Autofocus Modes
The D7100, D7000, D600, and D5200 each have three different Autofocus Modes to choose from, typically depending if your subject is still or moving.  They also have four different Autofocus Area Modes (see below) to specify how many of the AF points are active and how they track a moving object.  You can set these two functions in various combinations.  First the Autofocus Modes:

Single-Servo AF (AF-S)
Use this mode when your subject is stationary, or still and not going to move, or if your subject is not going to move very much, or if the distance between you and the subject is not going to change between the time you lock focus, recompose, and take the shot.  Lock focus on the subject and recompose if necessary.  When using AF-S, you can select from two Autofocus Area Modes, either Single-Point AF where you select the AF point, or Auto-Area AF, where the camera selects the AF point(s) for you.  I suggest you nearly always select your own desired AF point.

Continuous-Servo AF (AF-C)
Use this mode when your subject is moving.  If the subject is moving towards you or away from you, the camera will keep evaluating the focus distance, as long as the Shutter Button is kept half-pressed.  You will need to use this in conjunction with the Autofocus Area Modes to determine if and how the camera tracks the subject laterally to the surrounding AF points, or if it will only track the subject if it remains at the initially selected AF point.  If the subject is going to be difficult to follow or is moving across your field of view, set the AF-Area Mode to one of the Dynamic-Area AF modes or to the 3D-Tracking mode.  Focus on the moving subject with the selected point if using Single-Point, one of the Dynamic Area Modes, or 3D-Tracking, or let the camera select the AF point in Auto-Area AF, and then as long as the Shutter Button remains half-pressed the camera will track the subject as it moves closer or farther in distance.  Depending which AF Area Mode you are using, the camera may also maintain focus or track the subject to some or all of the surrounding focus points if it moves away from the initially selected point.  More about this in the Autofocus Area Modes section just below.

Auto-Servo AF (AF-A)
This mode is a hybrid of the two other focus modes.  It starts in Single-Servo AF (AF-S) mode then changes to Continuous-Servo AF (AF-C) mode if your subject starts moving.  Why shouldn’t you use this all the time, then?  Well, if you are focusing and then recomposing, as you may often be doing, your movement of the camera may fool it into thinking that the subject is moving and your resulting focus may not be where you want it to be, or may not be as accurate as it might be if you are using Single-Servo AF.

Nikon D600 autofocus 39 point af system use learn tutorial how to auto focus mode area
The arrangement and position of the 39 AF points of the Nikon D600, shown with the optional viewfinder grid display.

Manual Focus
Sometimes you may be taking several photos of the same subject from the same distance, or for some other reason want to keep the same focus distance and not have to keep re-focusing and re-composing.  Or you may be taking multiple photos for a panorama.  In these situations, turn off the auto-focus on your lens by switching from AF to M with the camera’s Focus Mode Selector switch and with the A/M switch on the lens itself.  Just remember to switch them back when you are finished.  You may also wish to do this if you want to precisely manually focus with the focus ring on your lens.  For lenses with “full time manual focus” however, you don’t need to switch to M in order to manually override the autofocus with the lens focus ring.  These lenses will have M/A and M on the lens focus mode switch instead of A and M.

Autofocus Area Modes
The Autofocus Area Modes are used to set if just a single AF point is active or else how many AF points surrounding your selected AF point will be used to maintain focus or to track a moving subject if you are using AF-C or AF-A Autofocus Modes.

Single-Point AF
Only one AF point will be active, and surrounding AF points will not become active to maintain focus or to track a subject that moves away from the one selected point.  This is typically used along with Single-Servo AF (AF-S) to focus on a stationary or still subject, or in a situation where you will be reframing the shot after you lock focus at a specific distance.  It can also be used with accuracy with AF-S mode for moving subjects if you take the photo quickly or if you recompose and take the shot quickly after locking in focus, especially if the camera-to-subject distance does not change at all or very much in that period between locking focus and taking the photo.  Use the Multi Selector to choose your active AF point as you look through the viewfinder and use the OK Button to quickly select the center AF point.  Also, remember that Custom Setting a6 allowed you to choose between having all 39 AF points available or to limit the camera to 11 AF points.  If you are just starting out with manually selecting a single Focus Point, you may wish to limit them to 11 now, and when you get the hang of it or when you are using one of the other AF Area Modes described below, increase it to 39 to take full advantage of all the AF points of the D7000 autofocus system.  If you choose Single-Point AF with Continuous-Servo AF (AF-C) or Auto-Servo AF (AF-A) for tracking moving subjects, it will only track the subject as long as it is positioned at the selected AF point, and it will not be tracked laterally to the other, surrounding points.  In other words, the single AF point you select will track a subject if it moves closer or farther away, but the AF system will not follow or track the subject if it moves left, right, up, or down and away from your selected AF point.  To do this, you use Dynamic-Area AF Mode or 3D-Tracking.

Dynamic-Area AF
With the Dynamic-Area AF Modes, you select an AF point to tell the camera where to autofocus, and if your subject briefly moves away from that point to a neighboring point or if you lose the subject from your AF point while panning, the camera will use the surrounding AF points to help maintain focus on it.  Select one of the Dynamic-Area AF options (below) when you are photographing moving or potentially moving subjects using Continuous-Servo AF (AF-C) or Auto-Servo AF (AF-A).  These modes are ideal for a subject moving closer or further from the camera but which may also move laterally away from the selected AF point faster than you can react in order to keep it located at that point, or for when you are panning and following the subject and attempting to keep it located at the selected AF point, but may have a little or a lot of difficulty doing so.  Remember that you need to keep the Shutter Button half-pressed in order for the continuous focusing at the initial point or the surrounding points to occur.  Note that the camera may pick up and start tracking a new subject that falls under the selected AF point if you lose your initial subject, in part determined by your setting for Custom Setting a3.

9-Point Dynamic-Area AF will use the immediate surrounding AF points to help maintain focus on a subject that briefly leaves the selected AF point.  This can be used with predictably moving subjects, like a runner or vehicle moving towards you or one that you can easily follow laterally by panning.

21-Point Dynamic-Area AF will use even more of the surrounding AF Points, more than half the total AF Points, to help maintain focus on a subject that briefly leaves the selected AF point.  This should be used for more unpredictably moving objects, like sports players on a field, which may quickly move further away from your selected AF point before you have a chance to realign that point over the subject.

39-Point Dynamic-Area AF (or 51-Point Dynamic-Area AF with the D7100) will use all of the 39 AF points (or 51 points) to help maintain focus on a subject that briefly leaves the selected AF point.  It can be used for very quick and unpredictably moving subjects, like pets, birds or other wildlife, and all 39 AF points will be used to maintain focus on the subject as you attempt to realign the selected AF point with the subject.

The Dynamic-Area AF Modes are not used to track and maintain focus on a subject that is moving across the various AF points in the frame, but rather are used to stay focused on a moving subject that you attempt to keep located at your selected AF Point.  To track a subject that is moving across the frame, intentionally passing from one AF point to the next, use 3D-Tracking.

Nikon D5200 autofocus af system viewfinder 39 point how to use learn manual guide book instruction dummies tutorial area mode dynamic
A simulated image of the Nikon D5200 viewfinder, showing the autofocus focus points active with 9-Point Dynamic Area AF area mode, when the center AF point is selected. (Image shown at 50% opacity to better view AF points.)

3D-Tracking
This mode is used for subjects moving across the frame in any direction, or subjects moving erratically from side-to-side in the frame, and they are tracked by areas of color.  This is used when you don’t wish to necessarily pan or follow the subject to keep it located in the same part of the frame, but rather when you wish to keep the camera relatively still as the subject moves across the frame.  You may select this option when you are tracking and photographing moving subjects using Continuous-Servo AF (AF-C) or Auto-Servo AF (AF-A).  Again, you choose the initial AF point to locate the subject and begin the tracking.  If the area of color you wish to track is too small or if it blends into the background, this mode might not be very effective.

Auto-Area AF
The camera uses all 39 AF points to detect what it thinks is the subject and automatically choose the appropriate AF point(s).  Typically, the camera will select the nearest subject or a human in the frame, so it may not focus on exactly what you wish to focus on.  That is why it is best to use one of the other modes and select the AF point yourself.

Group Area AF
The Nikon D810 and D4s include the Group Area AF autofocus area mode, which makes use of a group of 5 AF Points arranged in a cross-shaped pattern. And instead of selecting a primary point with the surrounding points being “helper points,” you will actually be selecting the group of five points, which will all be used to attempt to focus on the subject. Unlike the other AF Area Modes with multiple points, the Viewfinder will actually display the four outer points of the group, but for some reason not the central point – perhaps so that you can better view the subject.

Keep in mind that with the other somewhat similar Dynamic Area AF modes, you choose a primary point and attempt to keep the subject located at that point, and the surrounding points act as “helper” points if the subject happens to move away from the primary point. But with Group Area AF you select the entire group of AF Points, and they all work equally to focus on the subject. This mode can be used similar to Single Point AF but when it might be challenging to locate the subject under an individual point. When working in AF-S Focus Mode and using Group Area AF, the selected AF points will give priority to faces if they are present, otherwise they will focus on the closest subject.


The next step is to learn to lock focus independent of locking exposure, and customize the camera’s controls to perform these functions how you wish.  But you are going to have to have a look at my e-book guides Nikon D7100 Experience, Nikon D7000 Experience, Nikon D600 Experience and Nikon D5200 Experience to learn about this and many other important functions of your sophisticated Nikon D600, D5200, or D7000!

Nikon D600 book ebook camera guide download manual how to dummies field instruction tutorial      Nikon D7100 book ebook manual tutorial field guide how to learn use dummies


To learn about another important reason why you need to take control of your autofocus system, see the related post:

Don’t Let the Locations of the AF Points Dictate Your Composition

What do you do when, with your desired framing, your subject is not located exactly under or near an AF point? Even with all the AF points of an advanced Nikon D7000 and D600, this will often be an issue. Have a look at the above post to learn why this is an issue and how to resolve it.

Still need to purchase your D7100, D7000, D5200 or D600.  Please use my links to have a look at them on Amazon:

Nikon D7100 24.1 megapixel DX format dSLR camera

Nikon D7000 16.2 megapixel DX format dSLR camera

Nikon D600 24.3 megapixel full-frame FX format dSLR camera

Nikon D5200 24.2 megapixel DX format dSLR camera

Was this post helpful?  Please let others know about it by clicking the Facebook or Twitter sharing buttons below, linking to it from your blog or website, or mentioning it on a forum.  Thanks!  Want to help support this blog with no cost or effort?  Simply click on the Amazon, B&H Photo, or Adorama logos on the left side of this page to go to those sites and make your purchases.  They will then give me a little referral bonus!

Nikon Announces AF-S 50mm f/1.8 Lens

It’s finally here!  Well, not here yet, but it’s been announced:  the Nikon (Nikkor) AF-S 50mm f/1.8 G lens – the nifty fifty WITH an autofocusing motor built into the lens!

This means, unlike the previous version of the Nikon 50mm f/1.8, you can use it with the D5100, D3100, and older versions of those models that don’t have the autofocusing motor built into the lens.

Nikon AF-S 50mm f/1.8 nifty fifity 50
Product image from Nikon


Sample image from Nikon using the new AF-S 50mm f/1.8 G

This fixed focal length (prime) normal lens will give you those dreamy out-of-focus backgrounds and great low light performance that will make it wonderful for portraits, indoor use, and as a walk-around lens that will challenge you to really develop your eye and compose your frames since you won’t be able to zoom in and out.

It should be available in mid-June 2011 for about $220, and is already available for pre-order on Amazon right here.  Here is the press announcement, and here it is on the Nikon website.

See the Nikkor AF-S 50mm f/1.8 G on Amazon

Assignment: Guatemala – Canon 7D Tutorial and Review

I recently returned from a trip to Guatemala, where I was taking photos for an NGO that works with children, literacy, and education. It gave me the perfect opportunity to try out a bunch of new equipment and really put it to the test in the field.


San Miguel Duenas, Guatemala – Canon 7D, 70-200mm f/4L IS lens at 78mm, 1600 ISO, 1/100, f/5.6

Jump to the Custom Function section

First and foremost, it was the first time I really had the opportunity to use the Canon 7D body (I discuss the additional gear in this related post). The camera performed wonderfully in many ways, however, I did have autofocus related problems – namely a serious front focus issue. With both wide angle and telephoto L-series lenses, the camera was consistently focusing several inches or more in front of the subjects. I played around briefly with the AF Microadjustments, with the intention of taking a closer look at the situation when I returned home.  (Body was later exchanged for another that focuses properly.)

I had another, odd and unexpected complaint in the field, and that is with the high speed shooting modes. One has the choice of 3fps or 8fps, yet I needed something more like 5fps! I’ve included some images throughout the post that are straight from the camera (I merely converted from RAW to JPEG). Anyway, on to the review and instructions for many of the camera’s settings, and how and when to use them in real world situations. And at the end there is some info about video tutorials available for downloading and watching.

If any of the digital photography terms you come across in this post are unfamiliar, be sure to refer to this great glossary for assistance.

Design – The camera is extremely comfortable to hold and use, especially due to the size, shape, and material of the grip, and it felt to be designed perfectly for my hands. It is nicely weighted with both a 16-35 f/2.8L II and a 70-200 f/4, and carries well with an R-Strap attached to the camera body (the 70-200 f/4 doesn’t come with a collar). Due to its similar design and button placement as previous Canon models, it was easy to get used to changing various settings on the fly – everything from ISO right up on top to Flash Control in the menus. There are a few settings that I quickly fell into, but that I would like to experiment with a little more with before I settle permanently into. Here are a few notes, in no particular order of importance:

Av Mode – I set the camera to Av mode for 99% of the time, as that is how I typically work (because I always want to control the depth of field). About the only time I took it out was when I was experimenting in an HDR type situation where I was in Manual and bracketing, trying to properly expose both a dark colonnade I was under and the cathedral in bright sunlight beyond. I haven’t yet worked on combining the exposures, but here is a nice shot that came from that situation:


Antigua, Guatemala – Canon 7D, 16-35 f/2.8L lens at 16mm, 1600 ISO, 1/500, f/16

(edit – I added the camera and lens information to these images.  Please note that the camera settings used for these various images may not necessarily be the “best” or “ideal” settings to use in the specific situations, but camera settings are always the result of changing situations and lighting, coming from another scene, going back and forth between action and still subjects, adapting, experimenting, and sometime just plain not paying attention!)

ISO – I had high hopes for Auto ISO, thinking I would finally be given the freedom to stop worrying where I left it set, but I quickly found that in Av, I didn’t like the slow shutter speeds that were resulting when I selected the aperture and the camera selected the ISO. So I ended up never using it. I would like to experiment with it some more, and figure out if there is something I can do to keep the shutter speeds in a better range. It is wonderful to have the versatility to change ISO on the fly, but one often gets caught up in shooting, and forgets to change it to an appropriate setting, and thus sometimes the shutter speed isn’t the most ideal. So, I just have to stay in the habit of paying attention to where all three settings are as I go from indoor to out or change lenses, etc. This is aided by these settings being visible in the 7D viewfinder.

High Speed Continuous Shooting – many people marvel at the 7D’s ability to shoot 8fps in High Speed Continuous Mode. However, for my purposes on this trip, that proved far too excessive. I often shoot a burst of photos when someone or something is in motion and I want to capture the peak of action or a flattering pose, or when a gesture or facial expression might change rapidly. Unfortunately, 8fps results in a lot of unwanted files, and as I will soon address, these files are HUGE and rapidly fill up a hard drive. But sadly, the Low Speed Continuous drive setting is only 3fps, which is too slow to capture the rapid changes in a scene. The 3fps speed was one of the main drawbacks of my previous body, and a major reason for upgrading. What I need is something in between, maybe 5fps! Perhaps Canon or someone will tweek the firmware to allow this…


San Miguel Duenas, GuatemalaCanon 7D, 16-35 f/2.8L lens at 35mm, 800 ISO, 1/500, f/3.5

Custom Functions – In order for you to get the most out of the 7D, and to set it to function best how you work, you need to dig into the Custom Functions. One of the settings I use is customizing My Menu, and then having My Menu always appear first when I hit the Menu button. (My Menu Settings / Display from My Menu=enable) I played around with different items on My Menu, but have settled for now on the ones that I use most often or that I may quickly need and want to access without digging into the menus. They are:

Flash Control
– you can quickly adjust all the settings for the built in flash, external flash, wireless flash. You can even control all the setting of the 580EX II remotely – when it is not attached to your camera. Very cool.
Exposure Compensation/ AEB – exposure compensation is easy to change at any time with the big dial, so this shortcut is for using when I want to bracket (AEB).
Review Time – I found that I was often shooting away without chimping (looking at the LCD), so I often just turn off the LCD review altogether. Other times, however, I want to review.
ISO Expansion – I haven’t used this yet, but I wanted it handy in case I want to use the high ISO. I typically have this turned off because I didn’t want the camera to default to High ISO during any situations. But considering I wasn’t using Auto ISO, this all seems unnecessary, and now that I realize this, I will have to replace this with something else on the menu! I never went above 1600 ISO, which I did have to use sometimes in very dark classroom settings along with the flash. Upon quick review of those images, the lack of noise in these files is really good.
Format – this is to format the memory card in preparation for use the next day. Always reformat the card, never simply erase them or use the Erase All option if your camera had that (the 7D does not). However, after formatting, turn the dial to select another menu item so that next time you hit Menu, Format isn’t still selected and you quickly make a grave mistake of pressing it.
Highlight Tone Priority (II-3) – this is a great setting to use in a high key situation, or with a bright subject or scene. It helps to retain detail in the highlights so they don’t get blown out, such as a white wedding dress, or a snow or beach scene. I never did use it, but I keep it in this menu to remind me it is there for the day when I do need it!


Chichicastenango, Guatemala – Canon 7D, 70-200mm f/4L IS lens at 155mm, 200 ISO, 1/80, f/4

Other important Custom Function Settings

(please note, this post was initially written to explain how I used these settings in a specific travel situation.  I go into more detail about each of the Custom Function settings, with clear explanations of what they are and when and why to use them, in my e-book Canon 7D Experience, which is discussed below.)

Safety Shift (I-6) – I sometimes enable this setting. It allows the camera to shift the shutter speed or aperture automatically, without your expressed permission, in order to get the shot. This is great for situations where the light suddenly and dramatically changes, such as at a concert.  However if you are carefully choosing your settings, or working with a flash, you will want to disable this so that the camera isn’t overriding your careful settings.

AI Servo Tracking Sensitivity (III-1) – This dictates how quickly focus tracking switches to another subject when it momentarily loses the initial subject, such as when another subject passes in front of it. You can choose to have it stay focused on the initial subject (Slow), or focus quickly on a new subject that moves in front of your initial subject (Fast). Typically I want to stay focused on my selected subject, and ignore someone or something that momentarily passes between us. If you want to quickly focus on different subjects at different distances, put it on fast.

AI Servo 1st/2nd (III-2) – Is your priority focusing on the subject, tracking the subject, firing off rapid shots? Look at the manual to see which situation works best for how you shoot.Personally I think 0 or 1, with the autofocus (AF) Priority, is best. (The camera makes sure it focuses first before taking the shot. It may cost you a microsecond of time however.) Regarding tracking vs. drive, I keep it at 0. Setting 0 continues to prioritize focusing possibly at the expense of speed, while setting 1 will prioritize the speed of subsequent shutter releases at the expense of focus.

AI Servo AF Tracking Method (III-3) – This works with autofocus modes where more than one AF point is active. The names of the choices are a little confusing but what they do is Setting 0 will focus on a closer subject that enters into your view, not necessarily in front of your subject. while setting 1 will remain focused on the initial subject. I keep mine on 1, since I want to stay focused on my initial subject.


San Juan del Obisbo, GuatemalaCanon 7D, 70-200mm f/4L IS lens at 200mm, 100 ISO, 1/1000, f/4

AF Focus Mode (III-6) – I enabled all the AF modes in the Custom Functions – by default, several of them are not available to you unless you change that setting. I started out using Single Point, but sometimes changed to Spot for more precision. The cost of using Spot is that it may not focus as quickly or as well when hand held or with a moving subject, and is generally not necessary unless you are trying to focus on a very small, precise area, such as through a fence to a subject beyond.  I occasionally used AF Point Expansion when photographing rapidly moving children. I don’t know how other photographers work (according to a Canon rep who gave a 7D presentation at B+H, there are big name professionals who still just focus with the center point and recompose), but I always choose the focus point I want manually, using the Multi-Controller button. This takes a little longer, now that I am dealing with 19 focus points, but that enables me to quickly get the composition I want, makes sure the camera focuses on what I want it to, and to get subsequent shots without too much reframing. There is an important menu setting so that you can use the Multi-Controller directly to change the AF point without having to press the AF thumb button first – I believe it is on the screen where you can customize all the camera’s buttons. Oh, and I changed the custom settings so that all the focus points always show, and that they light up upon achieving focus, even in bright sunlight (which they would not do if you had this setting on Auto or Disable). That way I always know when it has focused.  And I set Custom Function III-7 to stop focus point selection when I reach the edge and not loop around to the other side. I’m also thrilled that the 7D has a grid display that you can turn on in the viewfinder, which helps me keep my horizons and compositions straight. The viewfinder looks pretty busy, filled up with AF points and the grid, but when you are shooting away and focusing on your subject, you don’t even notice they are there.

Single Point Focus vs. Spot Focus Size – This controls the size of the area being looked at for focusing purposes on the 7D.  With Single Point AF Area Mode, the camera is actually looking at a cross shape area (all focus points are cross type, center point is dual diagonal as well at certain apertures) that extends about 2x as big as the actual square you see in the viewfinder. With Spot AF Area Mode, the size of the cross is about the size of the square you see, I think perhaps slightly larger.  Now you might think that using Spot AF will be more accurate all the time and sounds like a great idea and will get you sharper pictures, but this is not necessarily the case.  Since Spot AF is so precise, and since autofocus works by looking for an area of contrast, Spot AF may not focus as well or as quickly in many general situations (because it may be looking at such a precise area that is all one color or  tone).

Spot AF is for when you need a really precise “focus beam” to pinpoint, for example a bird in a tree, and not the branches and leaves surrounding it and all around it, which may be closer to you and the camera.  Or if, say, you are shooting through a chain link fence and you want the camera to focus on the animal beyond and not on the fence.  If you were to use Spot AF all the time, you would have to continue to act in a slower and more precise manner, so that you ensure you are focusing on an area of contrast or a nice line.  For example, if you capture a shot of a person, you want to focus on the eye typically.  If you do this quickly with Single Point AF, you can aim at the general area of the eye and you will likely include it in the area being looked at by the camera.  However if you grab a quick shot with Spot AF, you may  be a little off and the camera is looking at an area of cheek to focus on, which will be difficult since there isn’t much contrast there.

Orientation Linked AF Point – This setting allows you to choose your favorite AF points, and when you are hold the camera horizontally or vertically, those points are automatically selected. However, it is very complicated to set, so much so that is would seem Canon doesn’t even understand it. The Canon rep did not fully explain it properly at the B+H presentation, the instructions in the manual do not work, and after 3 different instructions by email from Canon, I may finally have the correct way. I still have to try their latest directions. (note- nope, latest instructions still don’t work properly) **12/17/2009** AHA!! Here it is, finally explained in its entirety.

I also changed the button/ dial function settings so that in Manual mode, the big dial controls shutter speed and the top dial controls aperture. The default is the opposite. I changed this because I almost always shoot in Av mode, where the top dial controls aperture, so when I switch to Manual mode, I want that to remain the same.

Additional edit – August 2011:
I have written a popular e-book user’s guide for the Canon 7D
called Canon 7D Experience. It not only explains all of the features, functions, and controls of this powerful, sophisticated, and highly customizable camera, but also when and why to use them in your photography – including EVERY Menu item and Custom Function setting, with explanations and recommended settings for real-life use.  You can learn more about the guide, preview it, and purchase it here.


AF Microadjustments – This is a setting on the 7D which enables you to tweak the auto-focusing to your different lenses. A site about AF micro adjustments that look to be helpful is below:

http://www.northlight-images.co.uk/article_pages/cameras/1ds3_af_micoadjustment.html#Anchor-Canon-49575

Here is a micro-adjustment focus test chart you can use.

Viewfinder – The viewfinder on the 7D is big and bright and wonderful. It is nearly 100% view of the image you will capture. The aperture and shutter speed info is of course displayed below, along with the current ISO setting, which one should get in the habit of glancing at often. See the AF Focus Mode category above for more info on what you can view in the viewfinder to assist with focusing and composition.

Picture Style – I had this on Standard, since I shoot in RAW and intend to post-process, however, I would like to do a comparison of the styles to see which one best matches my visual preferences – although the Picture Styles will only affect JPEGs and, it is important to know, the image you see on your rear LCD screen when shooting RAW.


Jalapa, GuatemalaCanon 7D, 16-35 f/2.8L lens at 35mm, 800 ISO, 1/2000, f/8

File Size – I shot RAW for almost the entire trip, and quickly discovered that these files are HUGE. The files range from about 21MB to around 31MB each. I used SanDisk Extreme III 16GB cards, which worked great, and one card often lasted much of the day. I have no good reason for using SanDisk over Lexar, other than the fact that the Lexar people haven’t approached me about sponsorship… :) The Extreme III cards have been replaced by the new Extreme and Extreme Pro cards, and are thus the old ones are much cheaper at the moment, especially with current rebates. At 30MB/s, they were fast enough for the types of shooting and short bursts I was doing. However, downloading them to my computer and external HD were pretty slow using the SanDisk ImageMate CF card reader. Eventually I’m going to have to spring for a card reader that goes right into the PC slot. I used Adobe Bridge to simultaneously save the day’s files to 2 external hard drives. The 160GB Iomega Ego filled up before the trip was over, but fortunately I also had a Lacie 500GB. I am dreading the number of external hard drives I am going to have to buy for travel and for home storage, but once you go RAW, it’s hard to go back to shooting just JPEG. I’m going to have to look into the Drobo system that many rave about.

Battery Life – The battery life of the 7D is excellent. When you get new batteries, first charge them all the way. Do not recharge until they are completely drained. Do this one or two cycles. I know they say you no longer have to do this, but some claim that seasoning the batteries like this will maximize their charge life. Anyway, one battery lasted well into 2 days of shooting, maybe longer, I didn’t keep track. They just keep going, even with heavy use, chimping (LCD reviewing), frequent use of an external Speedlite flash, and use of image stabilization (IS) on the 70-200 lens. I carried 3 batteries, but probably could have gotten away with 2. The spring-loaded battery door that pops right open for quick battery changes is a nice touch.


Antigua, Guatemala – Canon 7D, 70-200mm f/4L IS lens at 78mm, 100 ISO, 1/250, f/4

Automatic Sensor Cleaning – Like most good dSLRs these days, the 7D automatically cleans the sensor at start up and shut down. Since the dust that is shaken off is collected on a tiny sticky strip at the base of the sensor, it seems to me that you should hold the camera straight as this happens. I’m not sure if this is actually true, but I think I read in the manual that it even says to place the camera flat on a table as you use this, so I have gotten in the habit of holding it straight and still as I turn it off and on. Yeah! No more having to clean the sensor manually with a Rocket Blower!

Video – I did not have a chance to even experiment with the HD video on the 7D yet…so much to learn, so little time…

The next post will review all the other gear I used on the trip – the camera backpack, R-strap, accessories, etc. – and perhaps some of the other lessons learned. Read it here.

Purchasing: If you plan to buy the Canon 7D or any other camera or equipment from Amazon.com, I would appreciate it if you use my referral link by clicking on the text or logo below. Your price will be the same, and they will give me a little something for referring you, which will help support this blog. Thanks!


See and buy the Canon 7D on Amazon

And due to popular request, if you are in the UK, here is my referral link to Amazon UK.

And for those wishing to purchase from B&H Photo, Adorama, or directly from Canon just click their logos on the left side of the page.


Jalapa, GuatemalaCanon 7D, 70-200mm f/4L IS lens at 200mm, 200 ISO, 1/1600, f/4

Again, be sure to check out my e-book user’s guide for the Canon 7D called Canon 7D Experience. It not only explains all the features, functions, and controls of this powerful, sophisticated, and highly customizable camera, but also when and why to use them in your photography. You can learn more about the guide, preview it, and purchase it here.

I’ve run across a nice set of video tutorials (link below) for using the Canon 7D. You can watch them online, or even download them to your camera for viewing. The one on AF Custom Fuctions is especially helpful at clarifying those setting. Be sure to look around on the Canon Digital Learning Center to find all kinds of other cool stuff about using your camera plus useful tips and instructions from pros who use them.

link to Canon 7D Video Tutorials

The distinctive voice you hear in the 7D tutorial videos is Canon guru Rudy Winston, and the photo samples are his images as well. If you are in NYC, you can often find him leading workshops and presentations at places like B+H and Adorama. I went to a wonderfully informative introduction to the 7D that he gave a B+H a month or 2 ago, and these videos are pretty much the same presentation.

Here is additional information from Canon Europe about custom functions of the 7D: